安装系统到 eMMC
介绍如何通过 Taco 将系统安装到树莓派 CM5 的 eMMC 中。
前提条件
- 树莓派 CM5(板载 eMMC)
- 瑞莎 Taco
- 主机电脑(Linux 或 macOS)
- USB-A 转 USB-C 数据线
说明:Linux 推荐 Debian 或 Ubuntu。
RPIBOOT
RPIBOOT 是树莓派官方提供的 USB 引导与设备烧录工具,可通过 USB 将系统镜像部署到目标设备的存储介质中,无需依赖 SD 卡完成系统烧录或更新。
安装 RPIBOOT
- Debian/Ubuntu
- macOS
- 安装依赖
在终端上使用以下命令安装编译 RPIBOOT 所需要的工具。
sudo apt update
sudo apt install git libusb-1.0-0-dev pkg-config build-essential -y
- 拉取 / 编译
在终端上使用命令拉取和编译 usbboot 源码
git clone --recurse-submodules --shallow-submodules --depth=1 https://github.com/raspberrypi/usbboot
cd usbboot
sudo make install
git clone --recurse-submodules --shallow-submodules --depth=1 https://github.com/raspberrypi/usbboot
cd usbboot
sudo make install
RPIBOOT 模式
当目标设备进入 USB 引导模式后,主机可通过 USB 识别并访问目标存储,从而将系统镜像写入板载 eMMC。
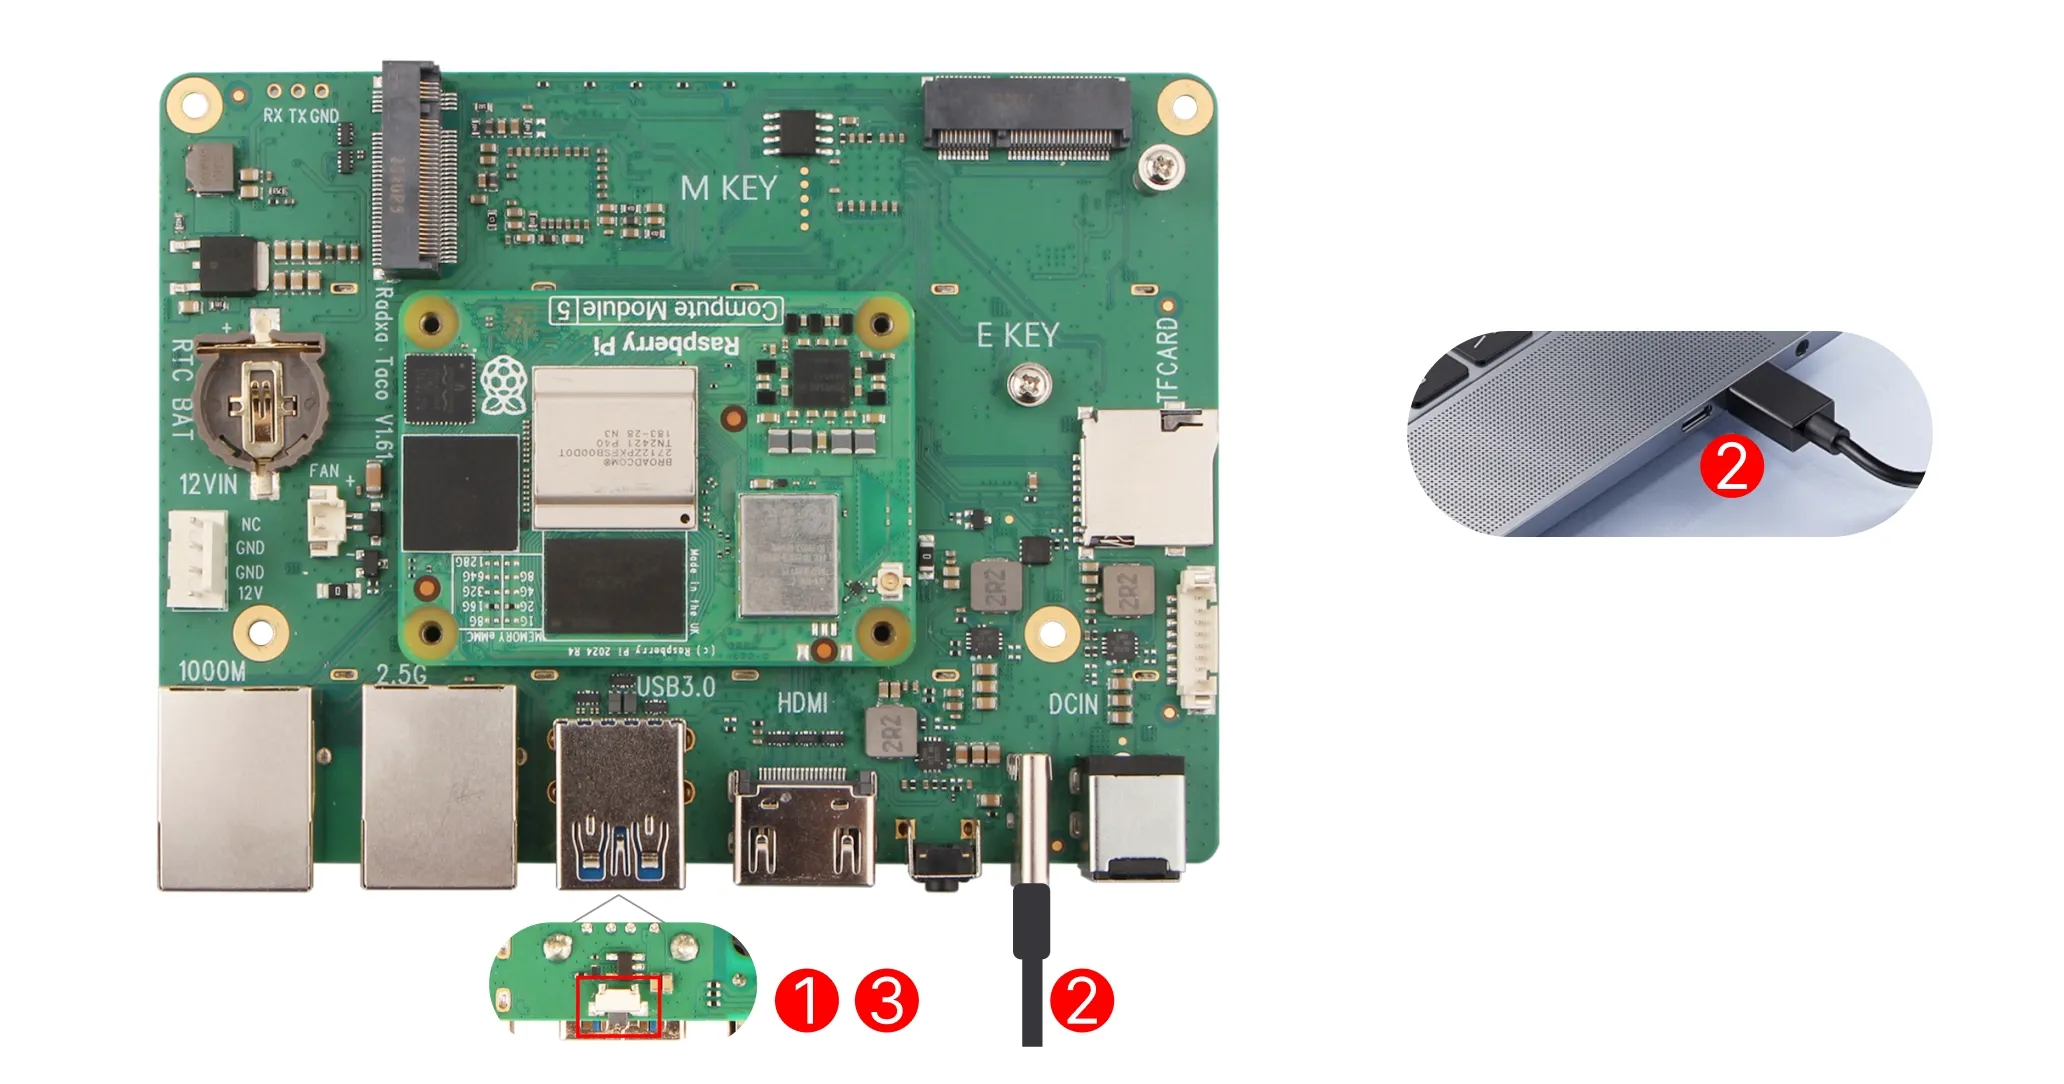
进入 RPIBOOT 模式步骤:
- 按住 Taco 上的 RPIBOOT 按钮。
- 使用数据线连接到主机,USB-C 接口连接到 Taco,USB-A 接口连接到主机。
- 松开 RPIBOOT 按钮。
单独使用数据线连接 Taco 和主机,不要连接 SATA 硬盘或者功耗较大的外设,以免影响系统供电稳定。
若主板连接 SATA 硬盘或者功耗较大的外设,请按照下面步骤进入 RPIBOOT 模式:
- 按住 Taco 上的 RPIBOOT 按钮。
- 使用 12V 电源适配器为主板供电。
- 松开 RPIBOOT 按钮。
- 使用数据线连接到主机,USB-C 接口连接到 Taco,USB-A 接口连接到主机。
使用 RPIBOOT
sudo rpiboot -d mass-storage-gadget
系统会自动识别到设备并开始引导过程,正常终端会出现类似以下信息:
RPIBOOT: build-date 2026/03/27 pkg-version local 101f2d00

Please fit the EMMC_DISABLE / nRPIBOOT jumper before connecting the power and USB cables to the target device.
If the device fails to connect then please see https://rpltd.co/rpiboot for debugging tips.

Loading: mass-storage-gadget/bootfiles.bin
Using mass-storage-gadget/bootfiles.bin
Waiting for BCM2835/6/7/2711/2712...

Sending bootcode.bin
Successful read 4 bytes
Waiting for BCM2835/6/7/2711/2712...

Second stage boot server
File read: mcb.bin
File read: memsys00.bin
File read: memsys01.bin
File read: rp1c0fw1.bin
File read: memsys02.bin
File read: rp1c0fw2.bin
File read: memsys03.bin
File read: bootmain
Loading: mass-storage-gadget/config.txt
File read: config.txt
Loading: mass-storage-gadget/boot.img
File read: boot.img
Second stage boot server done
系统会出现一个可移动设备,此时可以使用 Raspberry Pi Imager 安装系统镜像到树莓派 CM5 的 eMMC 中。
安装系统
使用 Raspberry Pi Imager 安装系统镜像到存储设备中。
安装 Raspberry Pi Imager
- Debian/Ubuntu
- macOS
在终端上使用以下命令安装 Raspberry Pi Imager。
sudo apt update
sudo apt install rpi-imager -y
访问 Raspberry Pi Imager 下载页面,下载并安装 Raspberry Pi Imager。
使用 Raspberry Pi Imager
使用 Raspberry Pi Imager 安装系统镜像到可存储设备中。
打开 Raspberry Pi Imager
Raspberry Pi Imager 版本不同,实际的界面可能略有不同,请根据实际情况进行操作。
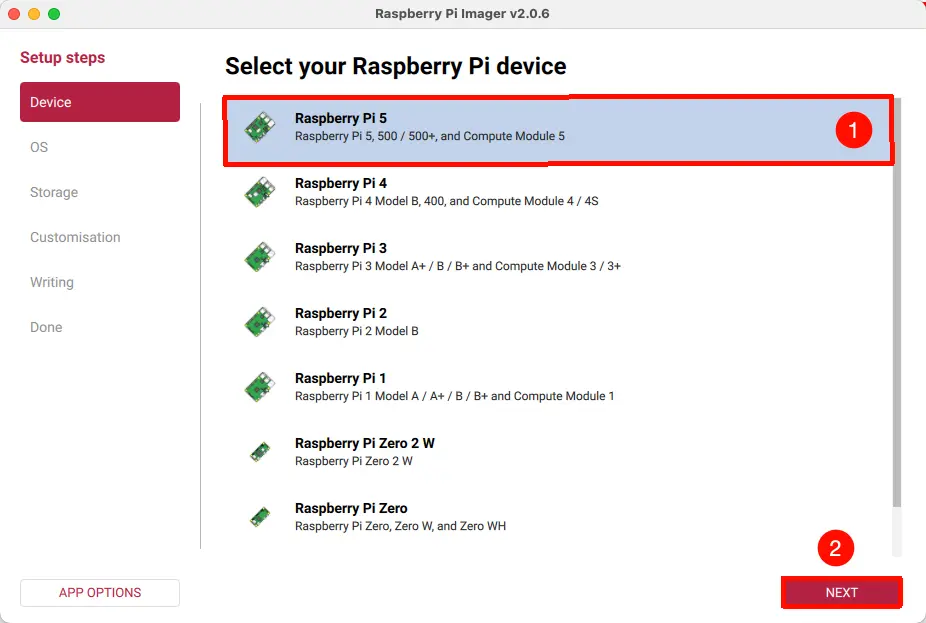
选择设备
打开 Raspberry Pi Imager,选择 Device 选项,选择 Raspberry Pi CM5 选项,该选项包含了树莓派 CM5 设备。
选择操作系统
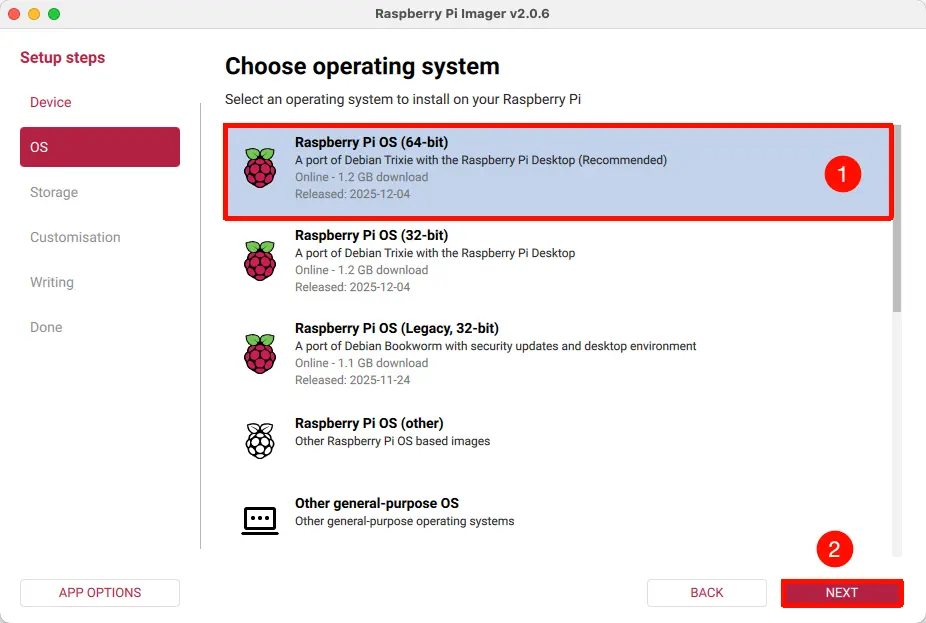
打开 Raspberry Pi Imager,选择 Operating System 选项,选择需要安装的系统镜像。
选择存储设备
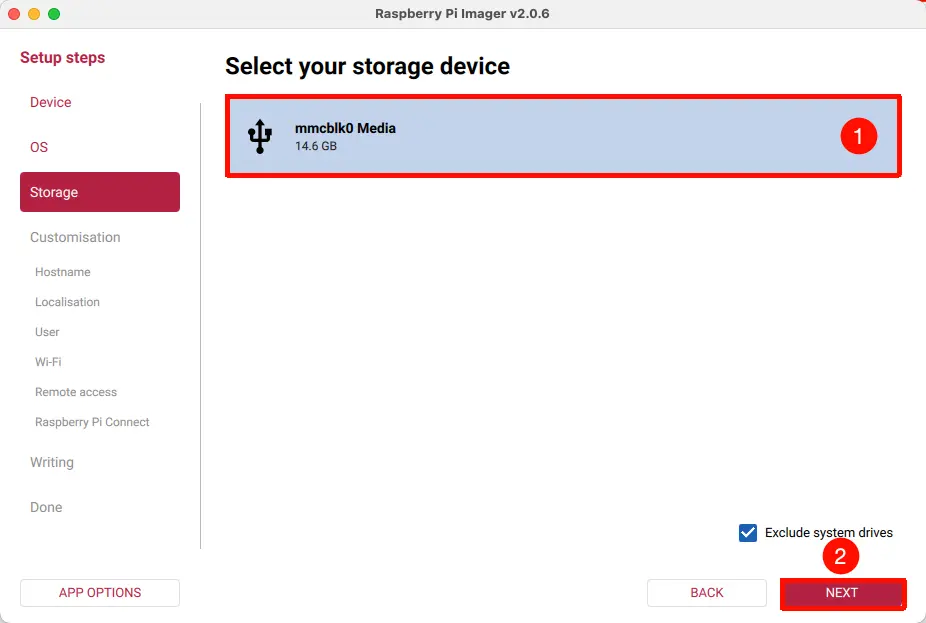
打开 Raspberry Pi Imager,选择 Storage 选项,选择树莓派 CM5 的存储设备。
你可以根据你的存储设备的容量大小或者安全插拔存储设备来判断是否选对了存储设备。如果选错了存储设备,会导致重要数据丢失。
设置系统信息
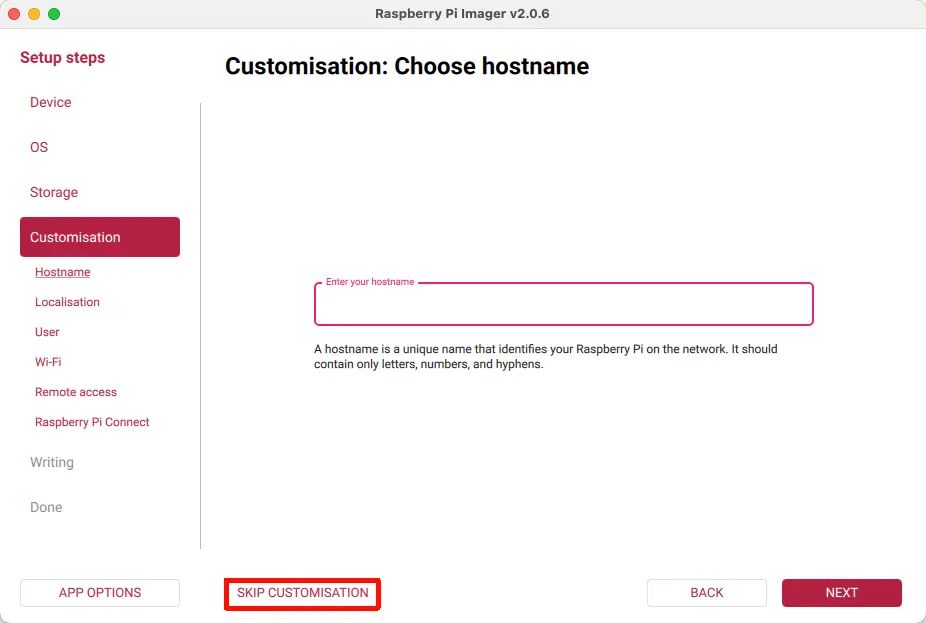
系统信息可以根据自己需求设置,我这里直接跳过系统信息设置。
开始安装
点击 Write 选项和 I Understand ... 确认,开始安装系统镜像到存储设备中。
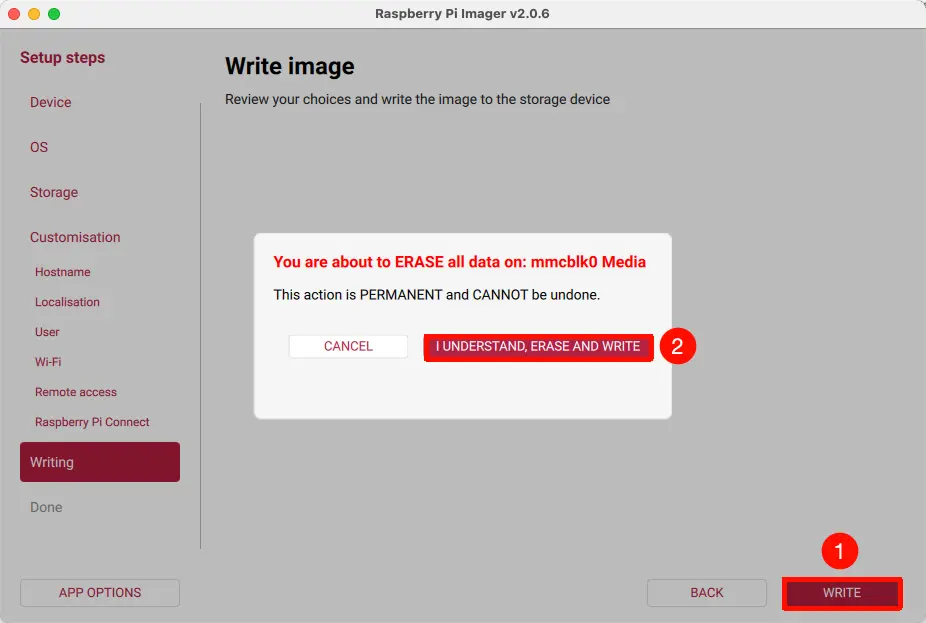
整个安装过程会进行系统镜像的写入和校验,请耐心等待,直到安装完成。
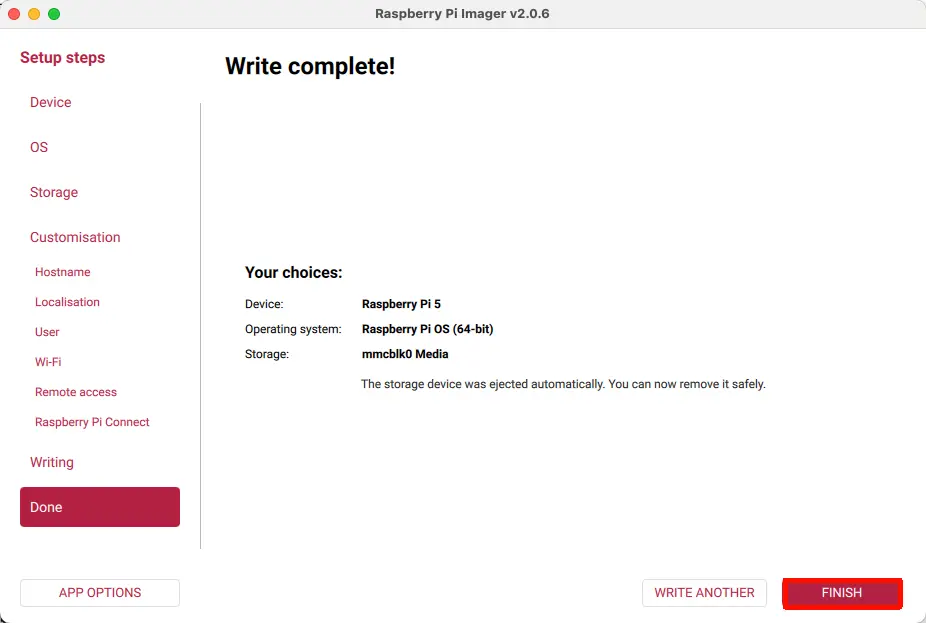
安装完成
安装完成后,点击 FINISH 选项完成安装。