SSH 远程
使用前提
SSH 登录需要双方设备处于同一局域网下,且目标设备需要开启 SSH 服务。
Radxa OS 首次启动会检测是否连接显示器,若有显示器则不会使能 SSH 服务;若没有显示器,系统会自动使能 SSH 服务
安装 OpenSSH
SSH 远程控制需要安装 OpenSSH, 在主板的终端运行以下命令安装:
sudo apt update && sudo apt install openssh-server -y
启动 SSH 服务
在主板的终端运行以下命令启动 SSH 服务:
sudo systemctl start ssh
设置 SSH 服务开机自启
在主板的终端运行以下命令设置 SSH 服务开机自启:
sudo systemctl enable ssh
检查 SSH 服务状态
在主板的终端运行以下命令检查 SSH 服务状态:
sudo systemctl status ssh
终端会输出类似信息: 提示您 SSH 服务是否自启动和当前运行状态。
● ssh.service - OpenBSD Secure Shell server
Loaded: loaded (/lib/systemd/system/ssh.service; enabled; vendor preset: enabled)
Active: active (running) since Sat 2000-01-01 00:14:50 UTC; 25 years 5 months ago
Docs: man:sshd(8)
man:sshd_config(5)
Main PID: 518 (sshd)
CPU: 284ms
CGroup: /system.slice/ssh.service
└─518 sshd: /usr/sbin/sshd -D [listener] 0 of 10-100 startups
SSH 远程控制
您可以通过终端命令行或者使用 Tabby 软件进行 SSH 远程登录。
- 终端命令行
- 使用 Tabby 软件
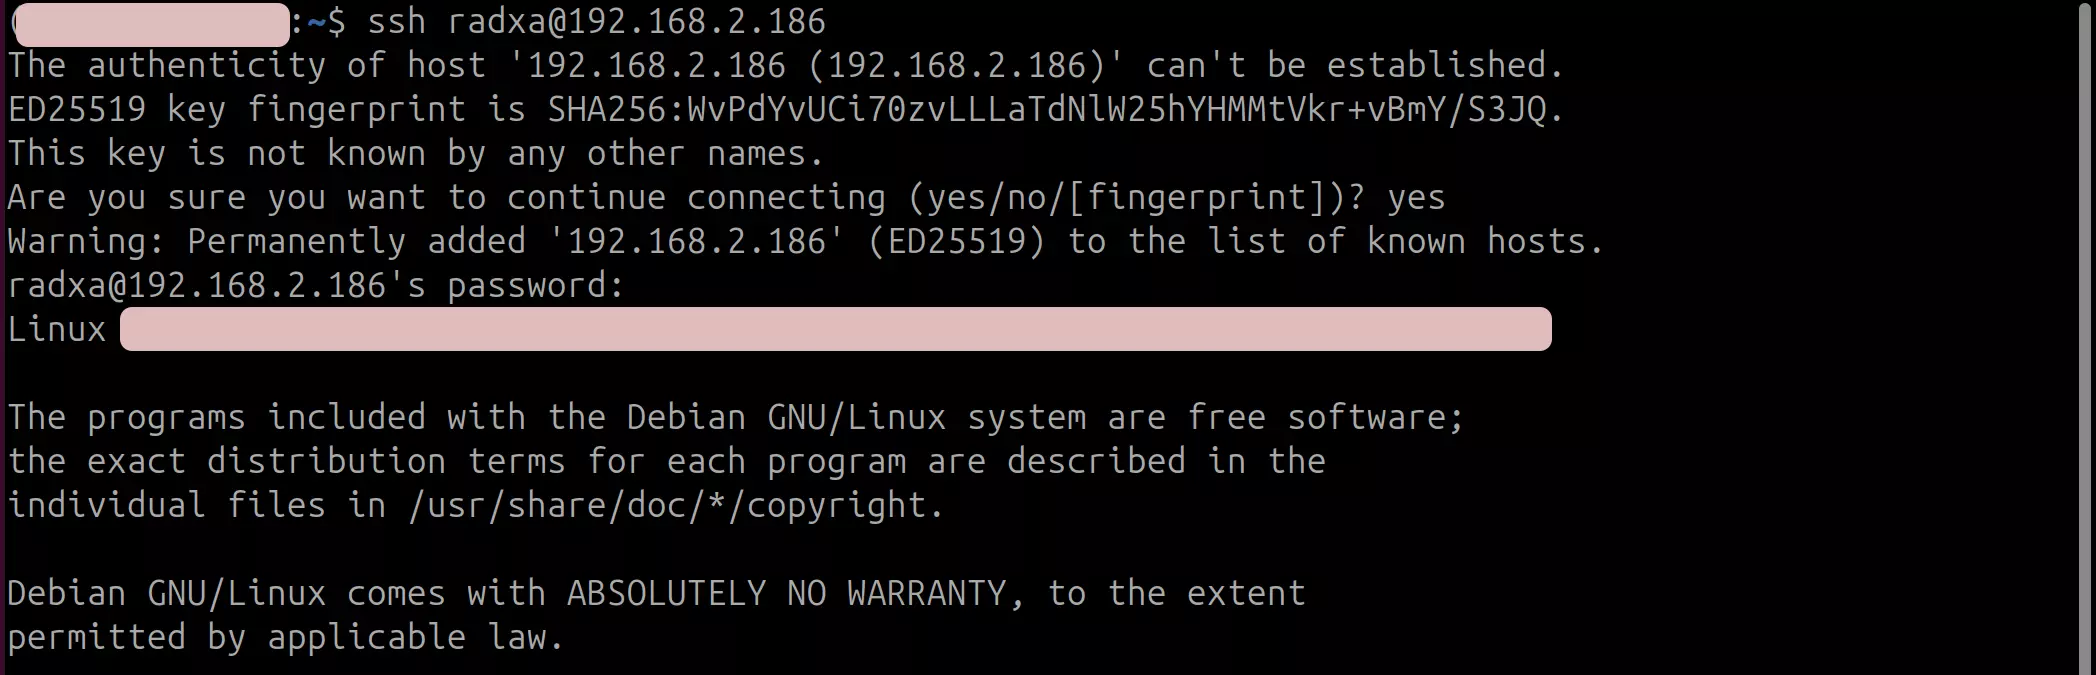
在另一台设备上打开终端,输入以下命令进行远程登录:
ssh <user-name>@<ip-address>
# 示例

ssh [email protected]
其中,<user-name> 和 <ip-address> 分别是目标设备的实际用户名和 IP 地址。
连接过程中需要你输入 yes 确认连接。
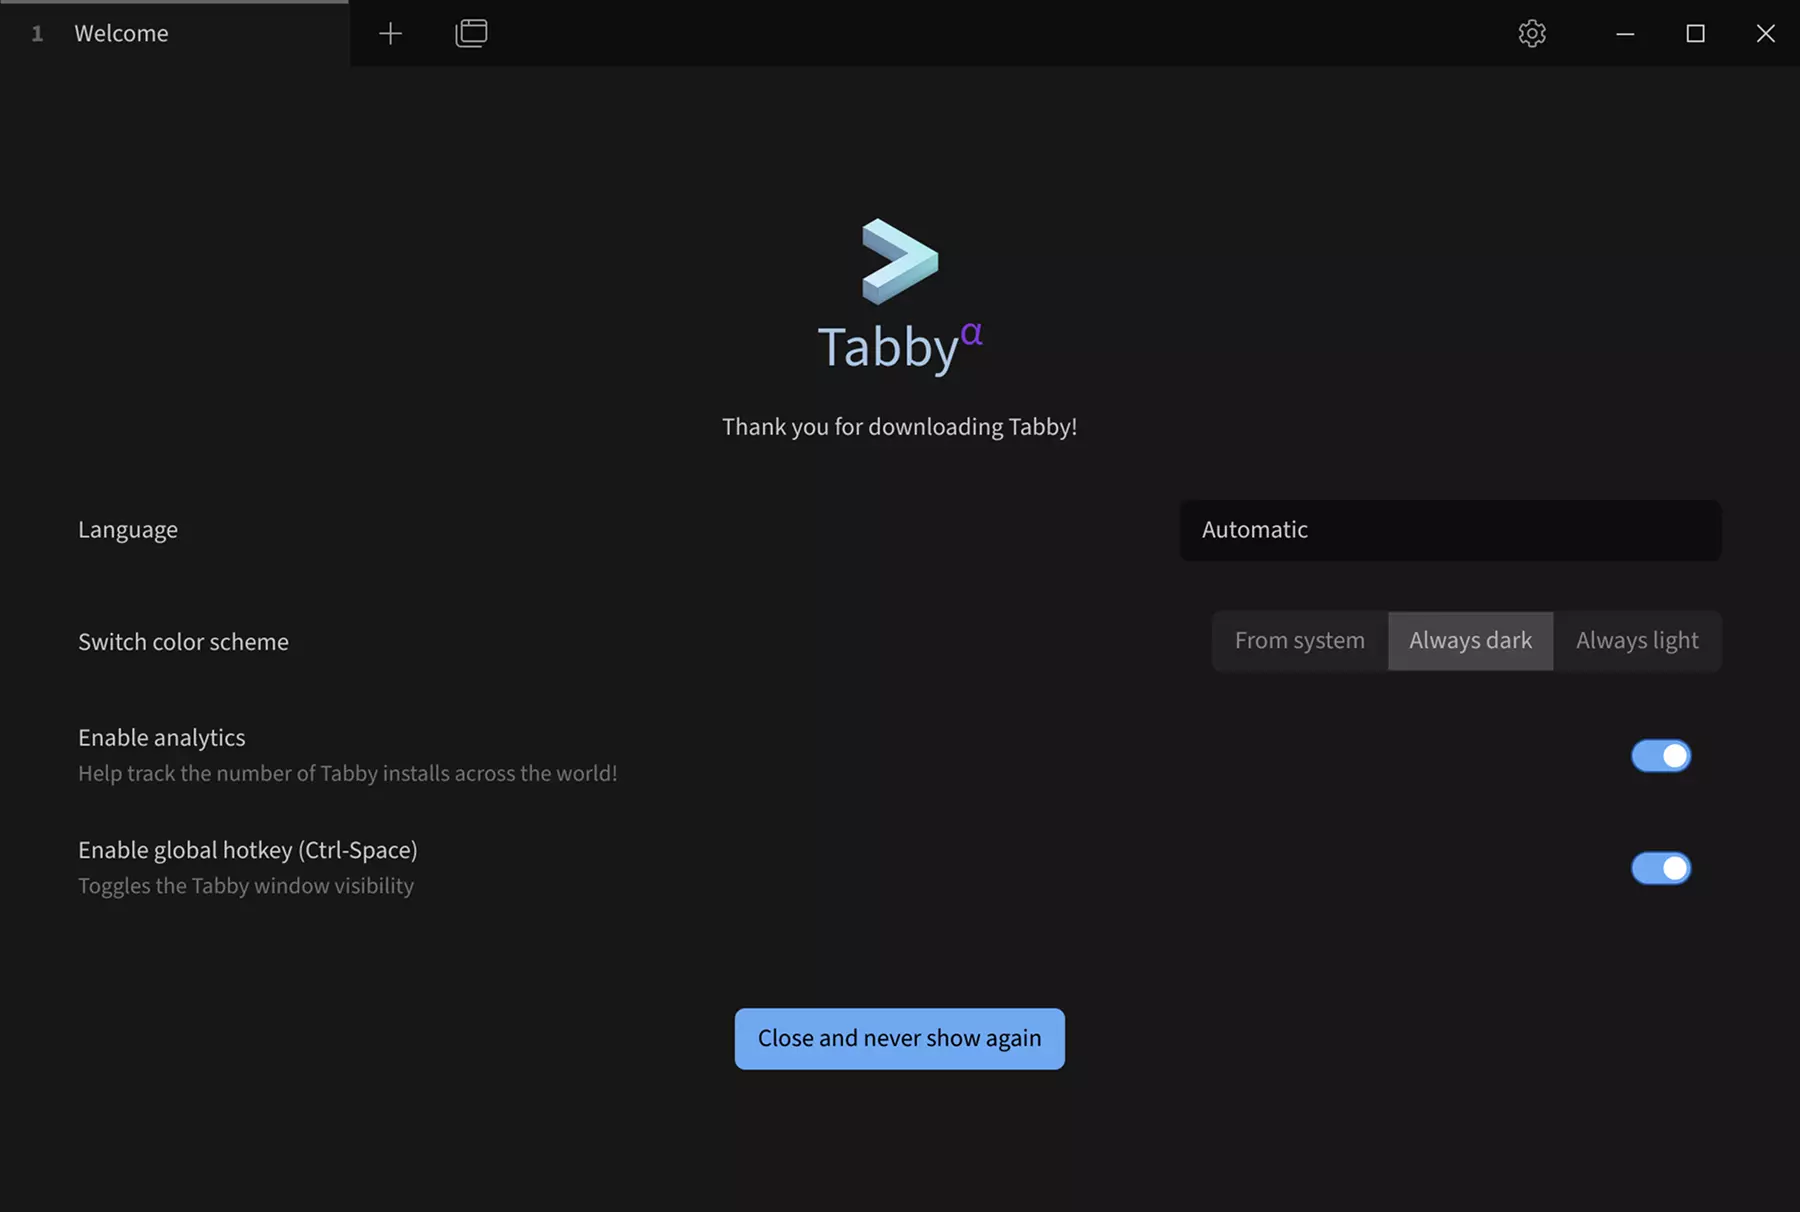
Tabby 是一款功能强大的跨平台串口调试工具,支持串口、SSH 等多种协议; 我们推荐使用 Tabby 软件进行 SSH 远程登录。
Tabby 下载
访问 Tabby 官网 下载并安装 Tabby 软件。
Tabby 安装
根据操作系统和硬件架构,选择对应的安装包(Windows: tabby-<version>.exe, Linux: tabby-<version>.deb, macOS: tabby-<version>.dmg)进行 Tabby 软件安装。
Tabby 使用
双击 Tabby 软件图标打开 Tabby 软件。
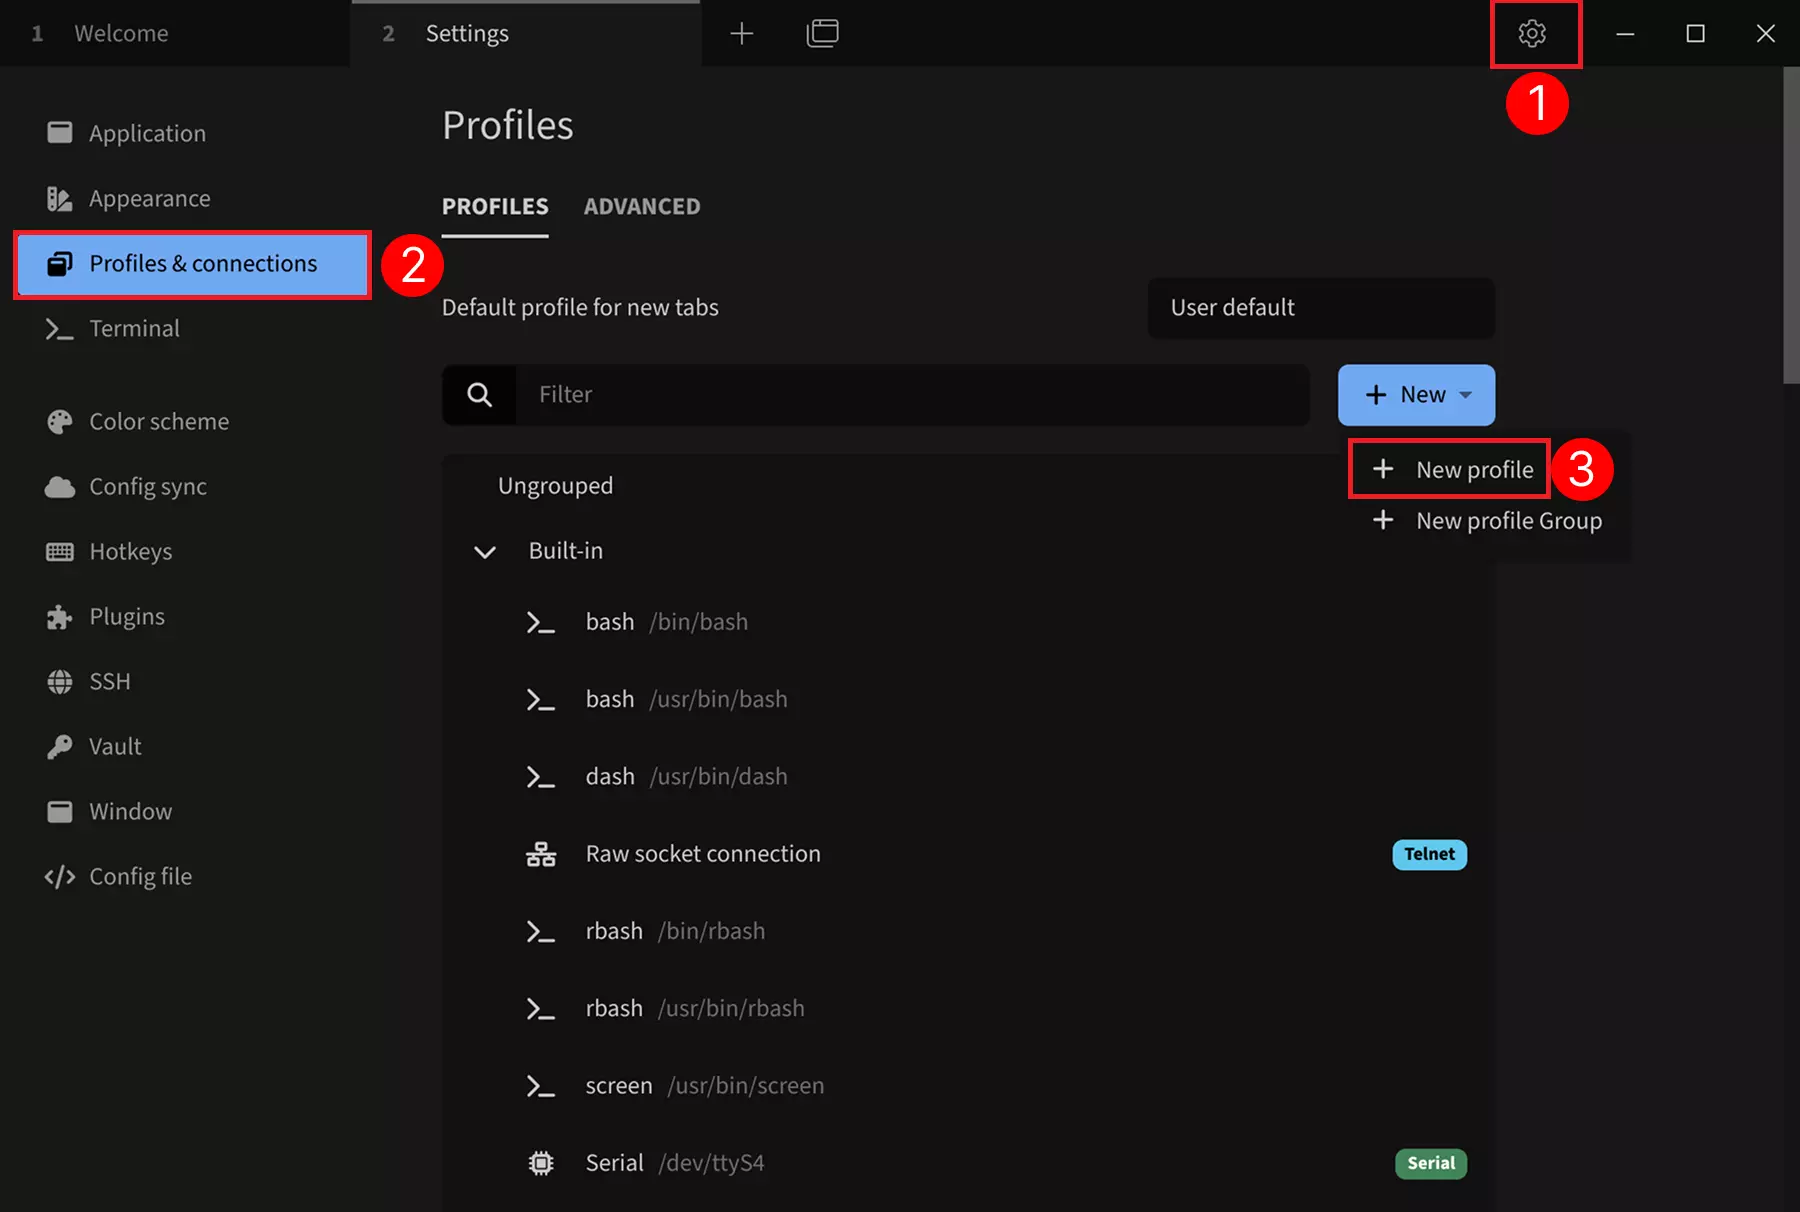
SSH 配置
① --> Settings : 点击设置选项
② --> Profiles & connections : 点击配置连接选项
③ --> New profile : 点击添加新的配置选项
选择 SSH 模板
选择一个基础配置作为模板:选择 SSH connection 模板,我们可以在后续配置界面修改设备名称、IP 地址、端口等参数。
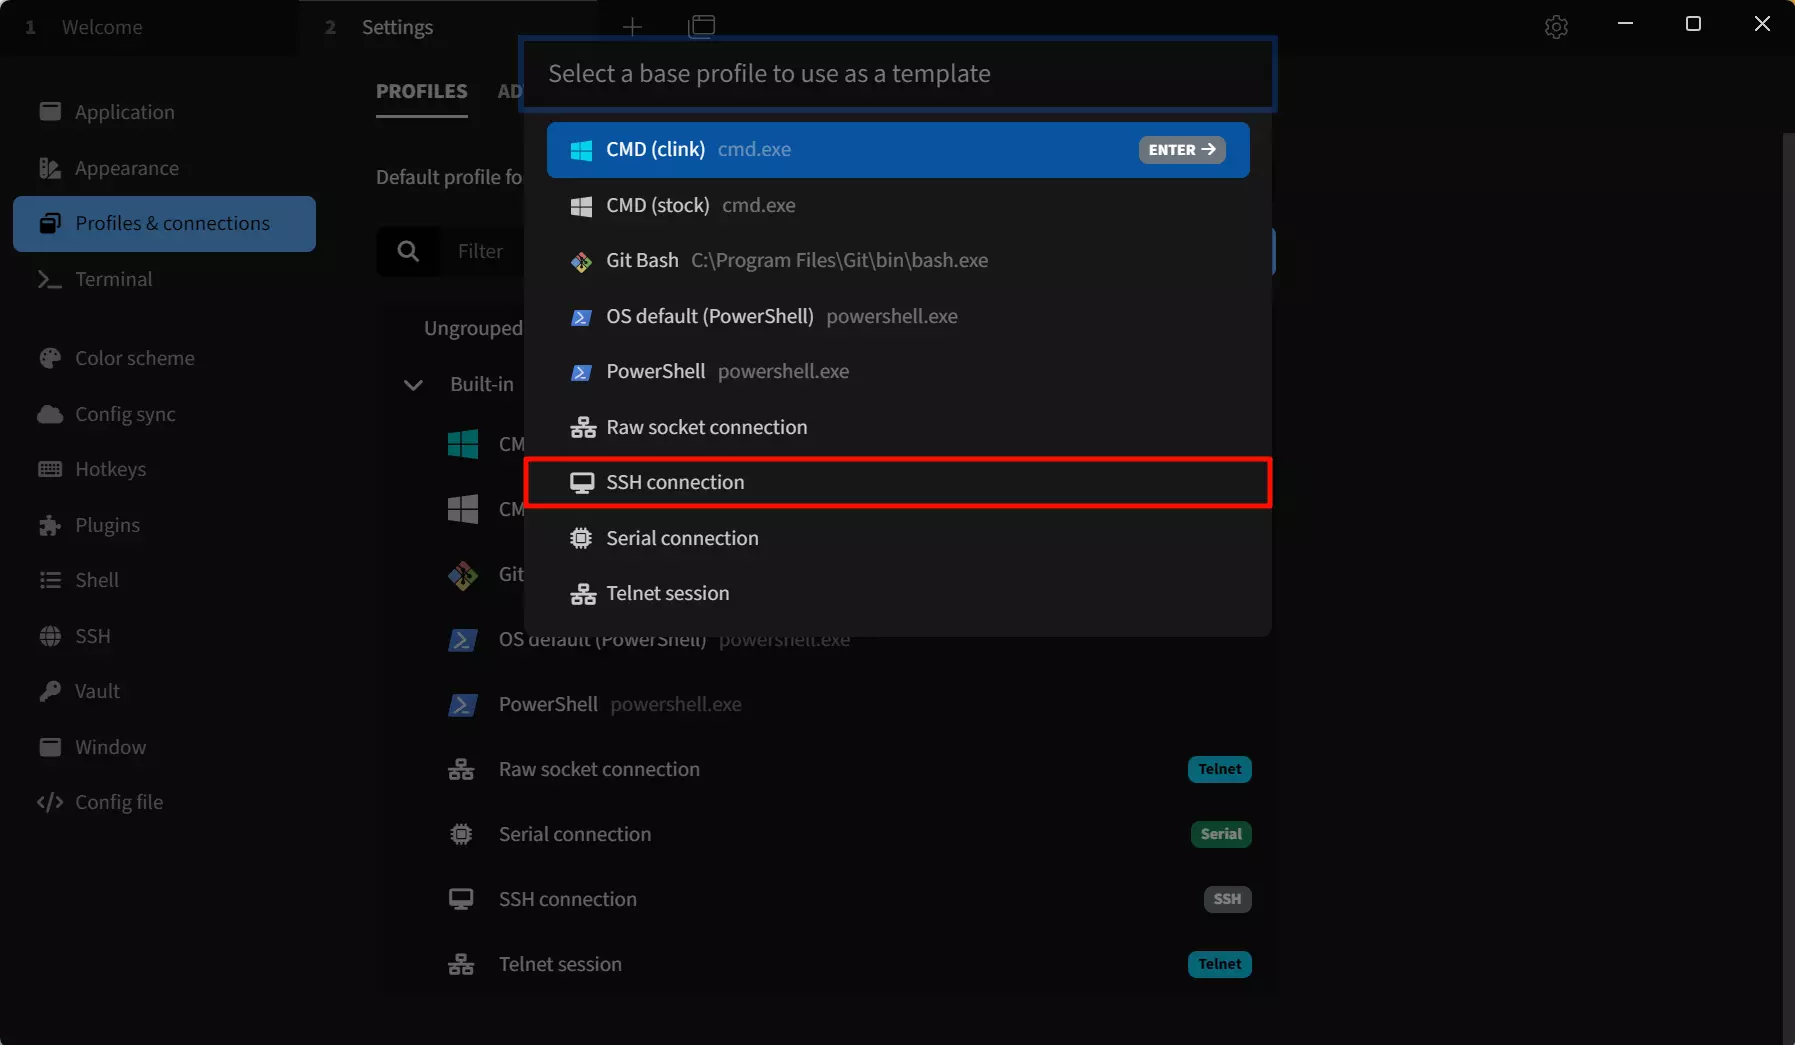
选择 SSH connection 模板后,修改以下参数:
① --> Name : 设置连接名称
② --> Host : 设置 IP 地址,根据目标设备的实际 IP 地址填写
③ --> User : 设置用户名,默认出厂用户名为 radxa
④ --> Save : 保存配置
端口号默认为 22,不用修改。

运行 SSH 连接
点击运行按钮远程连接 SSH 设备。
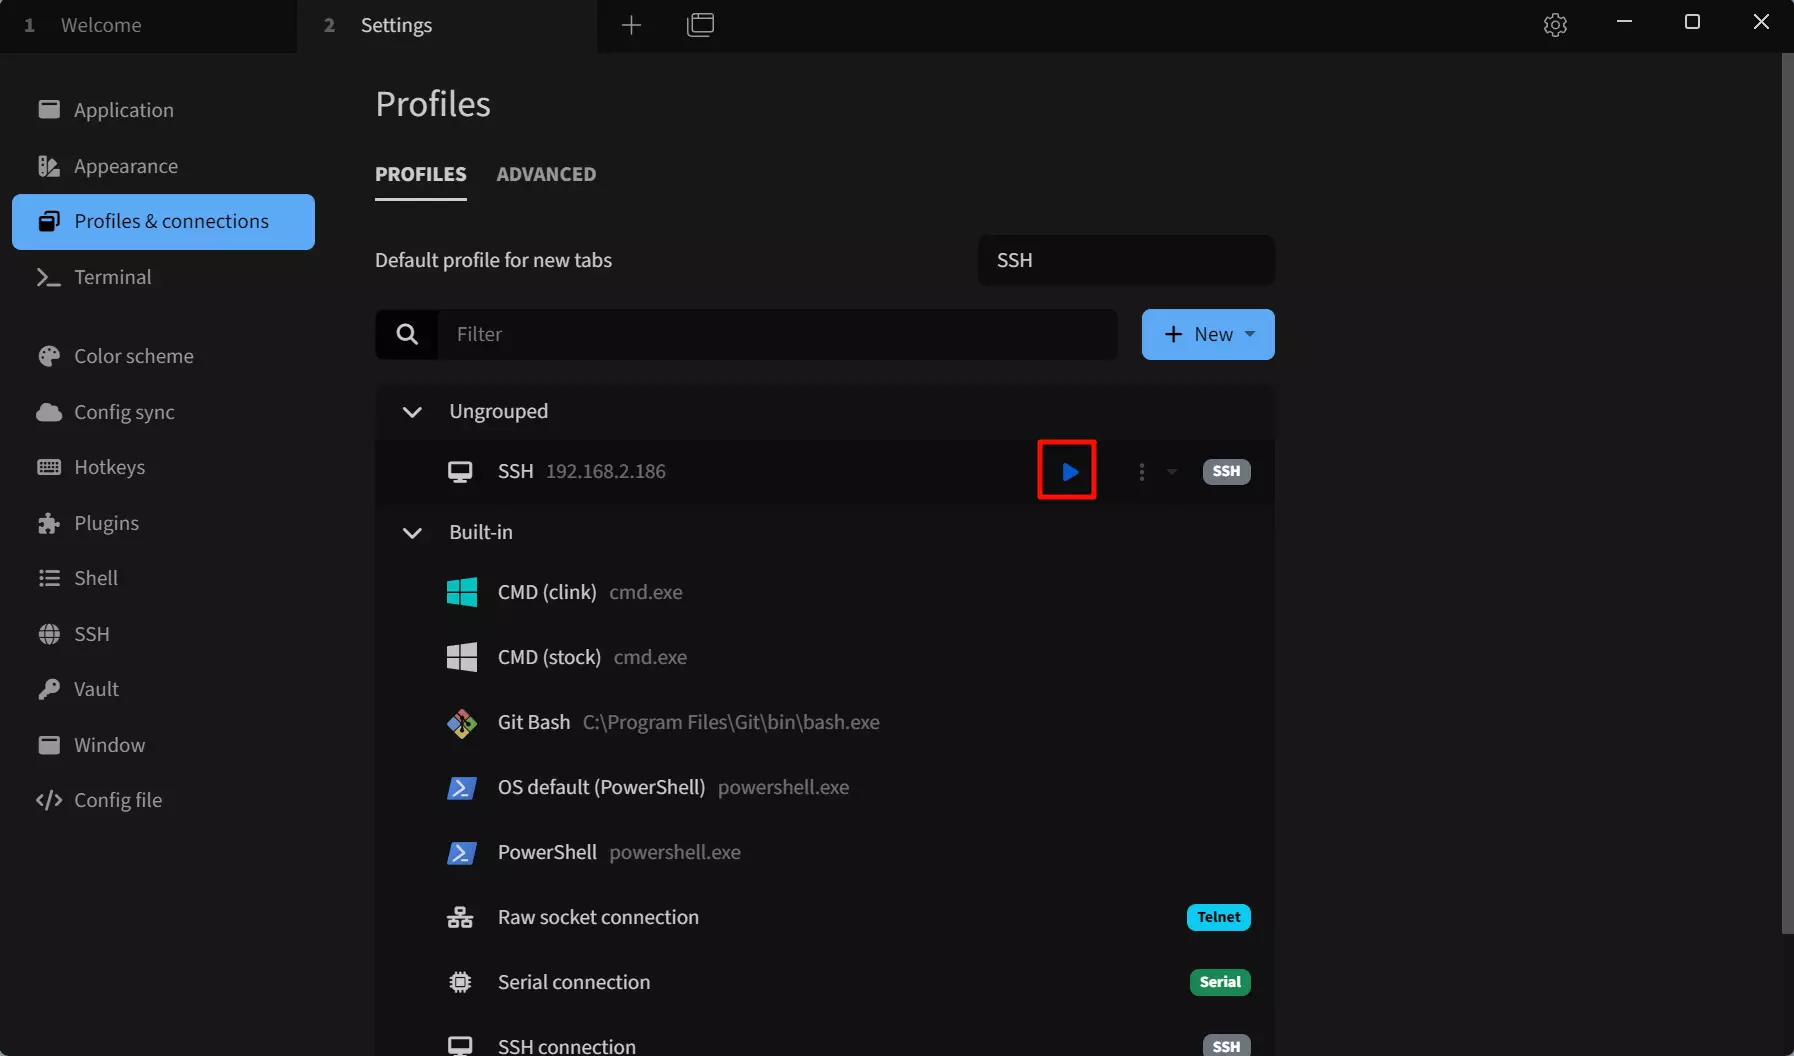
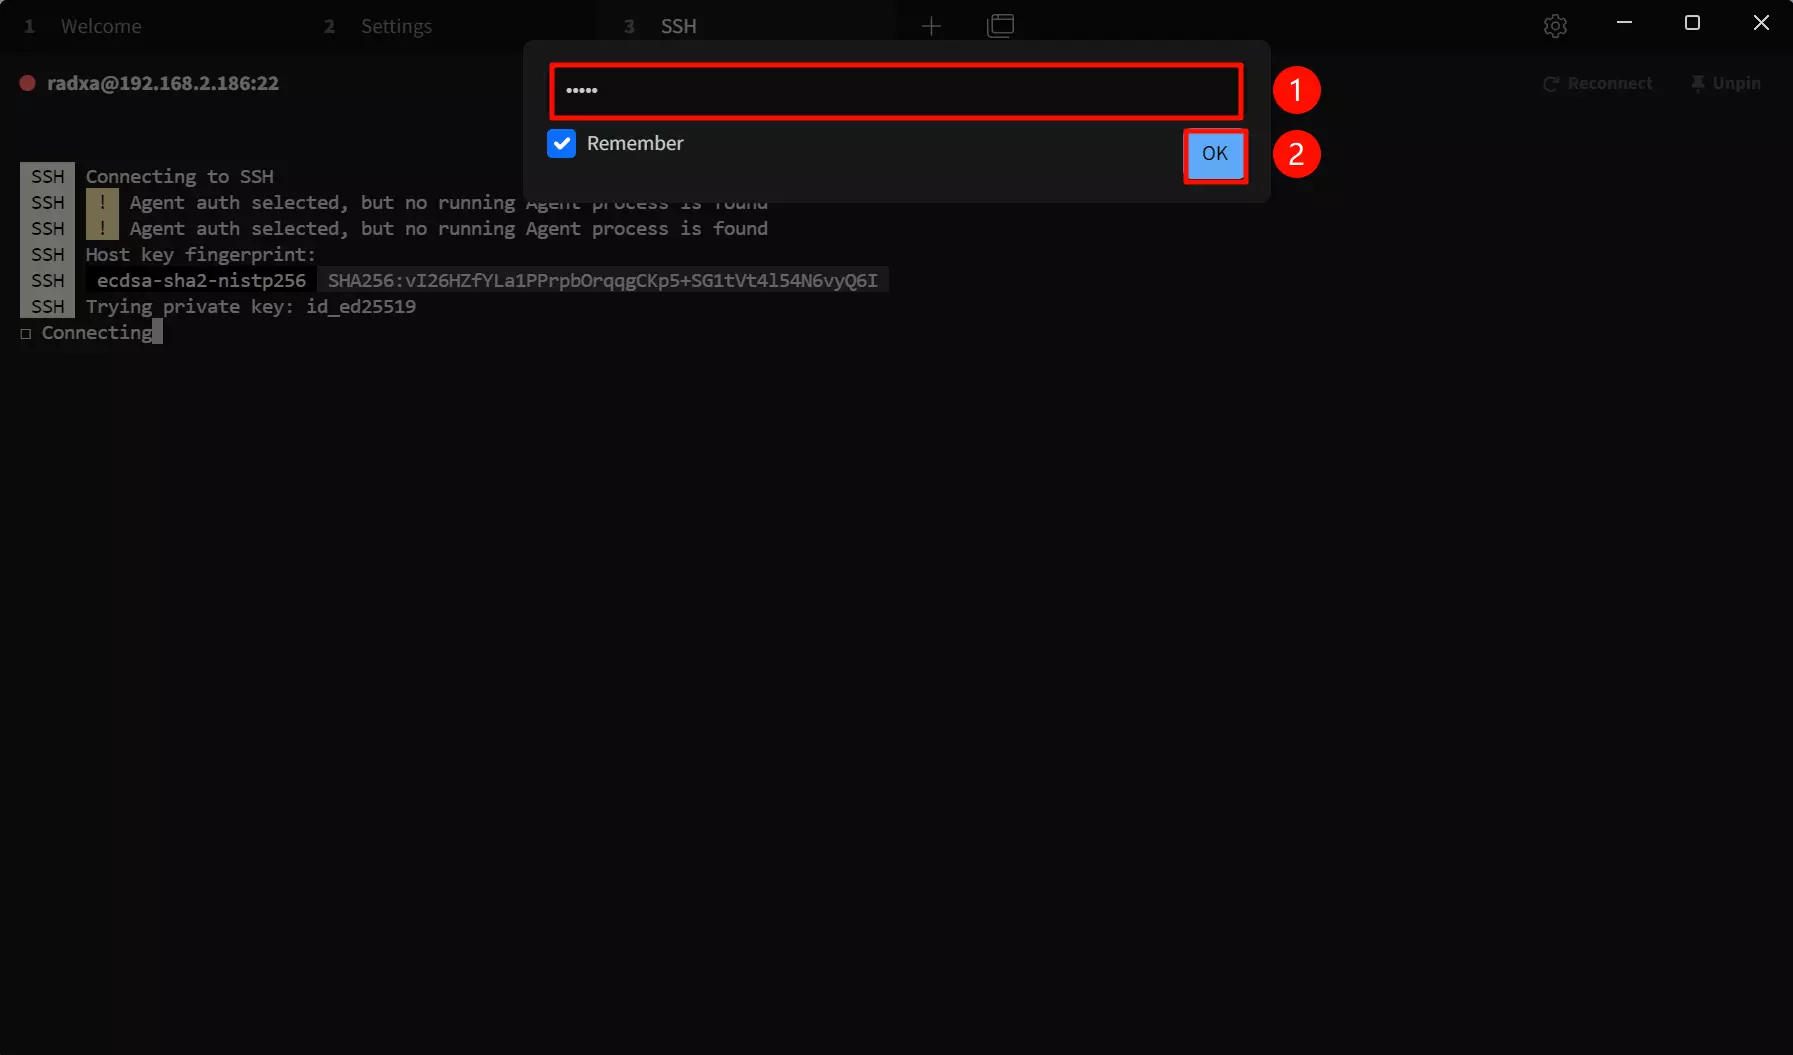
点击运行按钮后,Tabby 软件会弹出密钥验证和输入密码的界面。
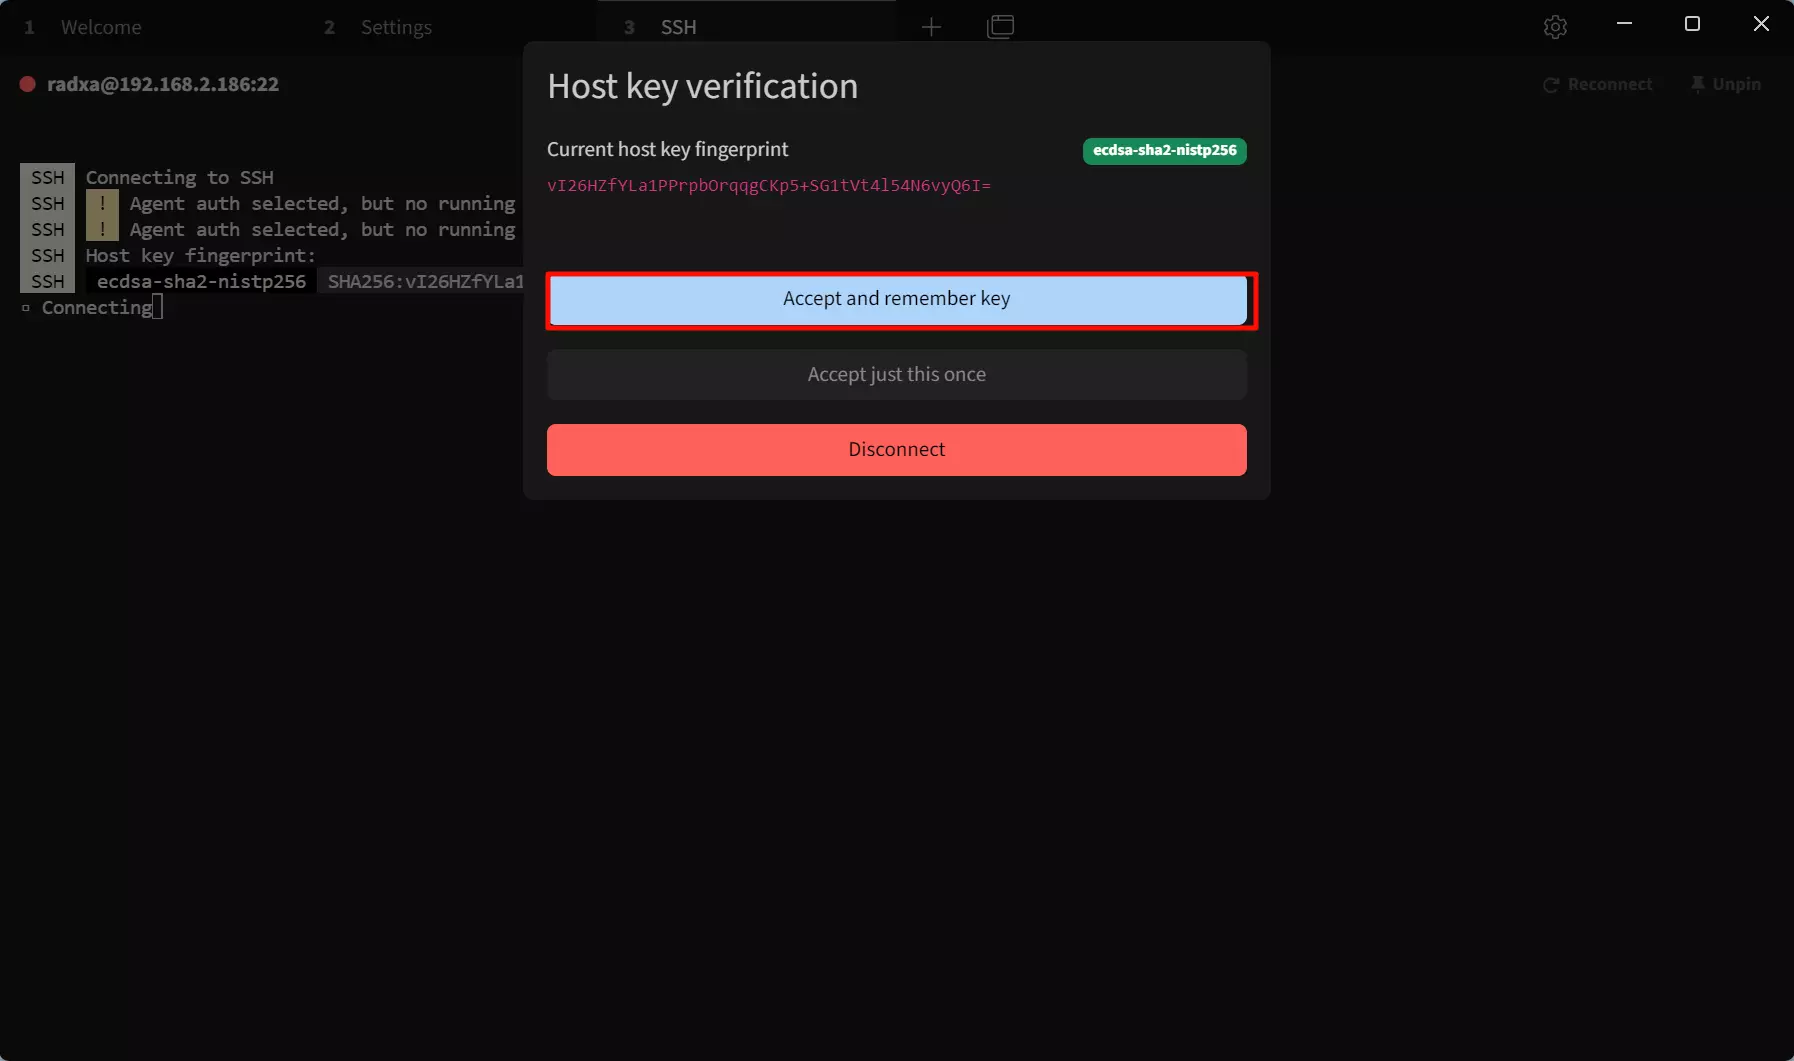
① --> password : 输入目标设备的密码
② --> OK : 确认连接
推荐勾选 Remember 选项,这样下次连接时就不需要输入密码了。
连接成功后,会出现远程的界面。
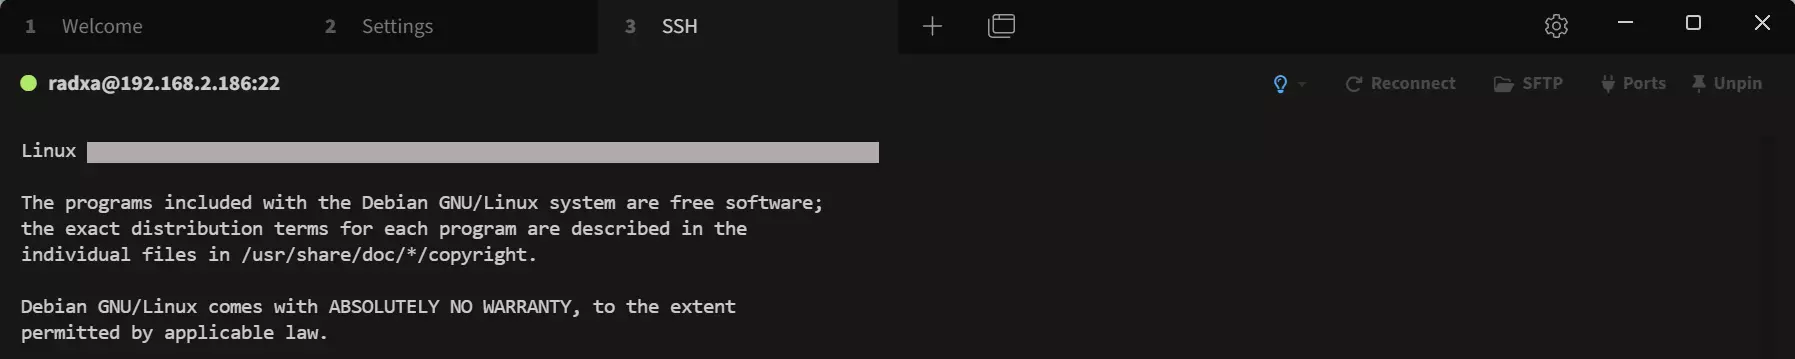
SSH 登录成功后,你就可以通过 SSH 运行命令控制系统。
故障排除
如果 SSH 连接失败,可按以下步骤逐一排查。
1. 确认 SSH 服务正常运行
在设备上执行:
sudo systemctl status ssh
若服务未运行,执行:
sudo systemctl start ssh
sudo systemctl enable ssh
Debian/Ubuntu 中 ssh 是 sshd 的别名。如 ssh 服务名无效,可尝试 sshd。
2. 确认网络连通性
在 PC 上 ping 设备 IP,确认网络可达:
ping 192.168.x.x
若 ping 不通,请检查:
- 设备与 PC 是否在同一局域网
- 设备 IP 地址是否正确(避免使用
127.0.0.1)
3. 检查防火墙
Radxa OS 默认使用 nftables。执行以下命令确认端口 22 未被阻止:
sudo iptables -L -n | grep -E "22|ssh"
sudo nft list ruleset 2>/dev/null | grep -E "22|ssh"
若防火墙规则阻塞了 SSH,可临时清除规则测试:
sudo iptables -F
4. 检查密码认证配置
确认 SSH 服务允许密码认证:
sudo grep -v "^#" /etc/ssh/sshd_config | grep PasswordAuthentication
预期输出为 PasswordAuthentication yes。若不是,编辑配置文件:
sudo nano /etc/ssh/sshd_config
确保存在且未被注释的行:
PasswordAuthentication yes
然后重启 SSH 服务:
sudo systemctl restart ssh
5. 确认用户名和密码
Radxa OS 默认用户名为 radxa,密码为 radxa。若密码错误,通过串口或连接显示器后重置:
sudo passwd radxa
6. 检查 SSH 日志
查看 SSH 服务日志,获取具体错误信息:
sudo journalctl -u ssh -b --no-pager | tail -30
常见错误及含义:
| 错误信息 | 可能原因 |
|---|---|
Connection refused | SSH 服务未运行或端口 22 被阻止 |
Permission denied | 密码错误或公钥认证失败 |
Connection timeout | 网络不通或 IP 地址错误 |
No route to host | 网络层路由不可达 |
7. Windows 客户端特殊问题
若使用 Windows SSH 客户端遇到问题:
8. 公钥认证失败
若配置了 SSH 公钥登录但失败,检查服务端权限:
# .ssh 目录权限应为 700
chmod 700 ~/.ssh

# authorized_keys 文件权限应为 600
chmod 600 ~/.ssh/authorized_keys
9. 重置 SSH 配置
以下操作会中断当前 SSH 连接。若远程操作,请确保有串口或显示器等备用接入方式后再执行。
# 备份当前配置
sudo cp /etc/ssh/sshd_config /etc/ssh/sshd_config.backup

# 恢复默认配置
sudo dpkg-reconfigure openssh-server

# 重启服务
sudo systemctl restart ssh
获取帮助
如问题仍未解决,请在 GitHub 提交 Issue,并提供以下信息:
sudo systemctl status ssh输出sudo grep -v "^#" /etc/ssh/sshd_config | grep PasswordAuthentication输出- SSH 日志
sudo journalctl -u ssh -b --no-pager | tail -30 - 完整的连接错误信息