Using with ROCK 5T
This guide provides installation instructions for the ROCK 5T with the Radxa Metal Case 1290.
Installation Guide
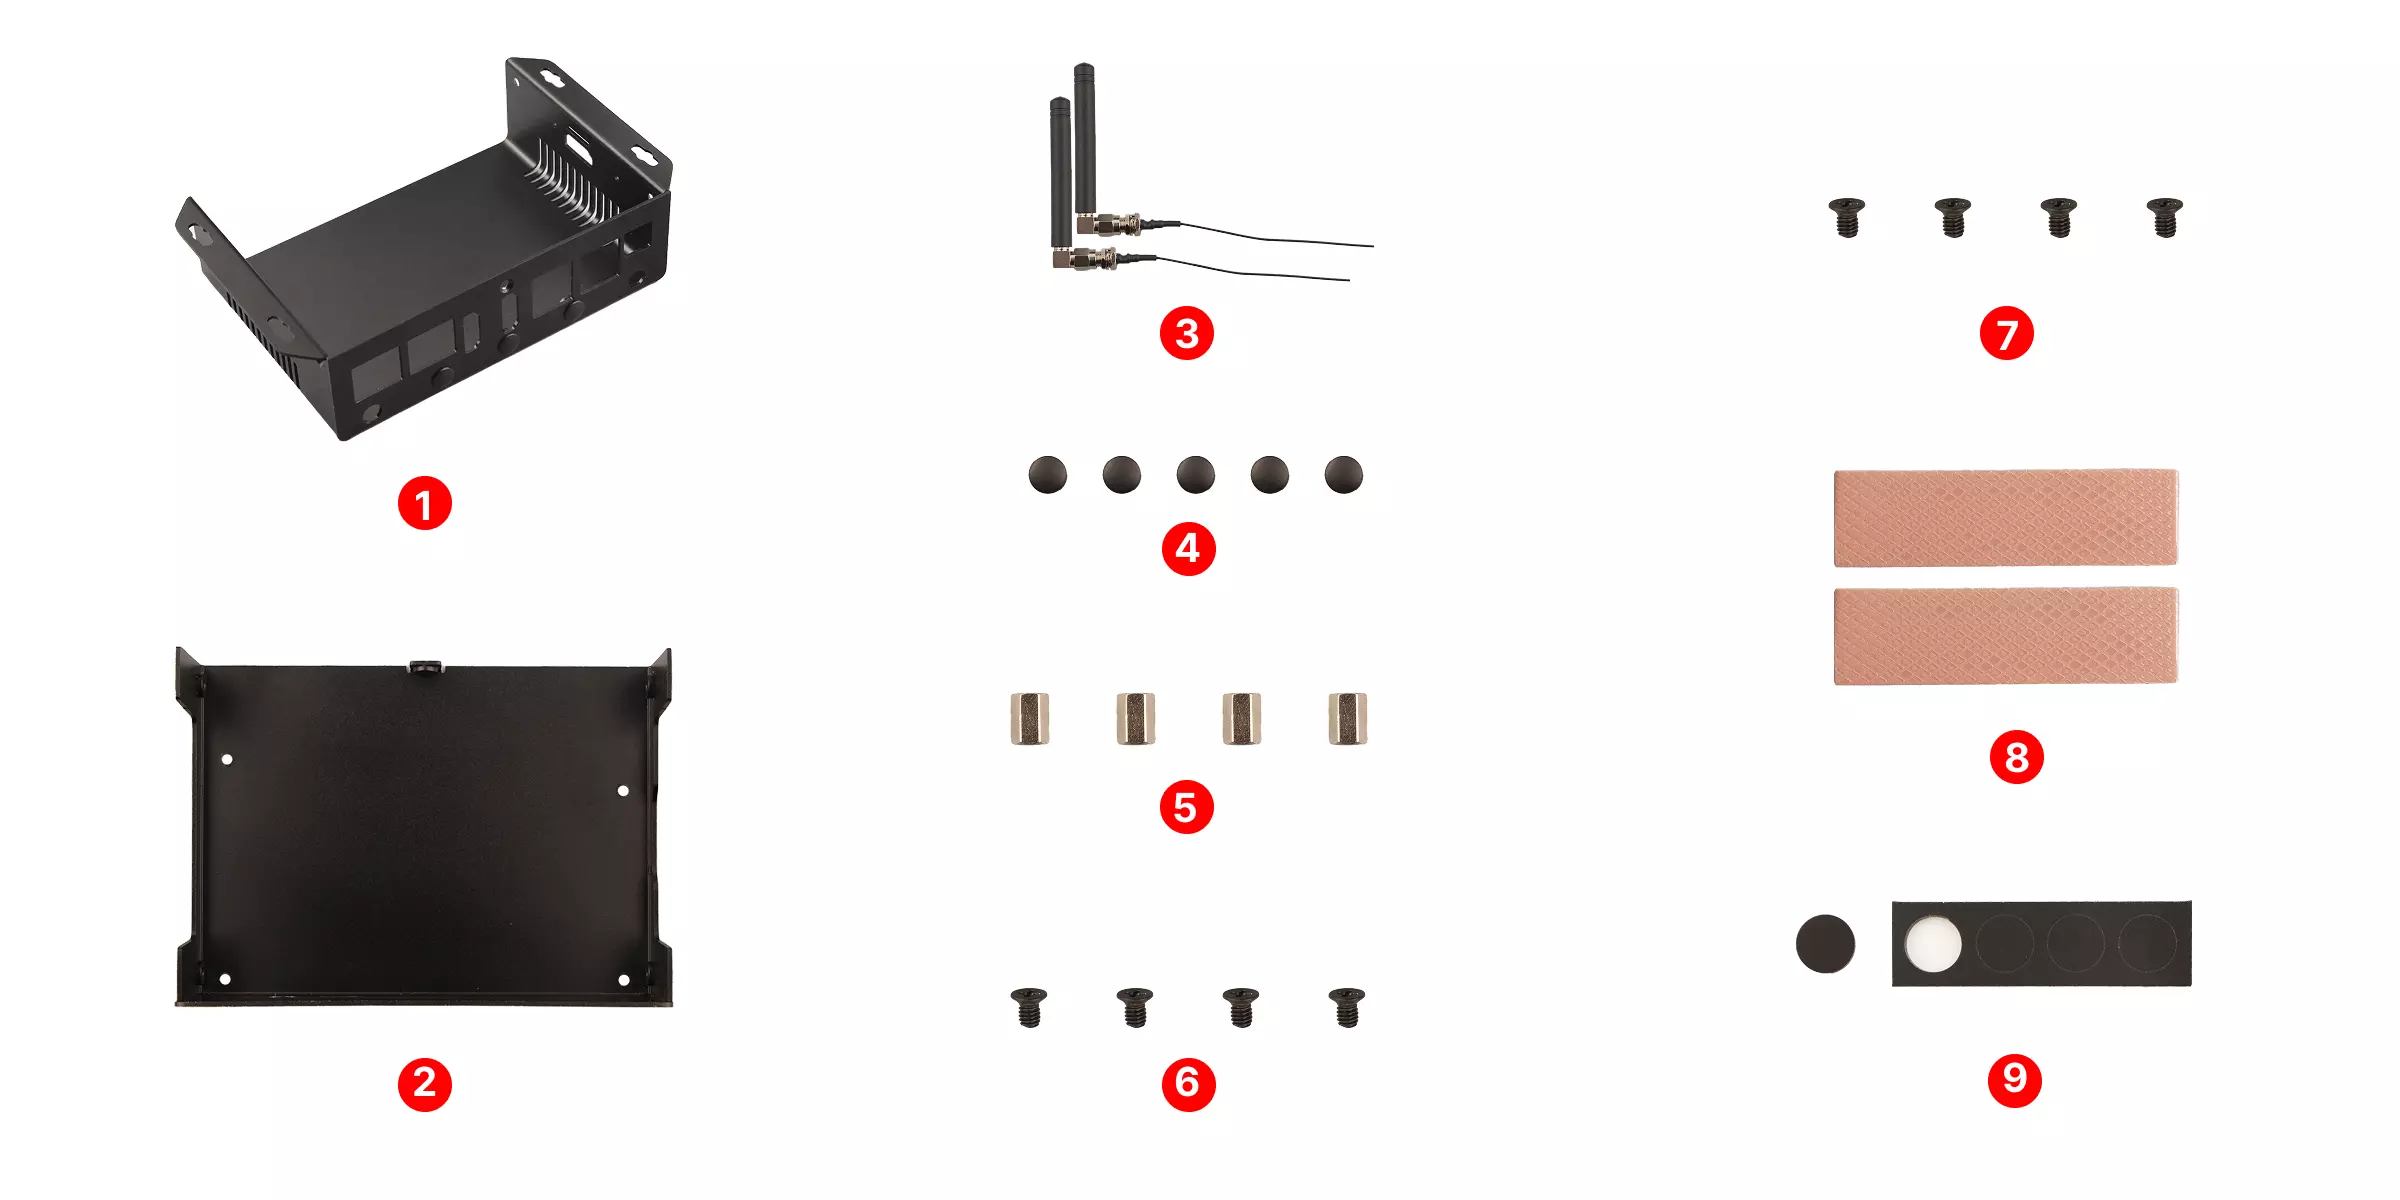
Package List
① : 1x Top Cover
② : 1x Bottom Cover
③ : 2x Rubber Antennas
④ : 5x Snap-in Plugs
⑤ : 4x CM2.5 * 6 mm Standoffs
⑥ : 4x CM2.5 * 4 mm Screws
⑦ : 9x KM2.5 * 4 mm Screws
⑧ : 2x Thermal Pads
⑨ : 1x Silicone Feet (contains 4 individual feet)
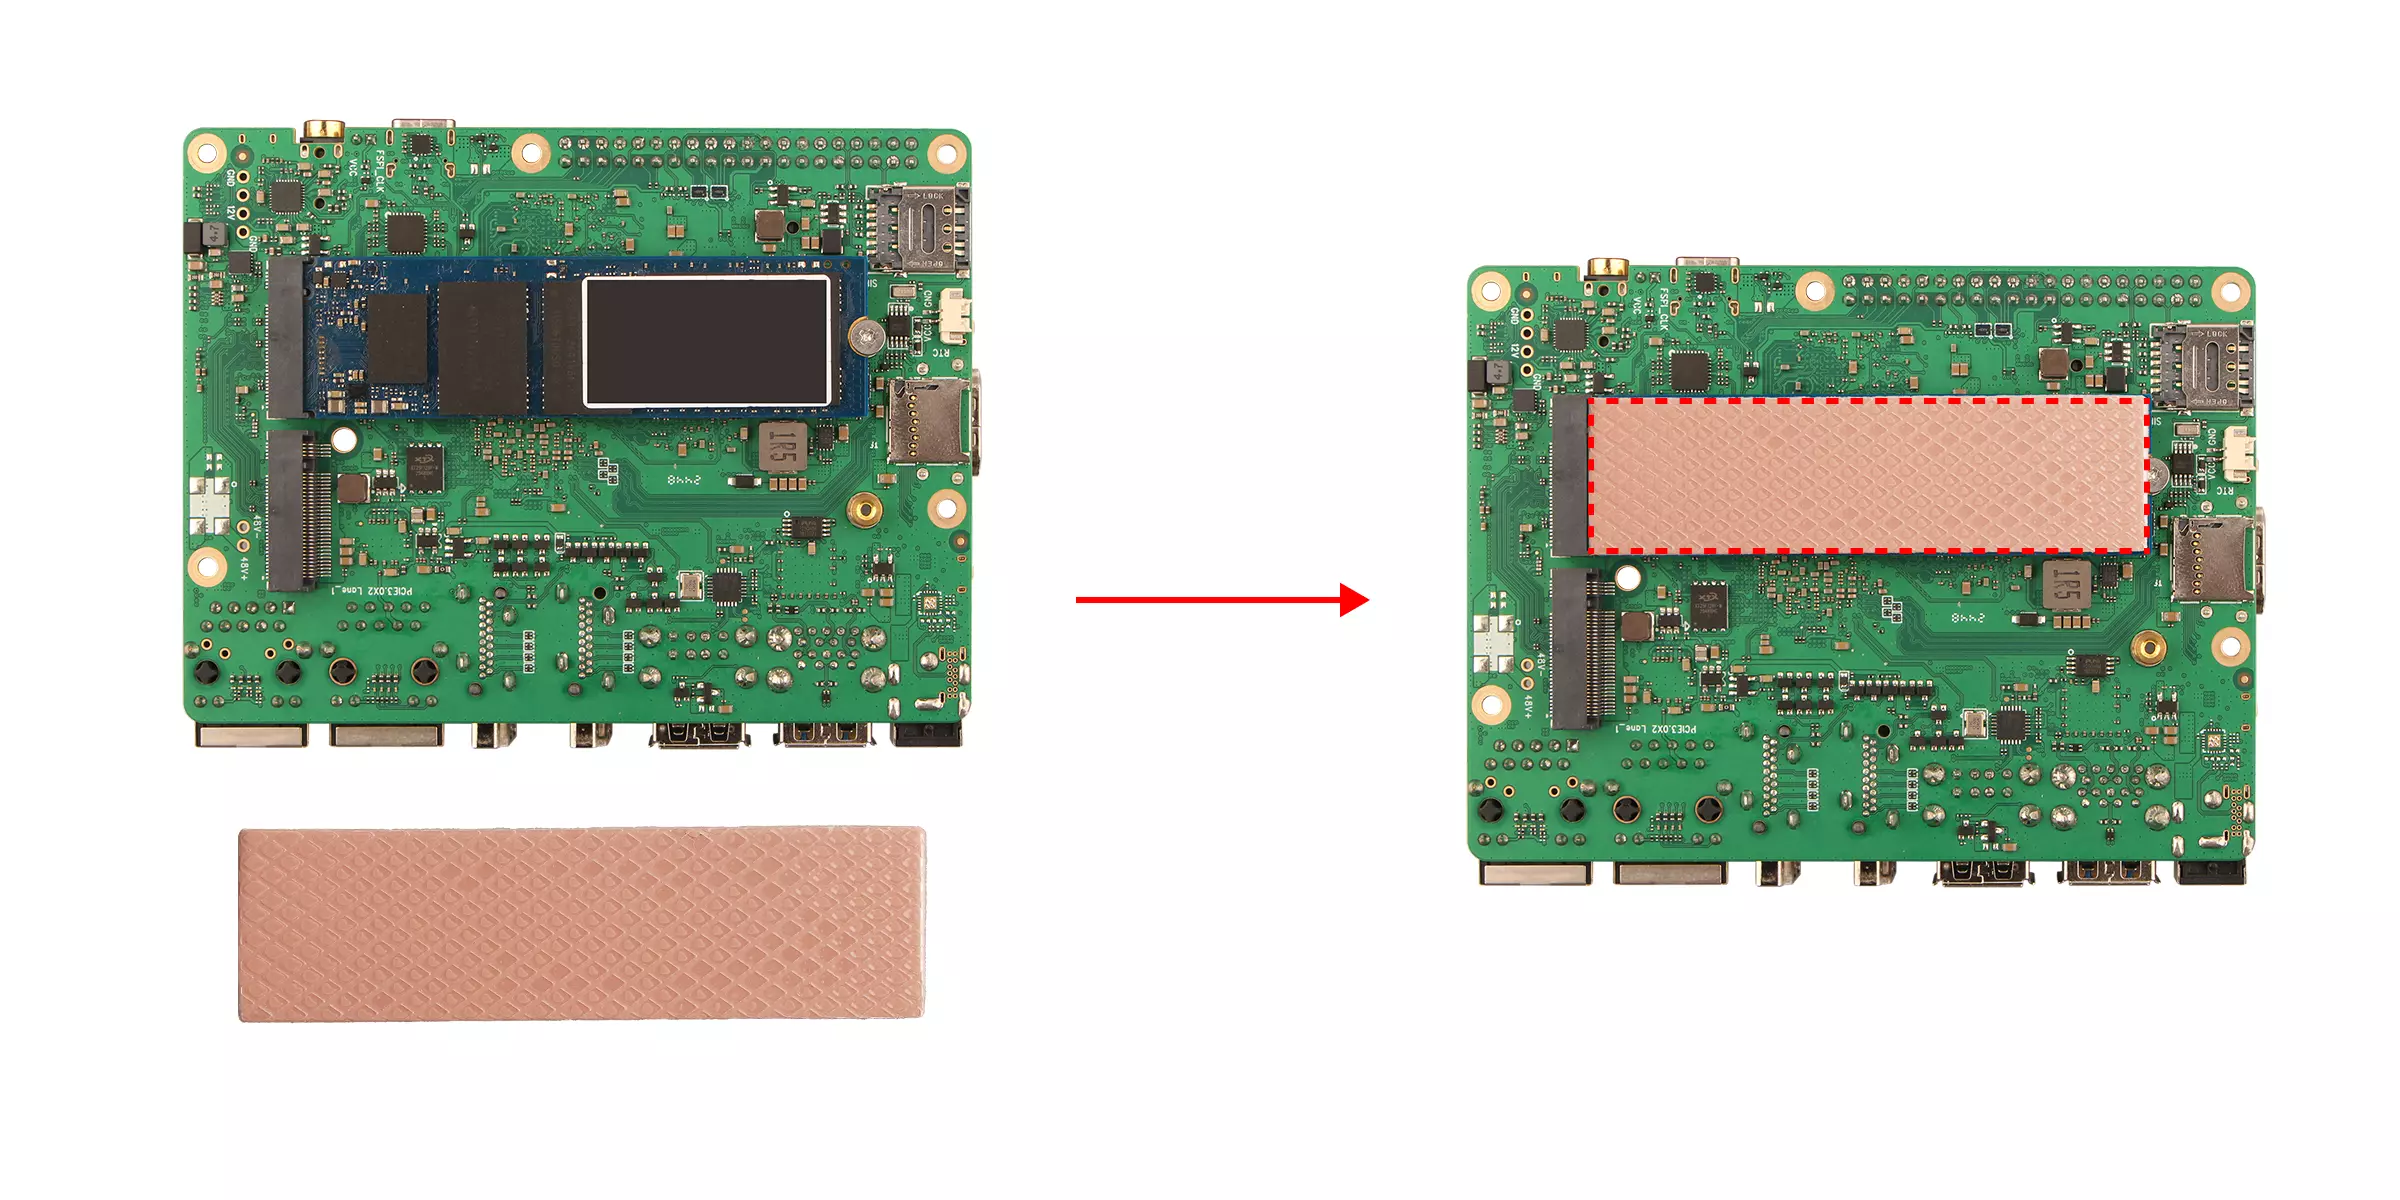
Step 1: Install Thermal Pads
If using an M.2 NVMe SSD, apply the thermal pad to the surface of the SSD to enhance heat conduction and dissipation.
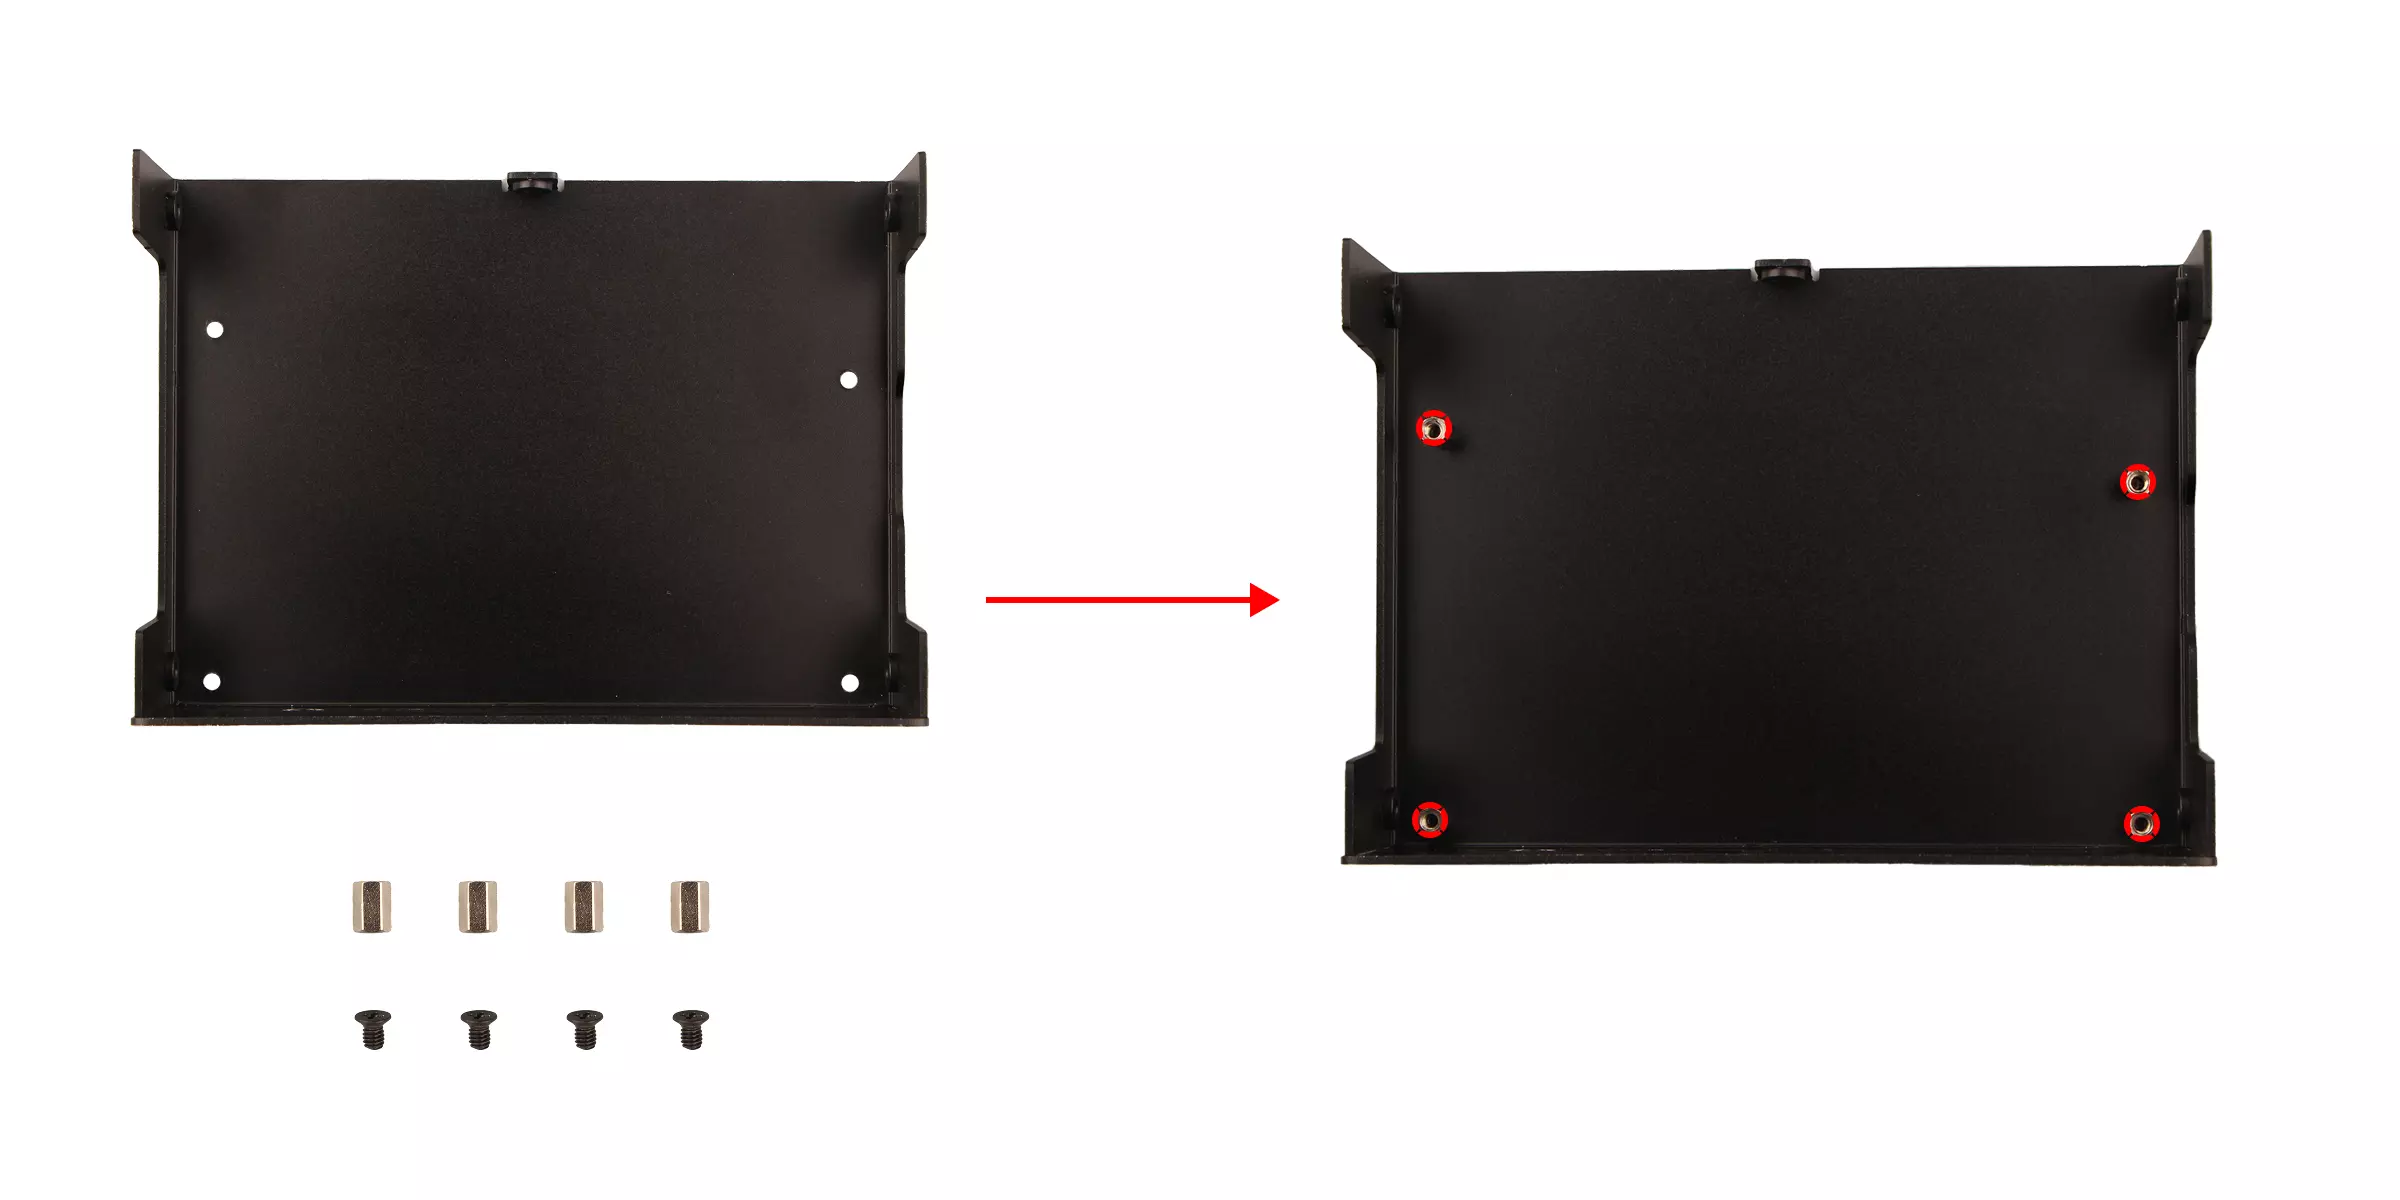
Step 2: Install Motherboard Standoffs
Use 4 CM2.5 * 6 mm brass standoffs and 4 CM2.5 * 4 mm screws to secure the motherboard standoffs to the bottom cover.
Step 3: Install the Motherboard
Gently place the motherboard onto the standoffs on the bottom cover and secure it using 4 KM2.5 * 4 mm screws.
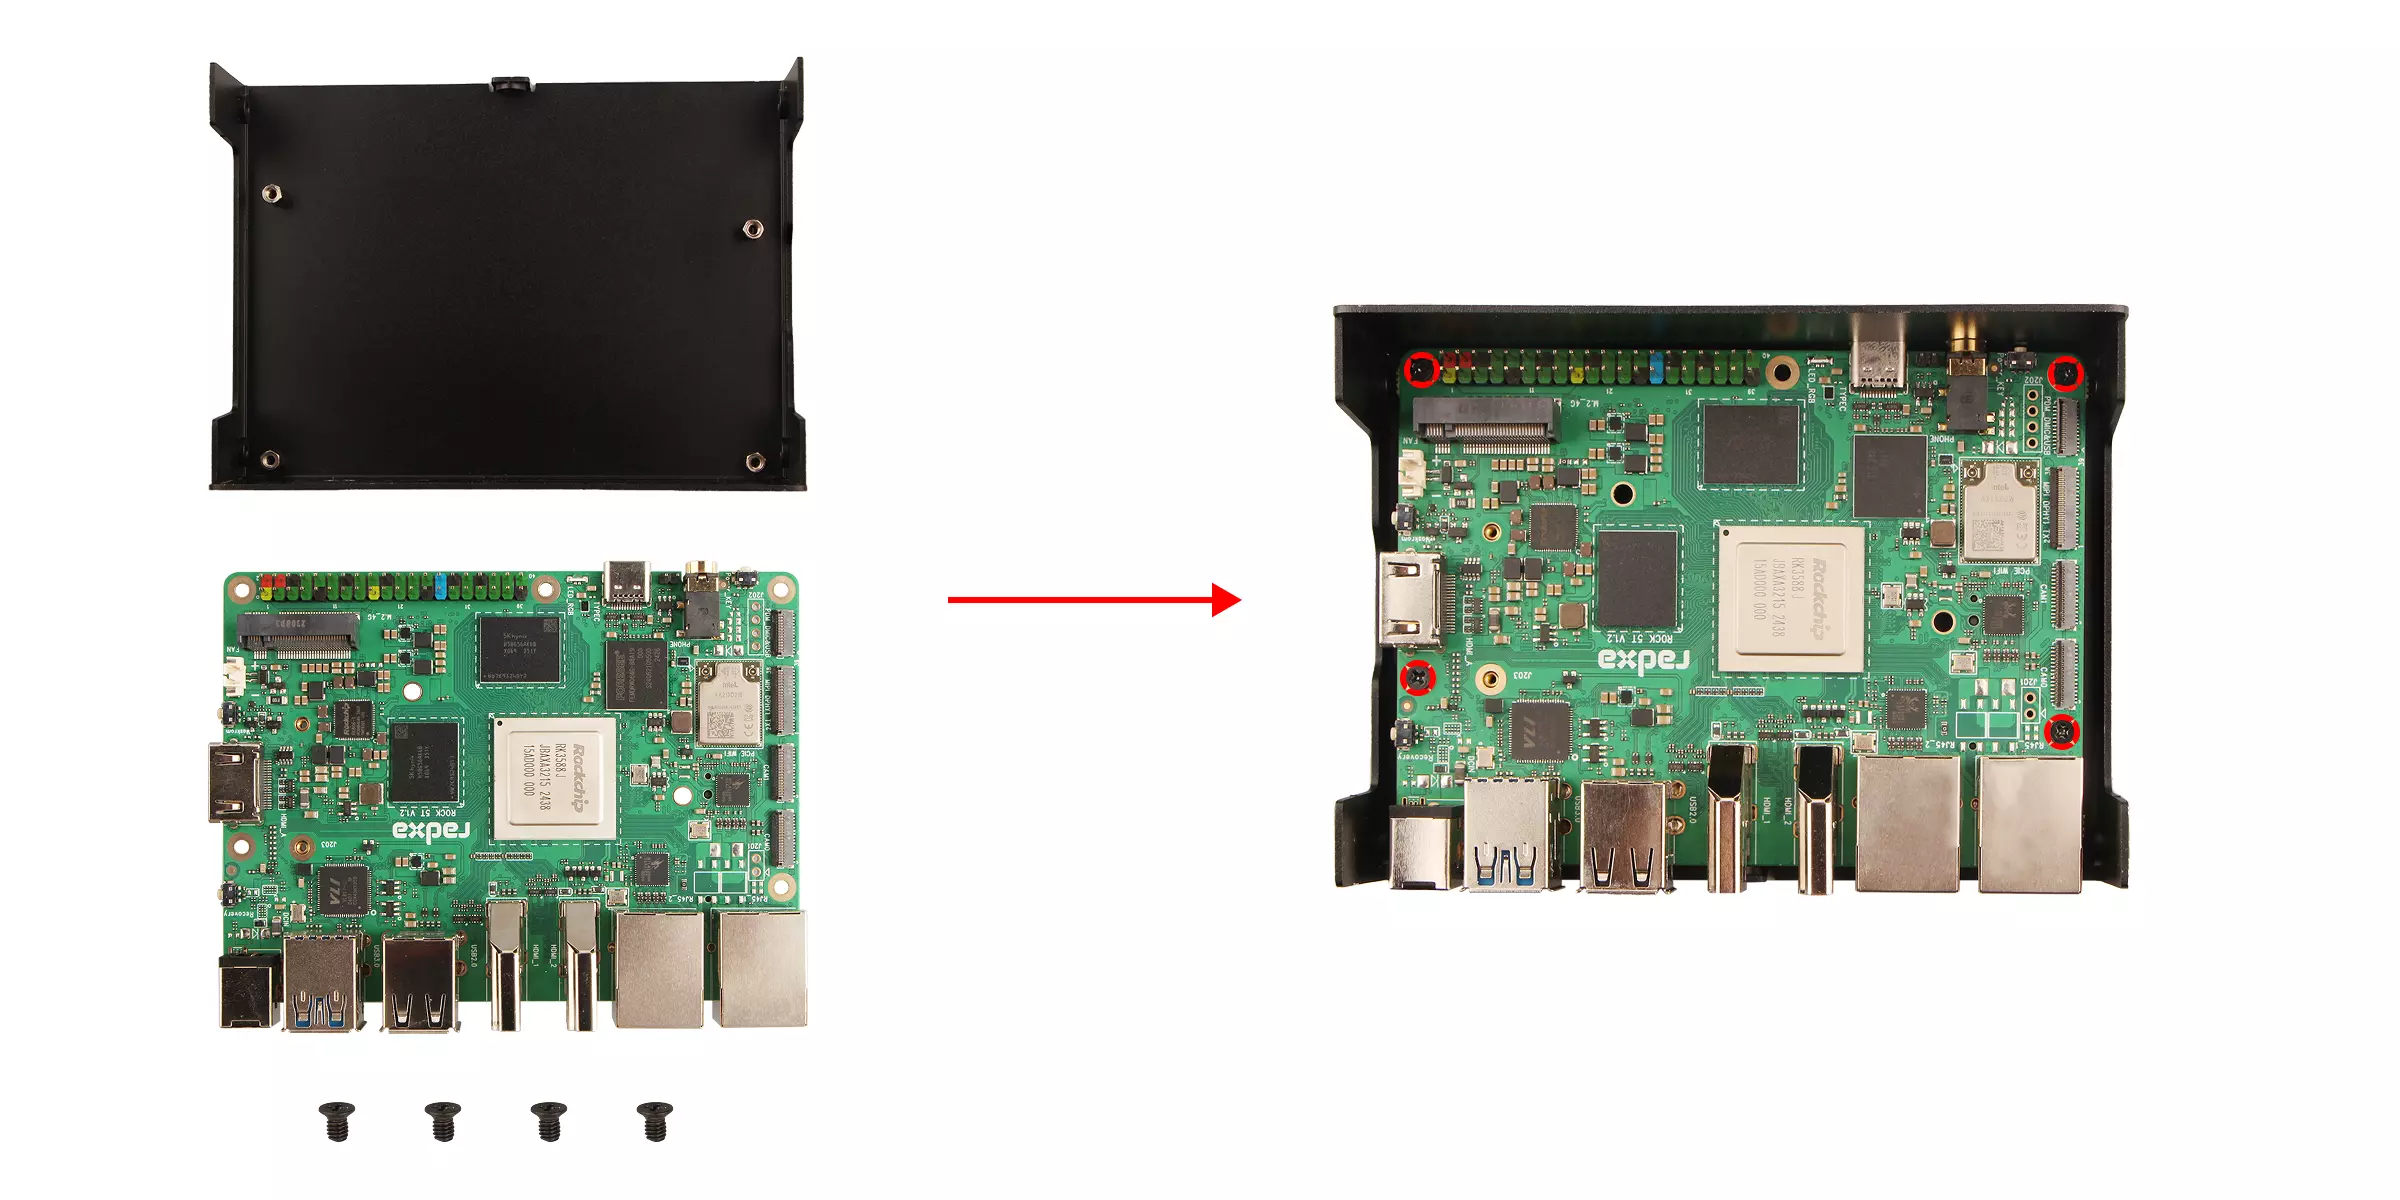
Step 4: Secure the Antenna Mounts
Install the antenna mounts into the antenna slots on the top cover.
You can choose which antenna mount interfaces to use. For unused antenna interfaces, use the snap-in plugs to prevent dust from entering.
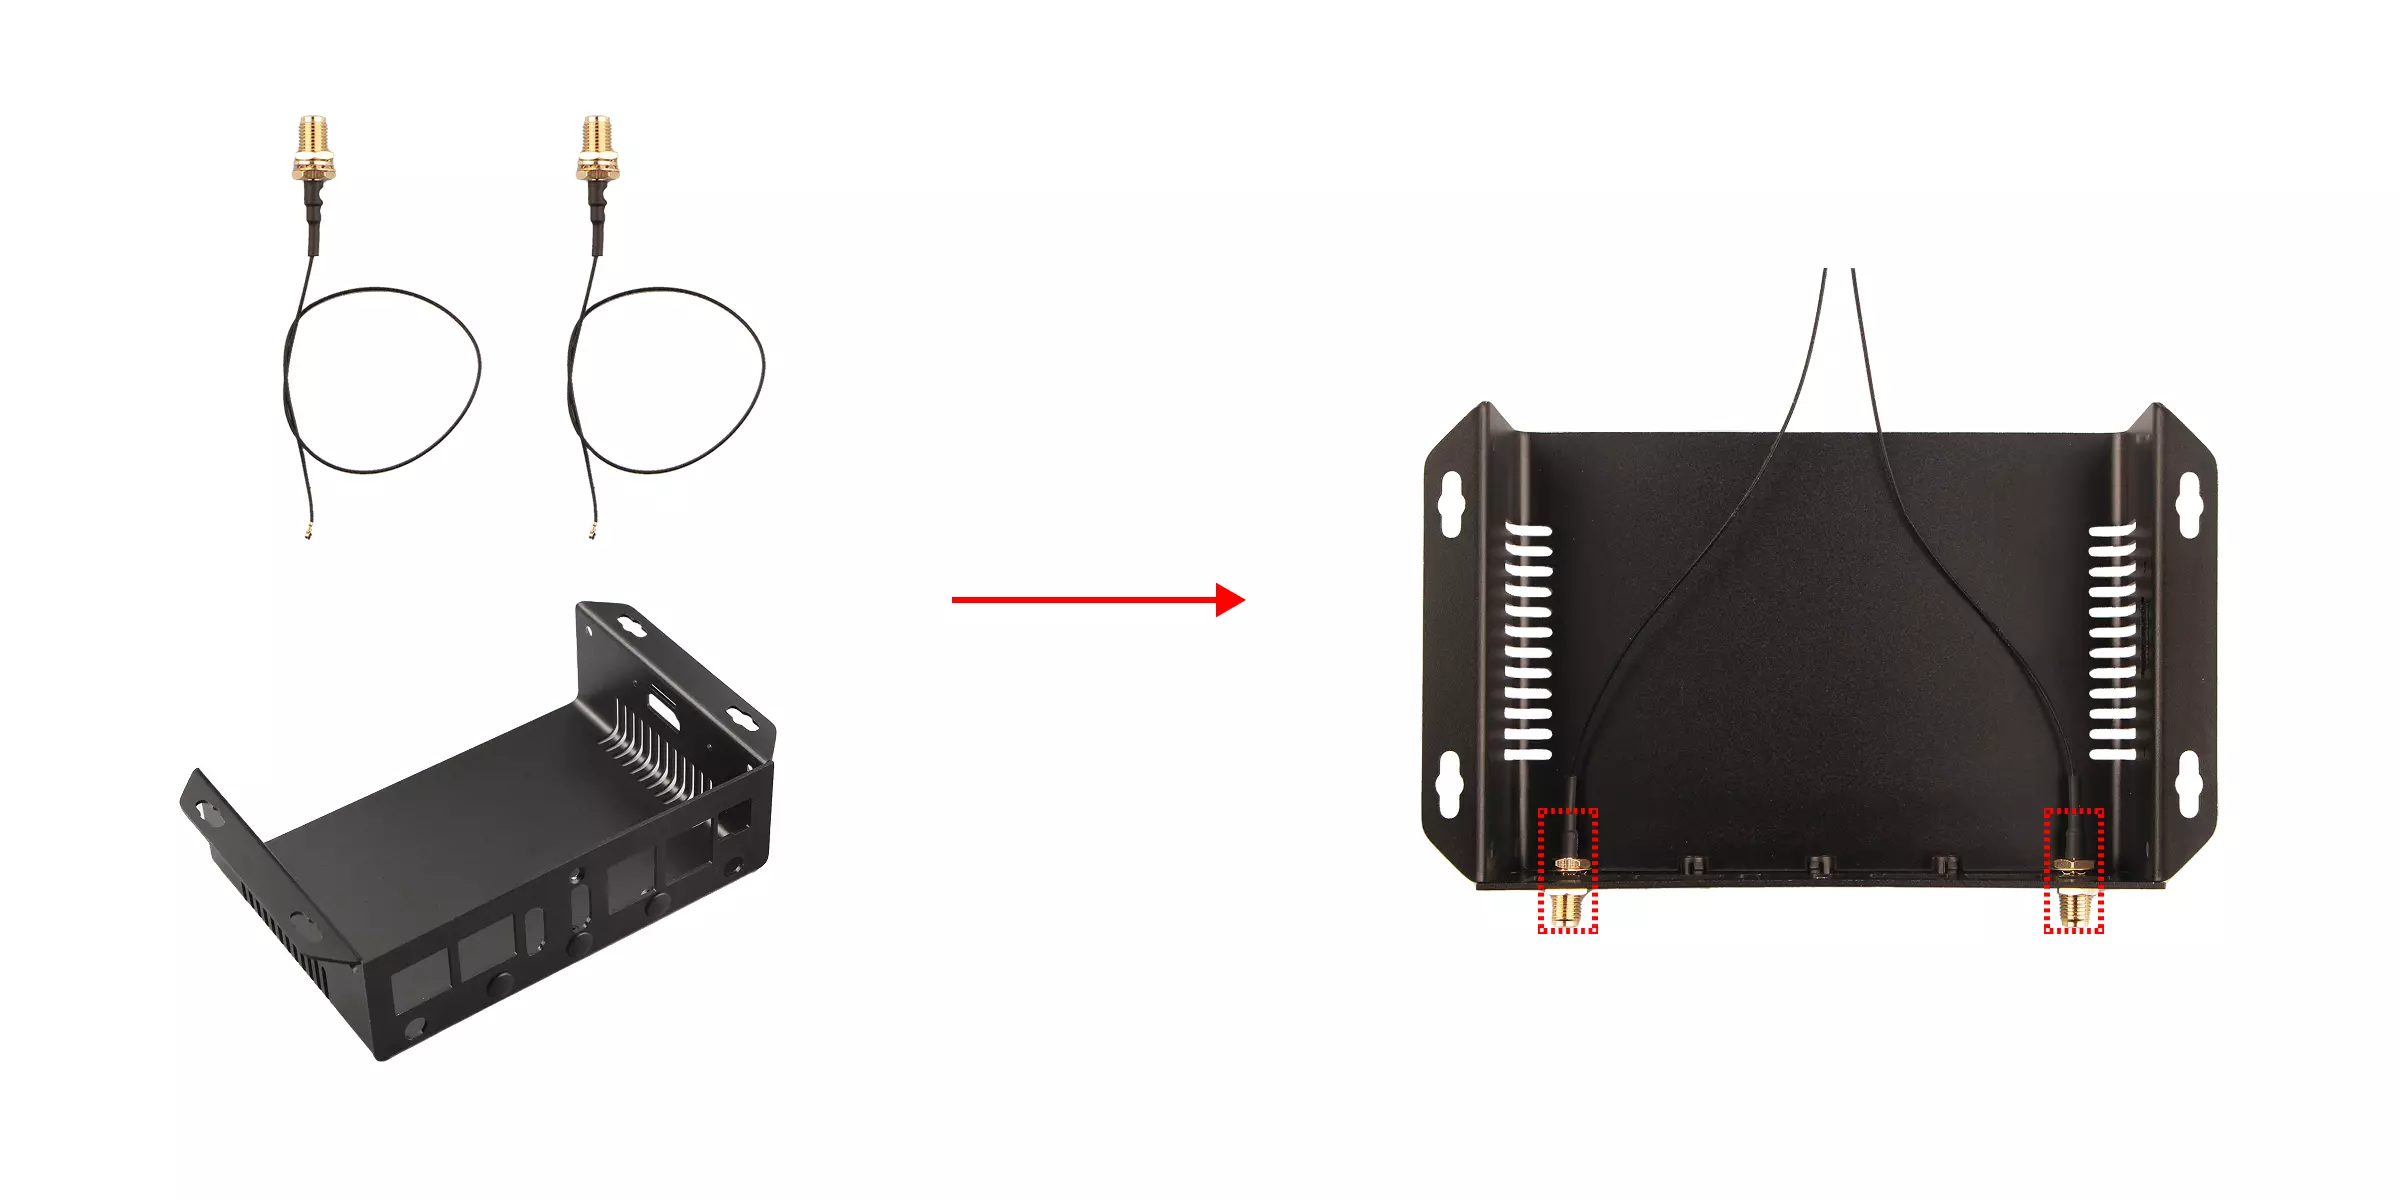
Step 5: Connect the Antennas
Align the antenna connectors vertically with the WiFi/BT module interfaces on the motherboard and press down until you hear a "click" sound, indicating they are properly connected.
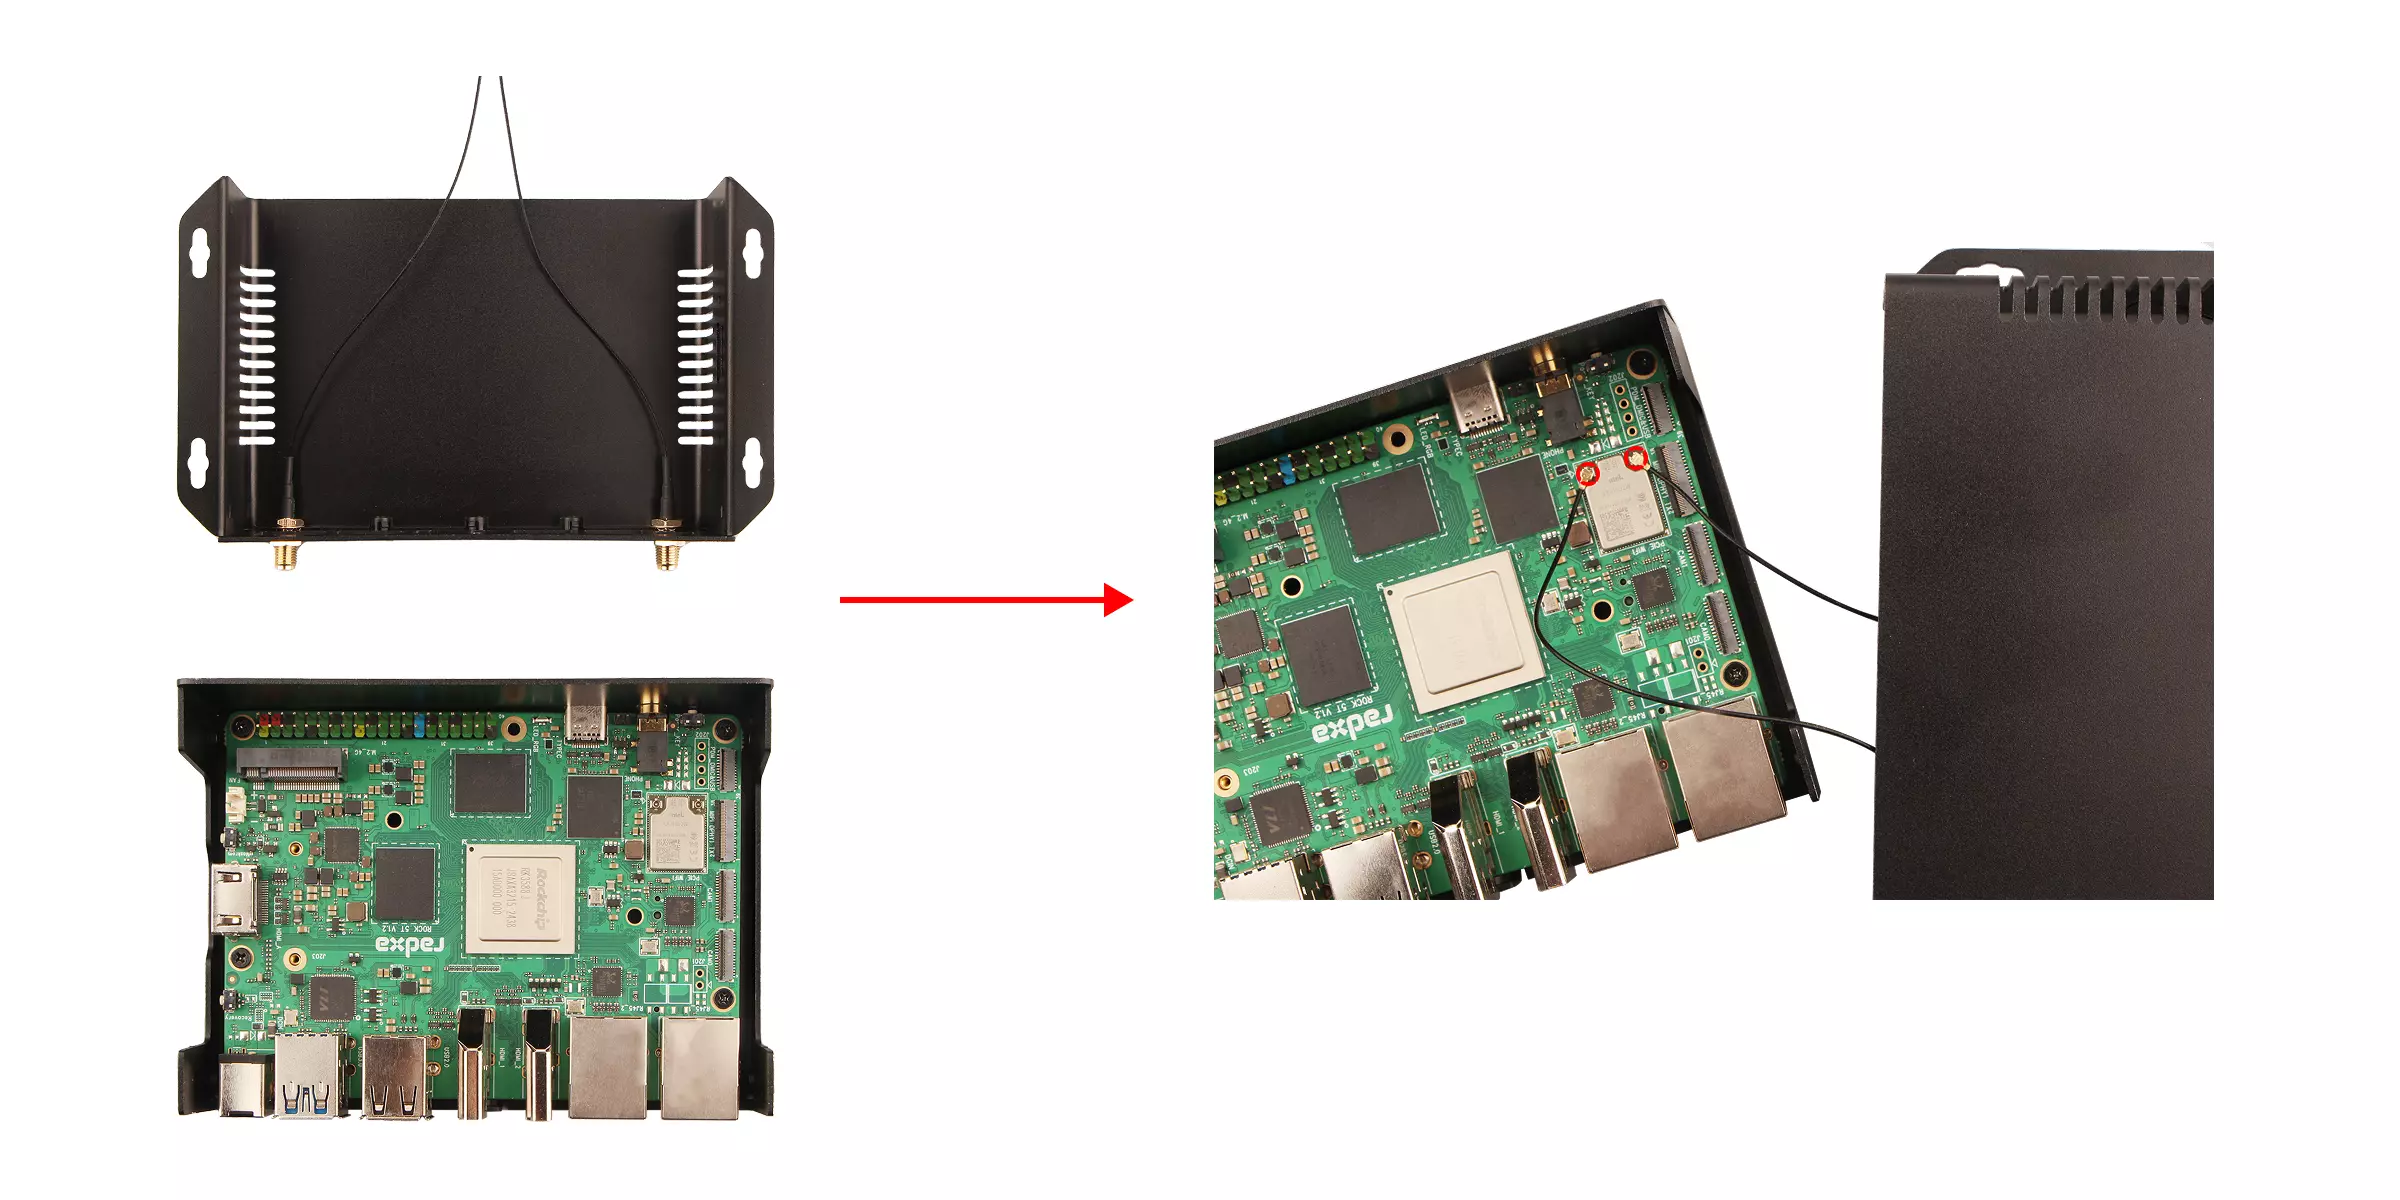
Step 6: Secure the Top Cover
Align the top cover with the bottom cover and secure it using 5 KM2.5 * 4 mm screws.
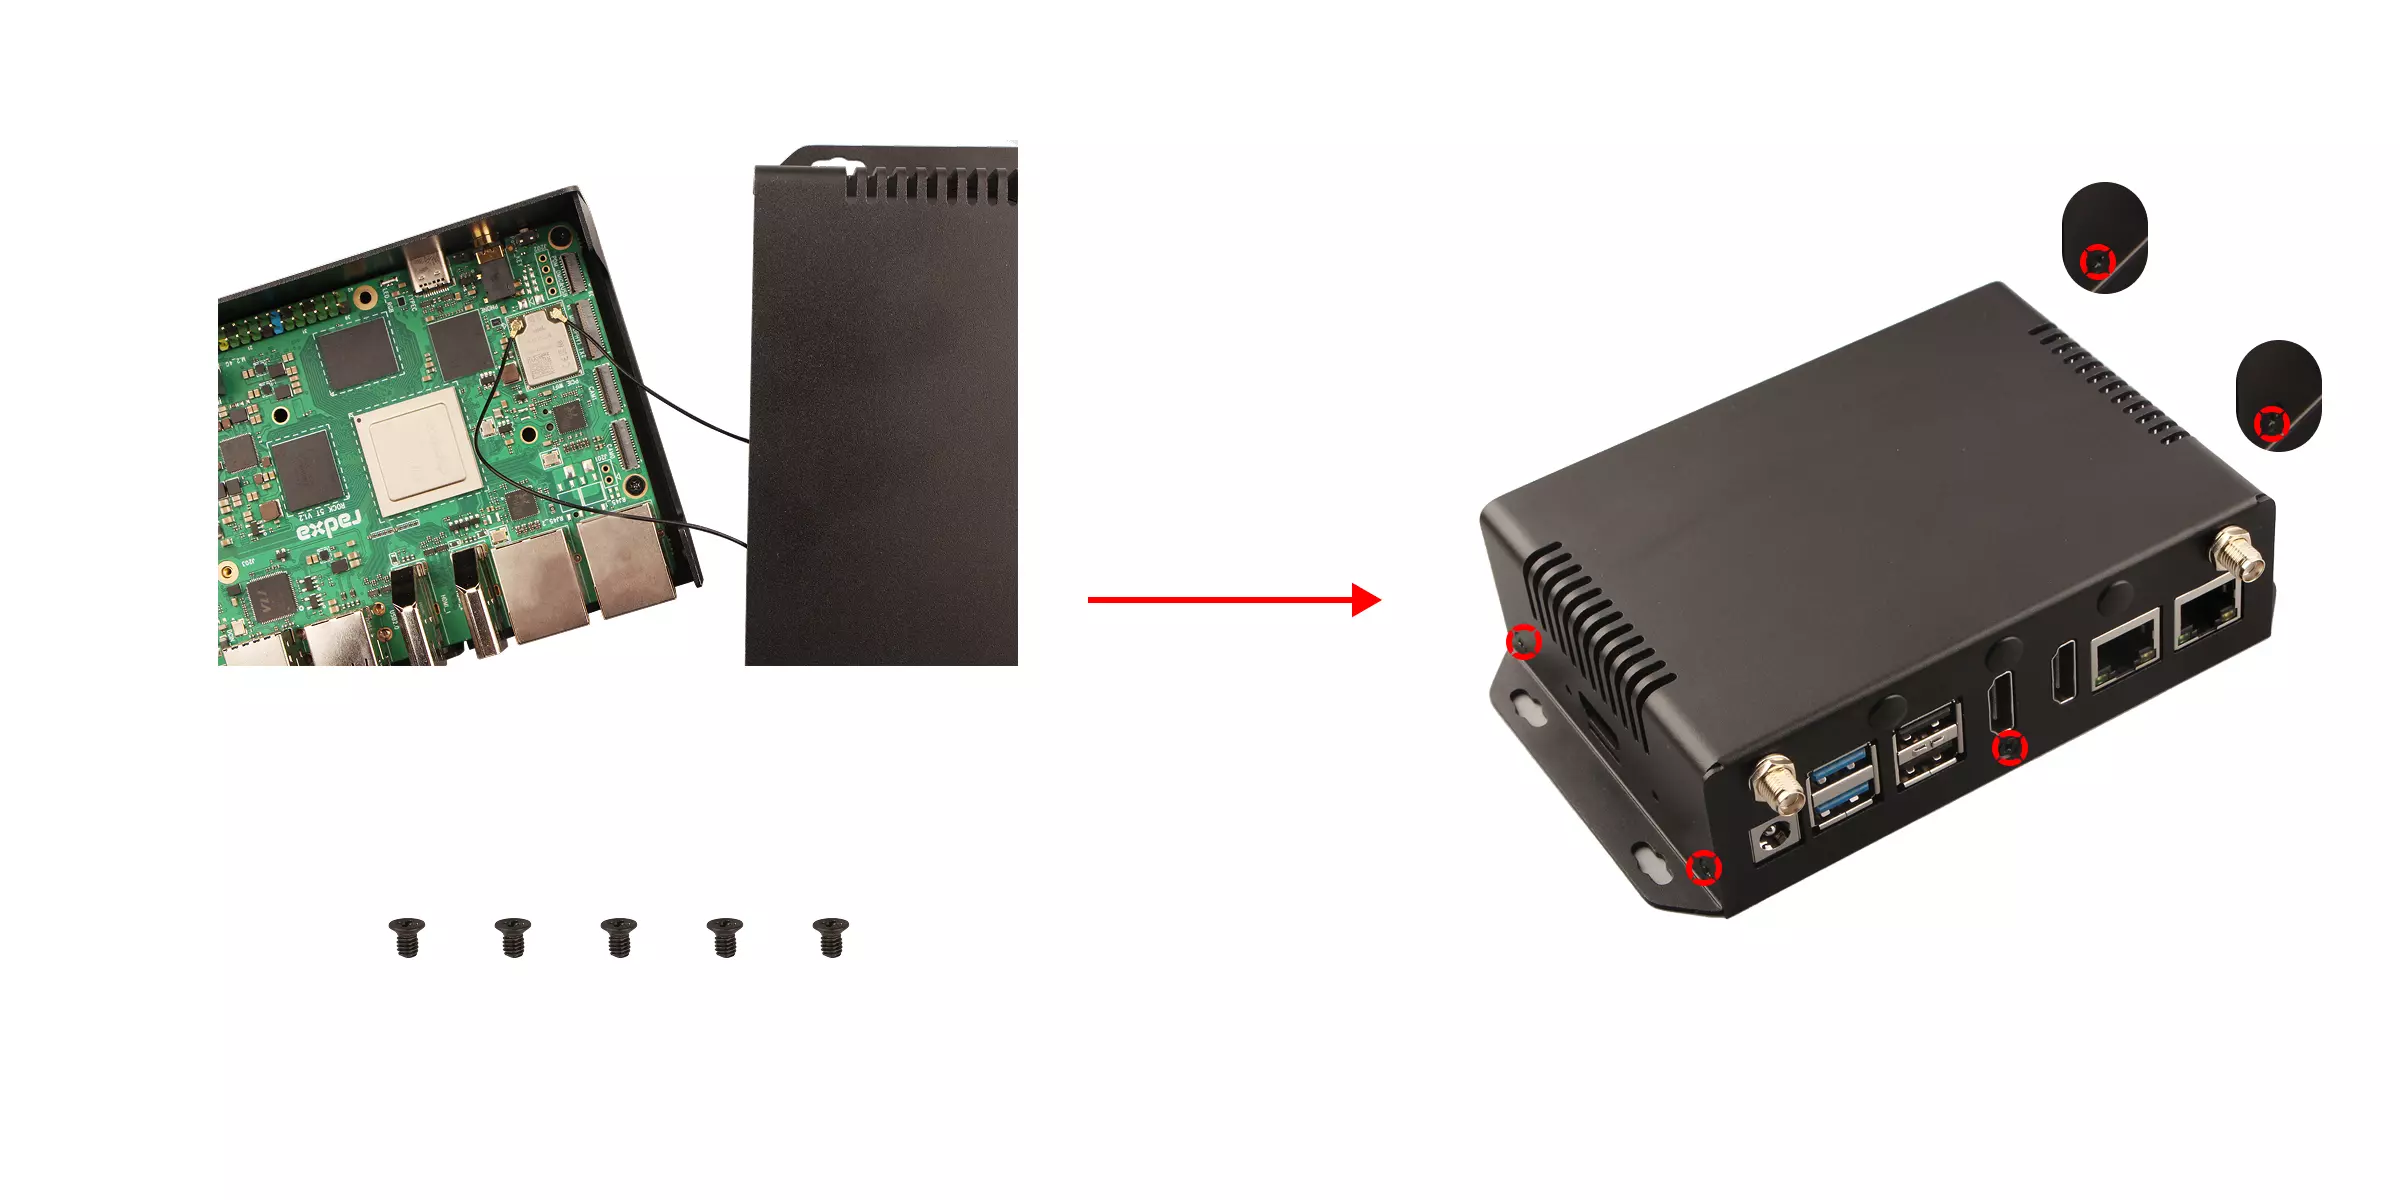
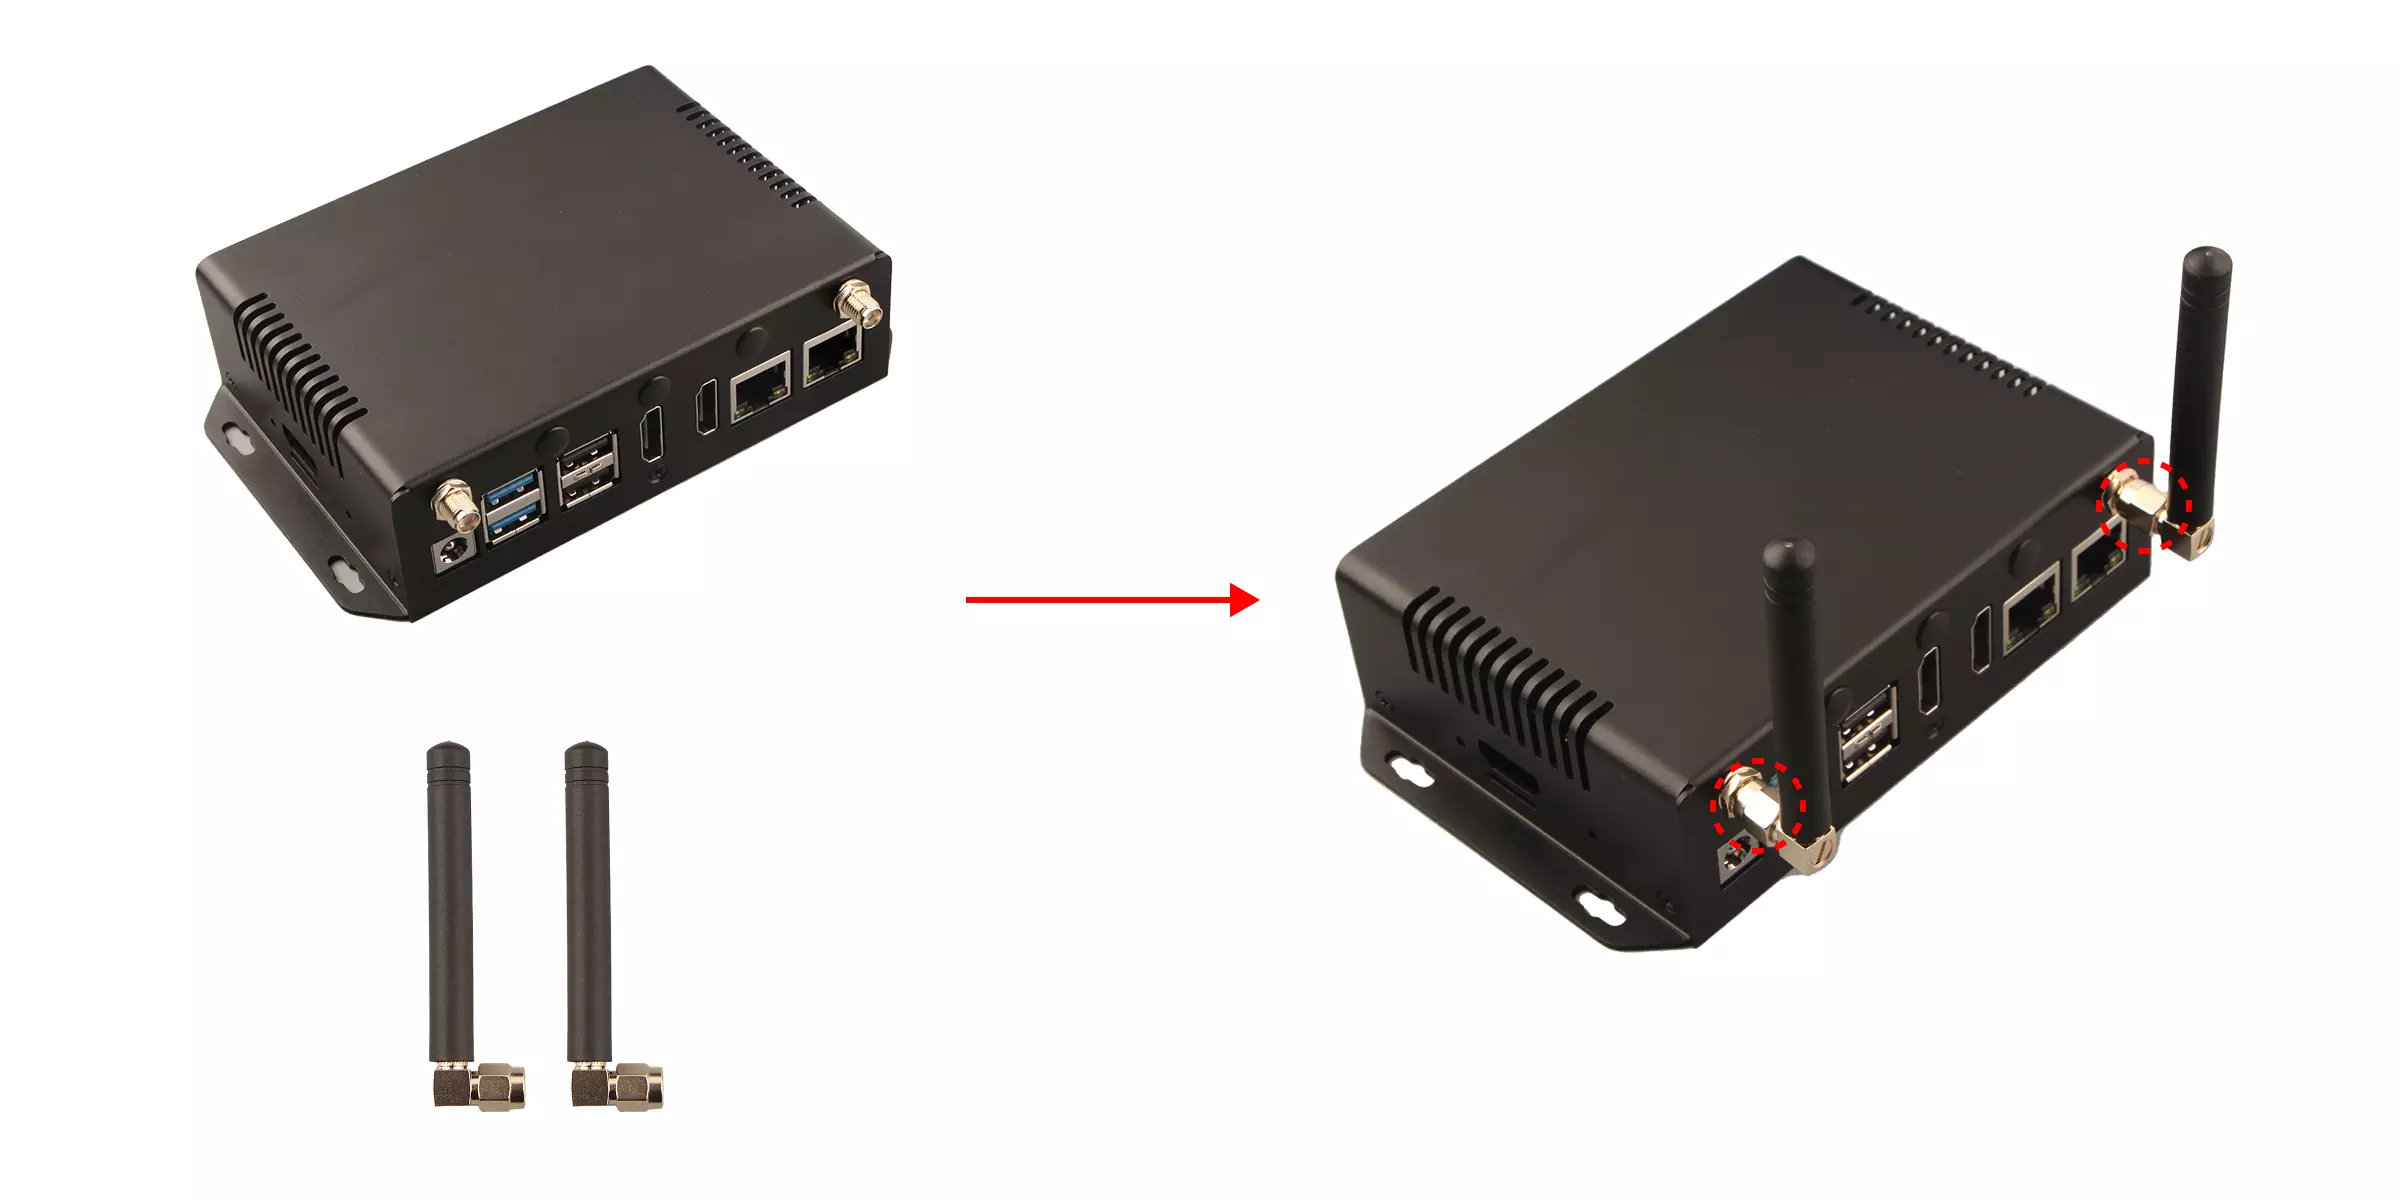
Step 7: Install the Rubber Antennas
Attach the rubber antennas to the antenna mounts.
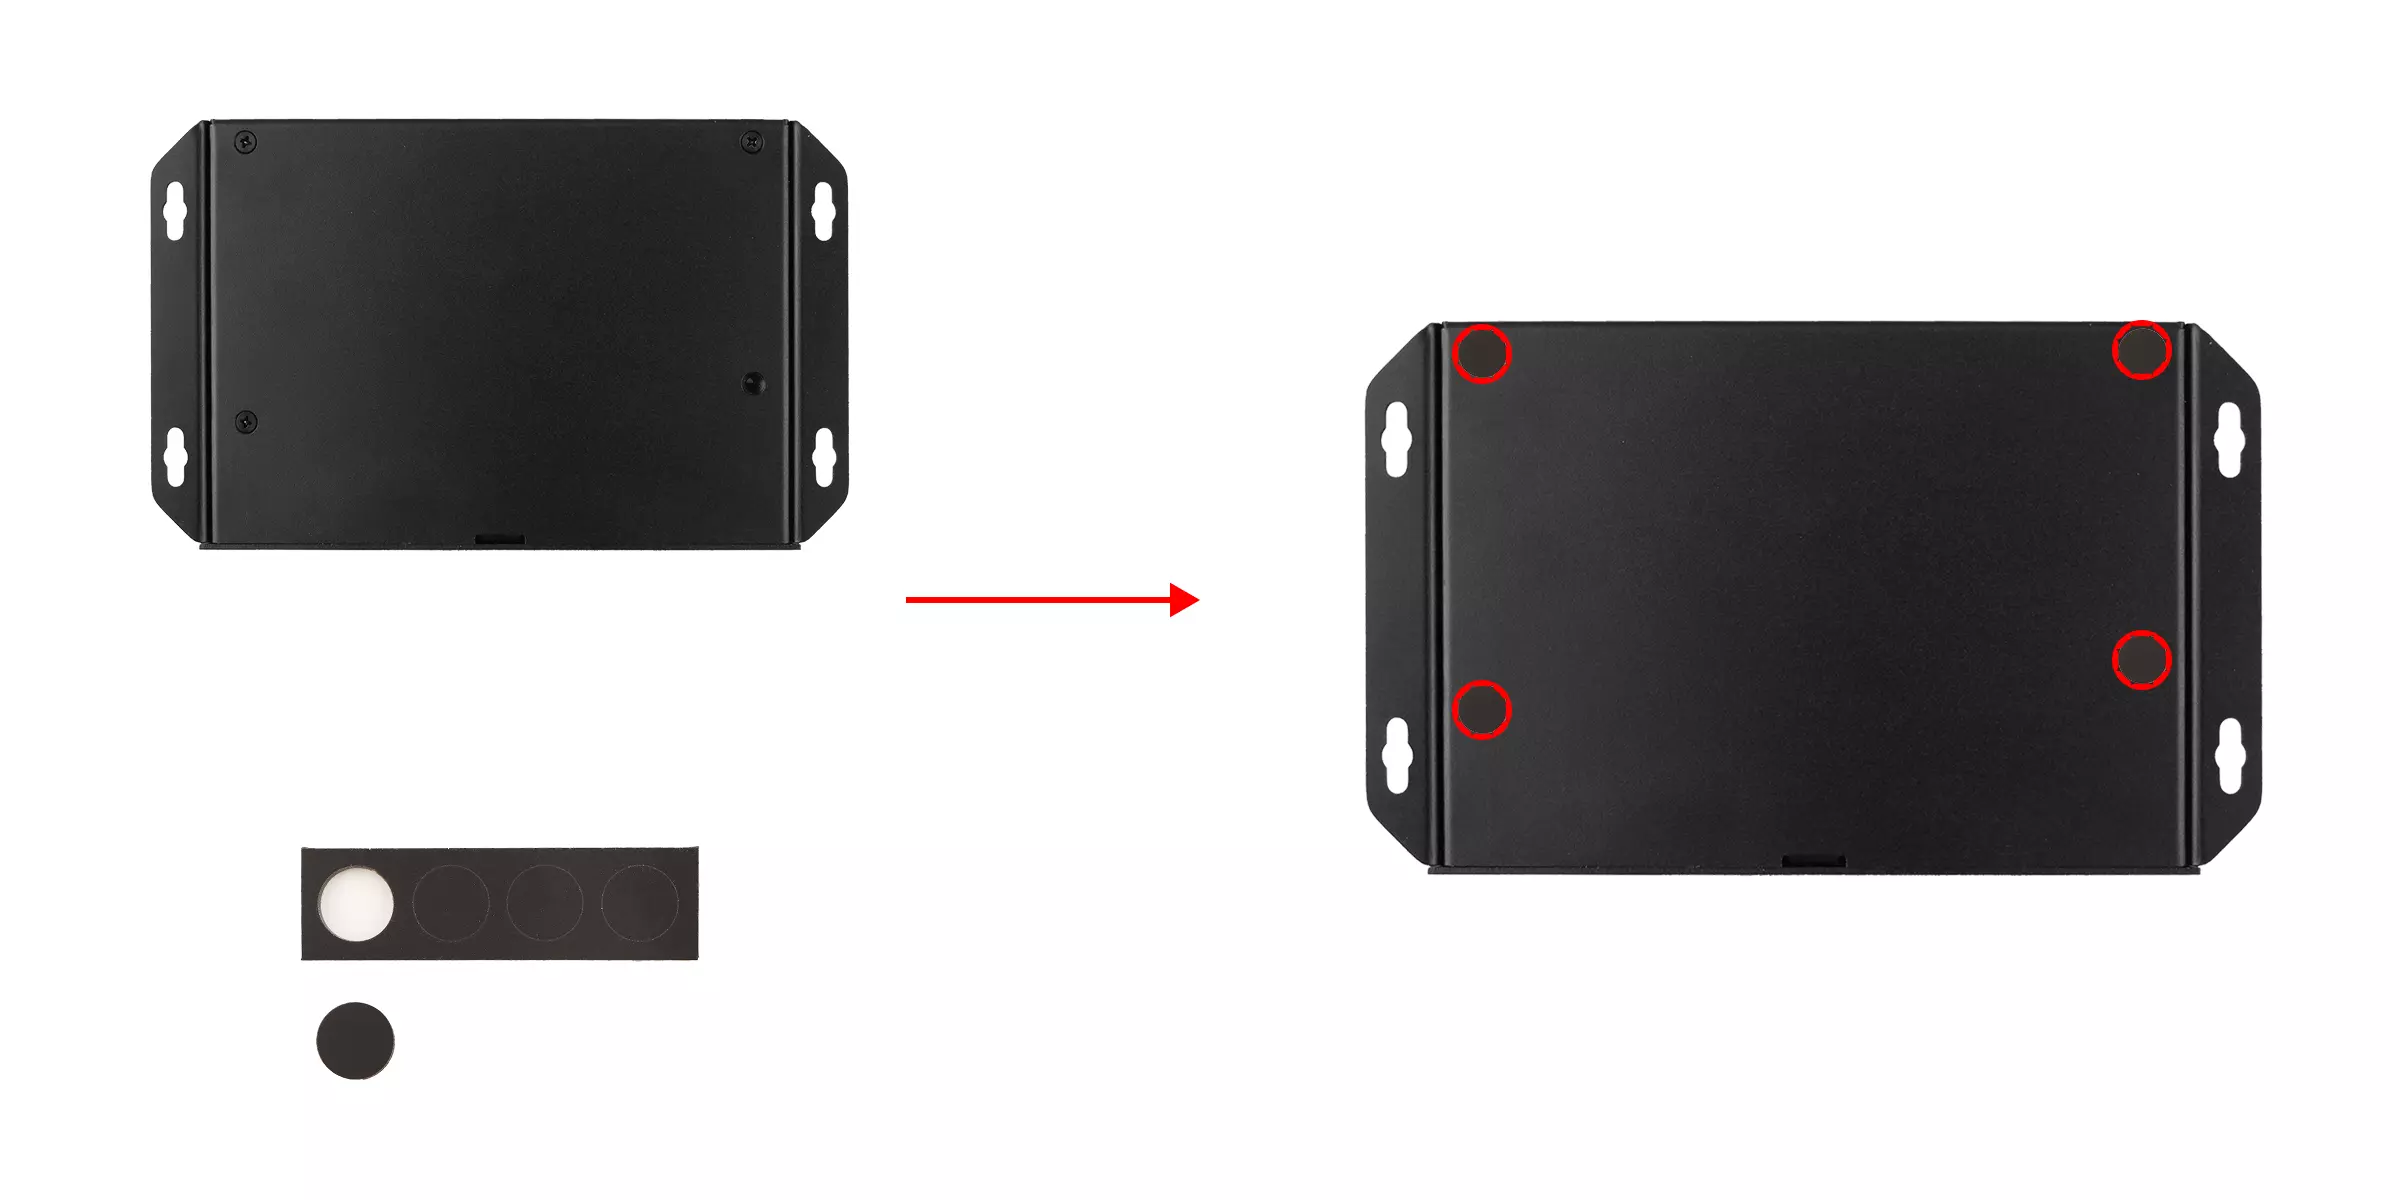
Step 8: Install the Rubber Feet
Attach the 4 rubber feet to the designated positions on the bottom cover (they can be installed on the motherboard's screw holes).