Raspberry Pi 5 guide
This guide explains how to use Raspberry Pi 5 with Radxa AIcore DX-M1 / DX-M1M.
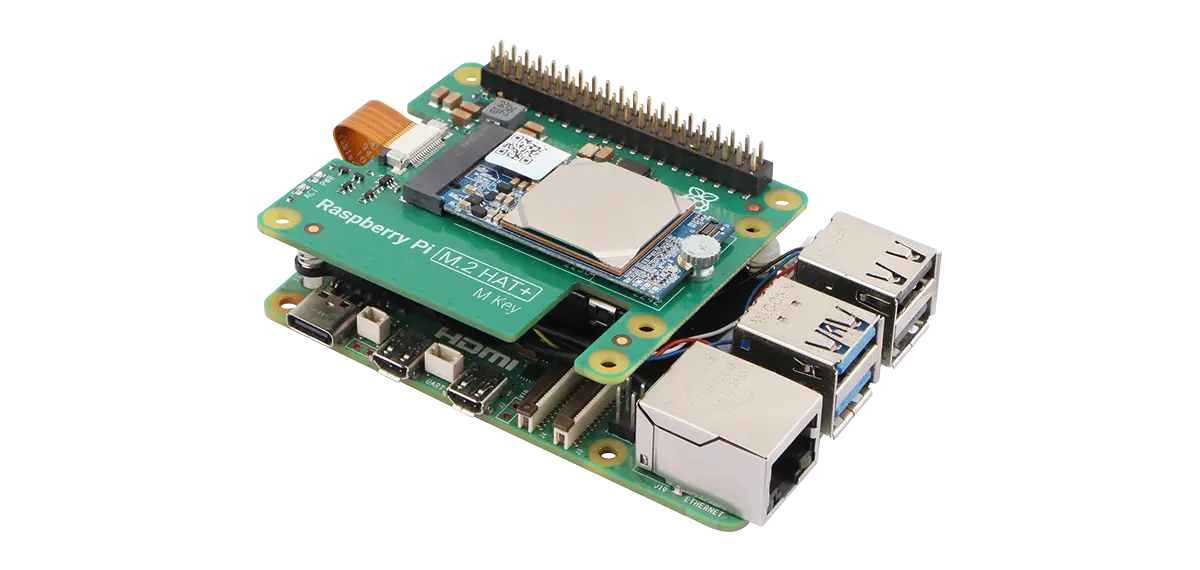
Hardware installation
Use Raspberry Pi 5 together with the Raspberry Pi 5 M.2 HAT+ and AIcore DX-M1M.
Note: The Raspberry Pi M.2 HAT+ supports M.2 M Key 2230 / 2242 form factors for installing AIcore DX-M1M. If you are using AIcore DX-M1, you need a dedicated adapter/bracket to secure it.
Enable PCIe Gen 3
Open a terminal and run sudo raspi-config. Then select Advanced Options -> PCIe Speed, choose Yes, and enable PCIe Gen 3 mode.
Verify hardware detection
After installing AIcore DX-M1M into the M.2 M Key slot and booting the OS, you can run lspci to verify whether AIcore DX-M1M is detected:
lspci
If AIcore DX-M1 / DX-M1M is detected, you should see output similar to the following:
0000:01:00.0 Processing accelerators: DEEPX Co., Ltd. DX_M1A
Environment setup
On Linux (Ubuntu, Debian), refer to DX-NPU-Driver installation and DX-RT runtime installation to install the required driver and runtime environment for AIcore DX-M1 / DX-M1M.
Example applications
After completing the steps above, you can follow DX-APP examples to run AI acceleration and inference with AIcore DX-M1 / DX-M1M.