Windows
File Download.
Please visit the Resource Download to download the corresponding Loader and image files.
Install RKDevTool
RKDevTool is software developed by Rockchip for USB flashing on the Windows platform. If RKDevTool is not installed on your Windows host, please follow the steps below to install it.
Please download and unzip the following file to install RKDevTool:
Install Drivers
Download and unzip DriverAssistant, then run DriverInstall.exe and click the Install Driver button to install the drivers. If you have previously installed other versions of the drivers, please click Uninstall Driver to remove the existing drivers before reinstalling.

Install RKDevTool
After unzipping RKDevTool_Release_v2.86.zip, simply click on RKDevTool.exe to use the software.
Enter Maskrom Mode
What is Maskrom mode
Maskrom mode, also known as Loader mode, is a special boot mode generally used to restore or repair malfunctioning devices. This mode enables users to interact directly with the device's hardware without going through the operating system. In Maskrom mode, users can communicate with the device via a computer or other devices and execute a series of commands to resolve the device's issues.MacOS:
The results after executing "lsusb" Output:Bus 000 Device 004: ID 2207:350b Fuzhou Rockchip Electronics Co., Ltd. Composite Device
Linux:
The results after executing "lsusb" Output:Bus 001 Device 030: ID 2207:350b Fuzhou Rockchip Electronics Company
Windows:
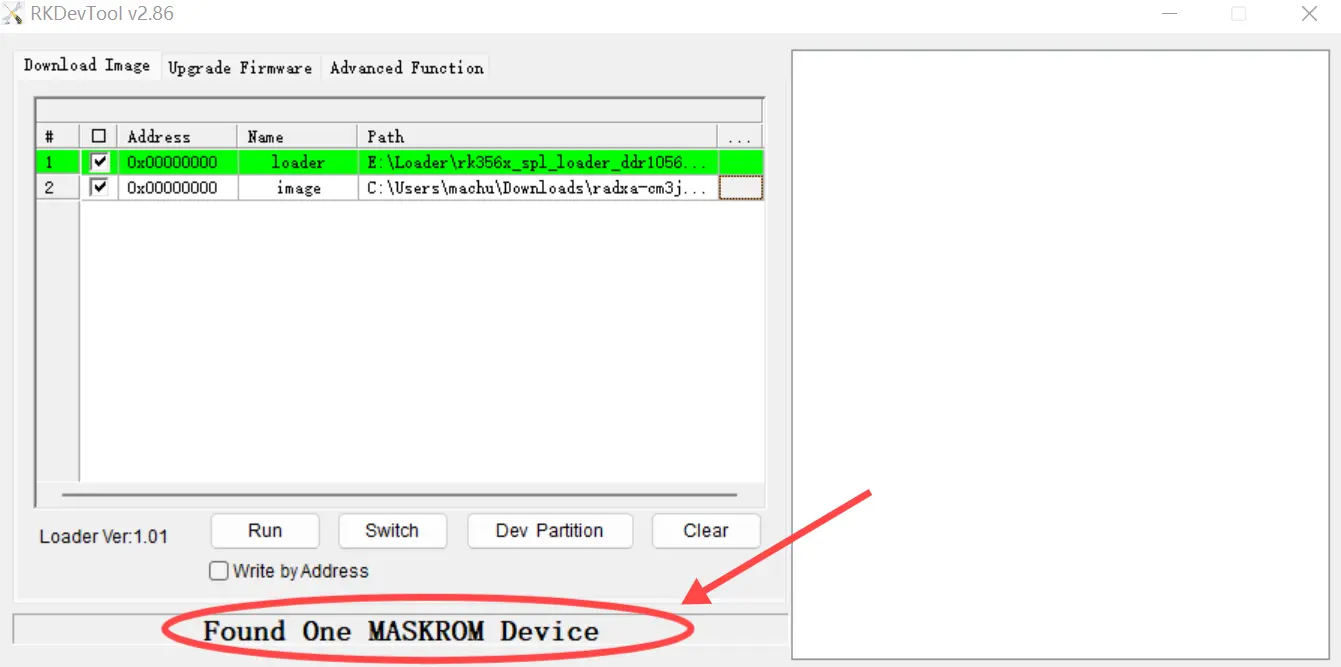
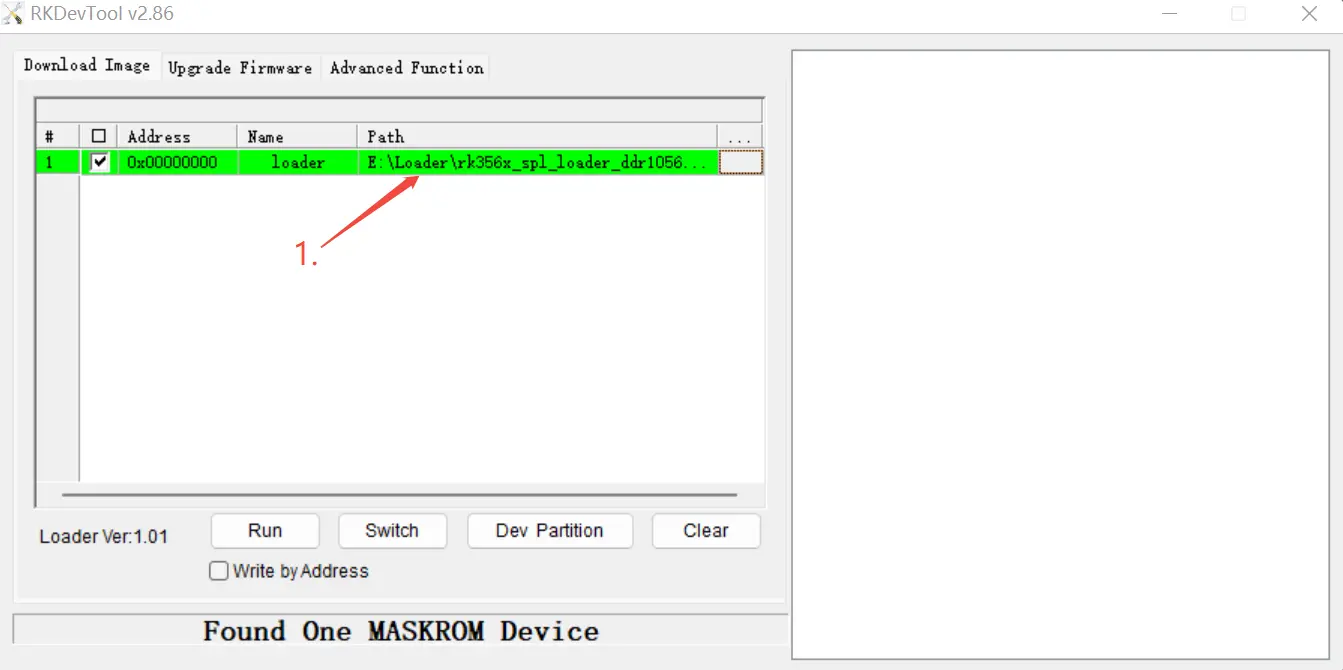
Open the RKDevTool, and you will see that the device is in the "Found One MASKROM Device" state.
How to enter Maskrom mode
- Raspberry Pi CM4 IO Board
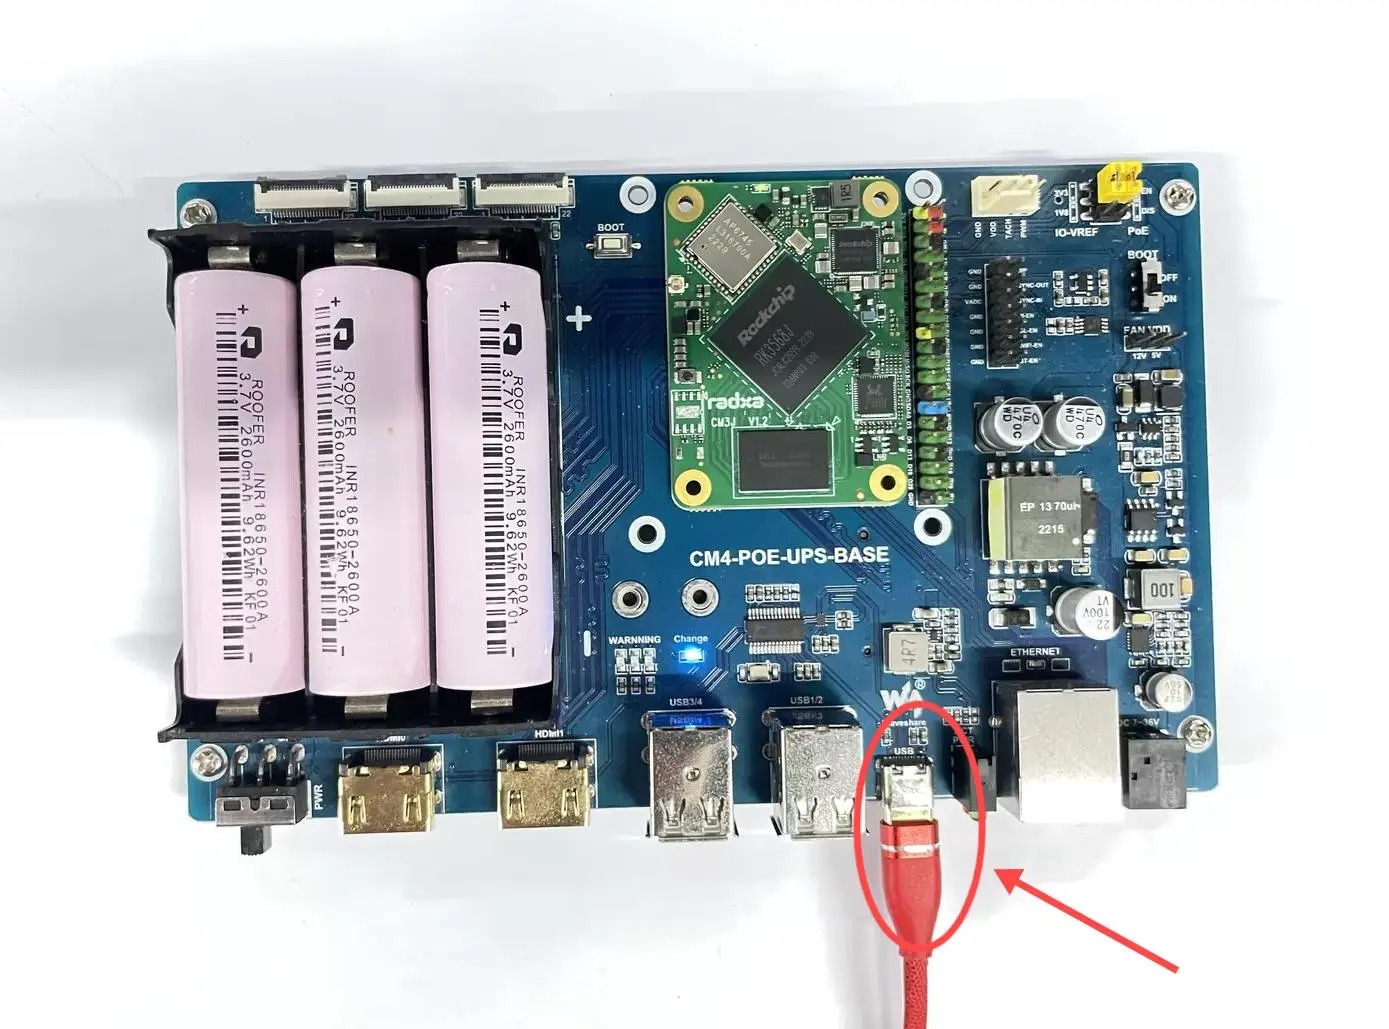
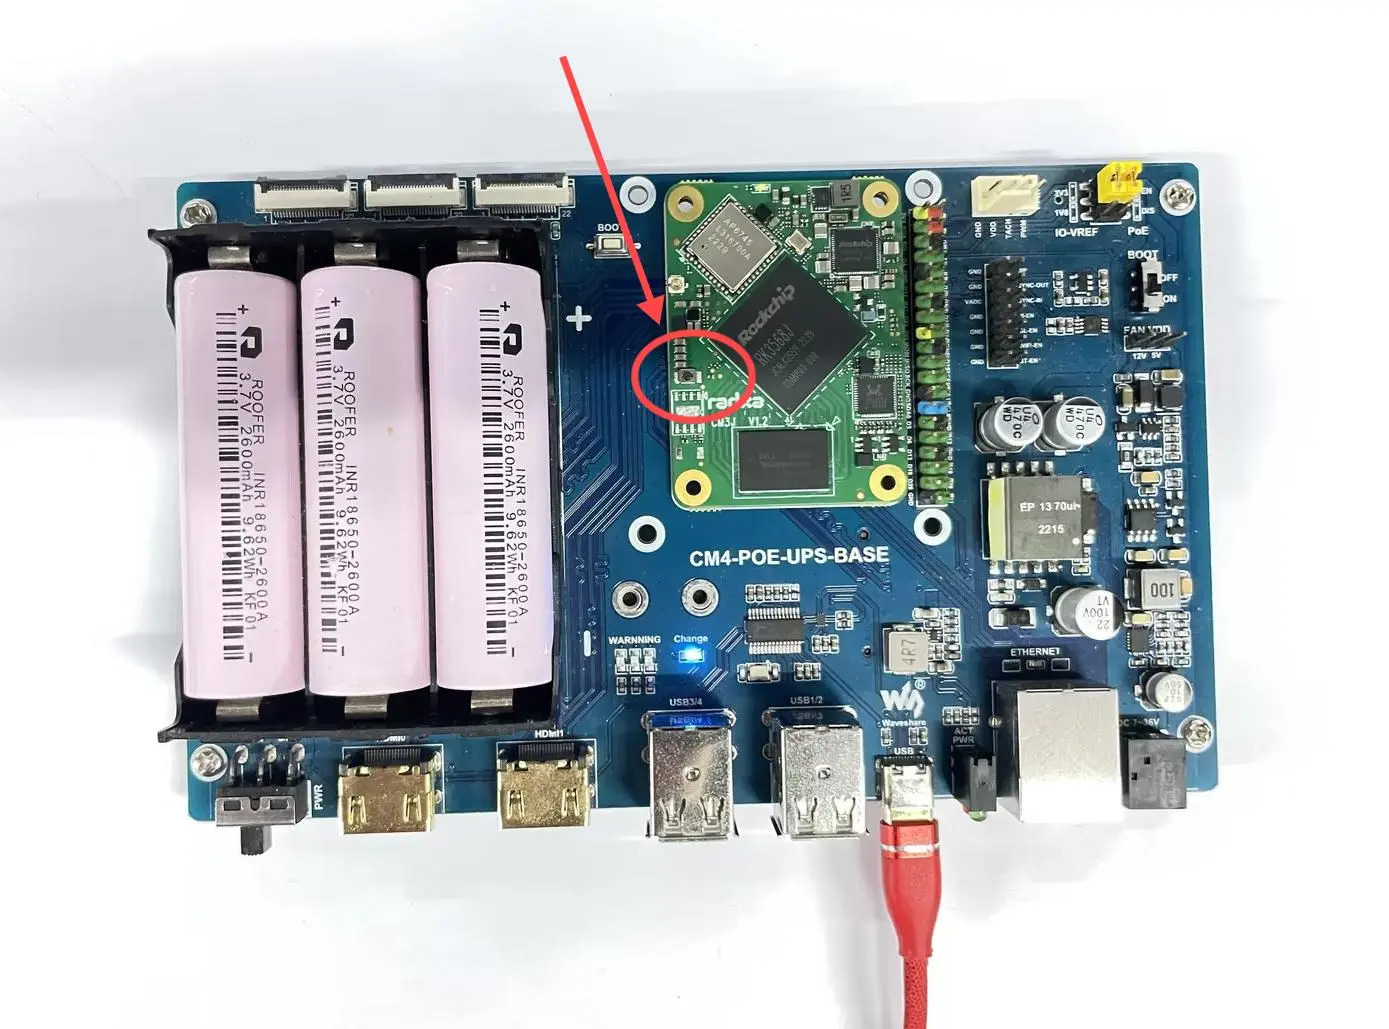
- WaveShare CM4-POE-UPS-BASE
- WaveShare CM4-IO-BASE-B
- WaveShare CM4-NANO-B
-
Prepare a USB-A to MicroUSB cable
-
Insert the USB-A to MicroUSB cable into the OTG port (Micro USB port) of the Raspberry Pi Compute Module 4 IO Board, and plug the other end into the computer.
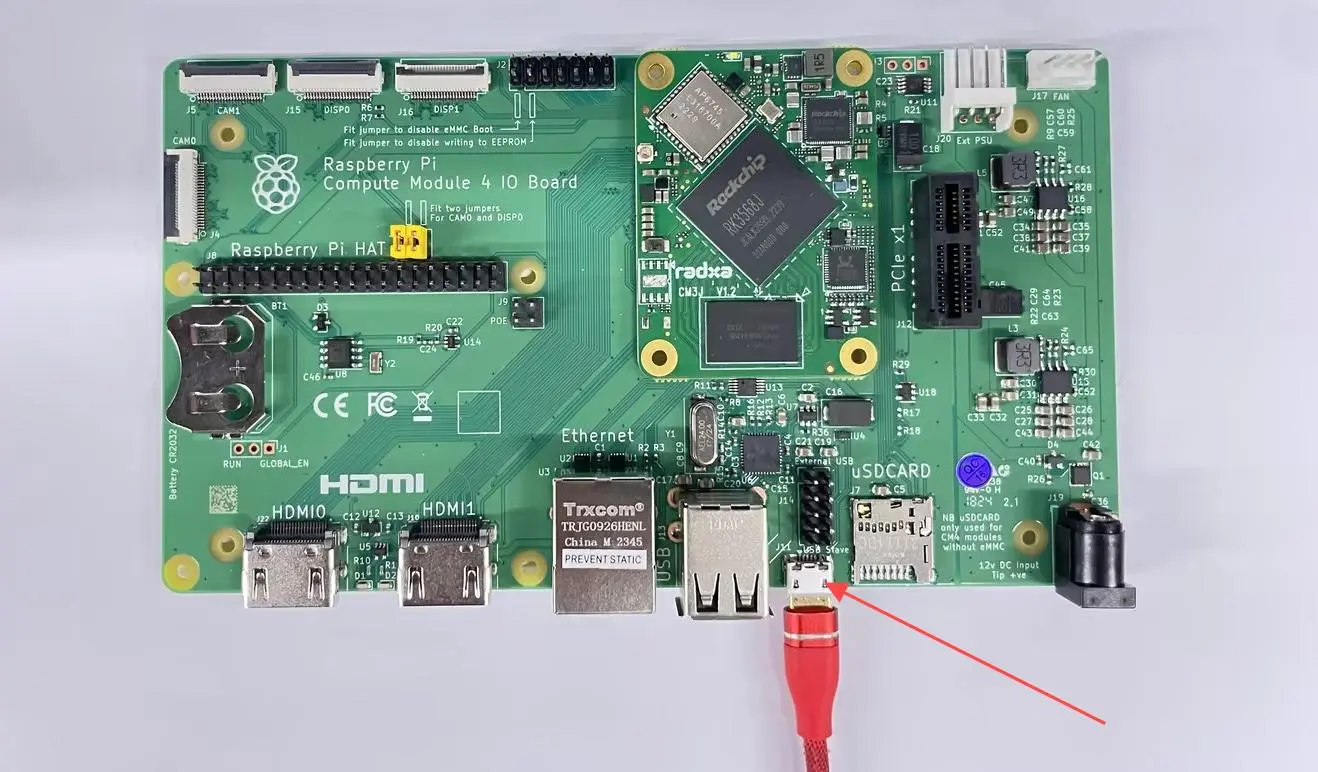
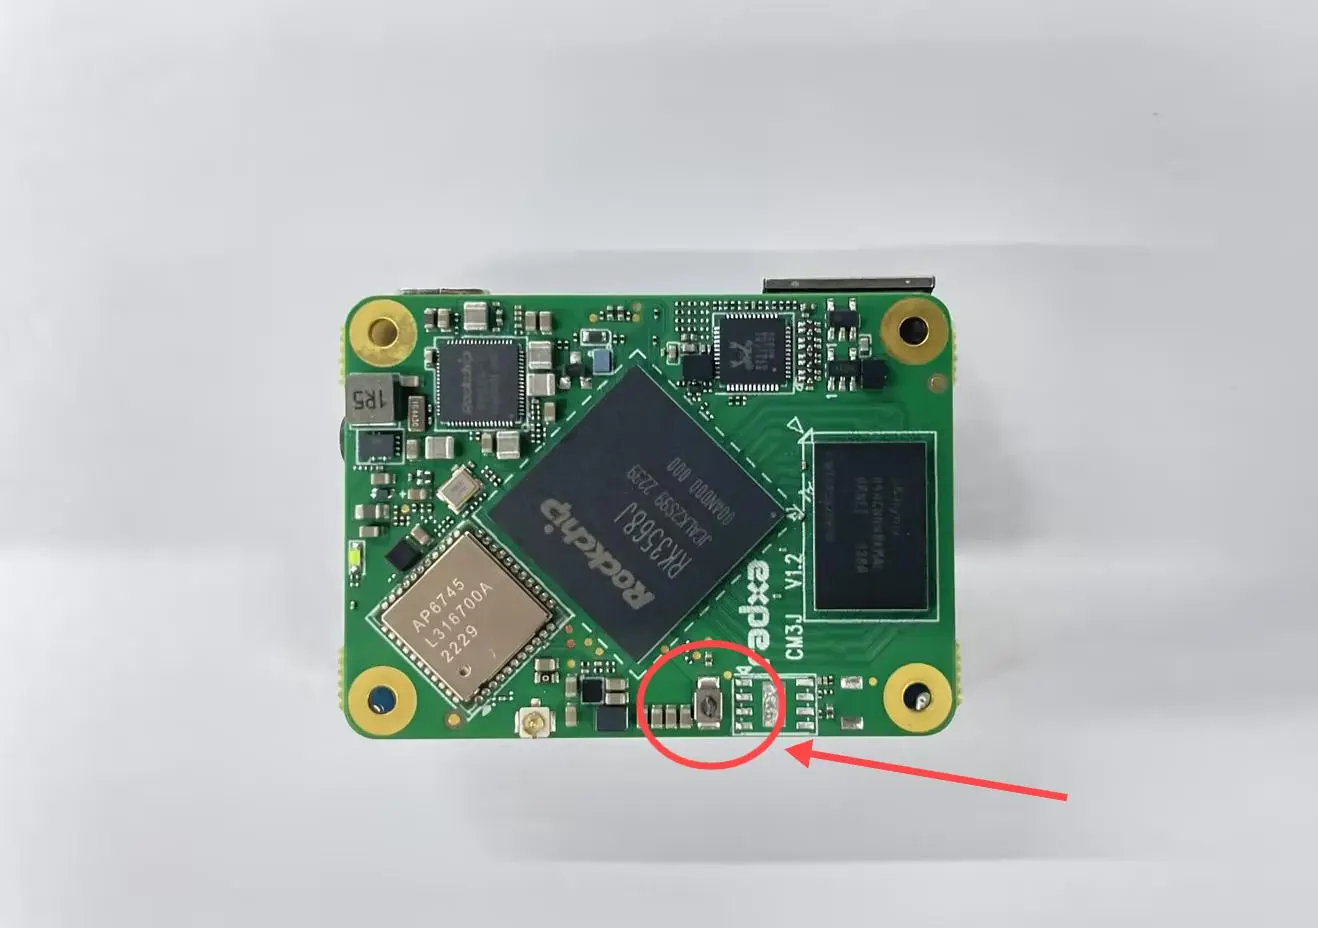
- Then press and hold the eMMC Button (if this is the first time flashing, the button does not need to be pressed).
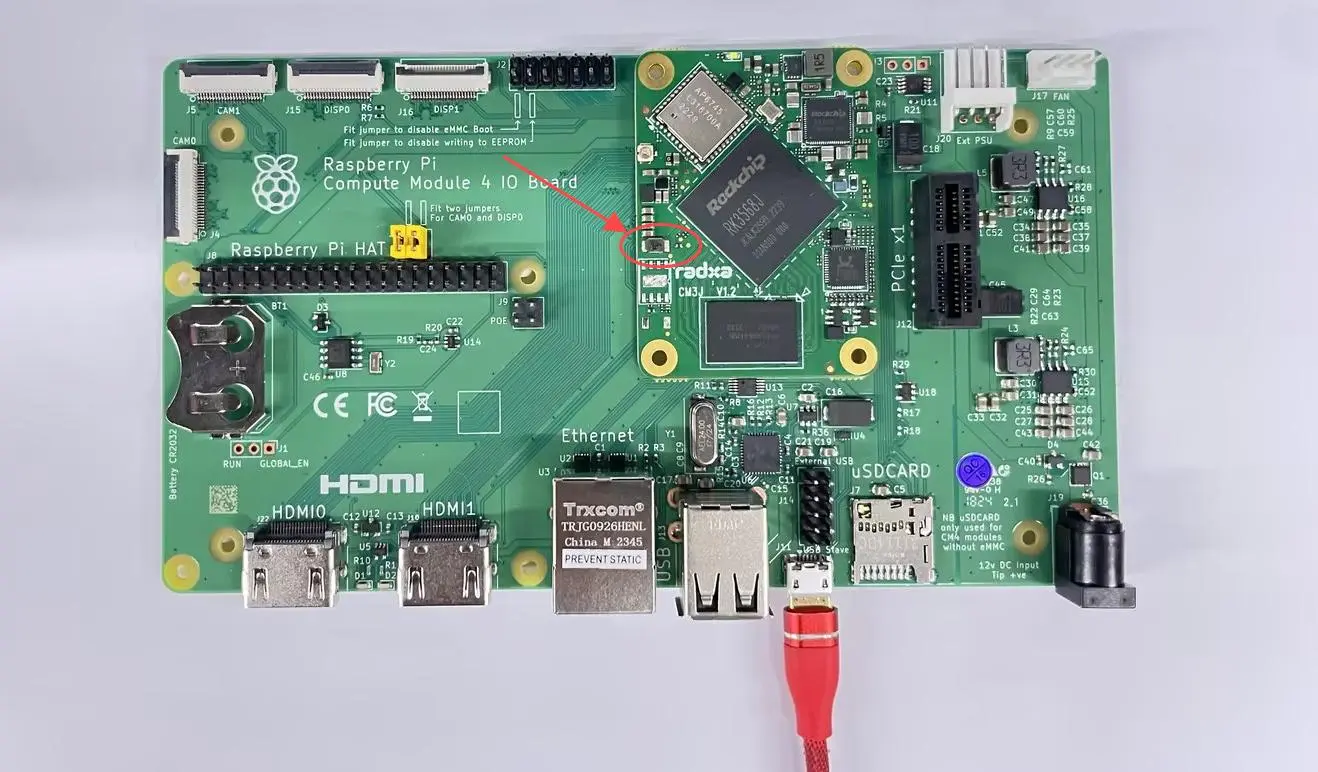
- Power on.
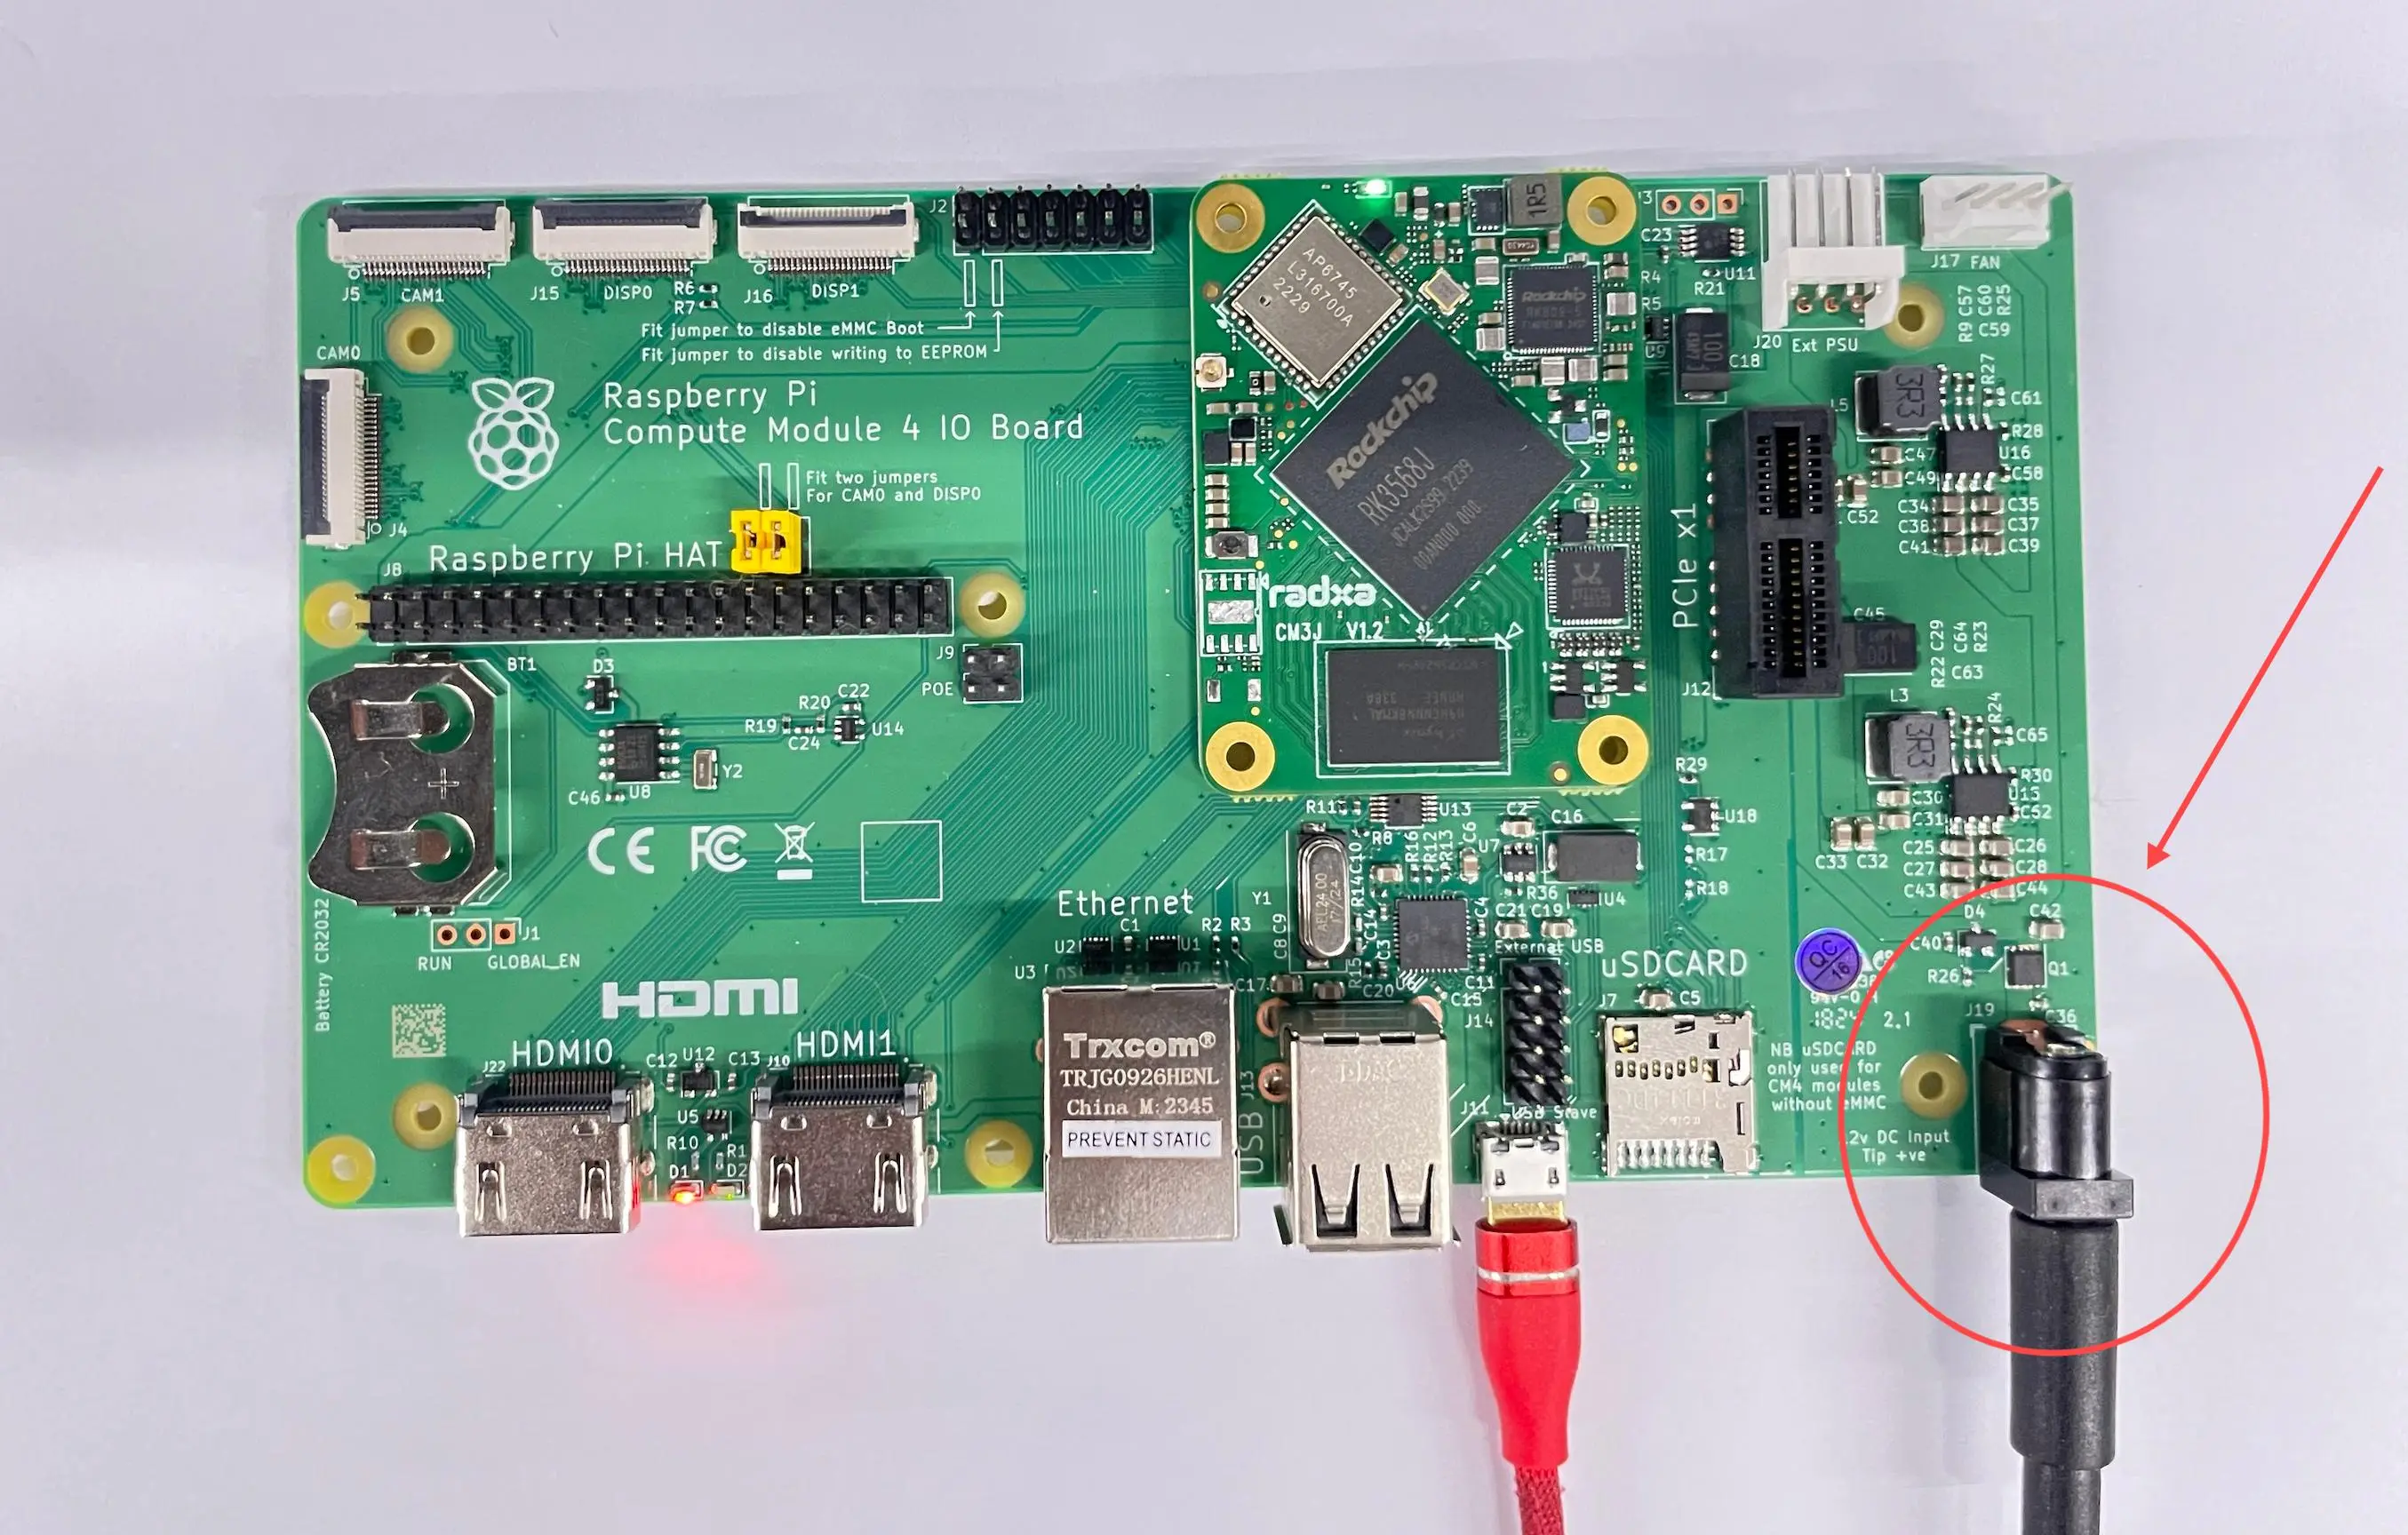
- At this point, under normal circumstances, it will enter Maskrom mode, and the RKdevTool will detect a Maskrom device.
-
Prepare a USB-A to USB-C cable.
-
Insert the USB-A to USB-C cable into the USB Type-C port of the WaveShare CM4-POE-UPS-BASE board, and plug the other end into the computer.
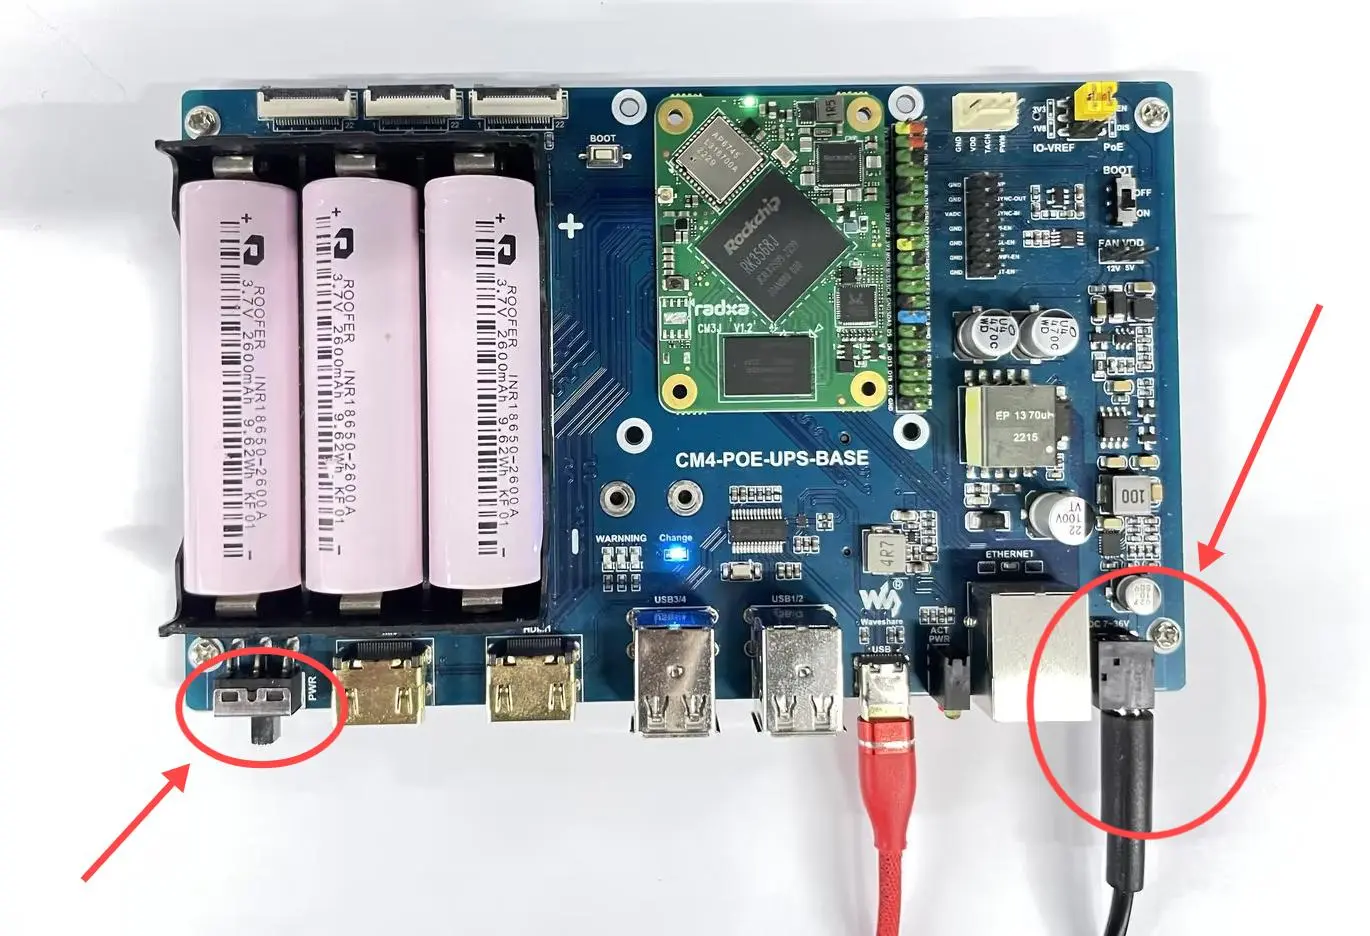
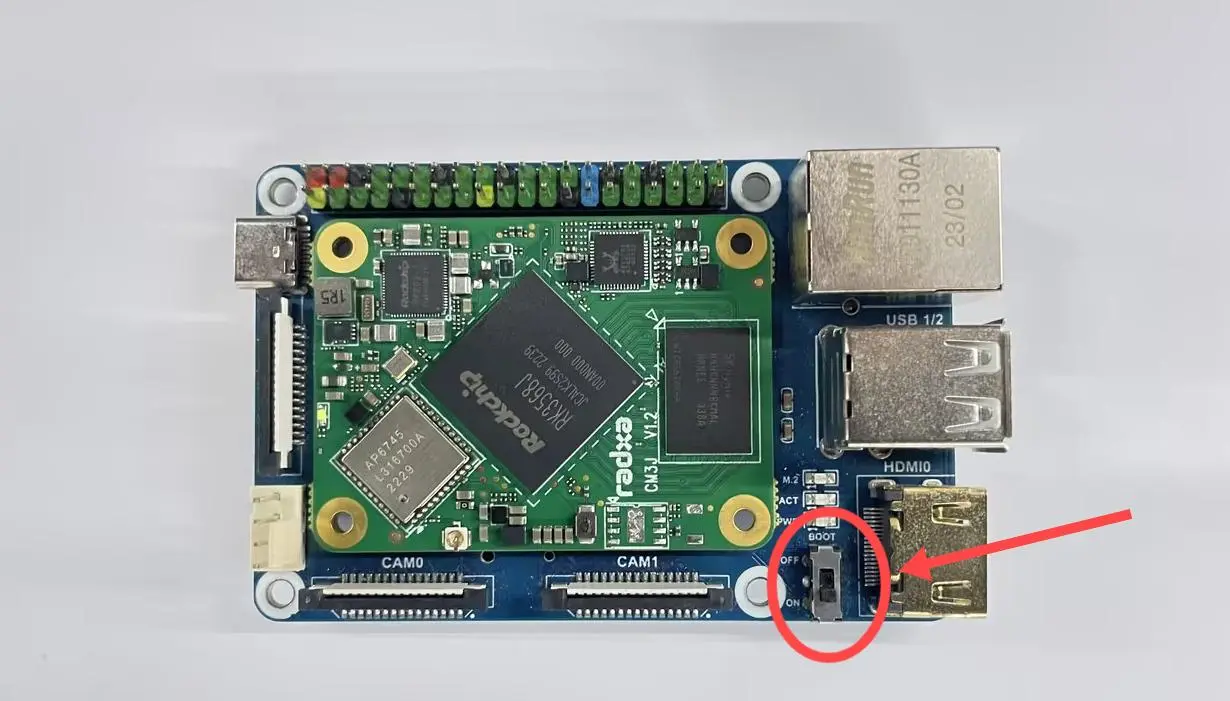
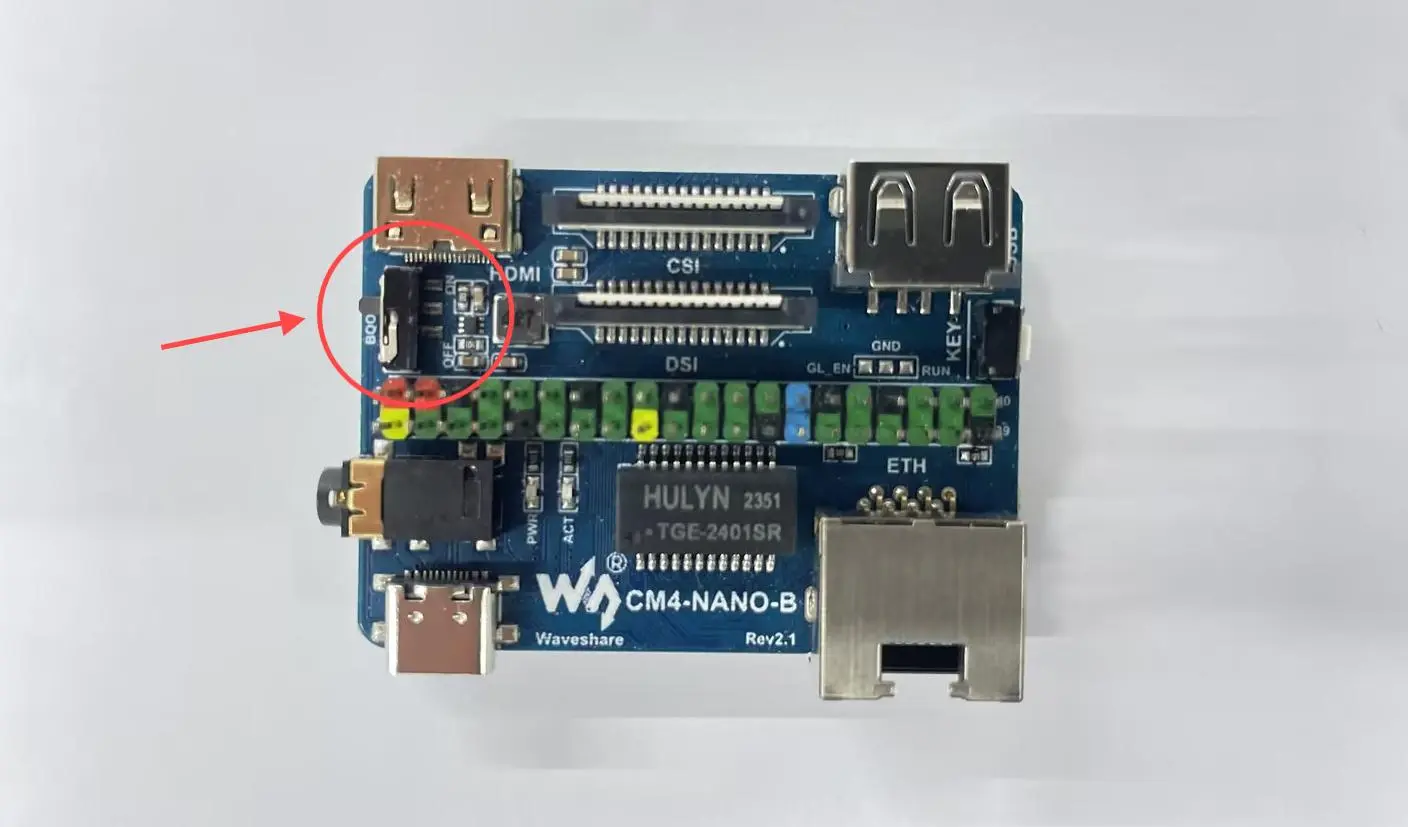
- Set the BOOT DIP switch on the board to the ON position.
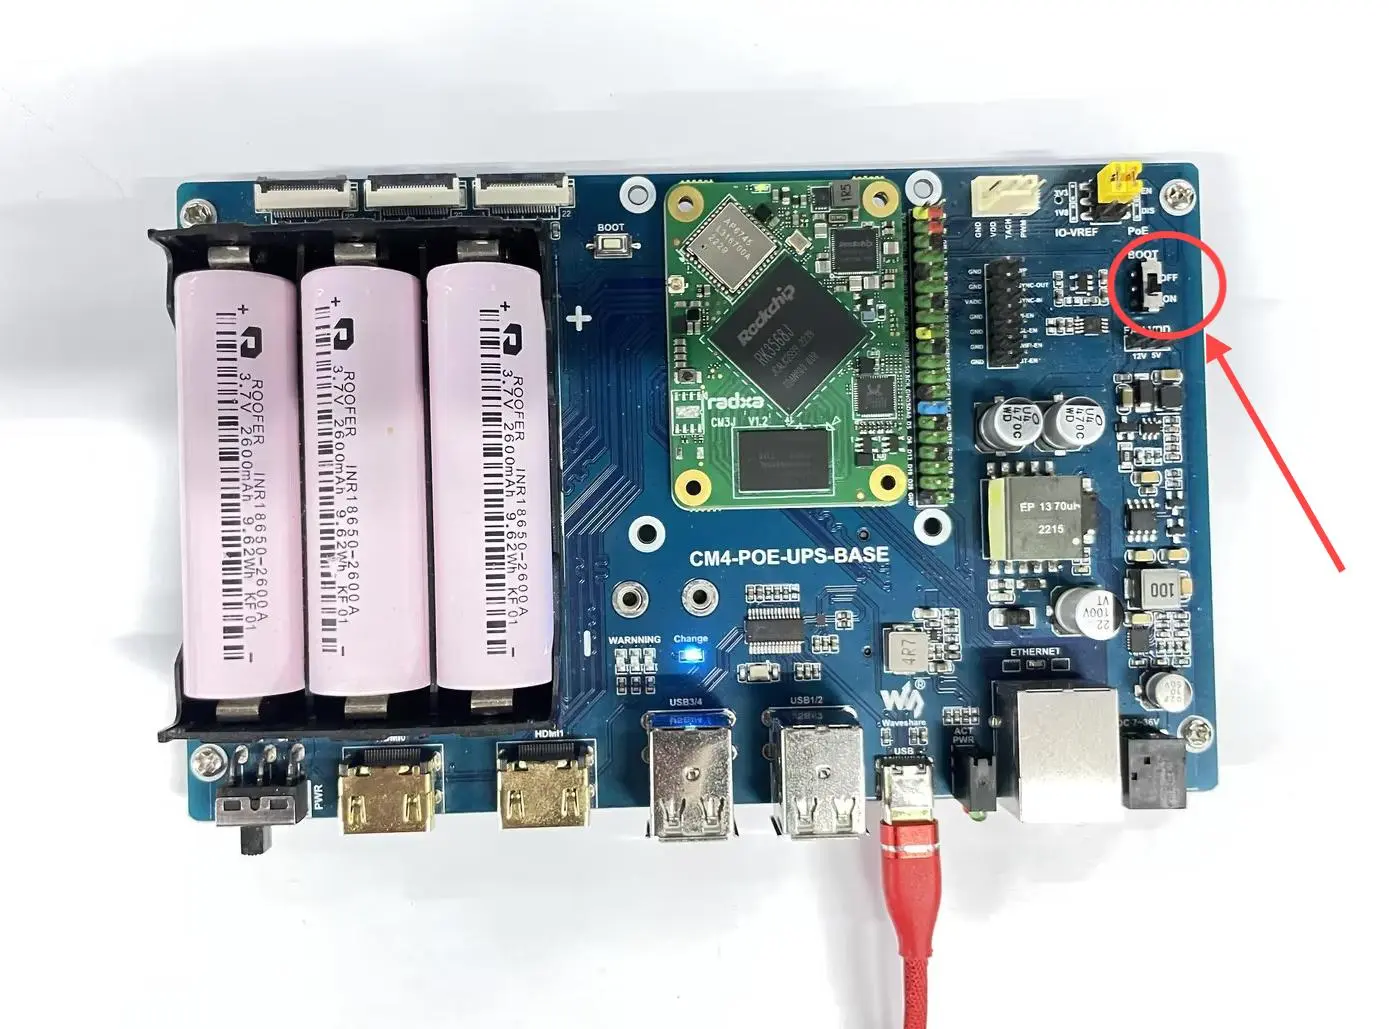
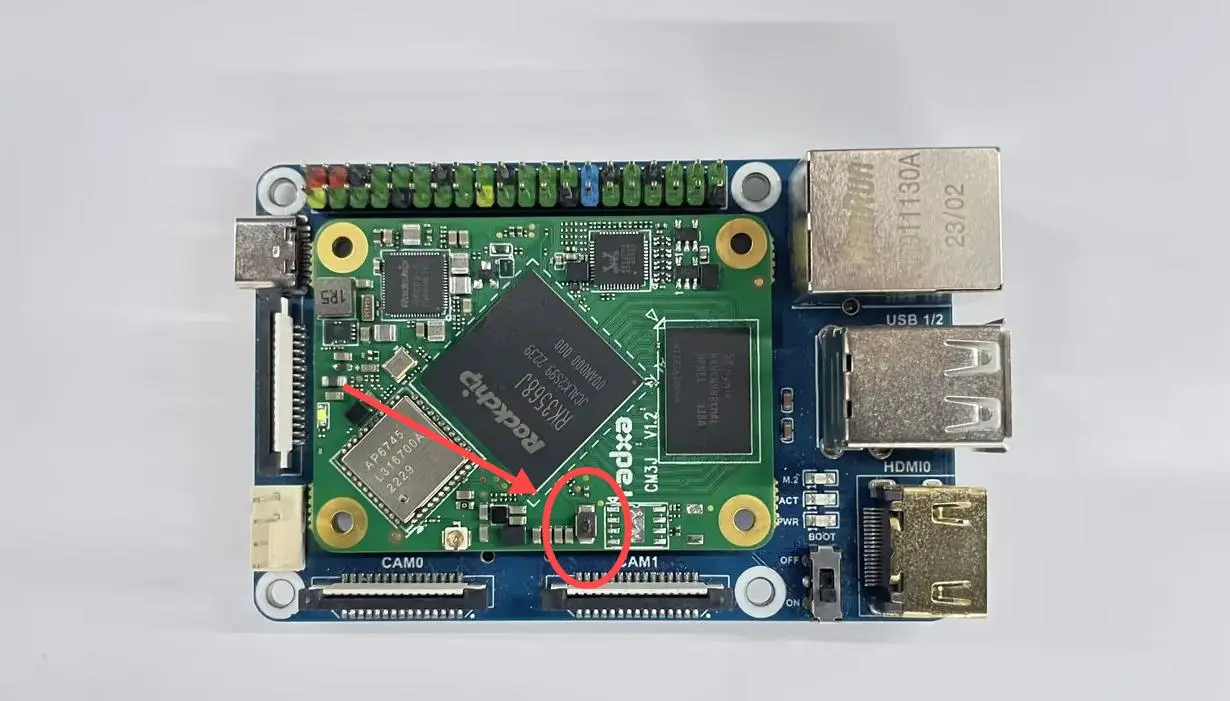
- Then press and hold the eMMC Button (if this is the first time flashing, the button does not need to be pressed).
- Power on, then switch the switch at the position shown in the image to the ON position.
- At this point, under normal circumstances, it will enter Maskrom mode, and the RKdevTool will detect a Maskrom device.
-
Prepare a USB-A to USB-C cable.
-
First, set the BOOT DIP switch on the board to the ON position.
- Then press and hold the eMMC Button (if this is the first time flashing, the button does not need to be pressed).
- Insert the USB-A to USB-C cable into the USB Type-C port of the WaveShare CM4-IO-BASE-B board, and plug the other end into the computer.
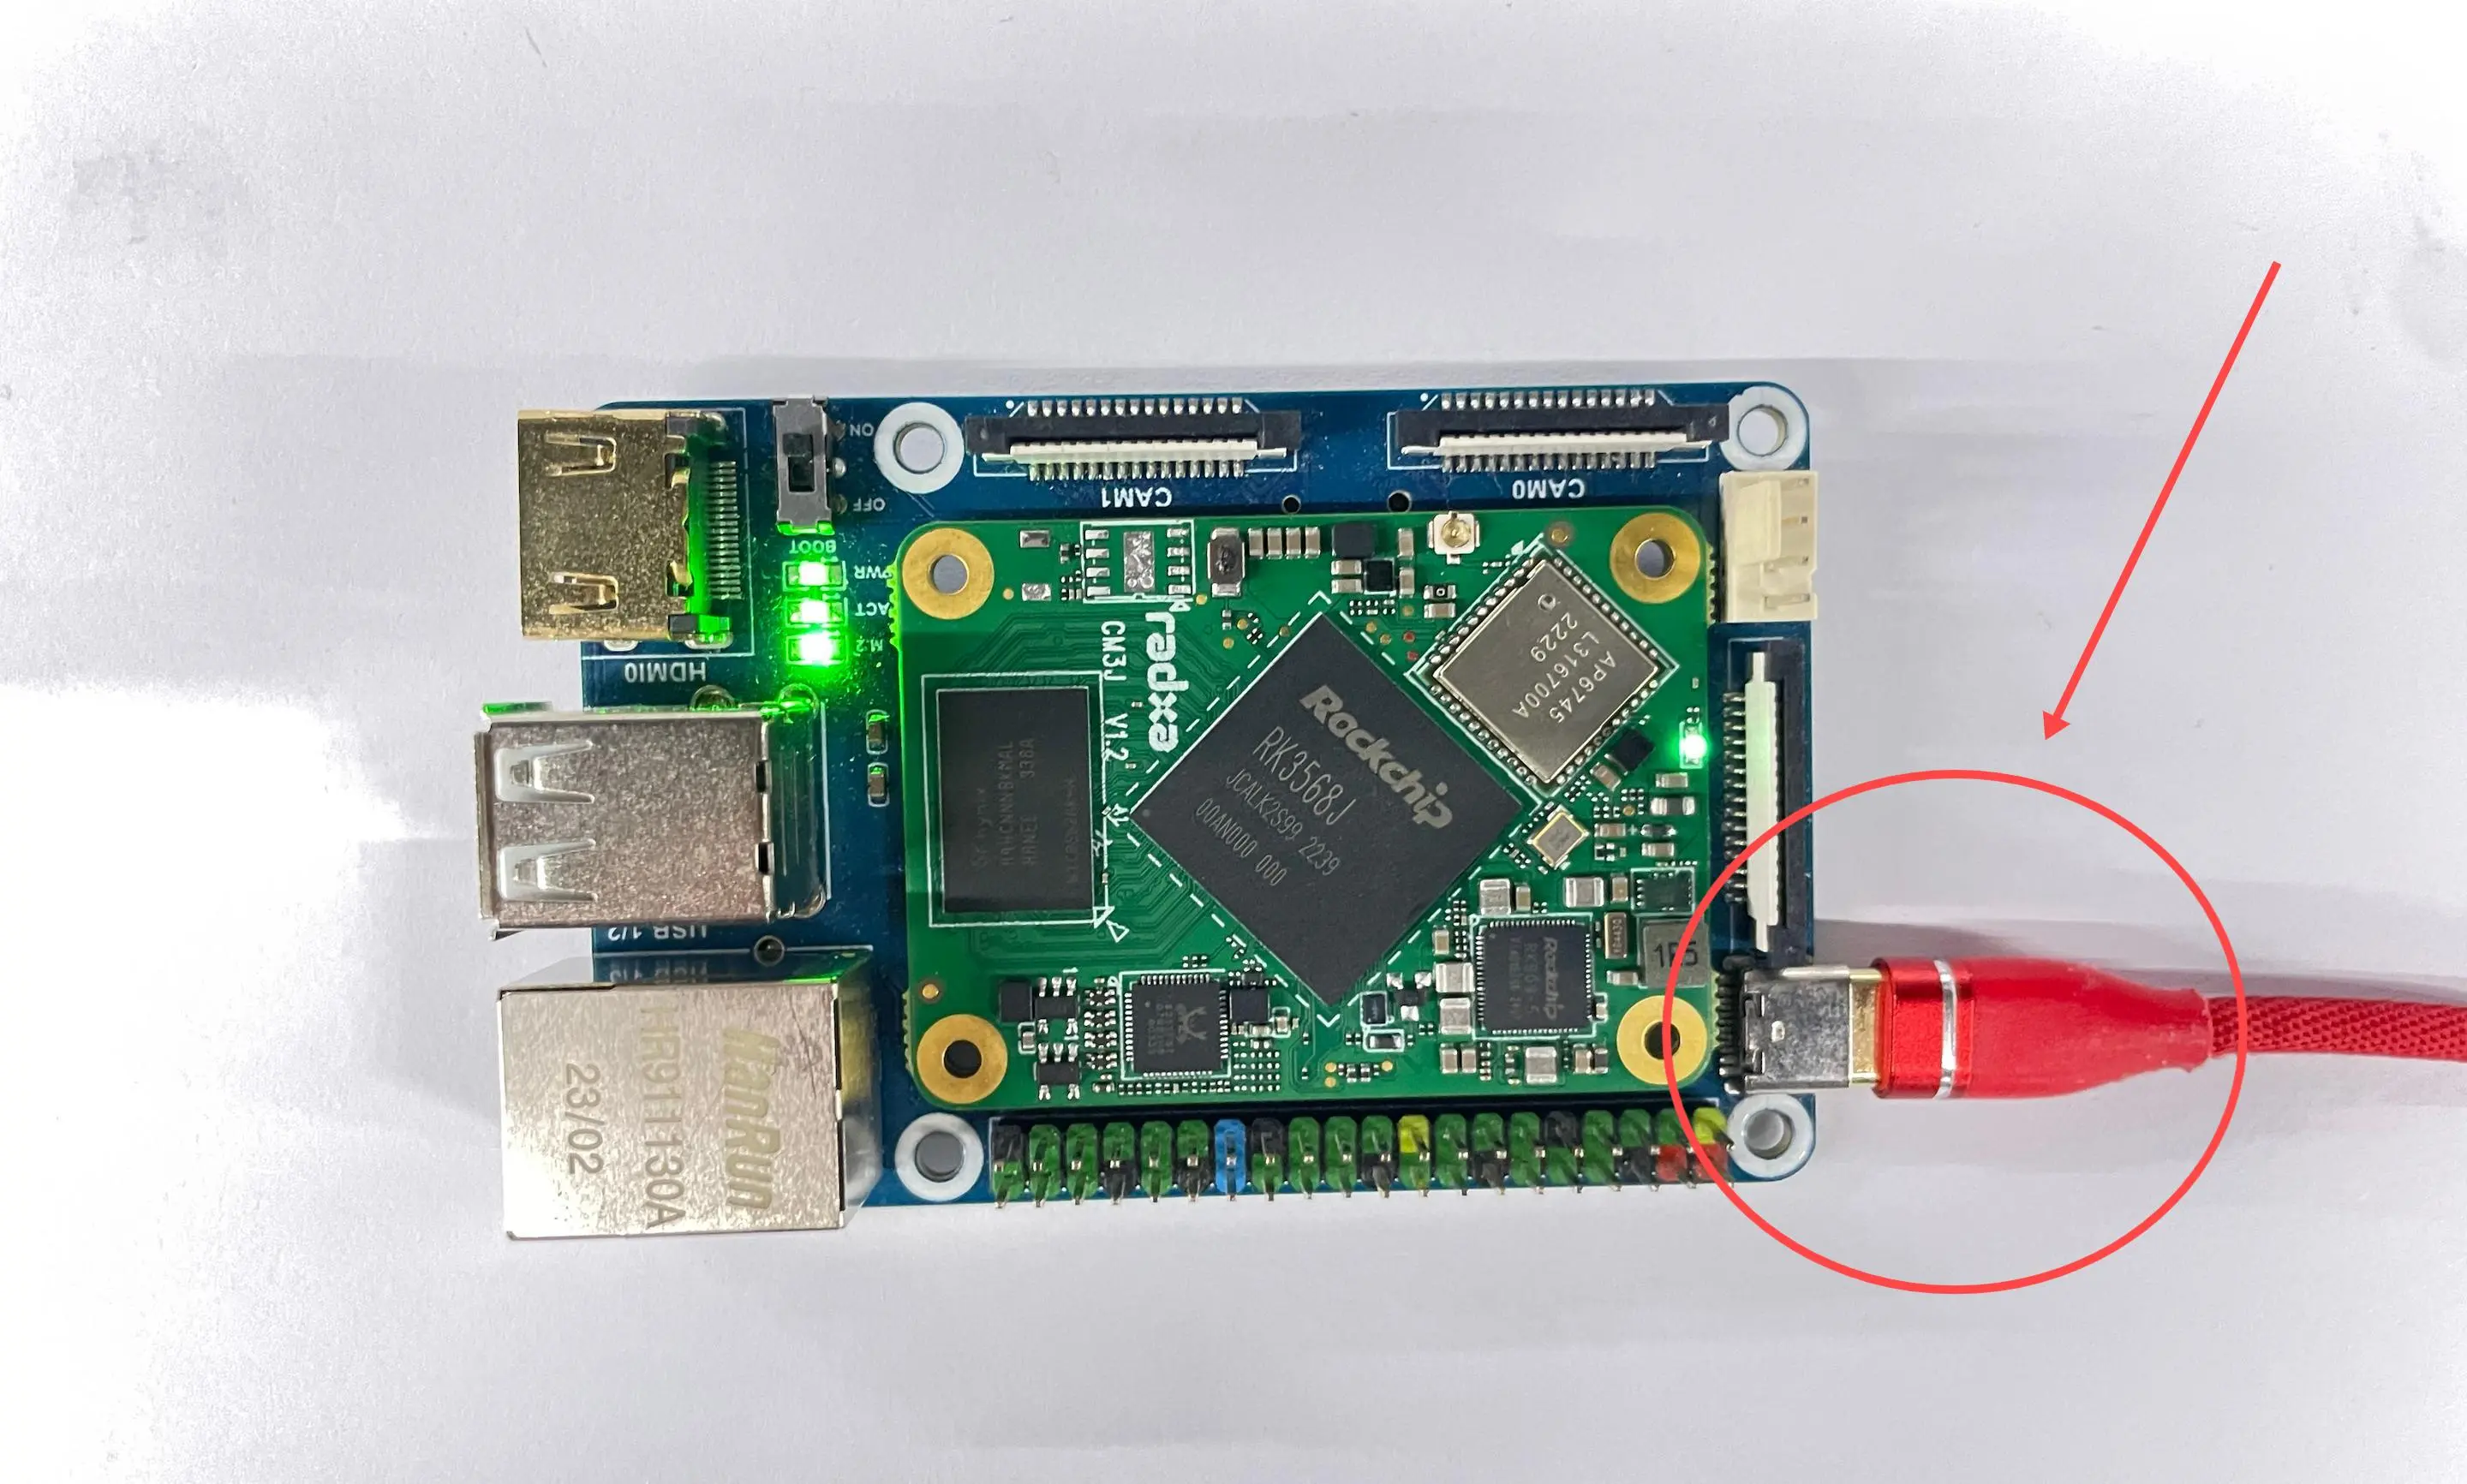
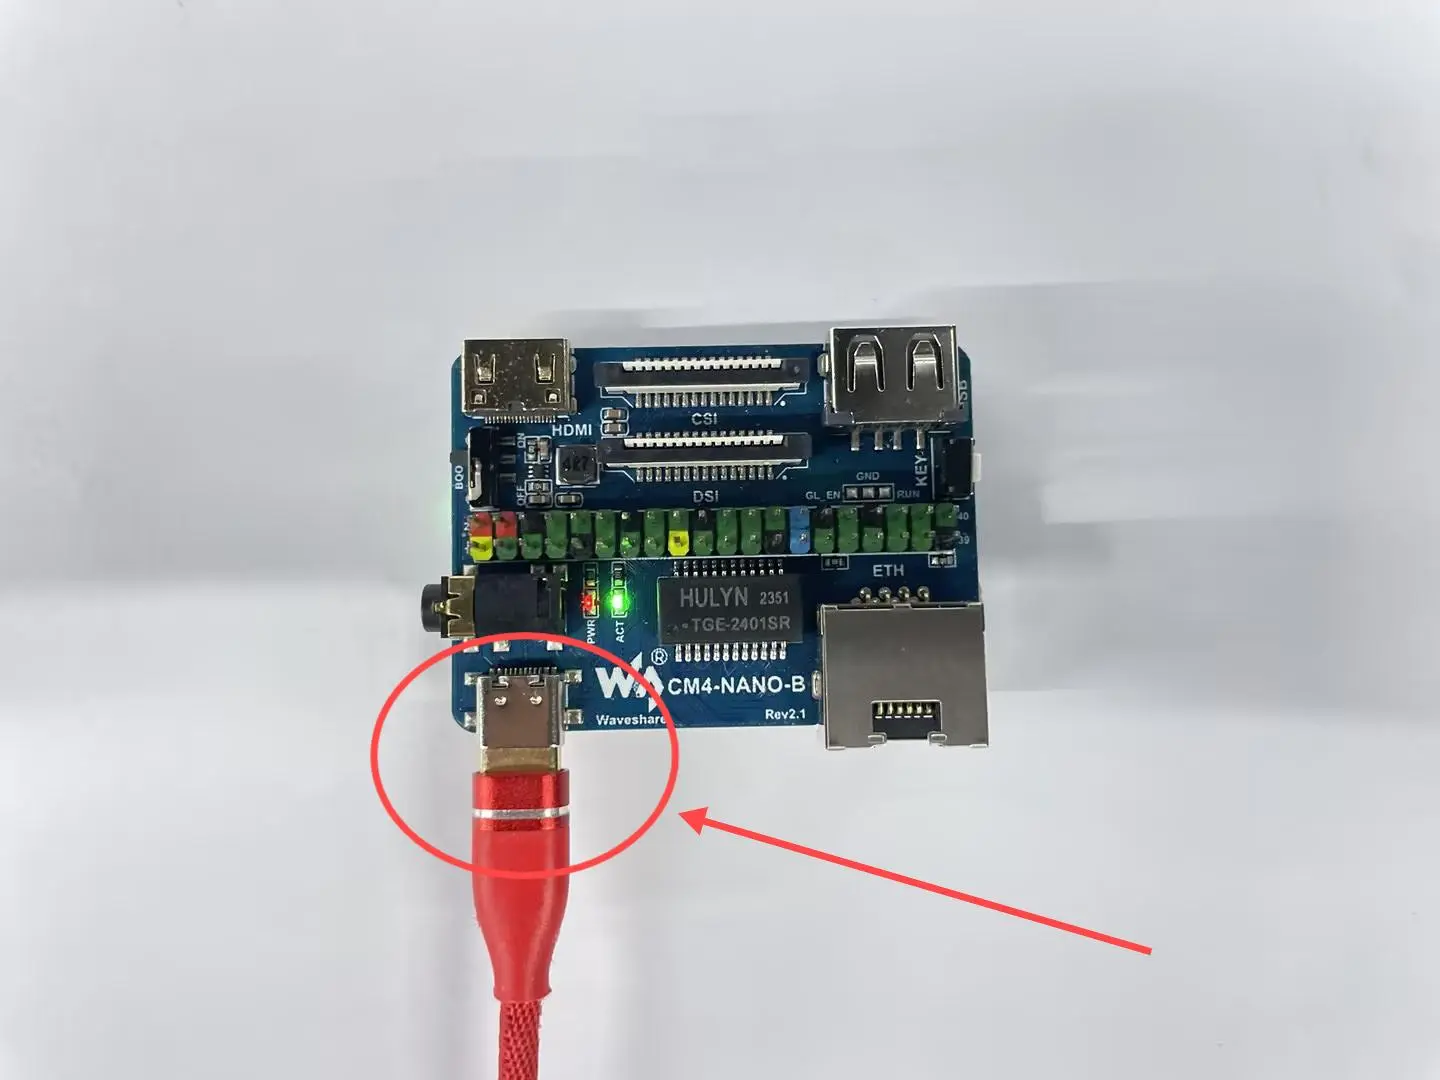
- At this point, under normal circumstances, it will enter Maskrom mode, and the RKdevTool will detect a Maskrom device.
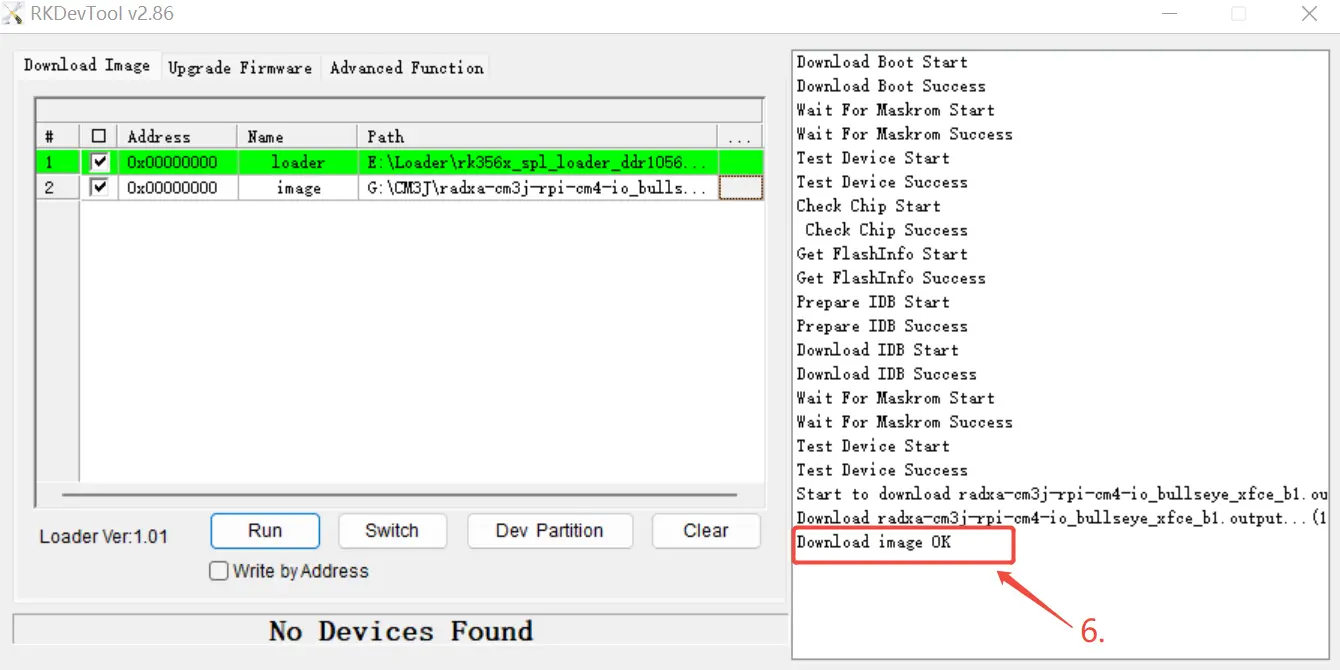
Flash the System to eMMC.
- Select Loader
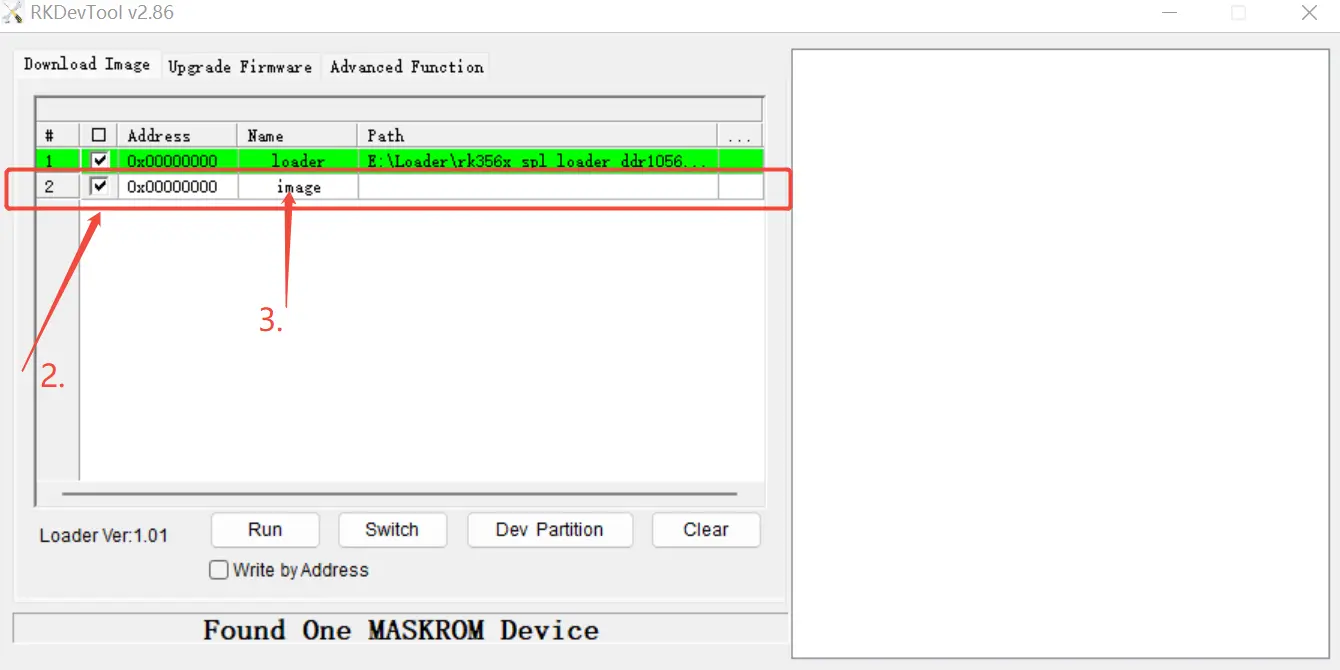
- Right-click to add an option and rename it to "Image"
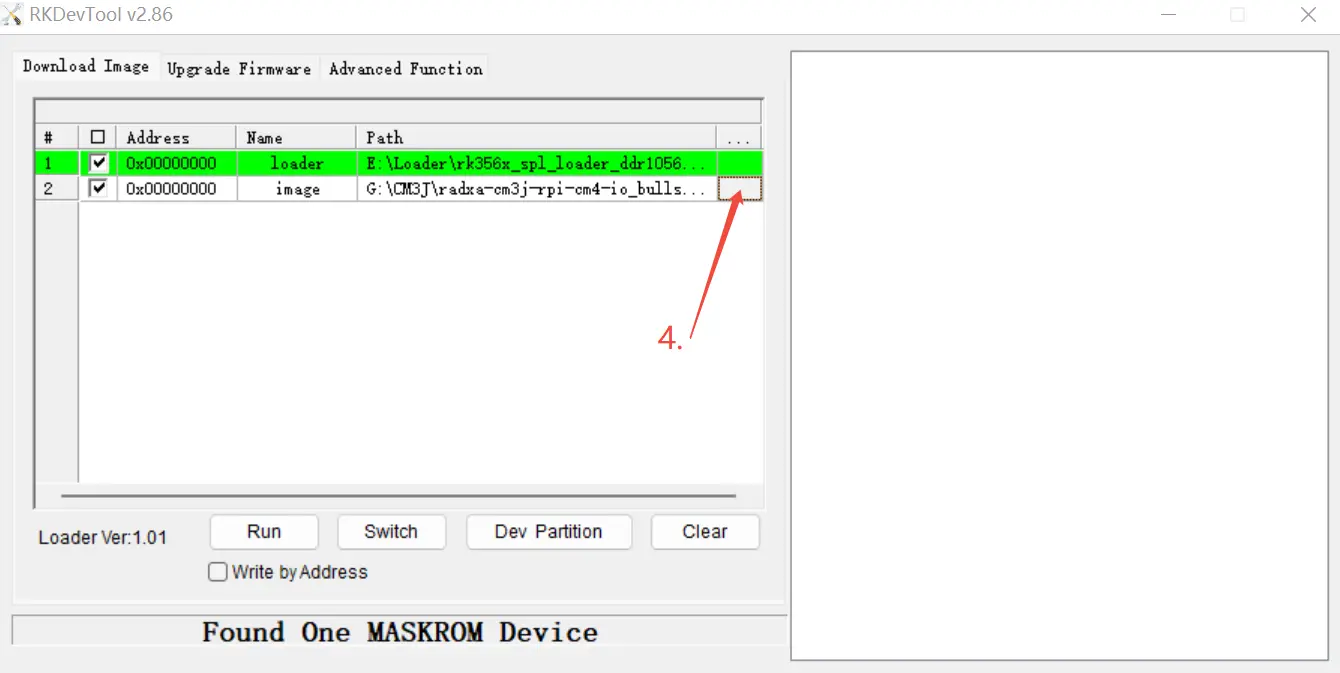
- Select the system image you want to flash. (When flashing, make sure to unzip the downloaded image into .img format.)
- Click "run" to begin the flashing process.
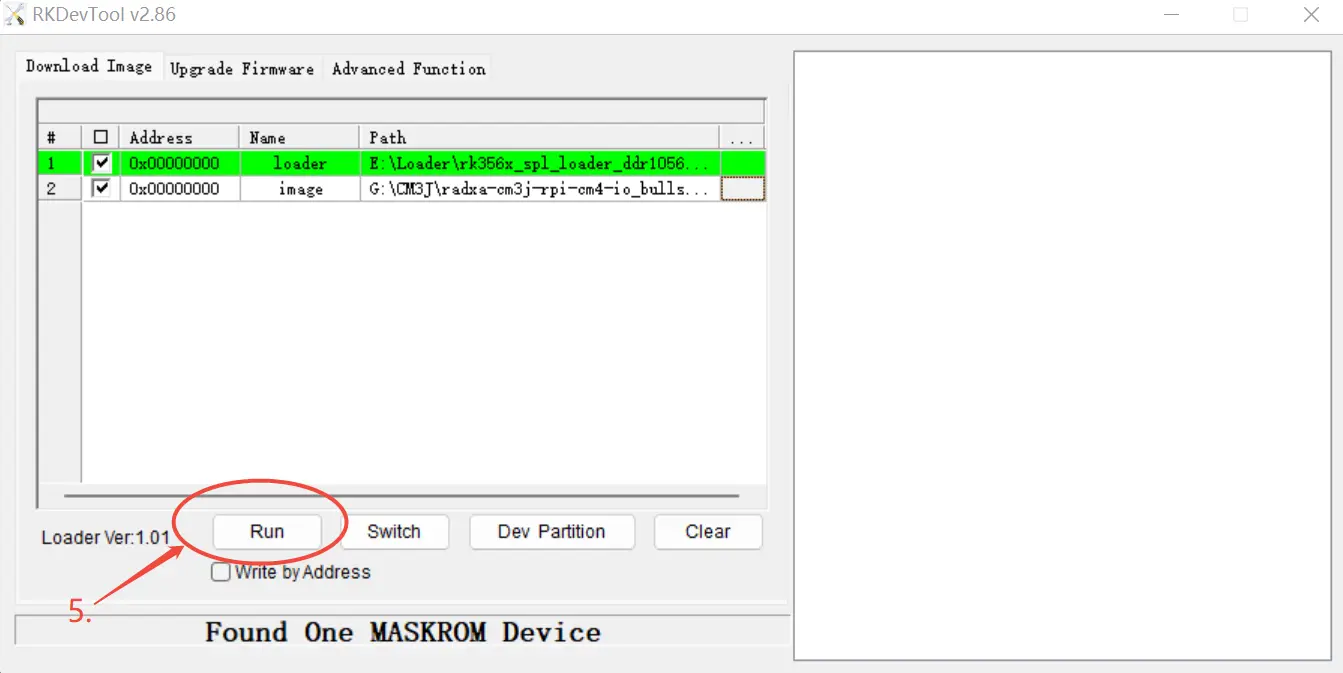
- The flashing is complete when it appears as shown in the image below.