VNC Remote
Prerequisites
For VNC remote access, both devices must be on the same local network, and the target device must have the VNC service enabled.
VNC remote control is suitable for systems with a graphical interface. If the system doesn't have a graphical desktop, it's recommended to use SSH for remote control instead.
Using VNC (Remote Device)
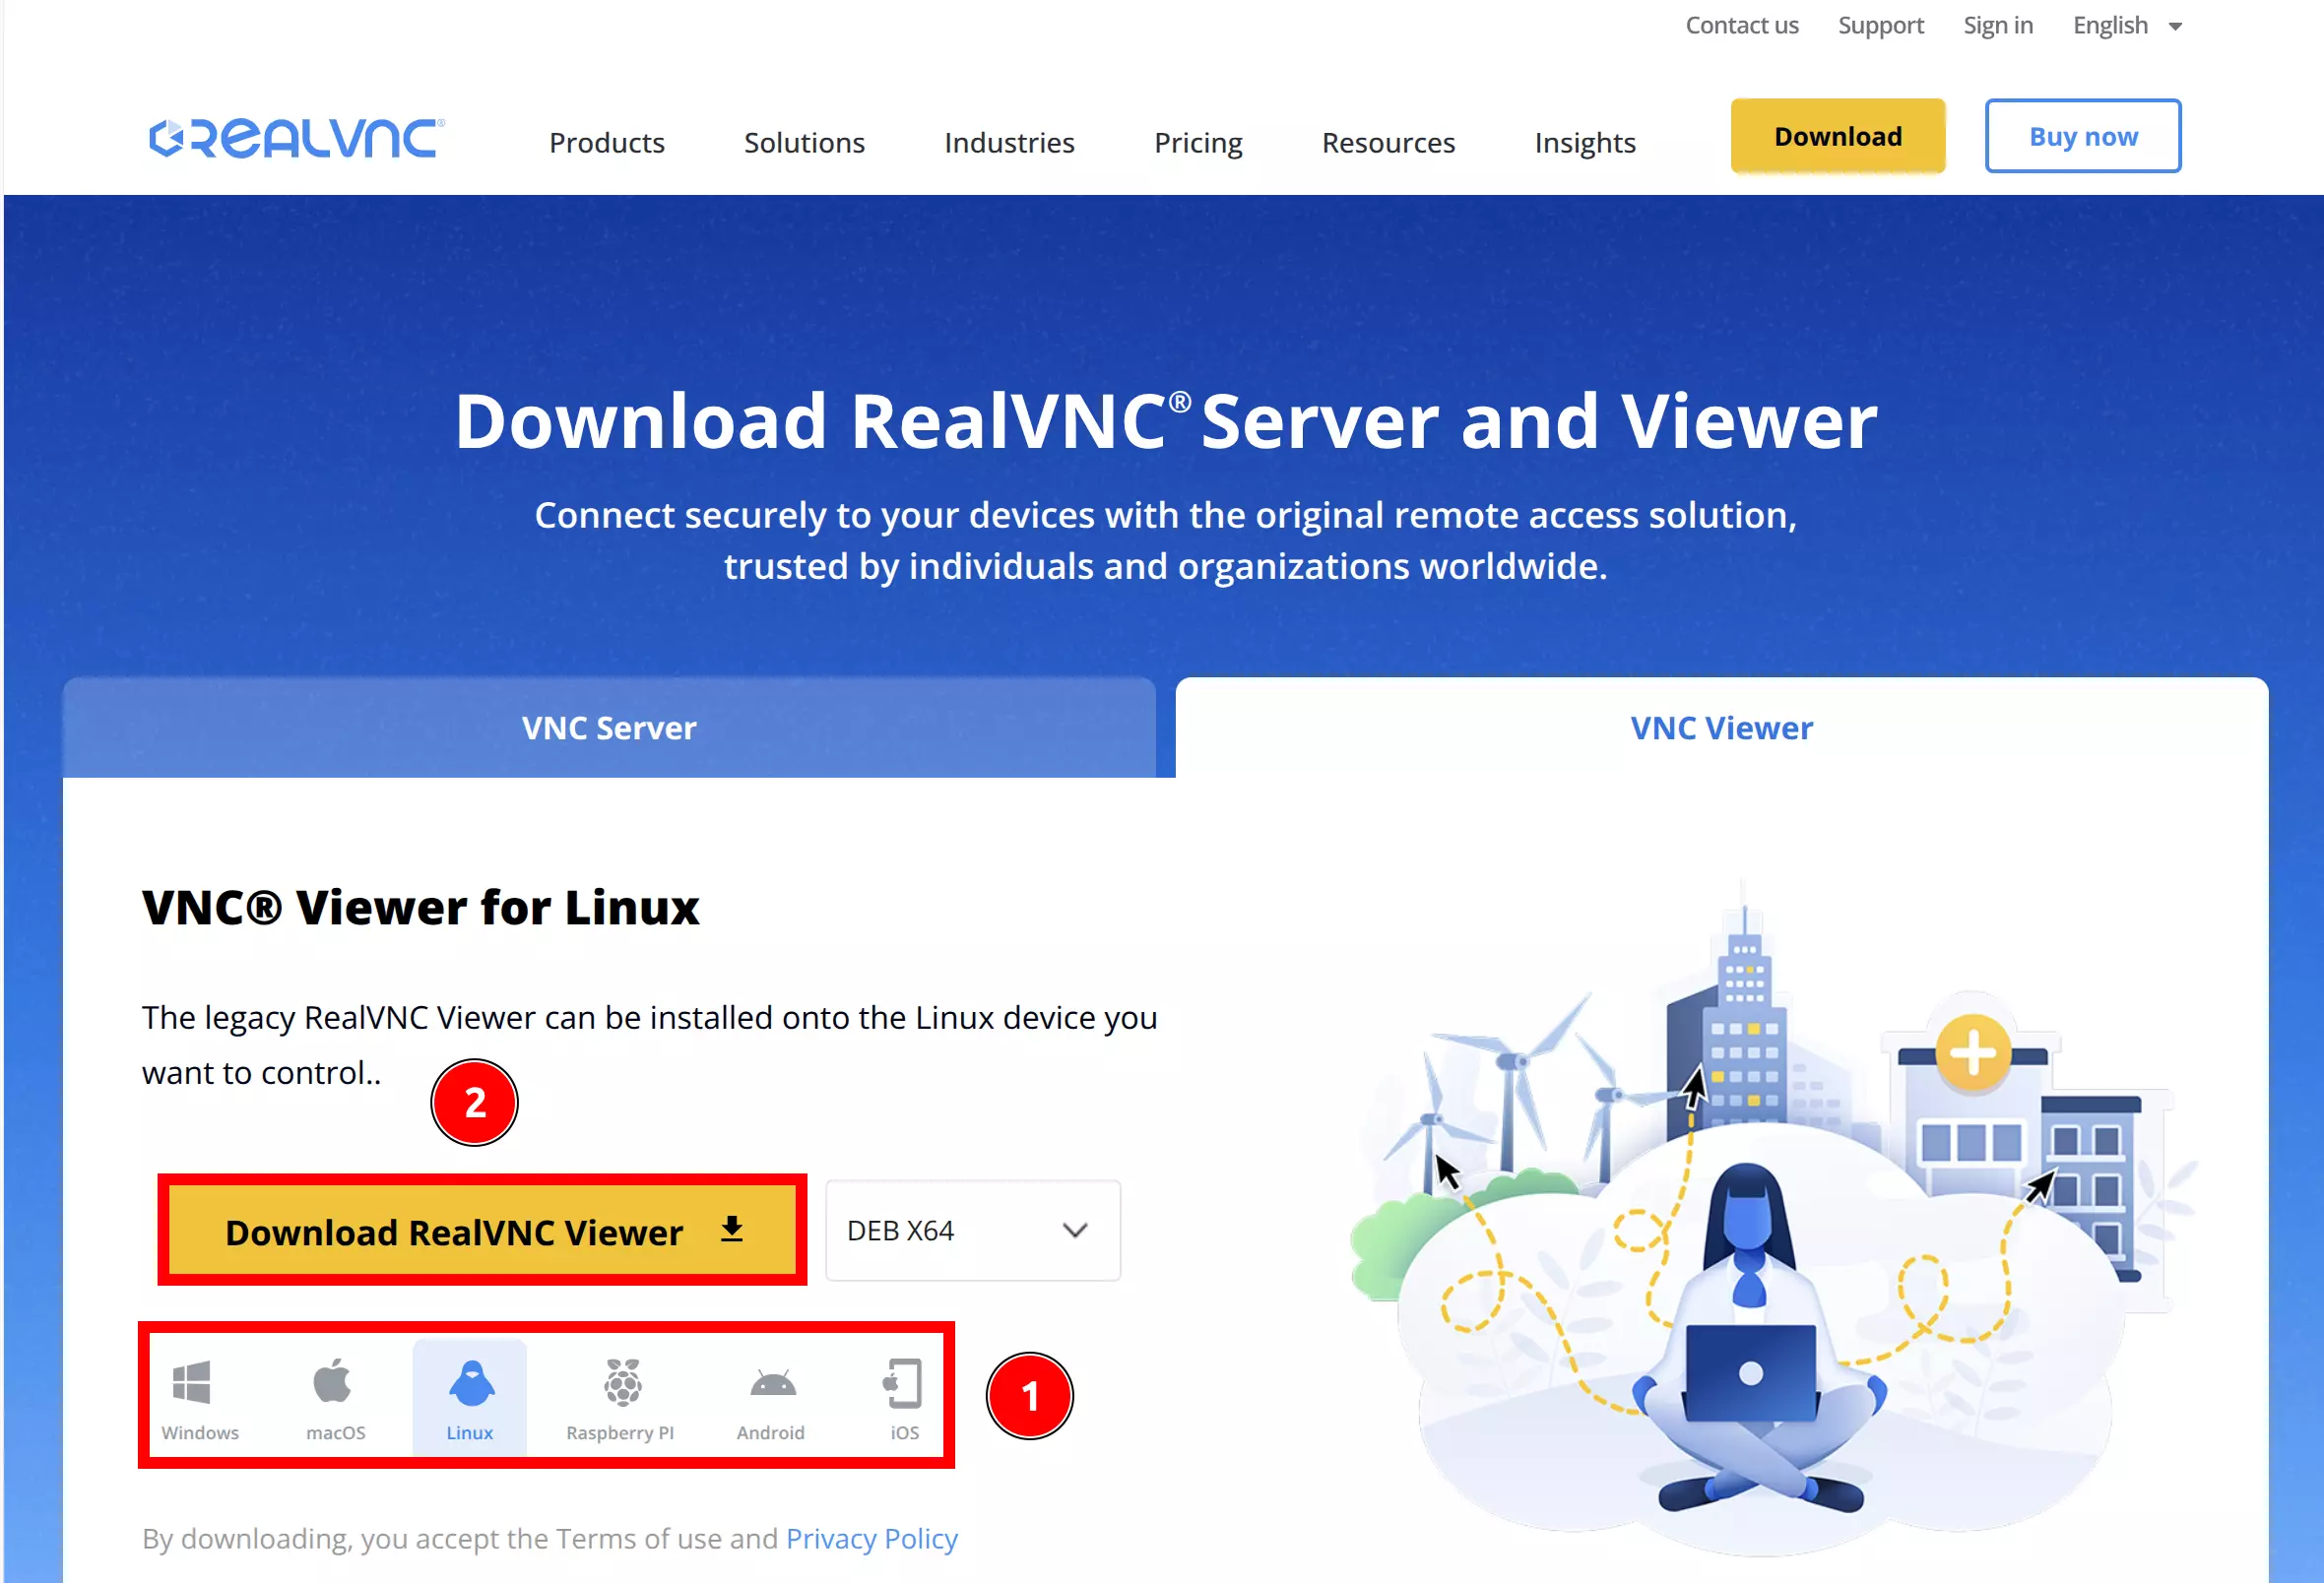
Download VNC Viewer
You need to install VNC Viewer software on your remote device to control the mainboard.
Visit the RealVNC official website to download the VNC Viewer installation package.
① : Select the operating system platform of your remote device
② : Download the VNC Viewer installation package
Install VNC Viewer
- Windows
- Linux
After downloading the Windows version *.exe installation package:
- Run the Installer
Run the VNC-Viewer-xxx.exe installer as administrator.

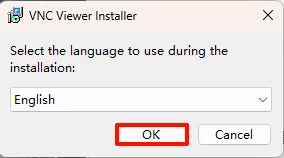
- Select Language
Choose English language and click OK to proceed.
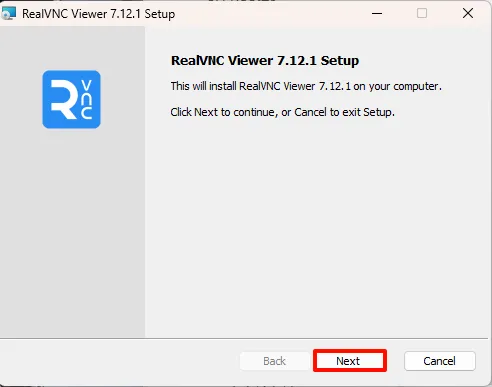
- Begin Installation
Click Next to start the installation wizard.
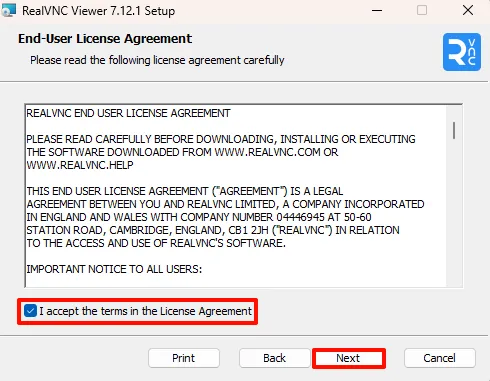
- Accept License Agreement
Check the I accept the terms in the License Agreement option and click Next to continue.
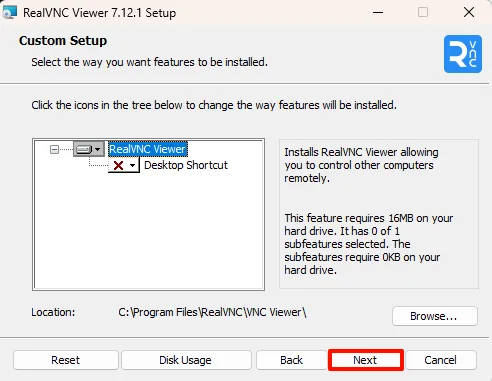
- Installation Location
It's recommended to use the default installation path. Click Next to continue.
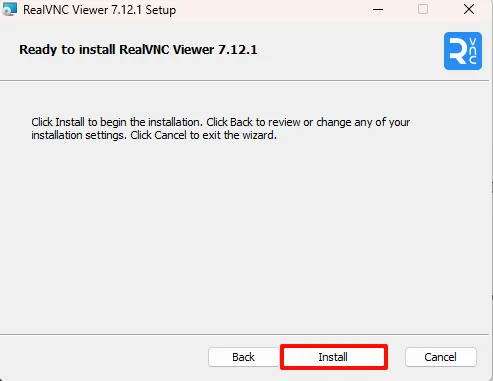
- Start Installation
Click Install to begin the installation process.
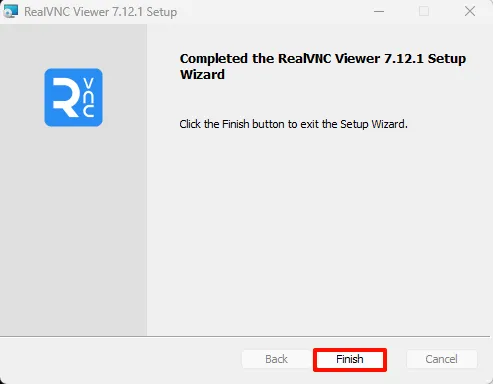
- Complete Installation
Click Finish to complete the installation.
After downloading the Linux version *.deb installation package, run the following command in the terminal to install VNC Viewer:
sudo dpkg -i VNC-Viewer-xxx.deb
Running VNC Viewer
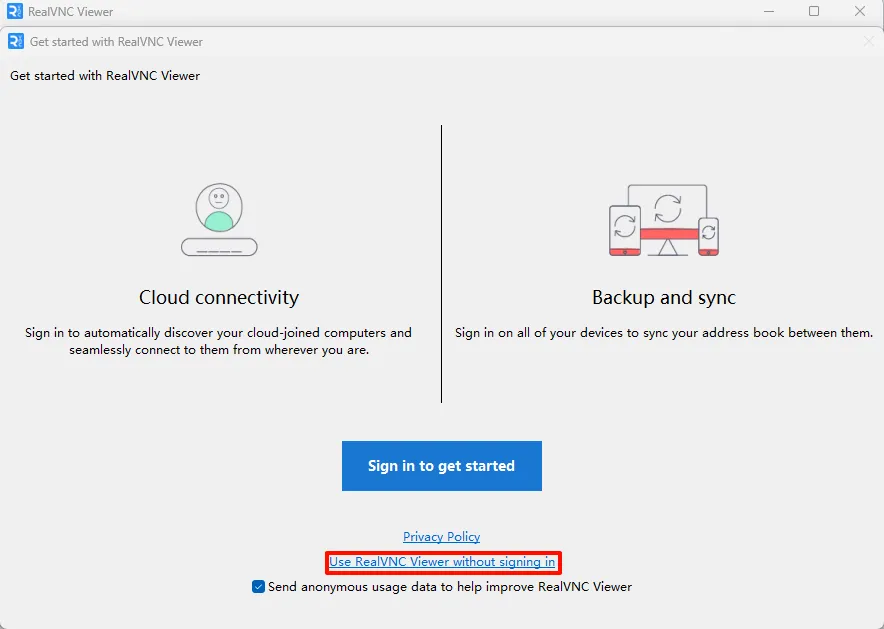
After installation, open the VNC Viewer software. You can choose to use VNC Viewer without signing in to an account.
VNC Viewer Interface
Using VNC (Mainboard)
Install VNC Server
Run the following commands in the terminal of the mainboard to install the VNC server:
sudo apt update
sudo apt install tigervnc-standalone-server tigervnc-common -y
Set VNC Remote Password
Run the following command in the terminal of the mainboard to set the VNC remote password:
vncpasswd
When entering the password and verification, the characters won't be displayed on the screen. When prompted whether to create a view-only password, select n (no).
After completing the password setup, you'll see output similar to:
Password:
Verify:
Would you like to enter a view-only password (y/n)? n
A view-only password is not used
Configure VNC Startup File
Edit the ~/.vnc/xstartup file on the mainboard:
sudo vi ~/.vnc/xstartup
Modify the content of ~/.vnc/xstartup to:
#!/bin/sh
unset SESSION_MANAGER
unset DBUS_SESSION_BUS_ADDRESS
export XDG_SESSION_TYPE=x11
export DESKTOP_SESSION=plasma
exec startplasma-x11
After editing the ~/.vnc/xstartup file, you need to make it executable:
sudo chmod +x ~/.vnc/xstartup
Start VNC Server
Run the following command in the terminal of the mainboard to start the VNC server. Use the -localhost no parameter to allow remote access:
vncserver -localhost no
After successful startup, the terminal will display information similar to the following, indicating the VNC server's port number:
New Xtigervnc server ***:1 (radxa)' on port 5901 for display :1.
Use xtigervncviewer -SecurityTypes VncAuth -passwd /tmp/tigervnc.VQ4DfI/passwd :1 to connect to the VNC server.
Check VNC Server Status
To check the status of the VNC server, run the following command in the terminal of the mainboard:
vncserver -list
The terminal will display output similar to:
TigerVNC server sessions:

X DISPLAY # RFB PORT # RFB UNIX PATH PROCESS ID # SERVER
1 5901 3283 Xtigervnc
Stop VNC Server
To stop the VNC server, run the following command in the terminal of the mainboard. The :1 in the command represents the display number of the VNC server:
vncserver -kill :1
After stopping the VNC server, the VNC Viewer software will automatically disconnect.
VNC Remote Login
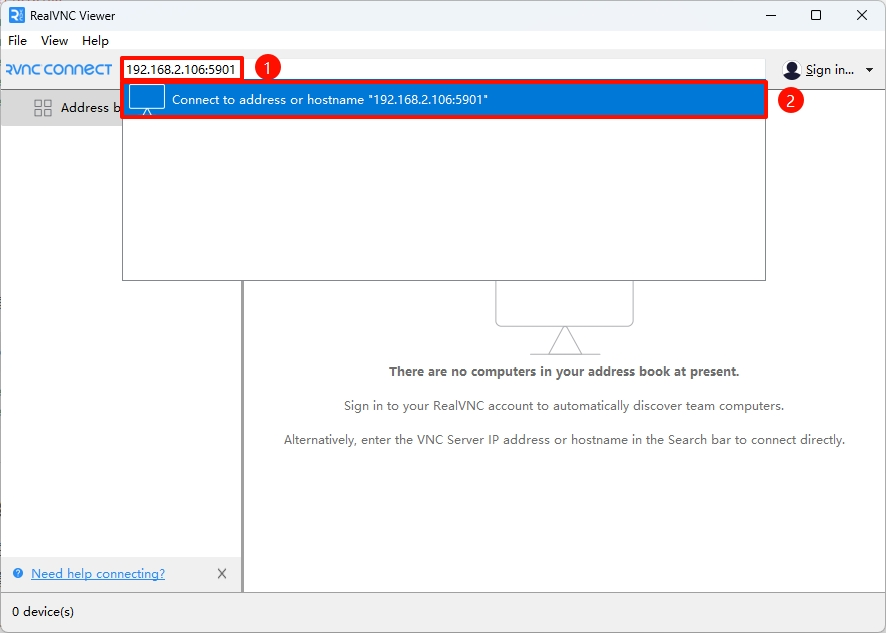
On another device, open the VNC Viewer software and connect to the mainboard using its IP address and port number.
① : Enter the mainboard's IP address and port number
② : Click Connect to address ··· to connect to the mainboard
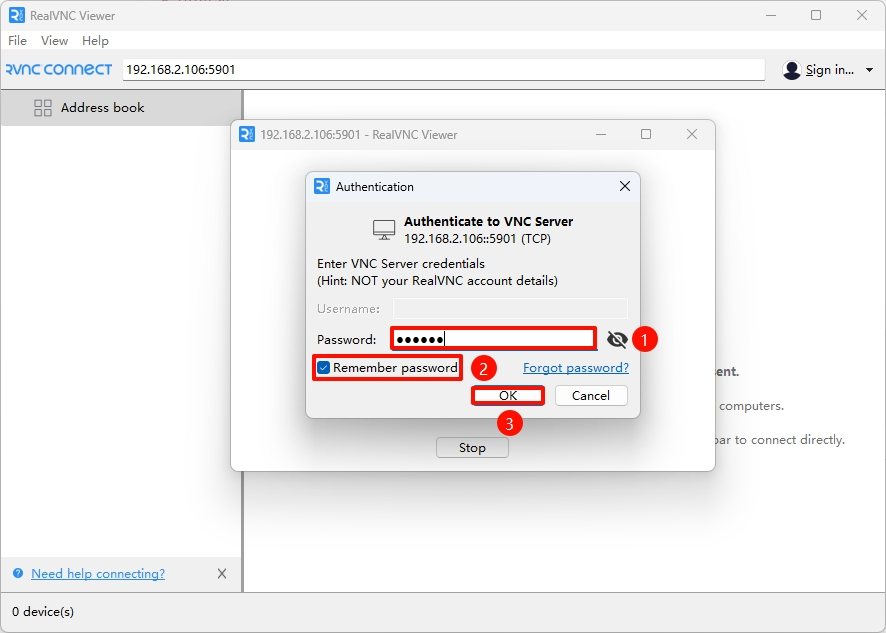
① : Enter the VNC remote access password
② : Check the Remember password option to save the password for future logins
③ : Click OK to connect

If you encounter a black screen when connecting via VNC, check if the system's auto-login option is enabled. If it is, you'll need to disable the auto-login option.