WiFi
This guide covers how to connect to a WiFi network, set up a hotspot, and test network bandwidth.
Connecting to a WiFi Network
- Graphical Interface
- Command Line Mode
① : Click on the network icon
② : Click the Connect button next to the WiFi network you want to join
③ : Enter the WiFi password and follow the prompts to complete the connection

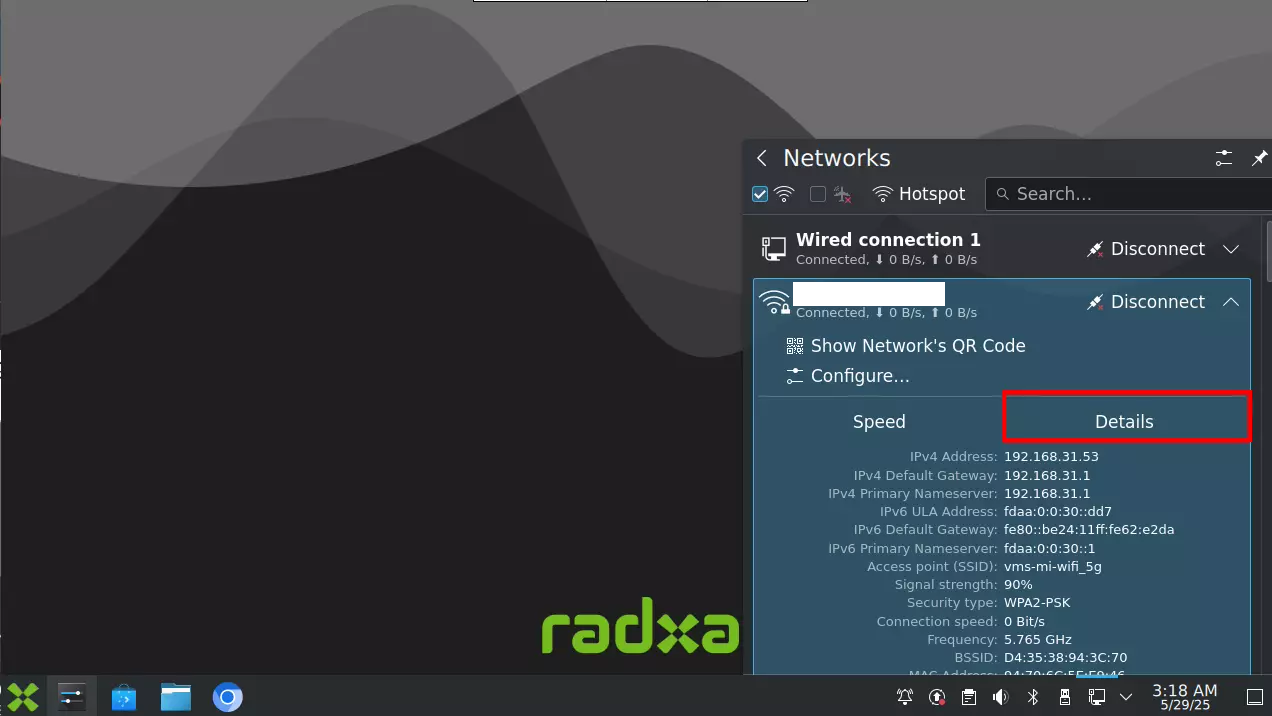
After a successful connection, select the Details option to view network connection information such as IP address, subnet mask, and gateway address.
For example, 192.168.31.53 is the IP address assigned by the router.
- Enable WiFi
sudo nmcli radio wifi on
- Scan for available WiFi networks
sudo nmcli device wifi list
- Connect to a WiFi network
sudo nmcli device wifi connect <SSID> password <PASSWORD>

# Example

sudo nmcli device wifi connect wifi_demo password 12345678
- View detailed network connection information
ip a
The terminal will display output similar to the following, where 192.168.31.76 is the IP address assigned by the router:
1: lo: <LOOPBACK,UP,LOWER_UP> mtu 65536 qdisc noqueue state UNKNOWN group default qlen 1000
link/loopback 00:00:00:00:00:00 brd 00:00:00:00:00:00
inet 127.0.0.1/8 scope host lo
valid_lft forever preferred_lft forever
inet6 ::1/128 scope host noprefixroute
valid_lft forever preferred_lft forever
2: end0: <NO-CARRIER,BROADCAST,MULTICAST,UP> mtu 1500 qdisc mq state DOWN group default qlen 1000
link/ether 46:d3:58:1c:a6:7b brd ff:ff:ff:ff:ff:ff
3: wlan0: <BROADCAST,MULTICAST,UP,LOWER_UP> mtu 1500 qdisc mq state UP group default qlen 1000
link/ether 00:9c:17:48:3a:b7 brd ff:ff:ff:ff:ff:ff
inet 192.168.31.76/24 brd 192.168.31.255 scope global dynamic noprefixroute wlan0
valid_lft 3589sec preferred_lft 3589sec
inet6 fdaa:0:0:30::20e/128 scope global dynamic noprefixroute
valid_lft 3589sec preferred_lft 3589sec
inet6 240e:3b7:3247:bbe2::20e/128 scope global dynamic noprefixroute
valid_lft 3589sec preferred_lft 3589sec
inet6 240e:3b7:3247:bbe2:ade9:33e1:9578:c650/64 scope global dynamic noprefixroute
valid_lft 208272sec preferred_lft 121872sec
inet6 fdaa::30:7a49:395c:bb65:e4da/64 scope global noprefixroute
valid_lft forever preferred_lft forever
inet6 fe80::7bd8:903:e5d7:6471/64 scope link noprefixroute
valid_lft forever preferred_lft forever
Nmcli (Network Manager Command Line Interface) is a command-line tool for managing network connections in Linux.
Additional commands:
sudo nmcli radio wifi off: Disable WiFisudo nmcli connection delete <SSID>: Delete a specific WiFi network
Setting Up a WiFi Hotspot
Create a WiFi Hotspot
sudo nmcli device wifi hotspot ifname <ifname> con-name <name> ssid <SSID> password <password>

# Example

sudo nmcli device wifi hotspot ifname wlan0 con-name My-Hotspot ssid My-Hotspot password 12345678
This command creates a WiFi hotspot named "My-Hotspot" with the password "12345678" using the wireless network interface wlan0, and saves the connection as "My-Hotspot".
ifname: Specifies the wireless network interface name for the hotspot. Useip ato check available interfaces.con-name: Specifies the connection name for managing the hotspot (start, stop, or delete).ssid: The name of the hotspot that will be visible to other devices.password: The password for the hotspot.
After successful setup, the terminal will display output similar to:
Device 'wlan0' successfully activated with 'd73e5af7-a49c-4608-bdab-bd28a36bdbef'.
Hint: "nmcli dev wifi show-password" shows the Wi-Fi name and password.
Stop WiFi Hotspot
sudo nmcli connection down My-Hotspot
Start WiFi Hotspot
sudo nmcli connection up My-Hotspot
Delete WiFi Hotspot
sudo nmcli connection delete My-Hotspot
Testing Network Bandwidth
Use the iperf tool to test network bandwidth (throughput) performance. It's recommended to run multiple tests and calculate the average.
Prerequisites
- Hardware Requirements
You'll need two devices: one as a server and one as a client.
Server: PC, server, or similar device.
Client: Radxa board.
- Same Local Network
Both server and client must be on the same local network and able to ping each other.
Install iperf
Both server and client need to have iperf installed.
sudo apt update
sudo apt install iperf
Testing Procedure
Server-Side
Open a terminal and enter the following command to start the server:
iperf -s
After successful startup, the terminal will display output similar to:
---

## Server listening on 5201 (test #1)
If the system shows iperf3: error - unable to start listener for connections: Address already in use, it means port 5201 is already in use by another iperf3 process.
Solution:
- Check for running iperf3 processes
ps -ef | grep iperf3
- Terminate the iperf3 process: Replace
<PID>with the actual process ID of iperf3.
sudo kill <PID>
Client-Side
- Upload Test
Open a terminal and enter the following command to test the client's upload bandwidth. Replace <server_ip> with the actual server IP address (you can find this using the ip a command).
iperf -c <server_ip> -t <time>

# Example

iperf -c 192.168.2.186 -t 60
Parameters:
<server_ip>: Server IP address<time>: Test duration in seconds
- Download Test
Open a terminal and enter the following command to test the client's download bandwidth. Replace <server_ip> with the actual server IP address (you can find this using the ip a command).
iperf -c <server_ip> -t <time> -R

# Example

iperf -c 192.168.2.186 -t 60 -R
Parameters:
<server_ip>: Server IP address<time>: Test duration in seconds-R: Reverse test mode (client acts as server, server acts as client)