Install System to eMMC
- The tools and system images required for the tutorial can be downloaded from the Resource Download page.
This guide explains how to install the FEL system image to onboard eMMC or an eMMC module.
Installing the system will format the eMMC. Please back up any important data in advance!
Prerequisites
Hardware Connection
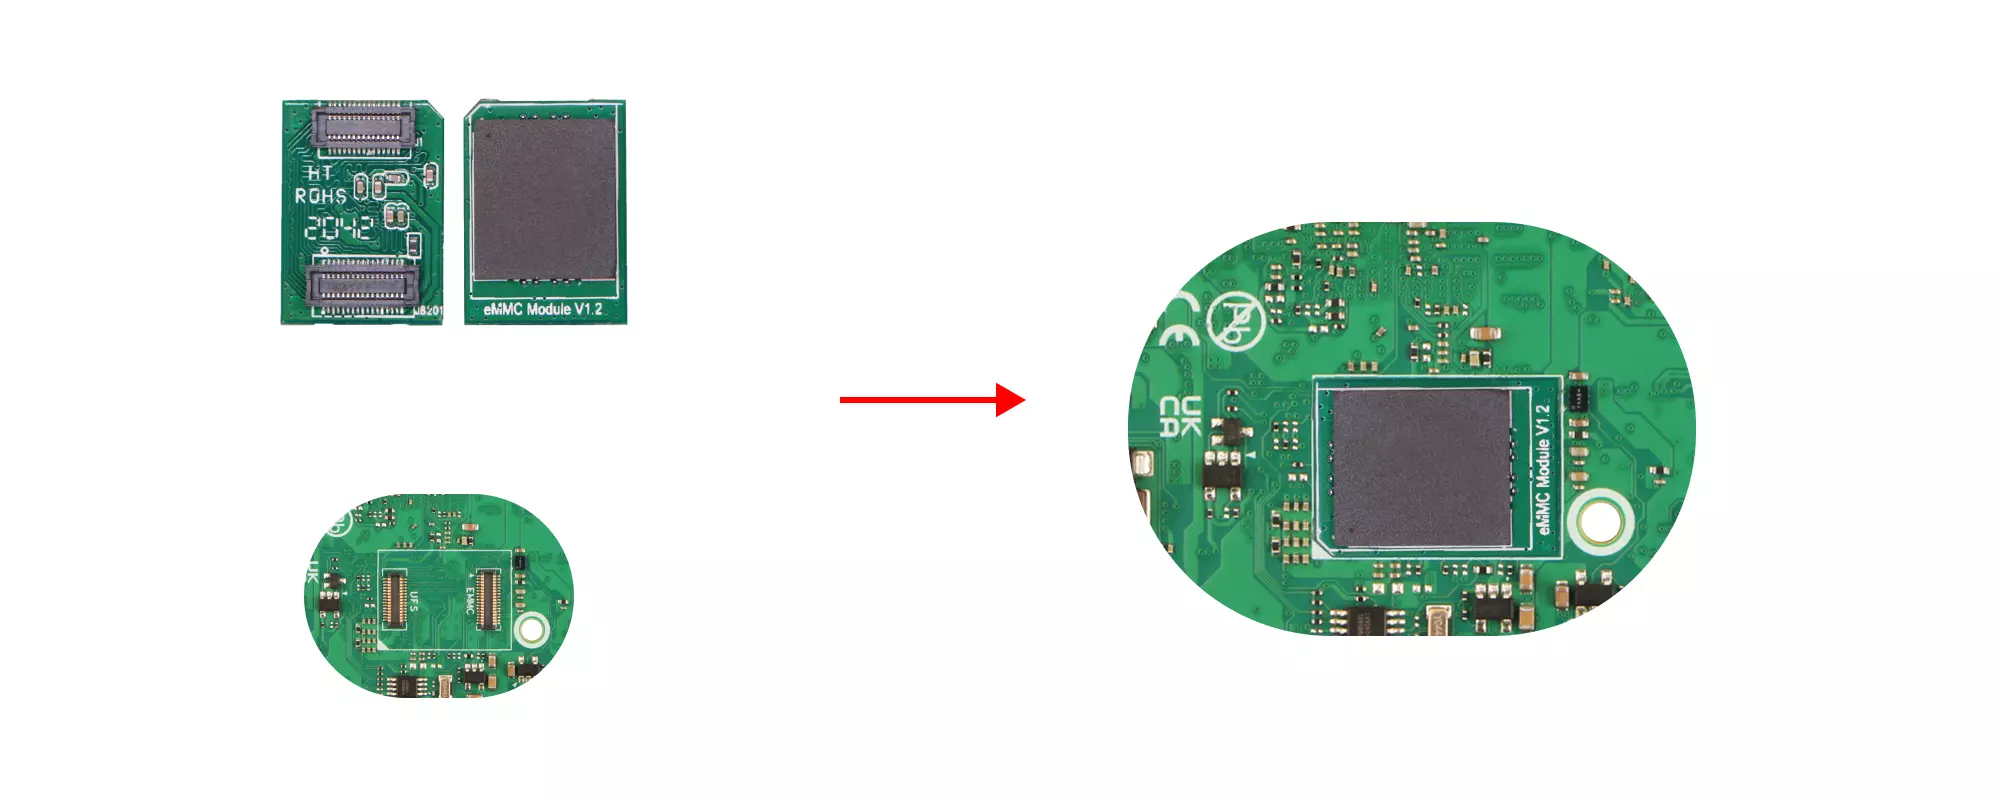
- eMMC Module
- Onboard eMMC
eMMC Module Installation Steps:
- Observe the notch direction on the eMMC module and the notch marking on the board's eMMC module interface to determine the correct installation orientation.
- Place the eMMC module above the board's eMMC module interface, ensuring the eMMC module interface is roughly aligned with the board's eMMC module interface.
- Gently press one end of the eMMC module until you hear a "click" sound, indicating successful installation. Then press the other end in the same way to ensure the eMMC module is properly installed.
The board comes with onboard eMMC and does not require installation.
Installing the System
About FEL Mode
FEL is a low-level boot and flashing mode in Allwinner chips, primarily used for system recovery or debugging when the device cannot boot from conventional storage media.
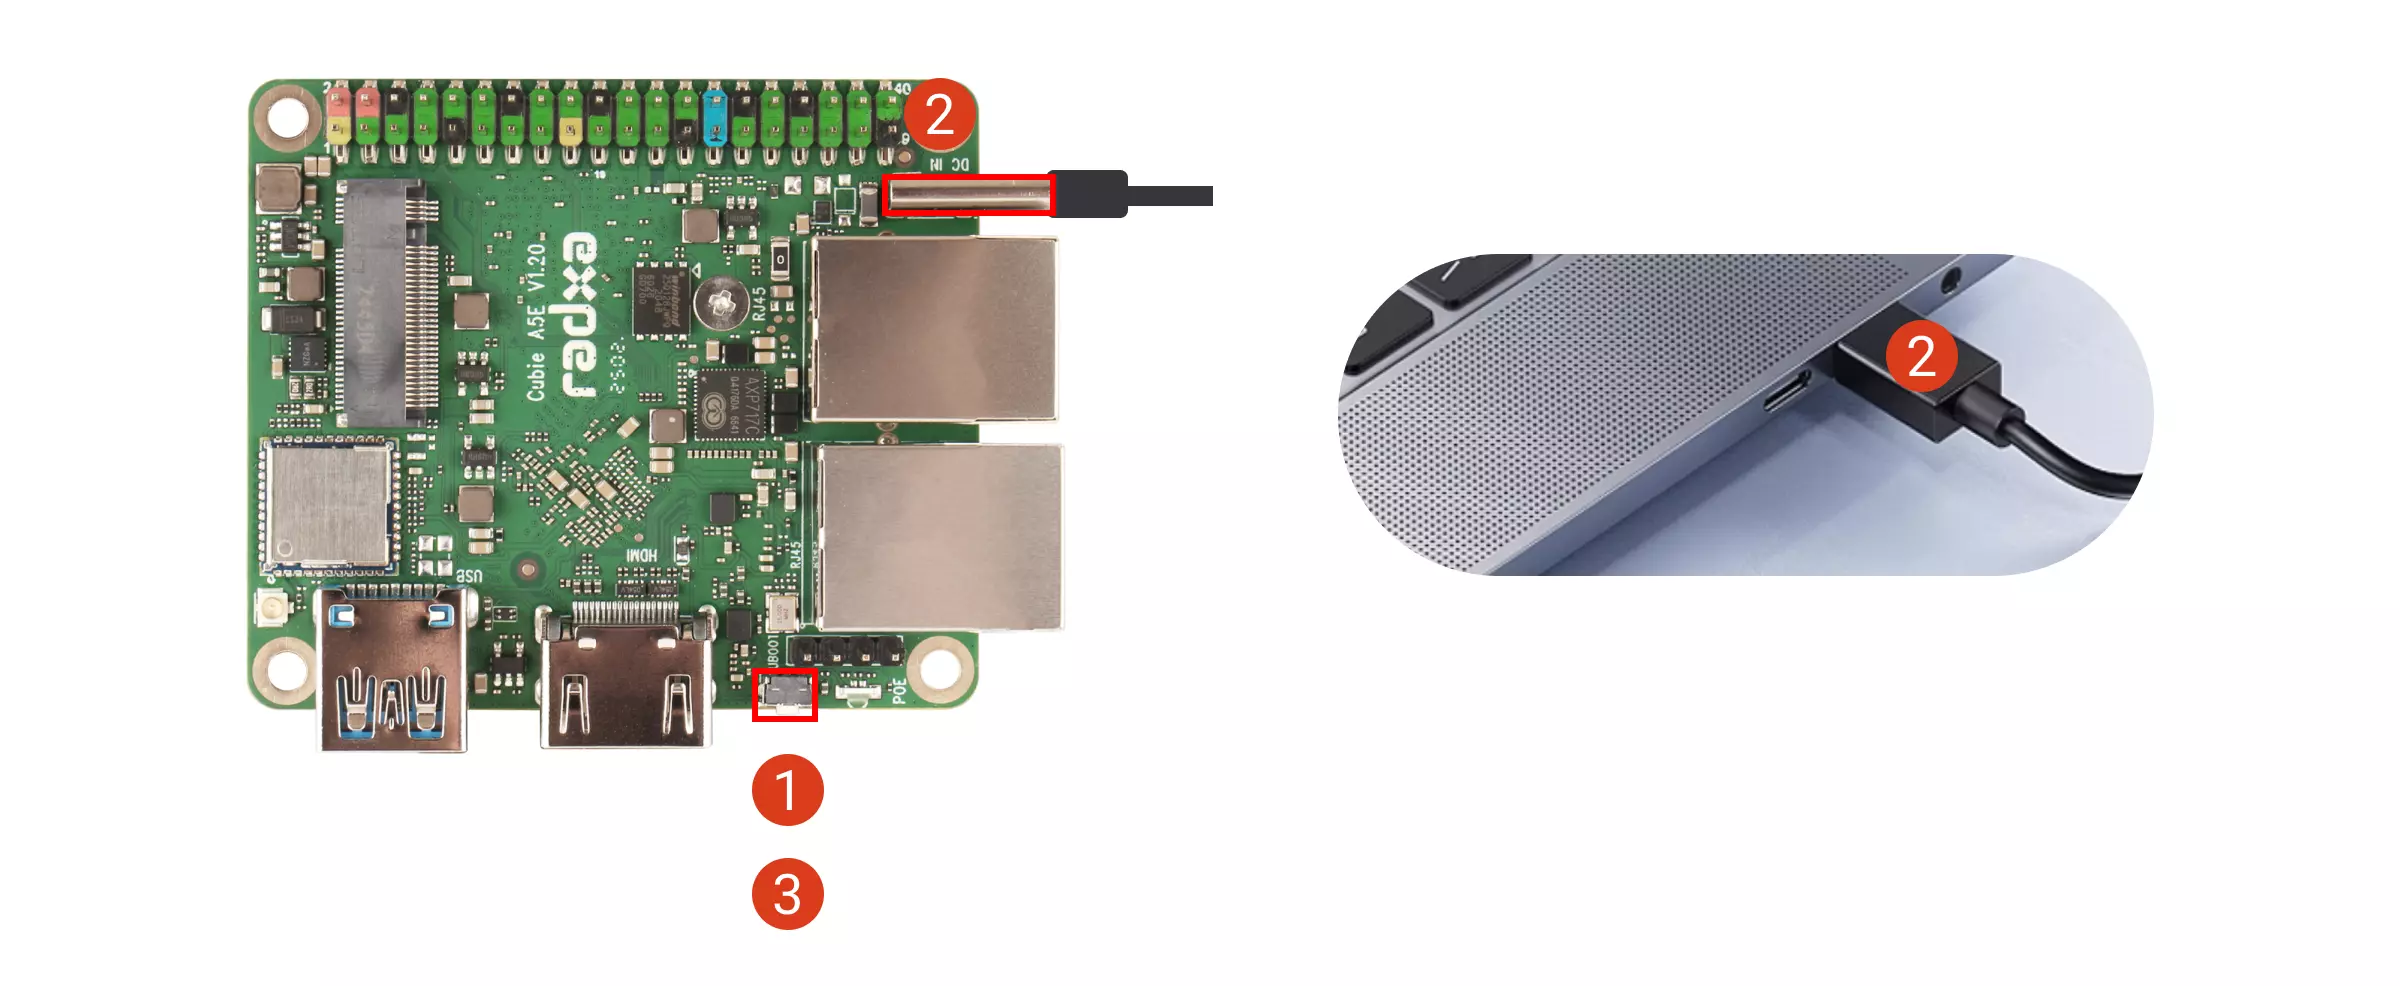
Entering FEL Mode
The board will enter FEL mode only if the UBOOT button is detected as pressed during power-up.
Detailed Steps:
① Press and hold the board's UBOOT button
② Connect the board's OTG port to your PC using a USB cable
③ Release the board's UBOOT button
Installing Flashing Tools
To install the system on eMMC, you'll need tools provided by the Allwinner platform:
- PhoenixSuit: For Windows platform
- LiveSuit: For Linux platform
- Windows
- Linux
Using PhoenixSuit tool on Windows platform.
If you are using Windows, you need to go to Windows Security Center → Device Security → Core Isolation and disable all options. Otherwise, you may encounter issues with drivers showing an exclamation mark or installation failure.
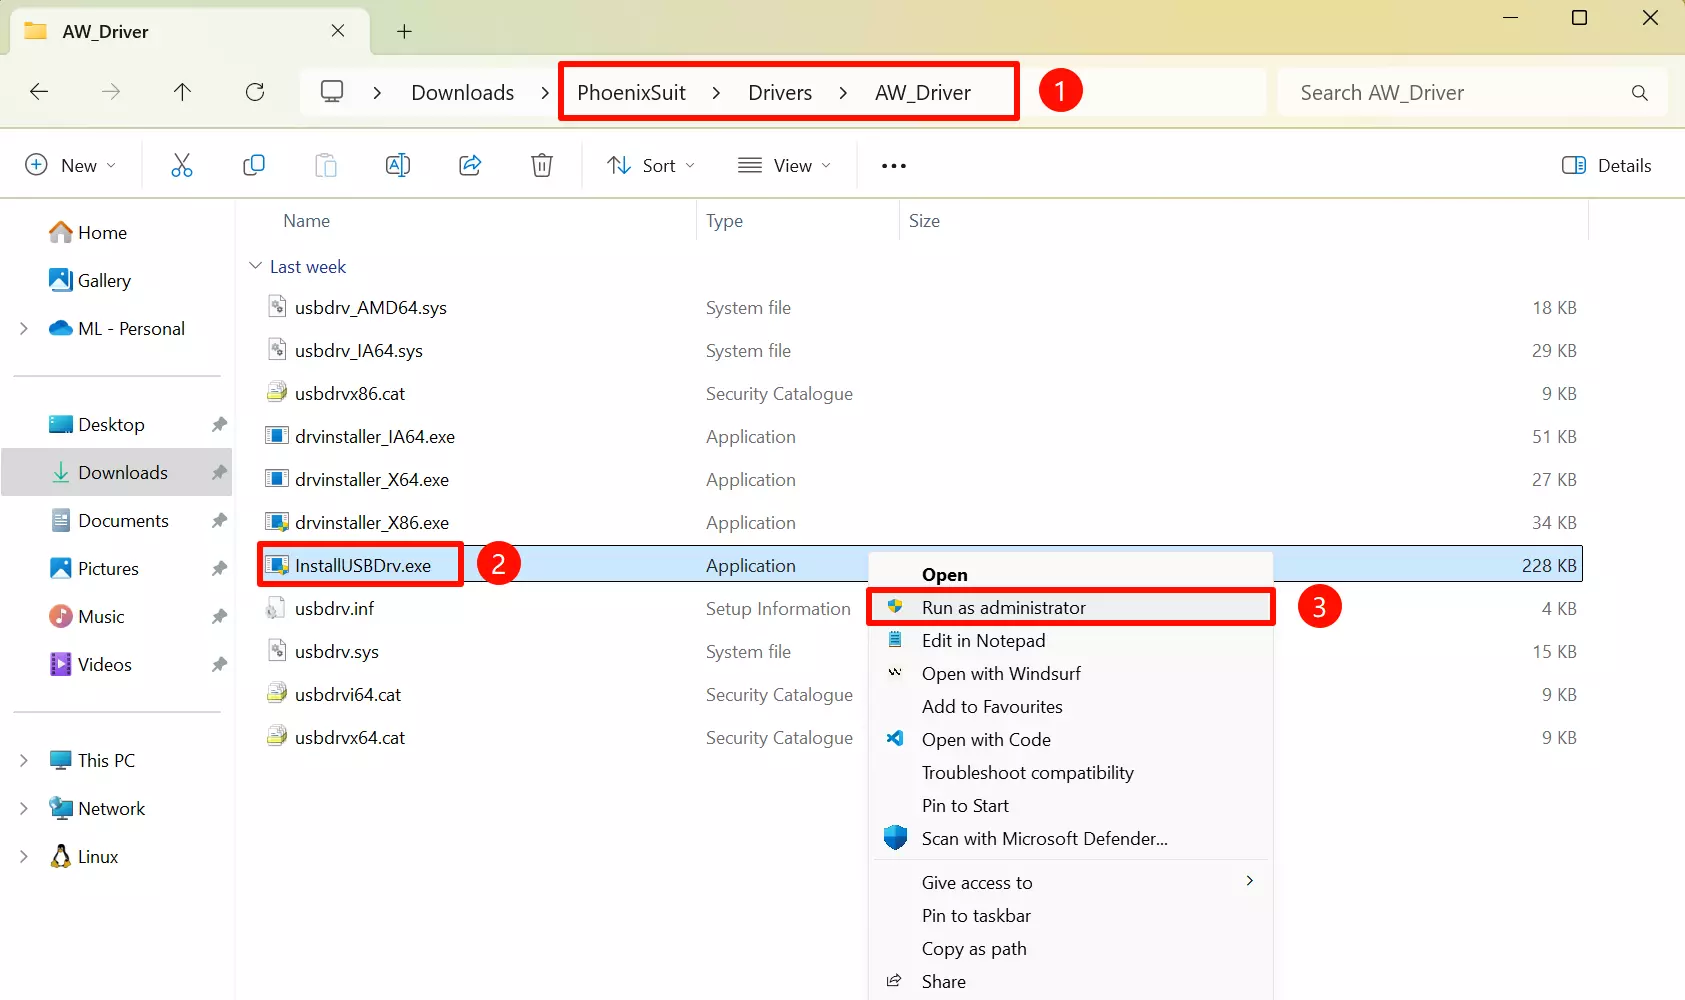
- Installing Drivers
Extract the downloaded PhoenixSuit package:
① Go to the PhoenixSuit → Drivers → AW_Driver directory
② Select the InstallUSBDrv.exe file in the AW_Driver directory
③ Run the InstallUSBDrv.exe driver as administrator
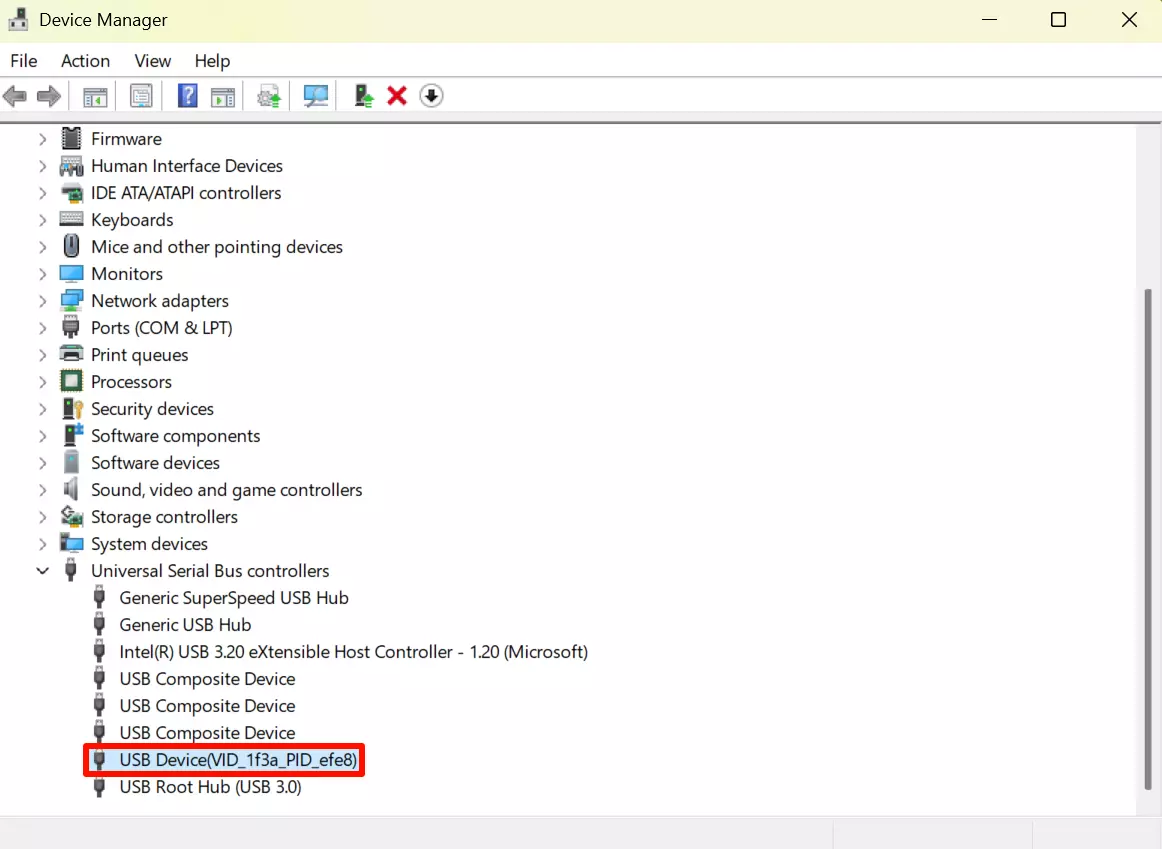
After successful driver installation, you should see a new USB Device recognized in Device Manager.
- Using PhoenixSuit Tool
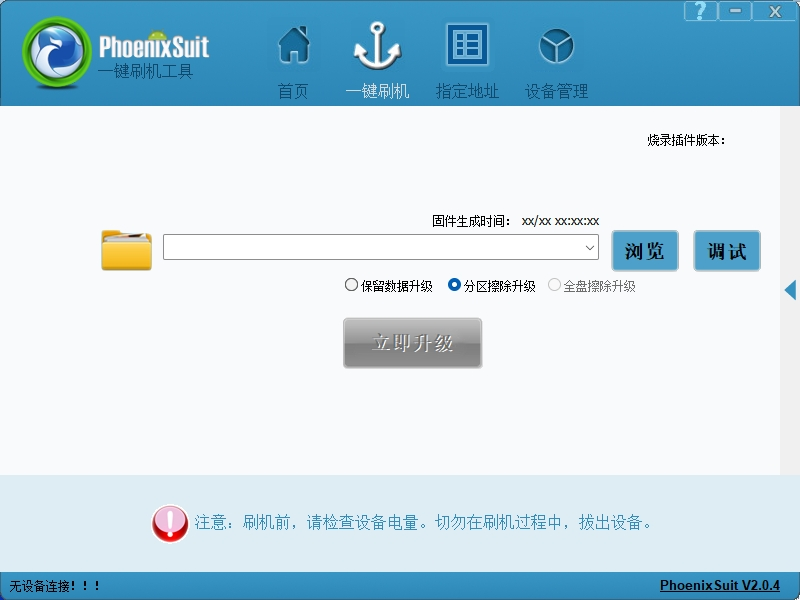
Navigate to the PhoenixSuit directory and run the PhoenixSuit.exe program.
Using LiveSuit tool on Ubuntu platform.
- Install Dependencies
sudo apt update
sudo apt install dkms
- Add Execute Permissions Extract the downloaded package, navigate to the LiveSuit directory, and run the following command to add execute permissions to the file.
sudo chmod +x LiveSuit.run
- Run LiveSuit.run File
Run the LiveSuit.run file to install the program.
./LiveSuit.run
After successful installation, you'll see output similar to the following (where user_name is your current username):
========***********LiveSuit installed completely***********===========
LiveSuit  has been installed in /home/user_name/Bin/livesuit
========***********LiveSuit installed completely***********===========
- Running LiveSuit Tool
Navigate to the program directory and run the following command to start the LiveSuit tool.
sudo ./LiveSuit
If you encounter an error about not being able to find libpng12.so.0, you can resolve it by running the following commands:
mkdir libpng
cd libpng/
wget https://ppa.launchpadcontent.net/linuxuprising/libpng12/ubuntu/pool/main/libp/libpng/libpng_1.2.54.orig.tar.xz
tar -xvf libpng_1.2.54.orig.tar.xz
cd libpng-1.2.54
./configure
make
sudo make install
sudo ln -s /usr/local/lib/libpng12.so.0.54.0 /usr/lib/libpng12.so
sudo ln -s /usr/local/lib/libpng12.so.0.54.0 /usr/lib/libpng12.so.0
Flash System Image
Open the system image flashing tool provided by Allwinner according to your system platform.
- Windows
- Linux
Open the PhoenixSuit tool on Linux platform to flash the system image.
- Image Flashing
Download the system image file in advance. The system image file needs to be decompressed before it can be flashed to the eMMC.
①: Select the Browse option and find the corresponding system image file (select the actual decompressed system file)
②: Select the Full Erase Upgrade option
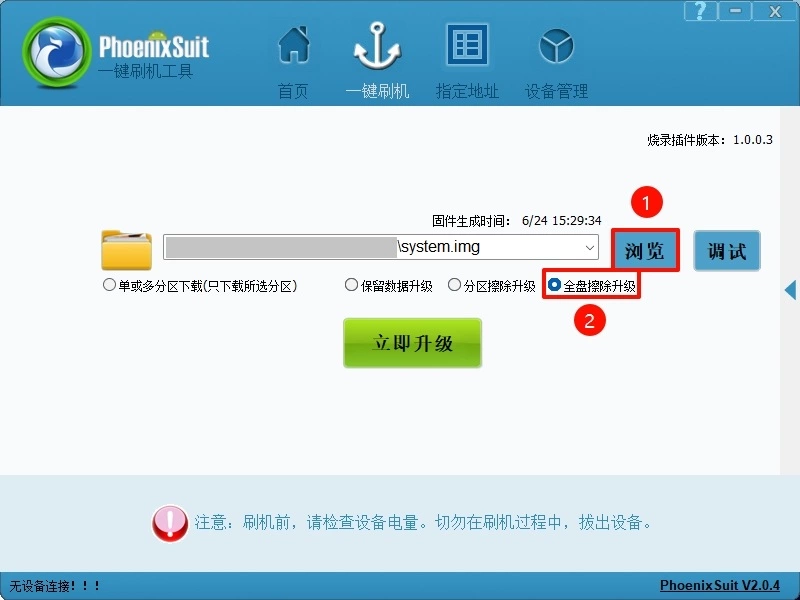
If the software does not automatically start flashing the system to the board, you can put the board back into FEL mode and observe the flashing progress in the software.
- Flashing Complete
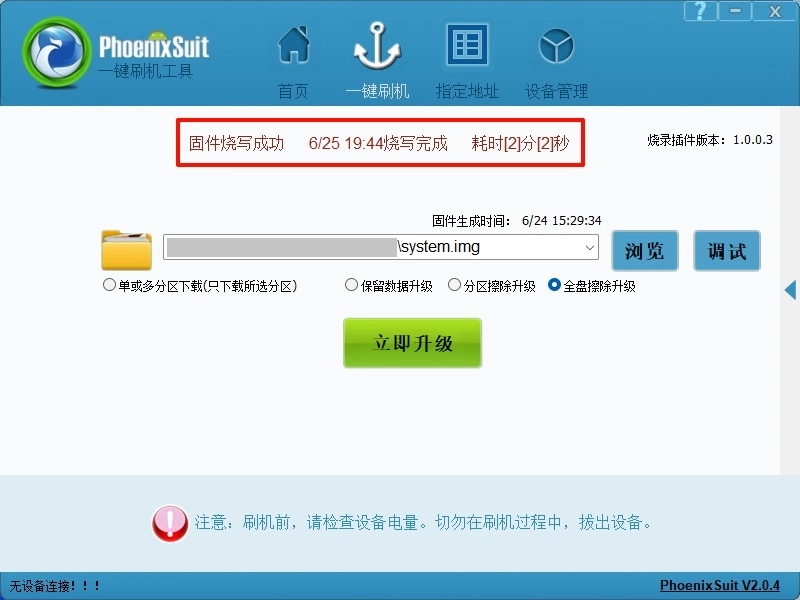
When the software displays Firmware Flashing Successful, it means the system image has been successfully flashed. You can now close the PhoenixSuit tool.
Open the LiveSuit tool on Linux platform to flash the system image.
- Image Flashing
Download the system image file in advance. The system image file needs to be decompressed before it can be flashed to the eMMC.
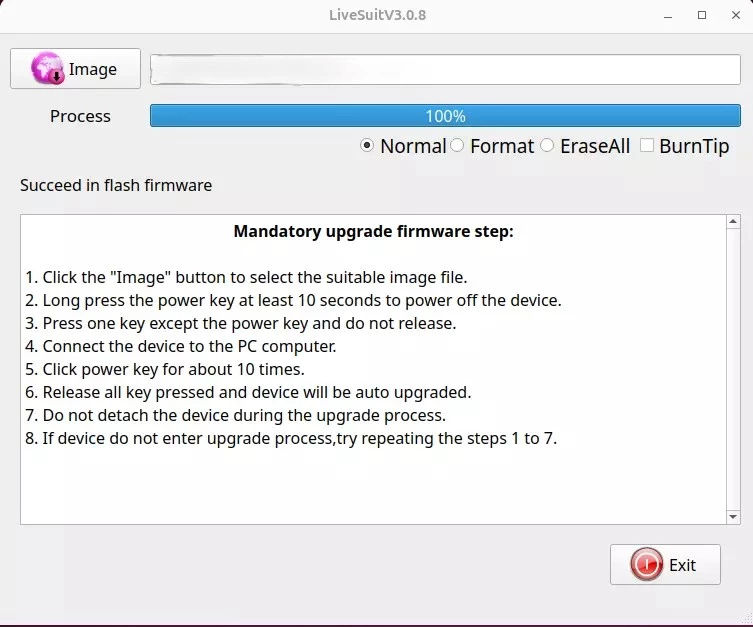
①: Select the Image option and find the corresponding system image file (select the actual decompressed system file)
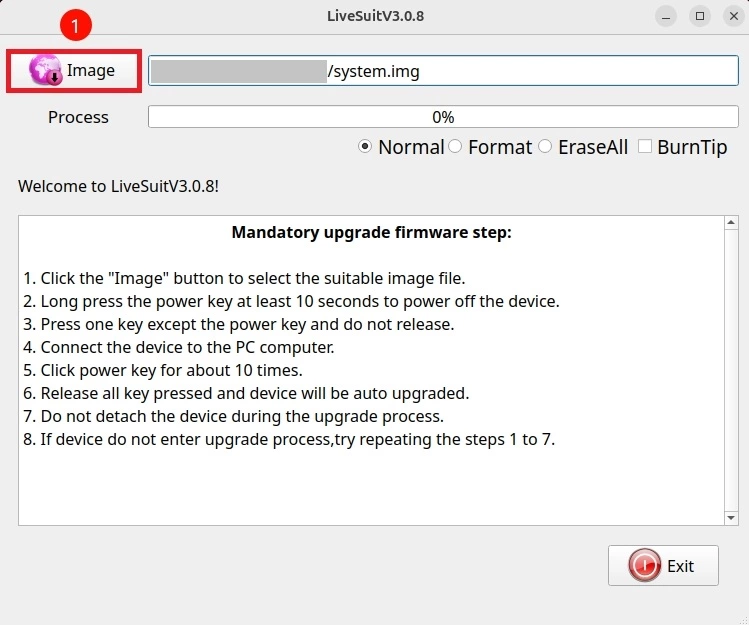
If the software does not automatically start flashing the system to the board, you can put the board back into FEL mode and observe the terminal output and the progress bar in the software.
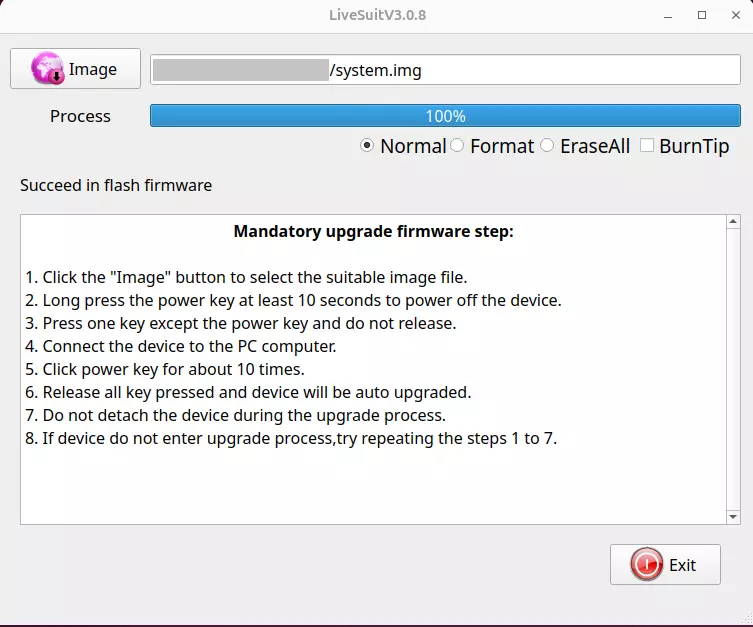
- Flashing Complete
When the progress bar shows 100%, it means the system image has been successfully flashed. You can now close the LiveSuit tool.
System Information
When using our provided system image for the first time, you need to log in with the username and password we have set.
- radxa
Username: radxa
Password: radxa