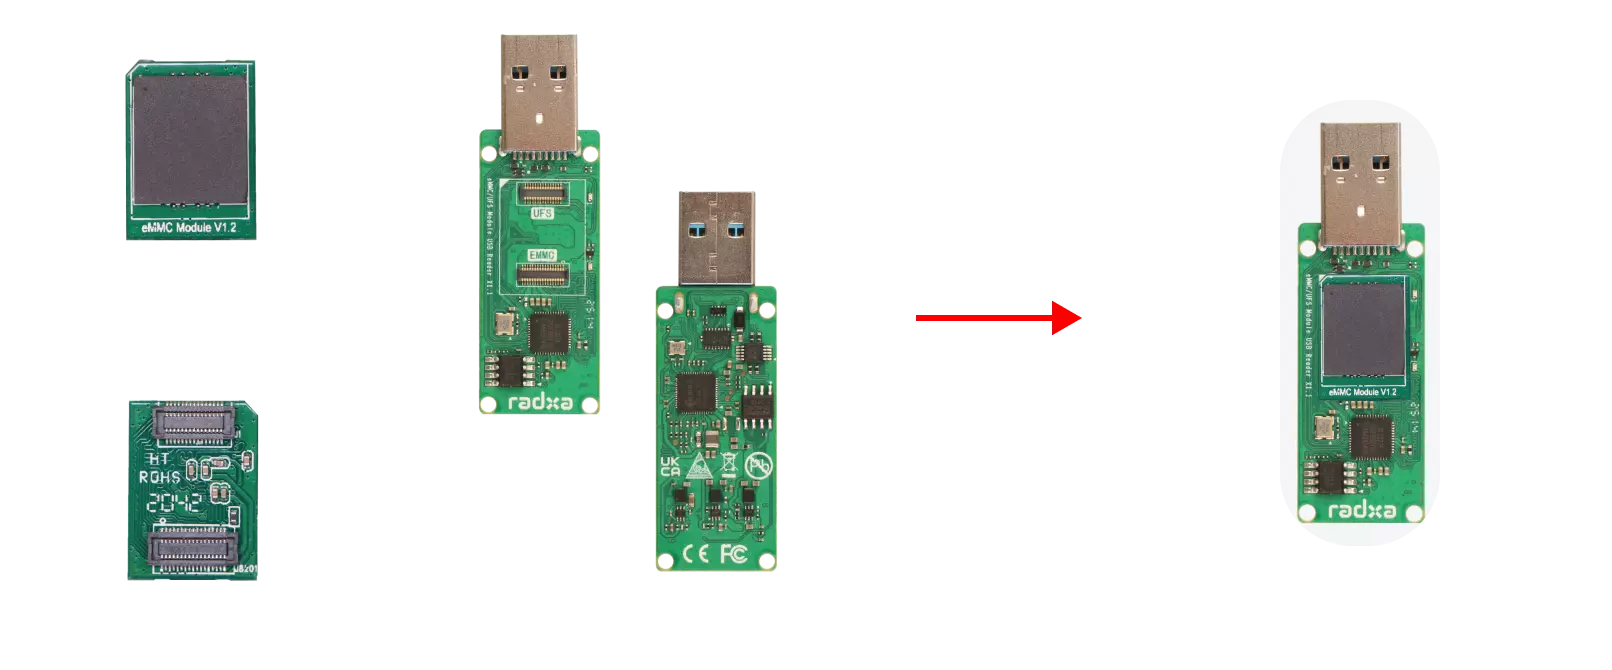
Using Radxa eMMC/UFS Combo Module Reader
This guide explains how to use the Radxa eMMC/UFS combo module reader to install the system onto an eMMC module.
Installing the system will format the eMMC module. Please back up any important data in advance!
Hardware Requirements
Prepare the following hardware in advance:
- Boot media: eMMC module
- Card reader: eMMC/UFS combo module reader
Hardware Connection
Install the eMMC module into the reader, then connect the reader to a USB port on your PC.
eMMC Module Installation Steps:
- Ensure the notch on the eMMC module aligns with the notch on the reader
- Align the bottom edge connector of the eMMC module with the reader's interface
- Gently press down on one end of the eMMC module until you hear a "click" sound, then repeat the process for the other end to ensure the module is properly seated.
Software Preparation
Use the open-source image flashing tool Etcher to write the system image to the eMMC module.
Download System Image
Go to the Downloads page to download and extract the system image file to your PC.
Download Etcher
Download the appropriate version of Balena Etcher for your operating system from the official website: balenaEtcher.
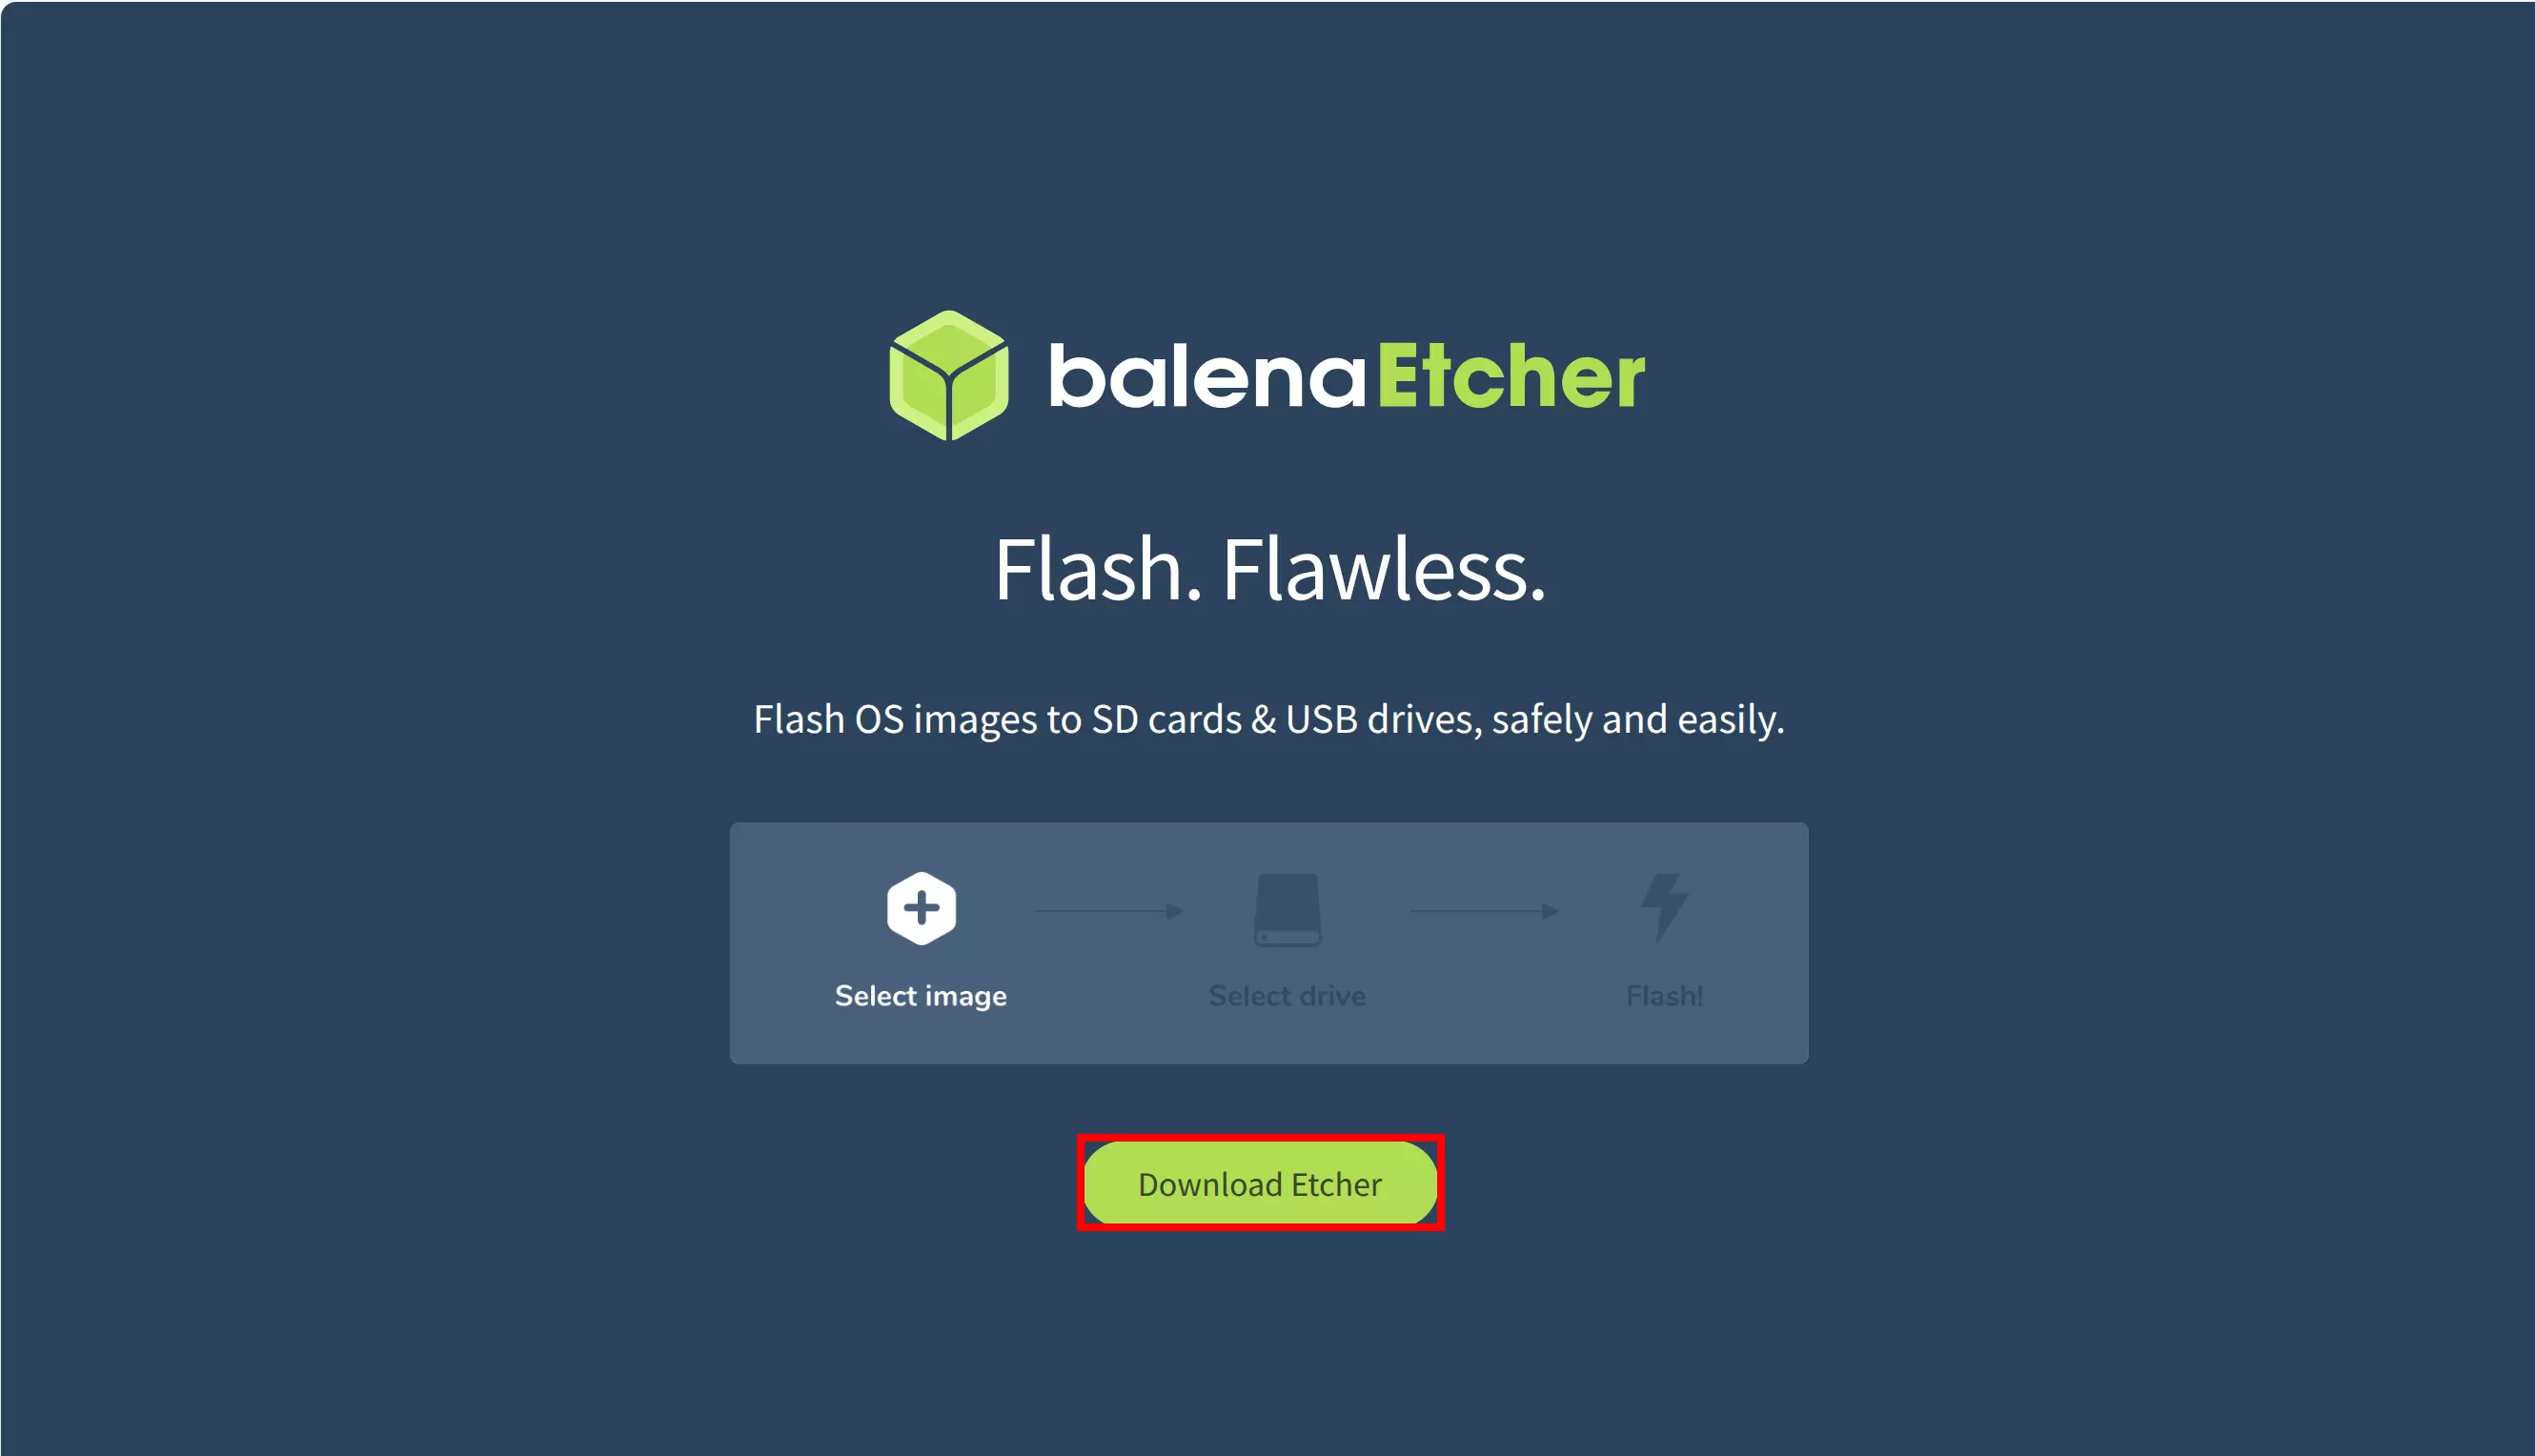
Download the software package that matches your system platform and architecture.
Using Etcher
After downloading, double-click to open the Etcher application.
-
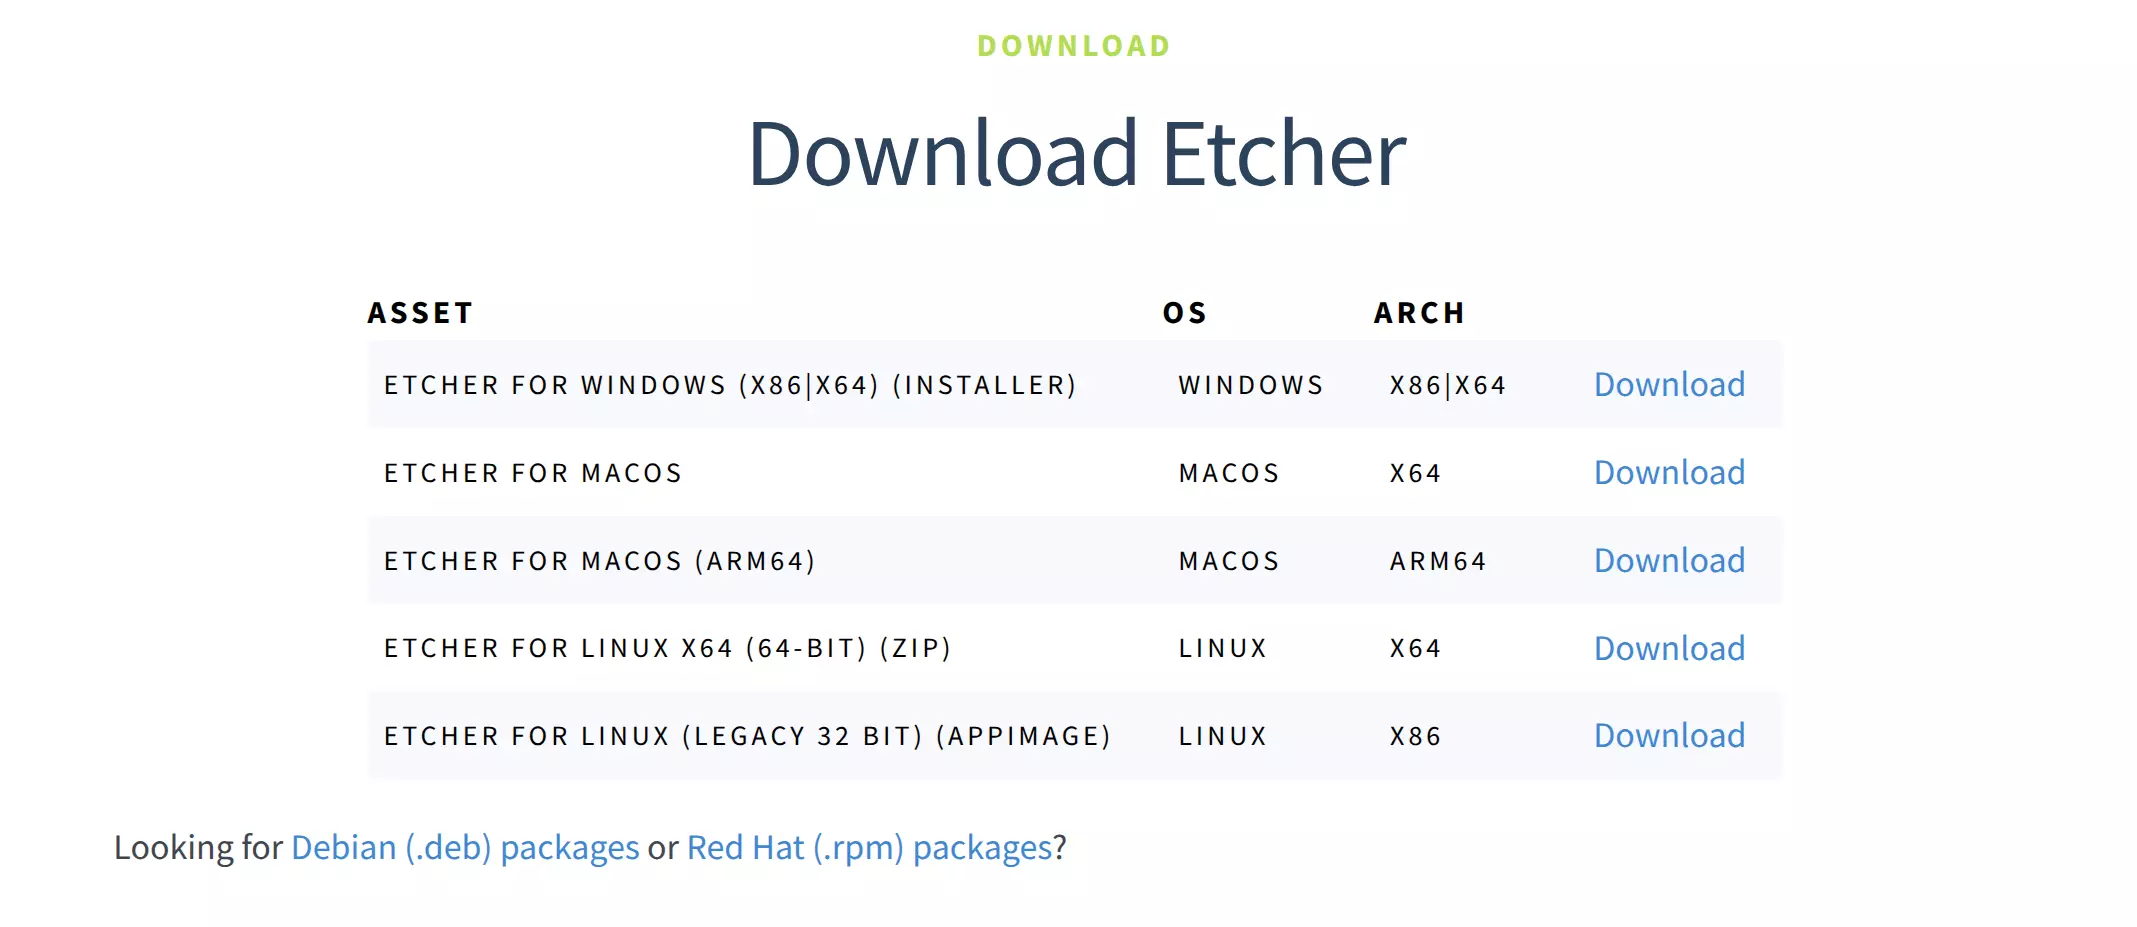
Windows
- The downloaded file will be an
*.exeinstaller. Double-click to run the program.
- The downloaded file will be an
-
Linux
- It's recommended to download the
*.ziparchive. After extraction, double-click the program to run it.
- It's recommended to download the
-
macOS
- Download the appropriate
*.dmgfile for your system architecture. After opening, drag the application to your Applications folder to install. Then double-click the app icon to run it.
- Download the appropriate
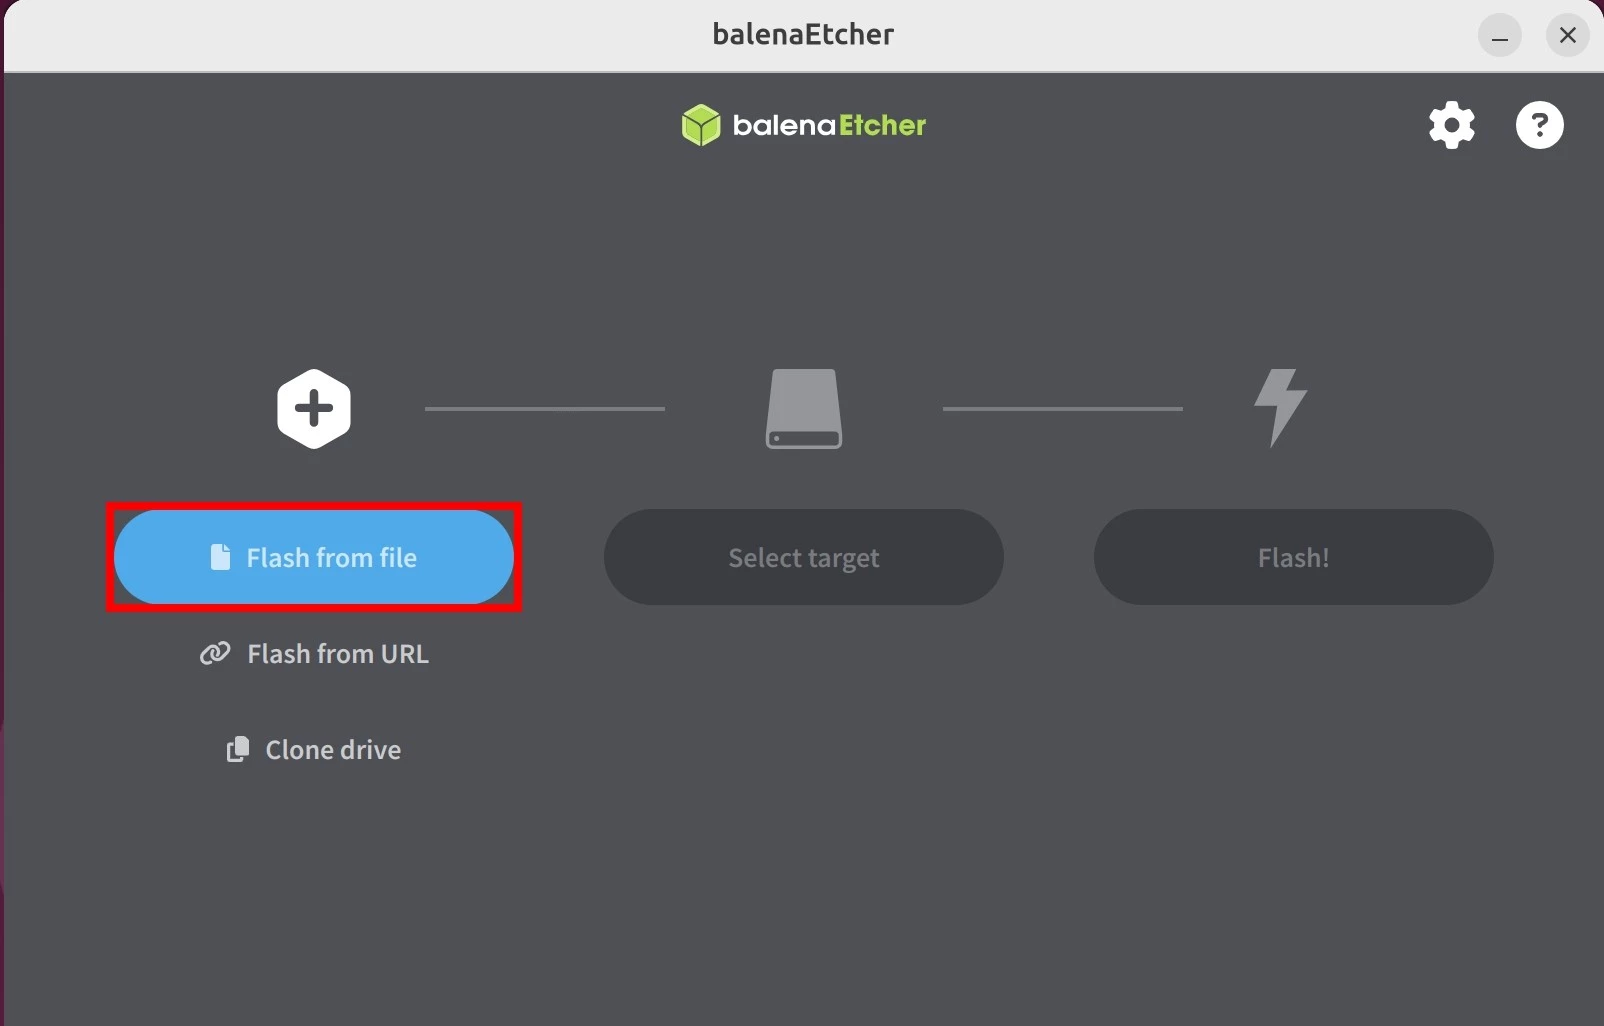
Installing the System Image
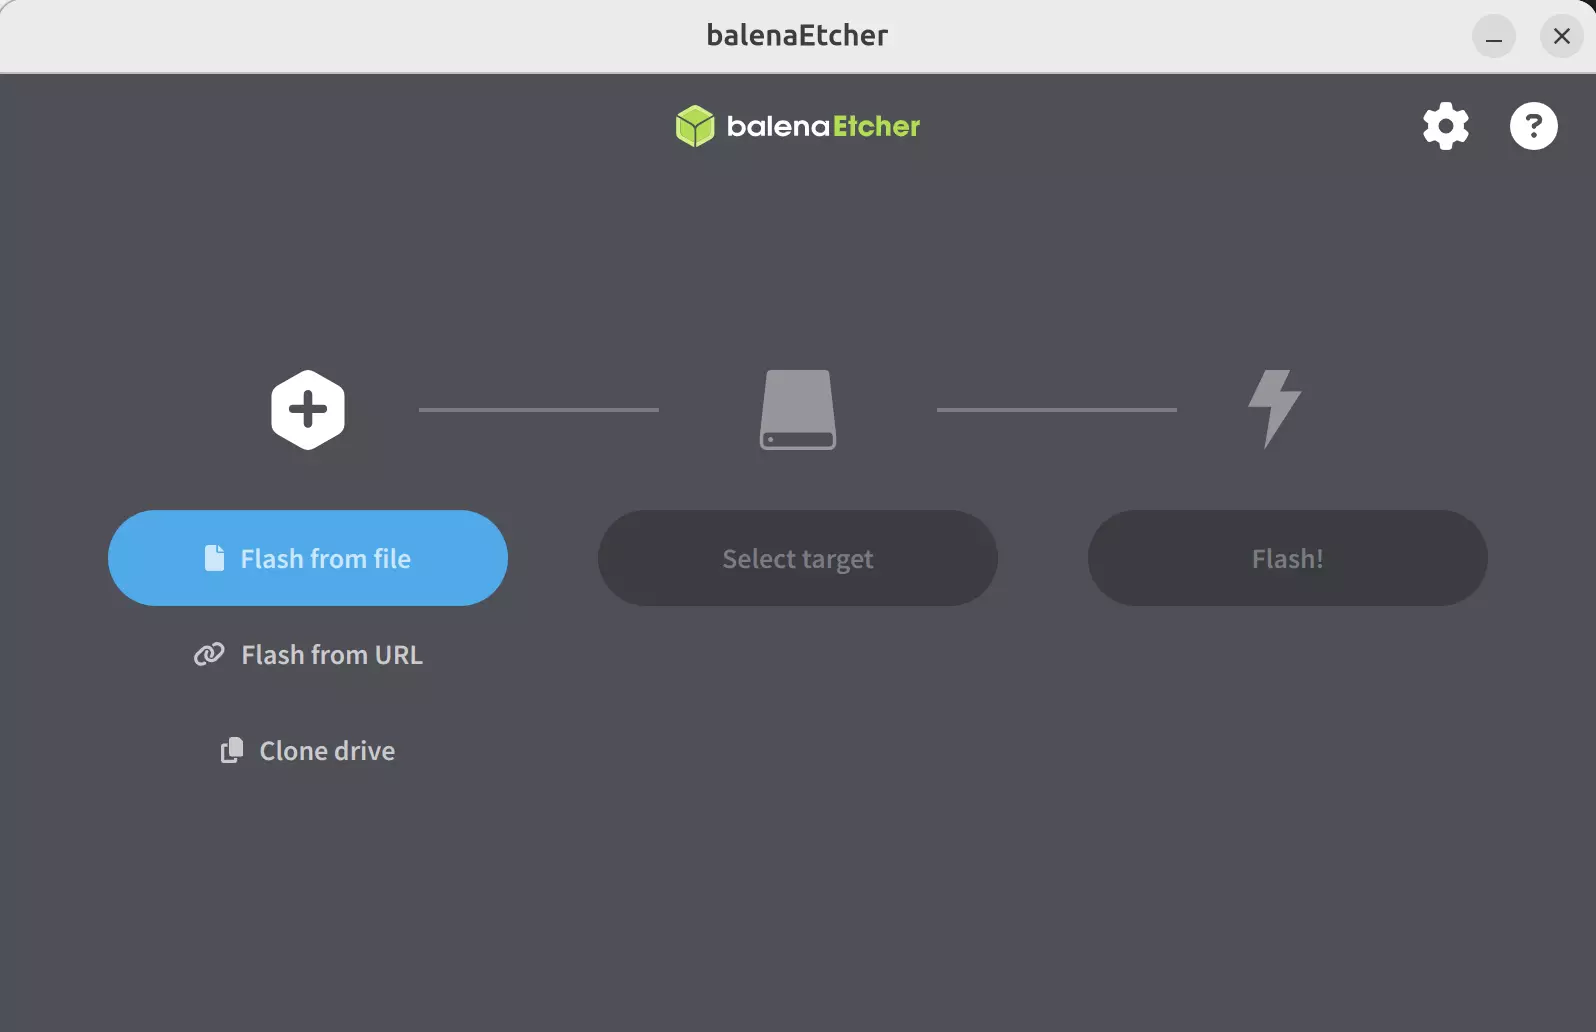
- Select the system image
- Click the
Flash from filebutton - Choose the downloaded and extracted system image file
- Click the
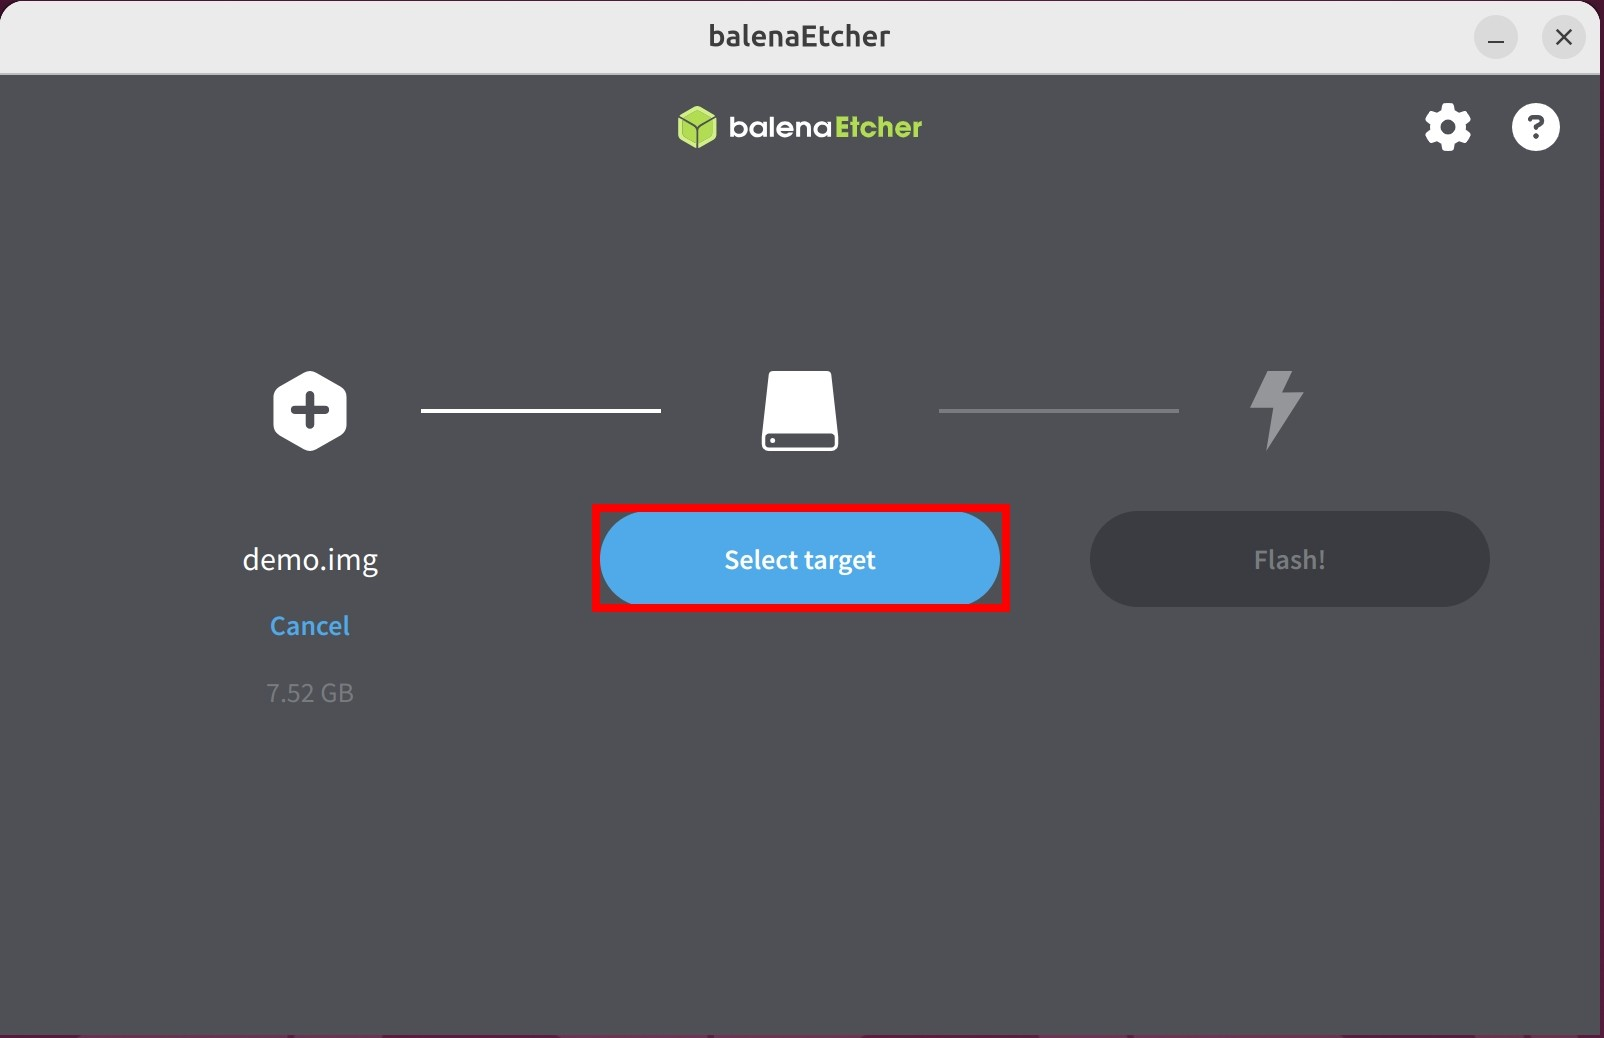
- Select the target device
- Click the
Select targetbutton - Choose the disk device corresponding to your connected card reader
- Click the
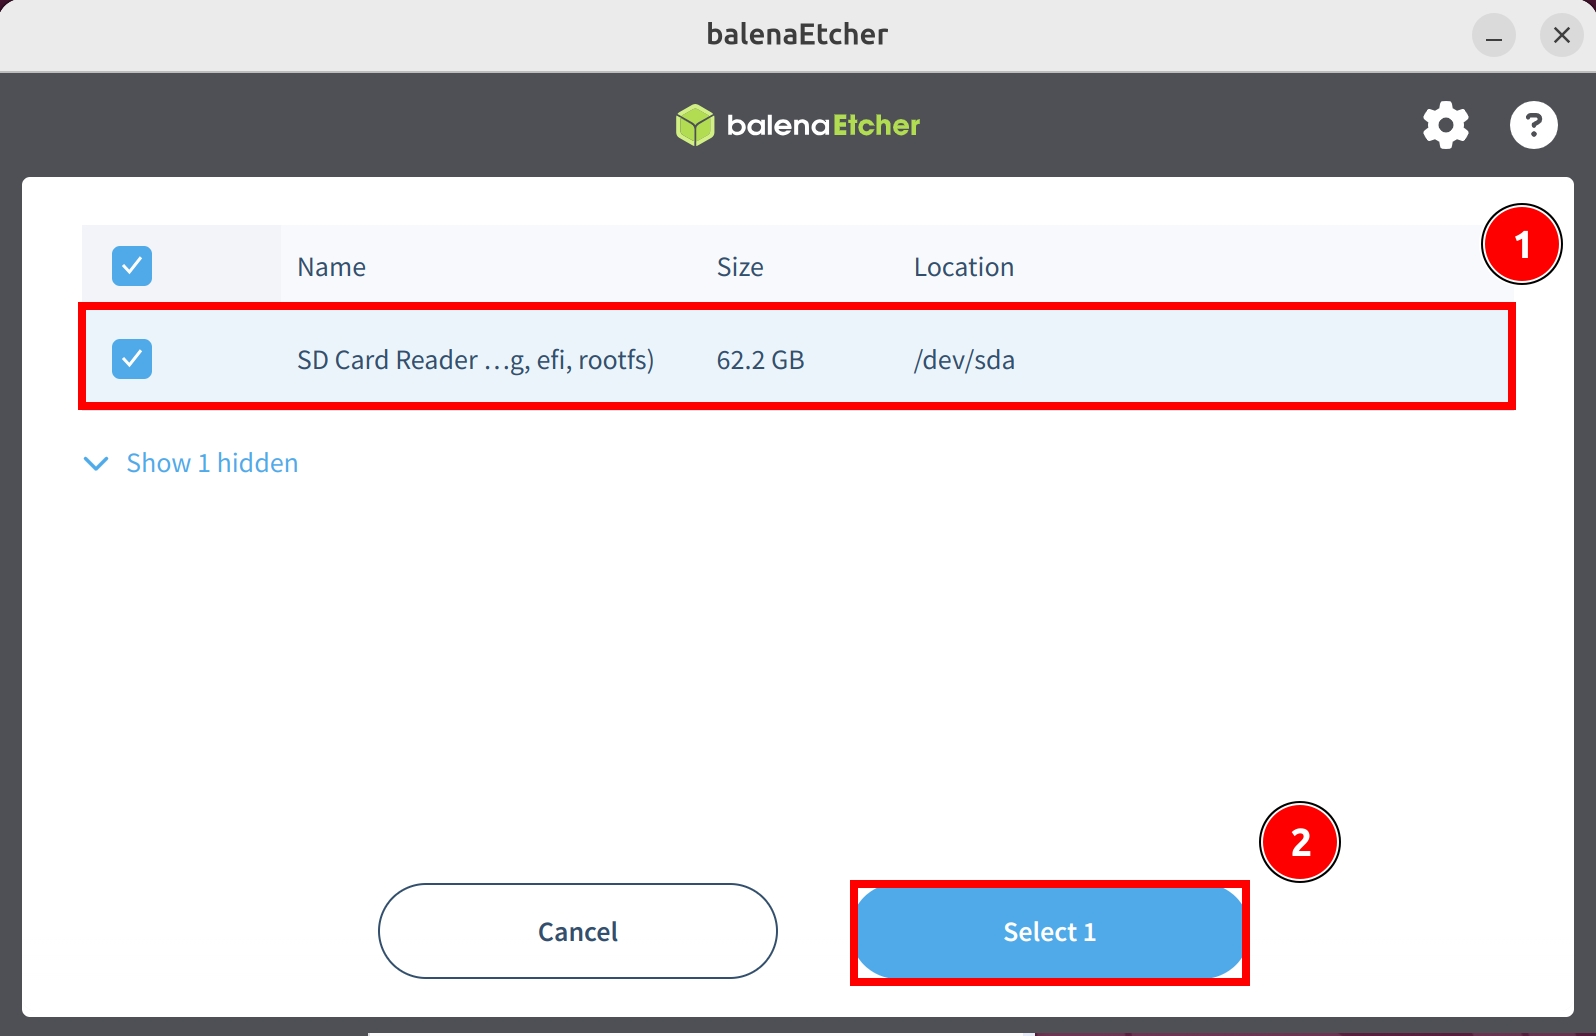
Be extremely careful to select the correct disk! Etcher will format the selected disk, which could result in permanent data loss if you choose the wrong one!
① Select the disk device where you want to install the system image
② Click Select 1 to confirm your device selection
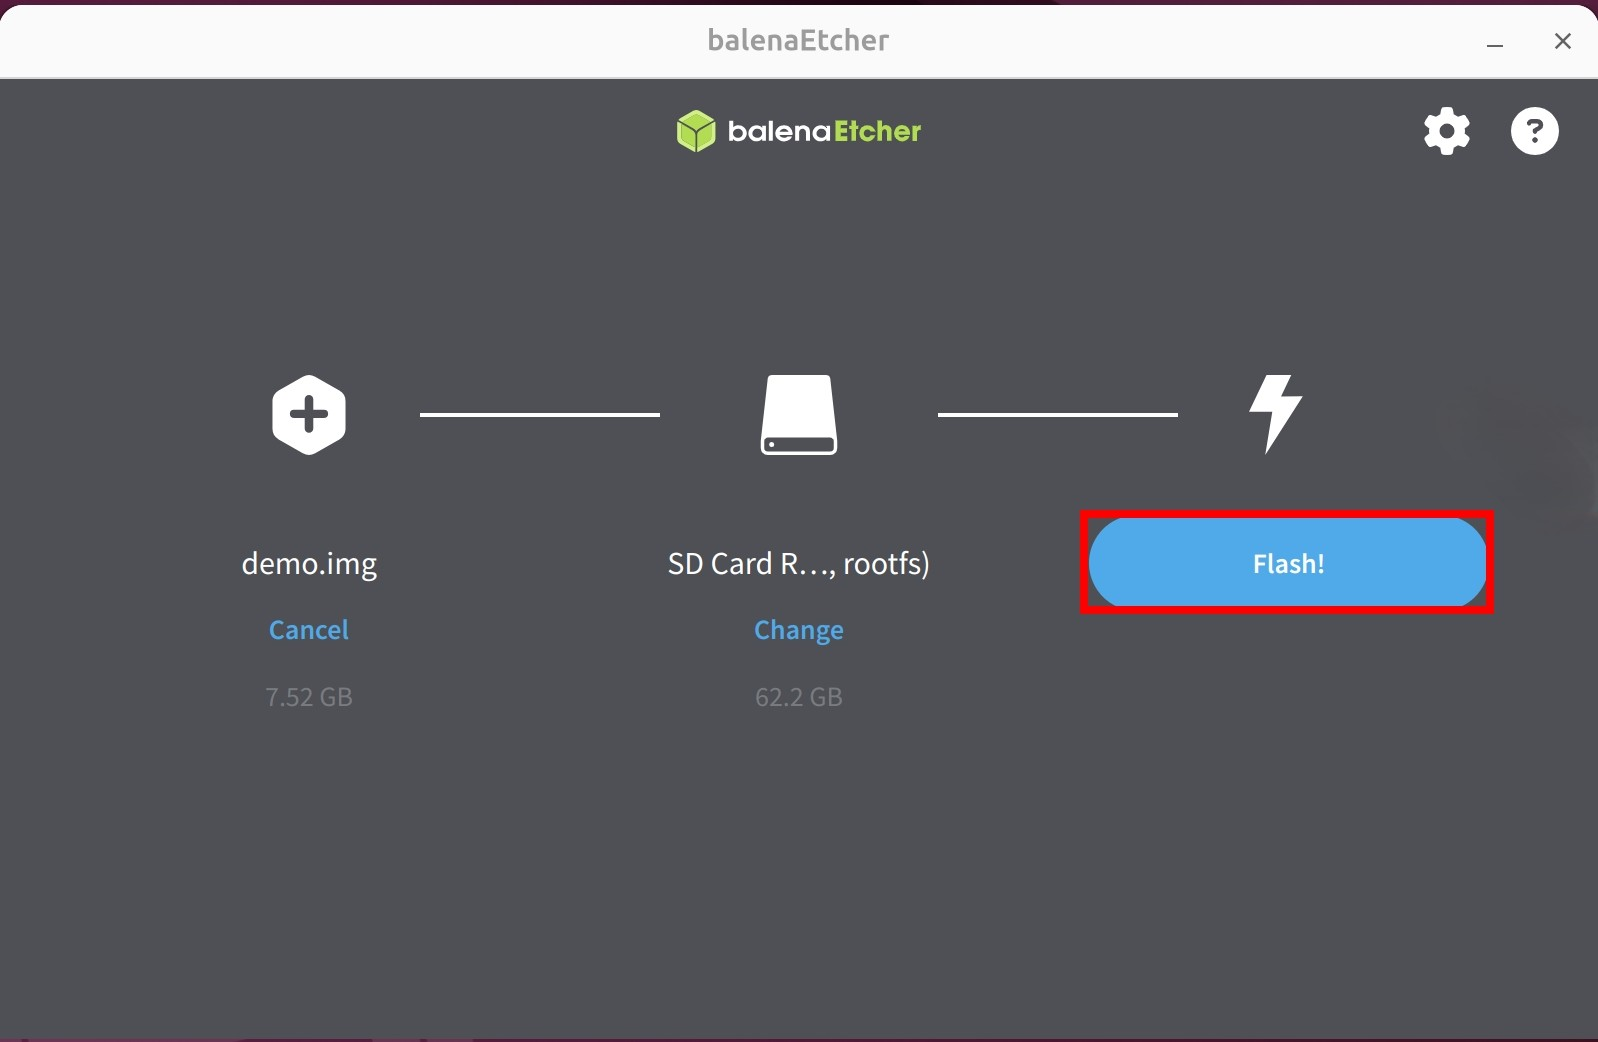
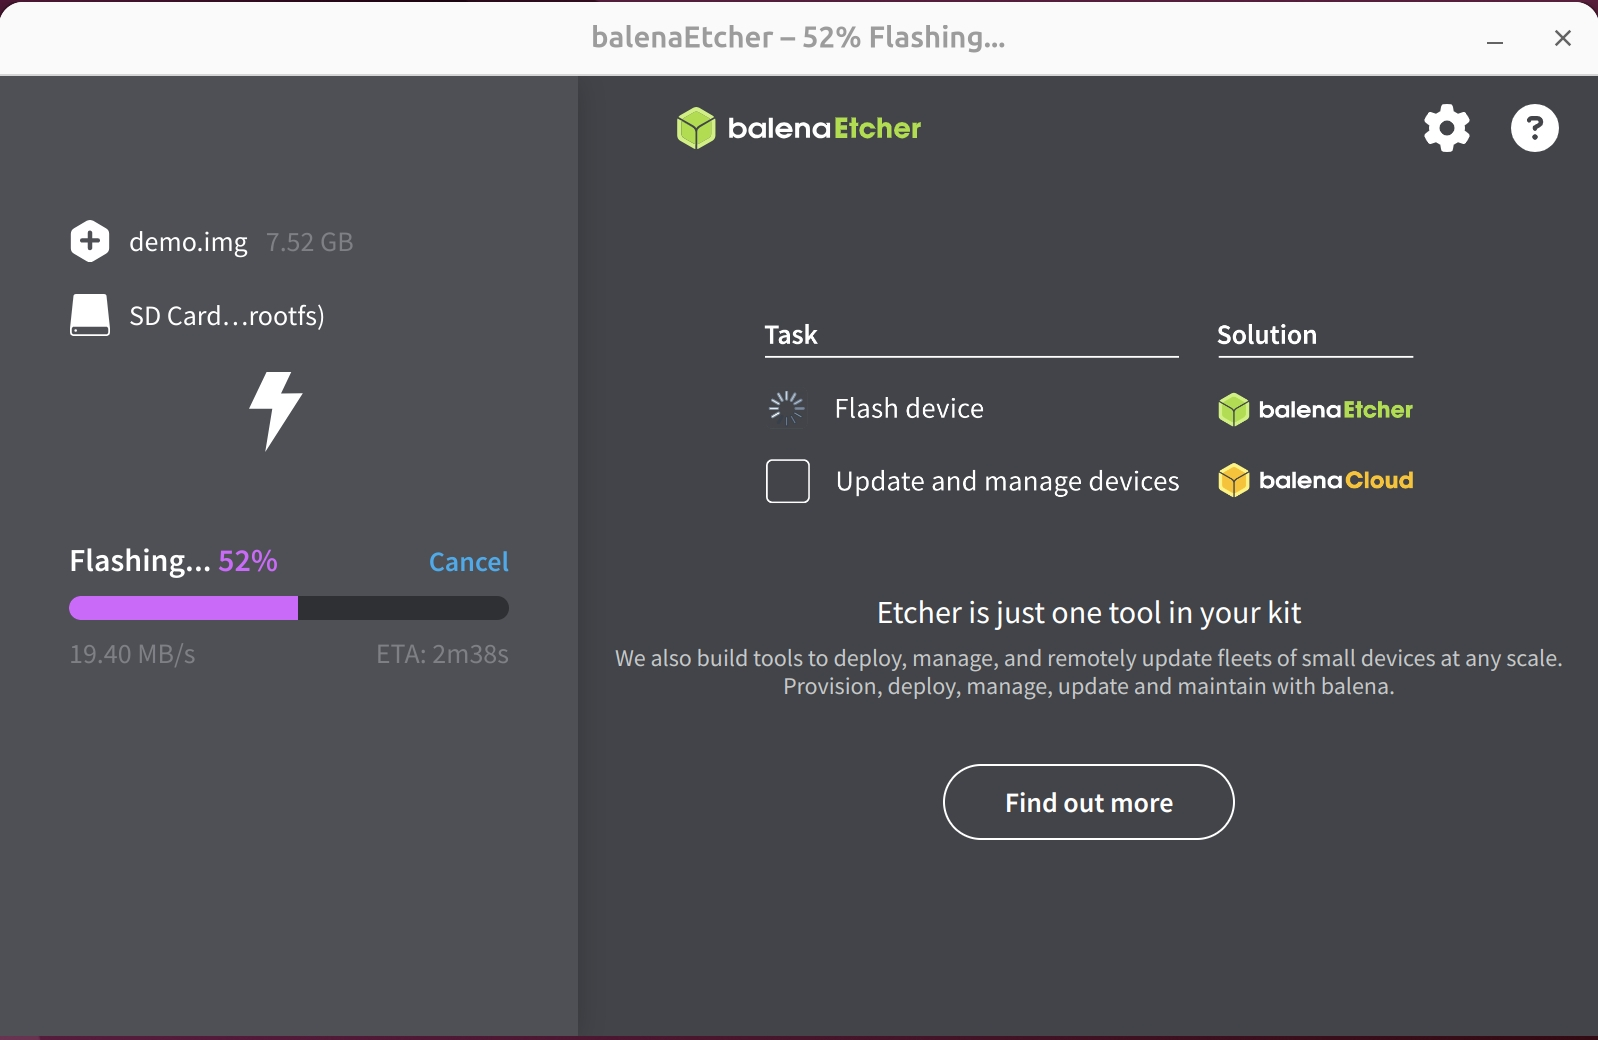
- Write the system image
- Click the
Flash!button - Wait for the software to write and verify the system image
- Click the
Writing system image...
Verifying system image...
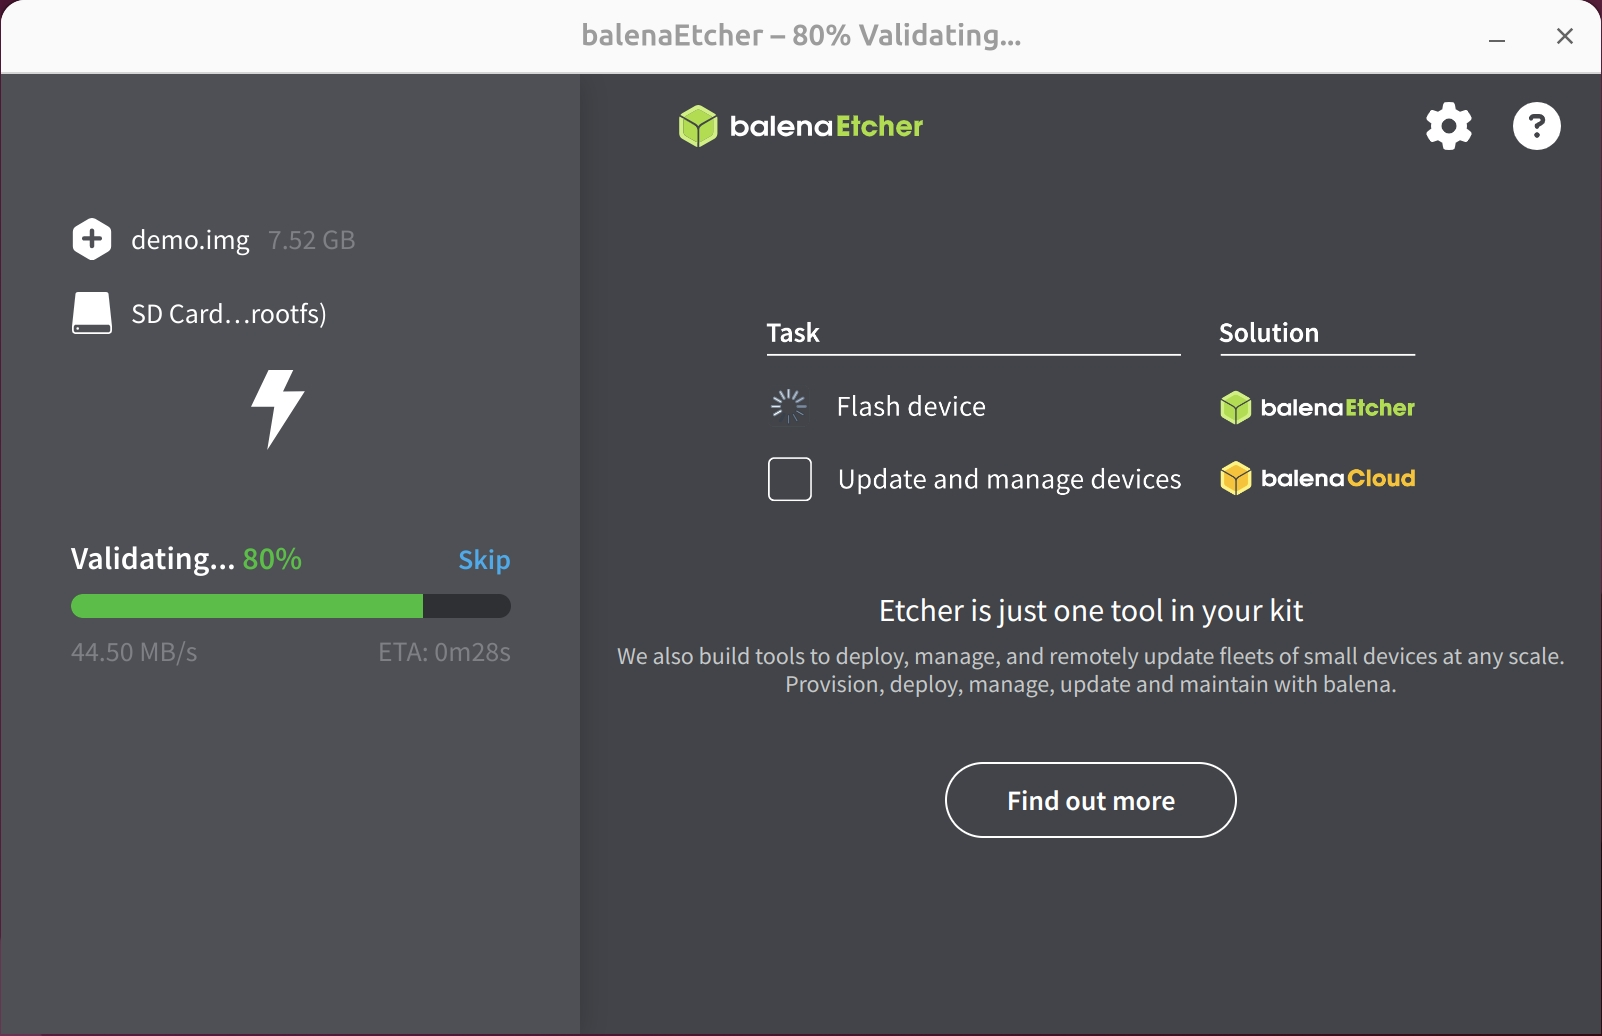
- After successfully writing the system image, close the Etcher application.
System Information
When using our provided system image for the first time, you'll need to log in with the following default credentials:
- Username: radxa
- Password: radxa