Quick Start
This tutorial is designed to help you quickly get started with the Cubie A7A product.
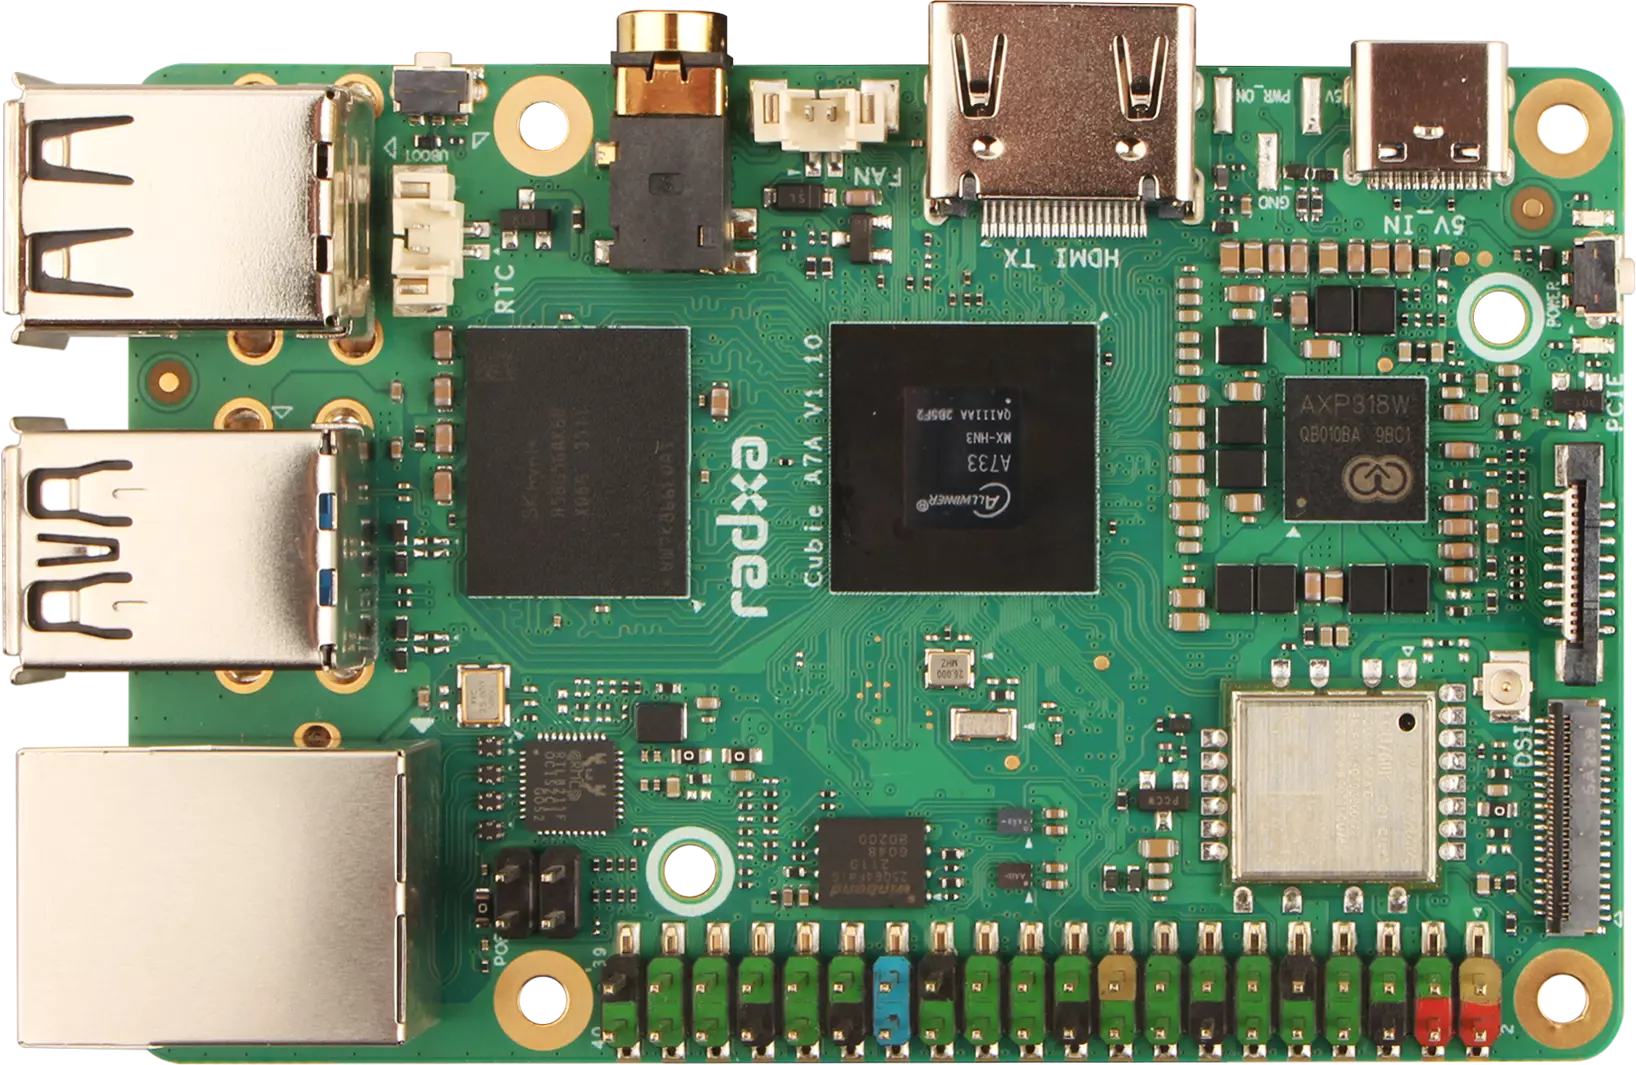
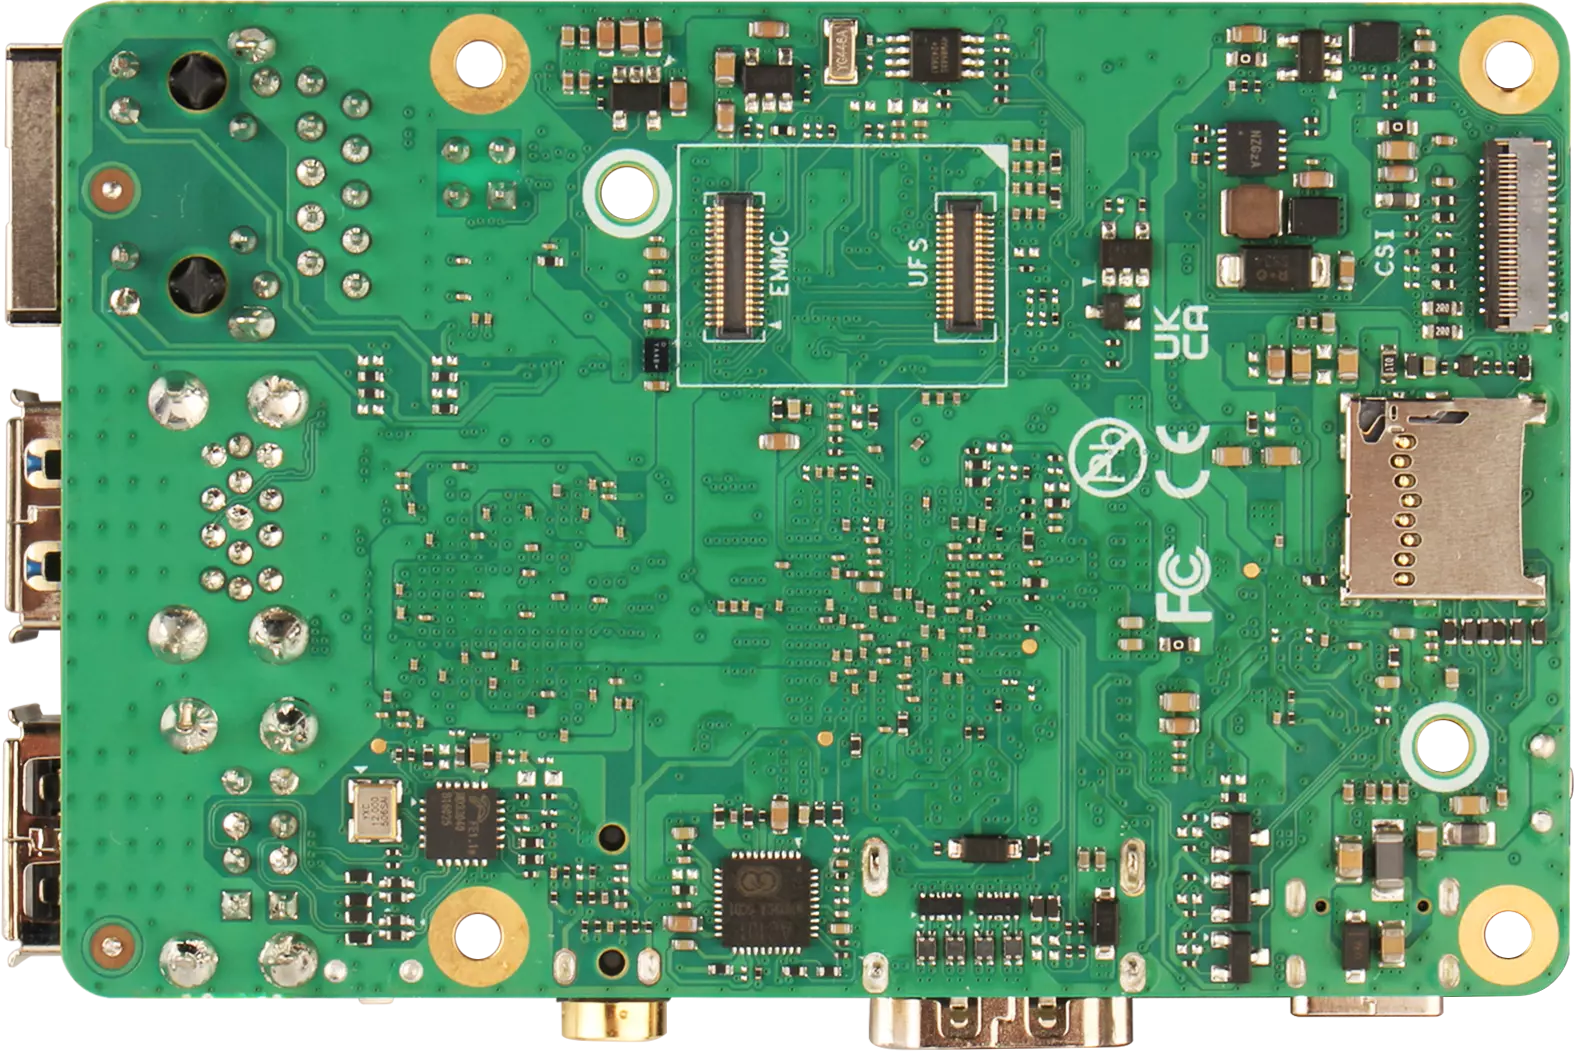
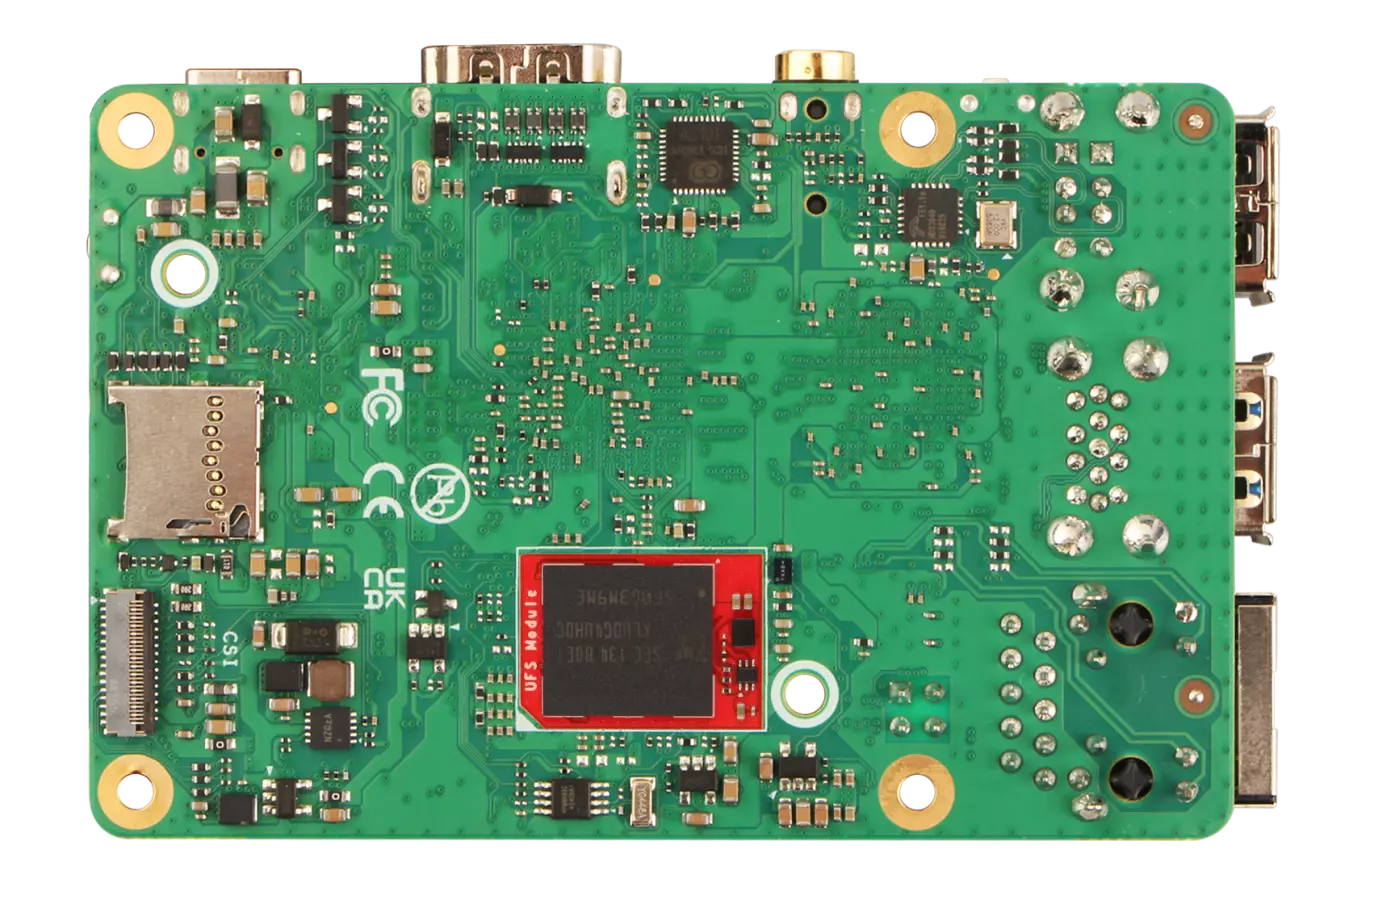
Product Overview
Cubie A7A Front View
Cubie A7A Rear View
Prerequisites
Hardware Requirements
Prepare the following hardware components in advance: Choose one of the optional hardware components
- Mainboard: Radxa Cubie A7A
- Boot media: MicroSD card
- Power adapter: 5V Type-C power adapter
- USB-to-TTL serial cable (optional): For serial debugging and system login
- HDMI cable and monitor (optional): For display output and GUI operation
The Cubie A7A supports 5V power input with PD protocol, and we recommend using a power adapter with at least 3A current to ensure stable operation of all peripherals.
Recommended Accessories:
System Installation
You can install the system by following the tutorials below, based on your boot media and available hardware:
Currently supports booting from MicroSD card, eMMC module and UFS module.
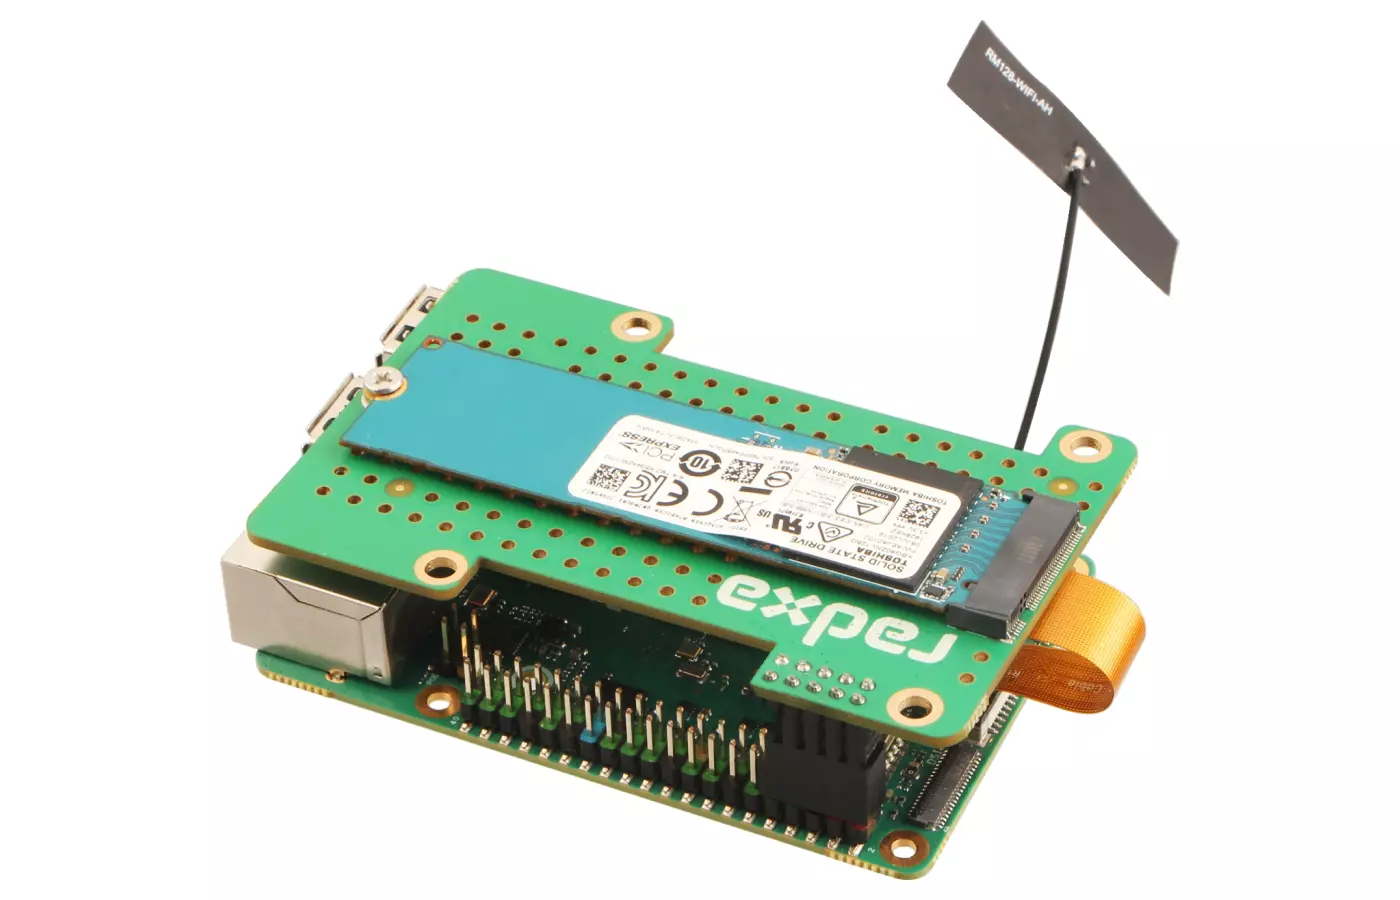
NVMe SSD: Currently recognized and can be used as expanded storage, but cannot be used as boot media.
Booting the System
If multiple boot media are installed in Cubie A7A, the system boot priority is: MicroSD Card > NVMe SSD > UFS Module > eMMC Module
After completing the system installation, install the corresponding boot media (such as MicroSD card / eMMC module / UFS module / NVMe SSD) to the corresponding interface of Cubie A7A.
- MicroSD Card
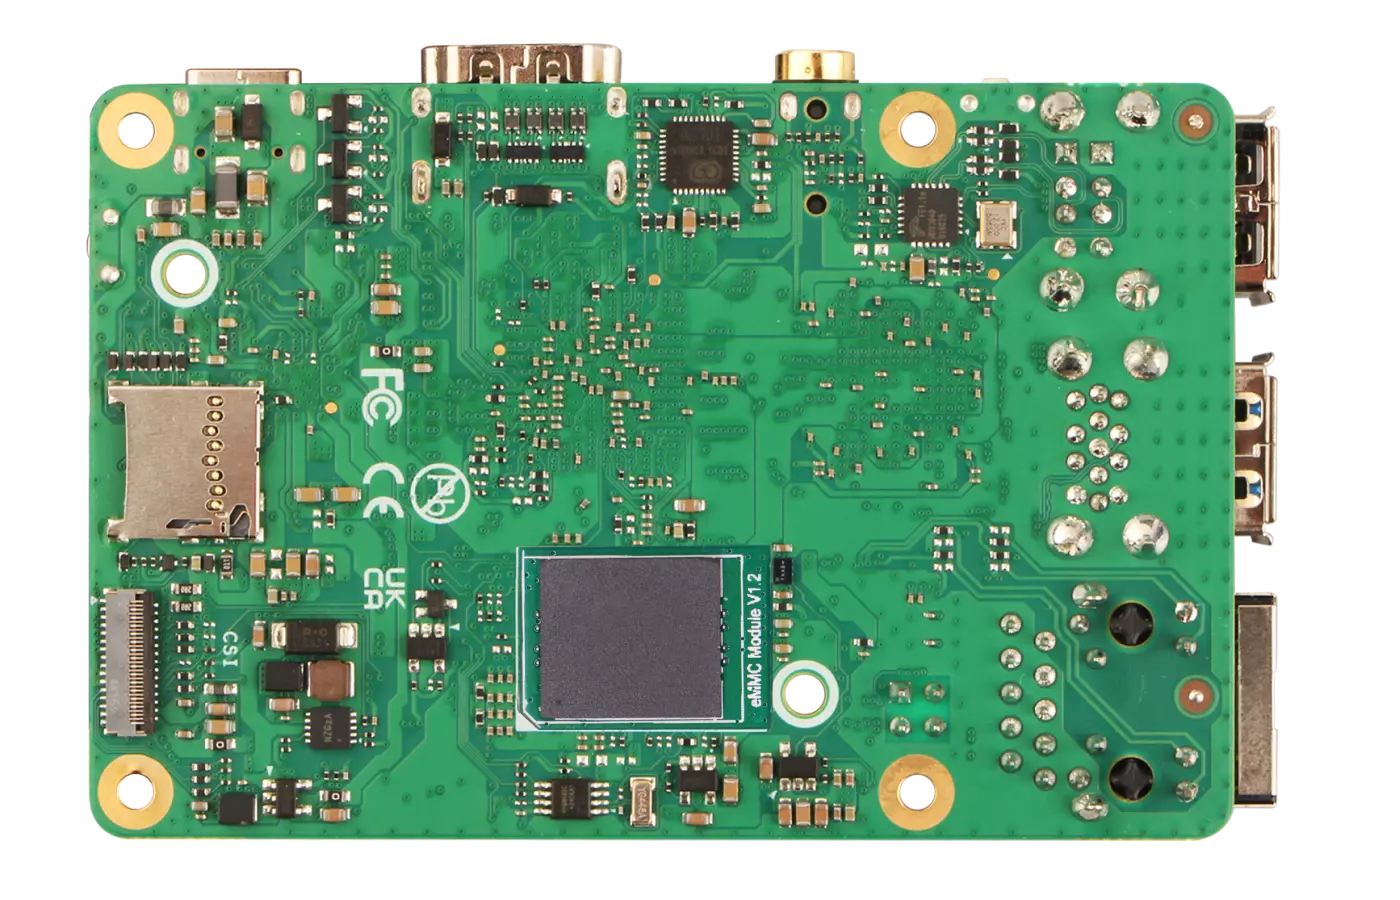
- eMMC Module
- UFS Module
- NVMe SSD
Insert the MicroSD card into the MicroSD card slot of Cubie A7A.
Install the eMMC module to the eMMC and UFS module dual interface of Cubie A7A.
Install the UFS module to the eMMC and UFS module dual interface of Cubie A7A.
Install the PCIe to M.2 M Key HAT expansion board to Cubie A7A, then install the NVMe SSD to the M.2 M Key interface of the PCIe to M.2 M Key HAT expansion board.
After installing the system boot media, power on the Cubie A7A using a 5V Type-C power adapter to start the system.
When the system boots normally, the power LED will light up green and the status LED will blink blue.
System Information
When using our provided system image for the first time, you'll need to log in with the default username and password we've set.
Username: radxa
Password: radxa
System Login
This section mainly introduces how to log in to the Cubie A7A system using a USB-to-TTL serial cable. For serial login, you can refer to the Serial Debugging tutorial.
Using Cubie A7A with a display offers a more intuitive and simpler operation, so it won't be covered here!
Using the System
With Display Mode
With Display Mode means using Cubie A7A with a monitor, which provides a more intuitive and simpler operation experience!
Headless Mode
Headless Mode means using Cubie A7A without a display, operating the system through serial console or SSH login!
For users in headless mode, we provide the following suggestions to help you get familiar with the system quickly!
Network Configuration
You can directly connect an Ethernet cable to Cubie A7A to ensure network connectivity.
Serial Login
You can follow the Serial Debugging tutorial to log in via serial console, obtain the IP address assigned to Cubie A7A by your router, and then log in to the system remotely via SSH.
Note: If you can directly access your router's admin interface to check the IP address assigned to Cubie A7A, you can skip the serial login step and proceed directly to SSH remote login using the assigned IP address.
SSH Remote Access
You can follow the SSH Remote Access tutorial to complete the SSH remote login to Cubie A7A's command-line interface.
VNC Remote Access
You can follow the VNC Remote Access tutorial to complete the VNC remote login to Cubie A7A's graphical interface.