Install System to eMMC Module
This section mainly describes how to install the system to the eMMC module.
Installing the system will format the eMMC module. Please back up any important data in advance!
Hardware Preparation
You need to prepare the following hardware in advance:
- Board: Radxa Cubie A7A
- System boot medium: eMMC Module
- Power/Data cable: USB Type A to Type C data cable
- Power adapter: 5V Type-C power adapter
Recommended accessories:
Hardware Description
The Cubie A7A board supports standard PD protocol 5V power input. A current of 3A or above is recommended to ensure stable operation of all peripherals.
- Power/Data cable
Mainly used to power the Cubie A7A and transfer data. You can use a USB Type A to Type C data cable to flash the system image to the eMMC module.
- Power adapter
After the system image is flashed to the eMMC module, you can use a Type-C power adapter to power the Cubie A7A, avoiding insufficient power issues during later development.
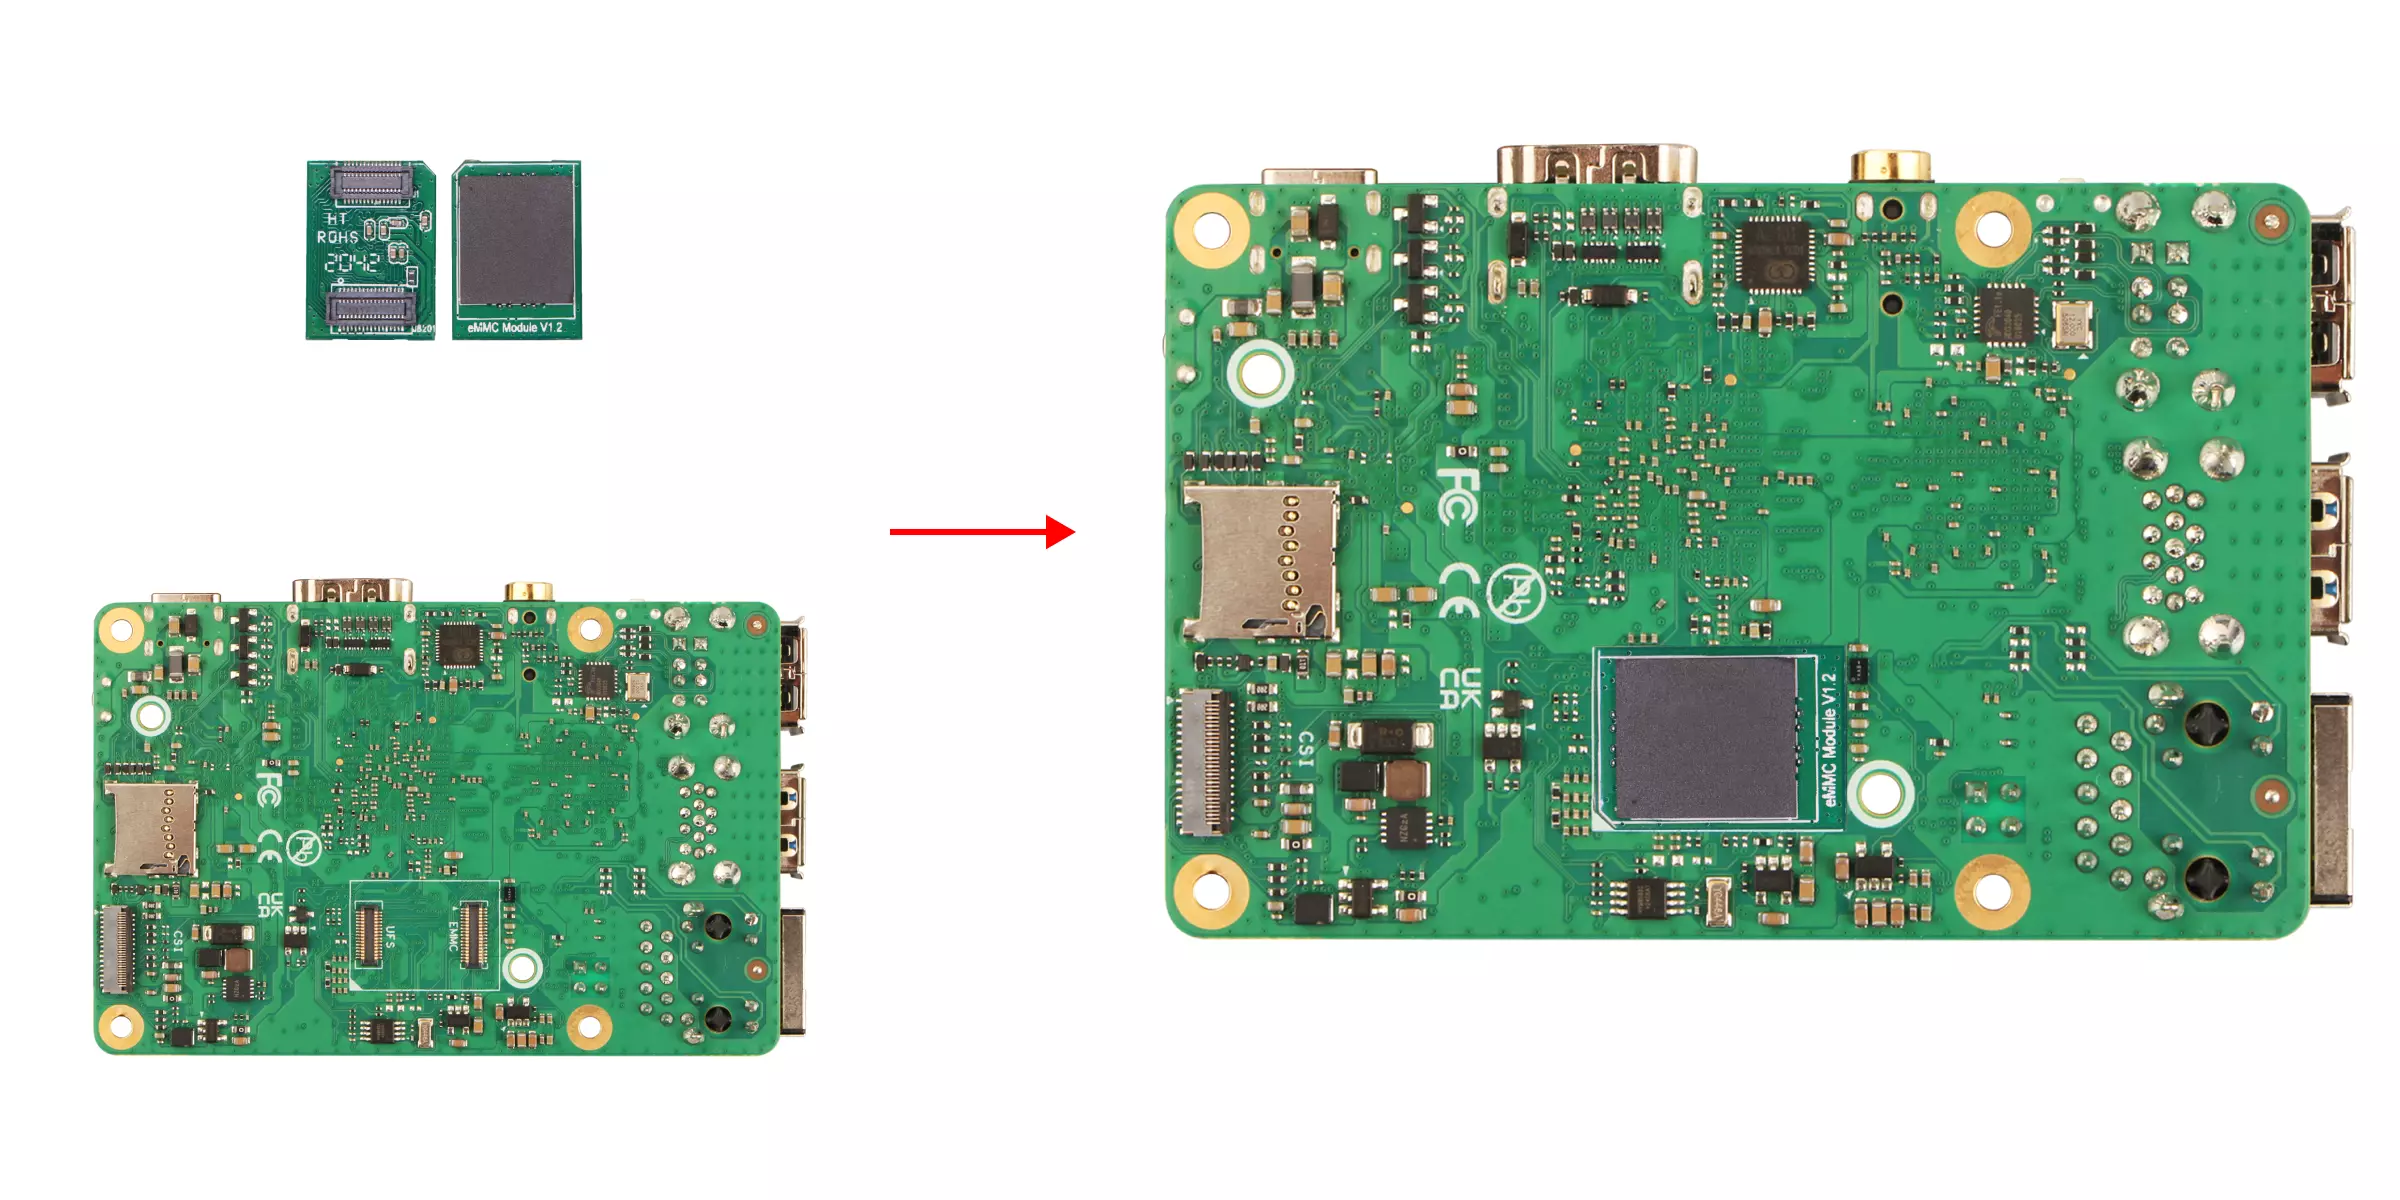
Hardware Connection
Install the eMMC module into the Cubie A7A's eMMC and UFS combo interface.
- Installation steps:
- Ensure the notch on the eMMC module aligns with the direction of the Cubie A7A's eMMC and UFS combo interface.
- Ensure the bottom slot of the eMMC module aligns with the Cubie A7A's eMMC and UFS combo interface.
- Gently press one end of the eMMC module connector until you hear a click, indicating successful installation. Repeat for the other end to ensure the eMMC module is securely installed.
Software Preparation
To flash the Phoenix system image to the eMMC module, you need to use the tool provided by Allwinner. You can download the software from the Resources Download page.
PhoenixSuit: A Windows-based tool that can be used to flash the system image to the eMMC module.
LiveSuit: A Linux-based tool that can be used to flash the system image to the eMMC module.
- Windows
- Linux
Using the PhoenixSuit tool on Windows.
If you are using Windows 11, go to Windows Security Center → Device Security → Core Isolation and turn off all options inside, otherwise you may encounter driver issues or installation failures.
- Install Driver
Extract the downloaded PhoenixSuit archive, go to the PhoenixSuit --> Drivers --> AW_Driver directory;
Run InstallUSBDriver.exe as administrator to install the driver.
Once the driver is successfully installed, you should see the USB Device(VID_1f3a_PID_efe8) device recognized in the device manager.
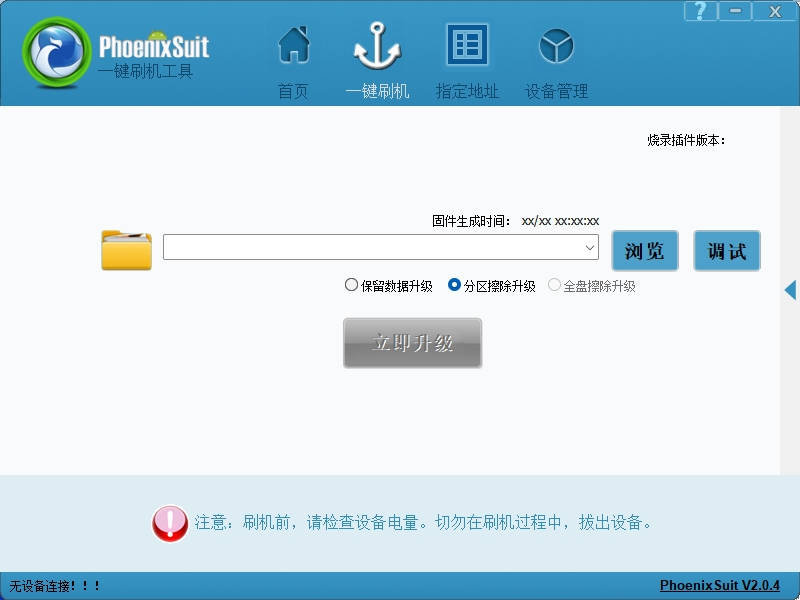
- Using PhoenixSuit Tool
Go to the PhoenixSuit directory and run the PhoenixSuit.exe program.
Using the LiveSuit tool on Ubuntu.
- Install Dependencies
sudo apt update
sudo apt install dkms
- Add File Execute Permission Extract the downloaded archive, go to the LiveSuit directory, and run the following command to add execute permission to the file.
sudo chmod +x LiveSuit.run
- Run LiveSuit.run File
Run the LiveSuit.run file to install the program.
./LiveSuit.run
After the program is successfully installed, you will see information similar to the following output: where user_name is the current logged-in username.
========***********LiveSuit installed completely***********===========
LiveSuit  has been installed in /home/user_name/Bin/livesuit
========***********LiveSuit installed completely***********===========
- Run LiveSuit Tool
Go to the program directory and run the LiveSuit tool with the following command.
sudo ./LiveSuit

If you encounter an error about missing libpng12.so.0, you can run the following commands to resolve it.
mkdir libpng
cd libpng/
wget https://ppa.launchpadcontent.net/linuxuprising/libpng12/ubuntu/pool/main/libp/libpng/libpng_1.2.54.orig.tar.xz
tar -xvf libpng_1.2.54.orig.tar.xz
cd libpng-1.2.54
./configure
make
sudo make install
sudo ln -s /usr/local/lib/libpng12.so.0.54.0 /usr/lib/libpng12.so
sudo ln -s /usr/local/lib/libpng12.so.0.54.0 /usr/lib/libpng12.so.0
Install System
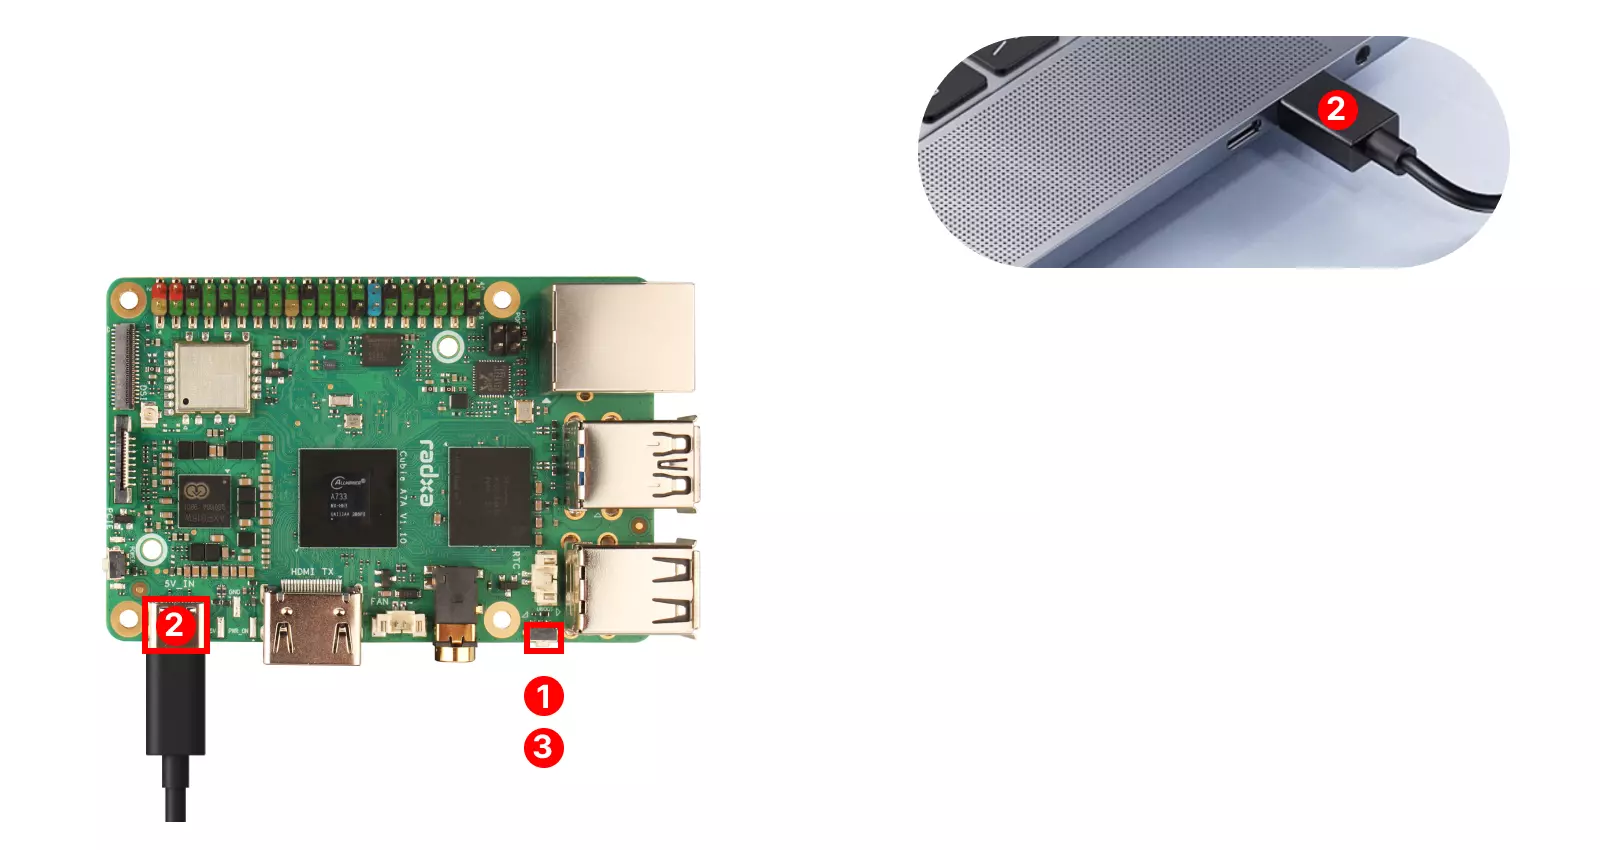
Enter FEL Mode
The board needs to enter FEL mode to flash the system image to the eMMC module.
① : Press and hold the UBOOT button on the Cubie A7A
② : Use the USB Type A to Type C data cable to connect the USB Type C port of the Cubie A7A to the USB Type A port of the PC
③ : Release the UBOOT button on the Cubie A7A
Flash System Image
Open the system image flashing tool provided by Allwinner according to your system platform.
- Windows
- Linux
Open the PhoenixSuit tool on the Linux platform to flash the system image.
- Image Flashing
Download the system image file from the Resources Download page in advance. The system image file needs to be extracted before it can be flashed to the eMMC module.
① : Select the Browse option and locate the corresponding file of the system image (select the actual extracted system file)
② : Select the Full Flash option

If the software does not automatically flash the system to the board, you can make the board re-enter FEL mode and then observe the flashing progress in the software.
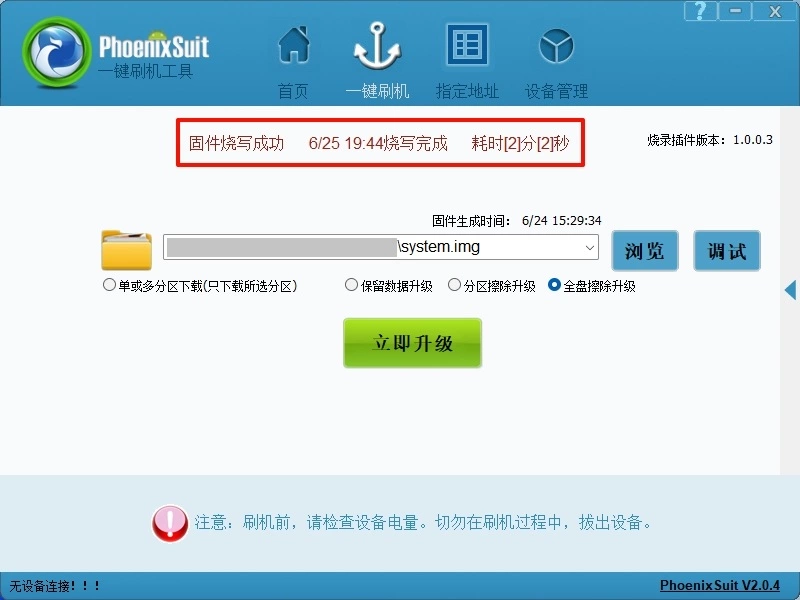
- Flashing Complete
When the software displays Firmware flashing successful, it means the system image has been successfully flashed. You can close the PhoenixSuit tool at this point.
Open the LiveSuit tool on the Linux platform to flash the system image.
- Image Flashing
Download the system image file from the Resources Download page in advance. The system image file needs to be extracted before it can be flashed to the eMMC module.
① : Select the Image option and locate the corresponding file of the system image (select the actual extracted system file)
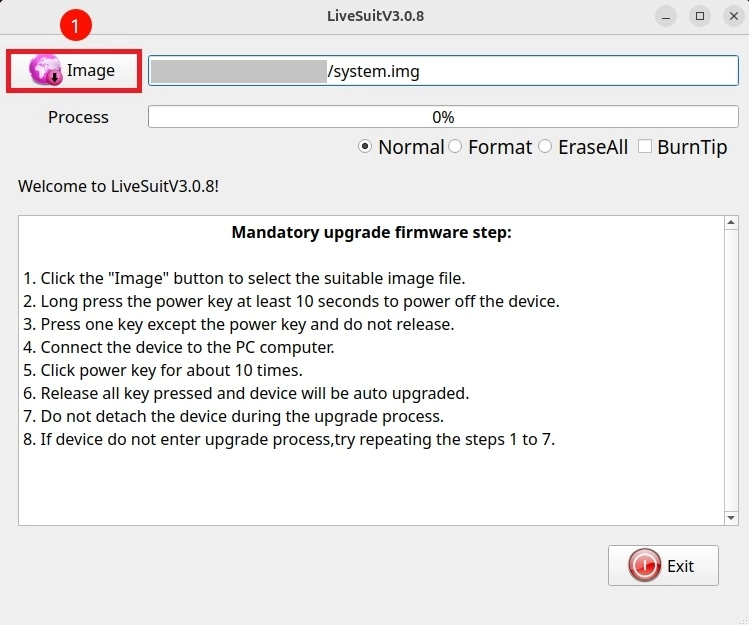
If the software does not automatically flash the system to the board, you can make the board re-enter FEL mode and then observe the information in the terminal output and the progress bar in the software.
- Flashing Complete
When the progress bar shows 100%, it means the system image has been successfully flashed. You can close the LiveSuit tool at this point.

System Information
When you use the system image we provide for the first time, you need to log in to the system using the username and password we set.
- radxa
User account: radxa
User password: radxa