Kernel Development
This tutorial mainly introduces how to compile the kernel. Using the kernel source code we provide, combined with Dev Containers, makes compiling the kernel very convenient.
Prerequisites
- Supported Platforms: Windows / Linux / macOS
- Hardware Requirements: Only supports x86_64 architecture PCs
- Software Requirements: VS Code + Docker
You need to install VS Code and Docker on your PC, and then use Docker to run the build environment.
Download Kernel Source Code
Open the terminal and use the git clone command to download the kernel source code.
git clone --recurse-submodules https://github.com/radxa-pkg/linux-a733.git
Development Environment
Install Extension Plugin
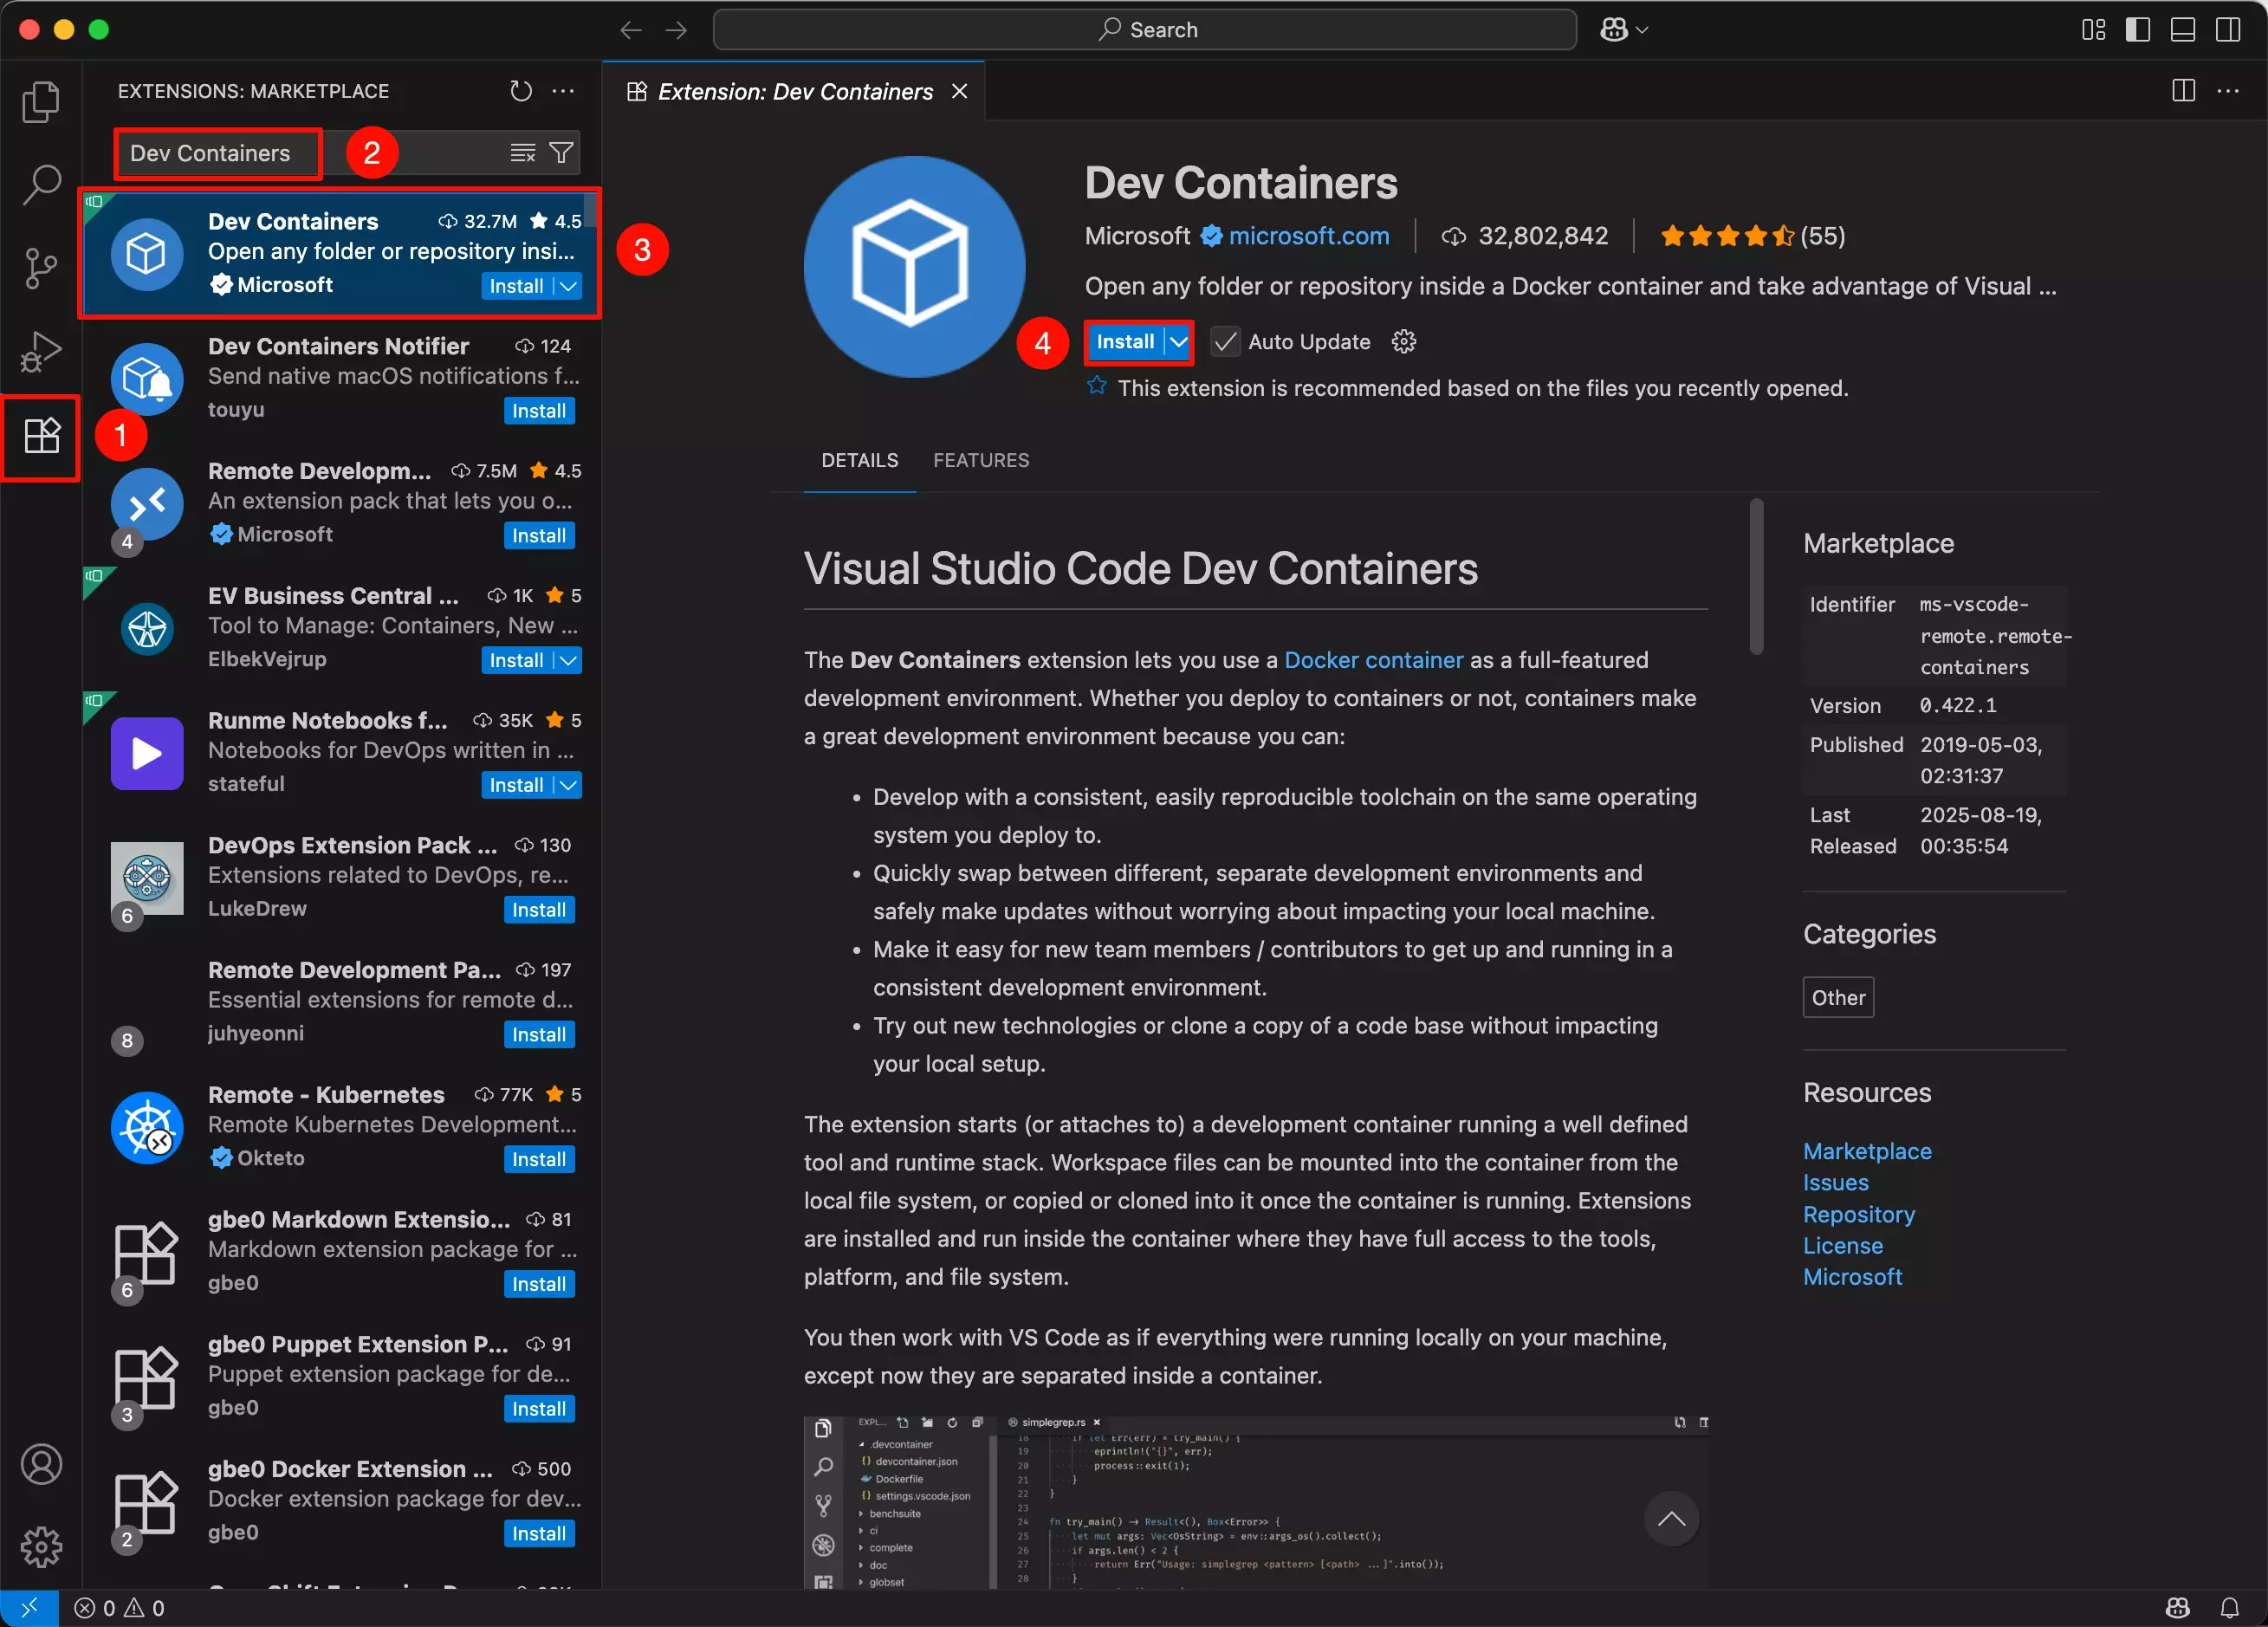
You need to install the Dev Containers extension in VS Code.
① : Click the Extensions option
② : Search for Dev Containers
③ : Select the Dev Containers extension
④ : Click the Install option to install the Dev Containers extension
Start Development Environment
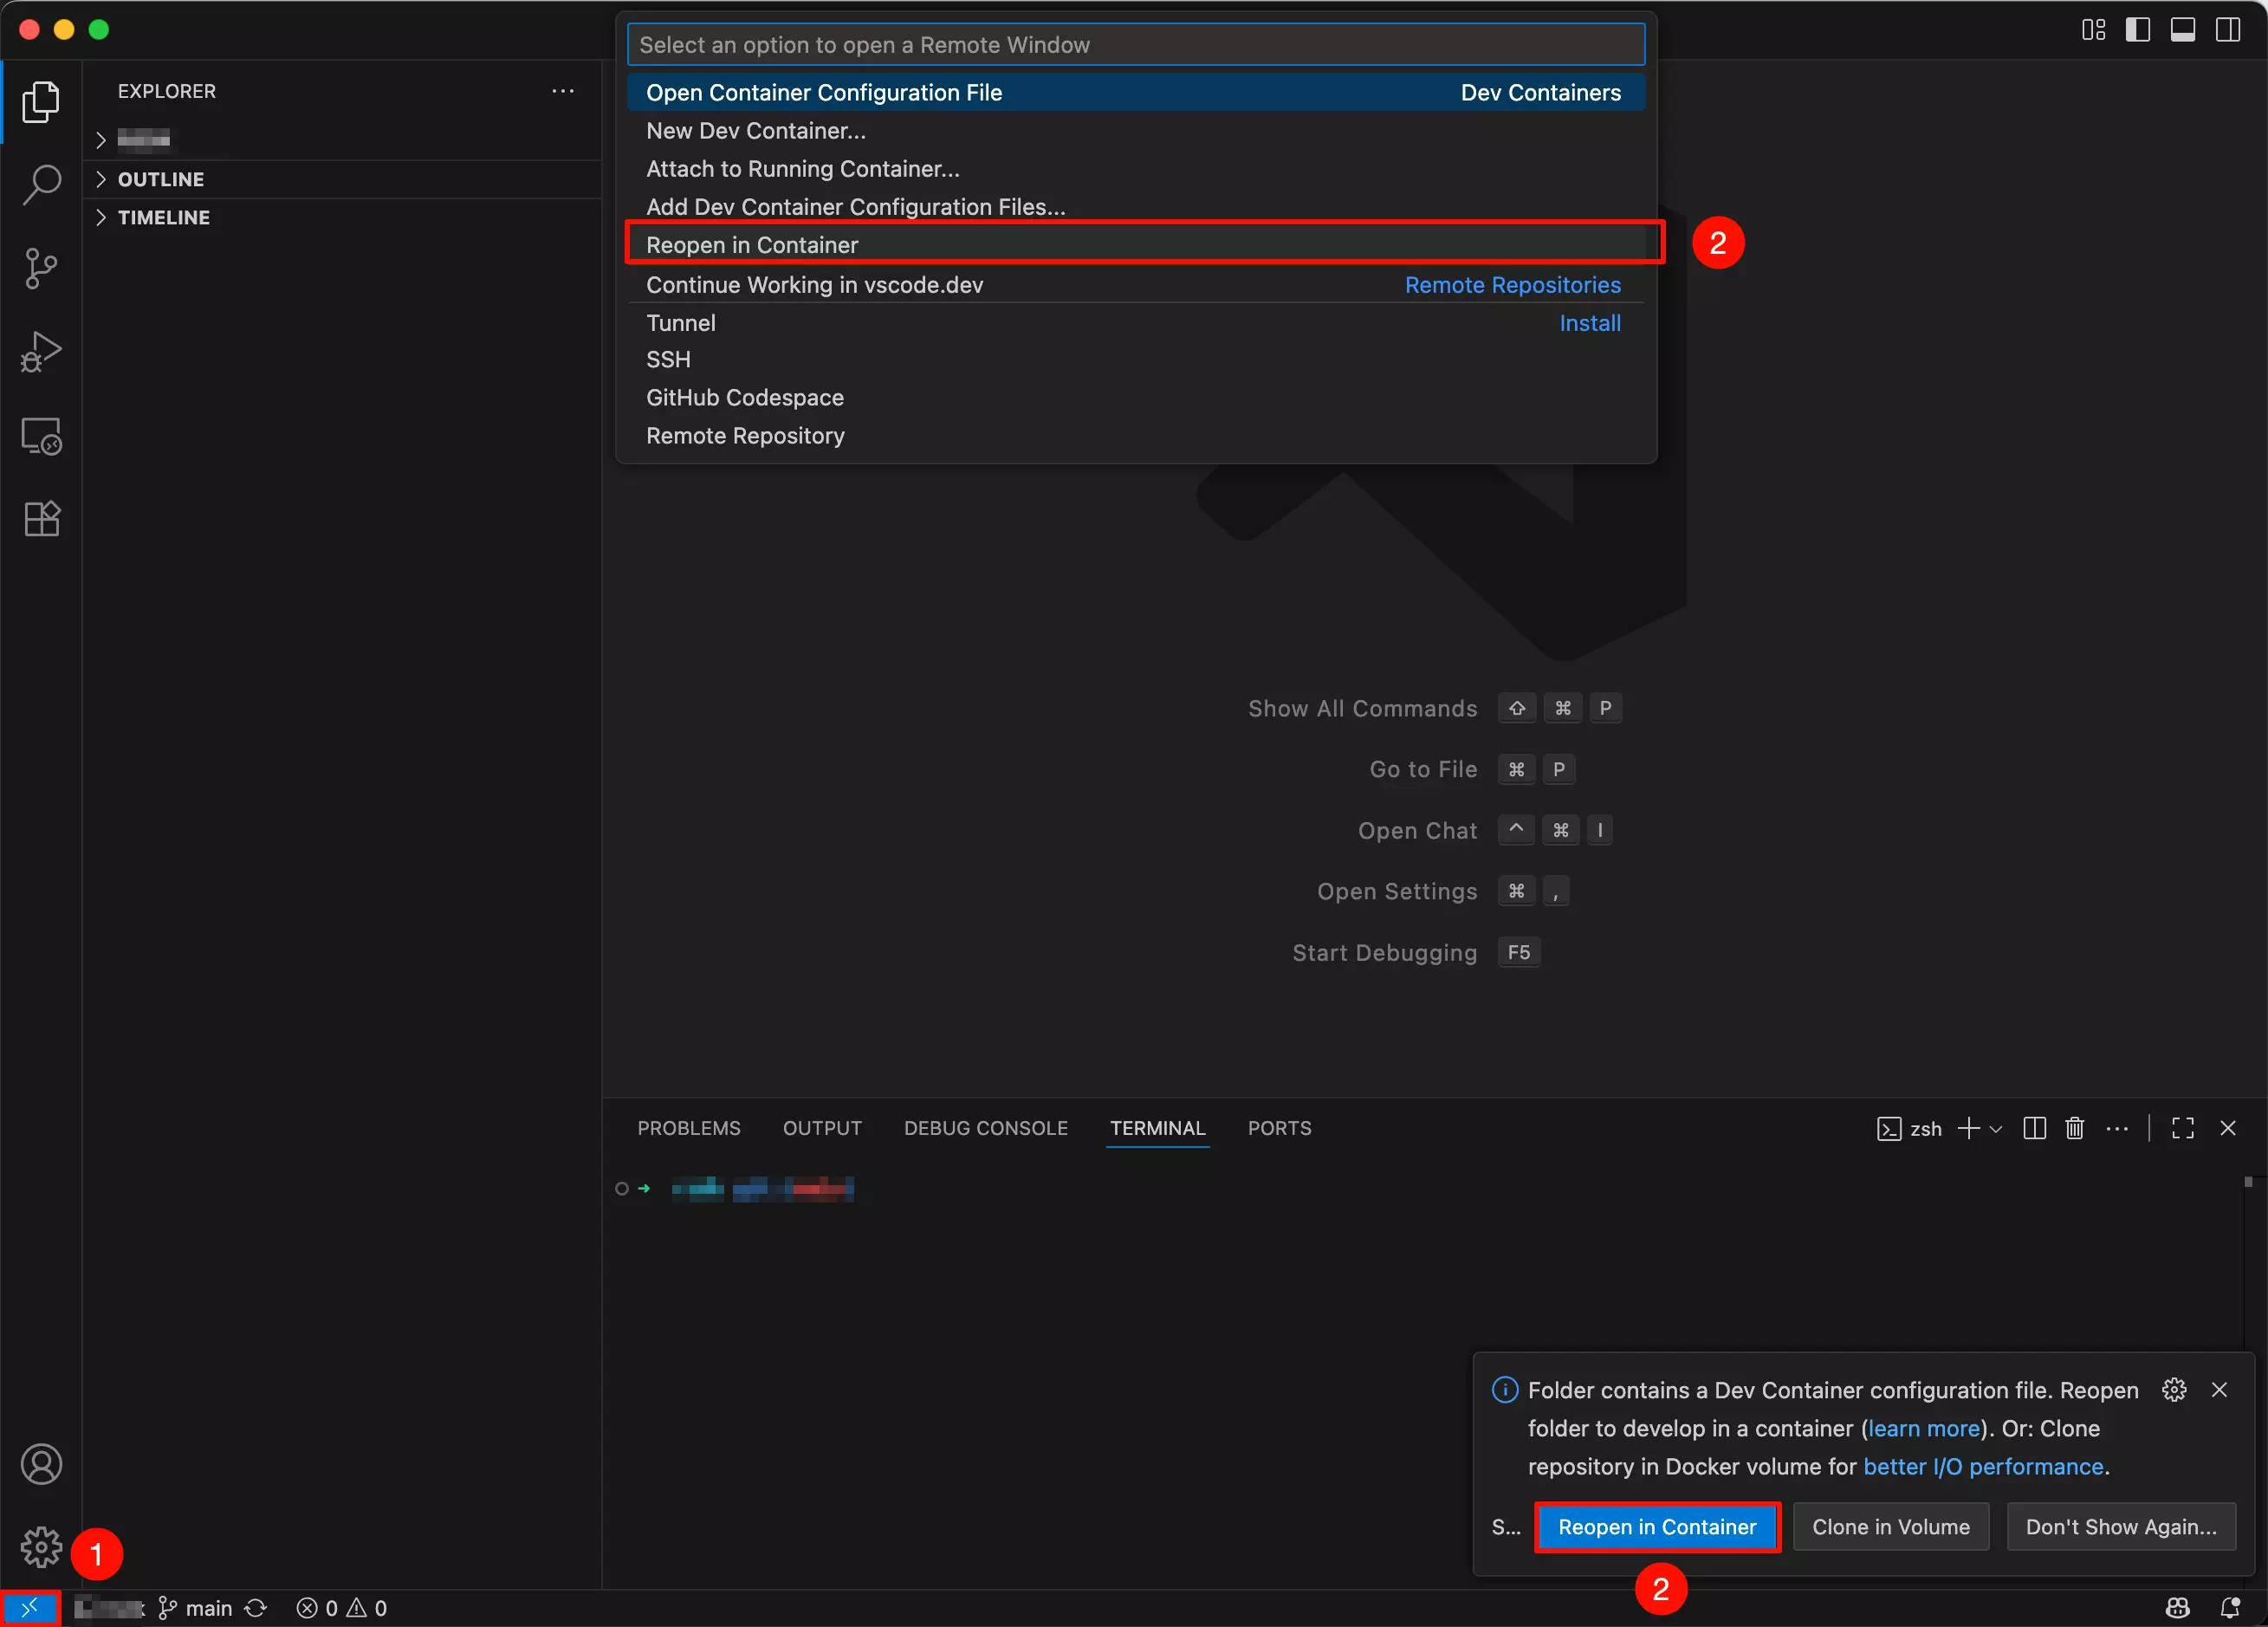
Open the kernel source code directory: Generally, the Dev Container extension will automatically detect the configuration files in the folder and prompt you to reopen the container development environment.
When starting the development environment for the first time, Dev Containers will automatically download and install dependencies. Please be patient and wait for the process to complete.
①: Click the Remote option in the bottom left corner
②: Select the Reopen in Container option
Compile Kernel
After starting the development environment, navigate to the kernel source code directory and use the make deb command to compile the kernel.
make deb
Once the compilation is successful, the terminal will output the path to the generated