Quick Start
This tutorial aims to help you quickly get started with the Android system on the Cubie A7A.
Product Overview
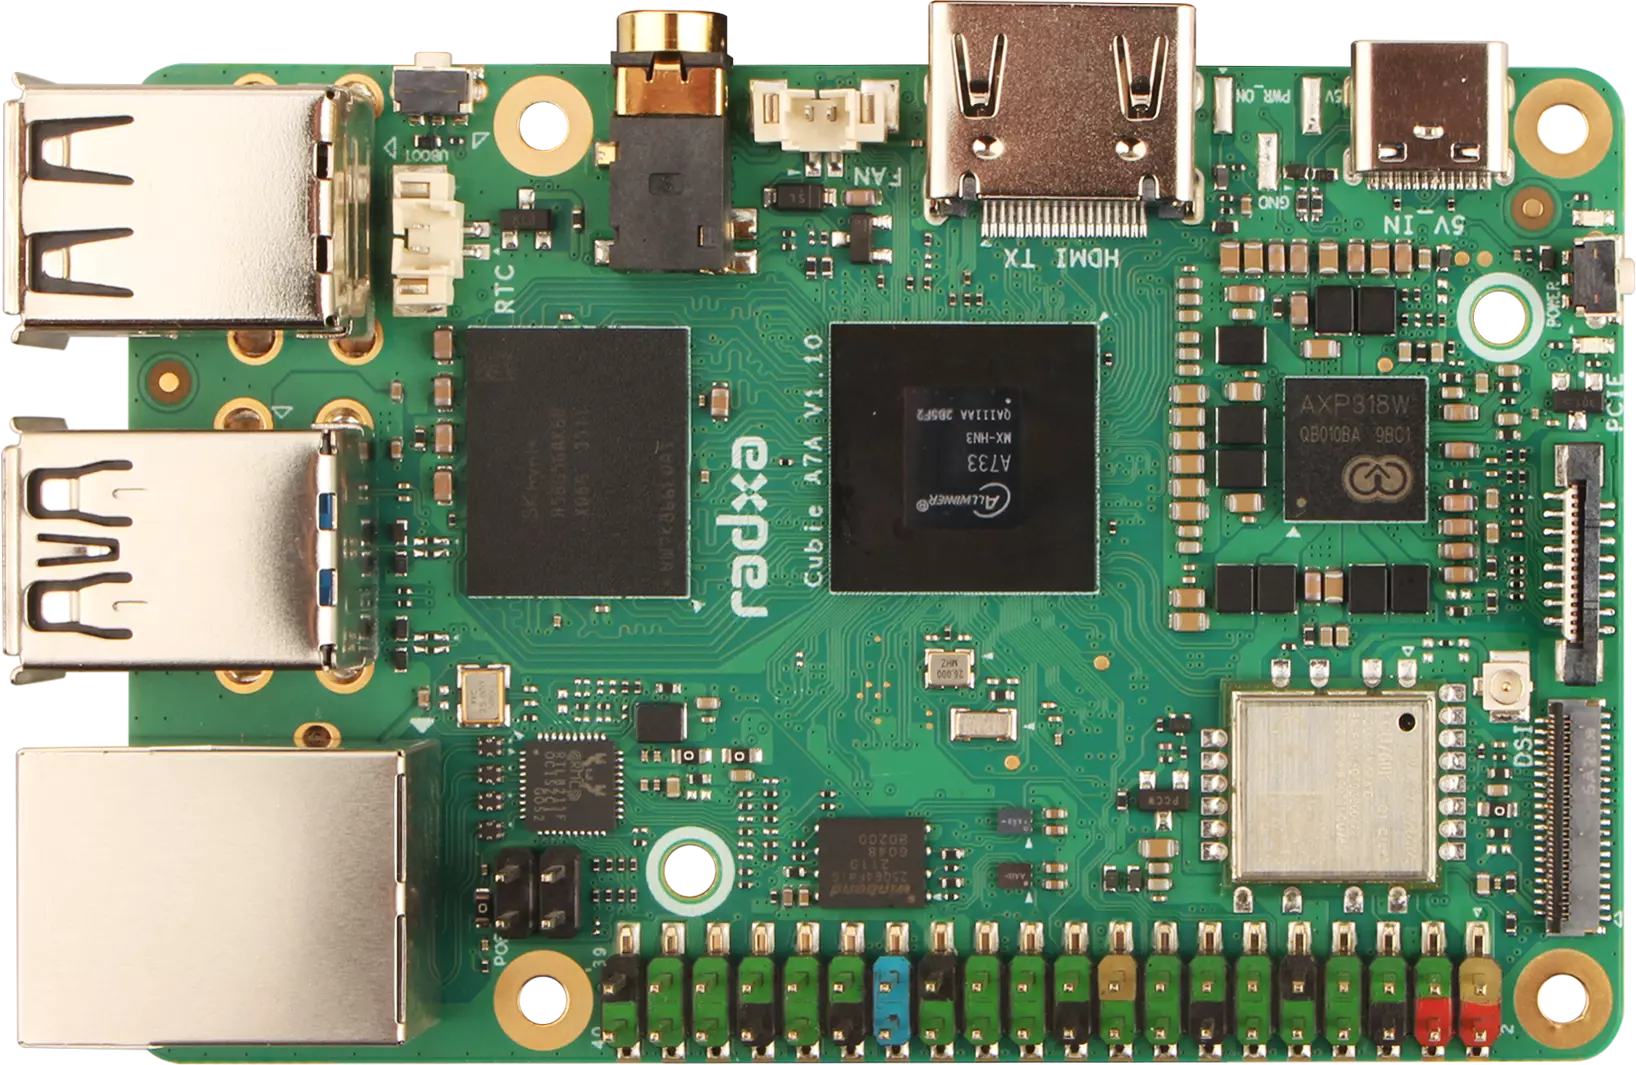
Front of Cubie A7A
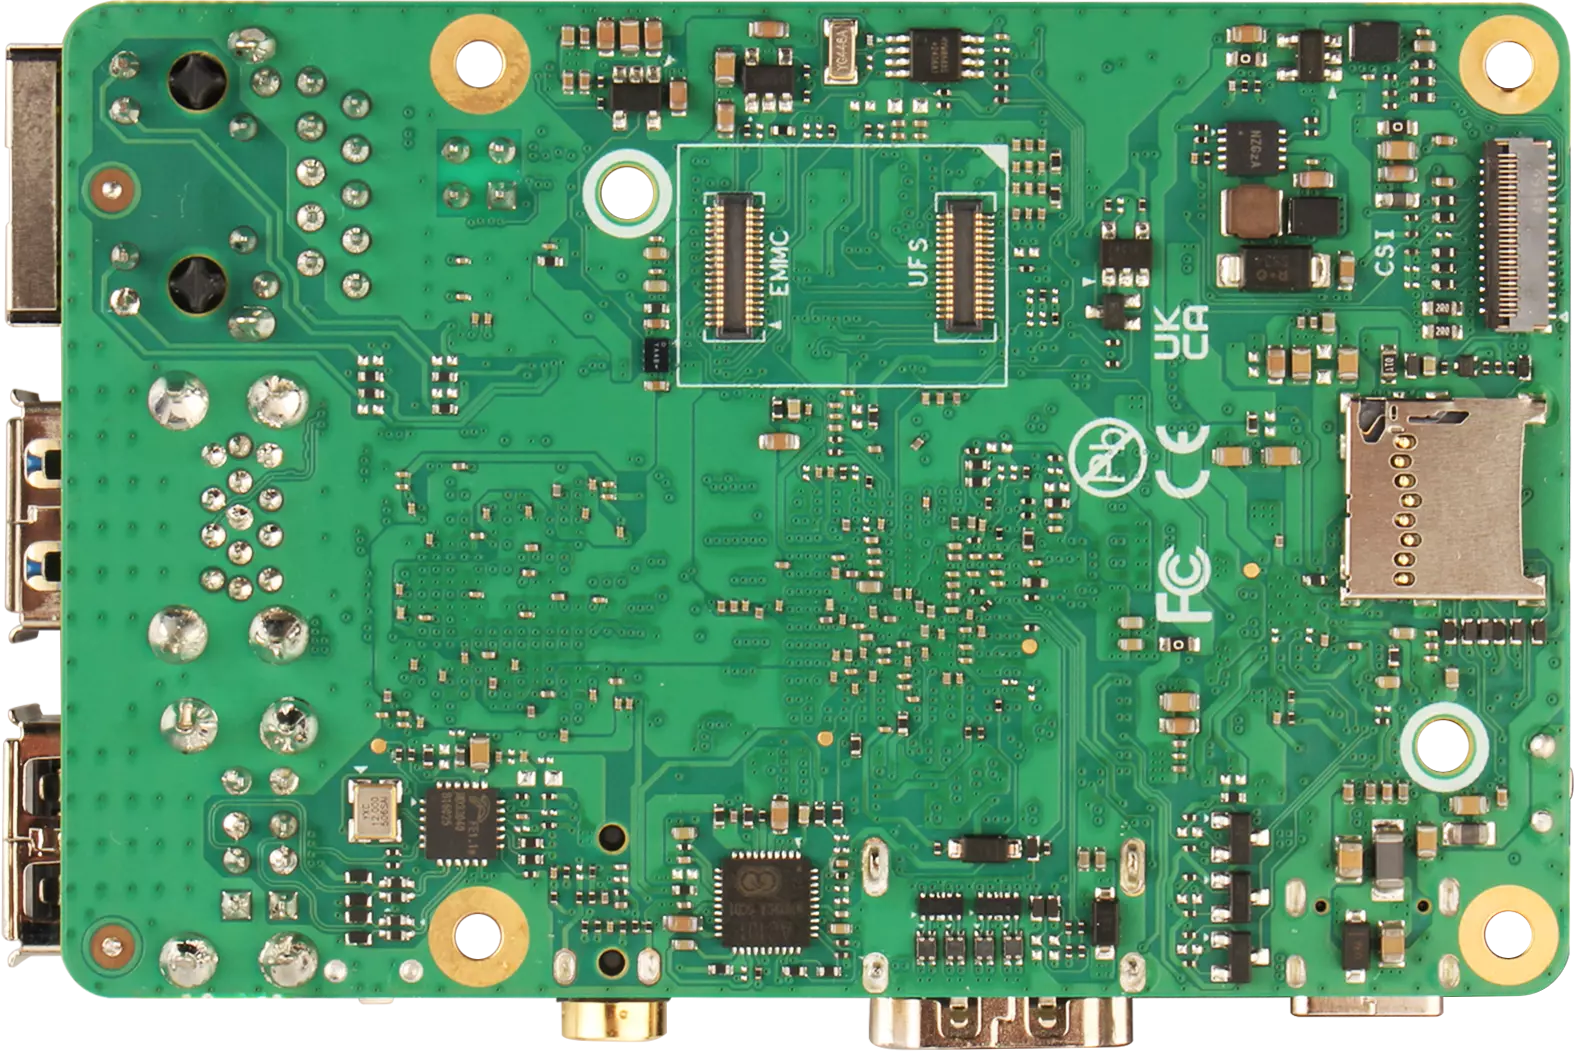
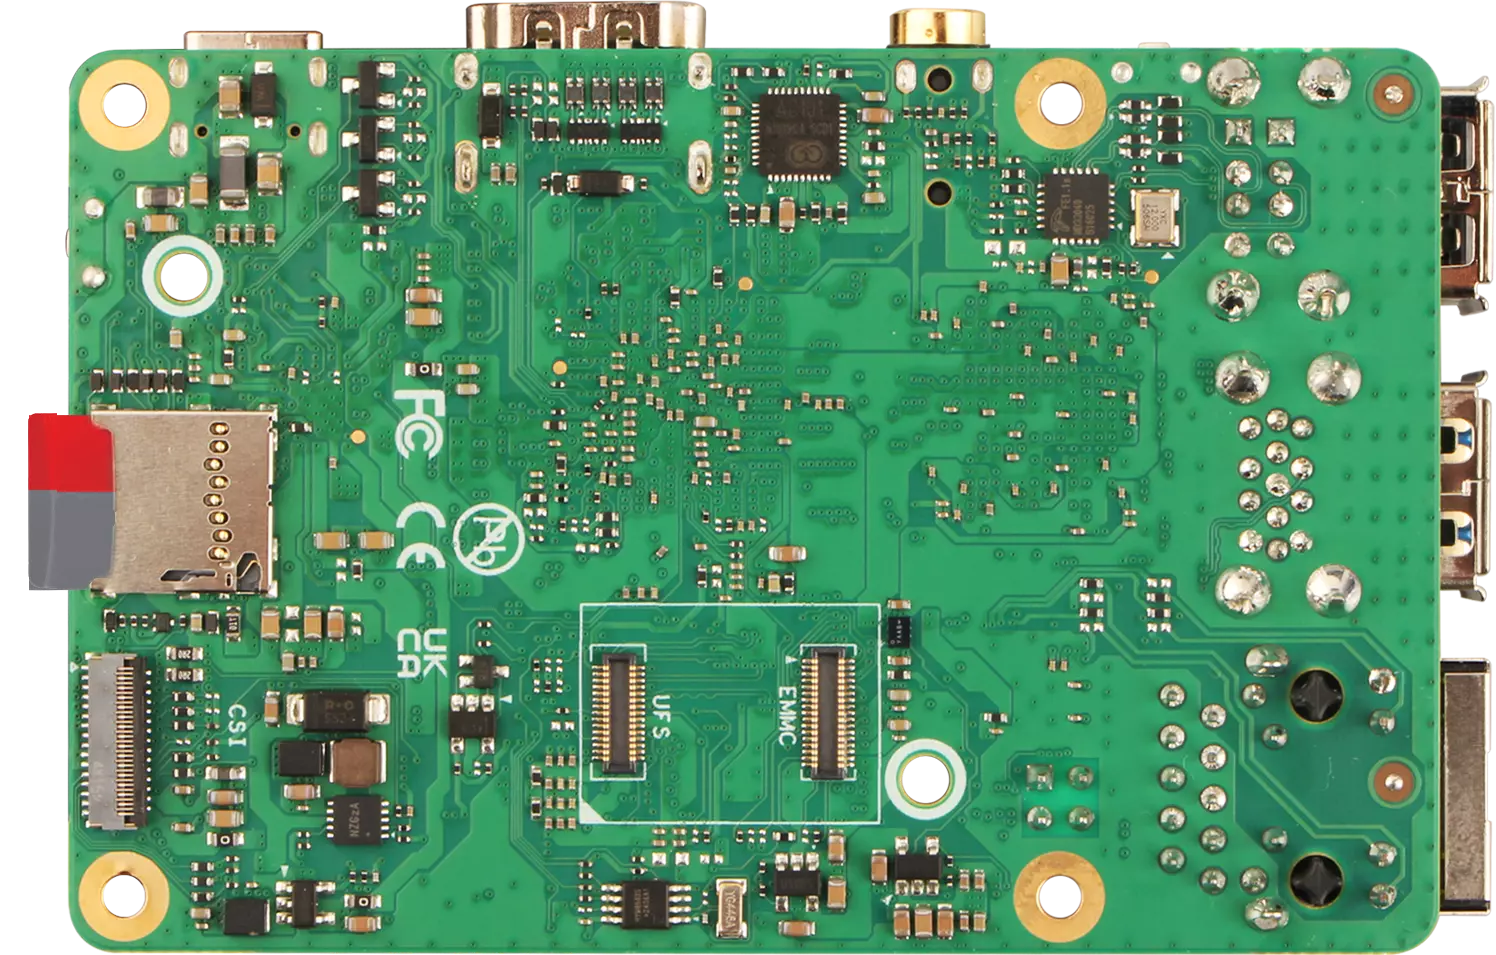
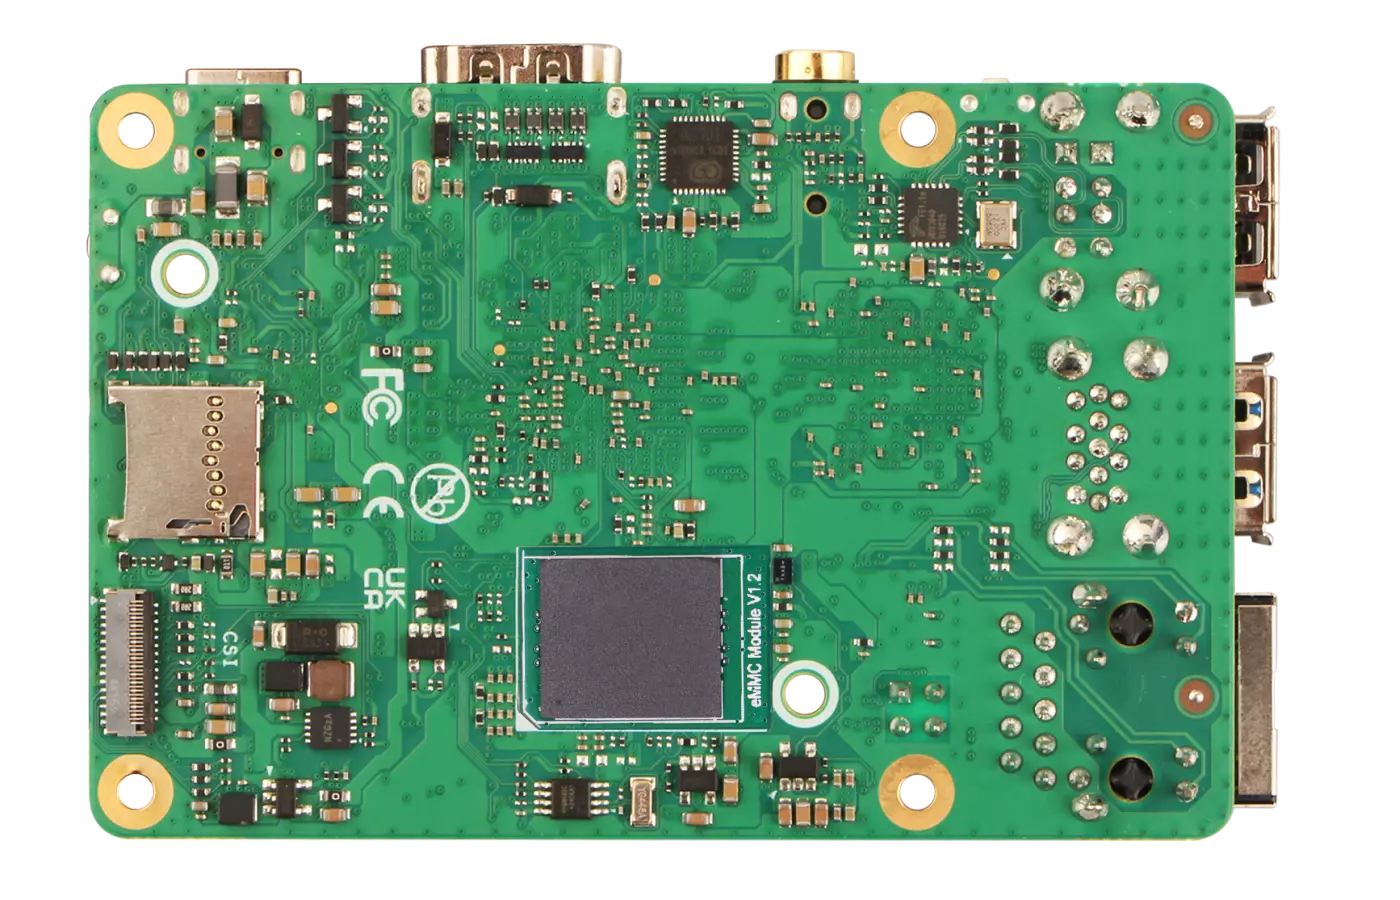
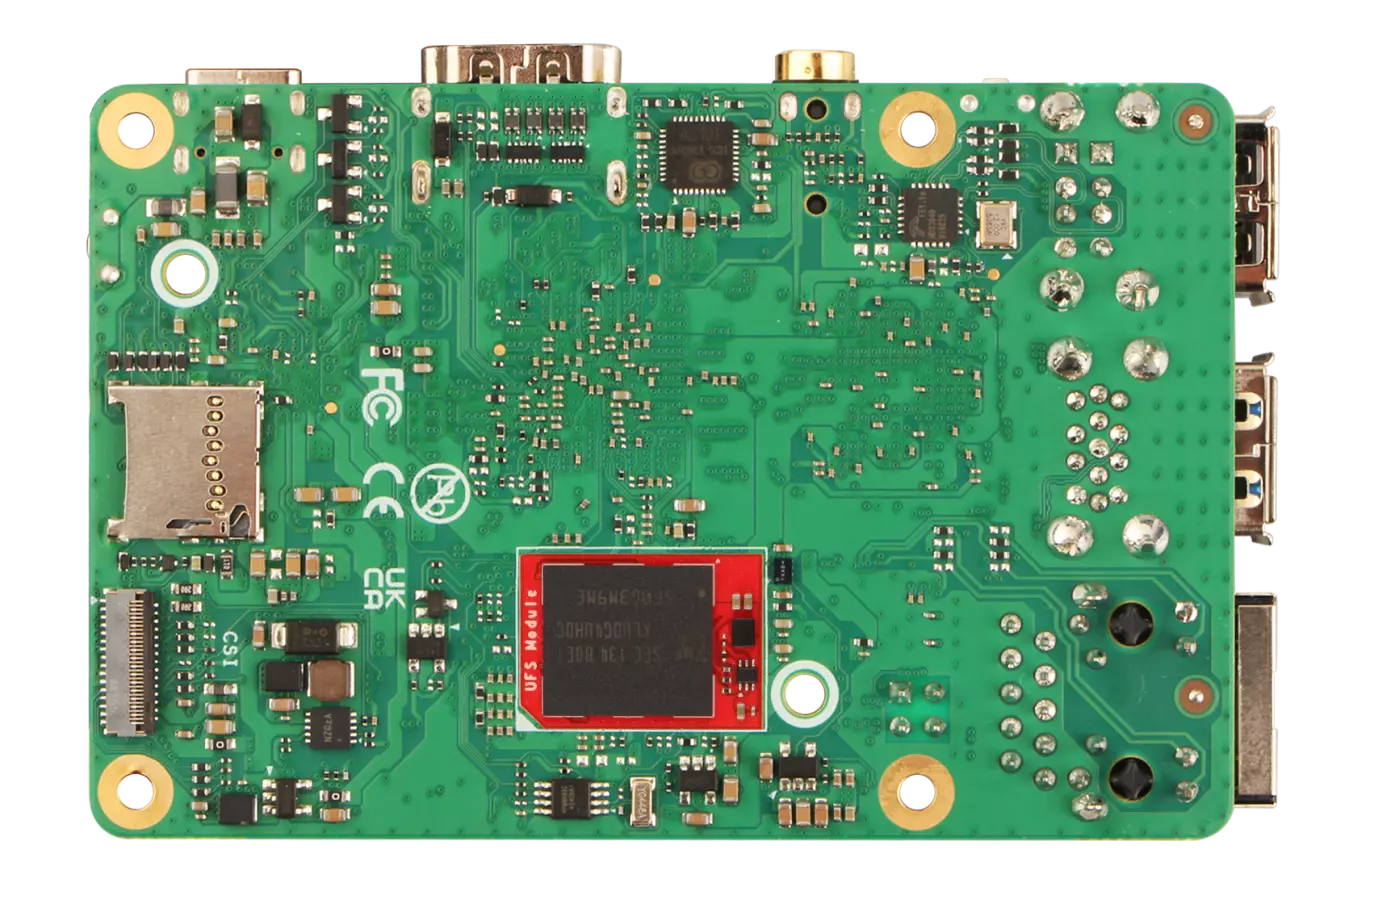
Back of Cubie A7A
Prerequisites
Hardware Preparation
You need to prepare the following hardware devices in advance. Optional hardware is not mandatory!
- Mainboard: Radxa Cubie A7A
- System boot medium: Supports microSD card, eMMC / UFS module (choose one system boot medium)
- Power/Data cable: USB Type A to Type C data cable
- Power adapter: 5V Type-C power adapter
- USB serial data cable (optional): For serial debugging and system login
- HDMI cable and monitor (optional): For displaying the system interface and graphical operations
Recommended accessories:
Hardware Description
The Cubie A7A mainboard supports standard PD protocol 5V power input. A current of 3A or above is recommended to ensure stable operation of all peripherals.
- System Boot Medium
Used to boot the Cubie A7A system. Supports microSD card, eMMC / UFS module (choose one system boot medium).
- Power/Data Cable
Used to power the Cubie A7A and transfer data. A USB Type A to Type C data cable can be used to flash the system image to the eMMC / UFS module.
- Power Adapter
After the system is successfully installed, a Type-C power adapter can be used to power the Cubie A7A, avoiding power insufficiency during later development.
- USB Serial Data Cable
Used for serial debugging and system login. Through serial debugging, you can view system boot logs and perform command-line operations after logging in, suitable for developers.
- HDMI Cable and Monitor
Used to display the system interface and perform graphical operations, suitable for beginners.
Install System
You can refer to the following tutorial to install the system based on your system boot medium and available hardware:
Boot System
If multiple system boot media are installed on the Cubie A7A, the system boot priority is: microSD card > eMMC or UFS module.
After installing the system, insert the corresponding system boot medium (e.g., microSD card, eMMC module, UFS module) into the appropriate interface on the Cubie A7A.
- microSD Card
- eMMC Module
- UFS Module
Insert the microSD card into the microSD card slot of the Cubie A7A.
Insert the eMMC module into the eMMC and UFS combo interface of the Cubie A7A.
Insert the UFS module into the eMMC and UFS combo interface of the Cubie A7A.
After installing the system boot medium, use a 5V Type-C power adapter to power the Cubie A7A to boot the system.
When the system boots successfully, the power indicator will light up green, and the status indicator will blink blue.
Login to the System
This section mainly introduces how to log in to the system on the Cubie A7A using a USB serial data cable. Refer to the Serial Debugging tutorial for details.
When using the Cubie A7A with a monitor, the operation is more intuitive and straightforward, so it is not covered here!
Use the System
Screen Mode
Screen mode refers to using the Cubie A7A with a monitor, making the operation more intuitive and straightforward!
Headless Mode
Headless mode refers to using the Cubie A7A without a monitor, where operations are performed by logging into the system via serial debugging or ADB debugging!