OpenCV Example
This document demonstrates OpenCV image preview, camera access, and computer vision examples.
Image Preview
Learn how to read and display images and camera feeds.
Image Preview
Read and display an image.
Steps to run the example:
- Create a new file
preview_image.py - Copy the code into
preview_image.py - Run the example using
python3 preview_image.py - Click on the preview window and press 'q' to exit the program
preview_image.py
#!/usr/bin/env python3
# -_- encoding: utf-8 -_-

import cv2

# Read the image

image_path = './radxa_logo.png' # Replace with your image path
image = cv2.imread(image_path)

# Check if the image is loaded successfully

if image is None:
print("Failed to load image. Please check the file path.")
else: # Display the image in a window
while True:
cv2.imshow('Preview', image) # Wait for 'q' key to quit
if cv2.waitKey(1) & 0xFF == ord('q'):
break
cv2.destroyAllWindows()
Preview effect:

Camera Preview
Access and display the camera feed in real-time.
Steps to run the example:
- Create a new file
preview_camera.py - Copy the code into
preview_camera.py - Run the example using
python3 preview_camera.py - Click on the preview window and press 'q' to exit the program
In the code, cv2.VideoCapture(0) opens the default camera at /dev/video0. If you have multiple cameras or your camera device file is different, please modify this value accordingly.
preview_camera.py
#!/usr/bin/env python3

# -_- encoding: utf-8 -_-

import cv2

# Open the camera
video_capture = cv2.VideoCapture(0)

while True:
    # Read a frame from the camera
    ret, frame = video_capture.read()

    # Check if the frame is read successfully
    if not ret:
        print("Failed to read frame. Please check the camera connection.")
        break

    # Display the frame in a window
    cv2.imshow('Preview', frame)

    # Wait for 'q' key to quit
    if cv2.waitKey(1) & 0xFF == ord('q'):
        break

# Release the camera and close the window
video_capture.release()
cv2.destroyAllWindows()
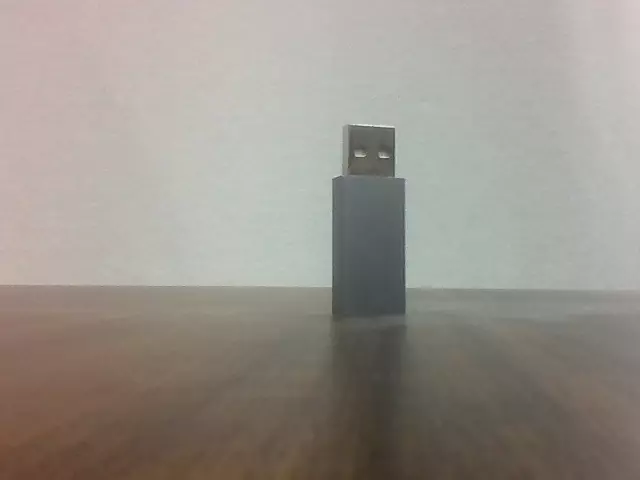
Preview effect:
Harris Corner Detection
Harris Corner Detection is a classic algorithm for detecting corners in images, which are important features in computer vision.
Image-based Detection
Read an image and perform Harris corner detection.
Steps to run the example:
- Create a new file
harris_image.py - Copy the code into
harris_image.py - Run the example using
python3 harris_image.py - Click on the preview window and press 'q' to exit the program
harris_image.py
#!/usr/bin/env python3
# -_- encoding: utf-8 -_-

import cv2
import numpy as np

# Harris corner detection parameters
block_size = 2
ksize = 3
k = 0.04
threshold = 0.01

# Read the image
image_path = './radxa_logo.png'  # Replace with your image path
image = cv2.imread(image_path)

# Check if the image is loaded successfully
if image is None:
    print("Failed to load image. Please check the file path.")
else:
    # Convert to grayscale
    gray = cv2.cvtColor(image, cv2.COLOR_BGR2GRAY)
    gray = np.float32(gray)

    # Apply Harris corner detection
    dst = cv2.cornerHarris(gray, block_size, ksize, k)

    # Dilate corner points for better visualization
    dst = cv2.dilate(dst, None)

    # Mark corners in red
    image[dst > threshold * dst.max()] = [0, 0, 255]

    # Display the result
    while True:
        cv2.imshow('Harris Corners', image)
        # Wait for 'q' key to quit
        if cv2.waitKey(1) & 0xFF == ord('q'):
            break

cv2.destroyAllWindows()
Preview effect:

Real-time Detection
Access camera feed and perform Harris corner detection in real-time.
Steps to run the example:
- Create a new file
harris_camera.py - Copy the code into
harris_camera.py - Run the example using
python3 harris_camera.py - Click on the preview window and press 'q' to exit the program
In the code, cv2.VideoCapture(0) opens the default camera at /dev/video0. If you have multiple cameras or your camera device file is different, please modify this value accordingly.
harris_camera.py
#!/usr/bin/env python3

# -_- encoding: utf-8 -_-

import cv2
import numpy as np

# Harris corner detection parameters

block_size = 2
ksize = 3
k = 0.04
threshold = 0.01

# Initialize the camera

cap = cv2.VideoCapture(0)

# Check if the camera is opened successfully

if not cap.isOpened():
print("Error: Could not open camera.")
exit()

while True: # Capture frame-by-frame
ret, frame = cap.read()

    # If frame is read correctly, ret is True
    if not ret:
        print("Error: Failed to capture frame.")
        break

    # Create a copy of the frame for processing
    display_frame = frame.copy()

    # Convert to grayscale
    gray = cv2.cvtColor(frame, cv2.COLOR_BGR2GRAY)
    gray = np.float32(gray)

    # Apply Harris corner detection
    dst = cv2.cornerHarris(gray, block_size, ksize, k)

    # Dilate corner points for better visualization
    dst = cv2.dilate(dst, None)

    # Mark corners in red
    display_frame[dst > threshold * dst.max()] = [0, 0, 255]

    # Display the resulting frame
    cv2.imshow('Harris Corners - Camera', display_frame)

    # Press 'q' to exit
    if cv2.waitKey(1) & 0xFF == ord('q'):
        break

# When everything done, release the capture and close windows

cap.release()
cv2.destroyAllWindows()
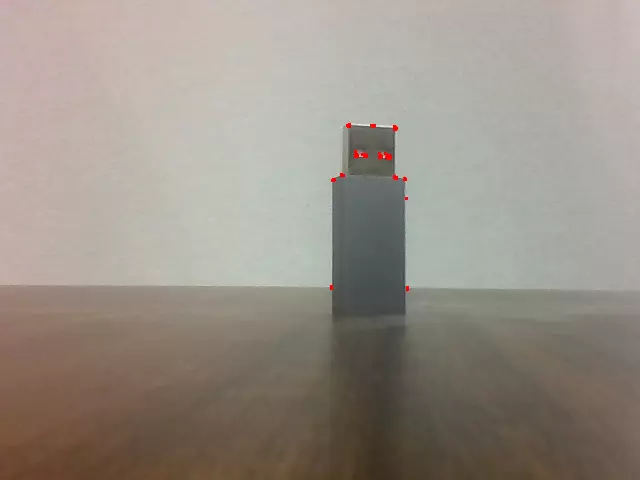
Preview effect:
Shi-Tomasi Corner Detection
Shi-Tomasi Corner Detection is an improved algorithm for corner detection in images, based on Harris Corner Detection, used to detect corners in images.
Image-based Detection
Read an image and perform Shi-Tomasi corner detection.
Steps to run the example:
- Create a new file
shi_tomasi_image.py - Copy the code into
shi_tomasi_image.py - Run the example using
python3 shi_tomasi_image.py - Click on the preview window and press 'q' to exit the program
shi_tomasi_image.py
#!/usr/bin/env python3

# -_- encoding: utf-8 -_-

import cv2
import numpy as np

# Shi-Tomasi corner detection parameters

max_corners = 100
quality_level = 0.01
min_distance = 10

# Read the image

image_path = './radxa_logo.png' # Replace with your image path
image = cv2.imread(image_path)

# Check if the image is loaded successfully

if image is None:
print("Failed to load image. Please check the file path.")
else: # Create a copy of the image for display
display_image = image.copy()

    # Convert to grayscale
    gray = cv2.cvtColor(image, cv2.COLOR_BGR2GRAY)

    # Detect corners using Shi-Tomasi
    corners = cv2.goodFeaturesToTrack(gray, max_corners, quality_level, min_distance)

    # Draw circles around detected corners
    if corners is not None:
        corners = np.int0(corners)
        for corner in corners:
            x, y = corner.ravel()
            cv2.circle(display_image, (x, y), 5, (0, 255, 0), -1)  # Green circles

    # Display the result
    while True:
        cv2.imshow('Shi-Tomasi Corners', display_image)
        # Wait for 'q' key to quit
        if cv2.waitKey(1) & 0xFF == ord('q'):
            break

cv2.destroyAllWindows()
Preview effect:

Real-time Detection
Access camera feed and perform Shi-Tomasi corner detection in real-time.
Steps to run the example:
- Create a new file
shi_tomasi_camera.py - Copy the code into
shi_tomasi_camera.py - Run the example using
python3 shi_tomasi_camera.py - Click on the preview window and press 'q' to exit the program
In the code, cv2.VideoCapture(0) opens the default camera at /dev/video0. If you have multiple cameras or your camera device file is different, please modify this value accordingly.
shi_tomasi_camera.py
#!/usr/bin/env python3

# -_- encoding: utf-8 -_-

import cv2
import numpy as np

# Shi-Tomasi corner detection parameters

max_corners = 100
quality_level = 0.01
min_distance = 10

# Initialize the camera

cap = cv2.VideoCapture(0)

# Check if the camera is opened successfully

if not cap.isOpened():
print("Error: Could not open camera.")
exit()

while True: # Capture frame-by-frame
ret, frame = cap.read()

    # If frame is read correctly, ret is True
    if not ret:
        print("Error: Failed to capture frame.")
        break

    # Create a copy of the frame for display
    display_frame = frame.copy()

    # Convert to grayscale
    gray = cv2.cvtColor(frame, cv2.COLOR_BGR2GRAY)

    # Detect corners using Shi-Tomasi
    corners = cv2.goodFeaturesToTrack(gray, max_corners, quality_level, min_distance)

    # Draw circles around detected corners
    if corners is not None:
        corners = np.int0(corners)
        for corner in corners:
            x, y = corner.ravel()
            cv2.circle(display_frame, (x, y), 5, (0, 255, 0), -1)  # Green circles

    # Display the resulting frame
    cv2.imshow('Shi-Tomasi Corners - Camera', display_frame)

    # Press 'q' to exit
    if cv2.waitKey(1) & 0xFF == ord('q'):
        break

# When everything done, release the capture and close windows

cap.release()
cv2.destroyAllWindows()
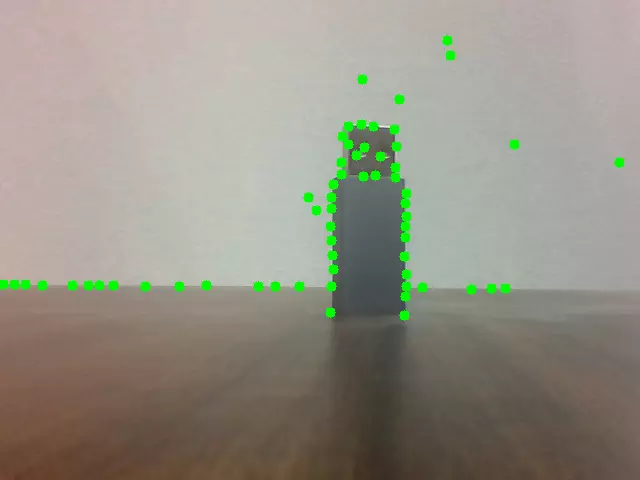
Preview effect:
ORB Feature Detection
ORB(Oriented FAST and Rotated BRIEF)是一种高效的特征检测与描述算法,结合了 FAST 关键点检测器 和 BRIEF 描述符,并进行了改进以提升性能,尤其在计算效率和旋转不变性方面表现突出。
Image-based Detection
Read an image and perform ORB feature detection.
Steps to run the example:
- Create a new file
orb_image.py - Copy the code into
orb_image.py - Run the example using
python3 orb_image.py - Click on the preview window and press 'q' to exit the program
orb_image.py
#!/usr/bin/env python3

# -_- encoding: utf-8 -_-

import cv2
import numpy as np

# Read the image

image_path = './radxa_logo.png' # Replace with your image path
image = cv2.imread(image_path)

# Check if the image is loaded successfully

if image is None:
print("Failed to load image. Please check the file path.")
else: # Create a copy of the image for display
display_image = image.copy()

    # Convert to grayscale
    gray = cv2.cvtColor(image, cv2.COLOR_BGR2GRAY)

    # Initialize ORB detector
    orb = cv2.ORB_create(nfeatures=500)

    # Detect keypoints and compute descriptors
    keypoints, descriptors = orb.detectAndCompute(gray, None)

    # Draw keypoints on the image
    display_image = cv2.drawKeypoints(image, keypoints, None, color=(0, 255, 0),
                                    flags=cv2.DRAW_MATCHES_FLAGS_DEFAULT)

    # Display the result
    while True:
        cv2.imshow('ORB Features', display_image)
        # Wait for 'q' key to quit
        if cv2.waitKey(1) & 0xFF == ord('q'):
            break

cv2.destroyAllWindows()
Preview effect:

Real-time Detection
Access camera feed and perform ORB feature detection in real-time.
Steps to run the example:
- Create a new file
orb_camera.py - Copy the code into
orb_camera.py - Run the example using
python3 orb_camera.py - Click on the preview window and press 'q' to exit the program
In the code, cv2.VideoCapture(0) opens the default camera at /dev/video0. If you have multiple cameras or your camera device file is different, please modify this value accordingly.
orb_camera.py
#!/usr/bin/env python3

# -_- encoding: utf-8 -_-

import cv2
import numpy as np

# Initialize ORB detector

orb = cv2.ORB_create(nfeatures=500)

# Initialize the camera

cap = cv2.VideoCapture(0)

# Check if the camera is opened successfully

if not cap.isOpened():
print("Error: Could not open camera.")
exit()

while True: # Capture frame-by-frame
ret, frame = cap.read()

    # If frame is read correctly, ret is True
    if not ret:
        print("Error: Failed to capture frame.")
        break

    # Convert to grayscale
    gray = cv2.cvtColor(frame, cv2.COLOR_BGR2GRAY)

    # Detect keypoints and compute descriptors
    keypoints, descriptors = orb.detectAndCompute(gray, None)

    # Draw keypoints on the frame
    display_frame = cv2.drawKeypoints(frame, keypoints, None,
                                    color=(0, 255, 0),
                                    flags=cv2.DRAW_MATCHES_FLAGS_DEFAULT)

    # Display the number of keypoints
    cv2.putText(display_frame, f'Keypoints: {len(keypoints)}', (10, 30),
                cv2.FONT_HERSHEY_SIMPLEX, 1, (0, 0, 255), 2)

    # Display the resulting frame
    cv2.imshow('ORB Features - Camera', display_frame)

    # Press 'q' to exit
    if cv2.waitKey(1) & 0xFF == ord('q'):
        break

# When everything done, release the capture and close windows

cap.release()
cv2.destroyAllWindows()
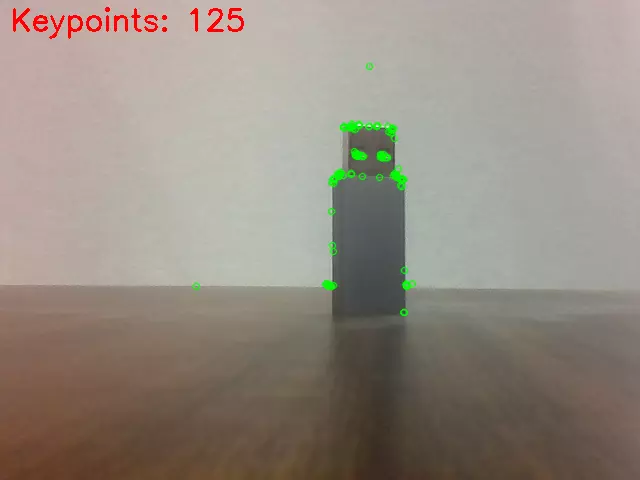
Preview effect:
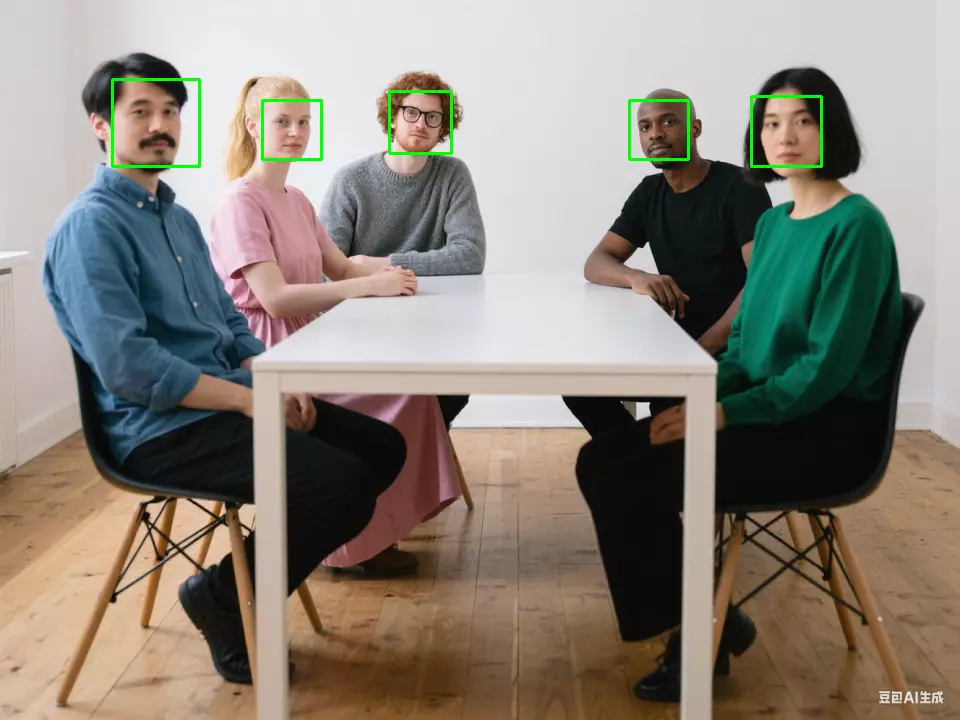
Face Recognition
Based on Haar Cascade classifier, this function implements face detection using a pre-trained Haar Cascade classifier, which quickly locates the face region in an image through machine learning training.
Image-based Detection
Read an image and perform face recognition.
Steps to run the example:
- Create a new file
face_recognition_image.py - Copy the code into
face_recognition_image.py - Run the example using
python3 face_recognition_image.py - Click on the preview window and press 'q' to exit the program
face_recognition_image.py
#!/usr/bin/env python3

# -_- encoding: utf-8 -_-

import cv2
import os

# Load the pre-trained Haar Cascade classifier for face detection

face_cascade = cv2.CascadeClassifier(cv2.data.haarcascades + 'haarcascade_frontalface_default.xml')

# Read the image

image_path = 'people.png' # Replace with your image path
image = cv2.imread(image_path)

# Check if the image is loaded successfully

if image is None:
print(f"Error: Could not read image at {image_path}")
exit()

# Convert to grayscale (face detection works on grayscale images)

gray = cv2.cvtColor(image, cv2.COLOR_BGR2GRAY)

# Detect faces in the image

faces = face_cascade.detectMultiScale(
gray,
scaleFactor=1.1, # Scale factor for image pyramid
minNeighbors=5, # How many neighbors each candidate rectangle should have
minSize=(30, 30) # Minimum possible object size
)

# Draw rectangles around the faces

for (x, y, w, h) in faces:
cv2.rectangle(image, (x, y), (x+w, y+h), (0, 255, 0), 2)

# Display the number of faces detected

print(f"Number of faces detected: {len(faces)}")

# Display the result

while True:
cv2.imshow('Face Detection', image) # Wait for 'q' key to quit
if cv2.waitKey(1) & 0xFF == ord('q'):
break

cv2.destroyAllWindows()
Preview effect:
Real-time Detection
Access camera feed and perform face recognition in real-time.
Steps to run the example:
- Create a new file
face_recognition_camera.py - Copy the code into
face_recognition_camera.py - Run the example using
python3 face_recognition_camera.py - Click on the preview window and press 'q' to exit the program
In the code, cv2.VideoCapture(0) opens the default camera at /dev/video0. If you have multiple cameras or your camera device file is different, please modify this value accordingly.
face_recognition_camera.py
#!/usr/bin/env python3

# -_- encoding: utf-8 -_-

import cv2

# Load the pre-trained Haar Cascade classifier for face detection

face_cascade = cv2.CascadeClassifier(cv2.data.haarcascades + 'haarcascade_frontalface_default.xml')

# Initialize the camera

cap = cv2.VideoCapture(0)

# Check if the camera is opened successfully

if not cap.isOpened():
print("Error: Could not open camera.")
exit()

while True: # Capture frame-by-frame
ret, frame = cap.read()

    # If frame is read correctly, ret is True
    if not ret:
        print("Error: Failed to capture frame.")
        break

    # Convert to grayscale (face detection works on grayscale images)
    gray = cv2.cvtColor(frame, cv2.COLOR_BGR2GRAY)

    # Detect faces in the frame
    faces = face_cascade.detectMultiScale(
        gray,
        scaleFactor=1.1,  # Scale factor for image pyramid
        minNeighbors=5,   # How many neighbors each candidate rectangle should have
        minSize=(30, 30)  # Minimum possible object size
    )

    # Draw rectangles around the faces
    for (x, y, w, h) in faces:
        cv2.rectangle(frame, (x, y), (x+w, y+h), (0, 255, 0), 2)

    # Display the number of faces detected
    cv2.putText(frame, f'Faces: {len(faces)}', (10, 30),
               cv2.FONT_HERSHEY_SIMPLEX, 1, (0, 0, 255), 2)

    # Display the resulting frame
    cv2.imshow('Face Detection - Camera', frame)

    # Press 'q' to exit
    if cv2.waitKey(1) & 0xFF == ord('q'):
        break

# When everything done, release the capture and close windows

cap.release()
cv2.destroyAllWindows()
Preview effect:
