Radxa OS Development
Prerequisites
Radxa OS development environment offers two setup methods: Method 1 is based on Dev Container (recommended for secondary development), and Method 2 is based on the rsdk-image prebuilt container (recommended for build-only use). Both methods use the same rsdk tool to compile Radxa OS. Choose the one that fits your needs.
You can follow the tutorial below to install Docker / Visual Studio Code / Dev Containers and other base components.
- Hardware: x86_64 PC
- Common dependencies: Docker
- Method 1 additional requirements: Visual Studio Code + Dev Containers extension
- Method 2 additional requirements:
aptavailable, and network access to the Radxaradxa-debrepository
Choose Your Setup Method
- Method 1: DevContainer
- Method 2: rsdk-image Container
-
Download rsdk source code
Use the
git clonecommand to clone the RadxaOS SDK (rsdk) source code.Linux@host$git clone --recurse-submodules <git_repo_url>Replace
<git_repo_url>with: https://github.com/RadxaOS-SDK/rsdk.git -
Start development environment
Open the Radxa OS SDK (rsdk) source code directory with Visual Studio Code: The
Dev Containerextension will usually automatically detect the configuration file in the folder and prompt you to reopen in the container development environment.tipWhen starting the development environment for the first time, Dev Containers will automatically download and install dependencies. Please be patient as this may take some time.
- Click the
Remoteoption in the bottom-left corner - Select the
Reopen in Containeroption
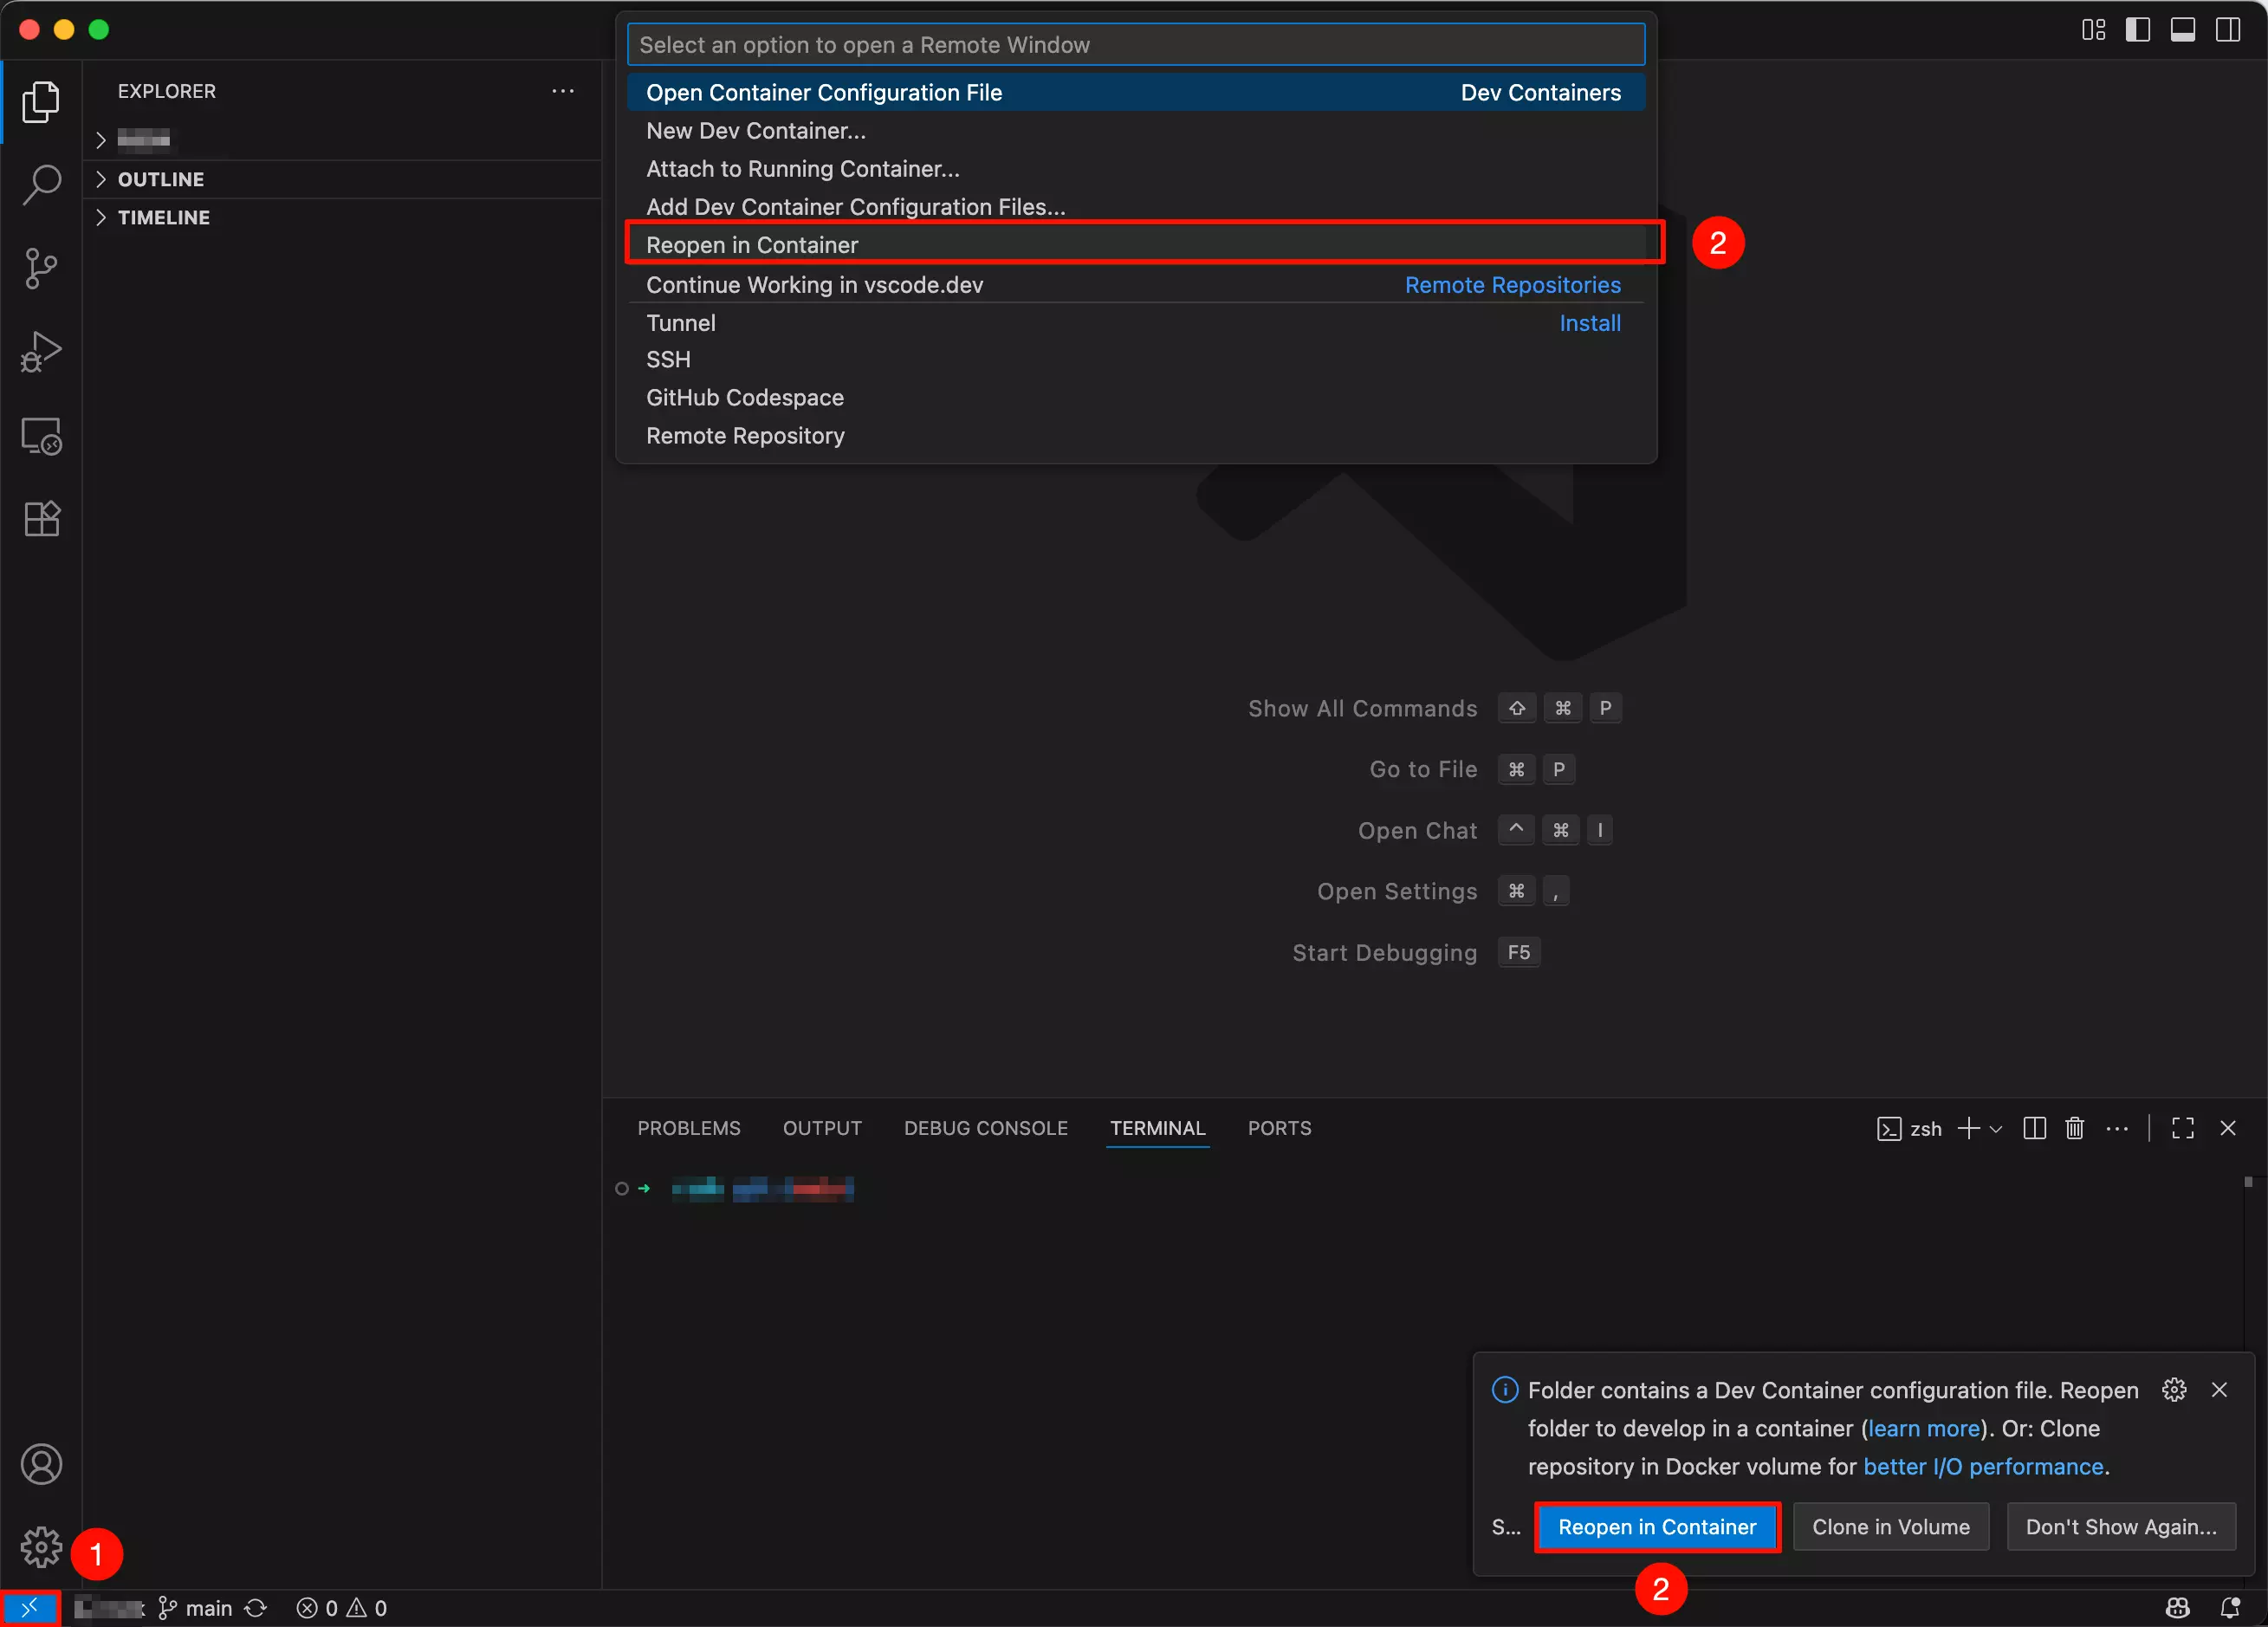
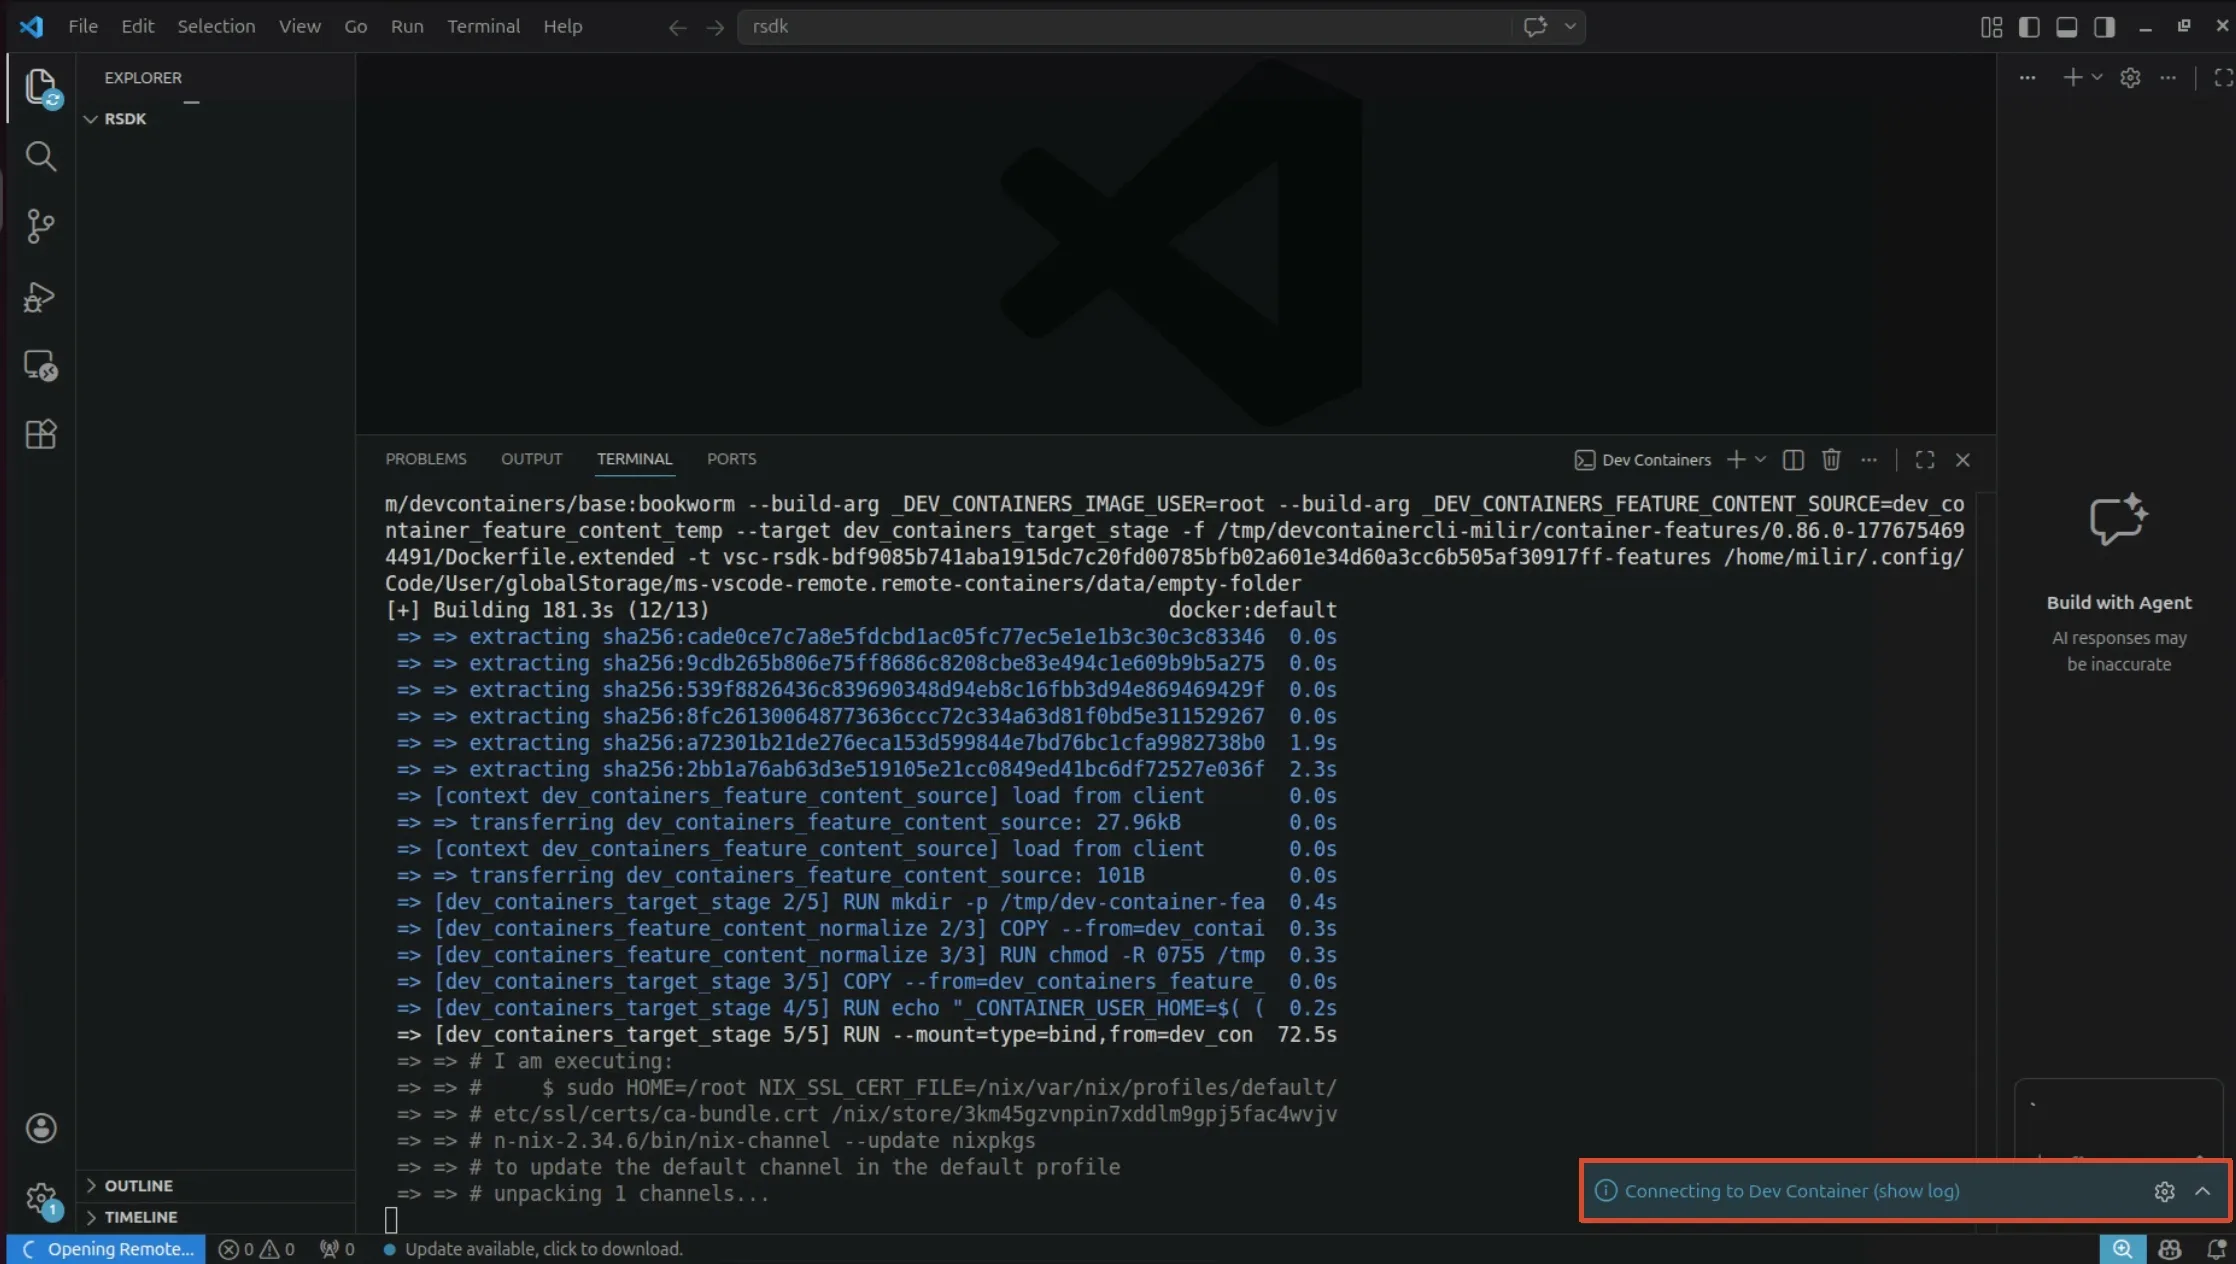
Wait for the container to automatically connect and initialize the environment. You can click the bottom right corner to select to display logs in the terminal.
- Click the
-
About rsdk-image
rsdk-imageis a prebuilt Docker image provided by Radxa. It comes with thersdkcommand-line tool pre-installed, so you do not need to install Nix or build the deb package locally. This method does not require Visual Studio Code or Dev Containers; it only depends on Docker and access to the Radxaradxa-debrepository. It is suitable for users who only need to build system images and do not plan to modifyrsdkitself. -
Install rsdk-image
-
Option A: Install via apt repository
Add the Radxa
radxa-debrepository (rsdk-imageis currently published in the testing repository):Linux@host$sudo tee /etc/apt/sources.list.d/70-radxa.list <<< "deb [trusted=yes] https://mirrors.hust.edu.cn/radxa-deb/rsdk-test/ rsdk-test main"
sudo apt updateInstall the
rsdk-imagedeb package:Linux@host$sudo apt install rsdk-image -
Option B: Install via manual deb download
Visit
radxa-pkg/rsdk-imageReleases to download the latestrsdk-image_*_amd64.deb, then install it locally:Linux@host$sudo apt install ./rsdk-image_*_amd64.deb
-
-
Run rsdk-image
Use the
rsdk-imagecommand to launch a preconfigured container environment:Linux@host$rsdk-image --name rsdk- The
--nameparameter specifies the container name and can be customized. - If the container already exists, you will enter it directly. To rebuild the container, first run
docker rm -f rsdkto remove the existing one. - You can also pass a command to execute inside the container:
rsdk-image --name rsdk -- <command>.
Once inside the container there is no need to clone the repository again. The container already ships with the
rsdktool and the SDK working directory, so you can runrsdkdirectly to build the system image. - The
Compile Radxa OS
After completing the environment setup, use the rsdk command to run the TUI interface:
rsdk
┌─────────────────┤ RSDK ├──────────────────┐
│ Please select a task:                     │
│                                           │
│            Build system image             │
│            =========                      │
│            About                          │
│                                           │
│         <Ok>             <Cancel>         │
│                                           │
└───────────────────────────────────────────┘
Select the Build system image option to further choose the target board model you want to build for.
┌─────────────────┤ RSDK ├──────────────────┐
│ Please select a product:                  │
│                                           │
│  (*) radxa-<sbc_model>                    │
│                                           │
│         <Ok>             <Cancel>         │
│                                           │
└───────────────────────────────────────────┘
After selecting yes, the Radxa OS build process will start, and rsdk will automatically complete the image compilation.
┌─────────────────┤ RSDK ├───────────────────────┐
│                                                │
│ Are you sure to build for 'radxa-<sbc_model>'? │
│                                                │
│                                                │
│          <Yes>             <No>                │
│                                                │
└────────────────────────────────────────────────┘
After compilation is complete, a folder corresponding to the board model and system version will be generated in the out directory, containing the Radxa OS image named output.img.
- For Radxa Cubie A7A / A7Z / A7S, the corresponding board model is
radxa-a733. - For Radxa Dragon Q6A / Q8B, the corresponding board model is
radxa-dragon-midstream.
FAQ
- During the build, if you encounter
rm: cannot remove ... rootfs/boot/efi: Device or resource busy, it meansout/<board>/rootfs/boot/efiis mounted. Runsudo umount -l out/<board>/rootfs/boot/efito unmount it before removing the build artifacts in theoutdirectory. - Method 1 related: Dev Container setup paused with the message
You might be rate limited by GitHub; if the development container fails to start, edit.devcontainer/devcontainer.jsonand adjustrunArgs. - Method 2 related: if the
rsdk-imagecontainer fails to start, rundocker rm -f rsdkto remove the existing container and try again.