Install System to microSD Card
This section explains how to deploy the Android system onto a microSD card.
warning
Flashing the image will format the microSD card. Back up any important data in advance!
Hardware Checklist
Prepare the following items:
- Board: Radxa Cubie A7Z
- Boot media: microSD card
- Card reader: microSD card reader
- Power supply: 5 V USB Type‑C adapter
Recommended accessory
Power Notes
Cubie A7Z accepts PD-compliant 5 V input; use an adapter capable of at least 3 A to keep peripherals stable.
- Power adapter: Once the image has been written to the microSD card, power the board via a USB‑C adapter to avoid power shortages during development.
Connect the Hardware
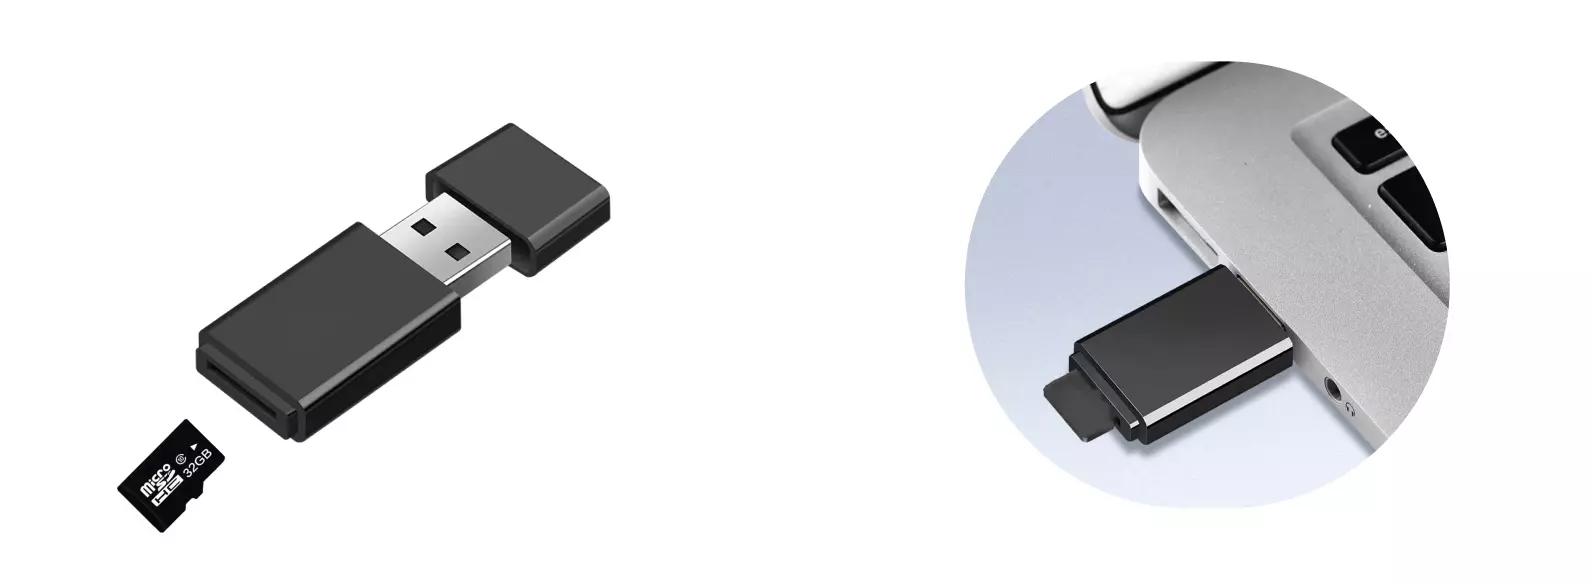
Insert the microSD card into the reader, then plug the reader into your PC.
Software Preparation
You need Allwinner’s Phoenix utilities to flash the Phoenix-format Android image to the microSD card. Download them from the Resources download page.
PhoenixCard: Windows utility for creating bootable microSD cards.
Flash the System
Unzip PhoenixCard, open the directory, and run PhoenixCard.exe as Administrator.
- Choose Image and select the decompressed system image file.
- Set the card type to Start up to build a bootable card.
- Tick the drive letter that corresponds to your microSD card.
- Click Burn to start writing.
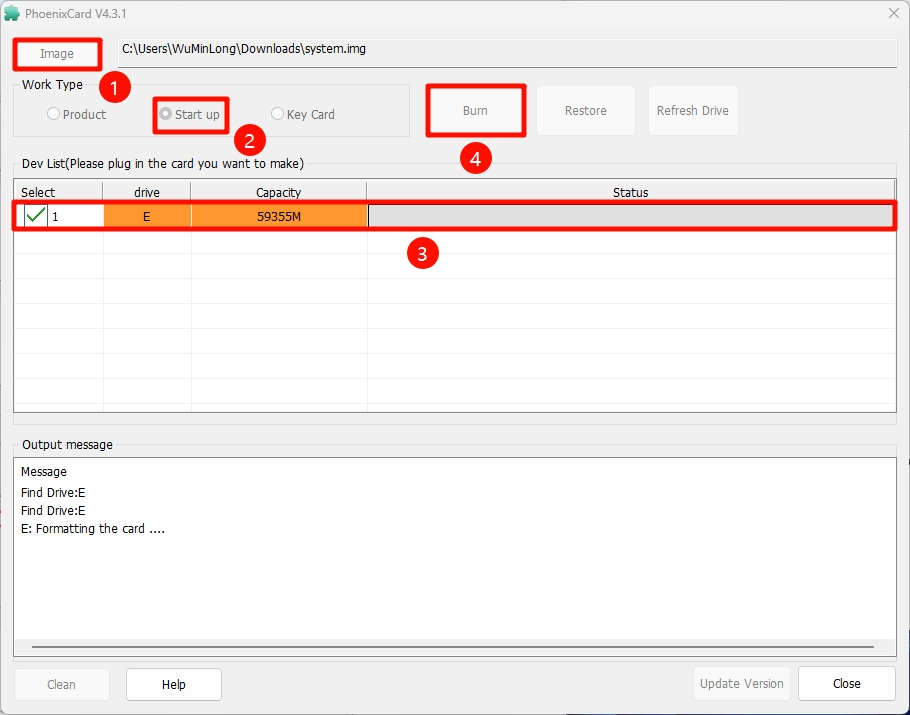
Wait for PhoenixCard to finish, then close the tool.