Install System to the Onboard UFS
This section explains how to flash the Android system directly to the Cubie A7Z onboard UFS storage.
Flashing the system erases the UFS drive. Back up any important data in advance!
Hardware Checklist
Have the following items ready:
- Board: Radxa Cubie A7Z
- Power/data cable: USB Type‑A to Type‑C cable
Software Preparation
Allwinner’s flashing utilities are required to write the Phoenix-format Android image to the onboard UFS. Download them from the Resources download page.
PhoenixSuit: Windows utility for burning images to UFS.
LiveSuit: Linux utility for burning images to UFS.
- Windows
- Linux
Use PhoenixSuit on Windows.
On Windows 11, go to Windows Security → Device security → Core isolation and disable every switch; otherwise the driver might fail to install.
- Install the driver
Unzip PhoenixSuit, then open PhoenixSuit/Drivers/AW_Driver.
Run InstallUSBDriver.exe as Administrator to install the driver.
After a successful installation, Device Manager should list USB Device (VID_1f3a_PID_efe8).
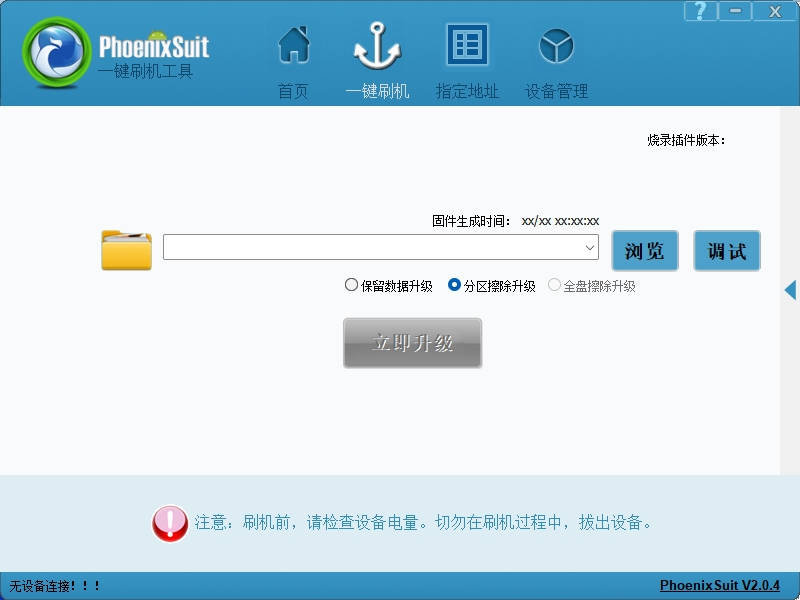
- Launch PhoenixSuit
Open the PhoenixSuit folder and run PhoenixSuit.exe.
Use LiveSuit on Ubuntu (or other Linux distributions).
- Install dependencies
sudo apt update
sudo apt install dkms
- Mark installer as executable
Unzip the package, enter the LiveSuit directory, and run:
sudo chmod +x LiveSuit.run
- Run the LiveSuit installer
Execute LiveSuit.run to install the program.
./LiveSuit.run
After a successful installation you will see output similar to:
========***********LiveSuit installed completely***********===========
LiveSuit  has been installed in /home/user_name/Bin/livesuit
========***********LiveSuit installed completely***********===========
- Launch LiveSuit
Switch to the installation directory and run:
sudo ./LiveSuit

If the program reports that libpng12.so.0 is missing, build and install it with the following commands:
mkdir libpng
cd libpng/
wget https://ppa.launchpadcontent.net/linuxuprising/libpng12/ubuntu/pool/main/libp/libpng/libpng_1.2.54.orig.tar.xz
tar -xvf libpng_1.2.54.orig.tar.xz
cd libpng-1.2.54
./configure
make
sudo make install
sudo ln -s /usr/local/lib/libpng12.so.0.54.0 /usr/lib/libpng12.so
sudo ln -s /usr/local/lib/libpng12.so.0.54.0 /usr/lib/libpng12.so.0
Install the System
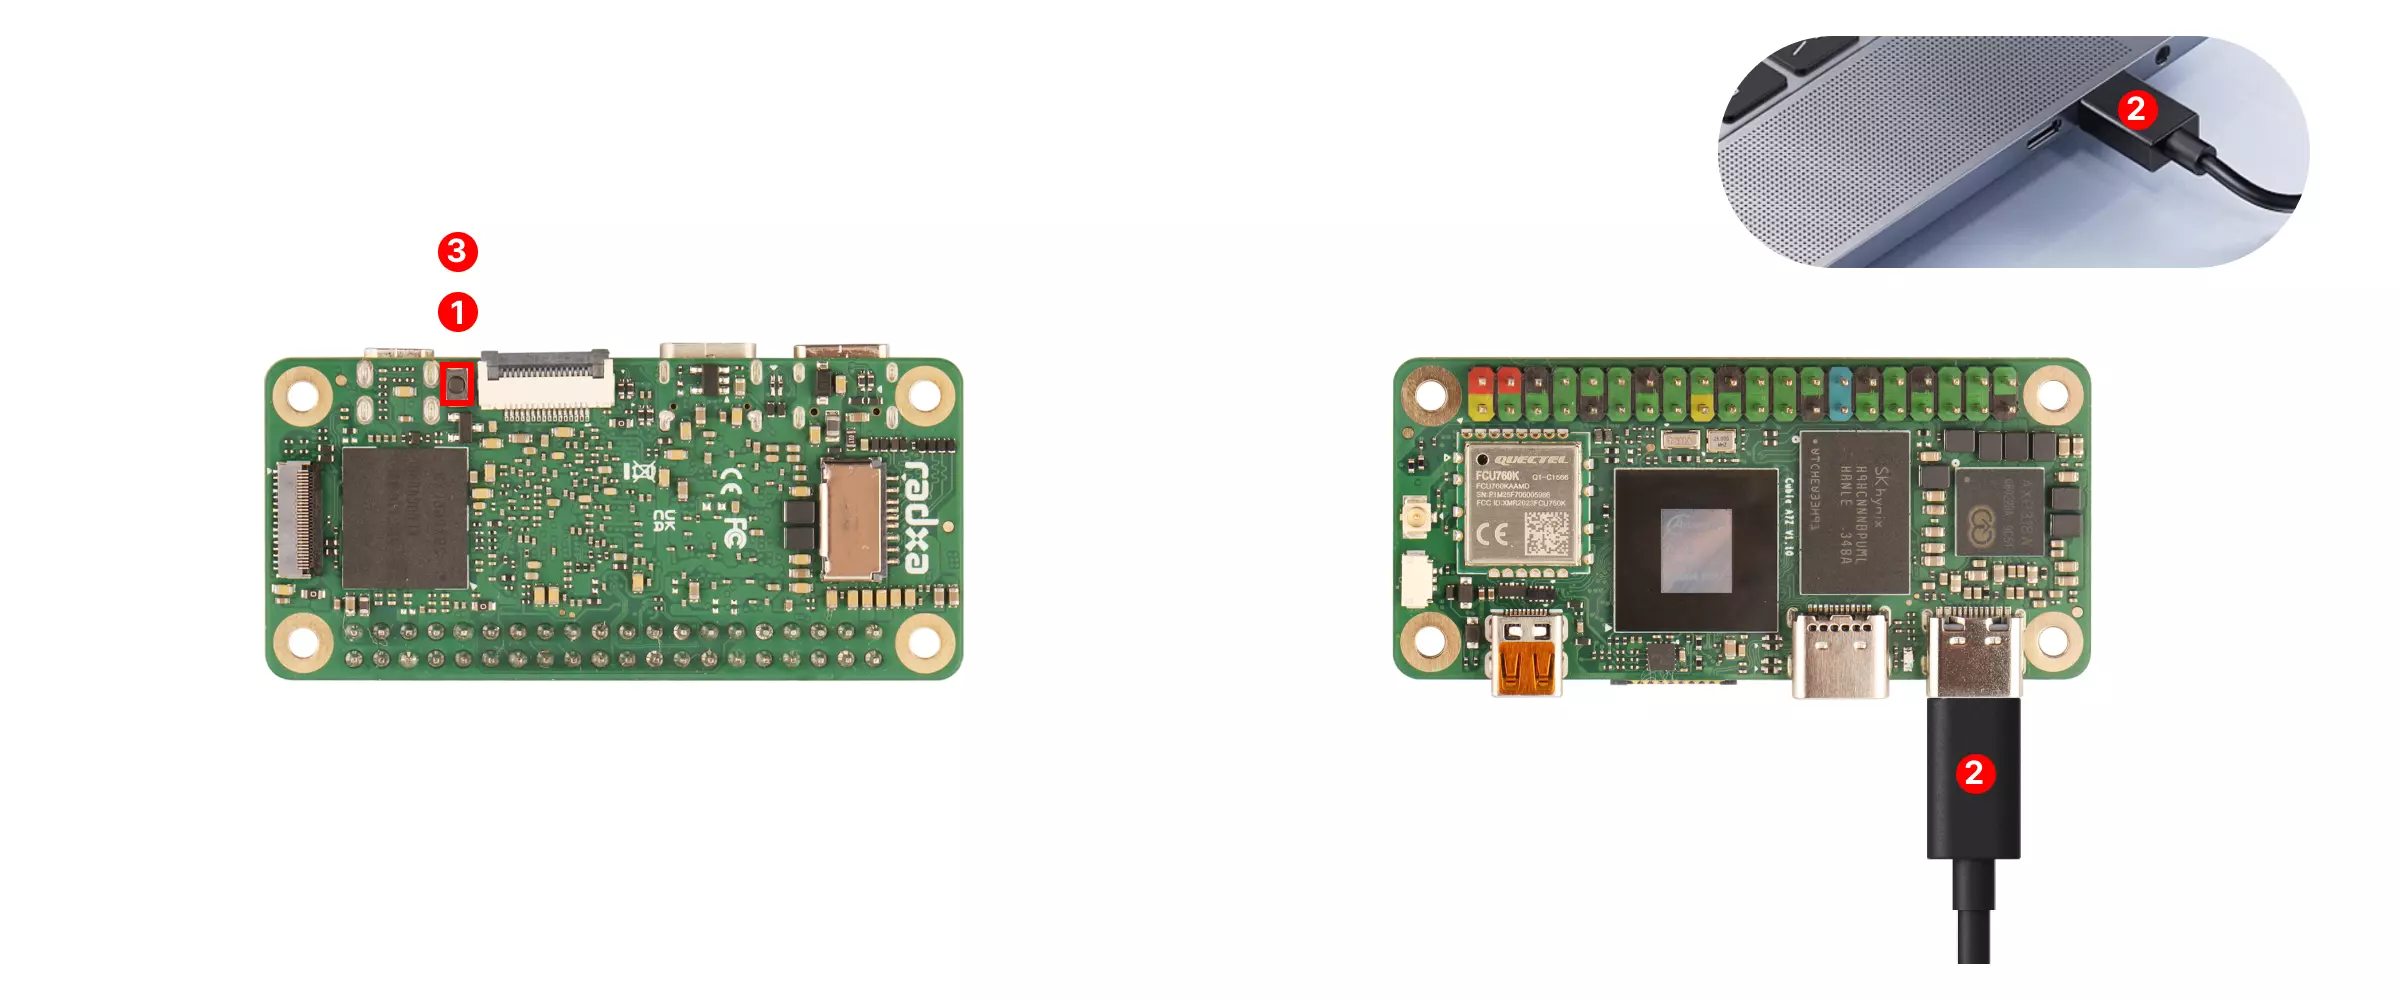
Enter FEL Mode
Before powering the board, hold the Cubie A7Z UBOOT button. While holding it, connect the board to your PC via the USB Type‑A to Type‑C cable. Release the button after power-on to enter FEL mode.
- Hold the UBOOT button.
- Connect the Cubie A7Z Type‑C port to the PC’s Type‑A port with the USB cable.
- Release the UBOOT button once powered.
Burn the Image
Launch the appropriate Allwinner flashing utility for your platform.
- Windows
- Linux
Use PhoenixSuit to flash the image.
- Prepare the image
Download the firmware from the Resources download page and unzip it before flashing.
- Click Browse and select the extracted image file.
- Choose Full erase upgrade.

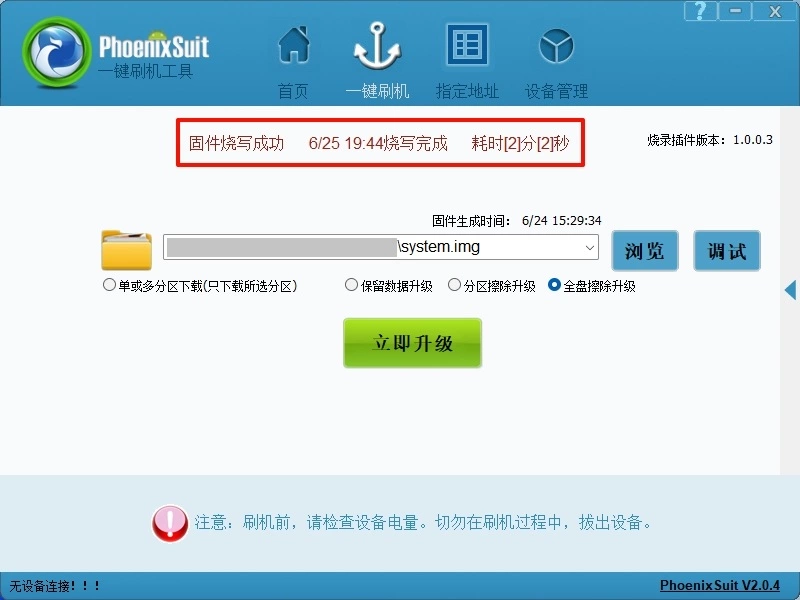
If PhoenixSuit does not start flashing automatically, re-enter FEL mode and watch the progress bar.
- Finishing up
When PhoenixSuit displays Firmware download successful, the process is complete—close the application.
Use LiveSuit to flash the image.
- Prepare the image
Download and unzip the firmware from the Resources download page.
- Click Image and select the extracted file.
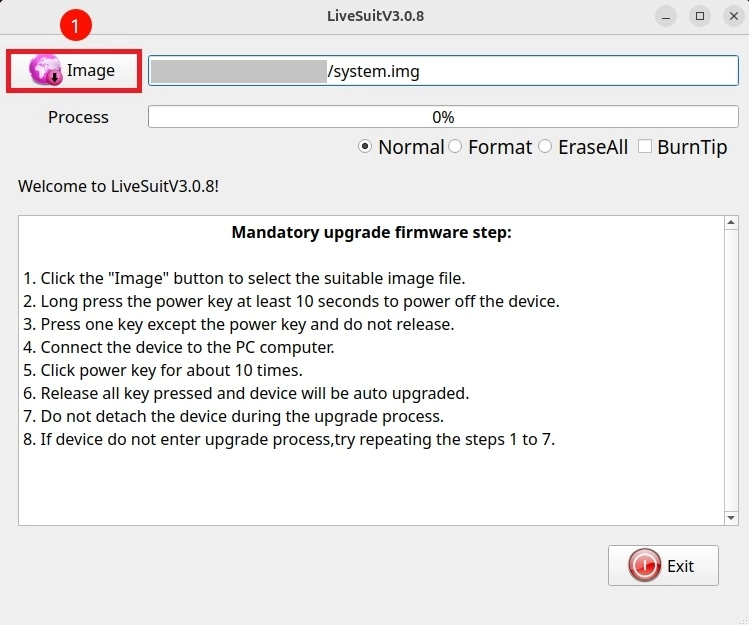
If flashing does not start automatically, re-enter FEL mode and monitor both the terminal output and the GUI progress bar.
- Finishing up
When the progress reaches 100%, the flash is complete—close LiveSuit.
