Serial Debugging
Serial debugging is a fundamental method for interacting with the Cubie A7A board through a UART (Universal Asynchronous Receiver/Transmitter) interface. It allows you to view system output and perform debugging using serial communication tools.
Hardware Connection
When using a USB-to-TTL serial adapter with the Cubie A7A for serial debugging, ensure the pins are connected correctly. Incorrect connections may damage the board hardware.
It is not recommended to connect the VCC pin of the USB-to-TTL adapter, as this could potentially damage the board if connected incorrectly.
Connect the USB-to-TTL serial adapter to the Cubie A7A's UART0 interface, with the other end connected to your PC's USB port.
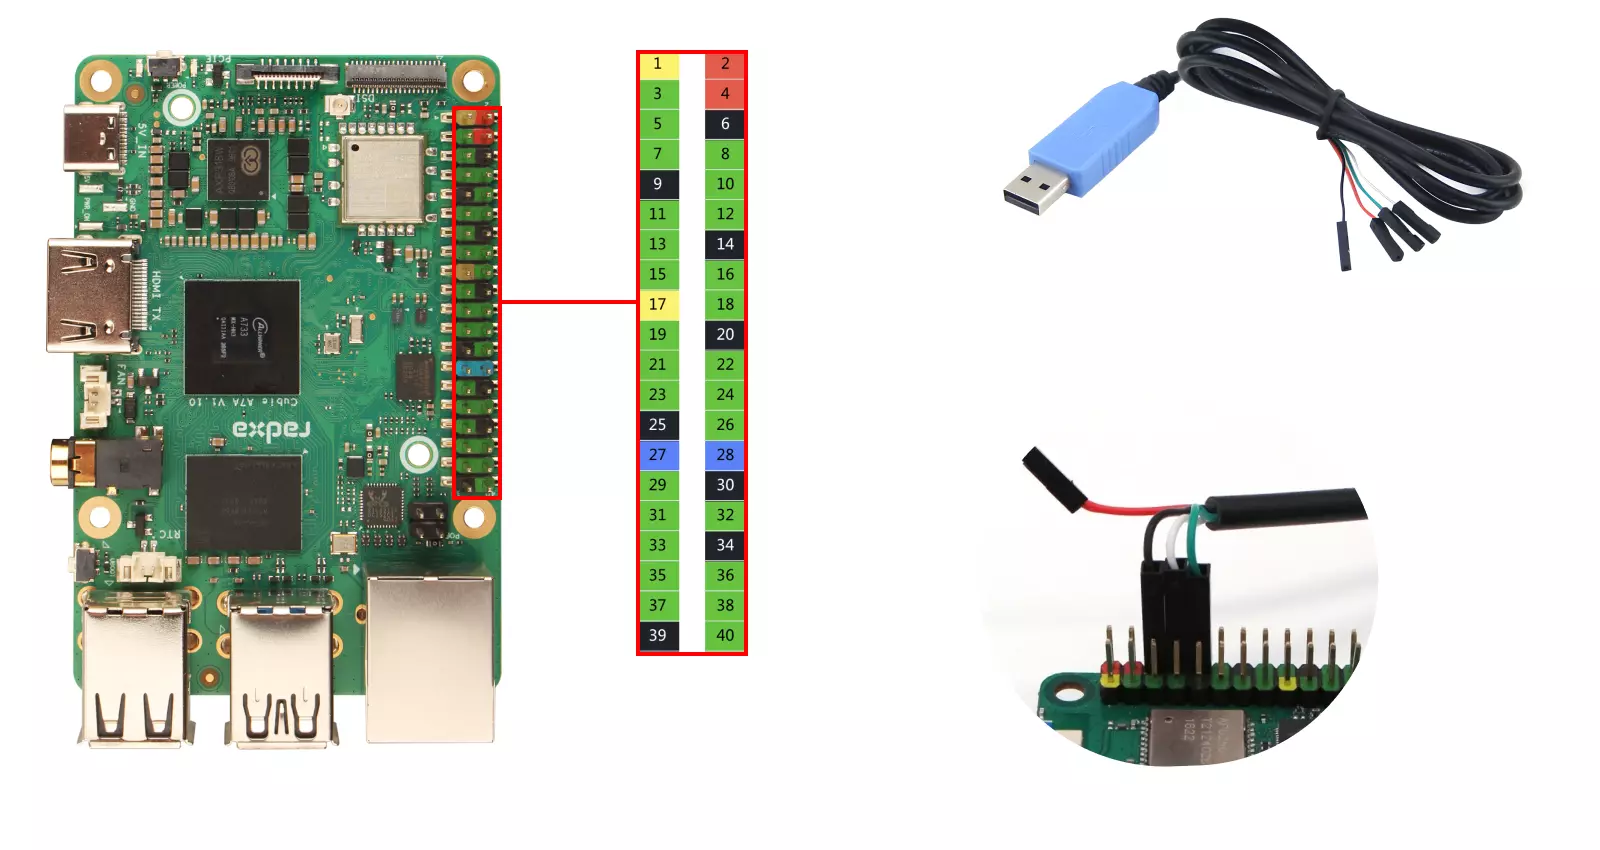
| Cubie A7A Pin Function | Connection Method |
|---|---|
| Cubie A7A: GND (Pin 6) | Connect to GND pin of USB-to-TTL adapter |
| Cubie A7A: UART0_TXD (Pin 8) | Connect to RXD pin of USB-to-TTL adapter |
| Cubie A7A: UART0_RXD (Pin 10) | Connect to TXD pin of USB-to-TTL adapter |
Serial Login
Serial Communication Parameters
- Baud Rate: 115200
- Data Bits: 8
- Stop Bits: 1
- Parity: None
- Flow Control: None
Using Tabby
We recommend using Tabby for serial port login. Tabby is a powerful and user-friendly serial debugging tool that supports multiple protocols including serial port and SSH, and is compatible with mainstream operating systems such as Windows, macOS, and Linux.
Download Tabby
Visit the Tabby official website to download and install the Tabby software.
Install Tabby
Select the appropriate installation package for your operating system and hardware architecture (Windows: tabby-<version>.exe, Linux: tabby-<version>.deb, macOS: tabby-<version>.dmg) to install the Tabby software.
Using Tabby
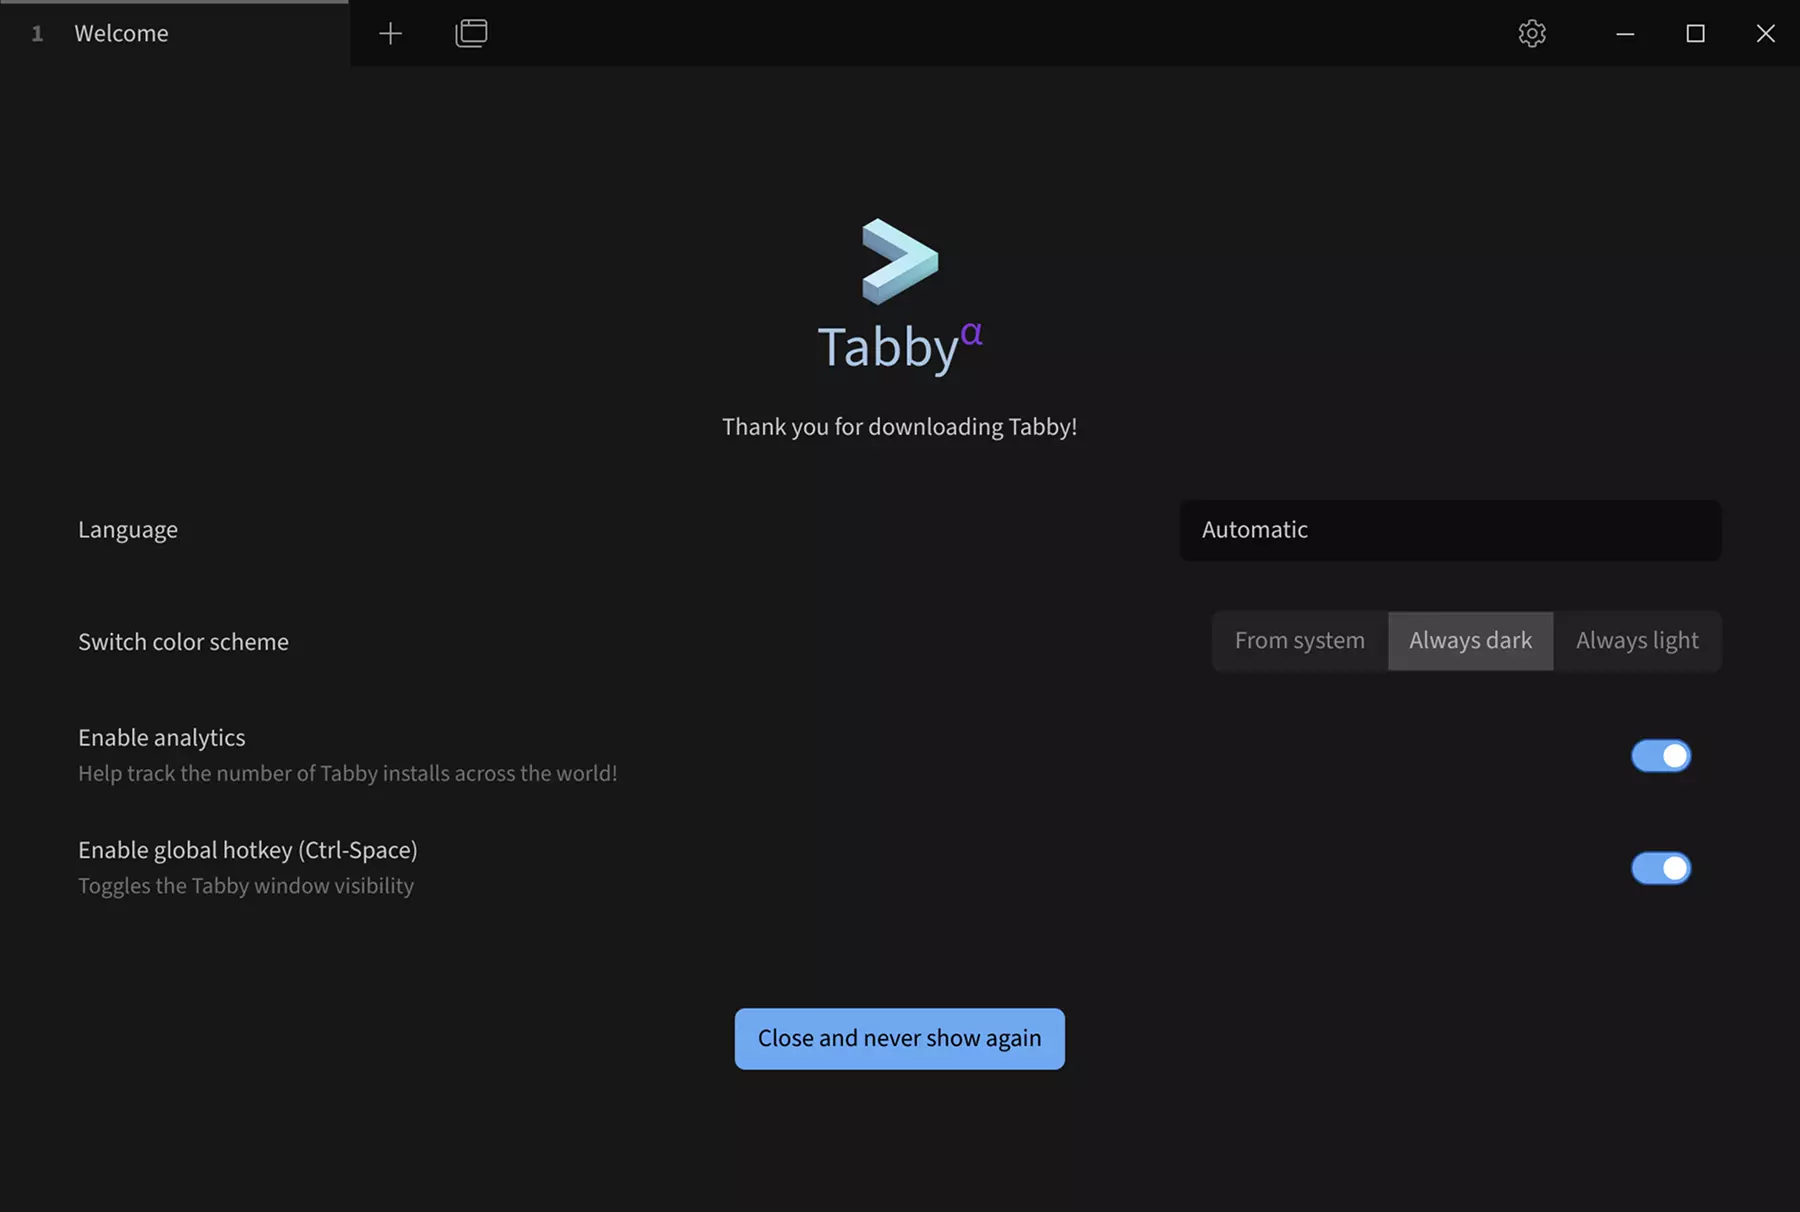
After installation, double-click the Tabby icon to launch the application.
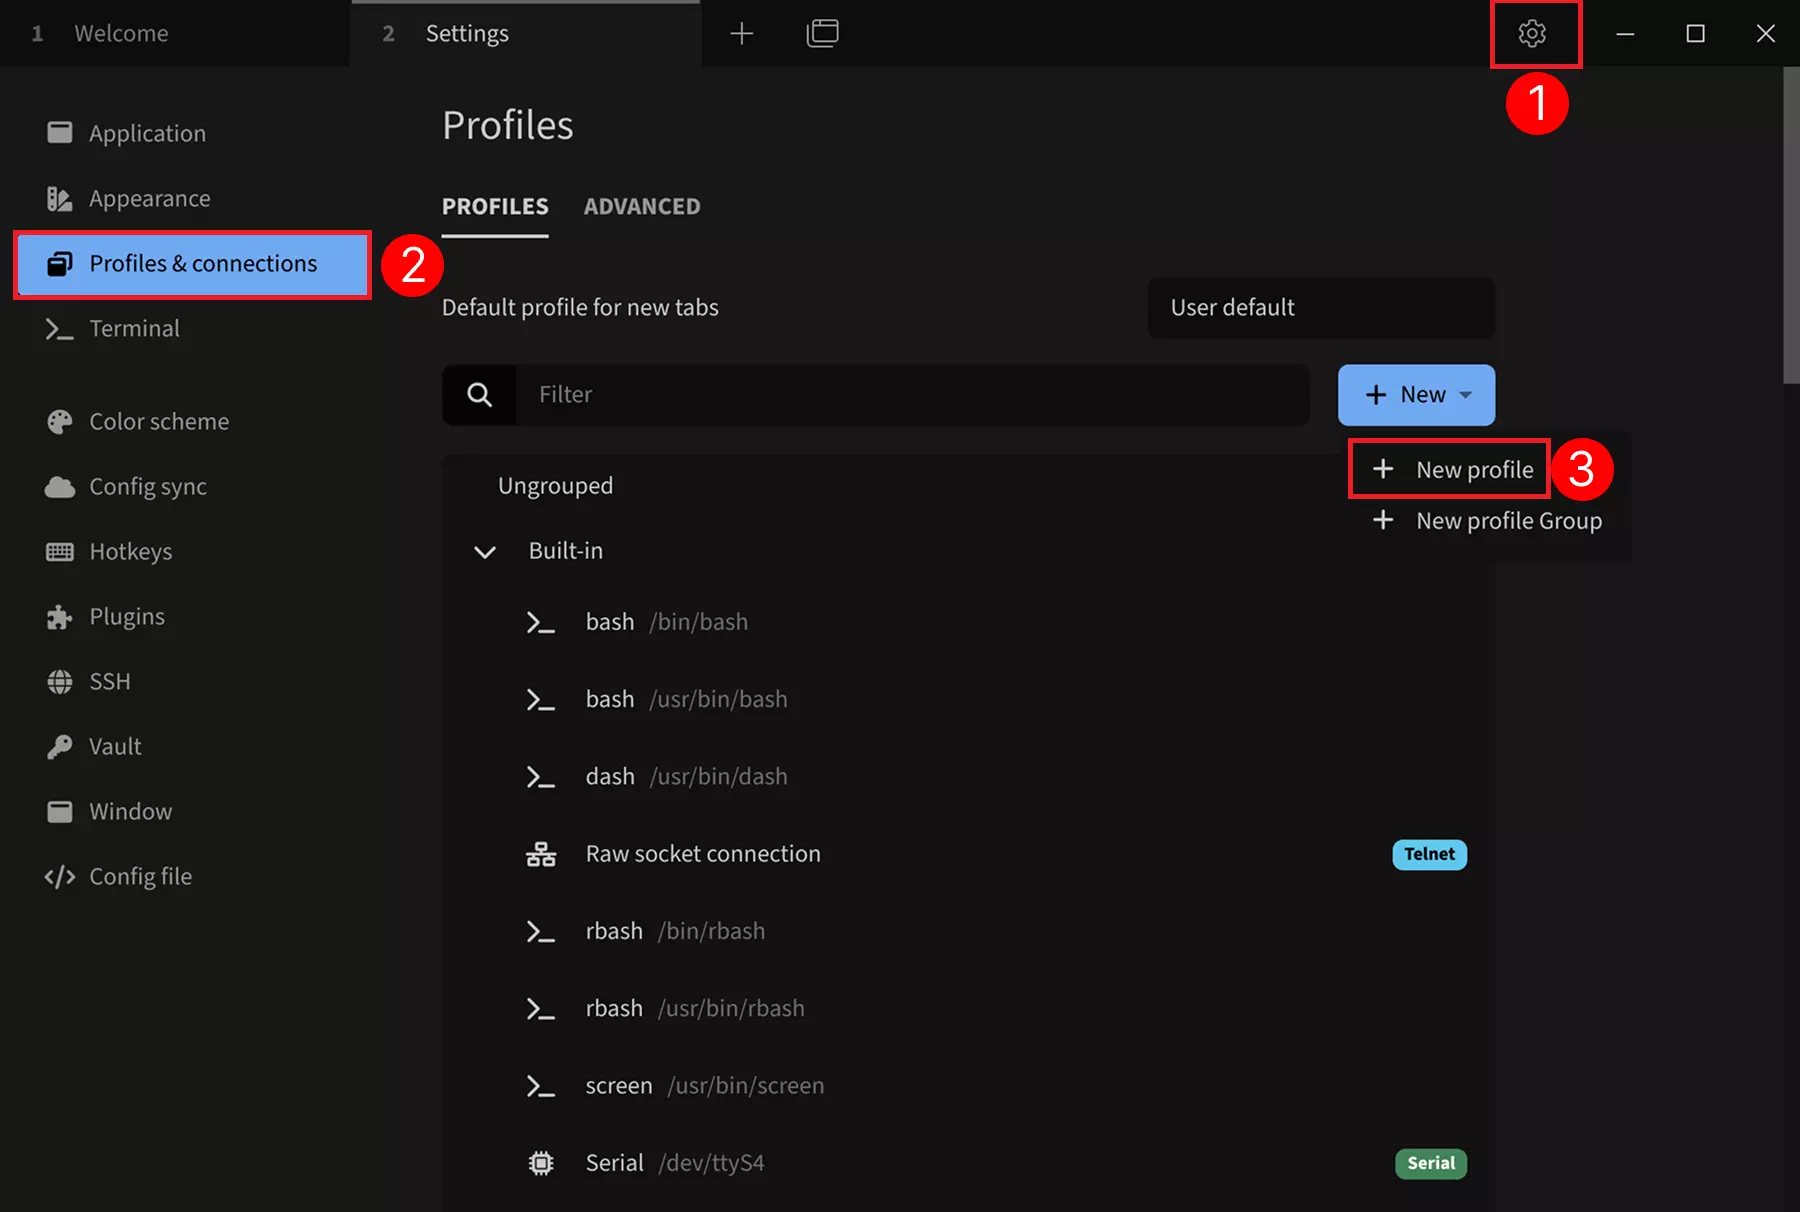
Serial Port Configuration
① --> Settings : Click the settings option
② --> Profiles & connections : Click to configure connection options
③ --> New profile : Click to add a new configuration
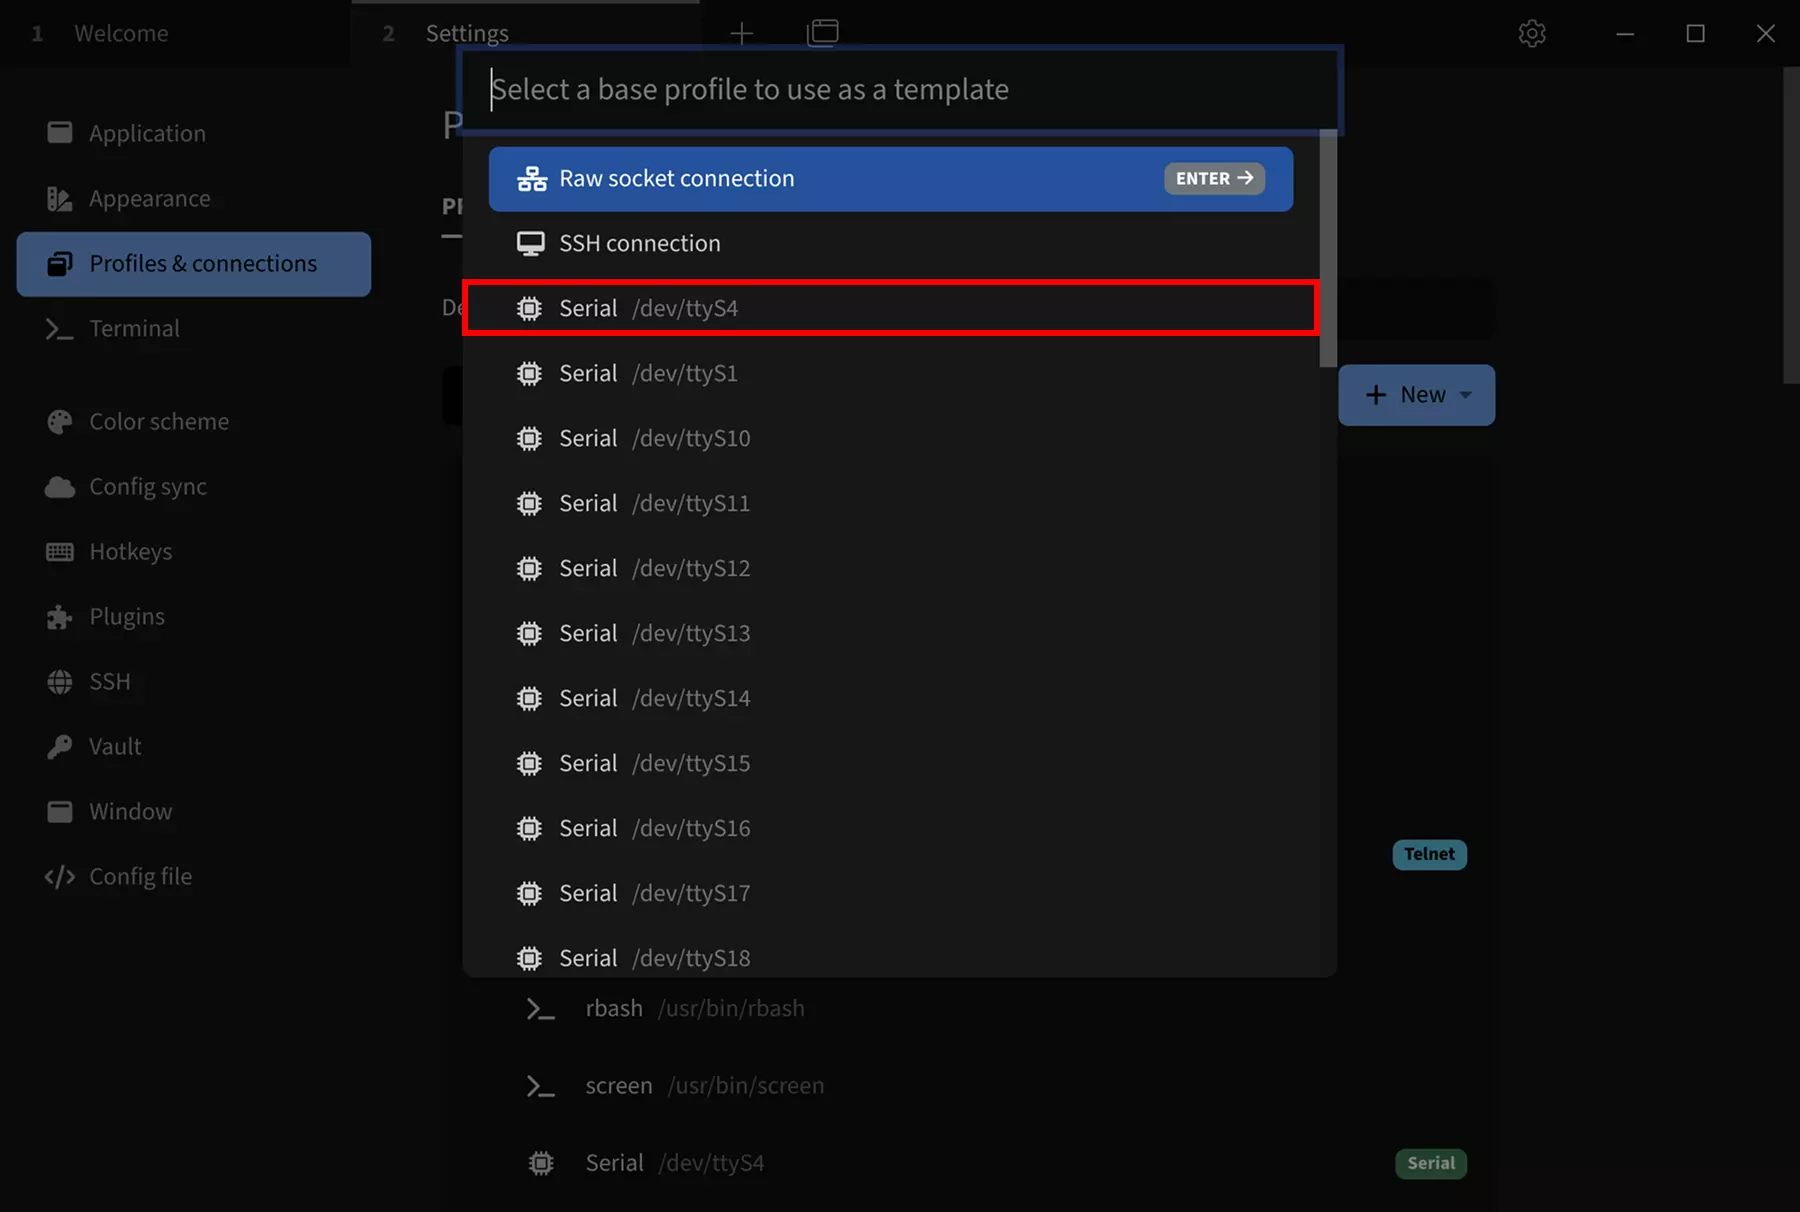
Select Serial Port Template
Choose a base configuration as a template: Select any Serial template. You can modify parameters such as device name, serial port device number, and baud rate in the subsequent configuration interface.
Modify Serial Port Parameters
After selecting the Serial template, modify the following parameters:
① --> Name : Set the connection name (recommended to use the product name)
② --> Device : Set the serial port device number (default is /dev/ttyUSB0 if only one serial device is connected to a Linux system)
③ --> Baud rate : Set the baud rate to 115200
④ --> Save : Save the configuration
For different platforms or when multiple serial devices are connected, you can safely unplug the USB serial cable connected to the board and observe the device number changes to identify the correct device.

Login via Serial Port
Click the run button to log in to the serial port device.

After a successful connection, press Enter to display the login prompt. Then use the corresponding system username and password to log in (the password will not be displayed as you type; press Enter after entering the password).
Android system login does not require entering user account and password.

Using the Serial Port
After successfully logging in to the system via the serial port, you can view system logs and run commands to test system functionality.