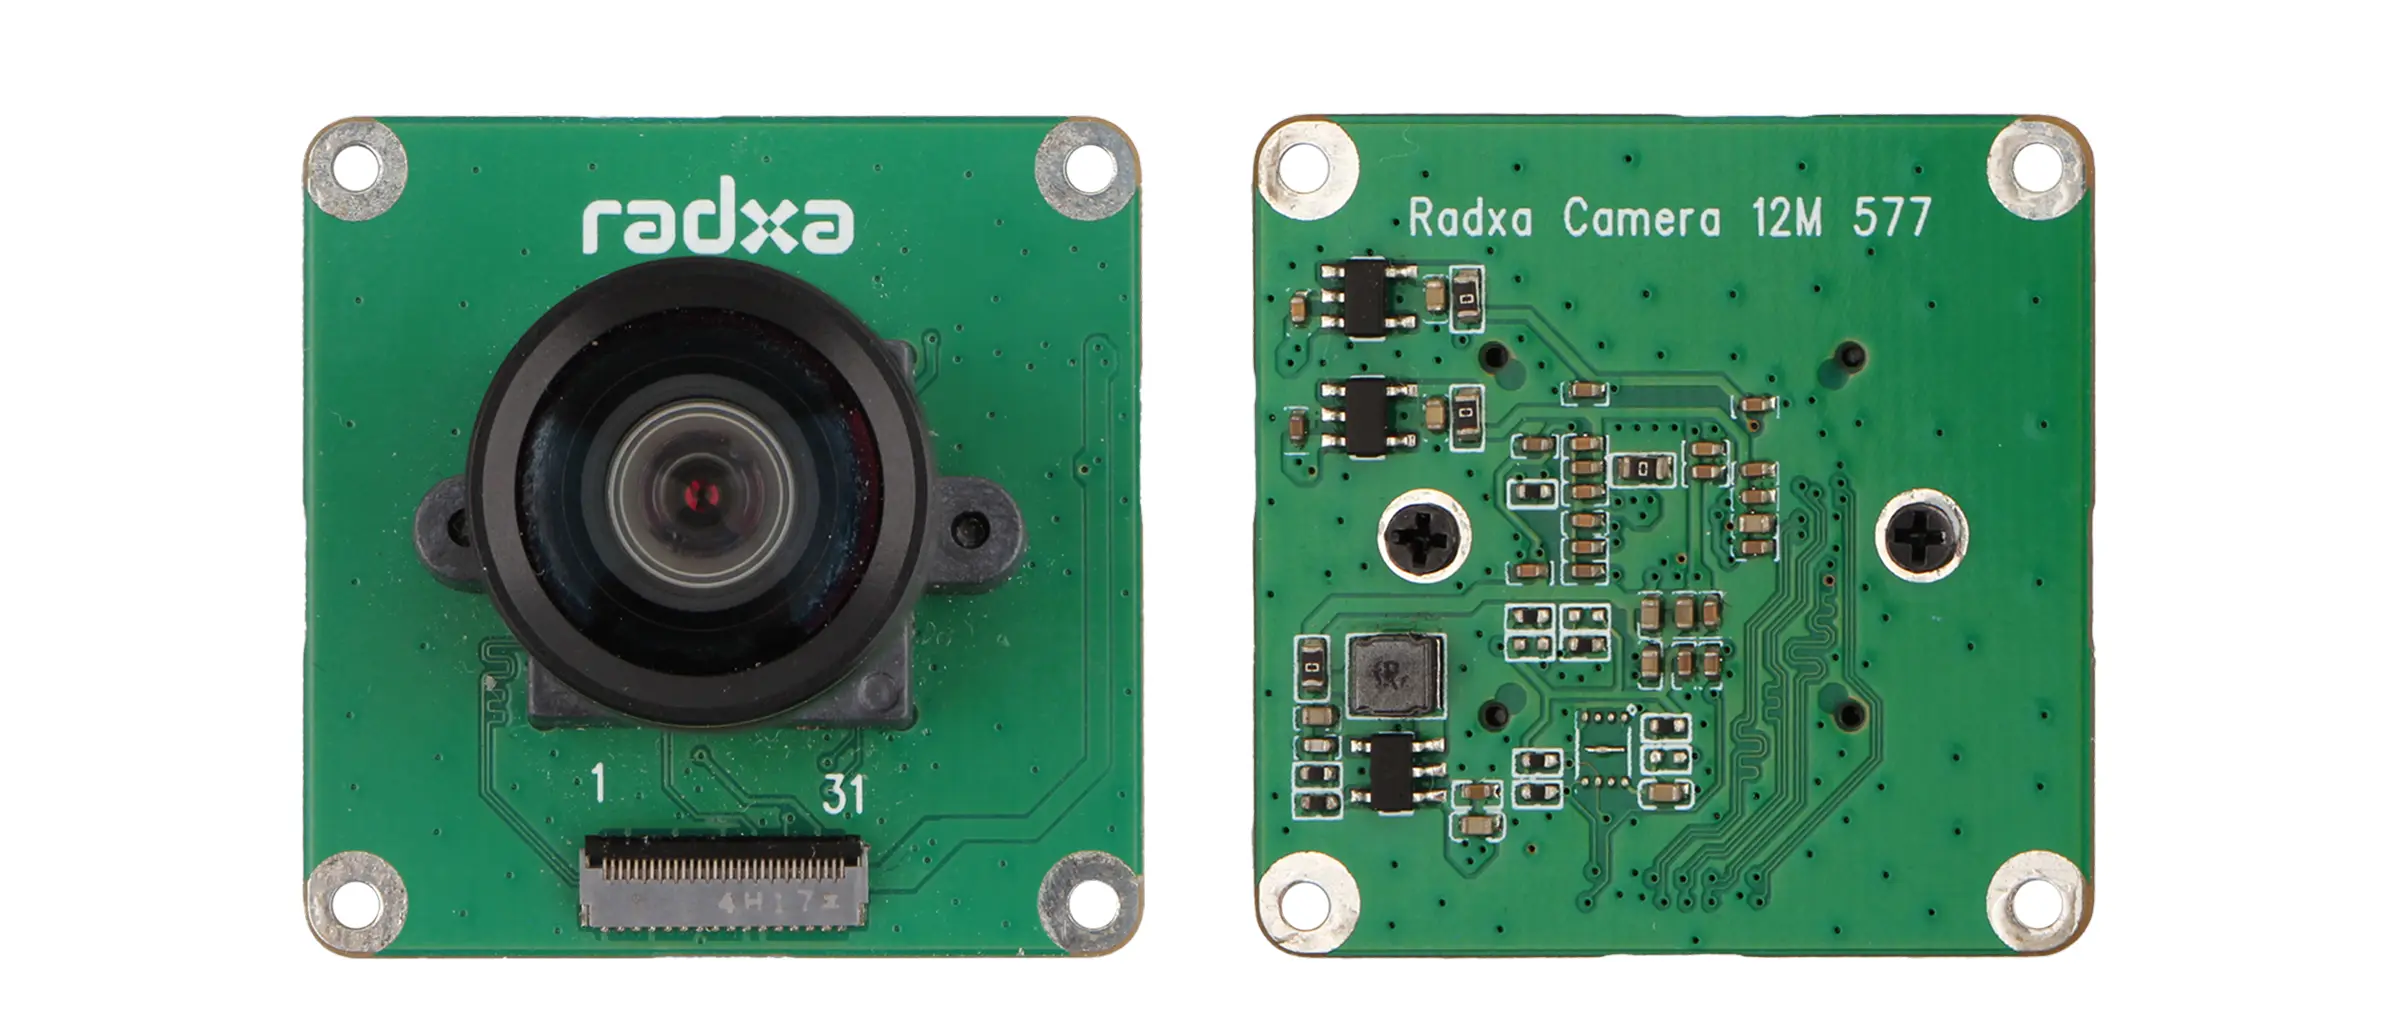
Radxa Camera 12M 577
Radxa Dragon Q6A's onboard MIPI CSI interface can be used to connect the Radxa Camera 12M 577 for image capture.
Interface specifications
Camera interface
The Radxa Camera 12M 577 interface has the following specifications:
- Connector type: 31-pin 0.3 mm pitch SMD Horizontal FPC connector
- Connection type: Flip type, bottom contact
Board MIPI CSI interface
The Radxa Dragon Q6A MIPI CSI interface has the following specifications:
- Connector type: 31-pin 0.3 mm pitch SMD Horizontal FPC connector
- Connection type: Flip type, bottom contact
Camera FPC cable
Use a 31-Pin 0.3 mm pitch to 31-Pin 0.3mm pitch opposite side FPC cable.
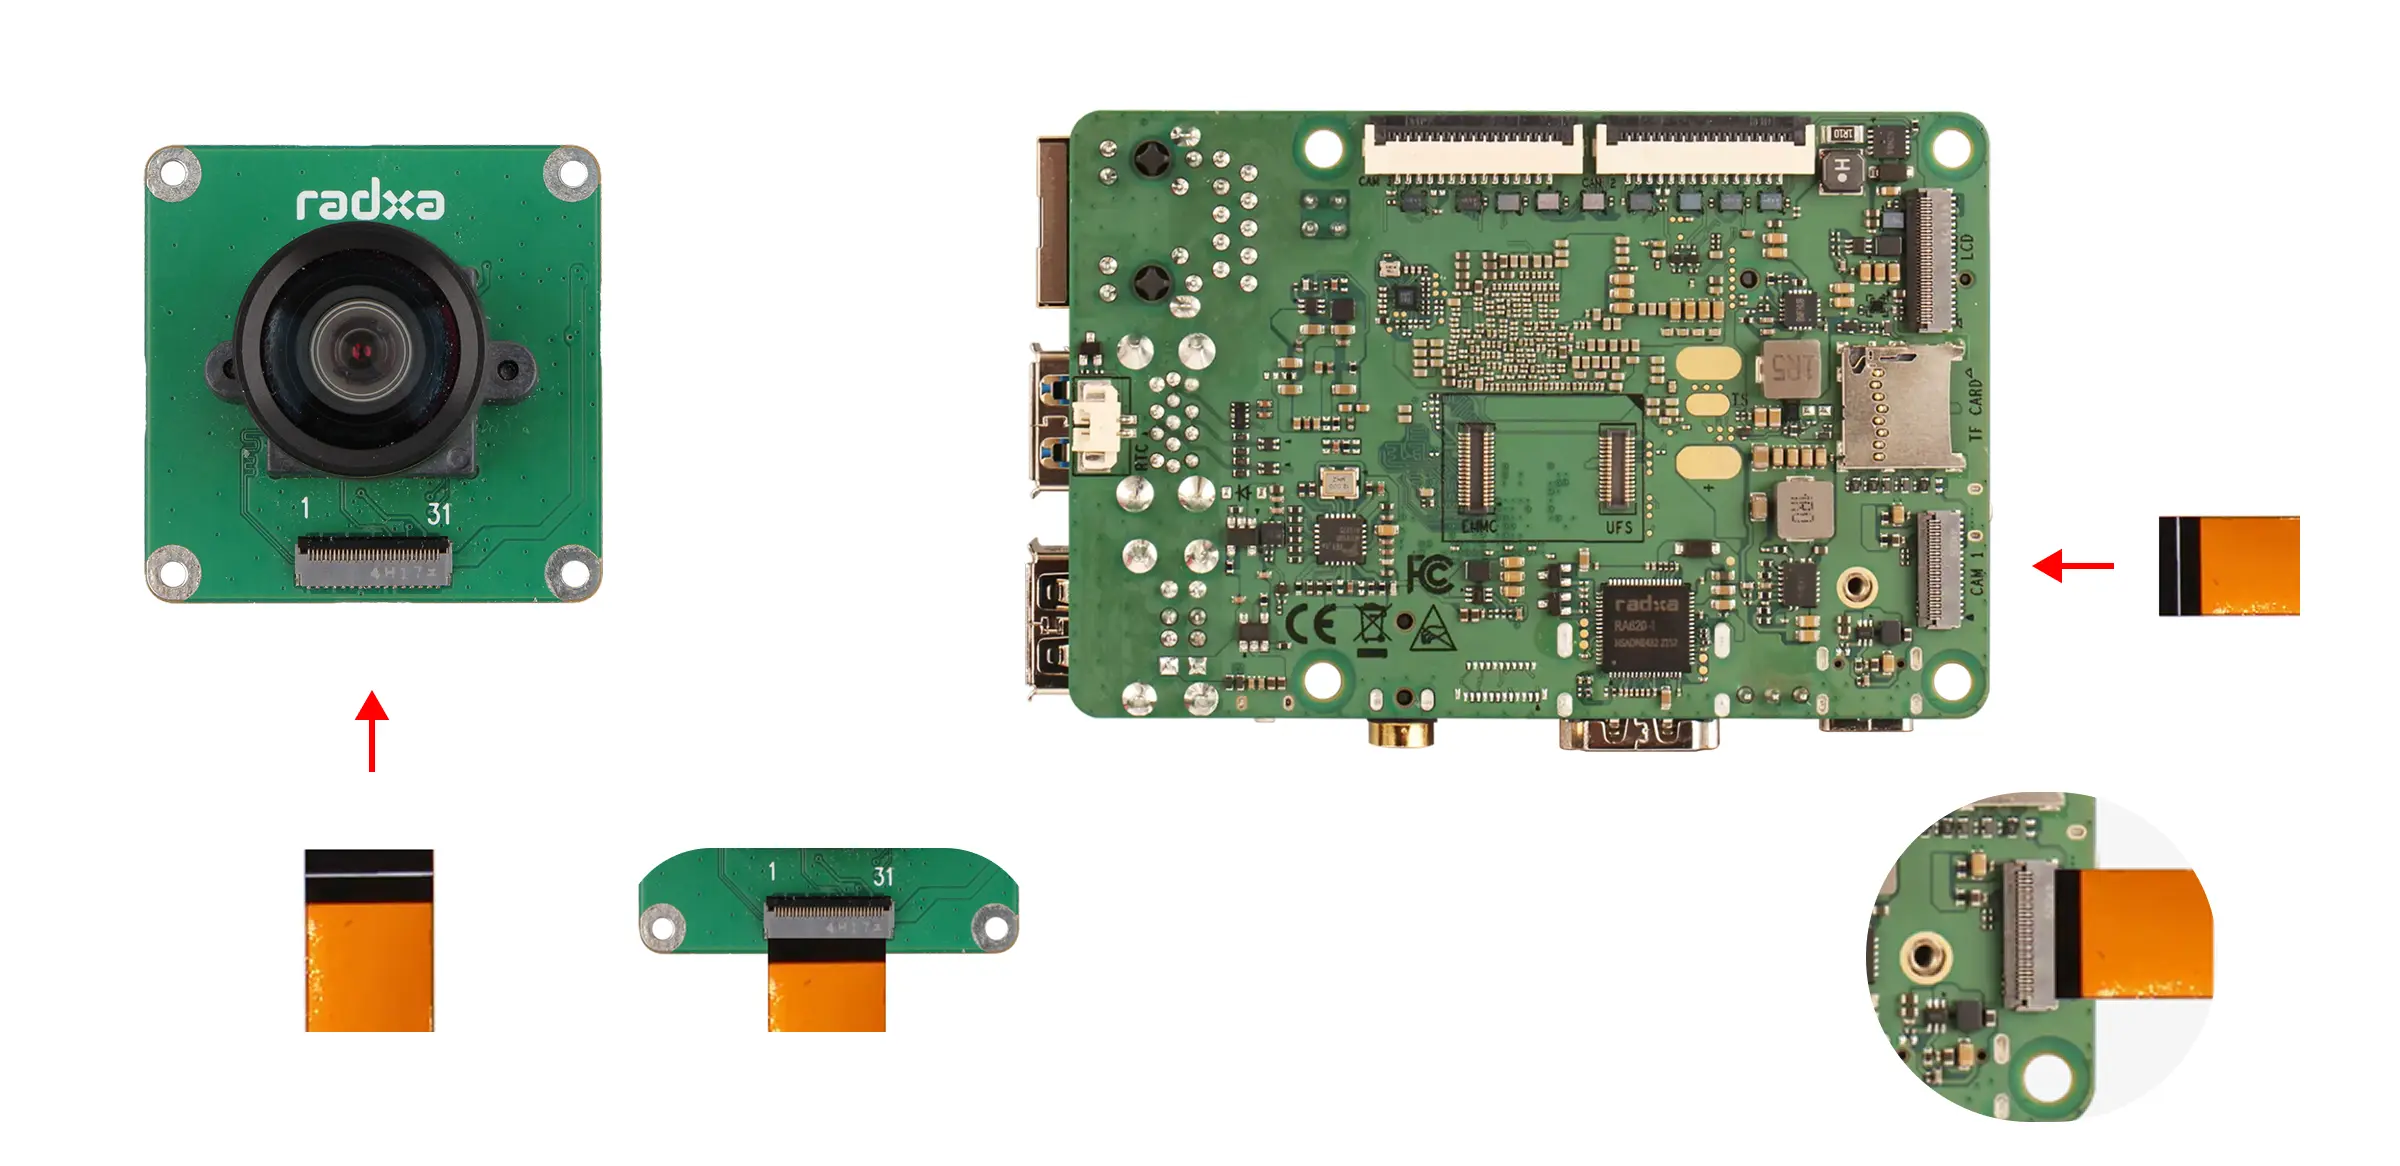
Hardware connection
Insert the 31-pin metal contacts of the FPC cable into the camera connector, and insert the 31-Pin metal contacts of the FPC cable into the board MIPI CSI connector.
- Make sure the edges of the FPC cable are aligned with the edges of the connector, with no skew and no exposed contacts.
- Ensure the cable has no creases, is not loose, and the connector latch is fully closed.
Software enablement
Use the Rsetup tool provided by the Radxa system to enable the Radxa Camera 12M 577.
- Select option: the corresponding option will be highlighted.
- Confirm selection: press
Enter. - Cancel selection: press
ESC. - Navigate options: use
Up,Down,Left, andRightkeys. - Multi-select screen: press
Spaceto toggle options, thenEnterto confirm. When a feature is enabled, a*appears in the corresponding option box.
Run the rsetup command in the terminal to start the Rsetup tool:
rsetup
In Rsetup, go to Overlays -> Manage overlays.
- Use the arrow keys to find the [ ] Enable IMX577 camera on CAM1 option.
- Press
Spaceso it changes to [*] Enable IMX577 camera on CAM1, indicating that the feature is enabled. - Press
Enterto confirm and save the settings to enable the camera. - Reboot the system to make the configuration take effect.
If the board has multiple MIPI CSI interfaces, Rsetup may show options such as [ ] Enable IMX577 camera on CAM *. Select the option corresponding to the MIPI CSI interface you are using.
Preview the camera
Use libcamera to preview the camera image.
Install dependencies
sudo apt update
sudo apt install build-essential git pkg-config -y
sudo apt install meson ninja-build -y
sudo apt install python3-pip python3-yaml python3-jinja2 python3-ply python3-pyparsing -y
sudo apt install libyaml-dev libevent-dev -y
sudo apt install libudev-dev libgnutls28-dev openssl libexpat1-dev -y
sudo apt install libdrm-dev -y
sudo apt install libjpeg-dev -y
sudo apt install libglib2.0-dev -y
sudo apt install qt6-base-dev qt6-base-dev-tools qt6-wayland-dev -y
sudo apt install \
    qtbase5-dev \
    qtbase5-dev-tools \
    qtchooser \
    qt5-qmake \
    qttools5-dev \
    qtdeclarative5-dev \
    libqt5opengl5-dev \
    qml-module-qtquick-controls \
    libgles2-mesa-dev \
    qml-module-qtquick2 -y
Build and install libcamera
git clone https://git.linuxtv.org/libcamera.git
cd libcamera
git checkout 02277d4c1a5ae7fee582f635936877435a12db64 # Optional. The following test steps are based on this version of libcamera.
meson setup build --wipe \
    -Dpipelines=simple \
    -Dcam=enabled \
    -Dgstreamer=disabled \
    -Dv4l2=enabled \
    -Dlc-compliance=disabled \
    -Dqcam=enabled
ninja -C build -j$(nproc)
sudo ninja -C build install
sudo ldconfig
Set permissions
sudo chmod 666 /dev/dma_heap/*
Start the camera
Open the system desktop terminal, go to the libcamera build directory, and start qcam.
cd libcamera/build/src/apps/qcam/
./qcam --stream pixelformat=YUYV,width=1920,height=1080