Booting from microSD Card and Installing System to eMMC
This guide explains how to install the system to eMMC using the dd command when the system can boot normally from a MicroSD card.
Installing the system will format the eMMC. Please back up any important data in advance!
Prerequisites
To use the dd command to install the system to eMMC, you need to meet the following conditions:
- The system can boot normally from a MicroSD card
- eMMC is installed on the board or the board has built-in eMMC
Hardware Connection
- eMMC Module
- Onboard eMMC
eMMC Module Installation Steps:
- Observe the notch direction on the eMMC module and the notch marking on the board's eMMC module interface to determine the correct installation orientation.
- Place the eMMC module above the board's eMMC module interface, ensuring the eMMC module interface is properly aligned with the board's eMMC module interface.
- Gently press one end of the eMMC module until you hear a "click" sound, indicating successful installation. Then press the other end in the same way to ensure the eMMC module is properly installed.
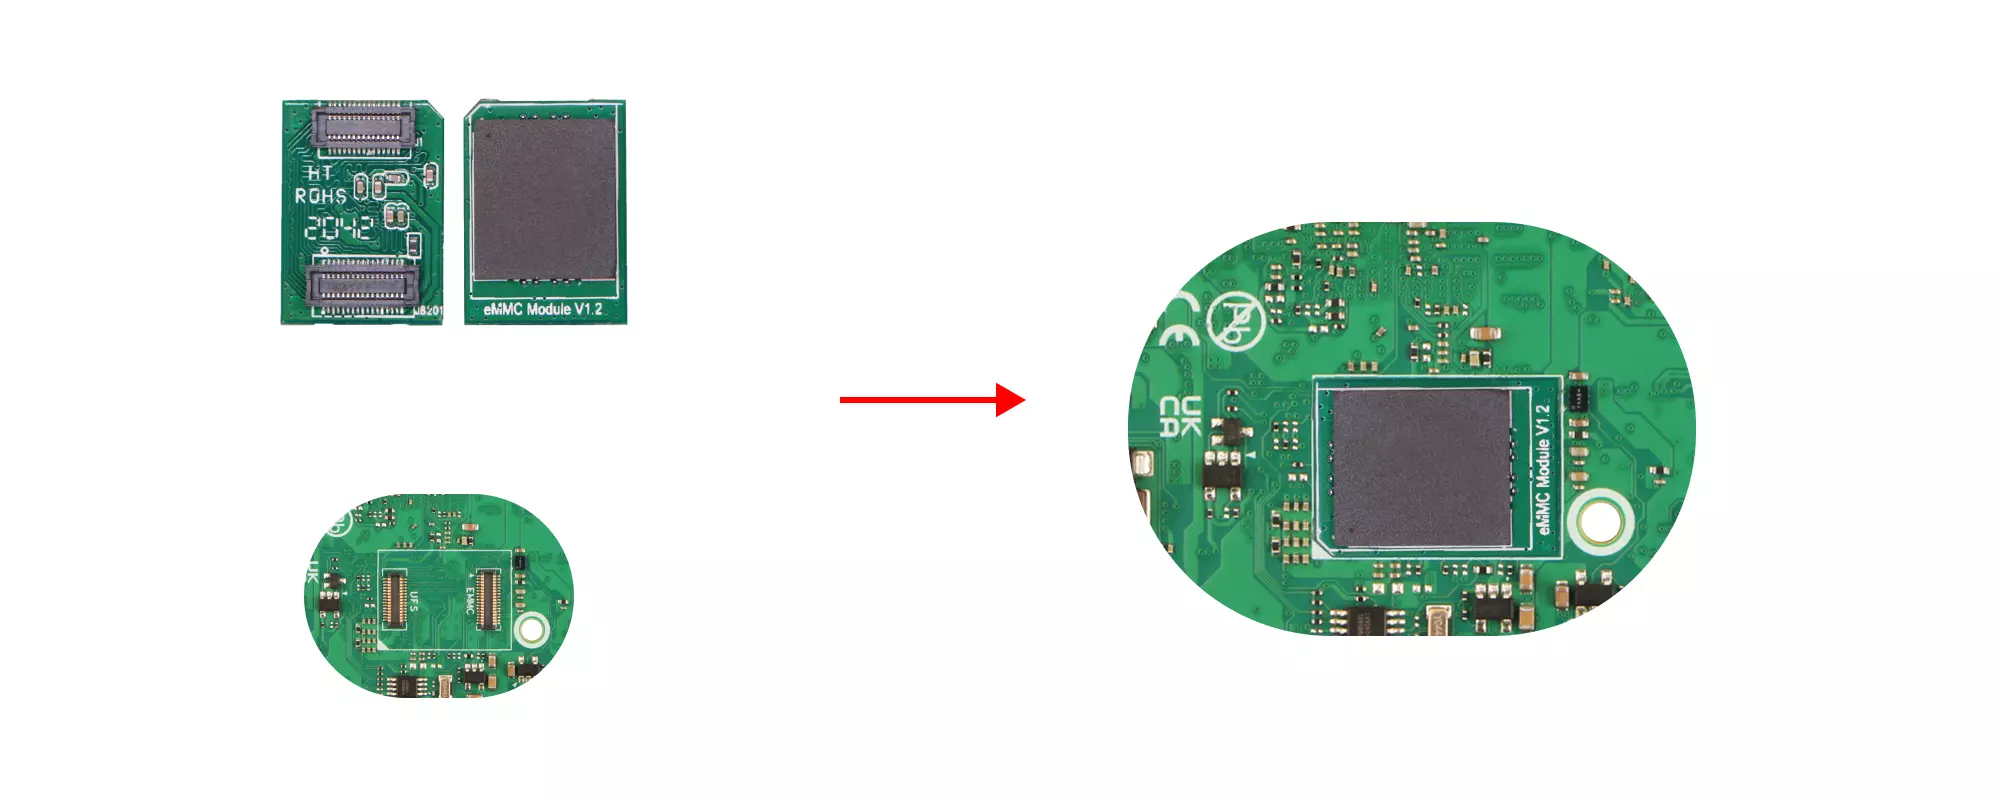
If your board has onboard eMMC, no installation is required.
System Installation
Download System Image
Access the Resource Download page from your device and download the latest system image to the device.
The downloaded system image is a compressed file and needs to be extracted before use!
You can use the wget command to download the system image file to your device.
sudo apt update
sudo apt install wget -y
wget <download_url>
Where <download_url> is the download URL of the system image file. You can copy the image download URL from the Resource Download page to replace it.
Download example: wget https://github.com/radxa-build/radxa-dragon-q6a/releases/download/rsdk-r2/radxa-dragon-q6a_noble_gnome_r2.output_512.img.xz
Extract System Image
Our system images are generally in *.img.xz format and need to be extracted before use.
sudo apt install xz-utils -y
unxz <path_to_image_unxz>
Where <path_to_image_unxz> is the path to the system image file, which needs to be replaced with the actual system image file path.
Extraction example:
unxz radxa-dragon-q6a_noble_gnome_r2.output_512.img.xz
Determine Device Path
You can use the lsblk command to check the device path and determine it based on the disk capacity.
Note: If the disk capacities are similar, you can safely remove and reinsert the eMMC module (for eMMC modules) to observe which device path appears and disappears, thus determining the correct device path.
lsblk
If the system recognizes the eMMC device, it will typically be identified as a /dev/mmcblk* device.
Terminal output example:
NAME        MAJ:MIN RM   SIZE RO TYPE MOUNTPOINTS
···
mmcblk1      179:0    0 29.1G  0 disk
└─mmcblk1p1  179:1    0 29.1G  0 part
···
Install System Image
Use the dd command to install the system image to the eMMC.
sudo dd if=<path_to_image> of=<device_target> bs=4M status=progress
Write example:
sudo dd if=radxa-dragon-q6a_noble_gnome_r2.output_512.img of=/dev/mmcblk1 bs=4M status=progress
Parameter description:
-
<path_to_image>: The path to the system image file, which needs to be replaced with the actual system image file path. -
<device_target>: The device path of the eMMC module, which needs to be replaced with the actual eMMC module's device path. -
bs=4M: Block size for writing. -
status=progress: Display write progress.
Verify Write Result
After the system installation is complete, you can use the lsblk command to check if the eMMC partition table has been created correctly.
lsblk
Terminal output example:
NAME        MAJ:MIN RM   SIZE RO TYPE MOUNTPOINTS
···
mmcblk0      179:0    0 29.1G  0 disk
├─mmcblk0p1  179:1    0   16M  0 part
├─mmcblk0p2  179:2    0  300M  0 part
└─mmcblk0p3  179:3    0 28.8G  0 part
···
Booting the System
After completing the system installation, remove the microSD card, ensure the eMMC module is properly installed in the eMMC module interface of the Dragon Q6A, then power on the Dragon Q6A using a 12V Type-C power adapter.
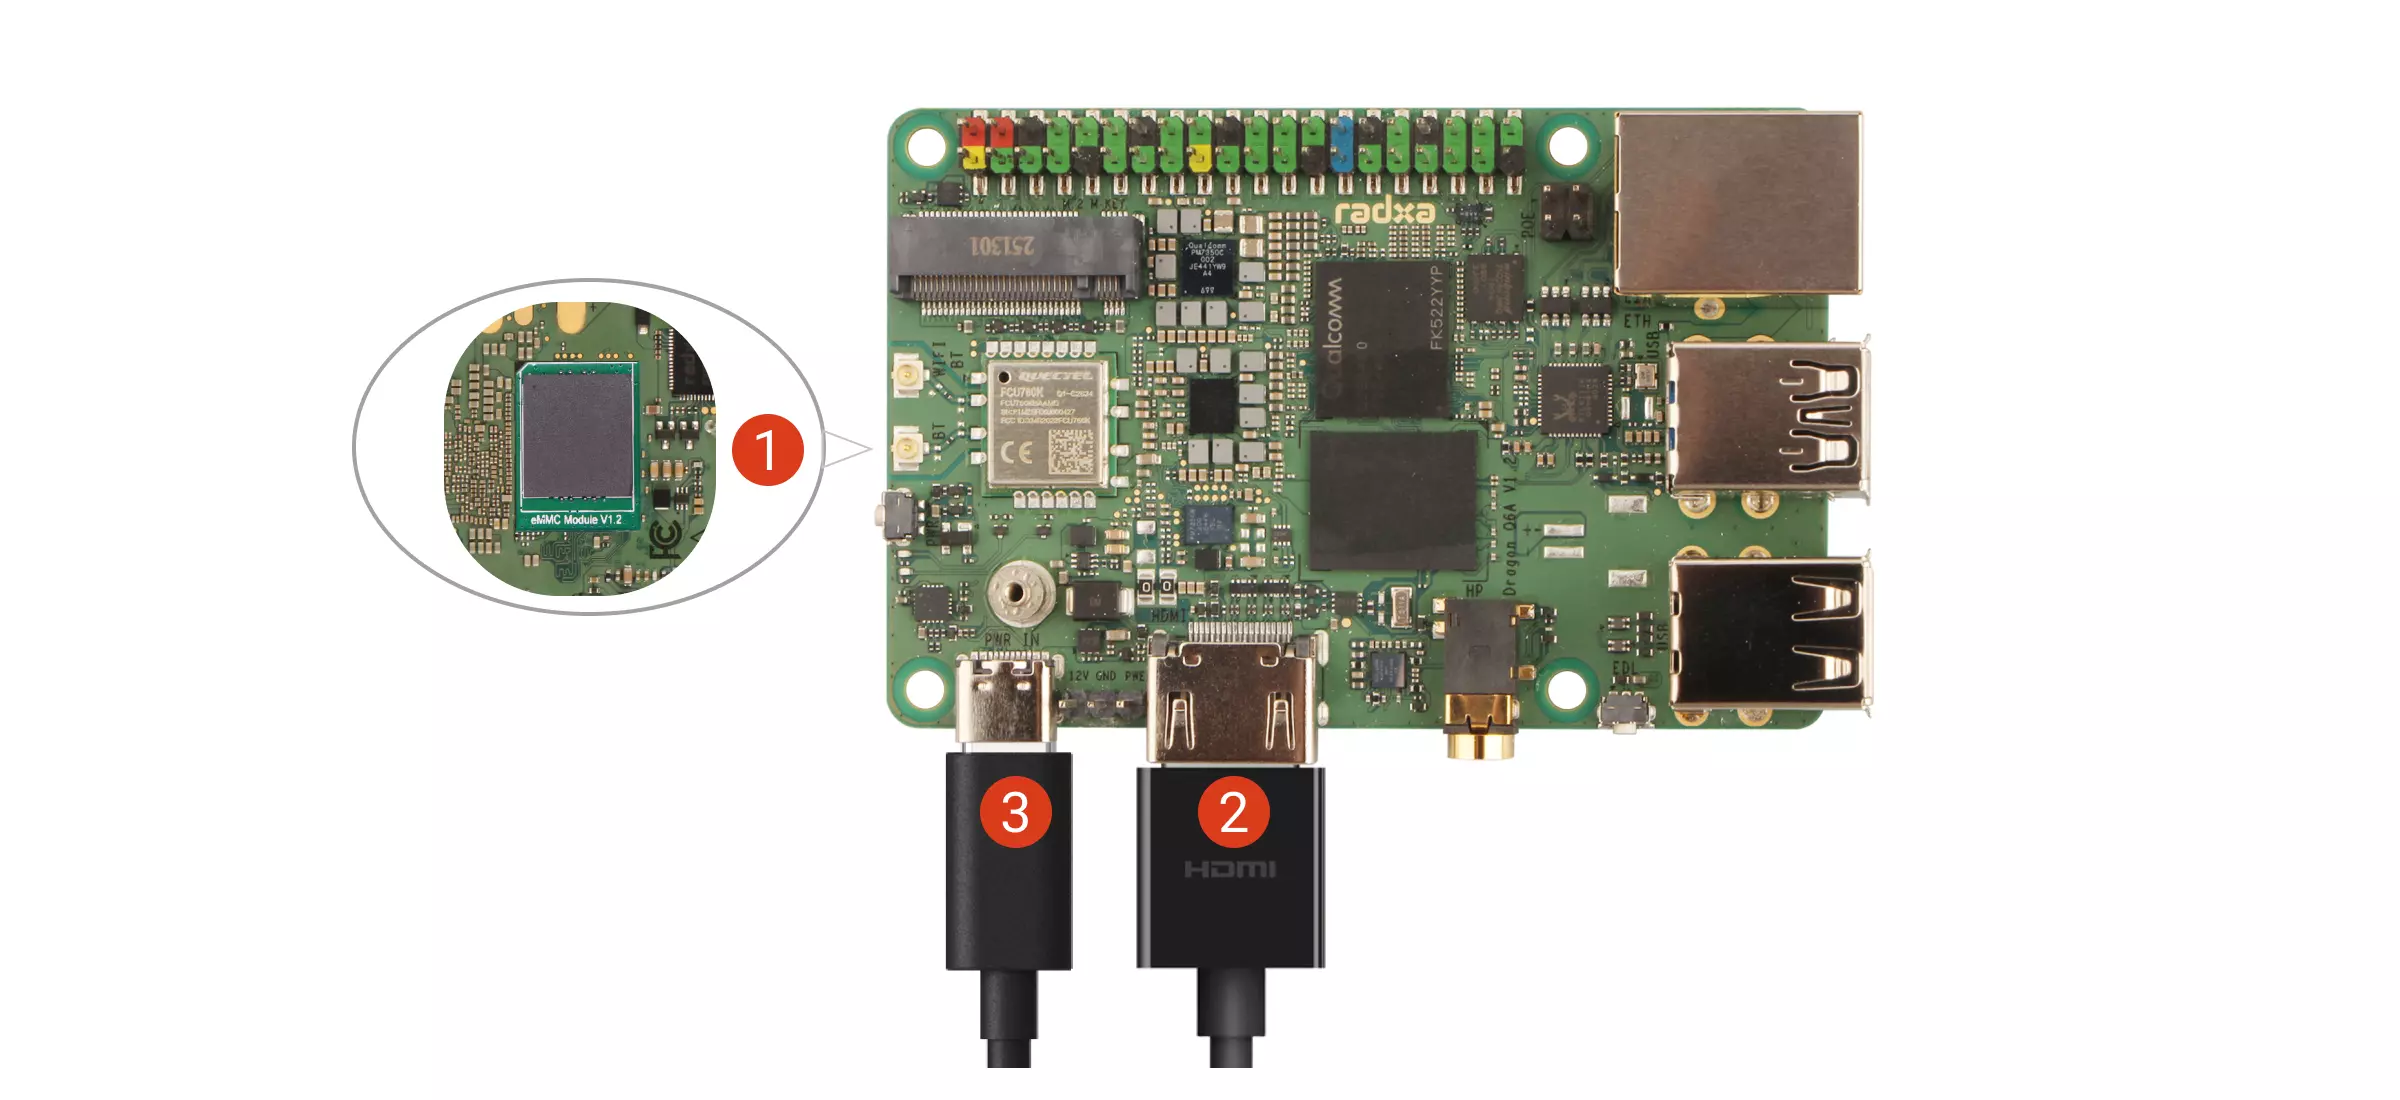
① : Verify the eMMC module is installed
② : Connect the monitor to the motherboard using an HDMI cable
③ : Power the Dragon Q6A using a 12V Type-C power adapter
When the system boots normally, the power indicator will light up green, and the status indicator will flash blue.
Logging into the System
When you start the system for the first time, you need to log in using the default username and password.
The default credentials for Radxa OS are as follows:
| Item | Content |
|---|---|
| Username | radxa |
| Password | radxa |
Using the System
After successfully booting the system, you can start using the Radxa OS on your Dragon Q6A. For basic usage of the Radxa OS, please refer to the Using the System tutorial.