Install Fedora 44
This guide explains how to create a bootable USB drive and install Fedora 44 Workstation to a microSD card on the Radxa Dragon Q8B, from BIOS setup and the live installer through the first-boot setup wizard and the desktop.
The installation process erases all data on the selected target storage device. Back up any important files in advance, and double-check the target disk.
Download the System Image
Download the ARM64 build of Fedora 44 Workstation from the official Fedora website.
Burn the Bootable USB Drive
Use balenaEtcher to write the downloaded system image to a USB drive. For installation and usage instructions, see Etcher Usage.
Modify BIOS Settings
Install the bootable USB drive and the microSD card on the board, then connect the power adapter.
Enter the UEFI Setup Main Screen
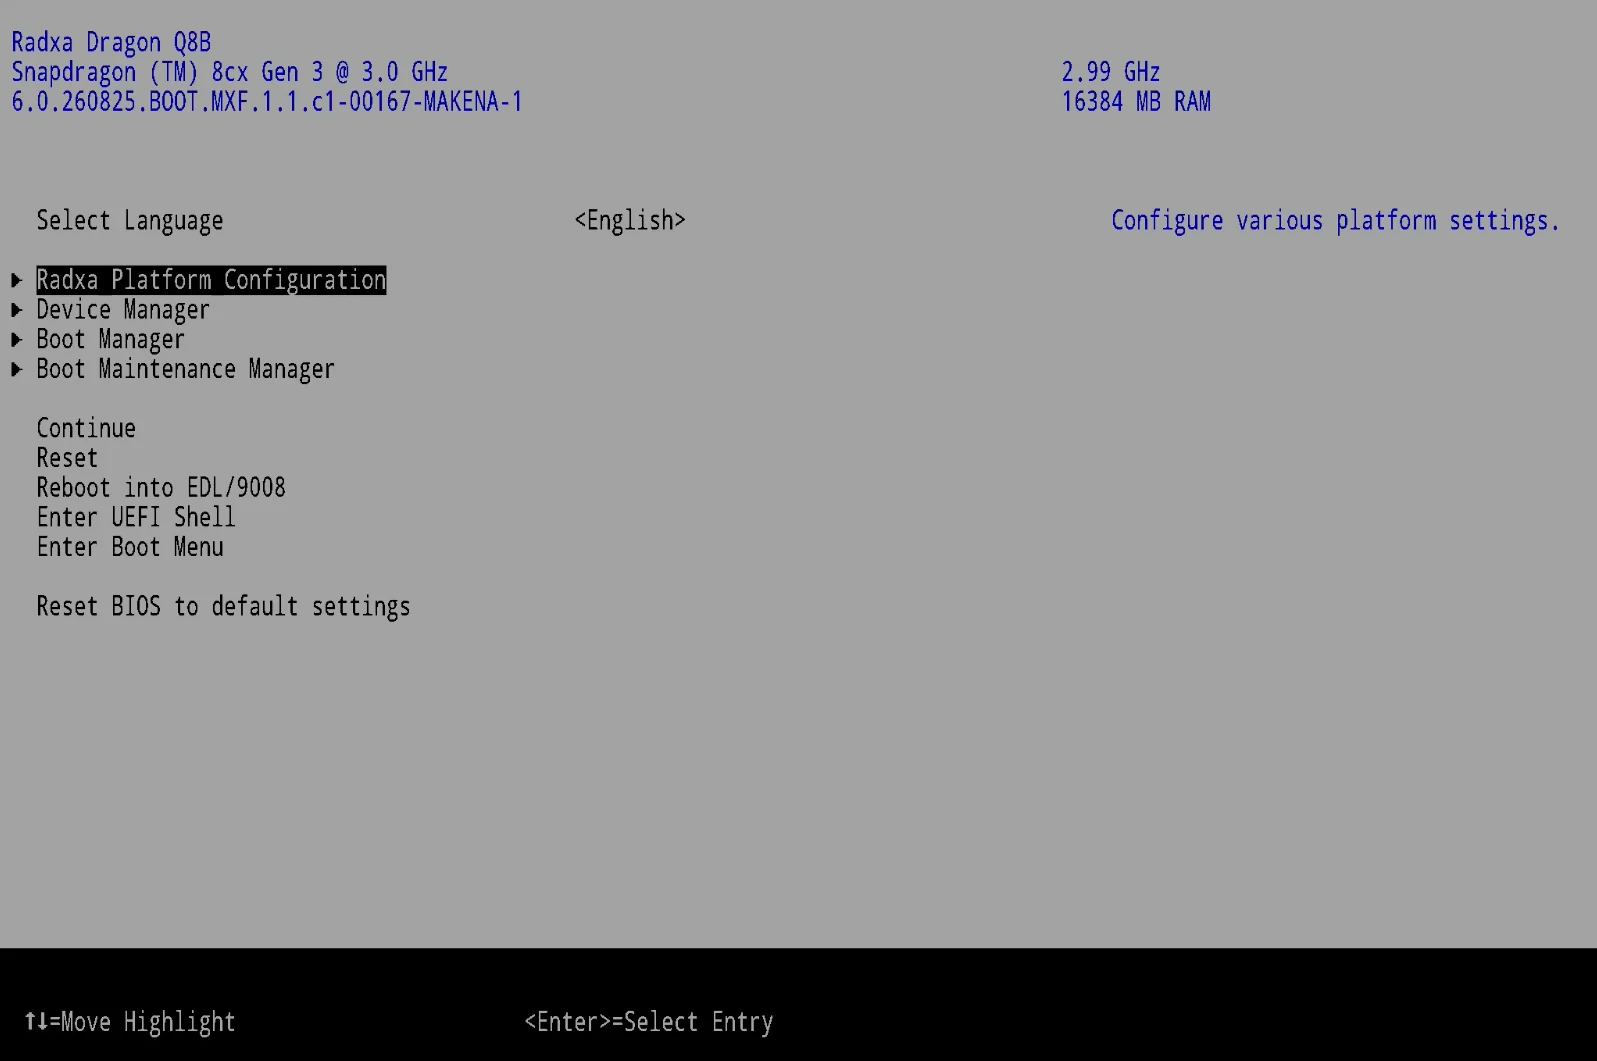
Power on and press F2 to enter the UEFI setup, and confirm that the firmware and memory are detected correctly. With the cursor on Radxa Platform Configuration, press Enter to continue.
Enter Radxa Platform Configuration
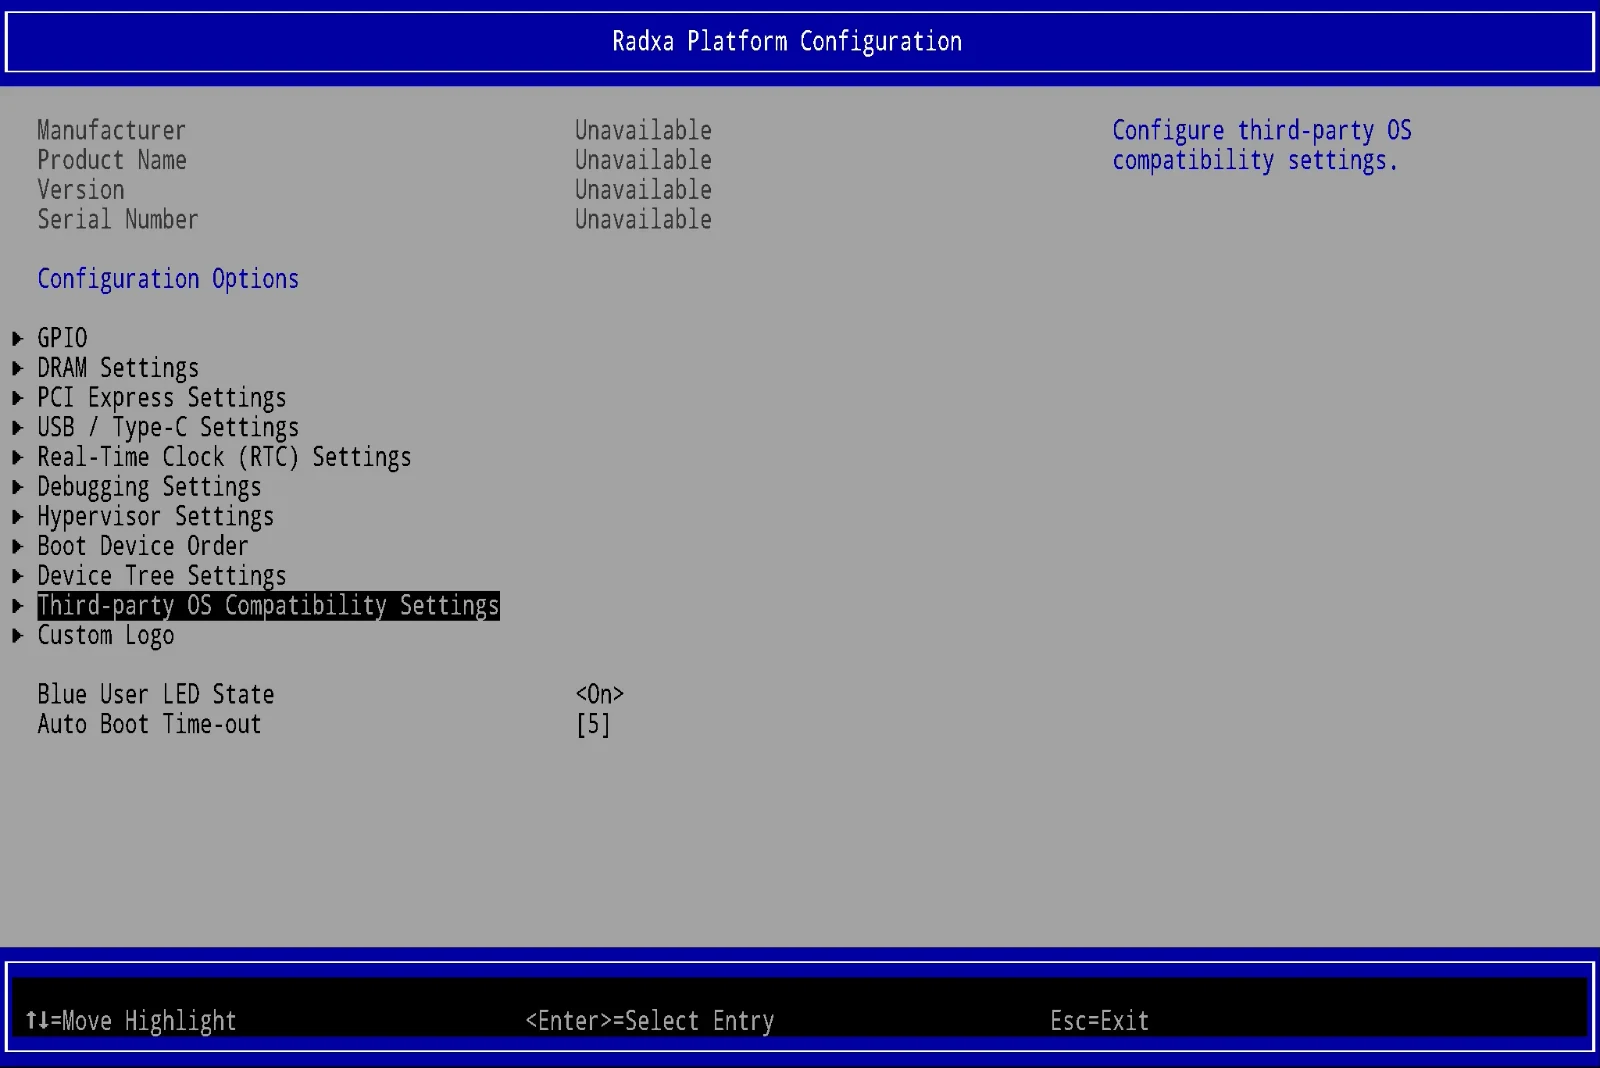
In the Configuration Options list, select Third-party OS Compatibility Settings and press Enter.
Set All Third-Party OS Compatibility Options to Enabled
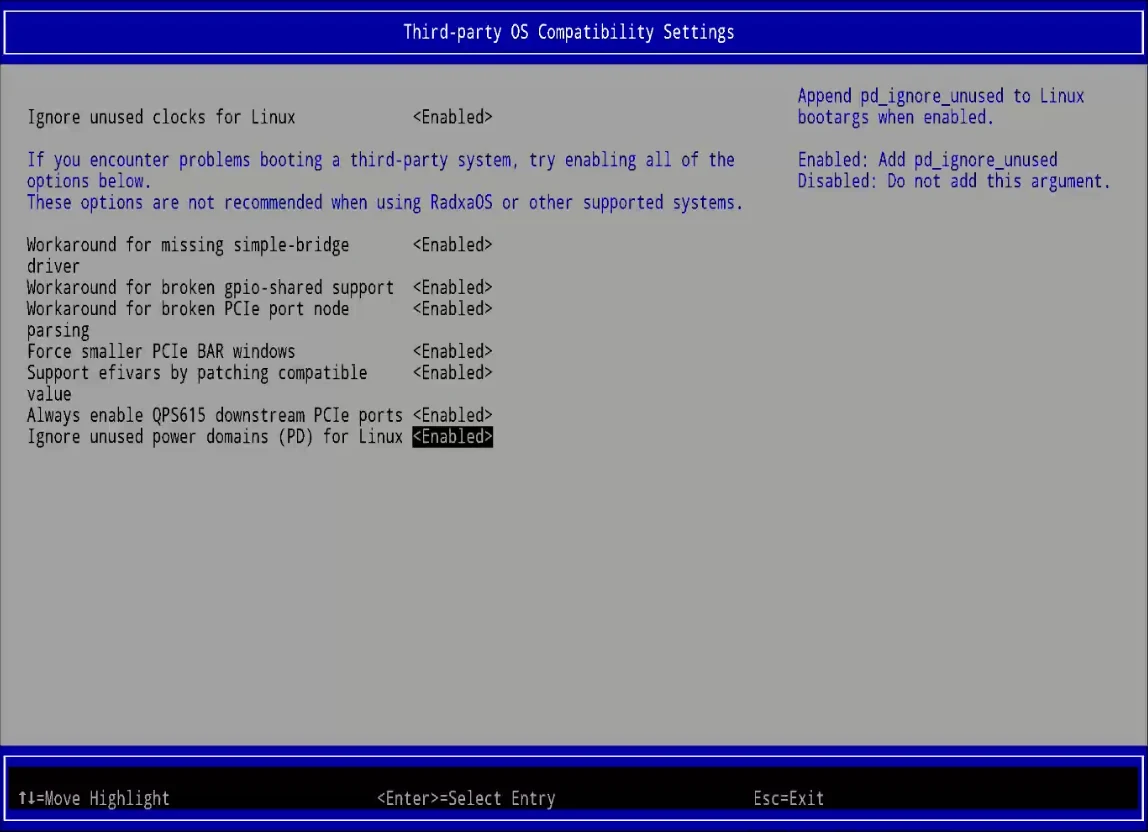
Keep every compatibility switch set to <Enabled> (including Ignore unused power domains (PD) for Linux, which appends pd_ignore_unused to the kernel parameters), then press Esc to exit and save.
Install Fedora
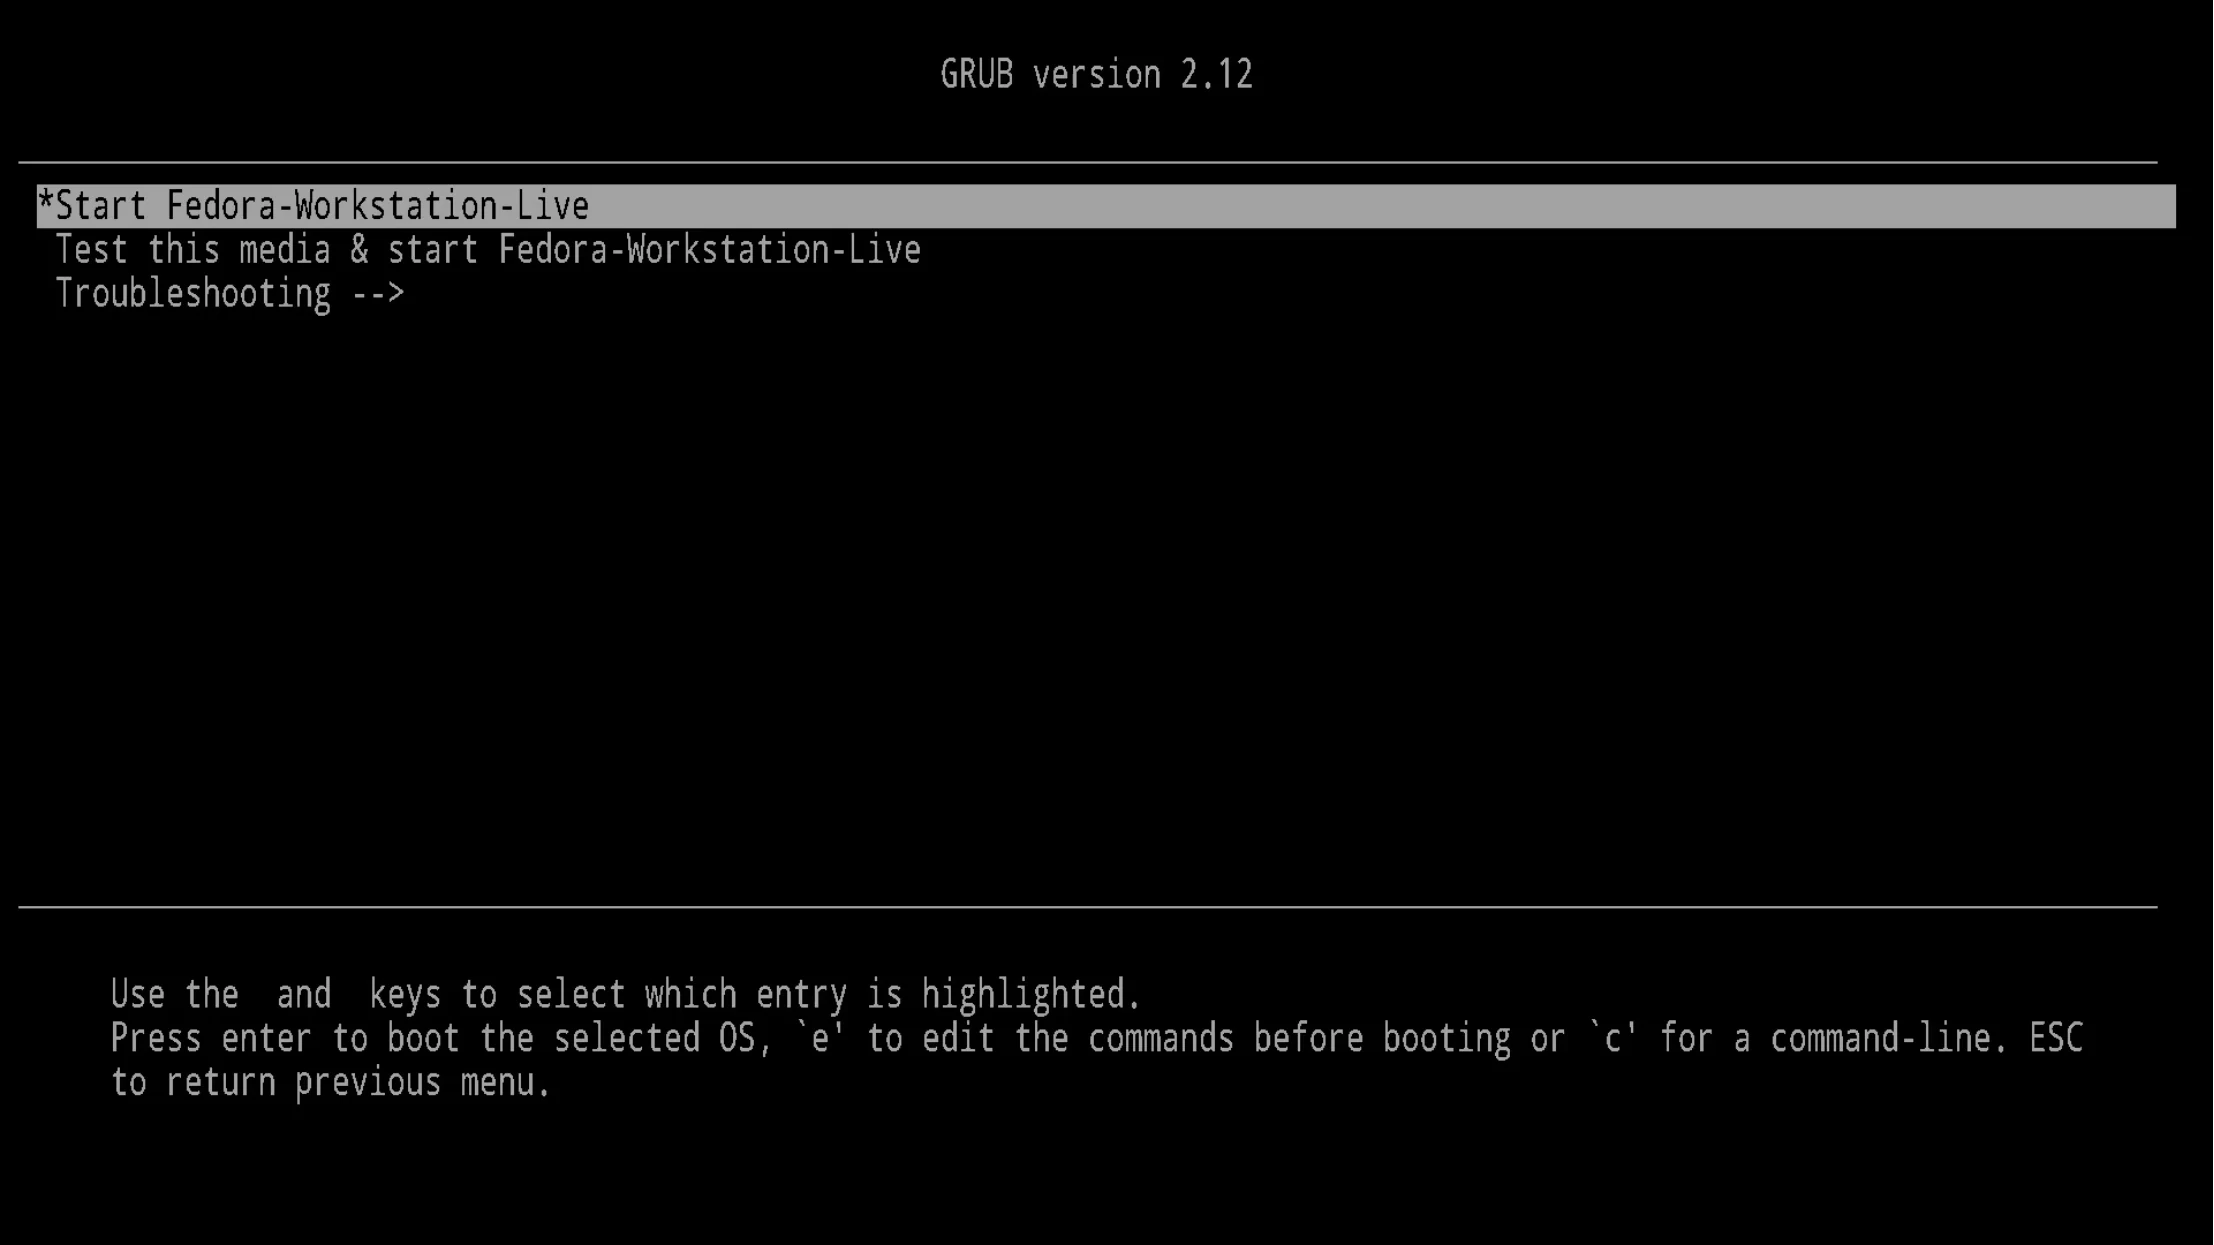
GRUB Menu: Start Fedora-Workstation-Live
Select Start Fedora-Workstation-Live and press Enter to boot. If you want to verify the integrity of the installation medium first, choose Test this media & start Fedora-Workstation-Live; if booting fails, choose Troubleshooting -->.
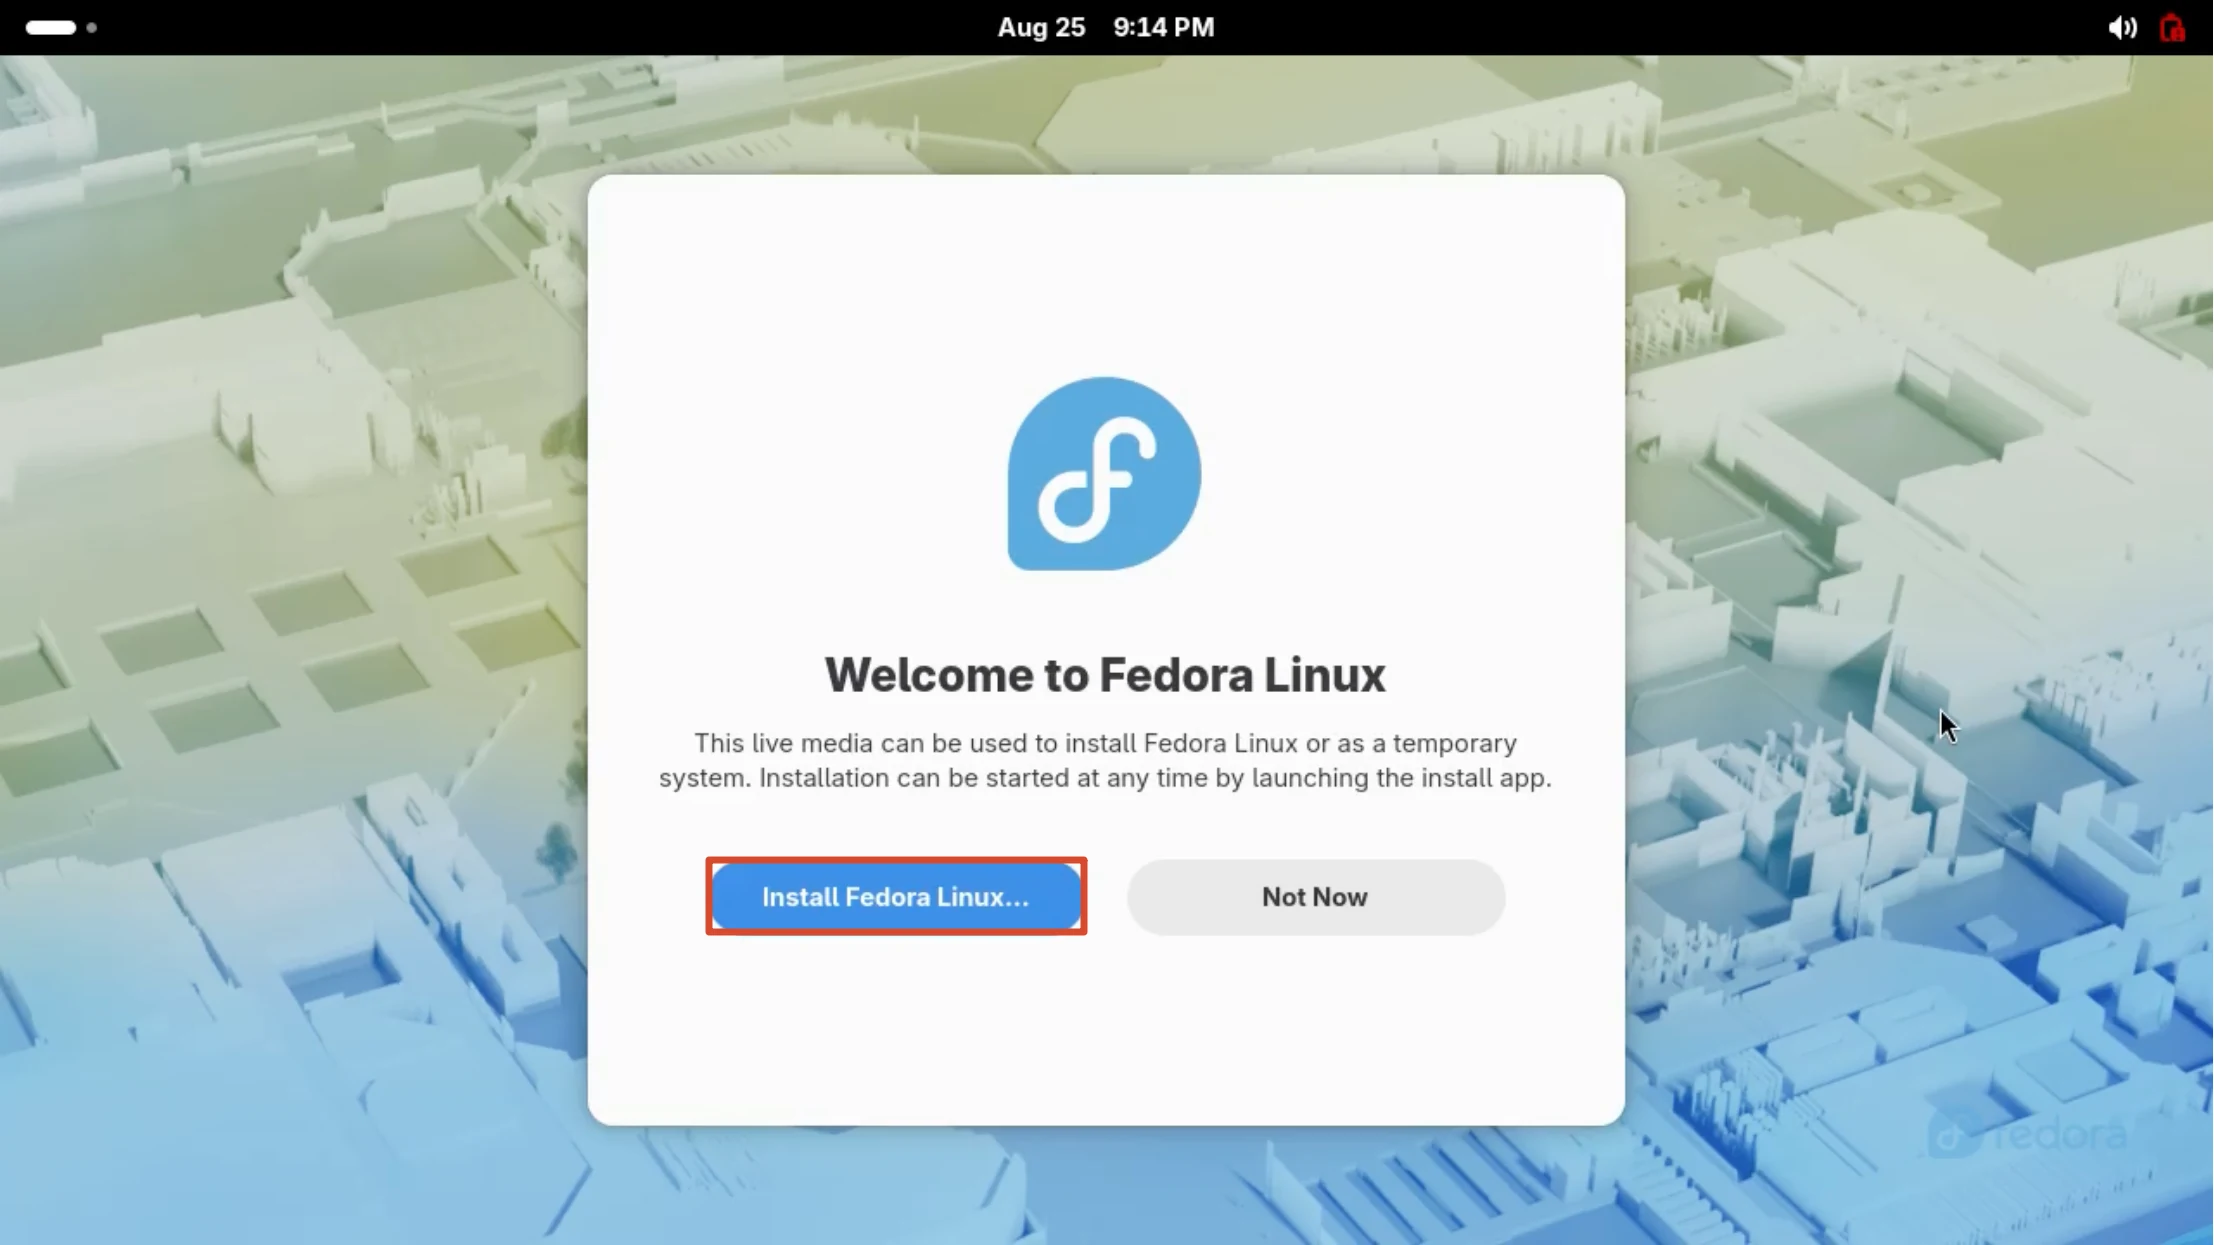
Welcome Window: Start the Installer
Once the live desktop is ready, the Welcome to Fedora Linux window appears; click Install Fedora Linux... to start the installation wizard (Not Now keeps you on the live desktop).
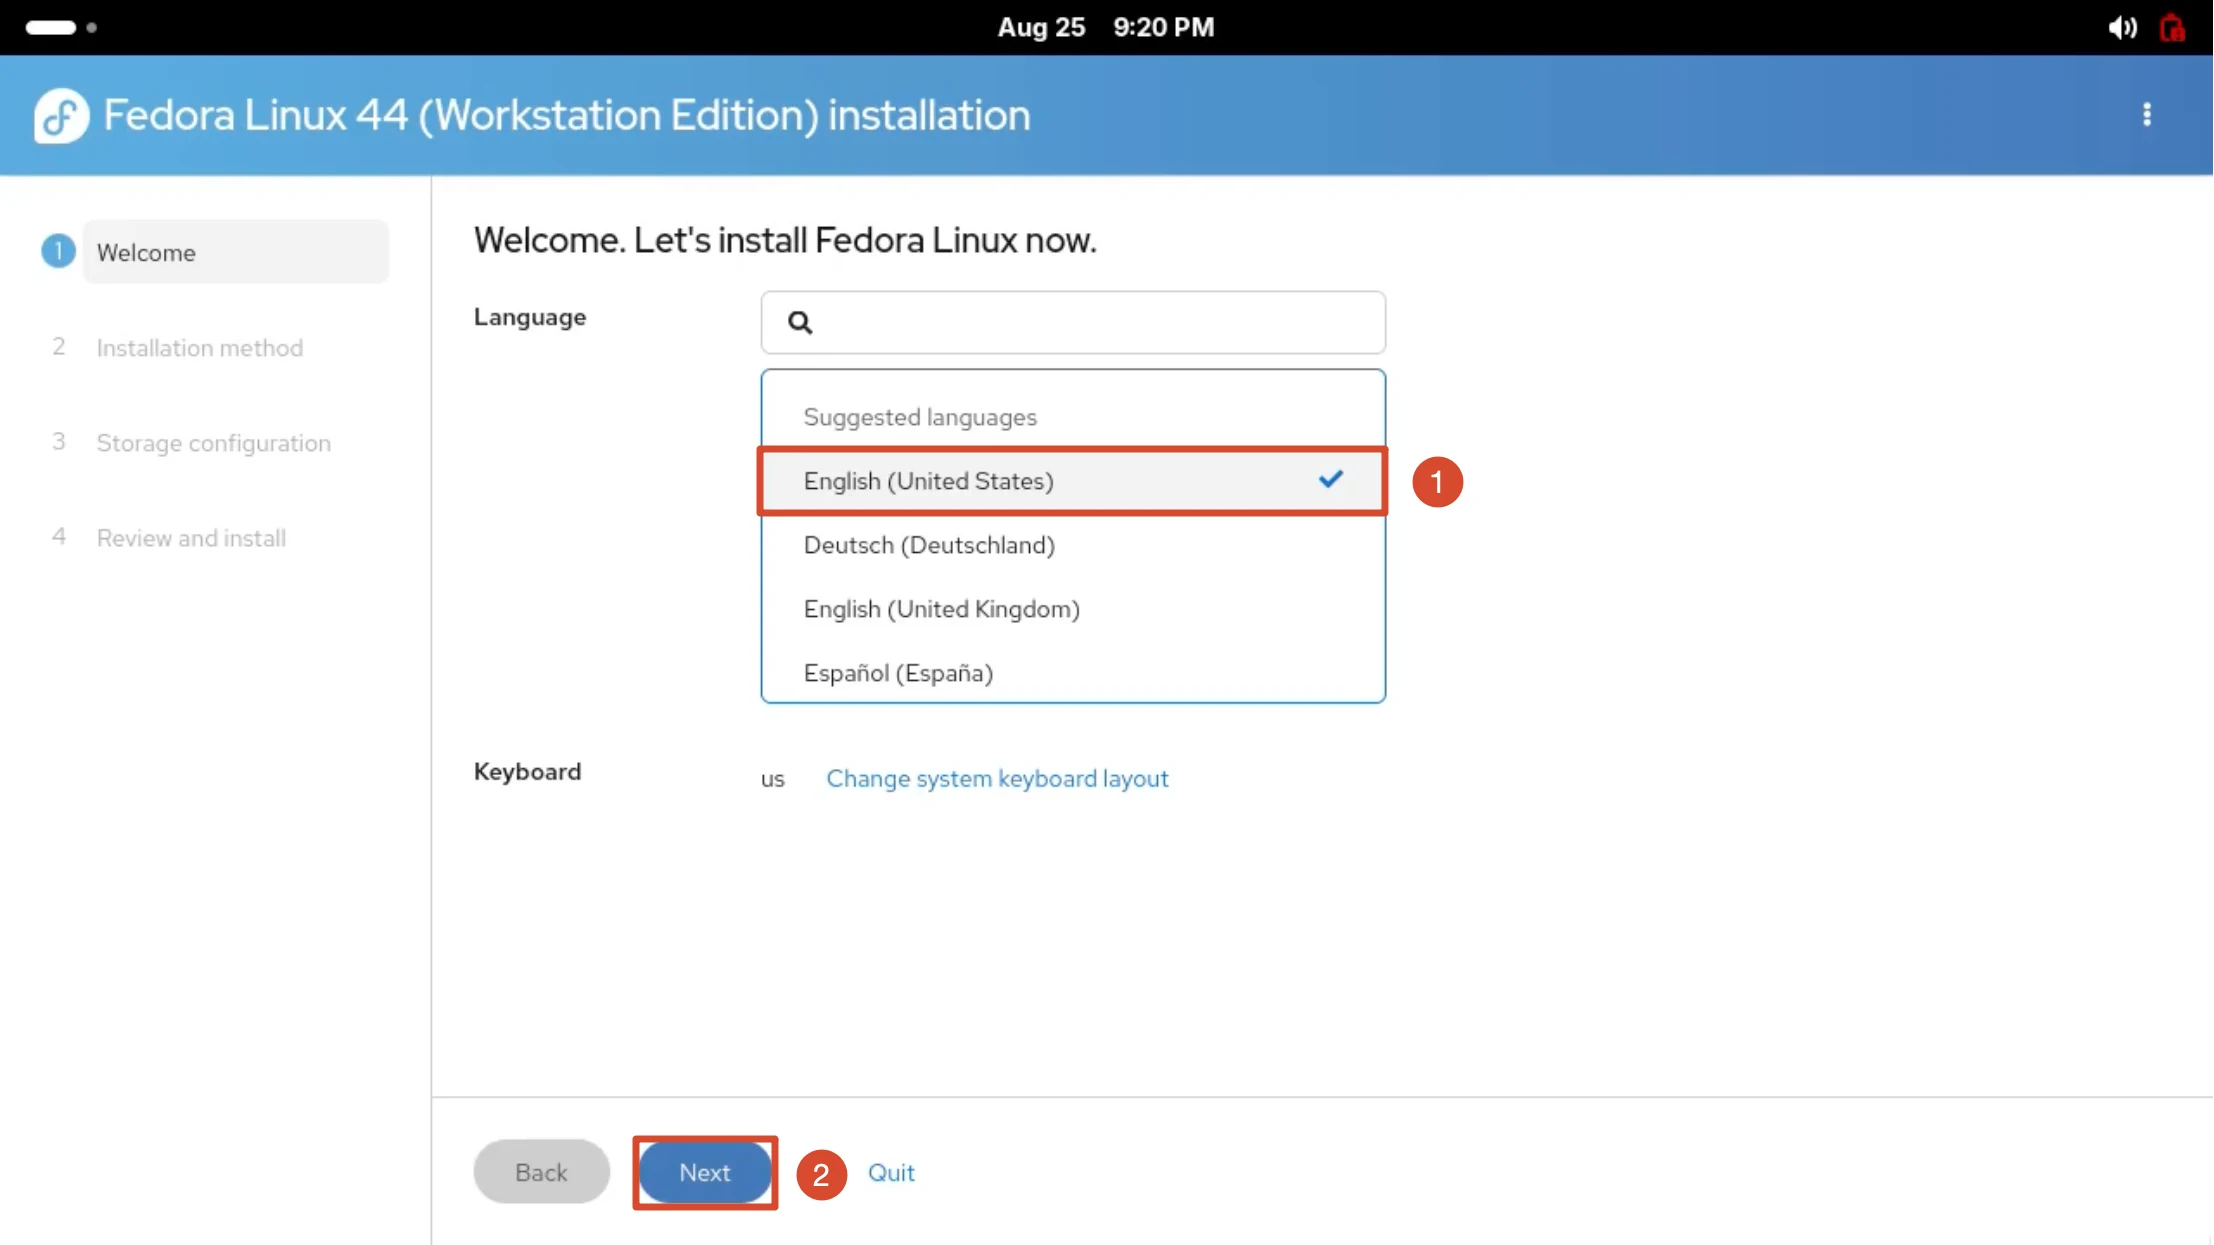
Installer: Language and Keyboard
On the Welcome page, confirm the language English (United States) and the keyboard us (click Change system keyboard layout to change them), then click Next.
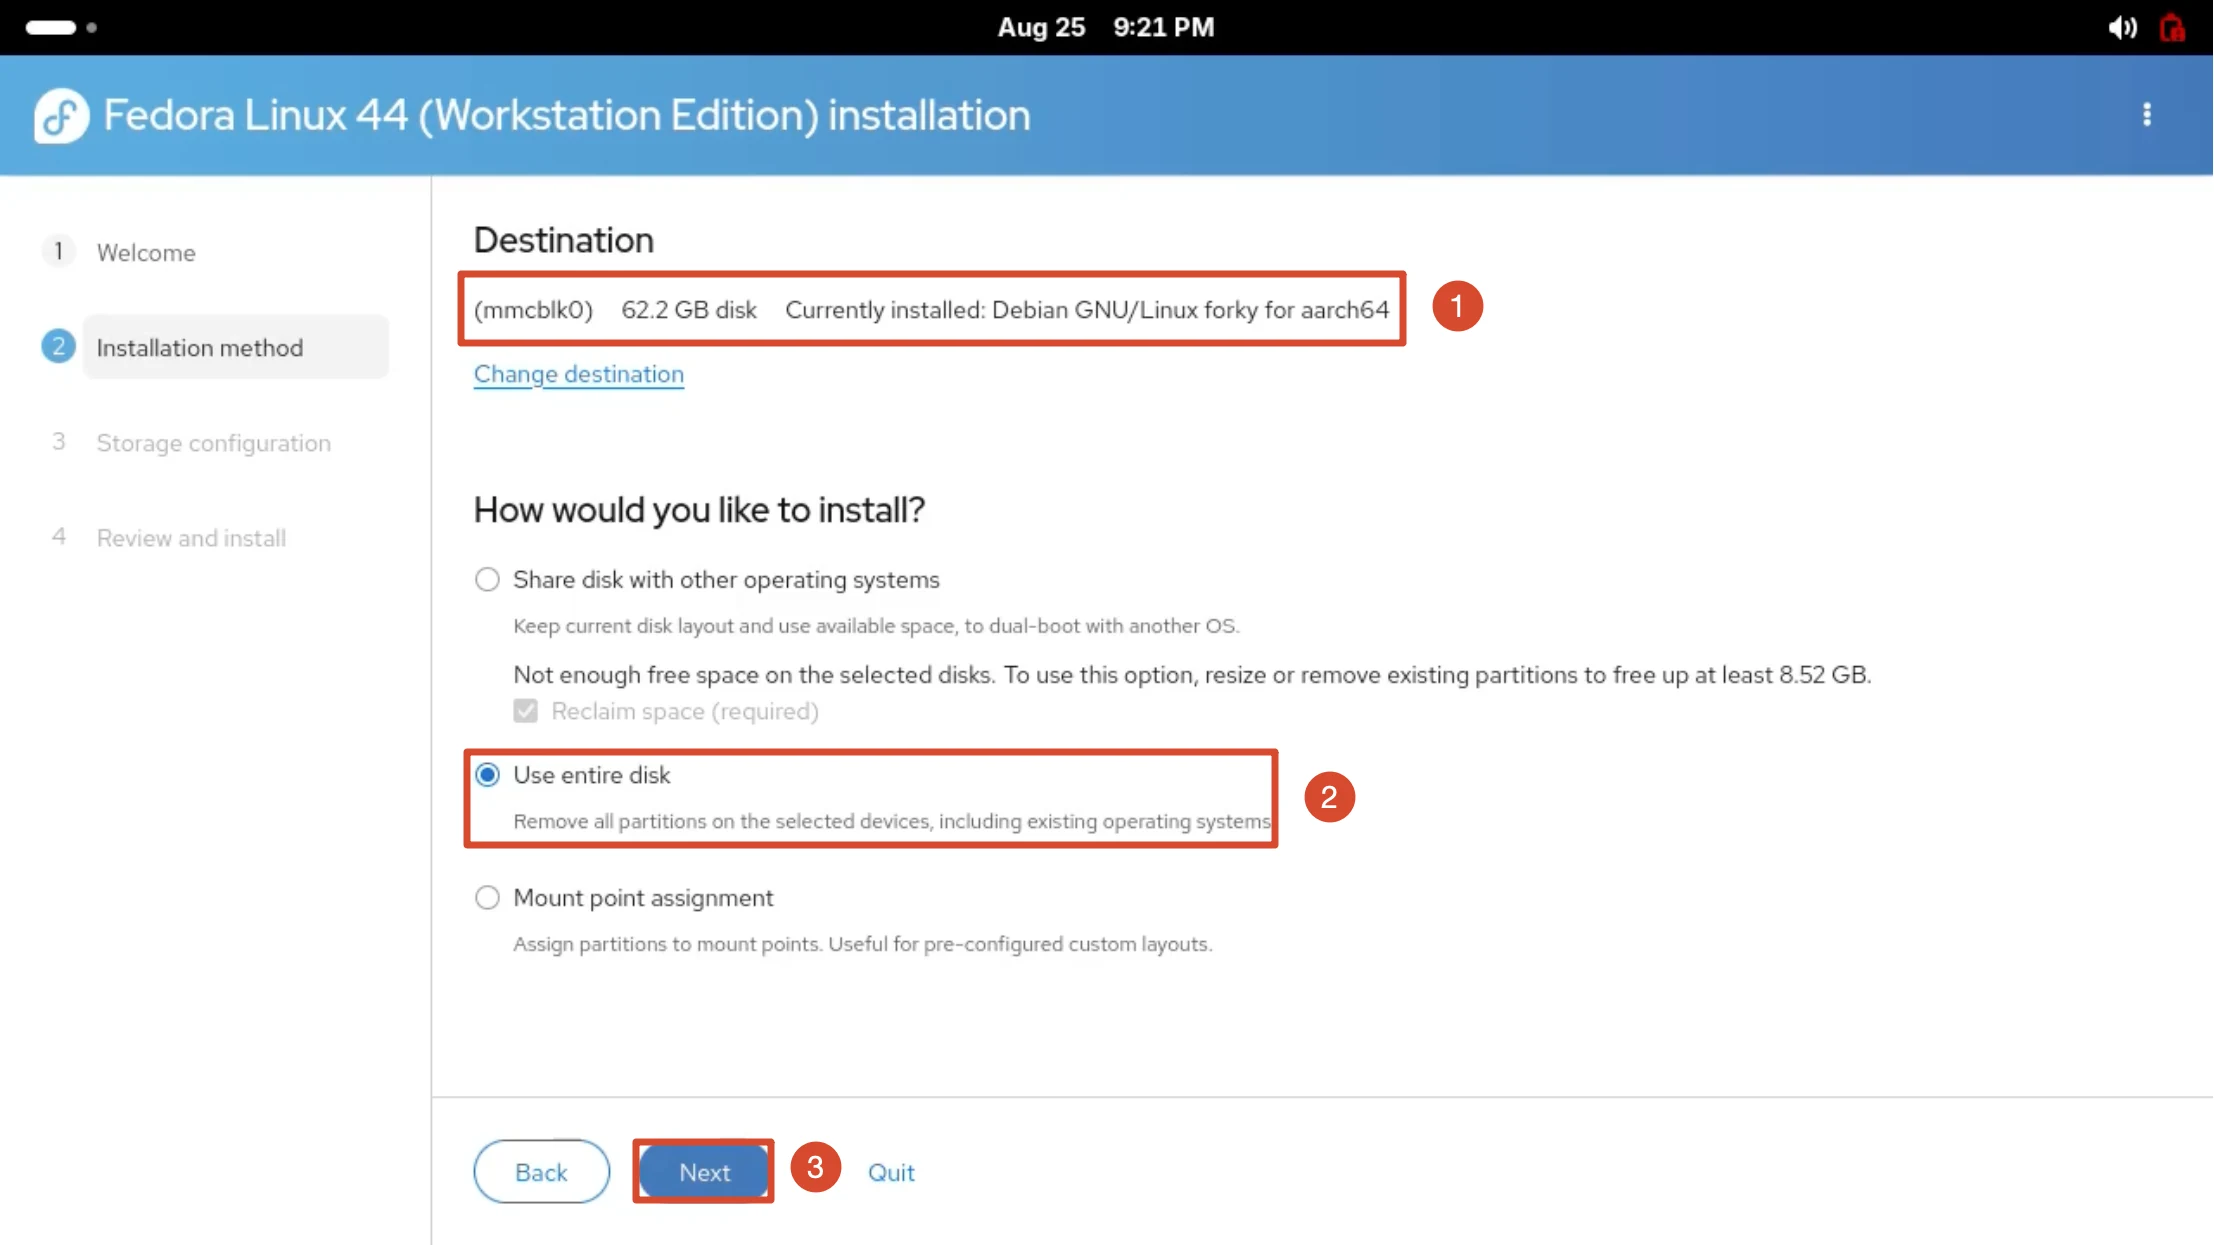
Choose the Target Disk and Installation Method
Confirm that the target disk is (mmcblk0) 62.2 GB. This is a single-system installation, so select Use entire disk (this removes the existing partitions on the disk, including any previous system) and click Next.
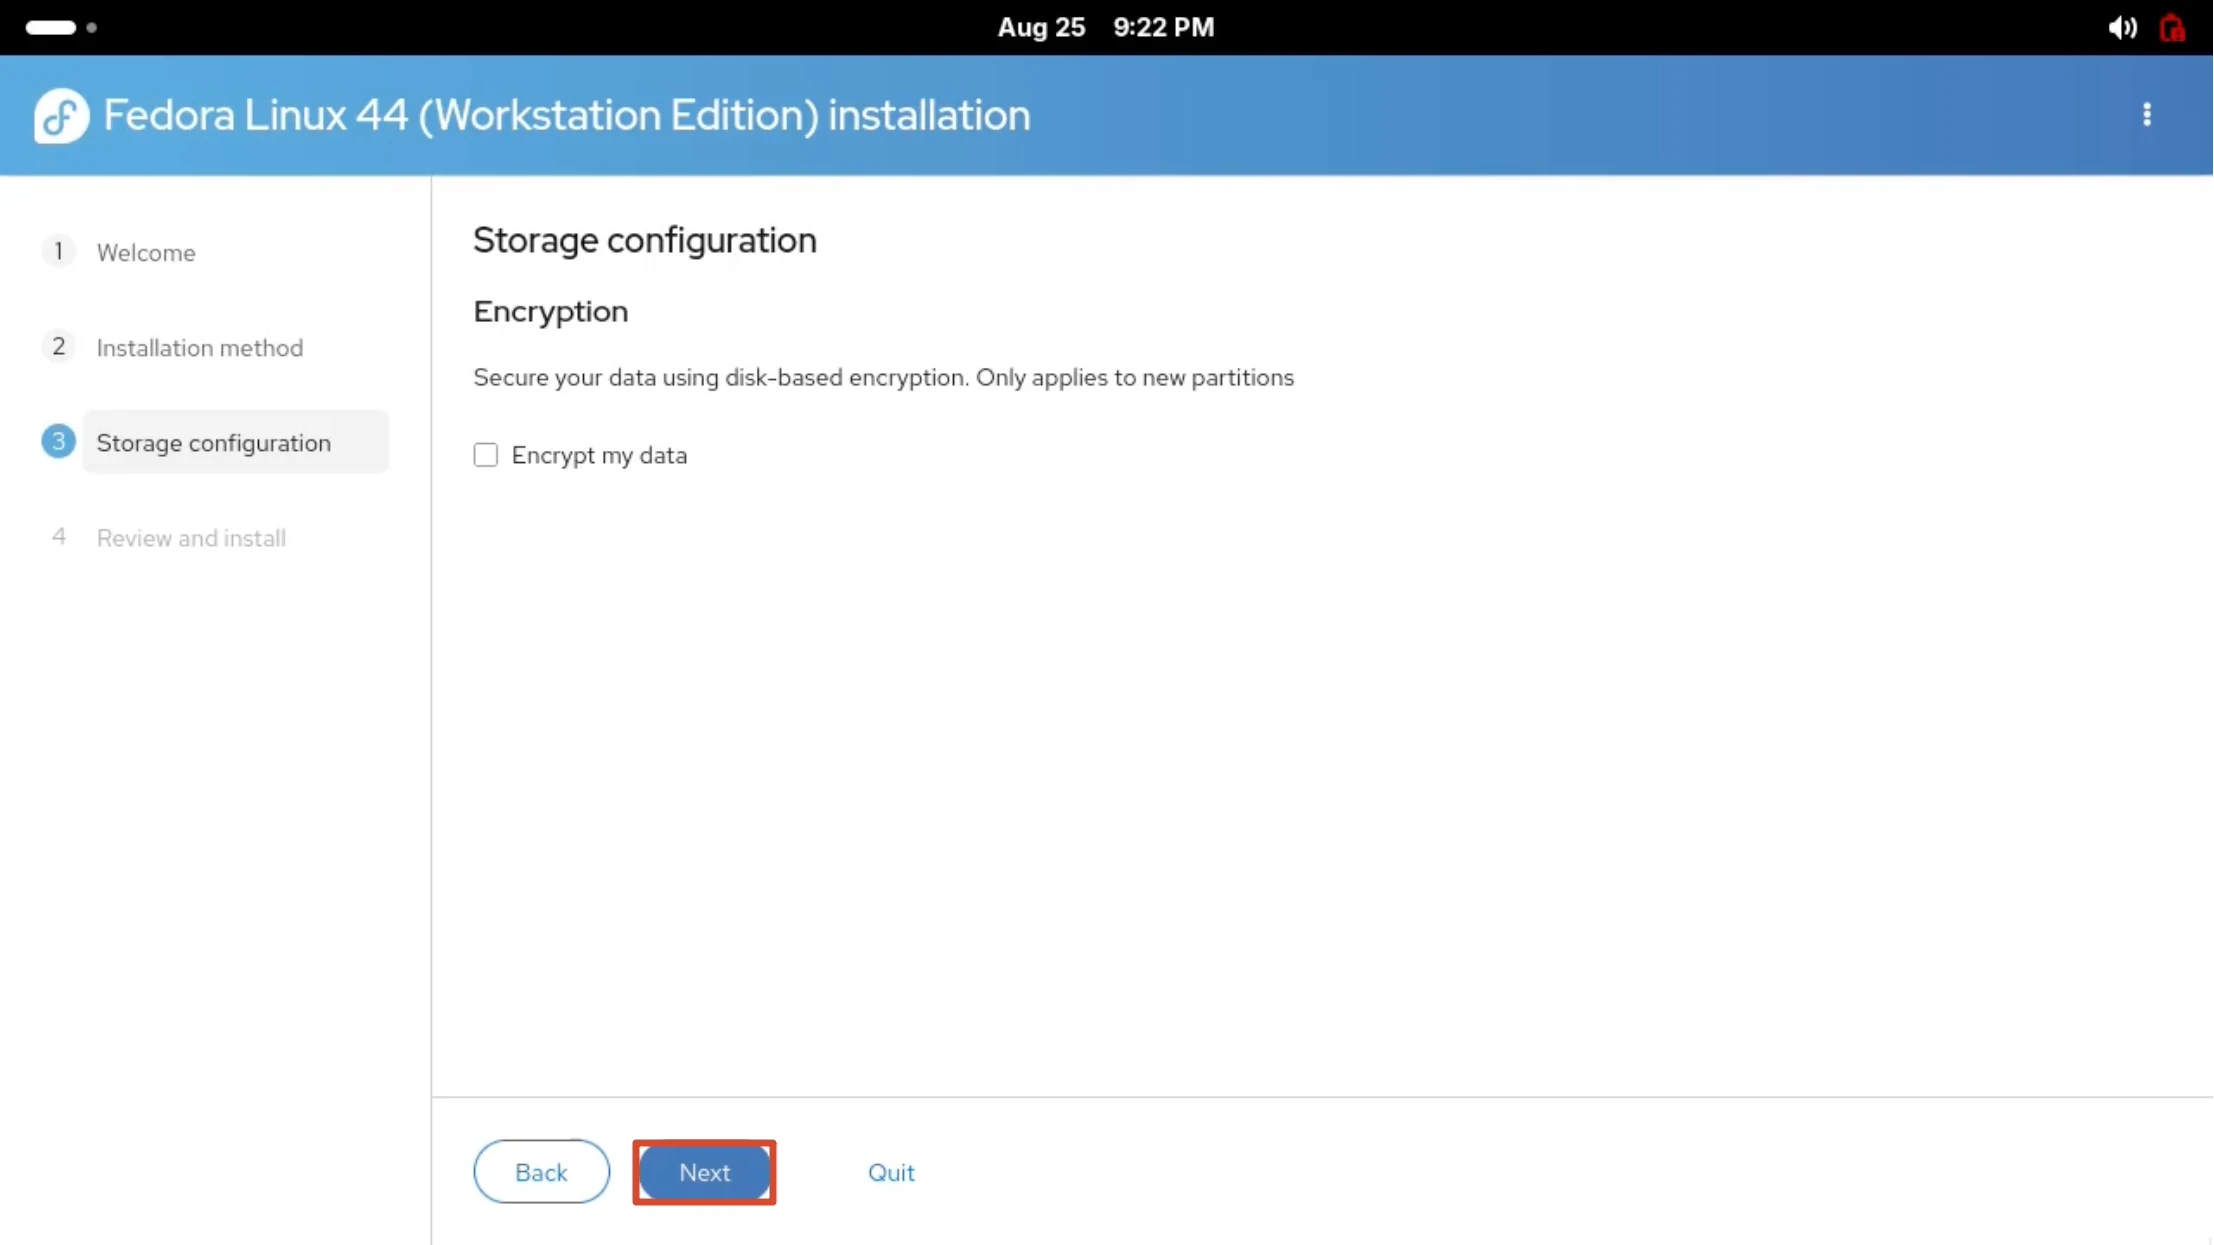
Storage Configuration: Encryption
On the Storage configuration page, keep Encrypt my data unchecked and click Next. Select it only if you need LUKS disk encryption.
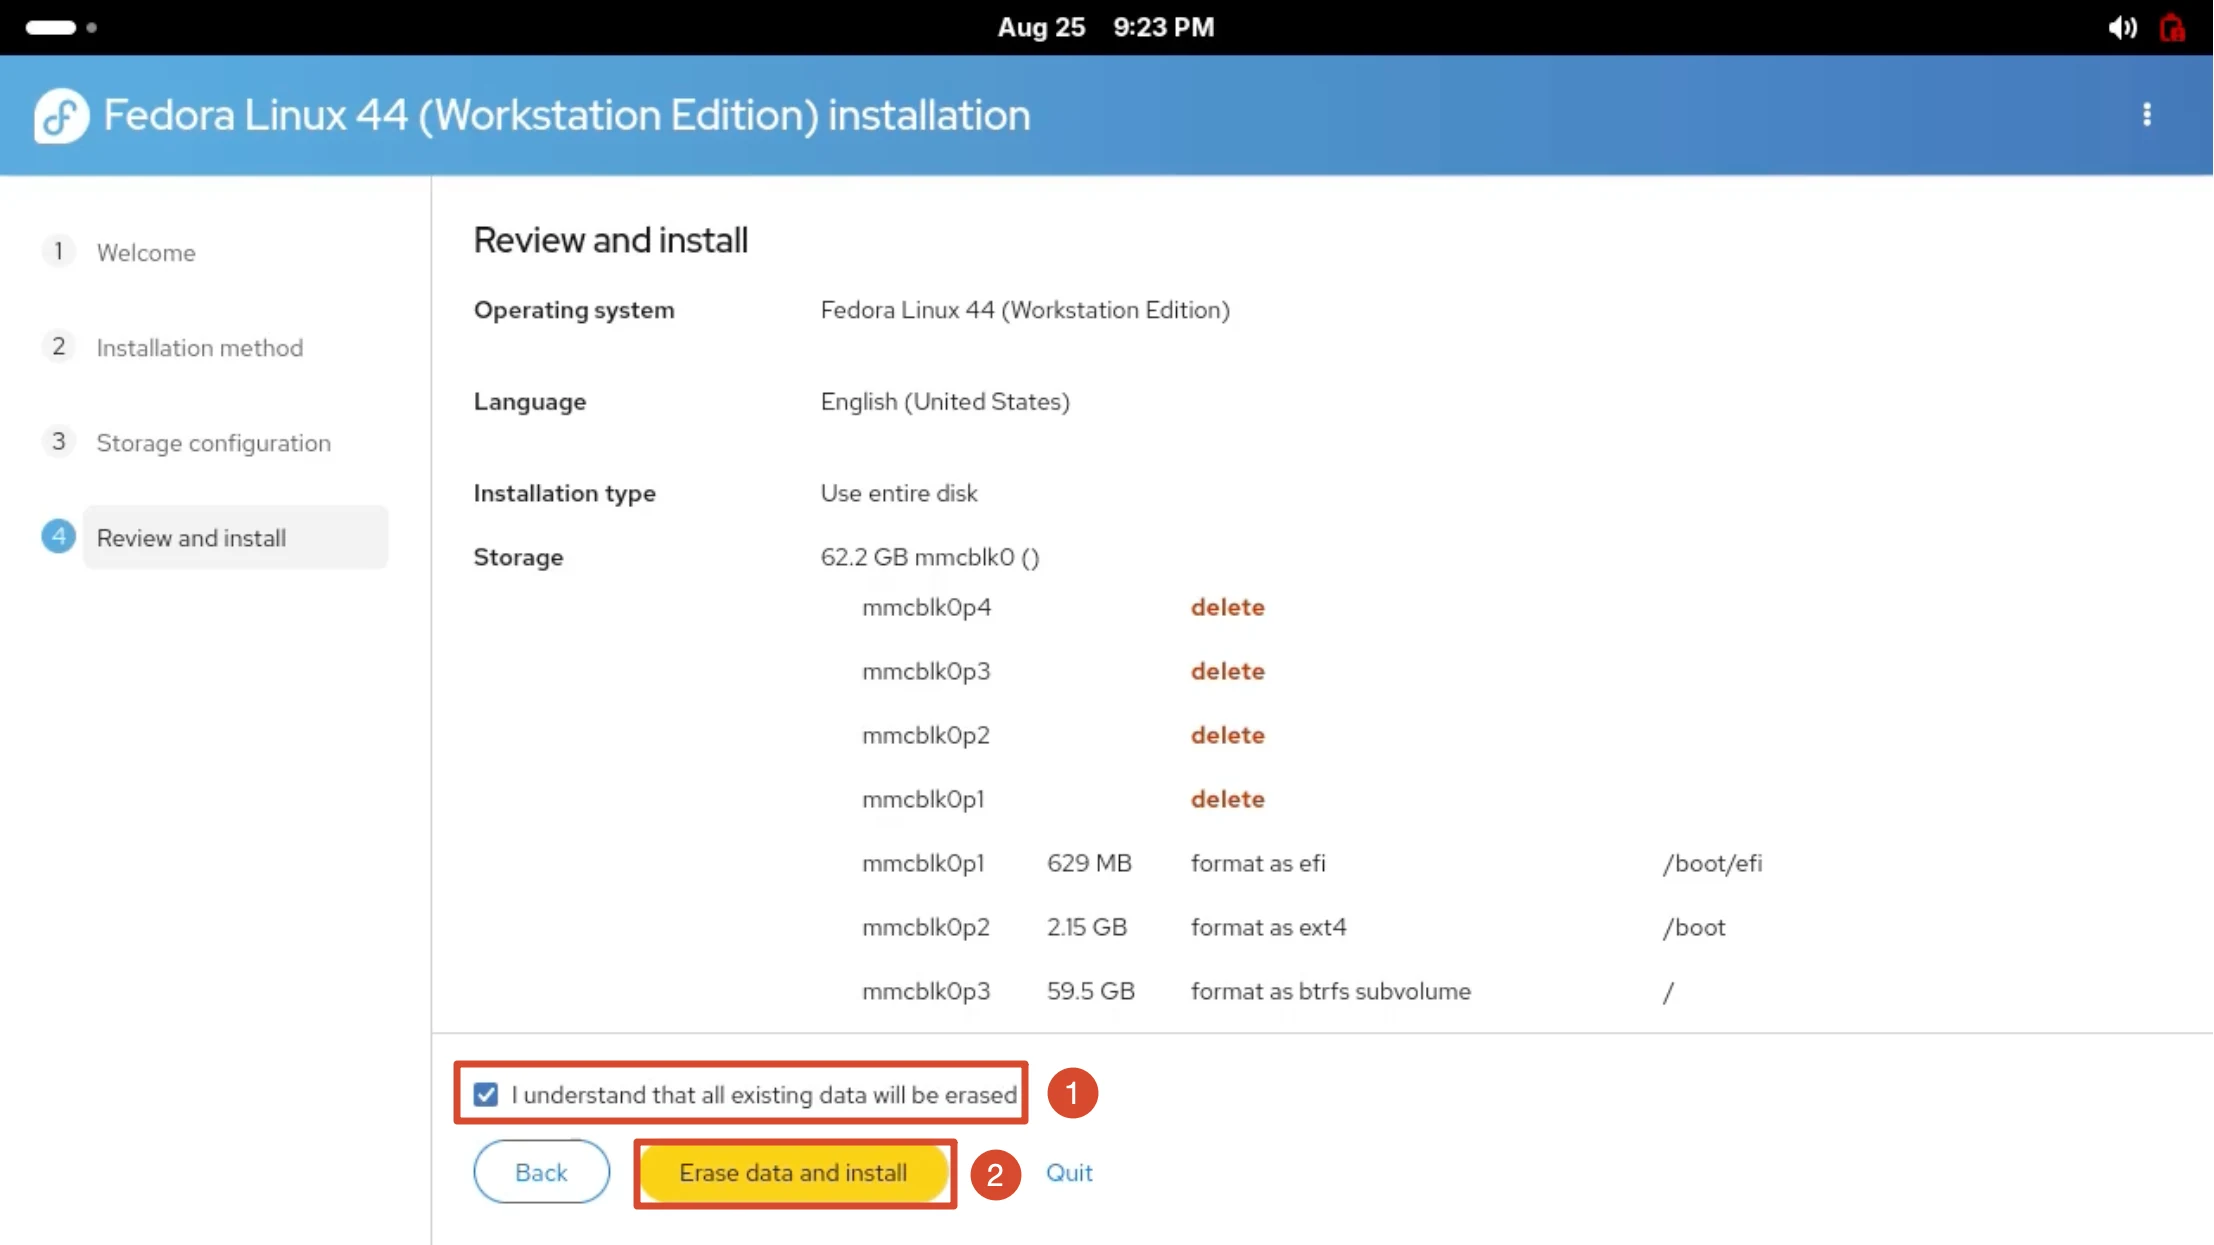
Review and Start the Installation
Review the system, language, installation method, and partitions (efi / boot / btrfs root). Check I understand that all existing data will be erased and click Erase data and install to begin writing.
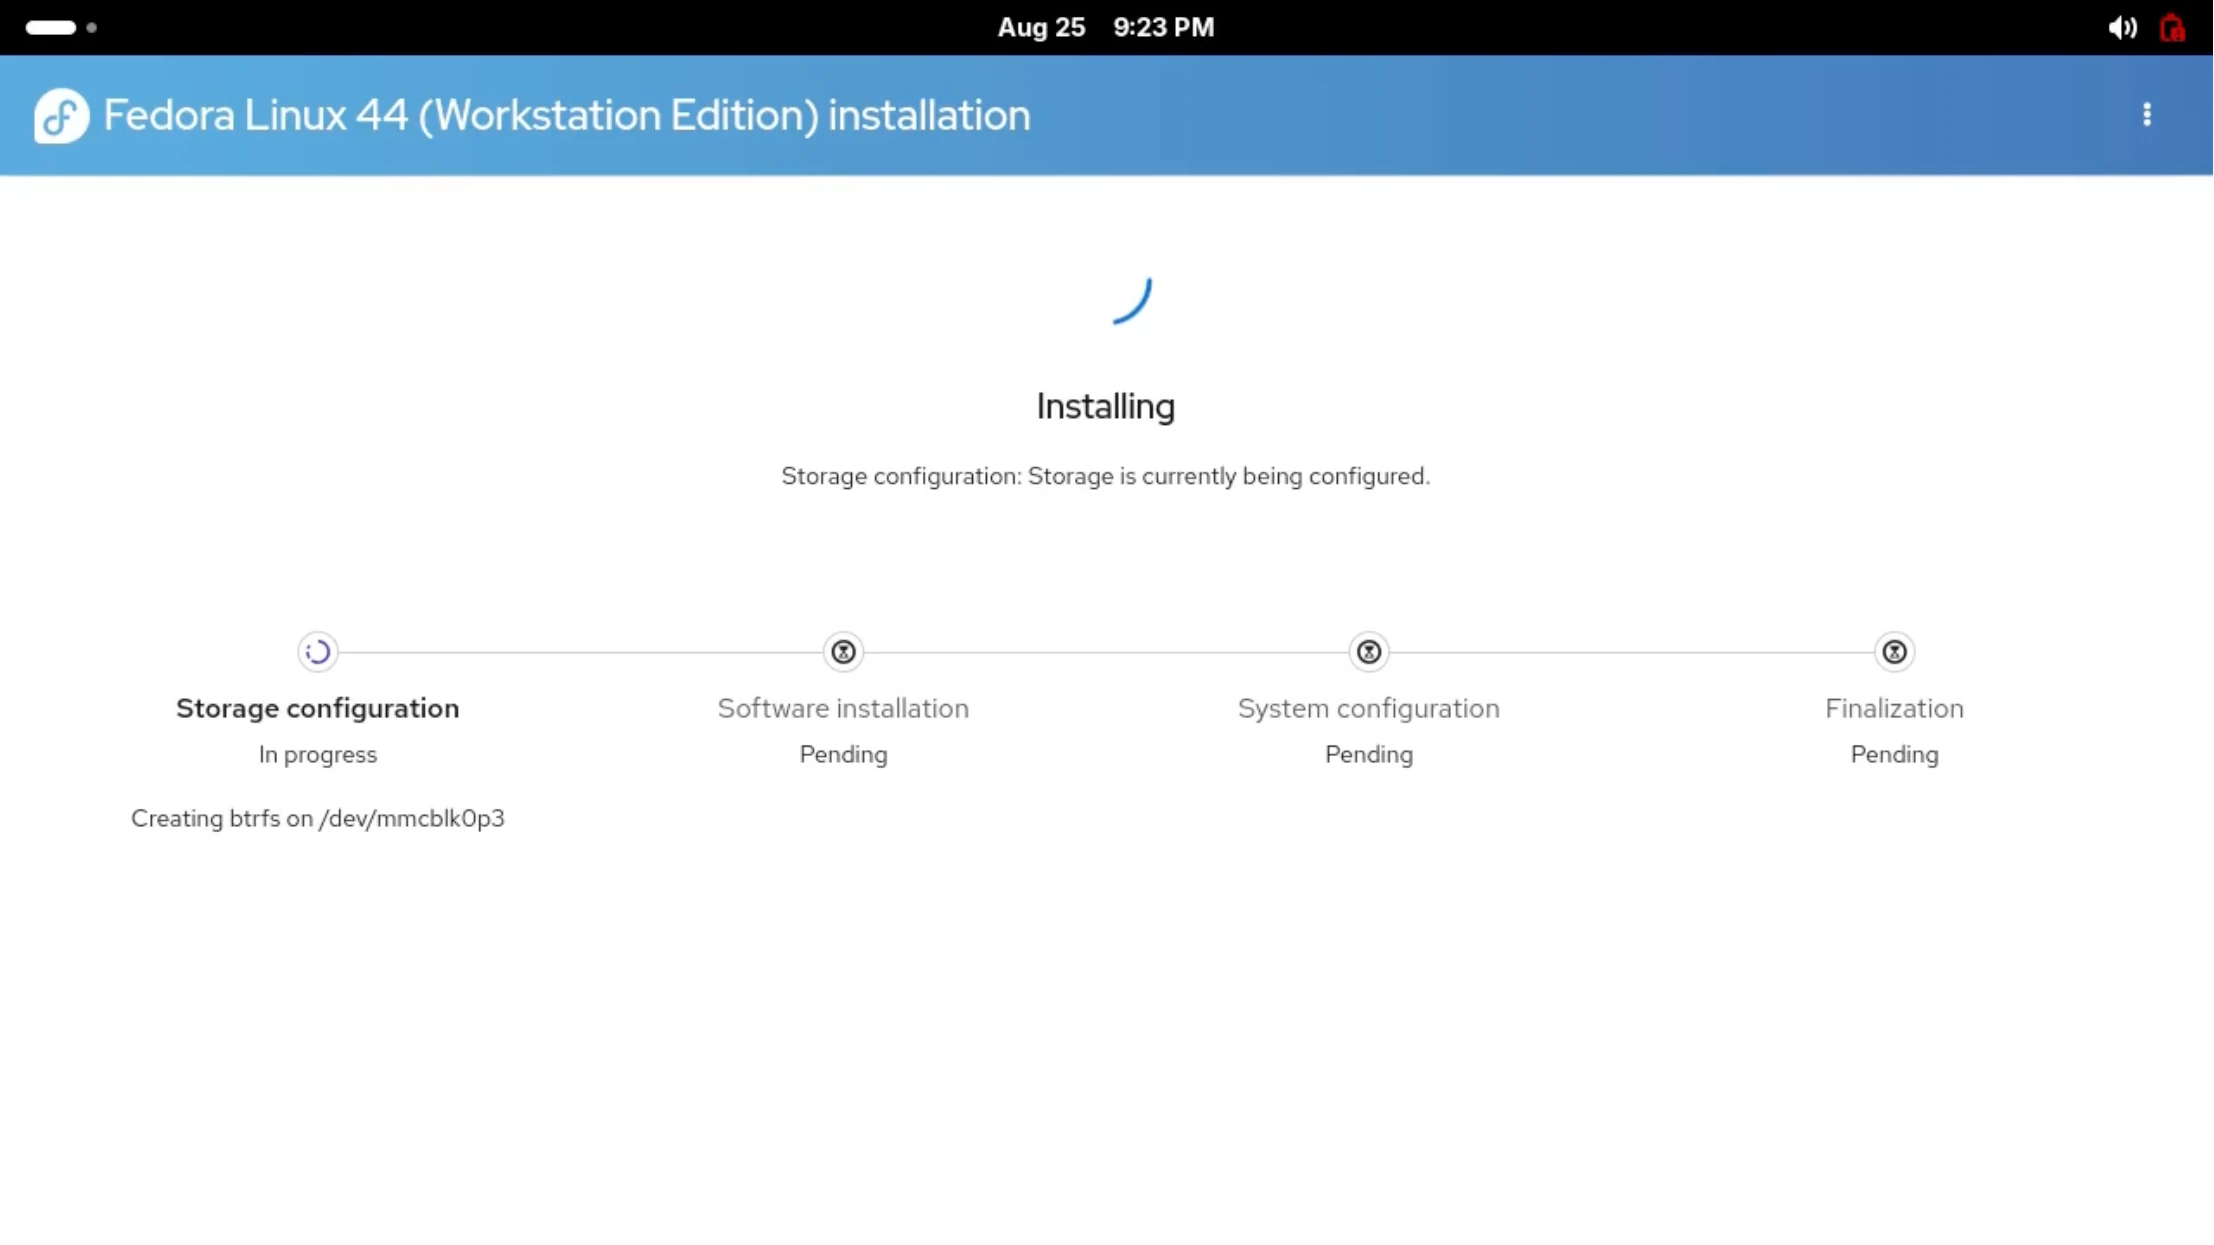
Installation in Progress: Storage Configuration
The installer creates the file system (btrfs) automatically. No action is needed; do not power off or unplug the medium.
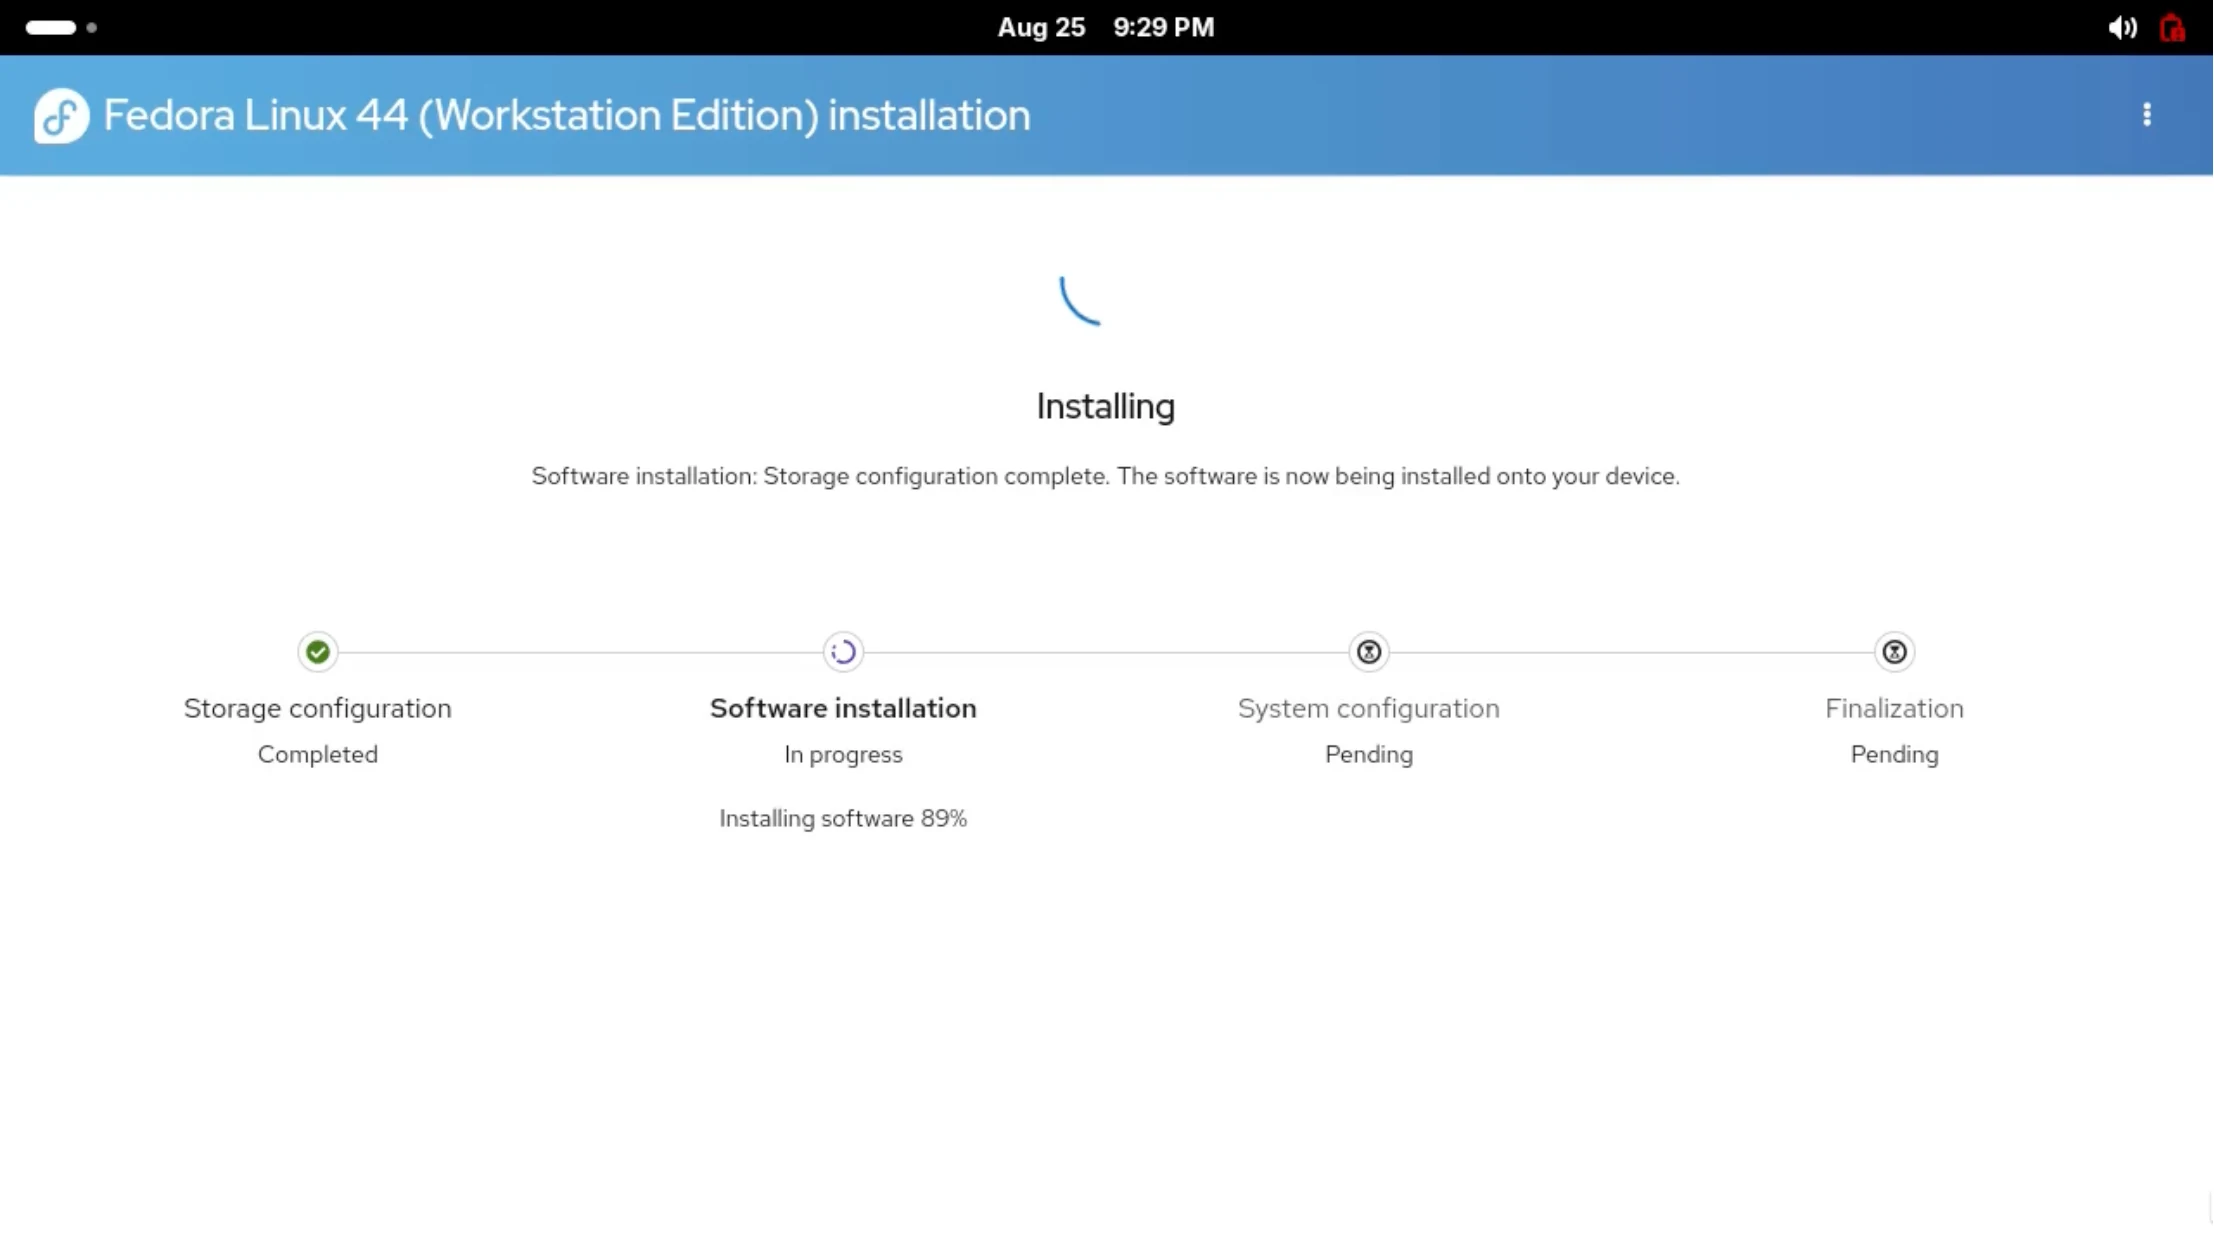
Installation in Progress: Software Installation
Packages are being installed. No action is needed — wait for the progress to advance.
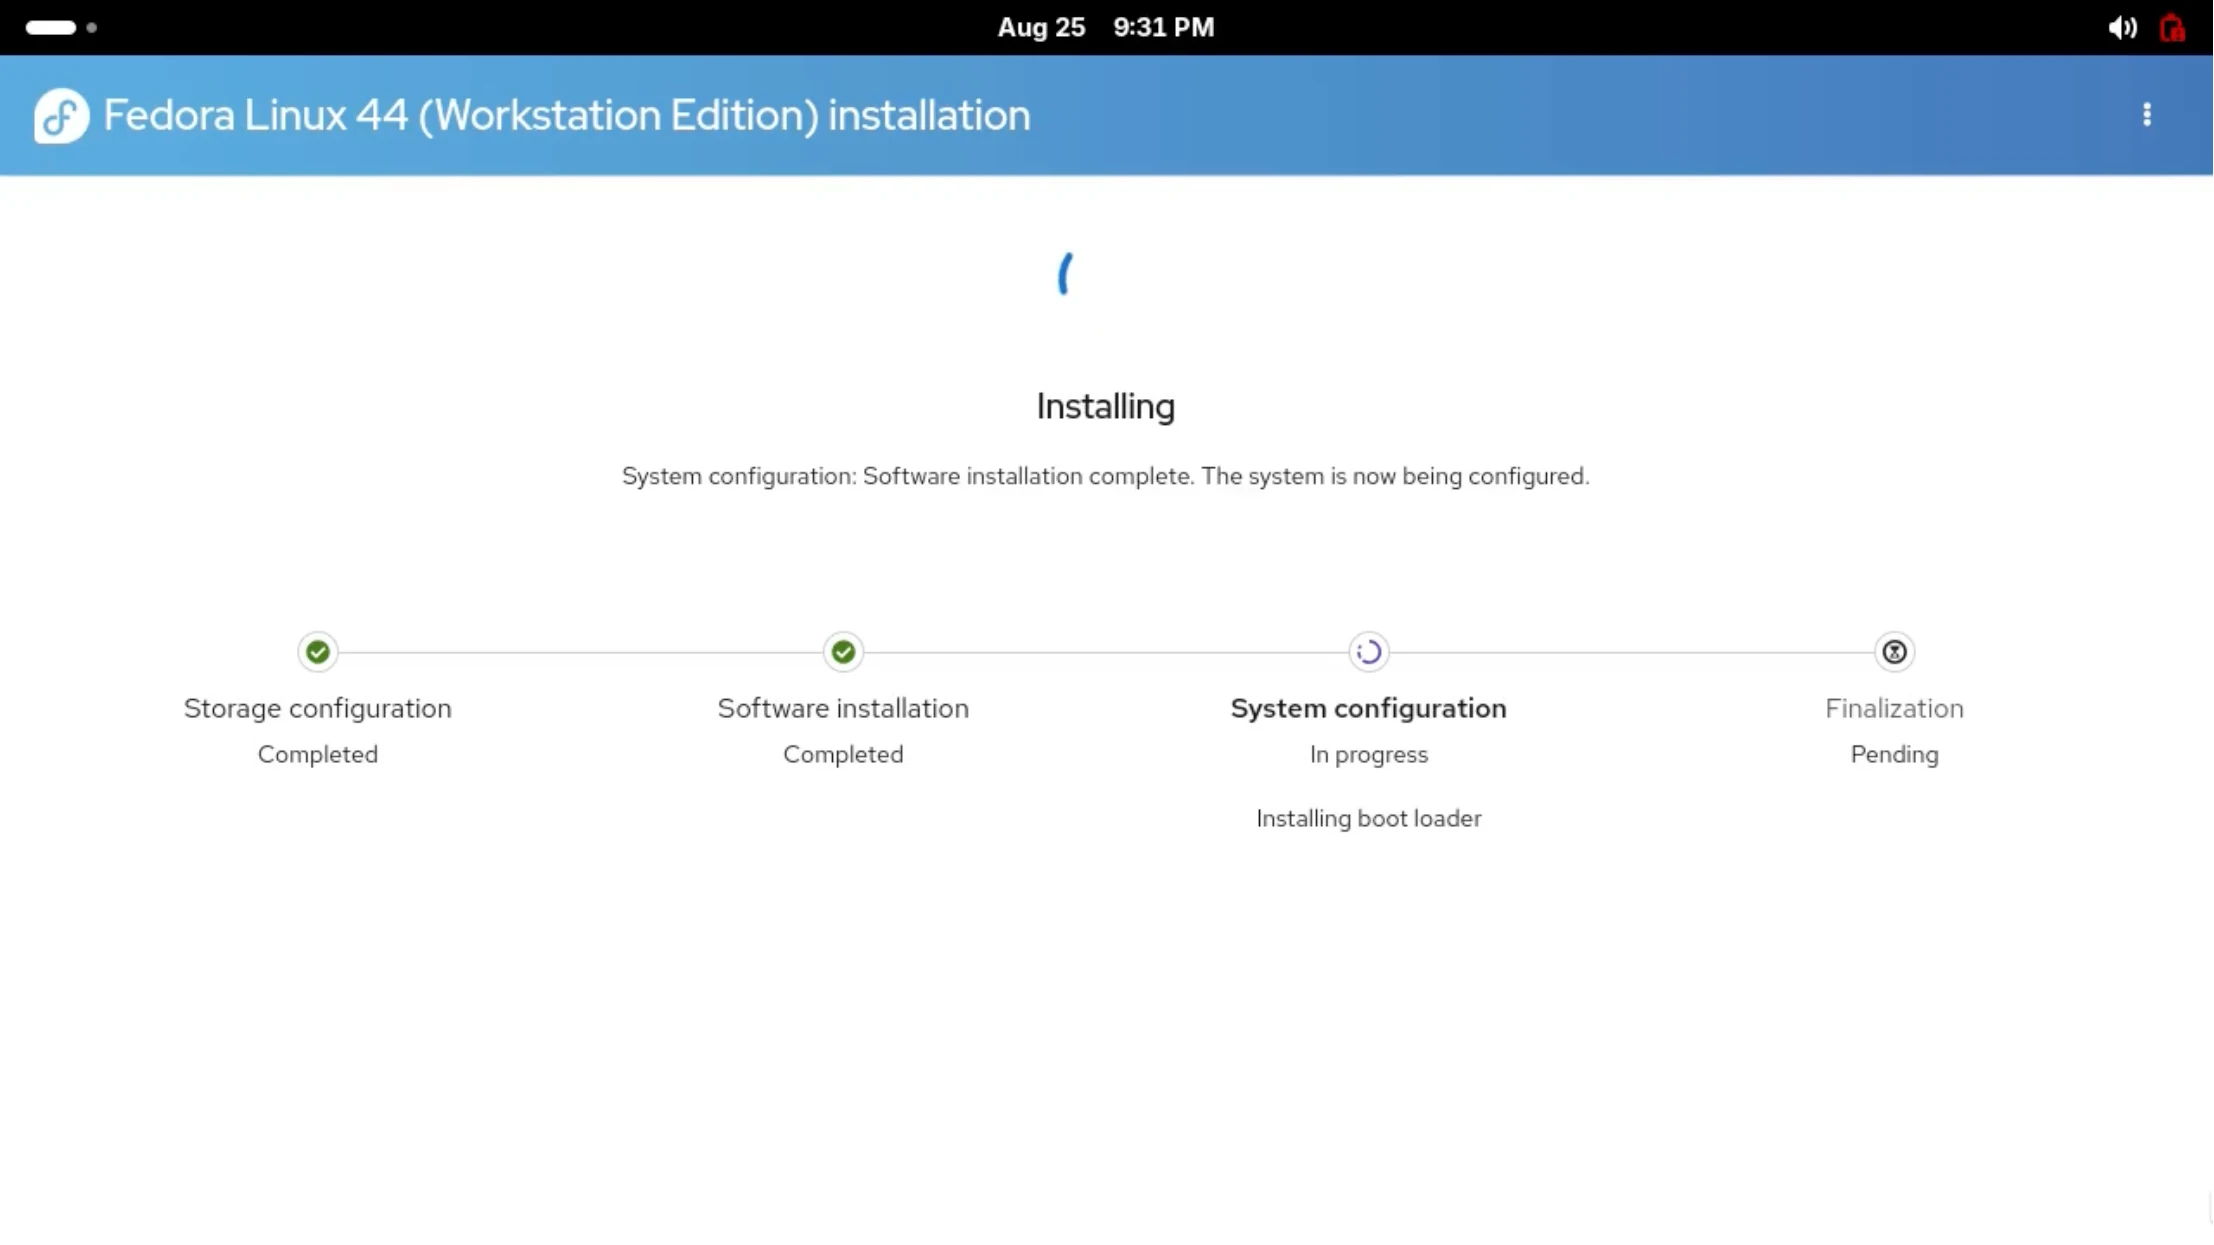
Installation in Progress: System Configuration
The boot loader is being installed. No action is needed.
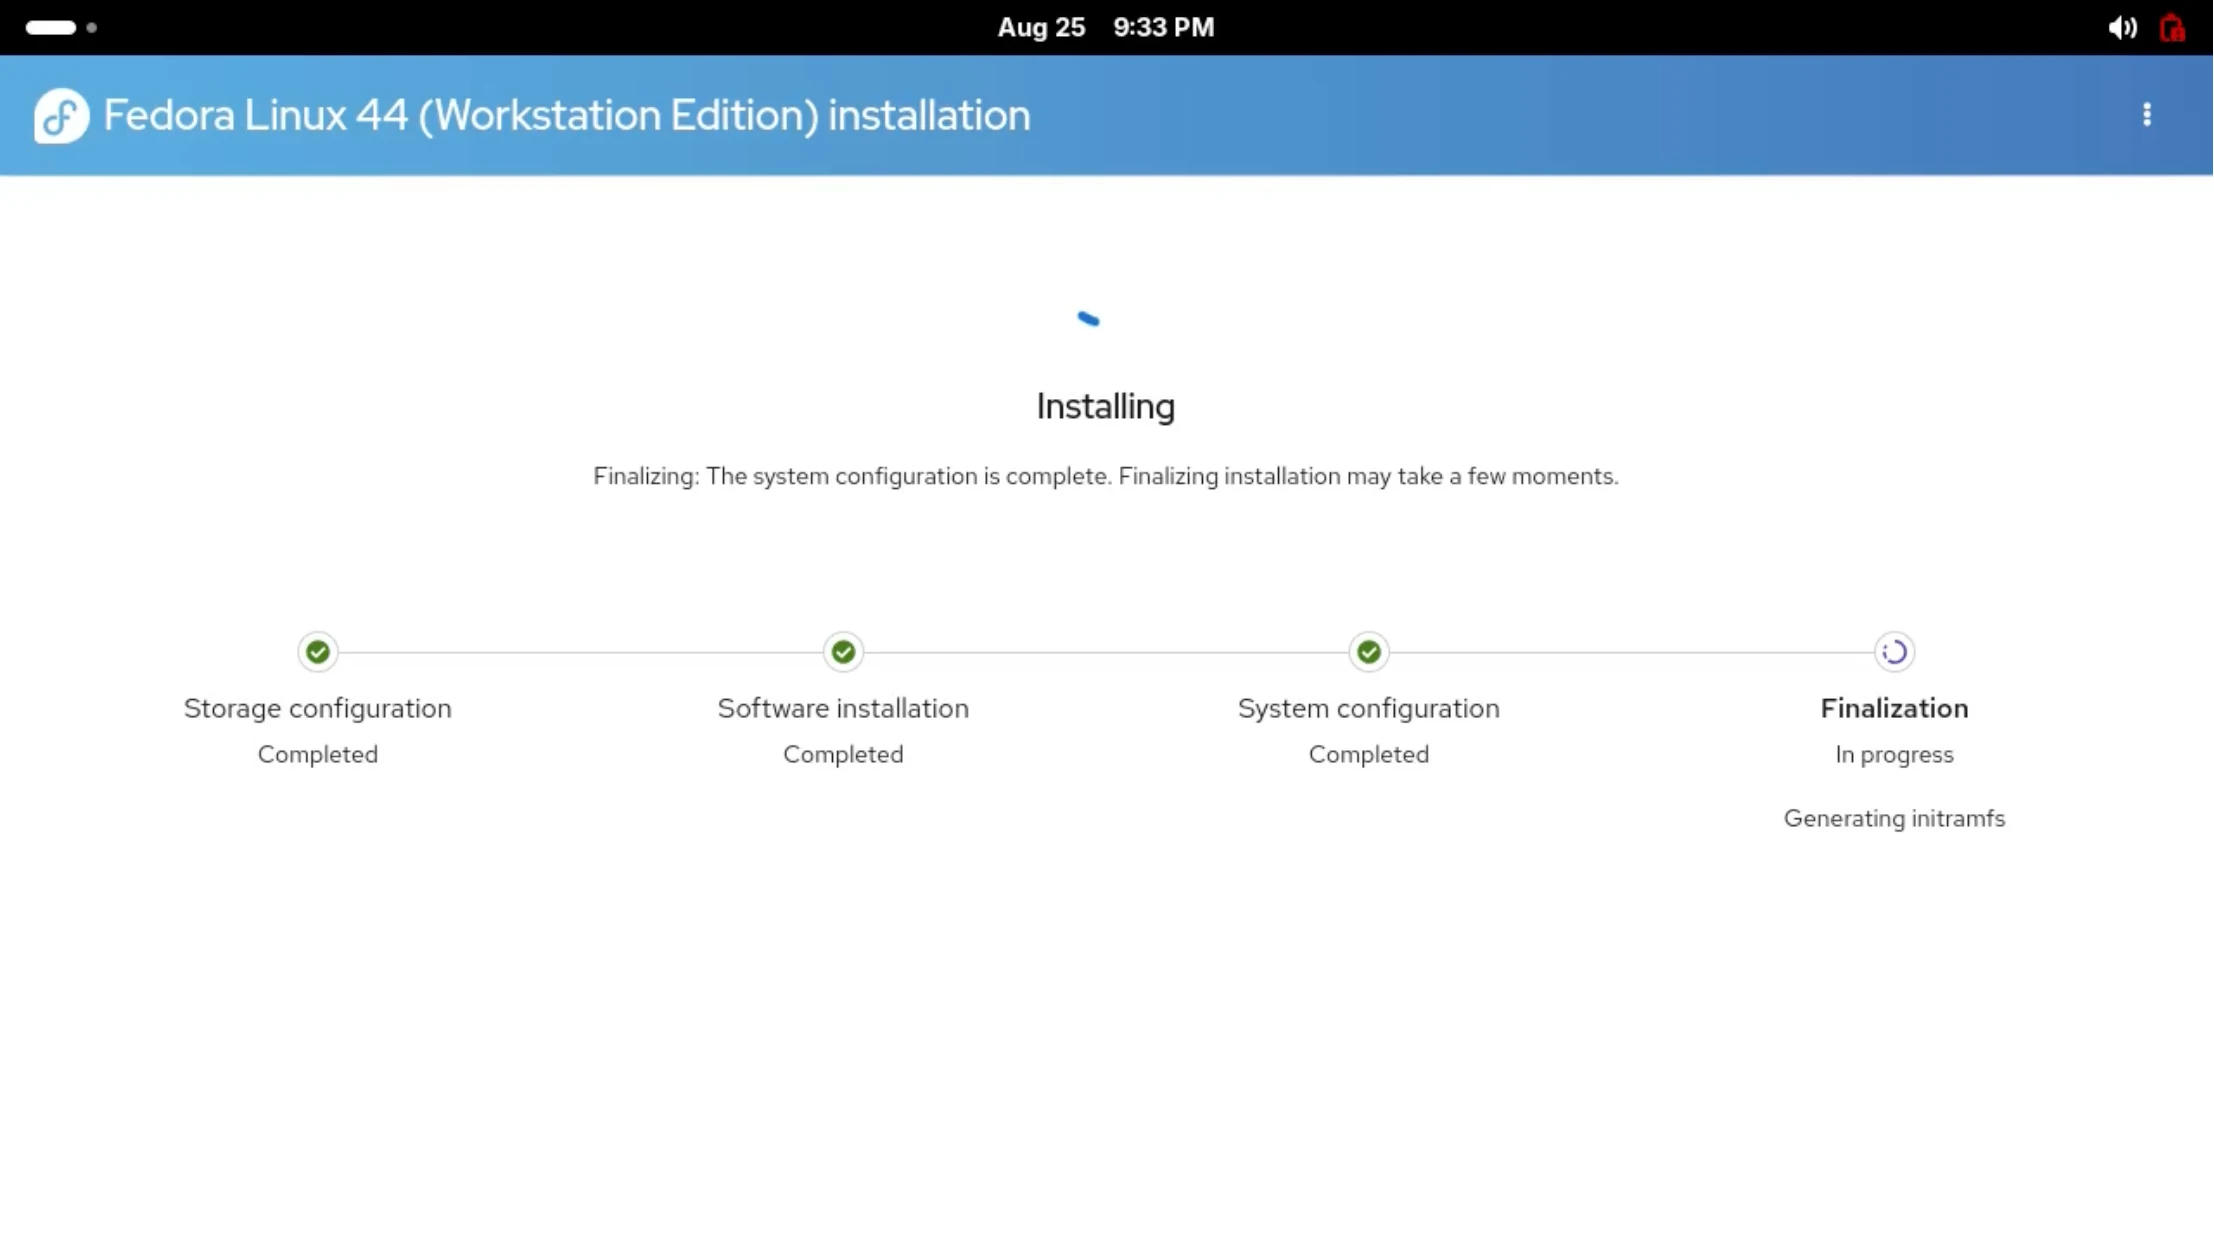
Installation in Progress: Finalization
The initramfs is being generated. No action is needed. Once all four stages are complete, proceed to the next step.
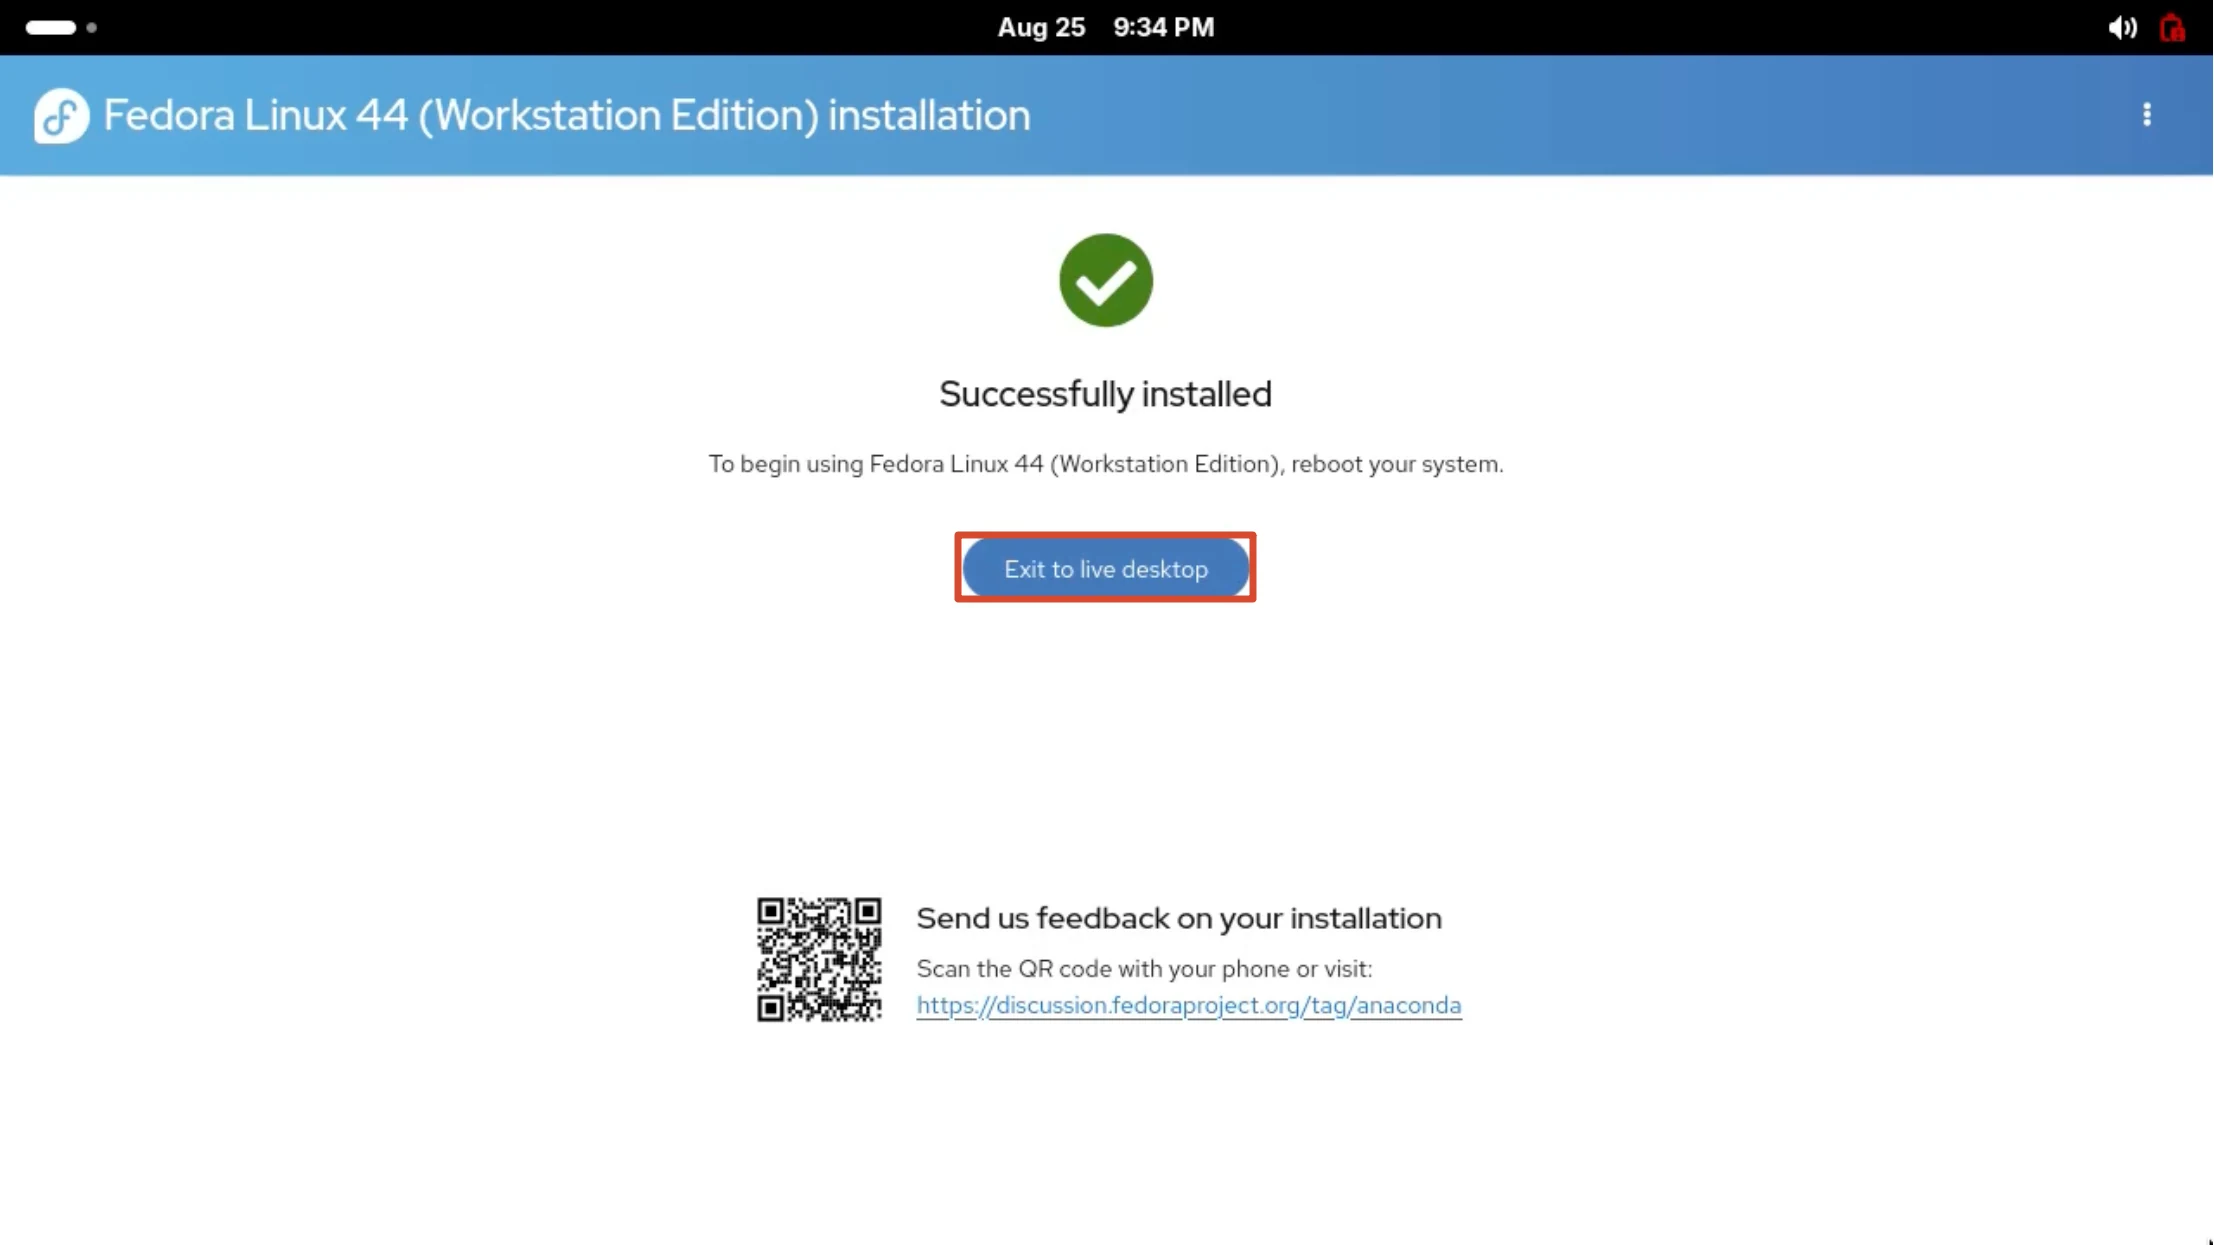
Installation Succeeded
Once Successfully installed appears, click Exit to live desktop to exit the installer, then restart the system.
Using Fedora
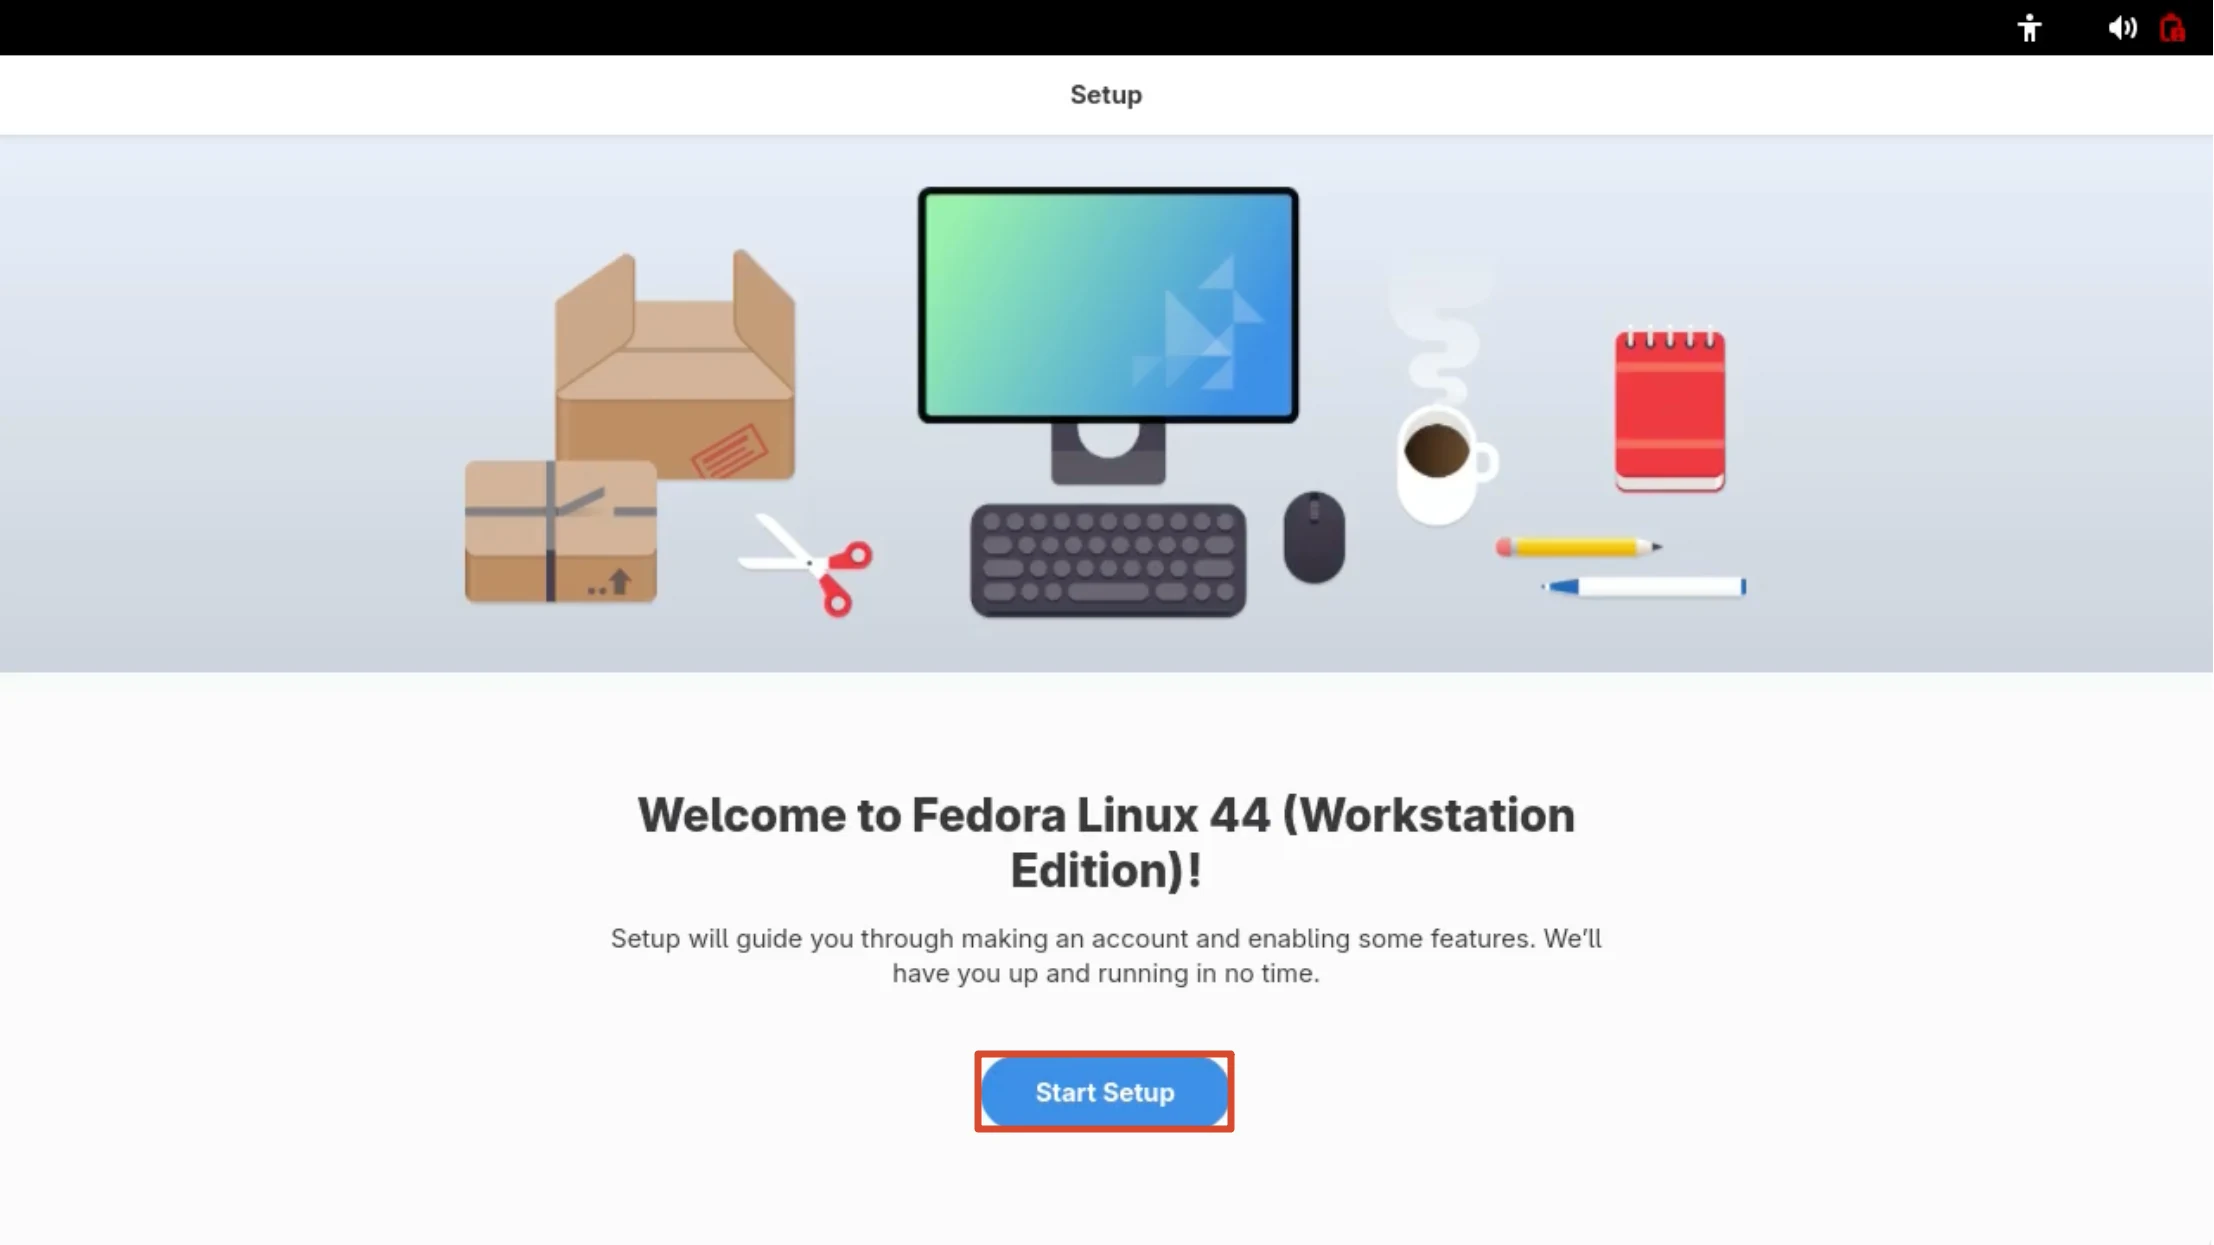
First Boot: Initial Setup Welcome
During the reboot, unplug the installation USB drive so the system boots from the microSD card. The first-boot setup wizard appears; click Start Setup to begin.
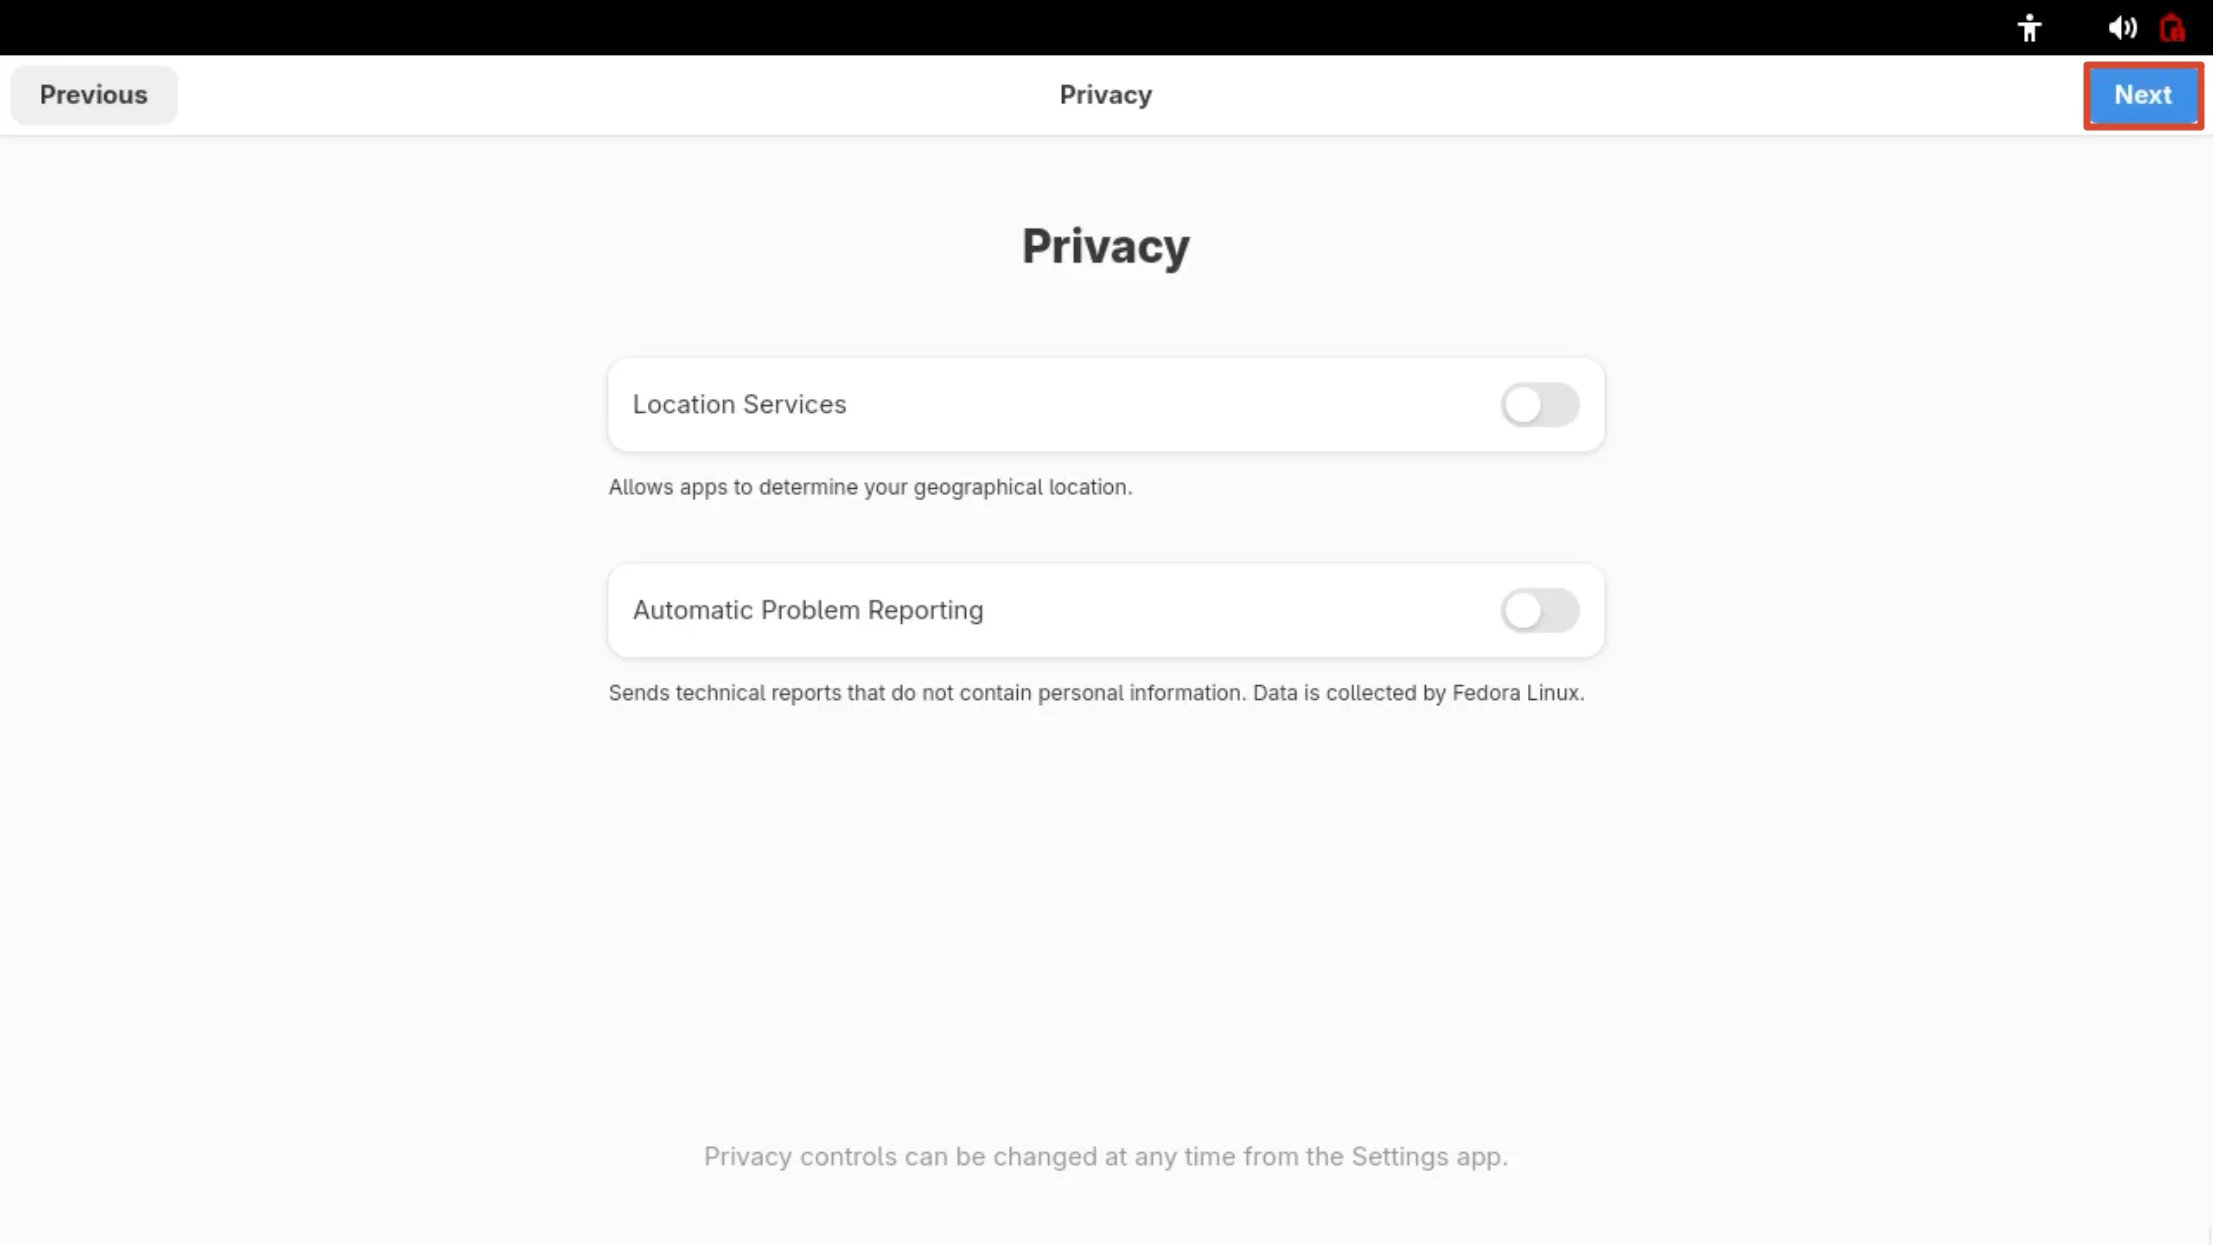
Privacy Settings
Location Services and Automatic Problem Reporting are off by default; keep the defaults (you can change them later in Settings) and click Next.
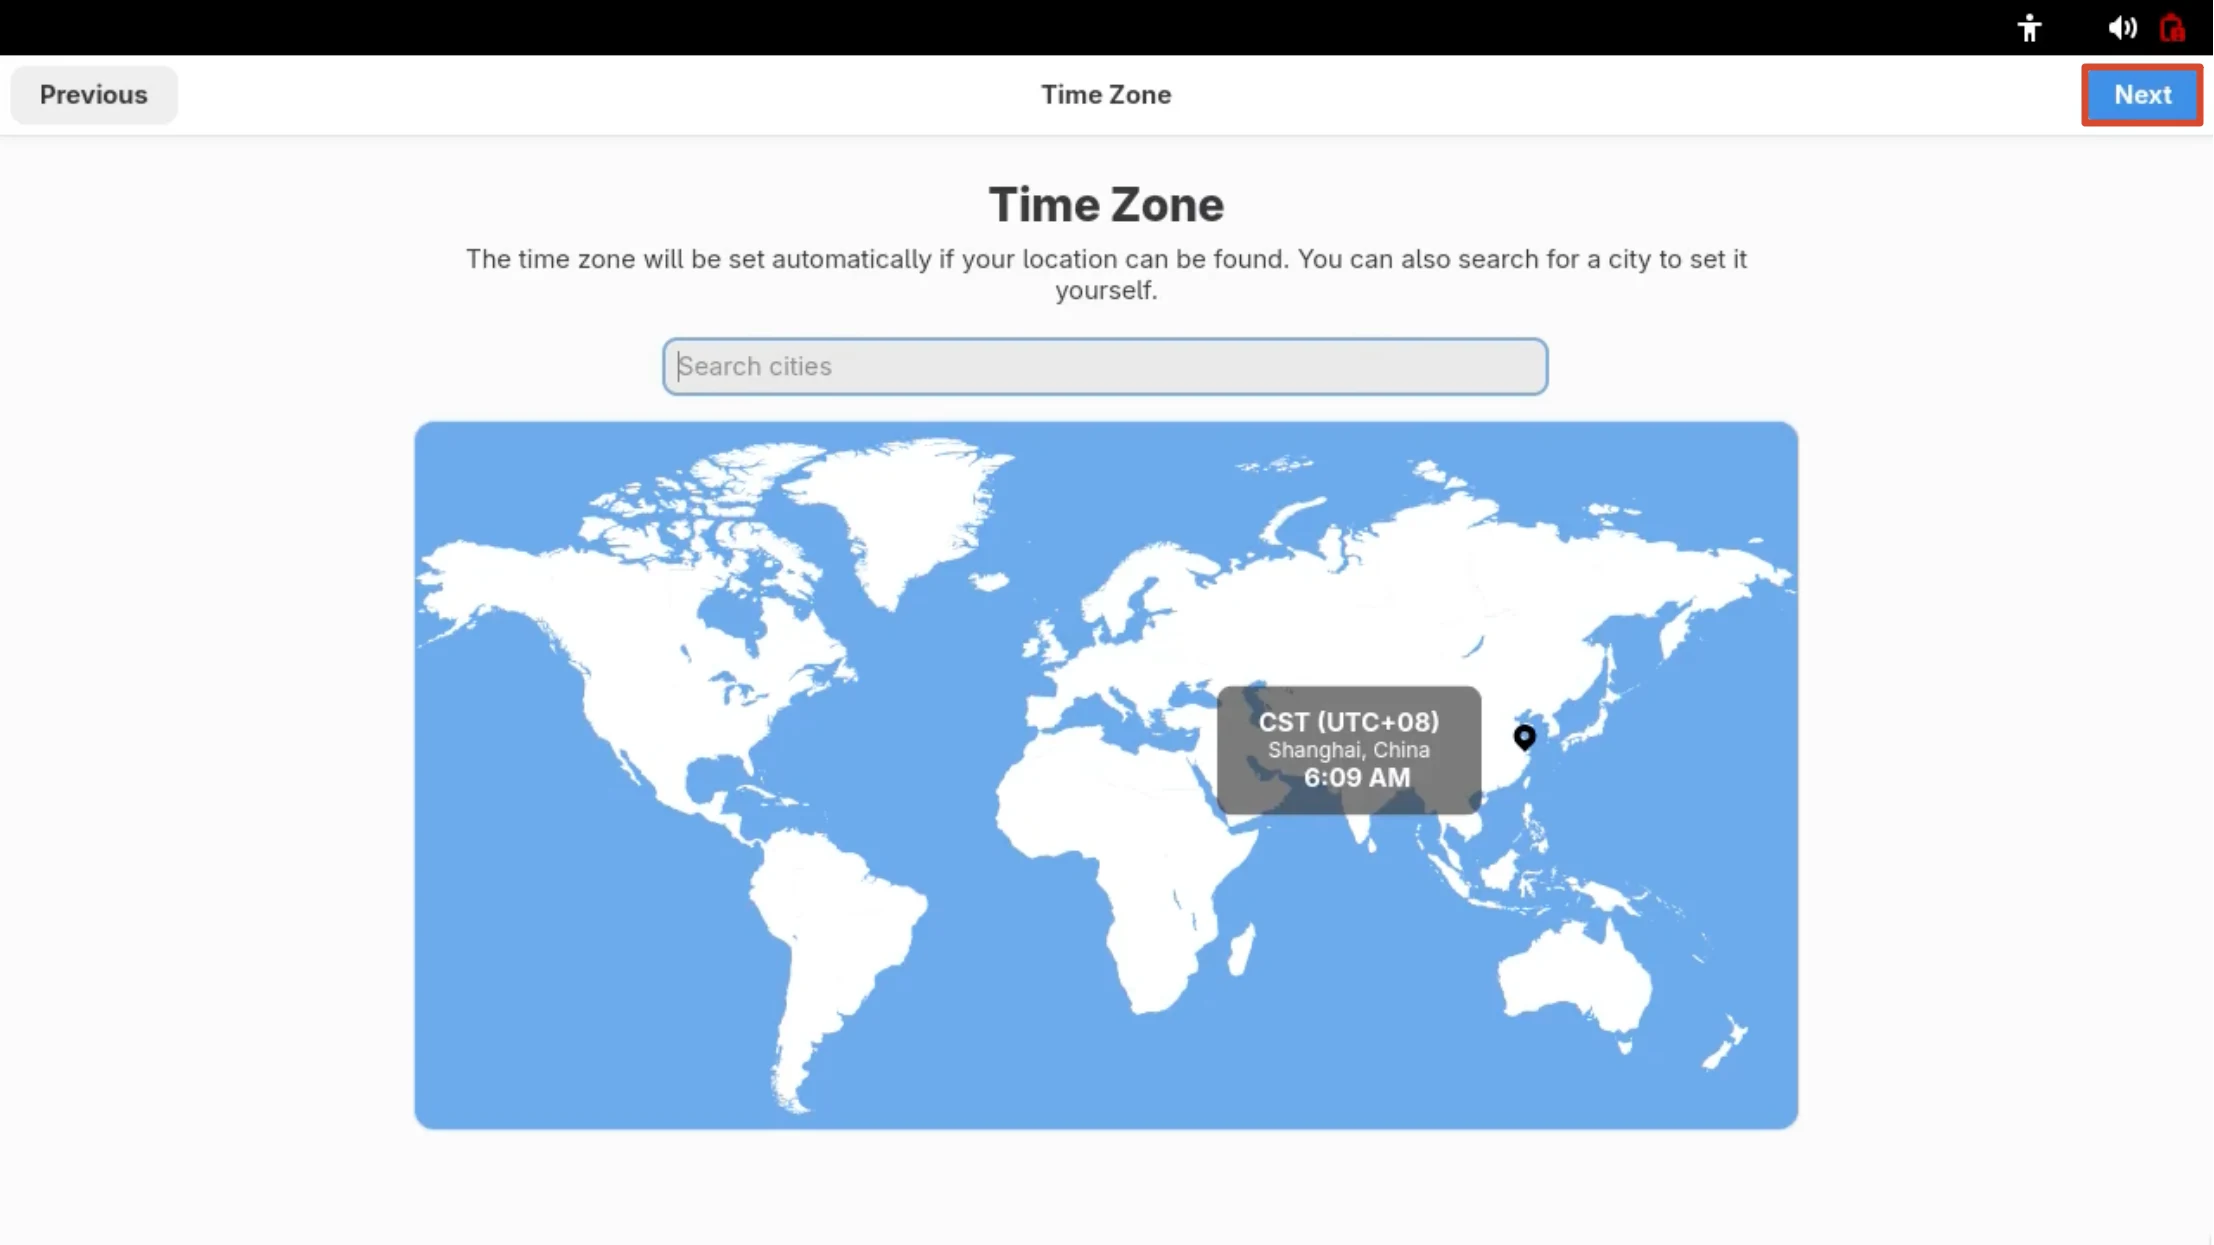
Select the Time Zone
Confirm that the time zone is CST (UTC+08) / Shanghai. To change it, search for a city in Search cities, then click Next.
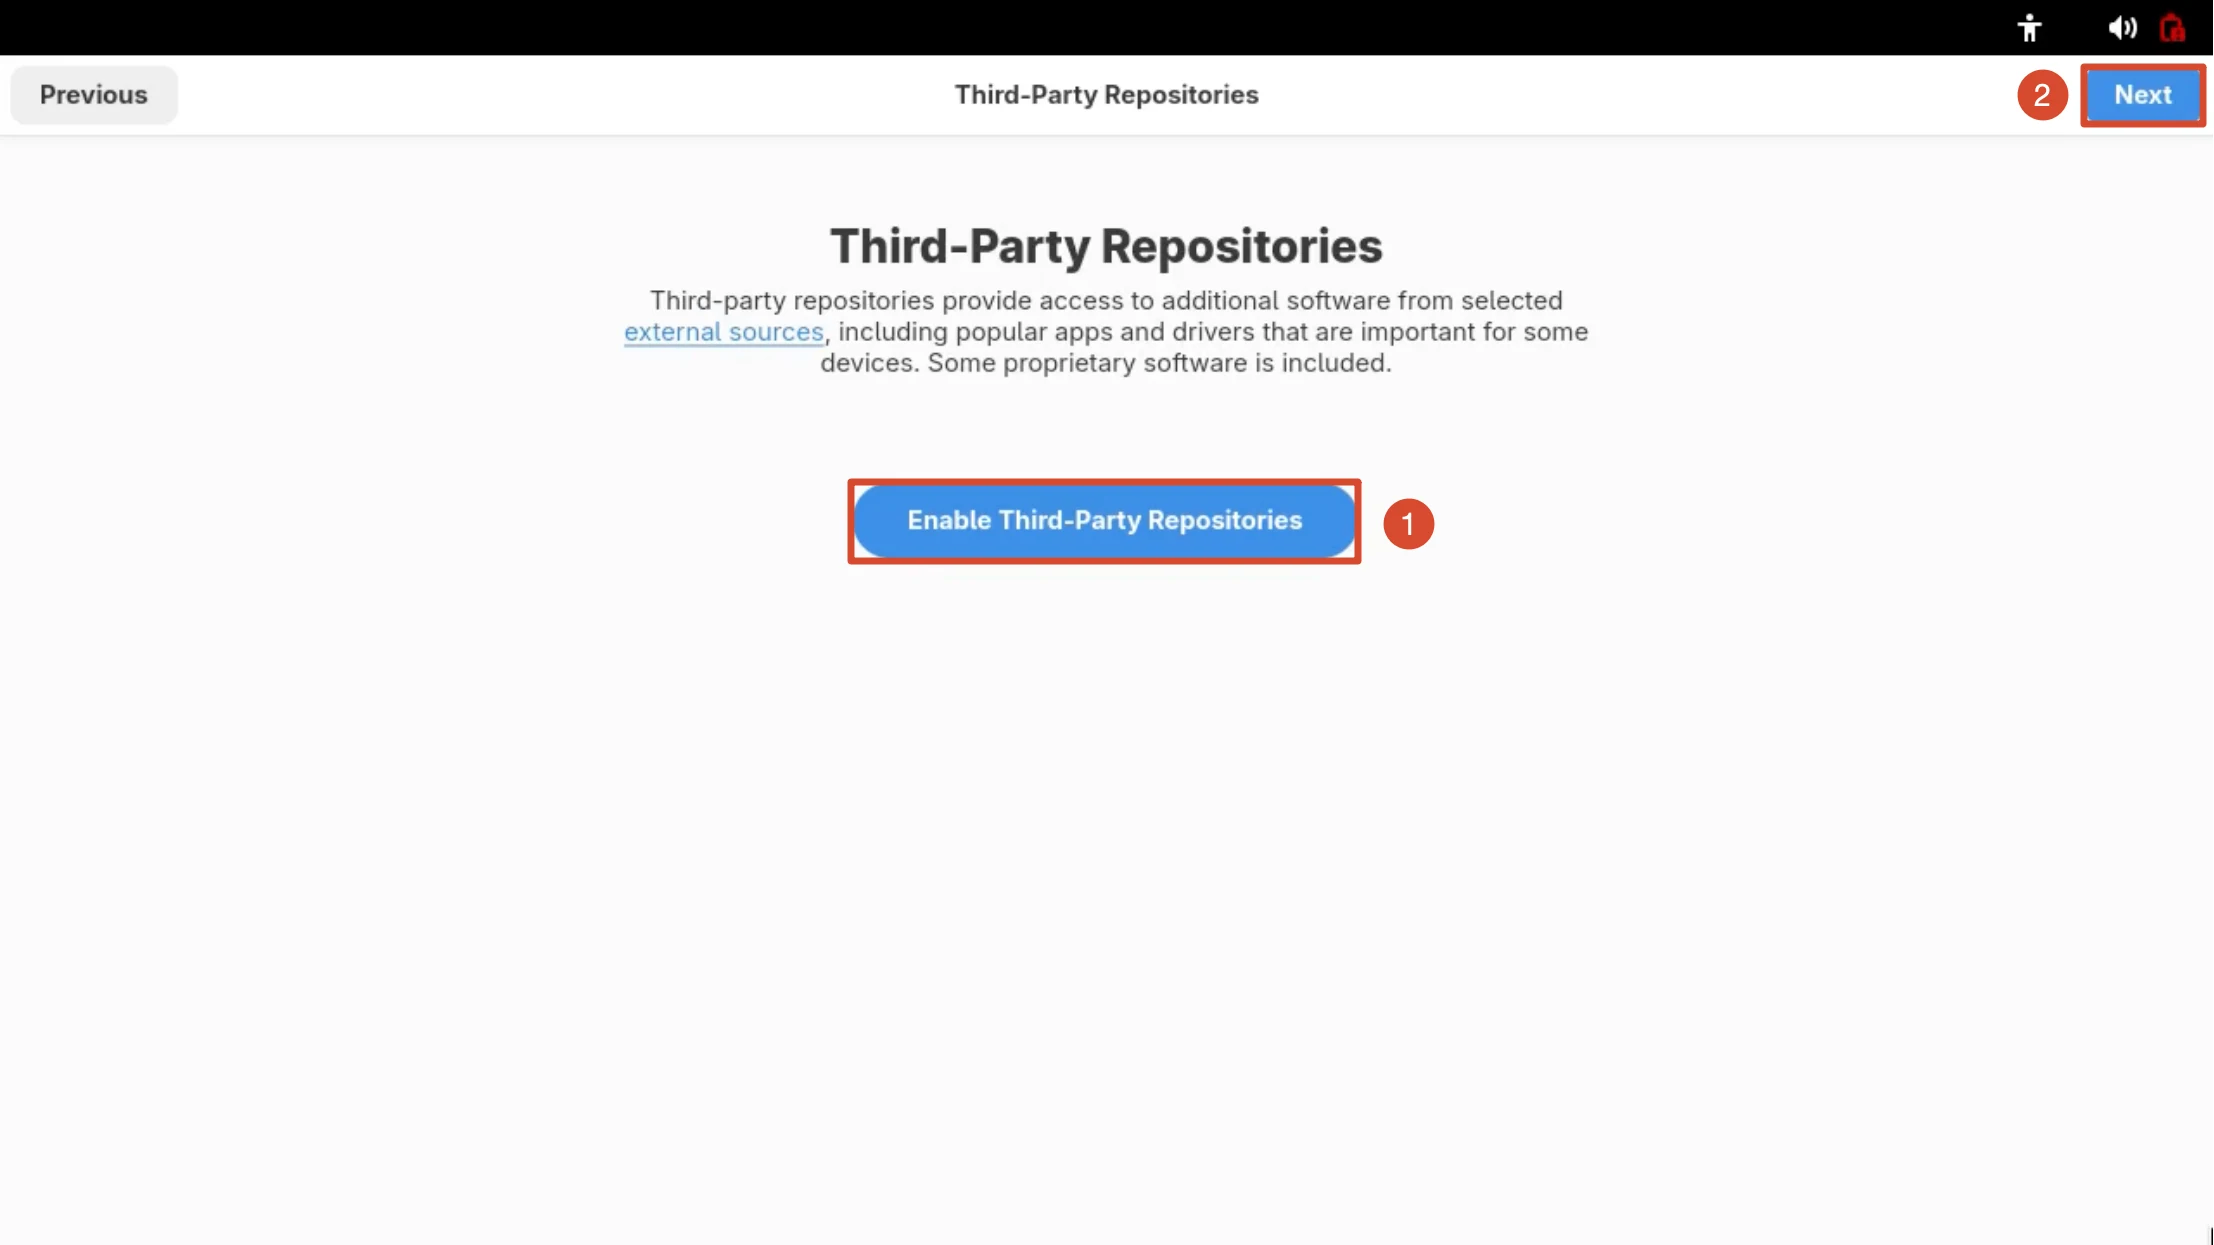
Third-Party Repositories
If you want common applications and some proprietary drivers, click Enable Third-Party Repositories; then click Next to continue (you can also proceed without enabling them).
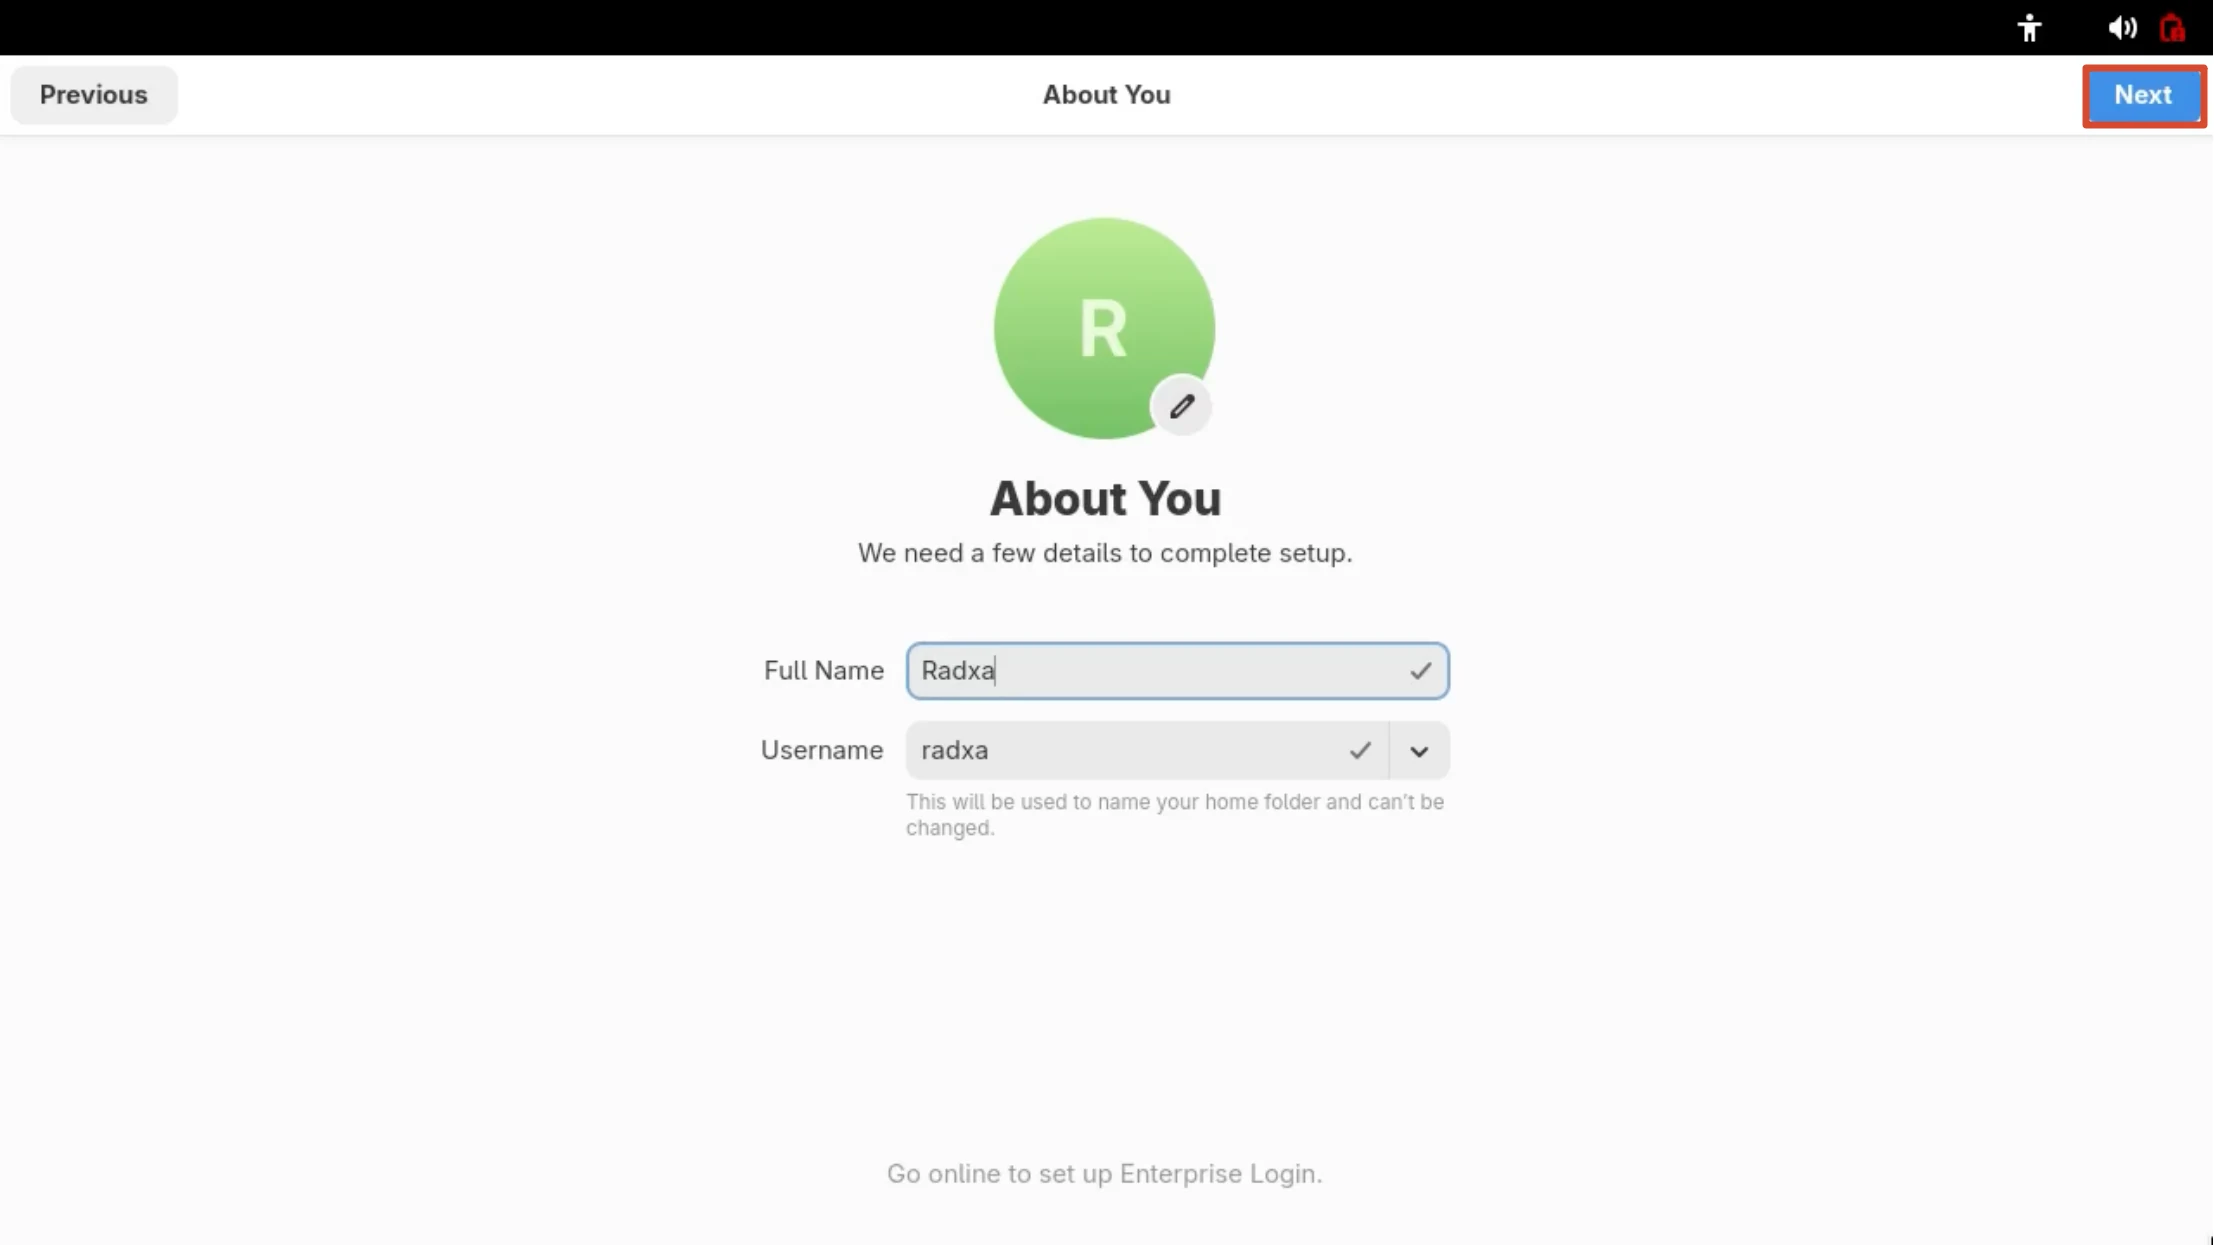
Set the User Information
Confirm the Full Name (for example, Radxa) and the Username (for example, radxa). The username is used for the home directory and cannot be changed, so confirm it and click Next.
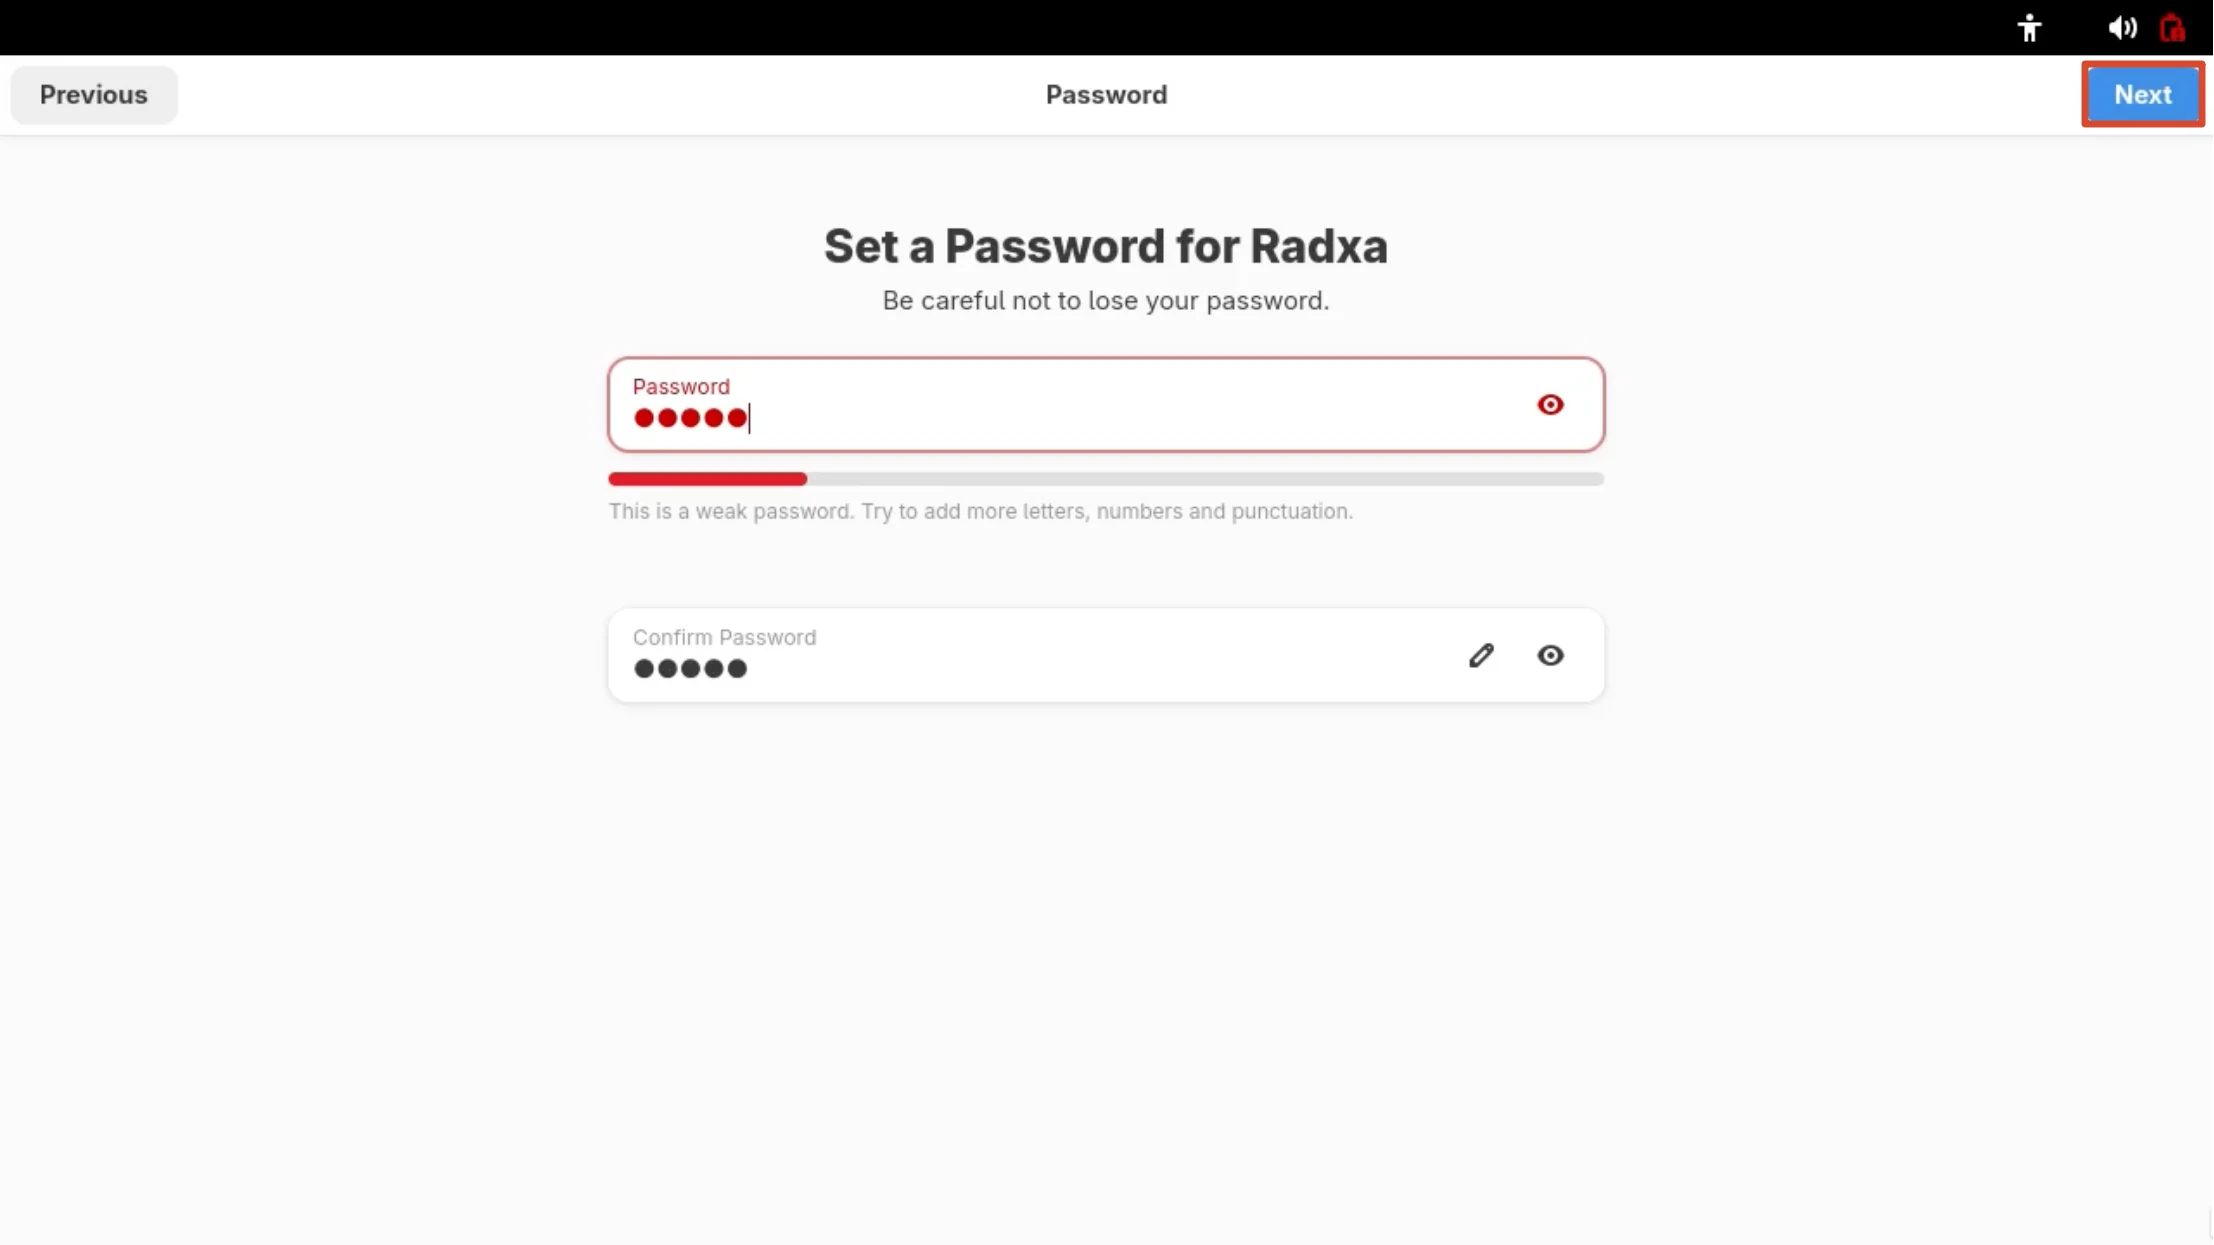
Set the Account Password
Enter the password and confirm it (Confirm Password). A weak password triggers This is a weak password; a longer combination of letters, numbers, and symbols is recommended, then click Next.
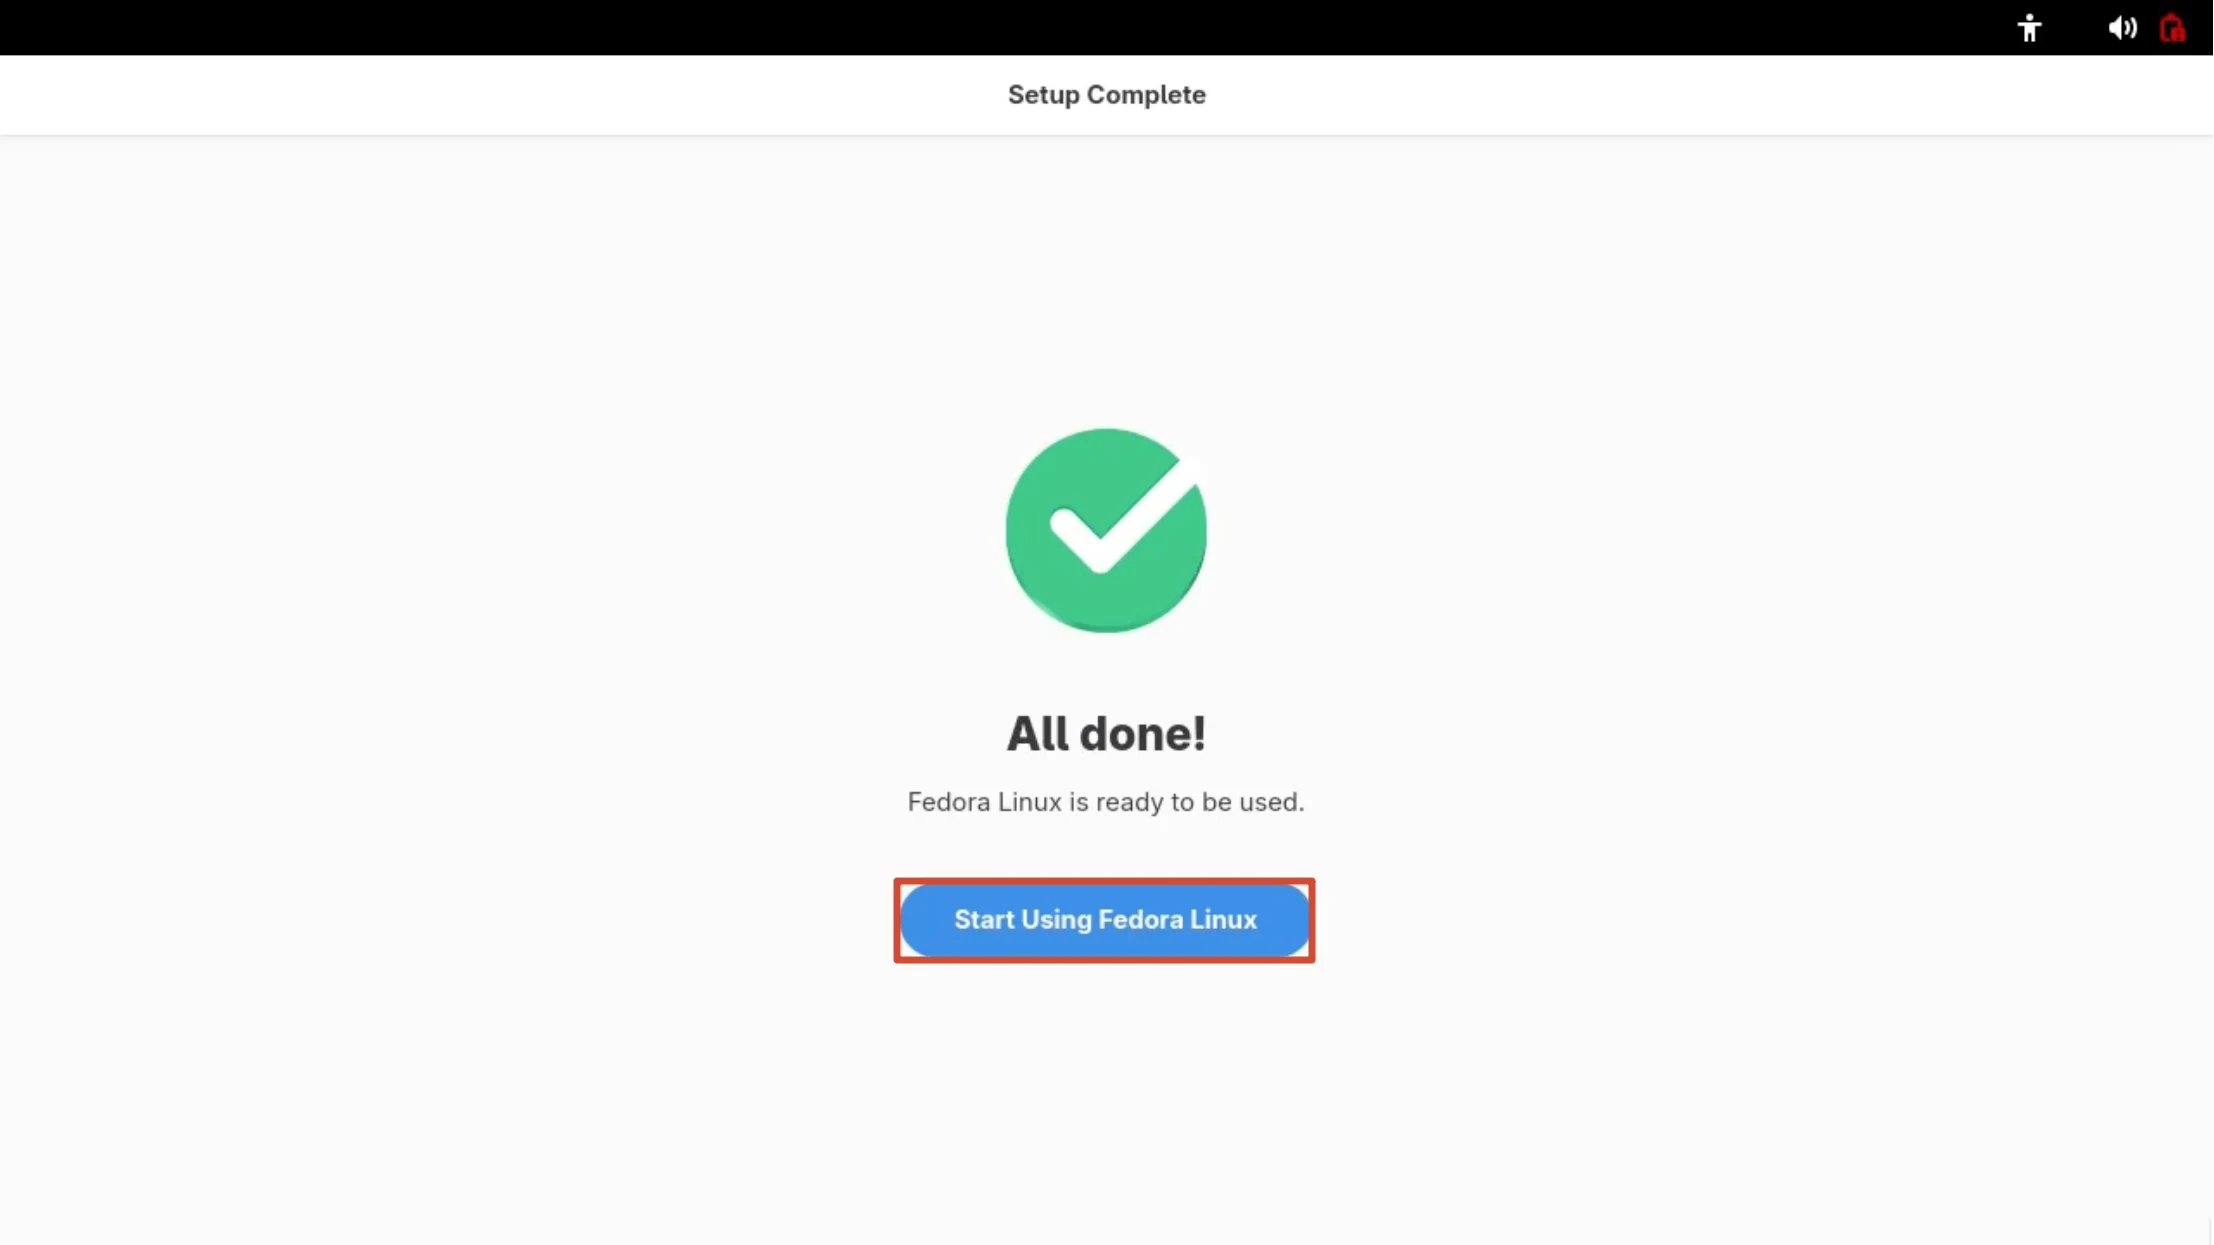
Setup Complete
Once All done! appears, click Start Using Fedora Linux to finish the wizard.
Enter the GNOME Desktop
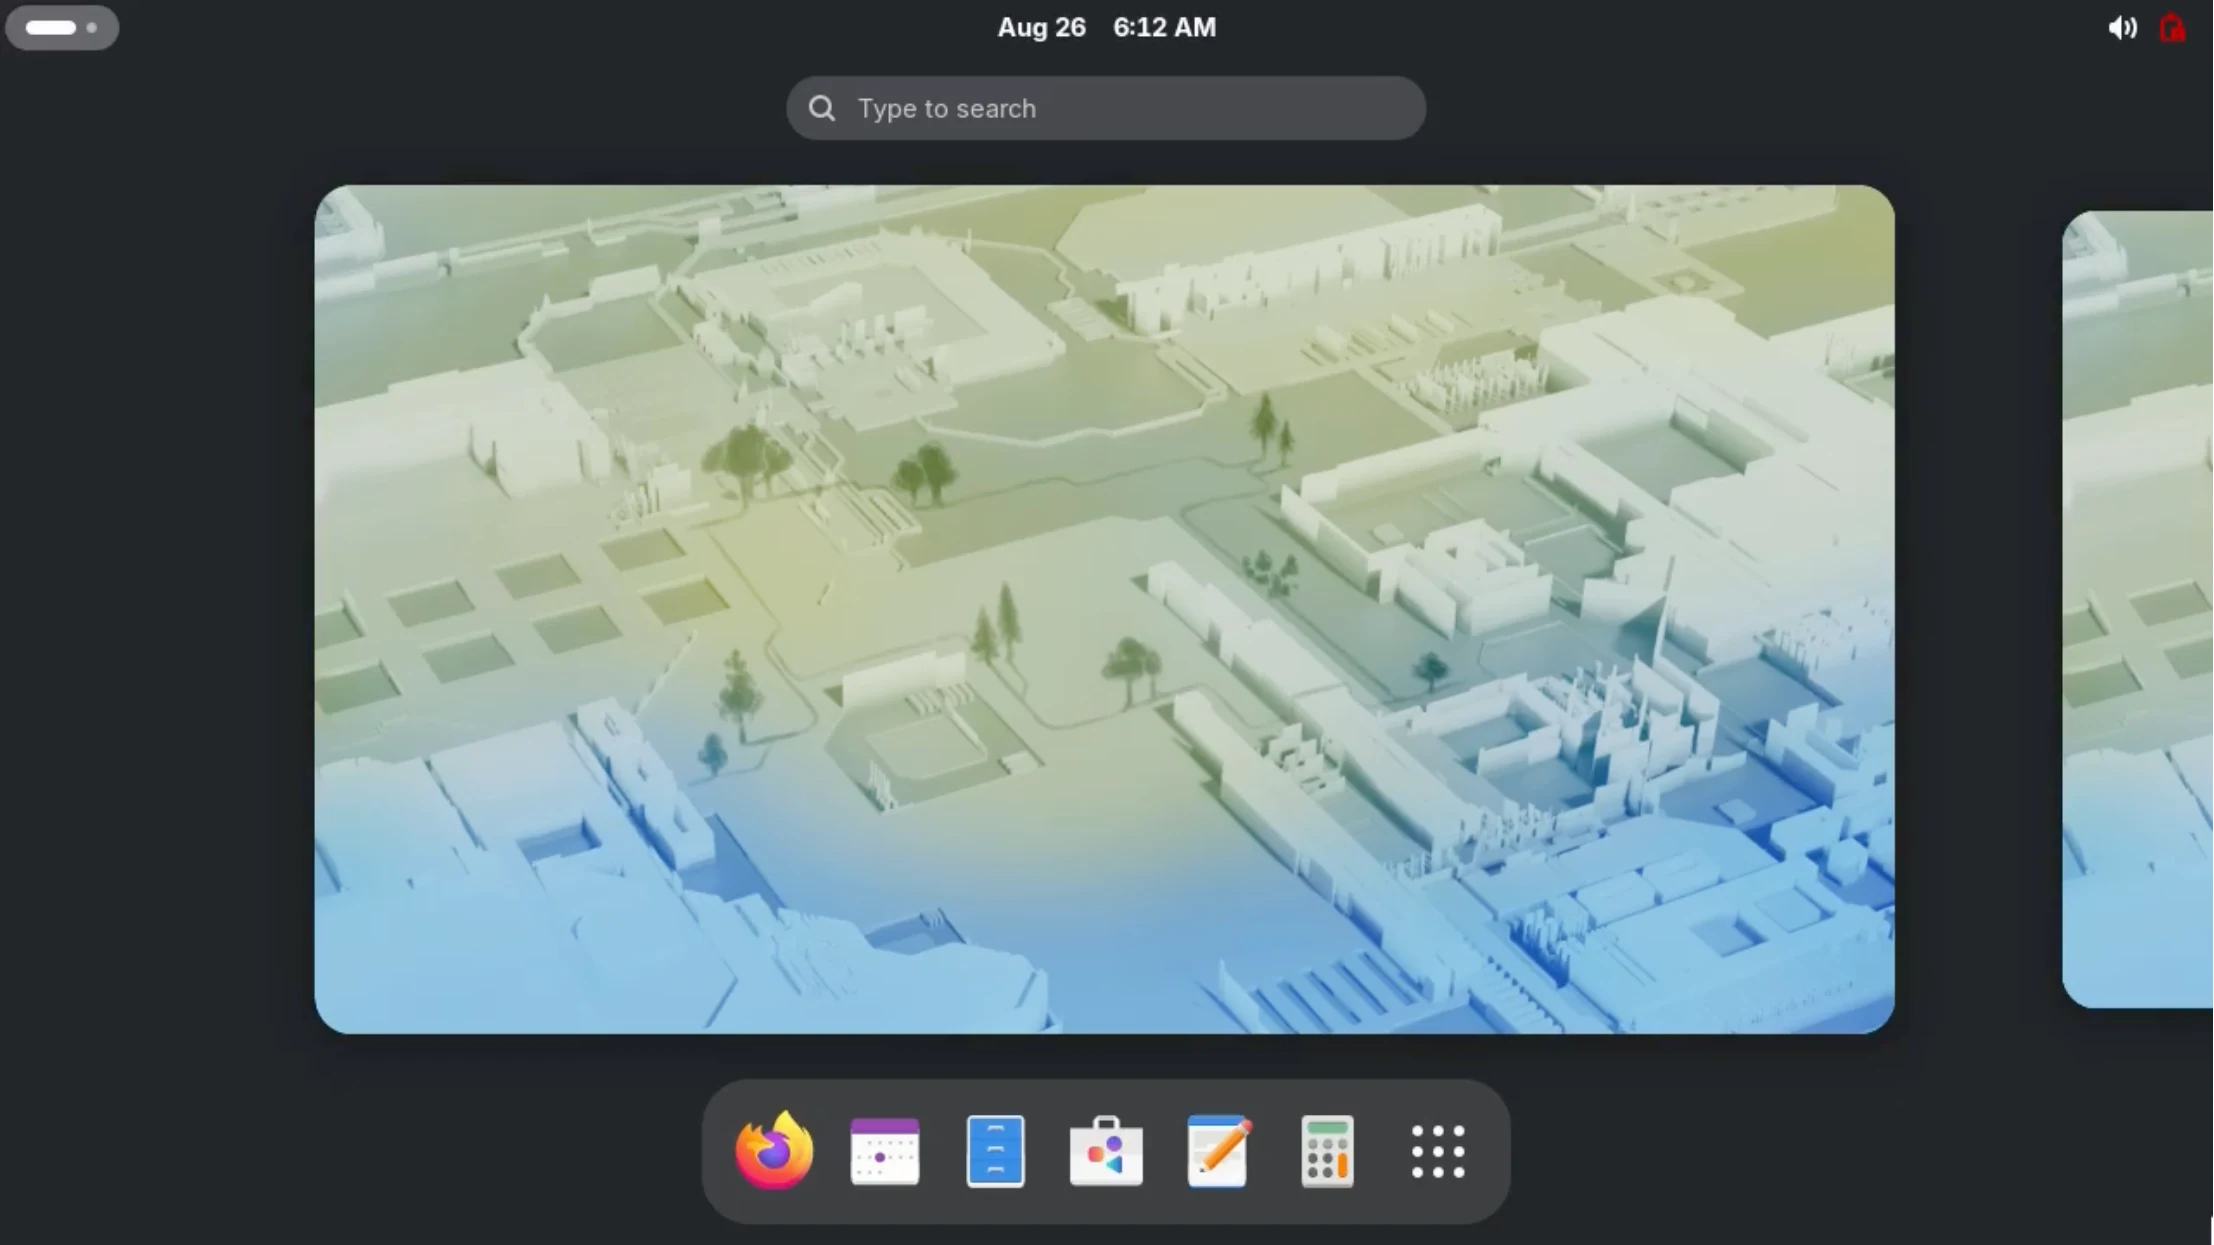
You are now on the Fedora 44 Workstation desktop. You can launch Firefox, Files, and other applications from the Dock at the bottom, and click the grid icon to view all applications.