Windows Host
File Downloads
Download Loader
Go to the Downloads Summary page to download the corresponding Loader file.
Download System Image
Go to the Downloads Summary page to download the operating system image archive. After downloading, extract the archive to get the *.img file needed for system installation.
The downloaded system image is a compressed file that needs to be extracted before it can be written to eMMC using imaging software.
Hardware Connection
Required Equipment
- One USB Type-A to Type-C cable
- A pin or toothpick
- 12V/2A DC power adapter (DC5525)
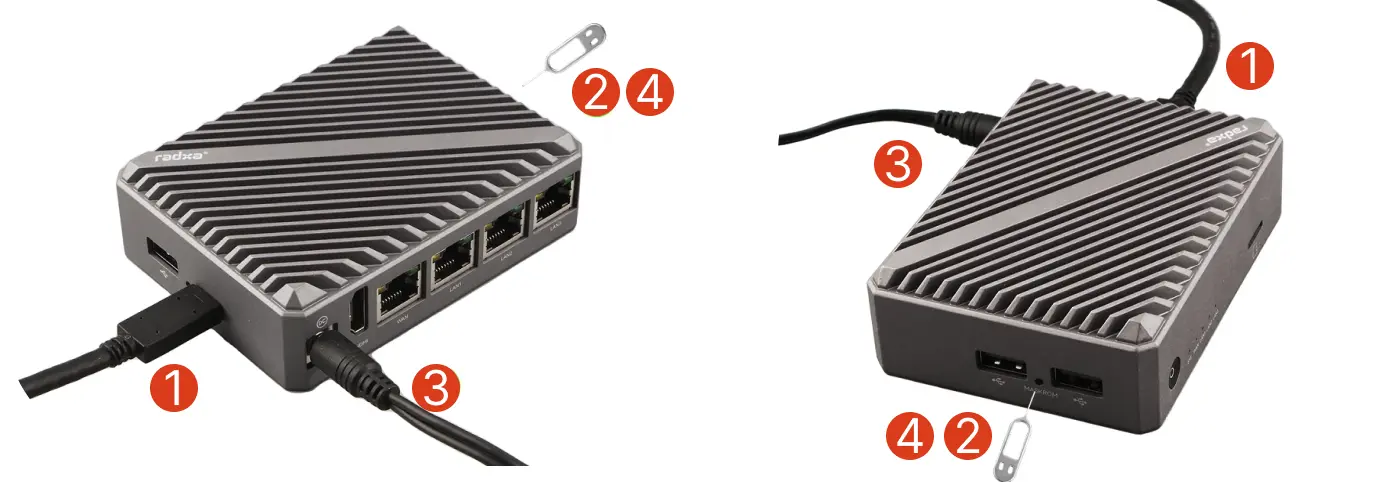
Entering Maskrom Mode
Maskrom mode is the "hardware first-aid kit" for embedded devices, enabling device recovery by directly interfacing with the chip's low-level hardware.
Maskrom mode is a built-in low-level recovery mode in Rockchip chips, which is automatically entered when the device cannot load a valid bootloader from any boot medium (eMMC, SD card, etc.).
This mode allows rewriting the device firmware via the RockUSB protocol.
Radxa E24C has a dedicated Maskrom button. If this button is detected as pressed during system startup, the system will automatically enter Maskrom mode!
-
Connect Radxa E24C to your PC using a USB Type-C to Type-A cable
-
Press and hold the Maskrom button using a pin or toothpick
-
Connect the 12V/2A DC power adapter
-
Release the Maskrom button
Normally, the power indicator will stay lit when in Maskrom mode. If this doesn't happen, you can repeat the steps above.
Installing the System to eMMC
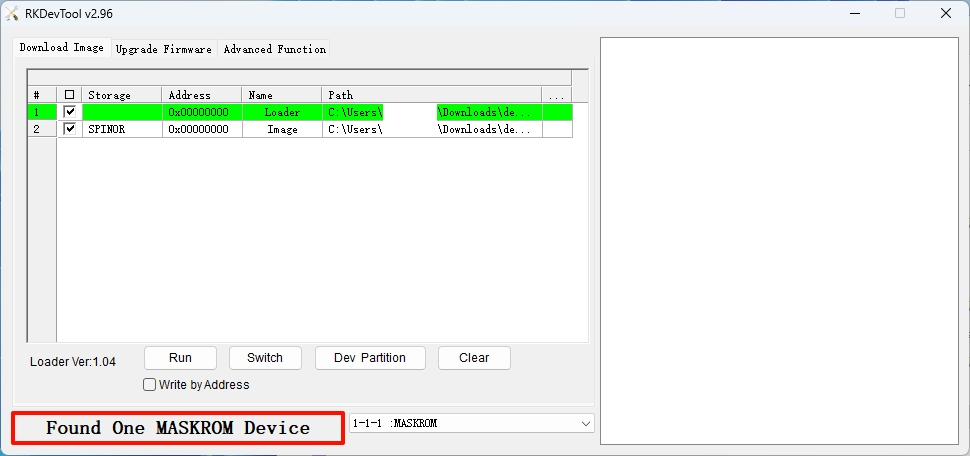
Maskrom Device Detection
For information on using the RKDevTool, refer to RKDevTool Usage
Open the RKDevTool software, which will automatically detect devices in Maskrom mode.
- If a Maskrom device is detected, you can proceed to the next step
- If no Maskrom device is detected, repeat the steps to enter Maskrom mode
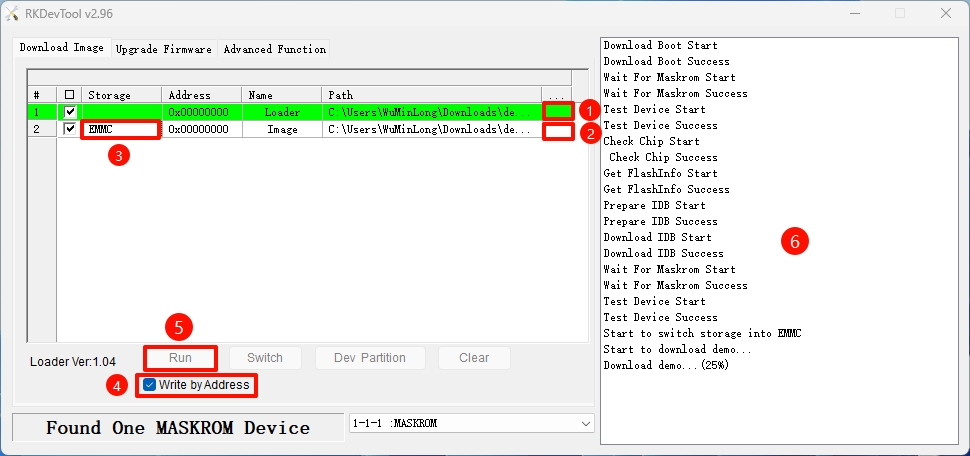
Installing the System
In RKDevTool, perform the following operations:
- ①: Select the Loader file
- ②: Select the system image
- ③: Choose eMMC as the system storage medium
- ④: Check the
Write by Addressoption - ⑤: Start the operation (writing Loader and system)
- ⑥: Operation feedback information
Using the System
Refer to the Quick Start guide for system login instructions!