RKDevTool Usage
RKDevTool is a software developed by Rockchip for USB flashing on Windows/Linux/macOS platforms.
Installing RKDevTool
- Windows
- Linux
- macOS
- Install Drivers
Download and extract the DriverAssitant file.
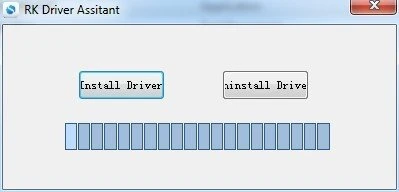
Locate the DriverInstall.exe file and run it as administrator:
To install drivers: Click the Install Driver option
To uninstall drivers: Click the Uninstall Driver option
If you have installed other versions of the driver before, please uninstall them first before installing the new one.
- Download RKDevTool
Download the RKDevTool utility, then extract the downloaded file. The RKDevTool.exe is the executable program - simply double-click it to launch the software.
- Install rkdeveloptool
Open your system terminal or command line and run the following commands to install:
sudo apt-get update
sudo apt-get install -y libudev-dev libusb-1.0-0-dev dh-autoreconf pkg-config libusb-1.0 build-essential git wget
git clone https://github.com/rockchip-linux/rkdeveloptool
cd rkdeveloptool
autoreconf -i
./configure
make -j $(nproc)
sudo cp rkdeveloptool /usr/local/sbin/
- Verify Version
After completing the RKDevTool installation, use the following command to check the RKDevTool version.
rkdeveloptool -V
- Install HomeBrew
HomeBrew is a free and open-source package manager that simplifies the software installation process for macOS users.
If you don't have HomeBrew installed, follow these instructions to install it.
/bin/bash -c "$(curl -fsSL https://raw.githubusercontent.com/Homebrew/install/HEAD/install.sh)"
- Install rkdeveloptool
Open your system terminal or command line and run the following commands to install:
brew install automake autoconf libusb pkg-config git wget
git clone https://github.com/rockchip-linux/rkdeveloptool
cd rkdeveloptool
autoreconf -i
./configure
make -j $(nproc)
cp rkdeveloptool /opt/homebrew/bin/
- Verify Version
After completing the RKDevTool installation, use the following command to check the RKDevTool version.
rkdeveloptool -V
Using RKDevTool
Maskrom mode is the "hardware first-aid kit" for embedded devices, enabling device recovery by directly interfacing with the chip's low-level hardware.
Maskrom mode is a built-in low-level recovery mode in Rockchip chips, which is automatically entered when the device cannot load a valid bootloader from any boot medium (eMMC, SD card, etc.).
This mode allows rewriting the device firmware via the RockUSB protocol.
Entering Maskrom Mode
Radxa E24C has a dedicated Maskrom button. If this button is detected as pressed during system startup, the system will automatically enter Maskrom mode!
Required Equipment
- One USB Type-A to Type-C cable
- A pin or toothpick
- 12V/2A DC power adapter (DC5525)
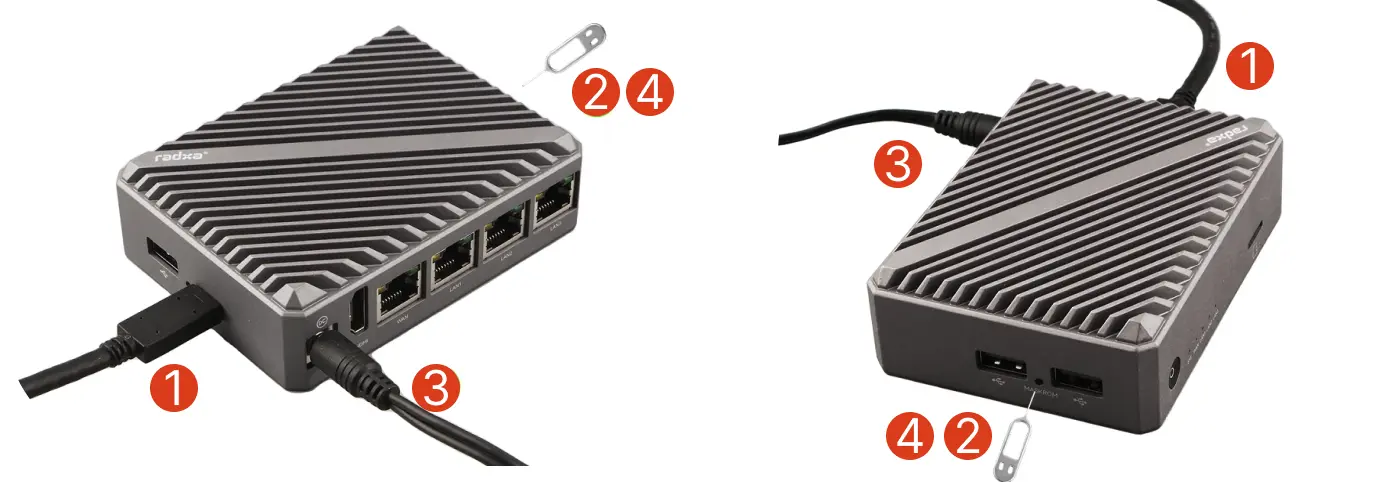
Entering the Mode
-
Connect Radxa E24C to your PC using a USB Type-C to Type-A cable
-
Press and hold the Maskrom button using a pin or toothpick
-
Connect the 12V/2A DC power adapter
-
Release the Maskrom button
Normally, the power indicator will stay lit when in Maskrom mode. If this doesn't happen, you can repeat the steps above.
Erasing eMMC
- Windows
- Linux/macOS
Use the RKDevTool to erase the eMMC.
Before using the tool, ensure your PC can detect the device in Maskrom mode, then follow these steps:
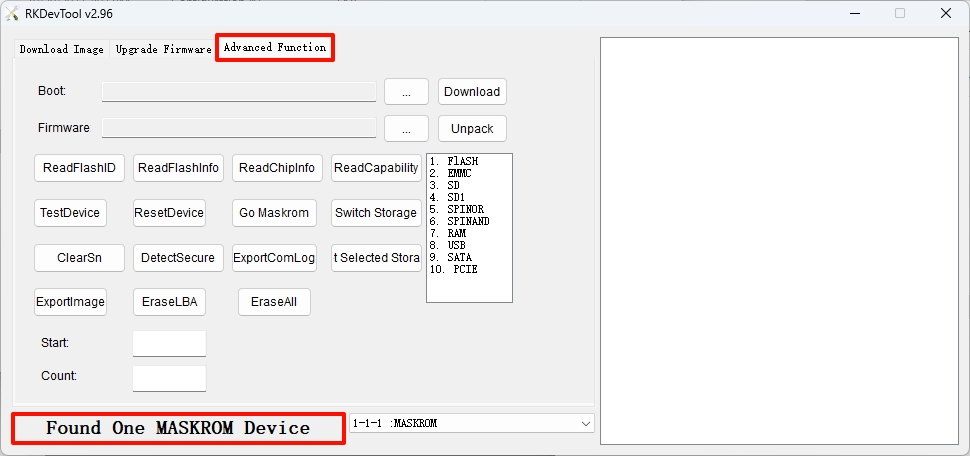
- Open RKDevTool
Make sure the host can detect the device in Maskrom mode and select the Advanced option.
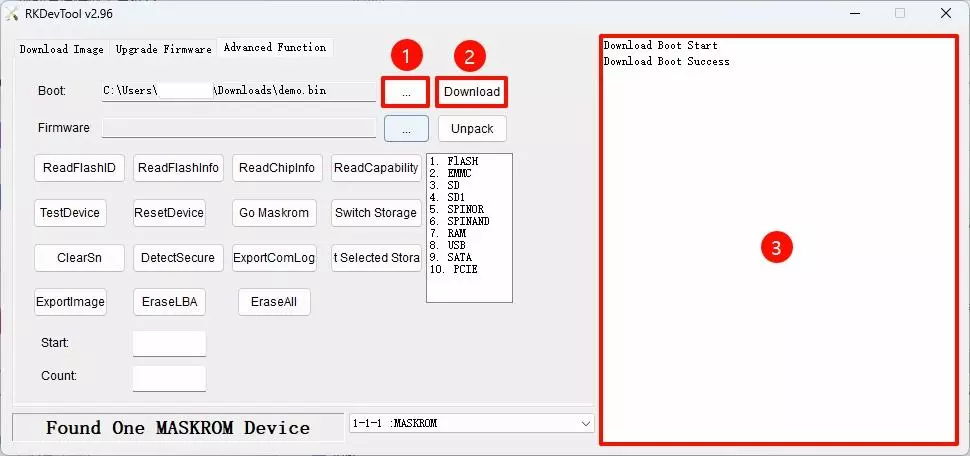
- Write Loader
Go to the Downloads Summary page to download the corresponding Loader file. Change the file selected in the Boot option to match the file you downloaded.
- ①: Select file path
- ②: Download Loader file
- ③: Operation feedback information
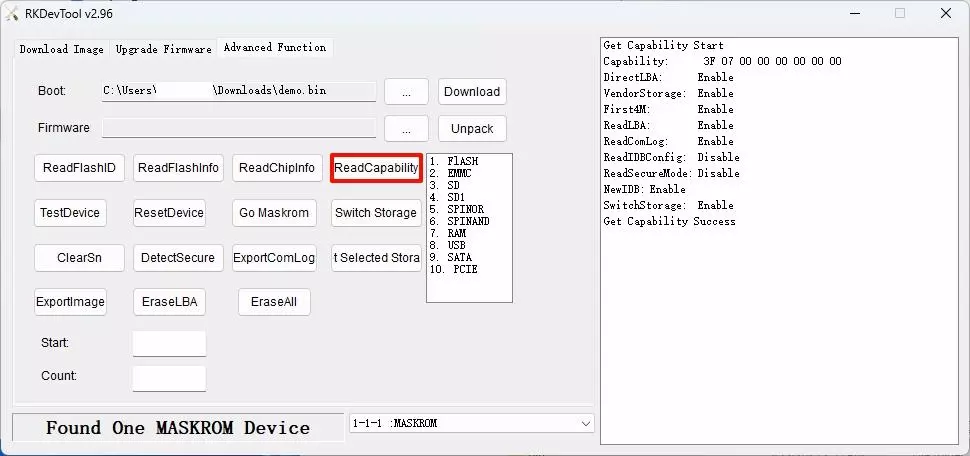
- Read Storage Capacity
Select the ReadCapability option to read the current device's storage capacity.
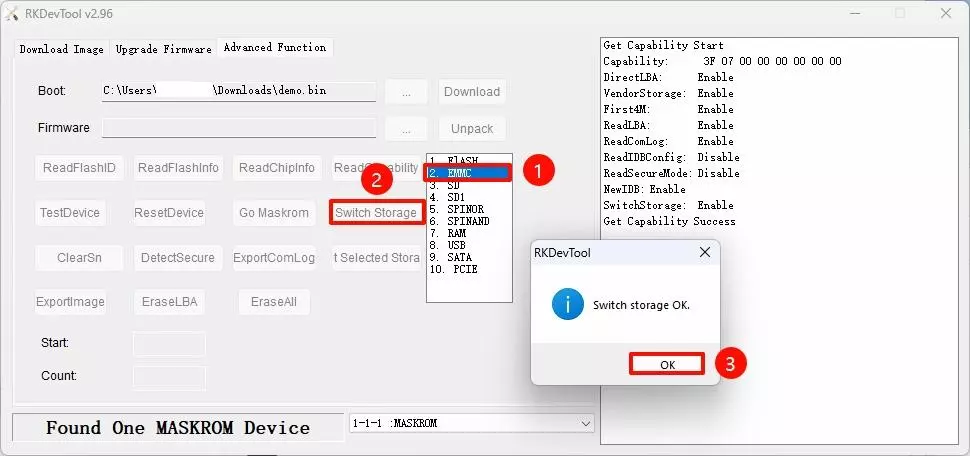
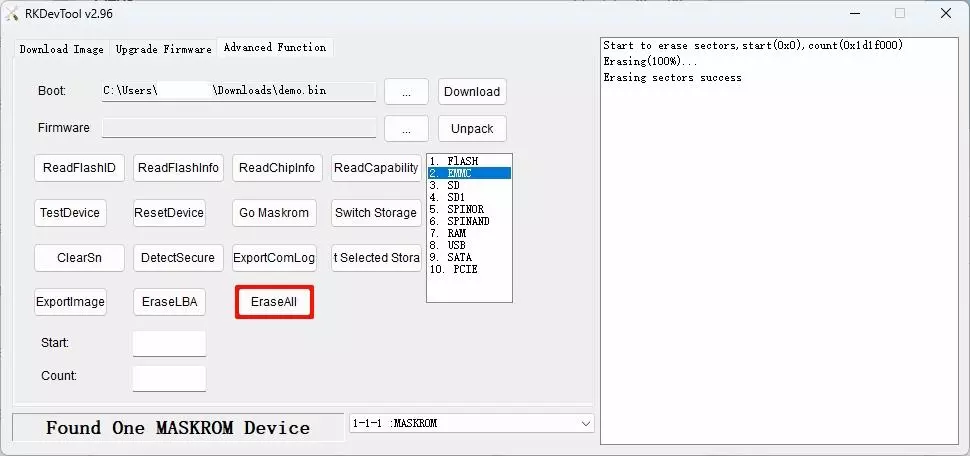
- Erase eMMC
First select EMMC, click Switch Storage to switch storage, then click the EraseALL option to clear the eMMC contents.
- Reboot the Device
Click the ResetDevice option to reboot the device.
Use the rkdeveloptool to erase the eMMC.
Before using the tool, ensure your PC can detect the device in Maskrom mode, then open your system terminal or command line and follow these steps:
- Generate a Zero Image
Create a 64MB file filled with zeros in the current directory.
dd if=/dev/zero of=./zero.img bs=1M count=64
- Check the Device
Verify if the device is detected in Maskrom mode.
sudo rkdeveloptool ld
Expected output: One device detected
DevNo=1 Vid=0x2207,Pid=0x350c,LocationID=101 Maskrom
- Write Loader
Go to the Downloads Summary page to download the corresponding Loader file, then replace <loader-file>.bin with the actual filename you downloaded.
sudo rkdeveloptool db <loader-file>.bin
- Erase eMMC
Use the RKDevTool to write zero.img to the starting sector of the device, which is used to erase or initialize the eMMC of Rockchip devices.
sudo rkdeveloptool wl 0 zero.img
- Reboot the Device
Use the RKDevTool to reboot the device.
sudo rkdeveloptool rd