Erase / Flash SPI Flash with Rsetup
To put the board into Maskrom mode, please refer to the Maskrom Mode guide.
This guide only applies to Radxa OS.
Use the Rsetup tool to enable SPI Flash.
Enable SPI Flash
Because eMMC and SPI Flash are mutually exclusive, the system enables eMMC and disables SPI Flash by default. If you need to enable SPI Flash, follow the steps below.
- Select option: The corresponding option will be highlighted
- Confirm selection: Press
Enter - Cancel selection: Press
ESC - Navigate options: Use
Up,Down,Left, andRight - Multiple selection interface: Press
Spaceto select, thenEnterto confirm; a*next to the option indicates that it is enabled
- Open a terminal and run
sudo rsetupto launch theRsetuptool.
sudo rsetup
- Go to
Overlays->Manage overlays, then pressEnterto confirm.

-
Press the spacebar to select
Enable SPI Flash, then pressEnterto confirm. -
Reboot the system after SPI Flash is enabled.
sudo reboot
Verify SPI Flash
After the system reboots, run the following command to verify whether SPI Flash has been enabled successfully:
lsblk
If you see the mtdblock0 device, SPI Flash has been enabled successfully.
Erase / Flash SPI Flash
This tutorial is only applicable to Radxa OS
Use the system configuration tool Rsetup to flash or erase the SPI boot firmware.
The core task of the SPI boot firmware (BootROM + Bootloader) is to initialize hardware in stages (CPU → Memory → Storage) and ultimately load the operating system kernel through the storage device.
To boot the system from an NVMe SSD, you need to flash the SPI boot firmware for normal system startup.
Prerequisites
Ensure that the board can boot normally from a MicroSD card and has a working network connection. The following operations require accessing the board's system.
Update System
Use the Rsetup tool to update the system and obtain the latest SPI boot firmware.
- Select option: The corresponding option will be highlighted
- Confirm selection: Press
Enter - Cancel selection: Press
ESC - Navigate options: Use
Up,Down,Left,Rightarrow keys - Multi-selection interface: Press
Spaceto select, thenEnterto confirm; a*will appear next to the selected option
- Open the terminal and enter the command
sudo rsetupto launch theRsetuptool
sudo rsetup
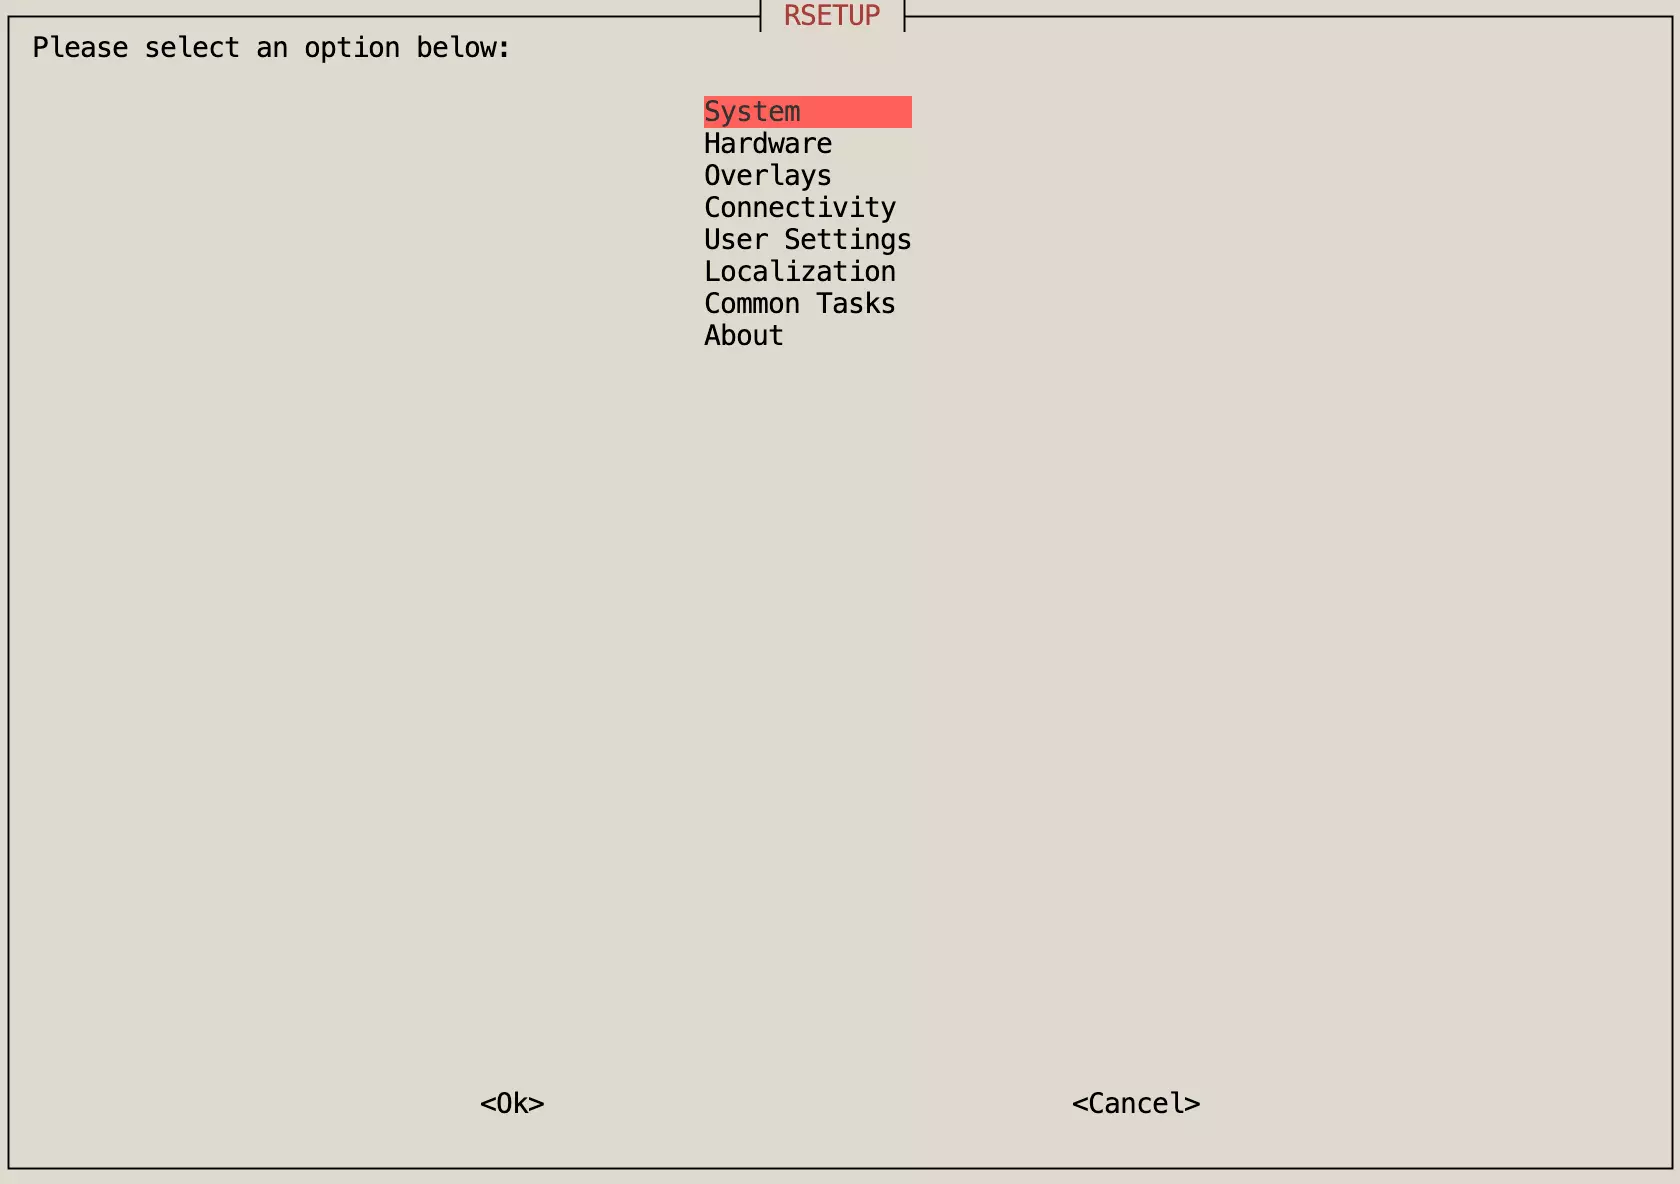
- Navigate to
System->System Updateand pressEnterto confirm, then follow theRsetuptool prompts to complete the system update.
The System Update option is used to update the system and is safer than using the apt update && apt upgrade commands.
Note: Using apt update && apt upgrade to update the system may result in incomplete updates or system abnormalities.

- After the update is complete, reboot the system.
sudo reboot
Flash SPI Boot Firmware
Use the Rsetup tool to update the SPI boot firmware, which will automatically flash the latest SPI boot firmware.
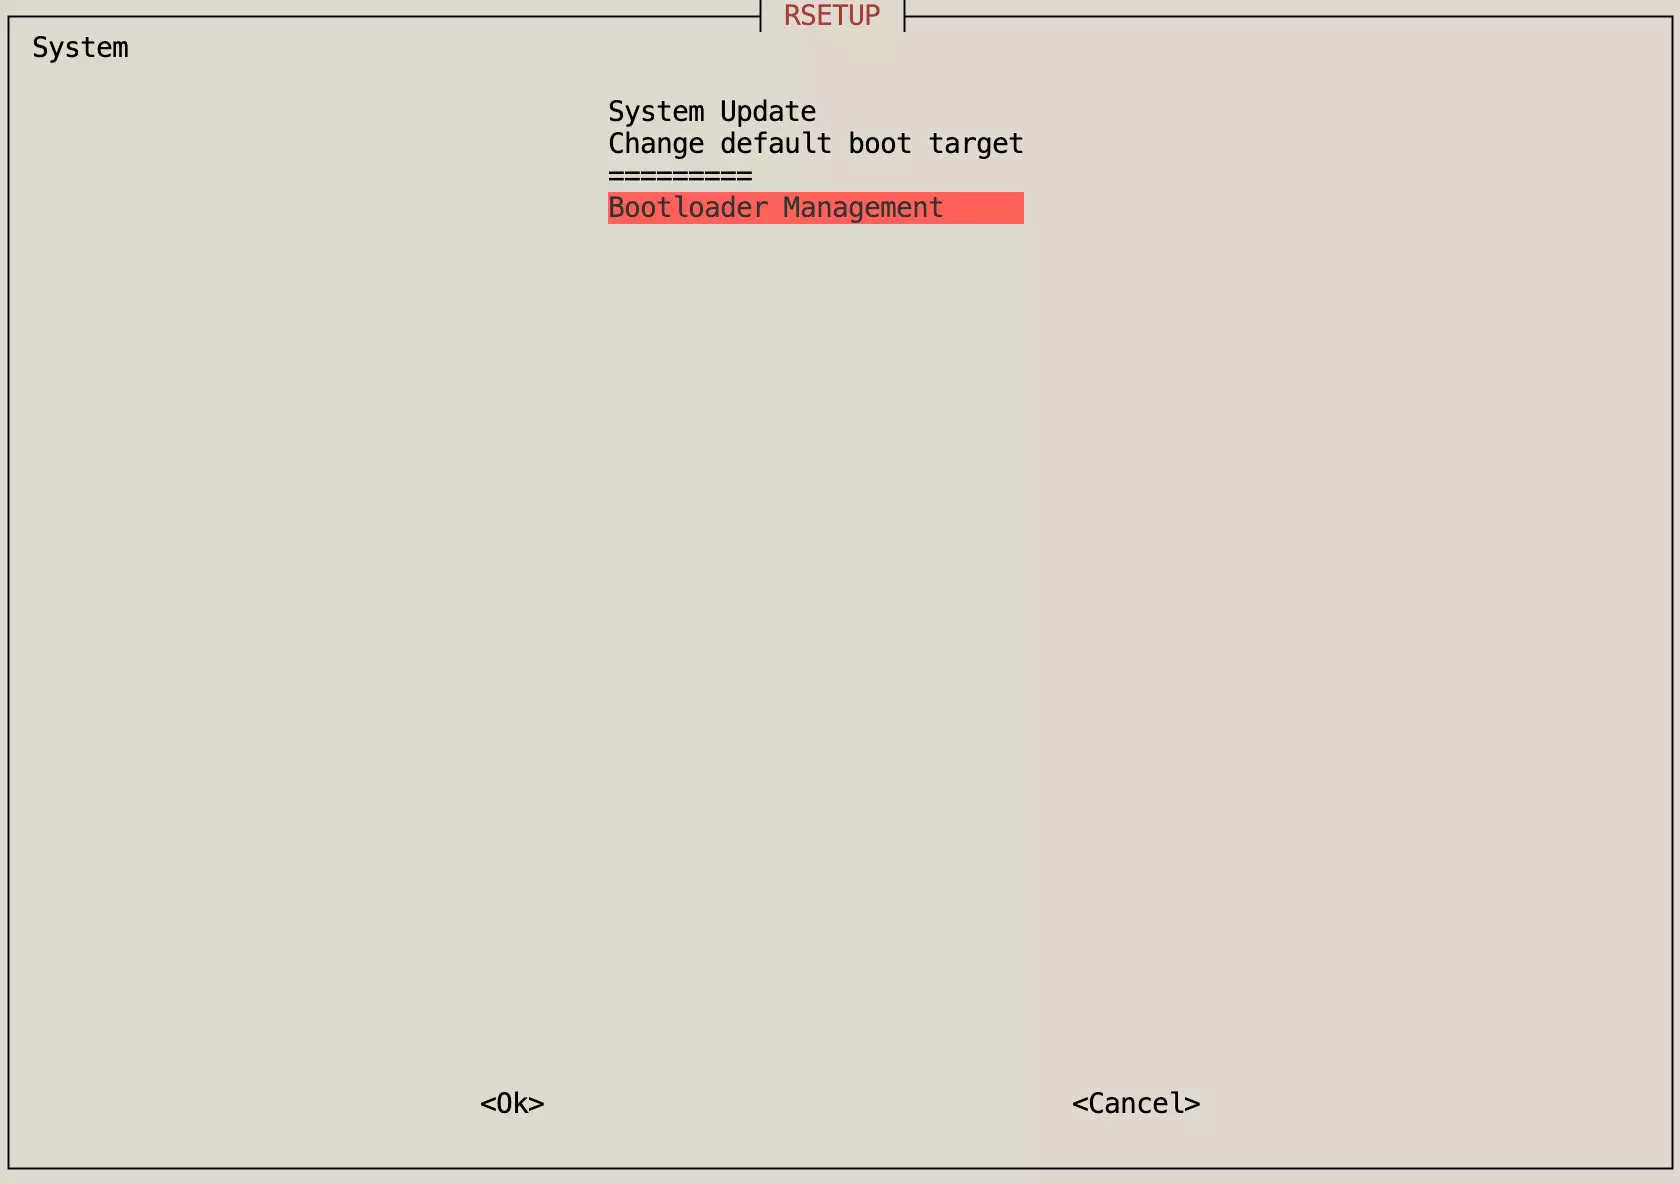
- Navigate to
System->Bootloader Managementand pressEnterto confirm.
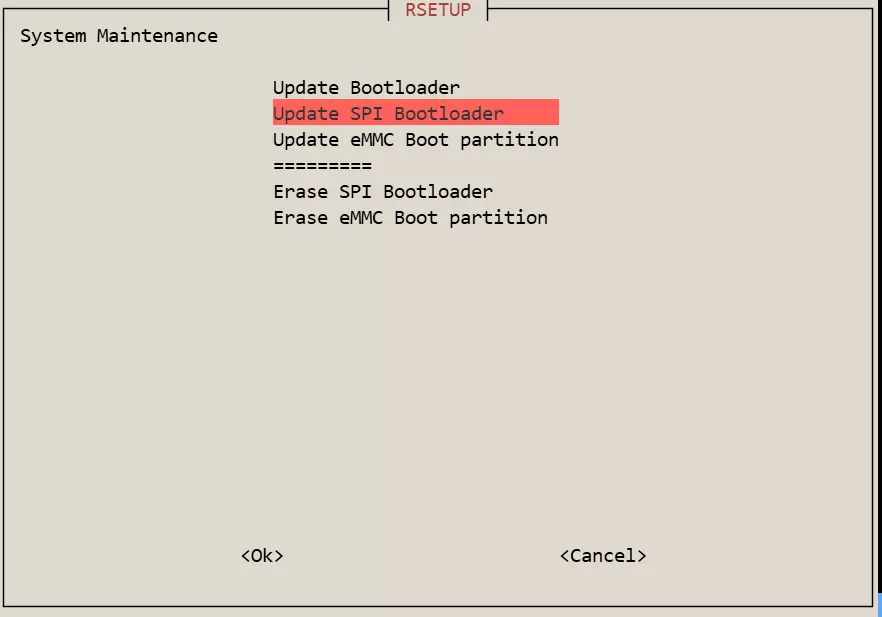
- Select
Update SPI Bootloaderand pressEnterto confirm.
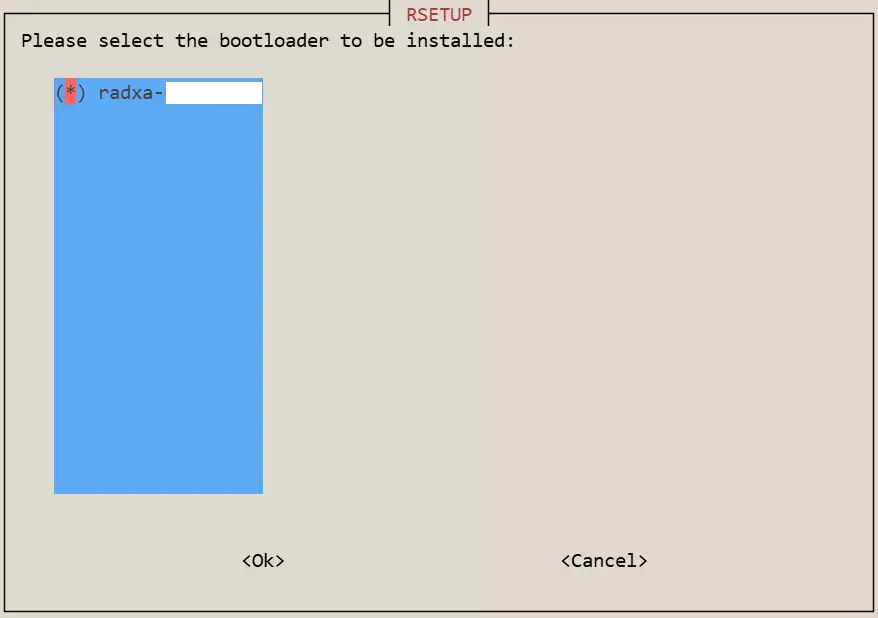
- Use the spacebar to select the SPI boot firmware option corresponding to your board (a
*indicates the option is selected), then pressEnterto confirm. Follow theRsetuptool prompts to complete the SPI boot firmware update.
- After the update is complete, reboot the system.
sudo reboot
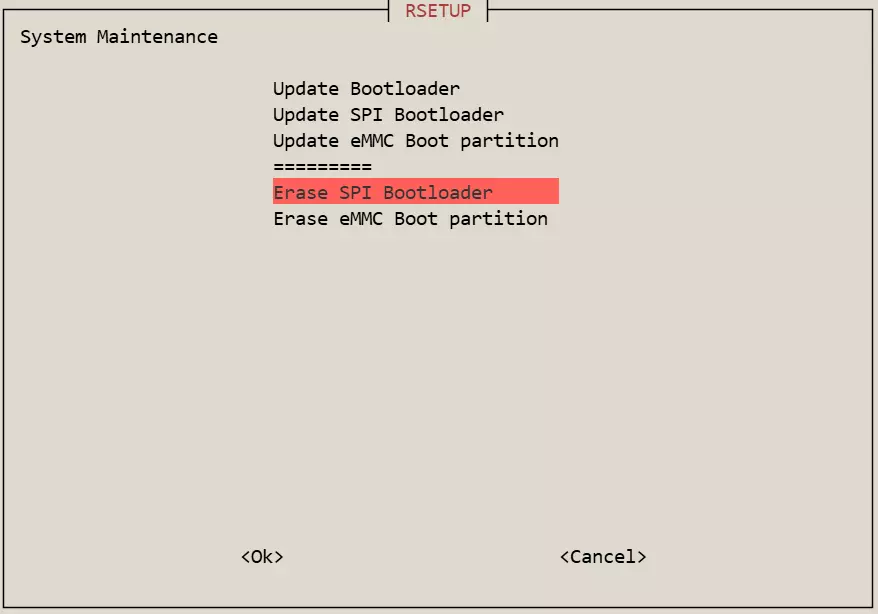
Erase SPI Boot Firmware (Optional)
After erasing the SPI Bootloader, boot media that relies on the SPI boot firmware will not be able to boot the system (for example: some boards may not be able to boot from NVMe SSD).
Use the Rsetup tool to erase the SPI boot firmware.
- Navigate to
System->Bootloader Management
- Select
Erase SPI Bootloaderand pressEnterto confirm.
- After the erase is complete, reboot the system.
sudo reboot