Quick Start
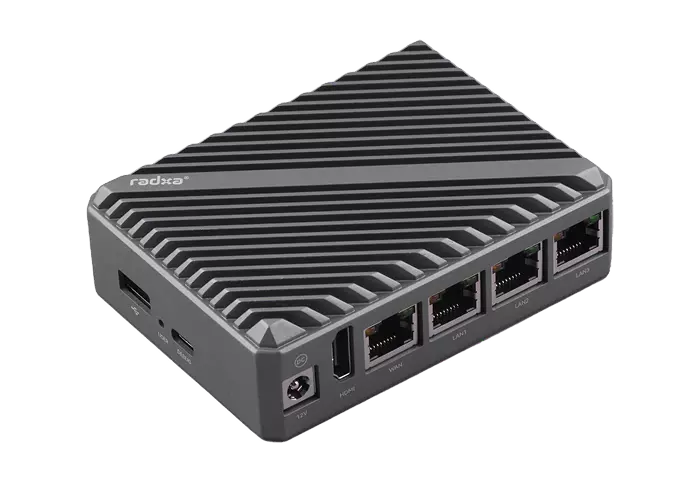
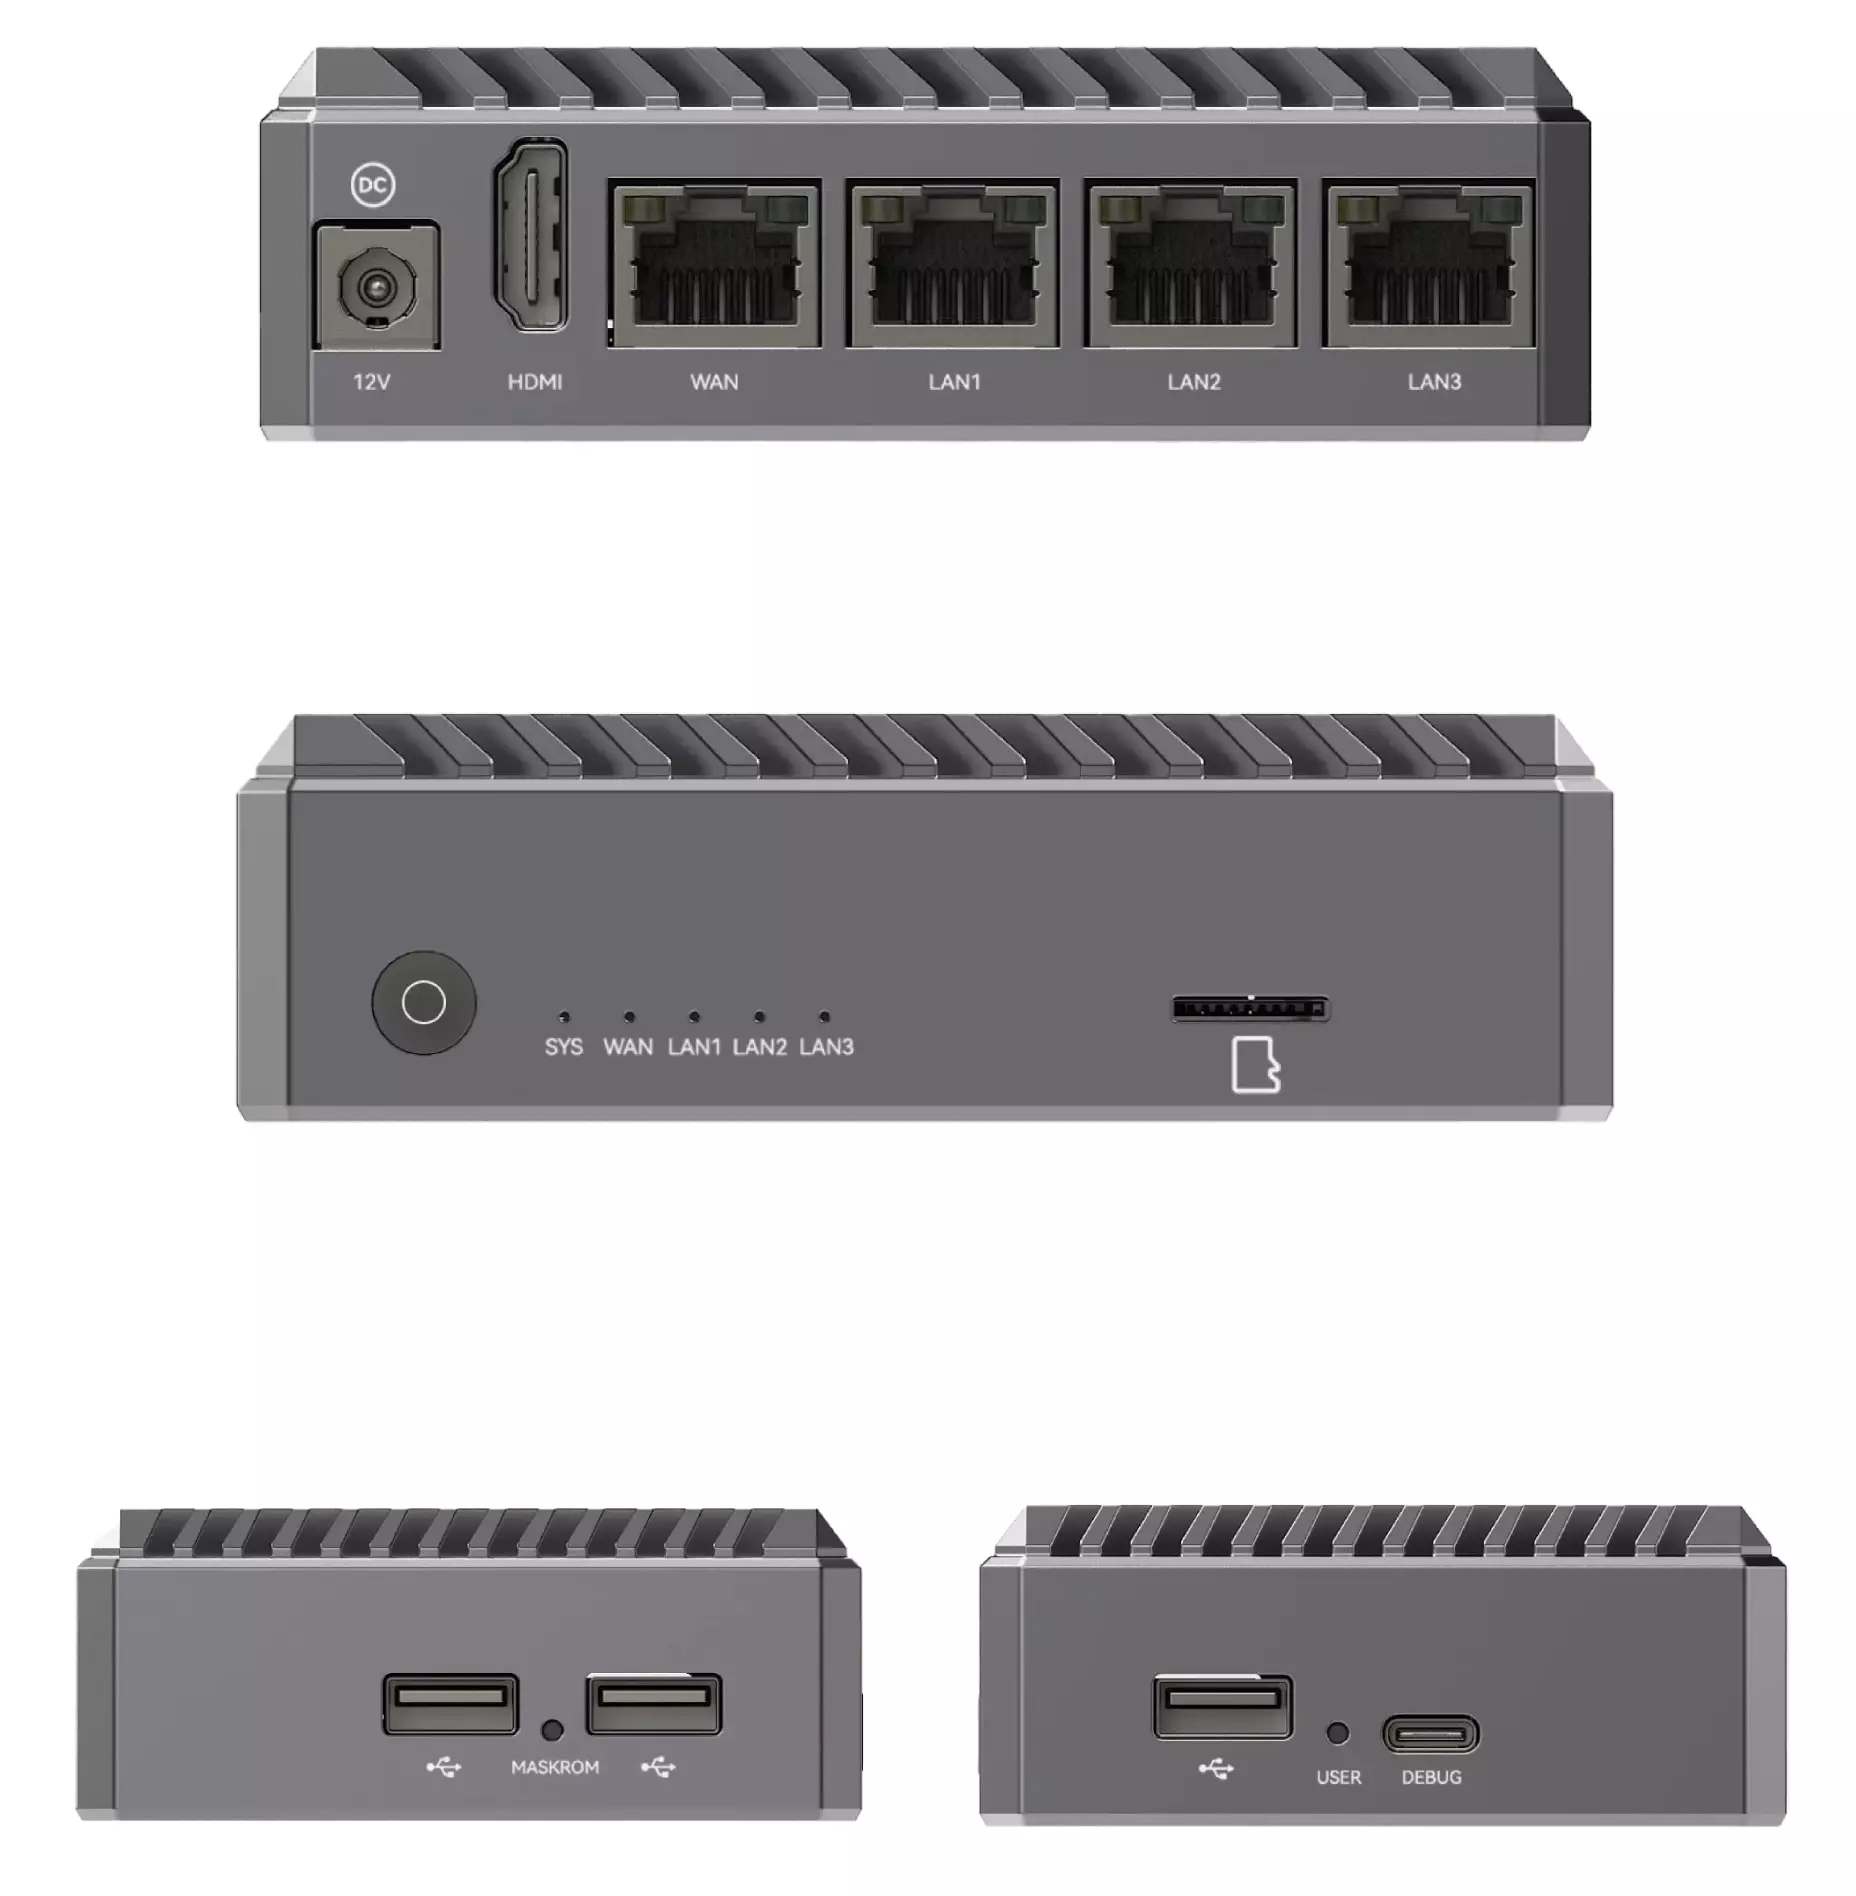
Product Photos
This tutorial uses the Radxa E24C enclosure version for demonstration purposes!
Prerequisites
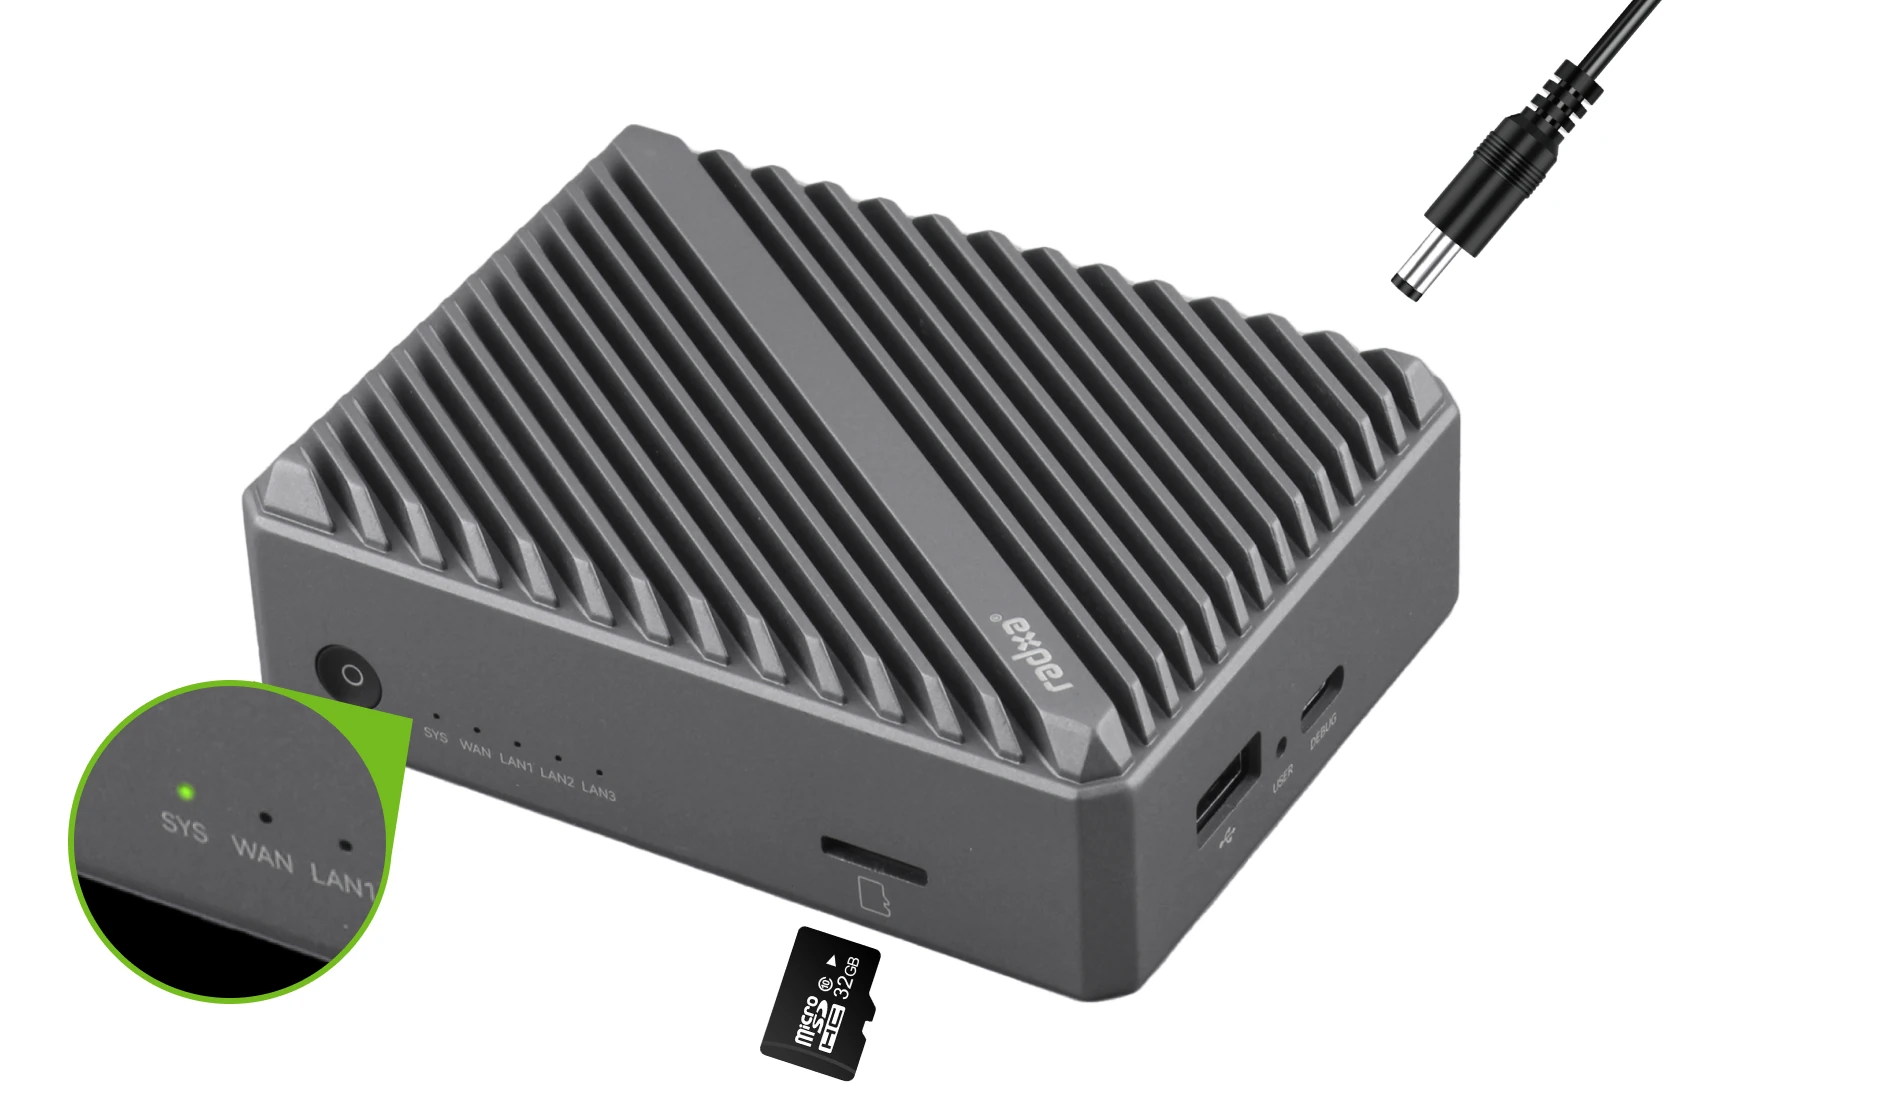
To properly boot and use the Radxa E24C device, you will need the following accessories: power adapter, bootable system media, and a debug cable (USB Type-A to Type-C).
For users with different development capabilities, we recommend the following additional accessories to reduce the learning curve and development time with the Radxa E24C.
- For Beginners:
Required accessories: Power adapter, bootable system media, monitor, HDMI cable
- For Developers:
Required accessories: Power adapter, bootable system media, debug cable (USB Type-A to Type-C)
Note: A monitor can be used to display the system interface and perform graphical operations!
Power Supply
Use a 12V/2A power adapter with a DC5525 connector to power the board.
Radxa E24C only supports 12V power input, and we recommend a current of 2A or higher to ensure stable operation of all peripherals.
Recommended power supply:
- Radxa DC12 36W Power Adapter (Recommended)
- Radxa DC12 60W Power Adapter
- Standard 12V/2A DC power adapter (DC5525 connector)
Boot Media
Radxa E24C supports various configurations, with the main difference being the presence of onboard eMMC storage.
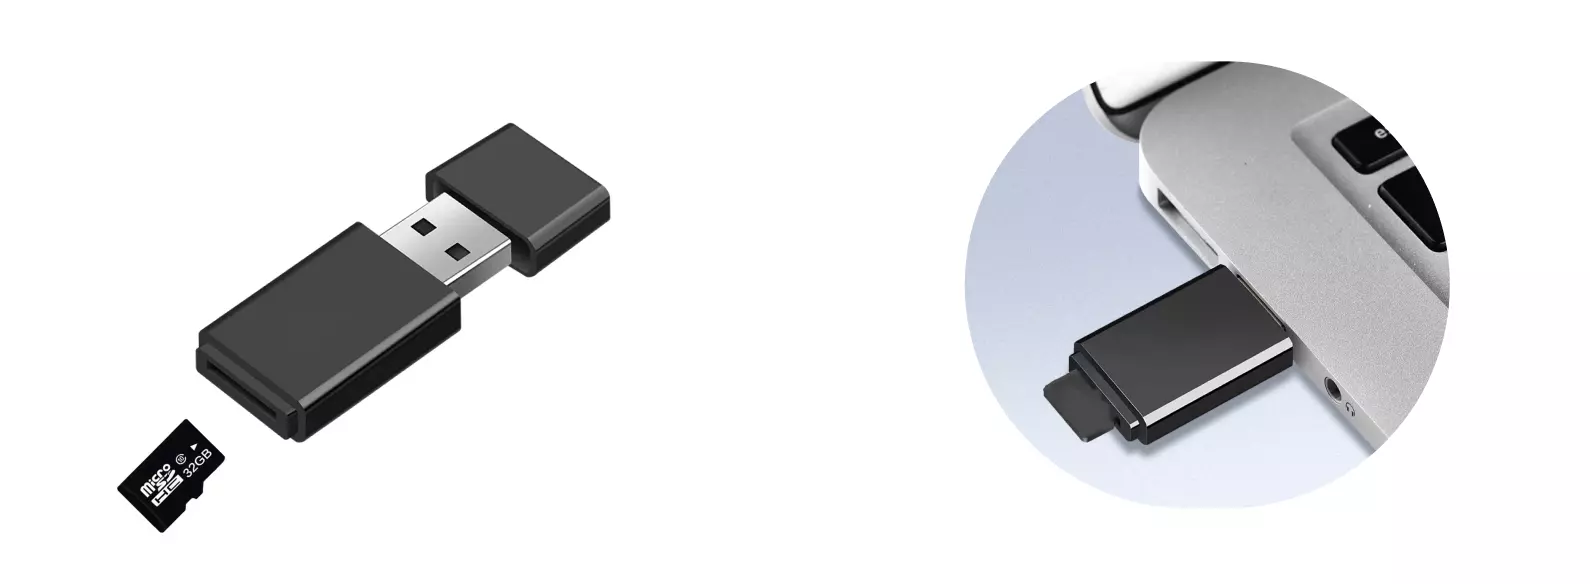
For boards without eMMC: You will need a microSD card and a card reader.
For boards with eMMC: The system is pre-installed at the factory and ready to use!
Debug Cable
Radxa E24C features a USB Type-C port primarily used for debugging and system access.
Installing the Operating System
- No eMMC System
- With Onboard eMMC System
For systems without onboard eMMC, you'll need to write the system image to a microSD card using a card reader.
- System Download
Go to the Download Resources page to download the appropriate operating system image package. After downloading, extract the compressed file to get the *.img file needed for system installation.
The downloaded system image is a compressed file that needs to be extracted before it can be written to the SD card using imaging software.
- Hardware Connection
Insert the microSD card into the card reader, then connect the card reader to your PC's USB port.
- Imaging Tool
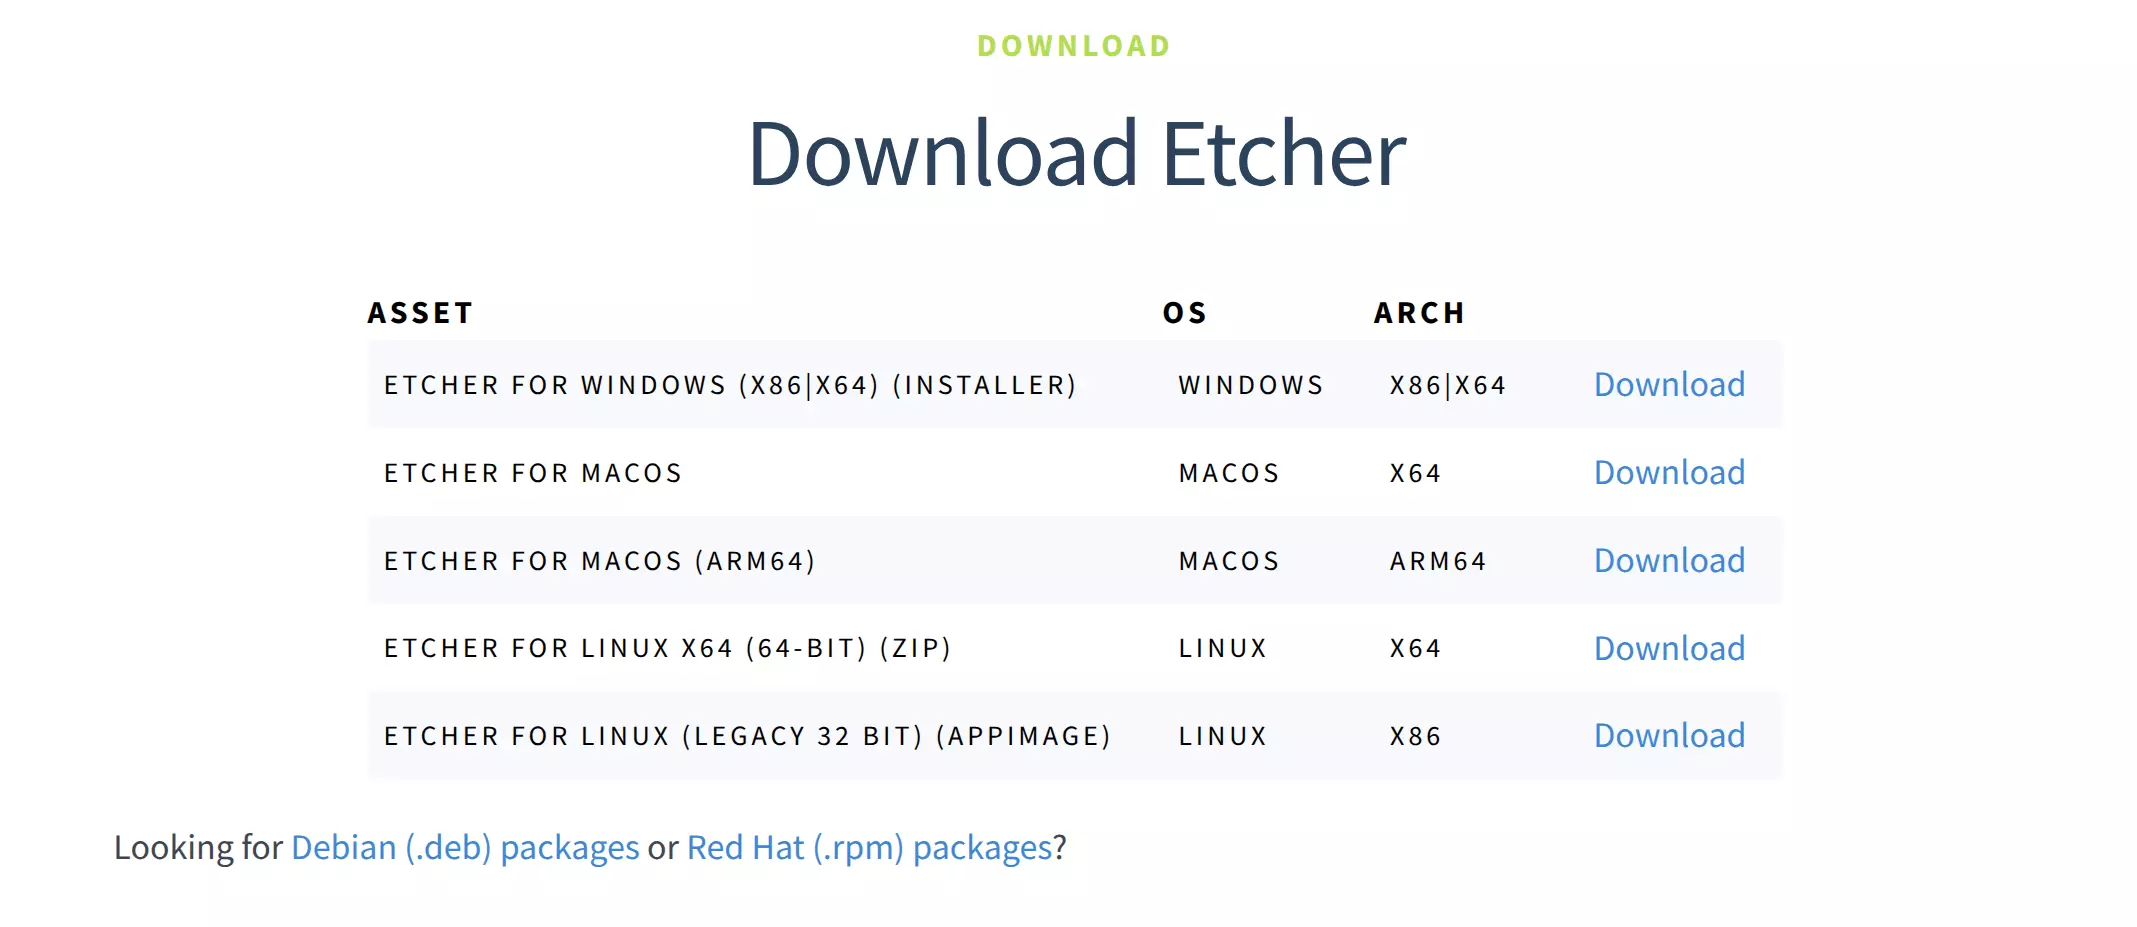
We recommend using balenaEtcher, an open-source imaging tool developed by Radxa's partner Balena. It's user-friendly, powerful, and supports Windows, Linux, and macOS.
Download the software for your platform from the official website: balenaEtcher
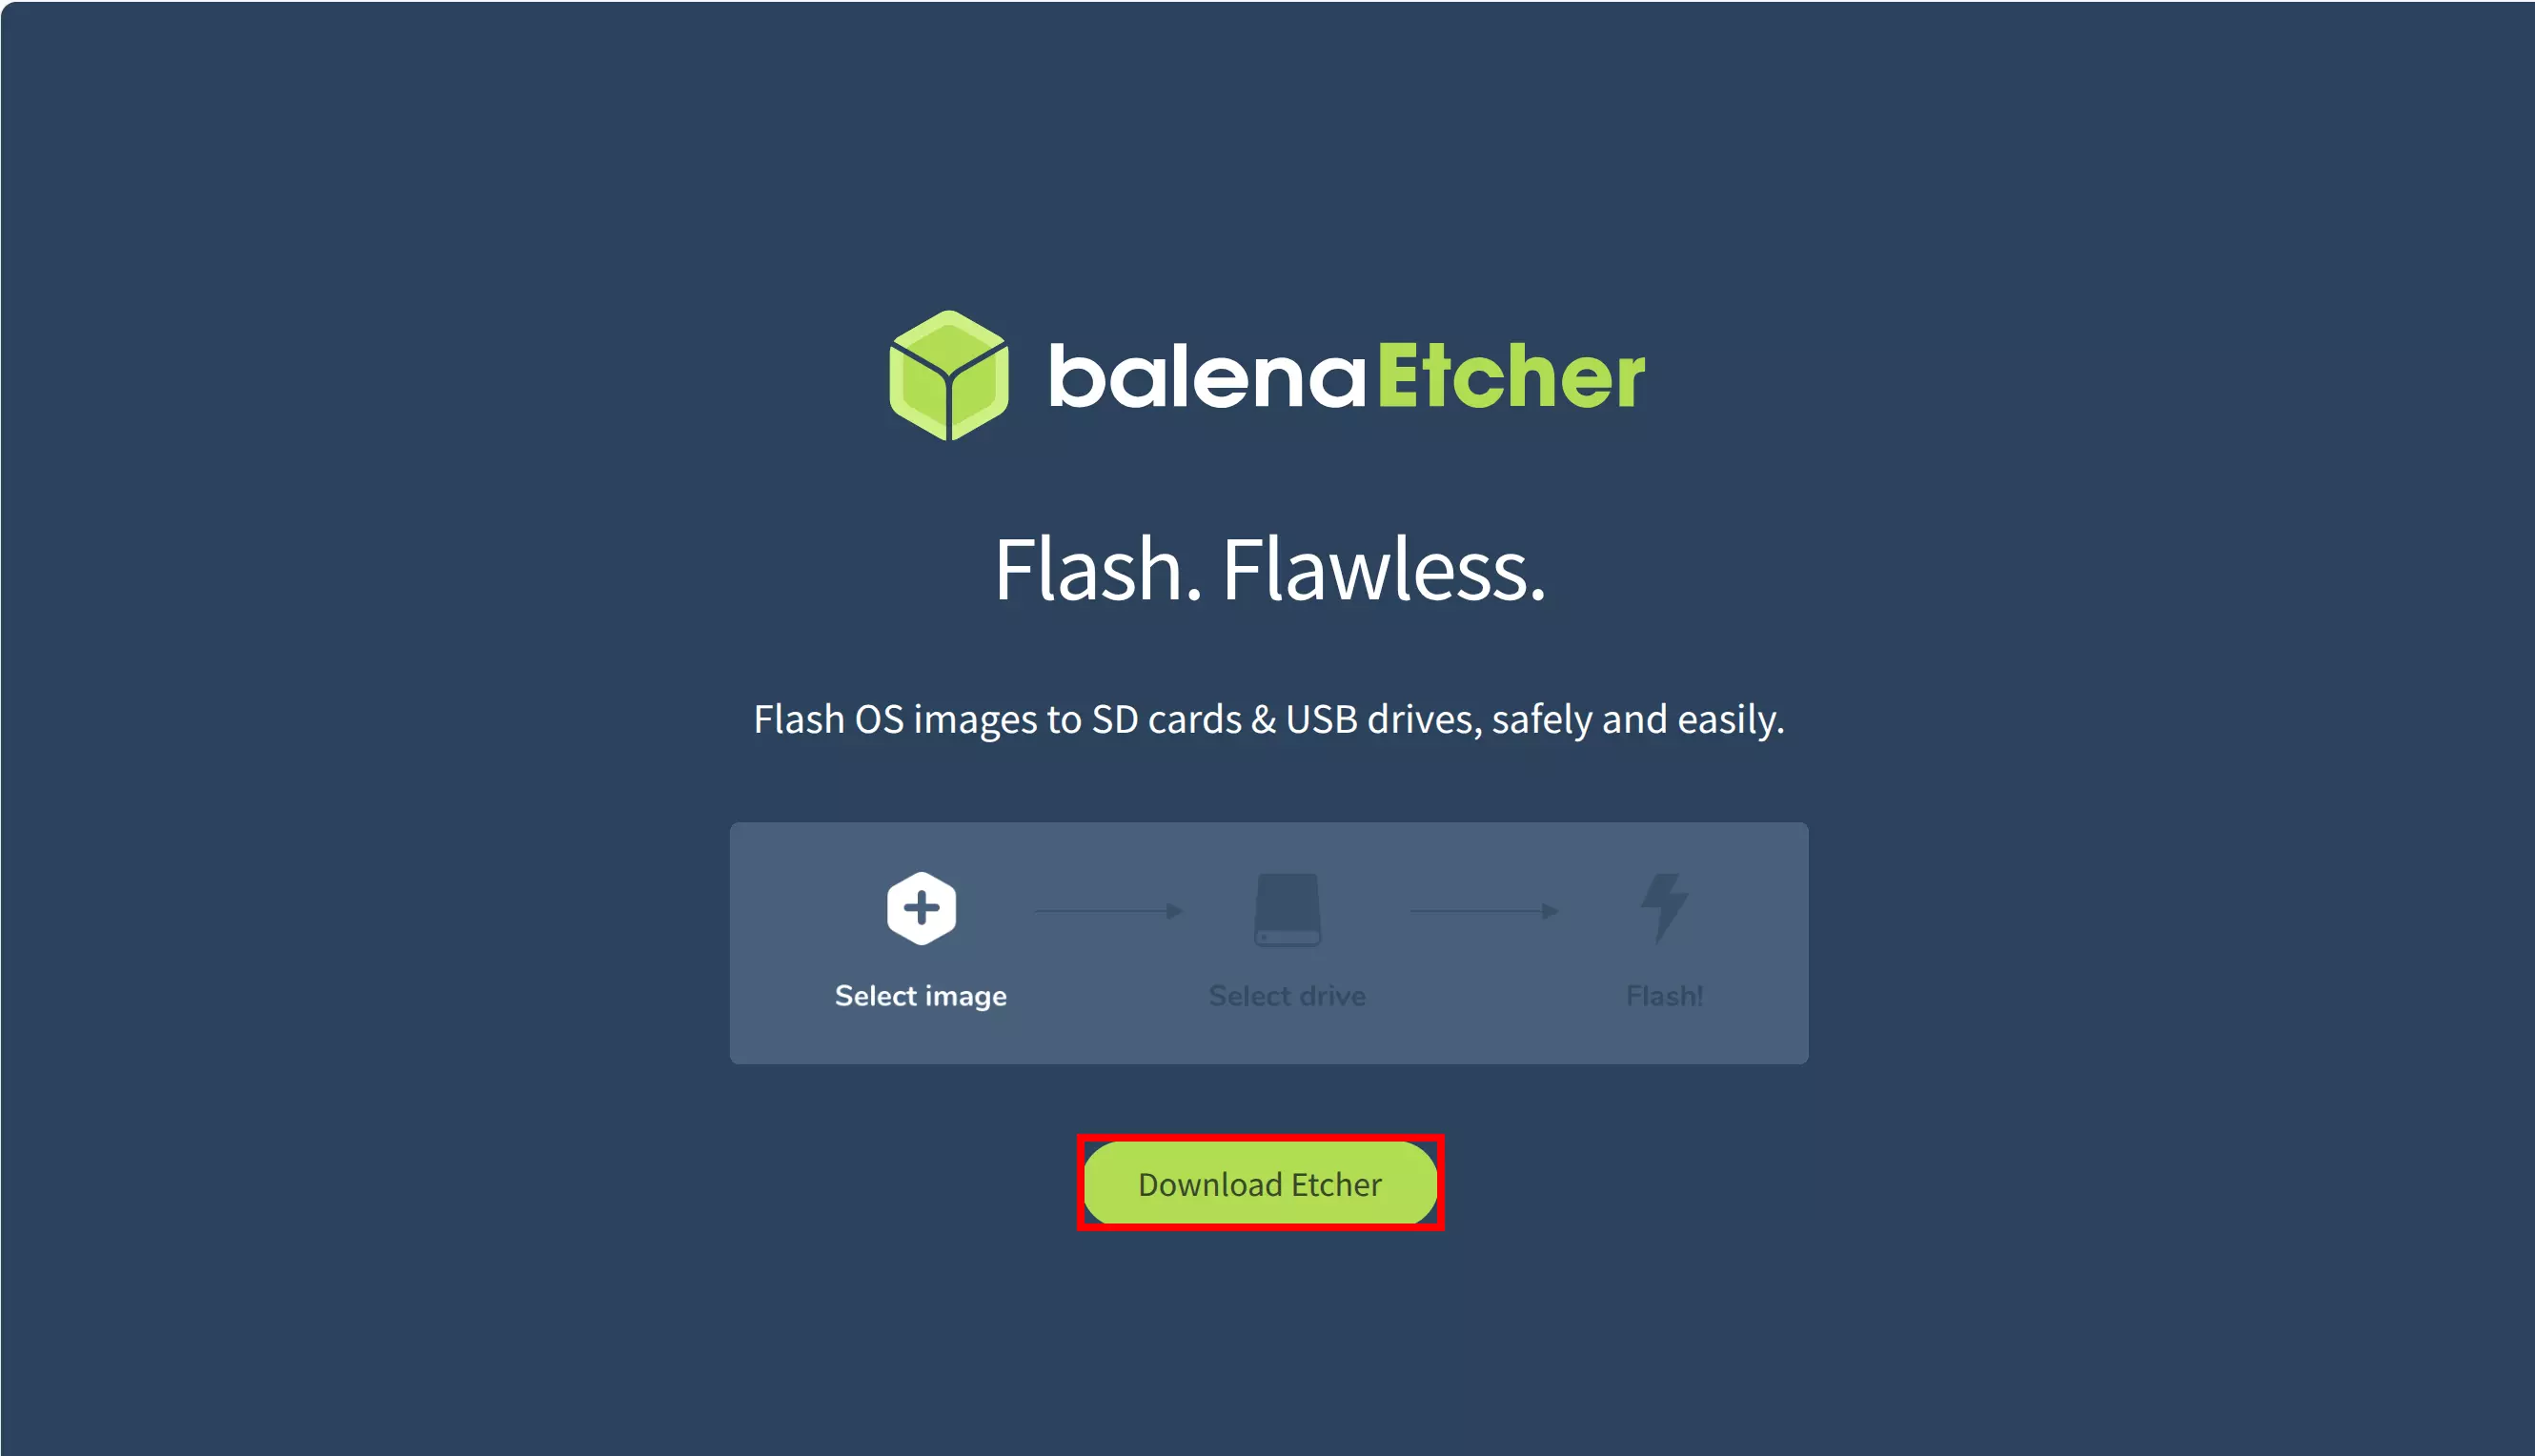
On the download page, select the appropriate system platform to download the Etcher software.
For Windows and Linux, simply run the program directly - no installation required!
- Installing the System Image
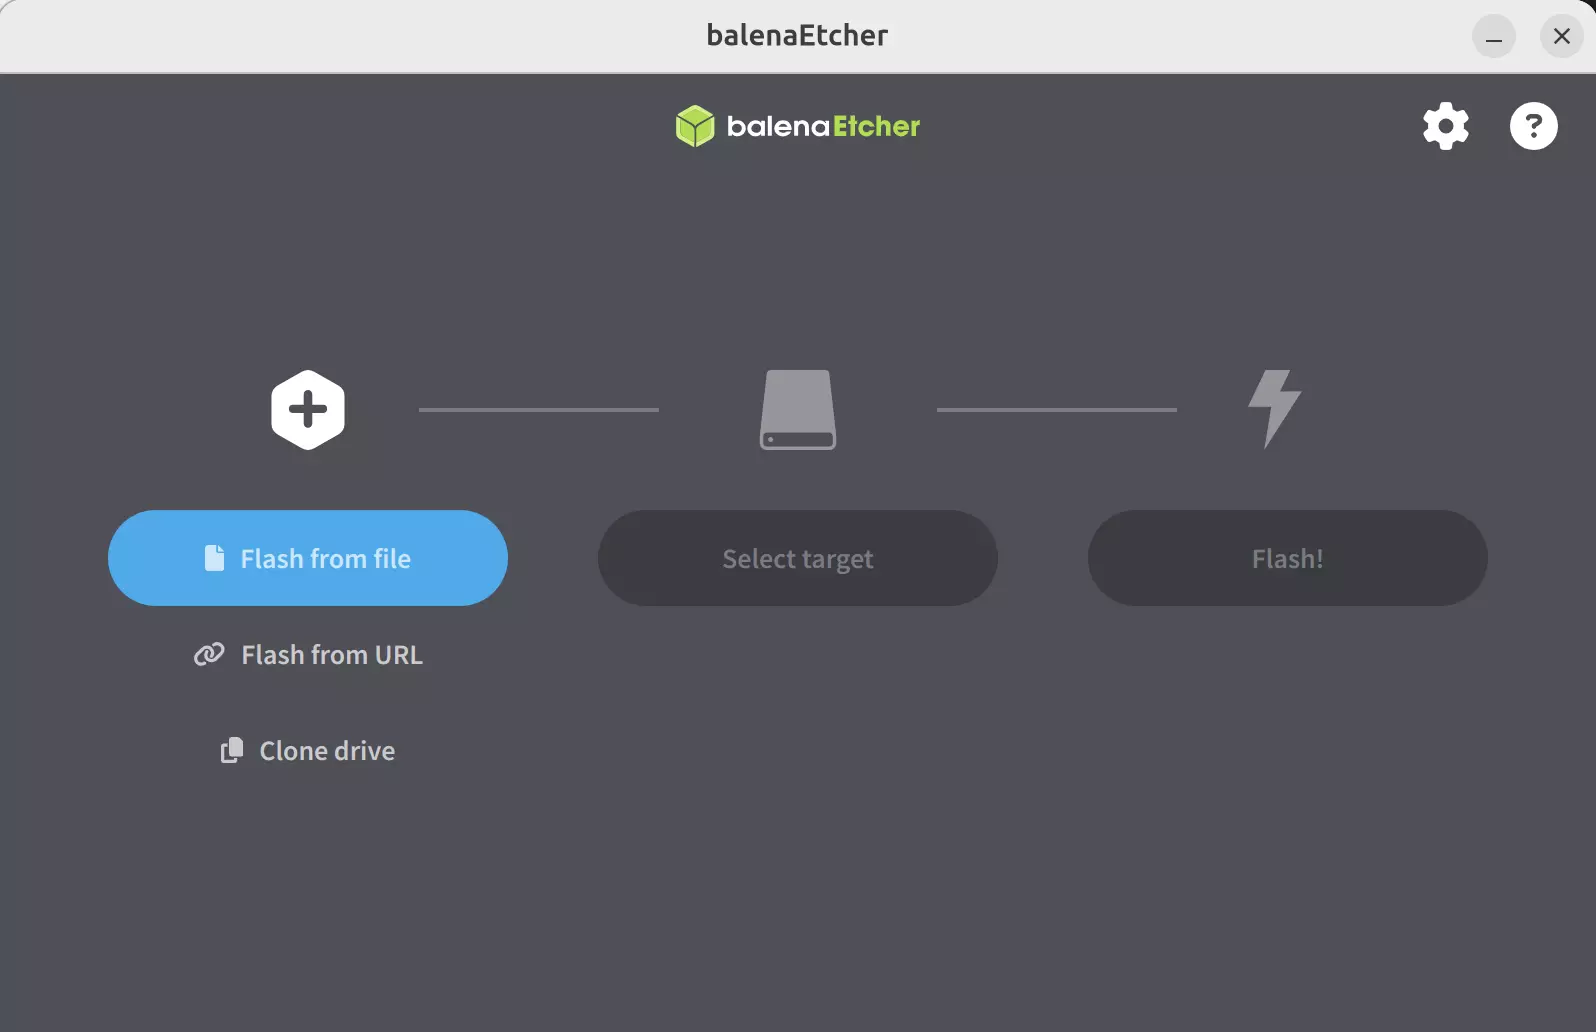
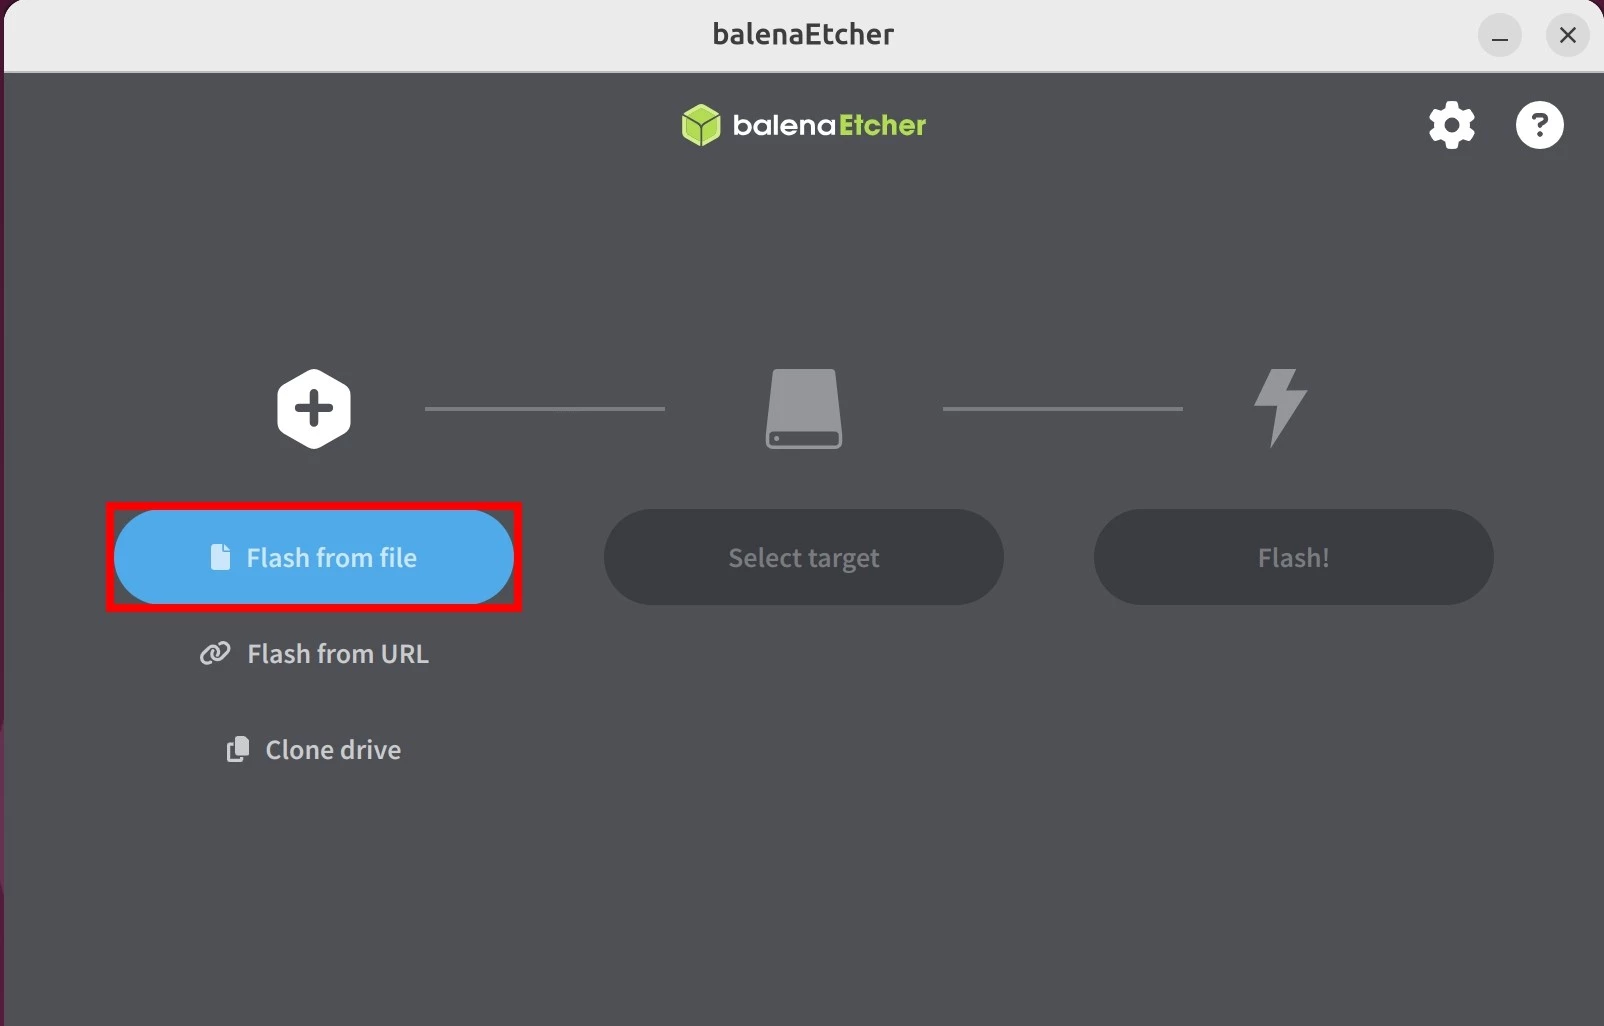
- Select the system image: Click
Flash from fileand choose the system image file you downloaded and extracted earlier.
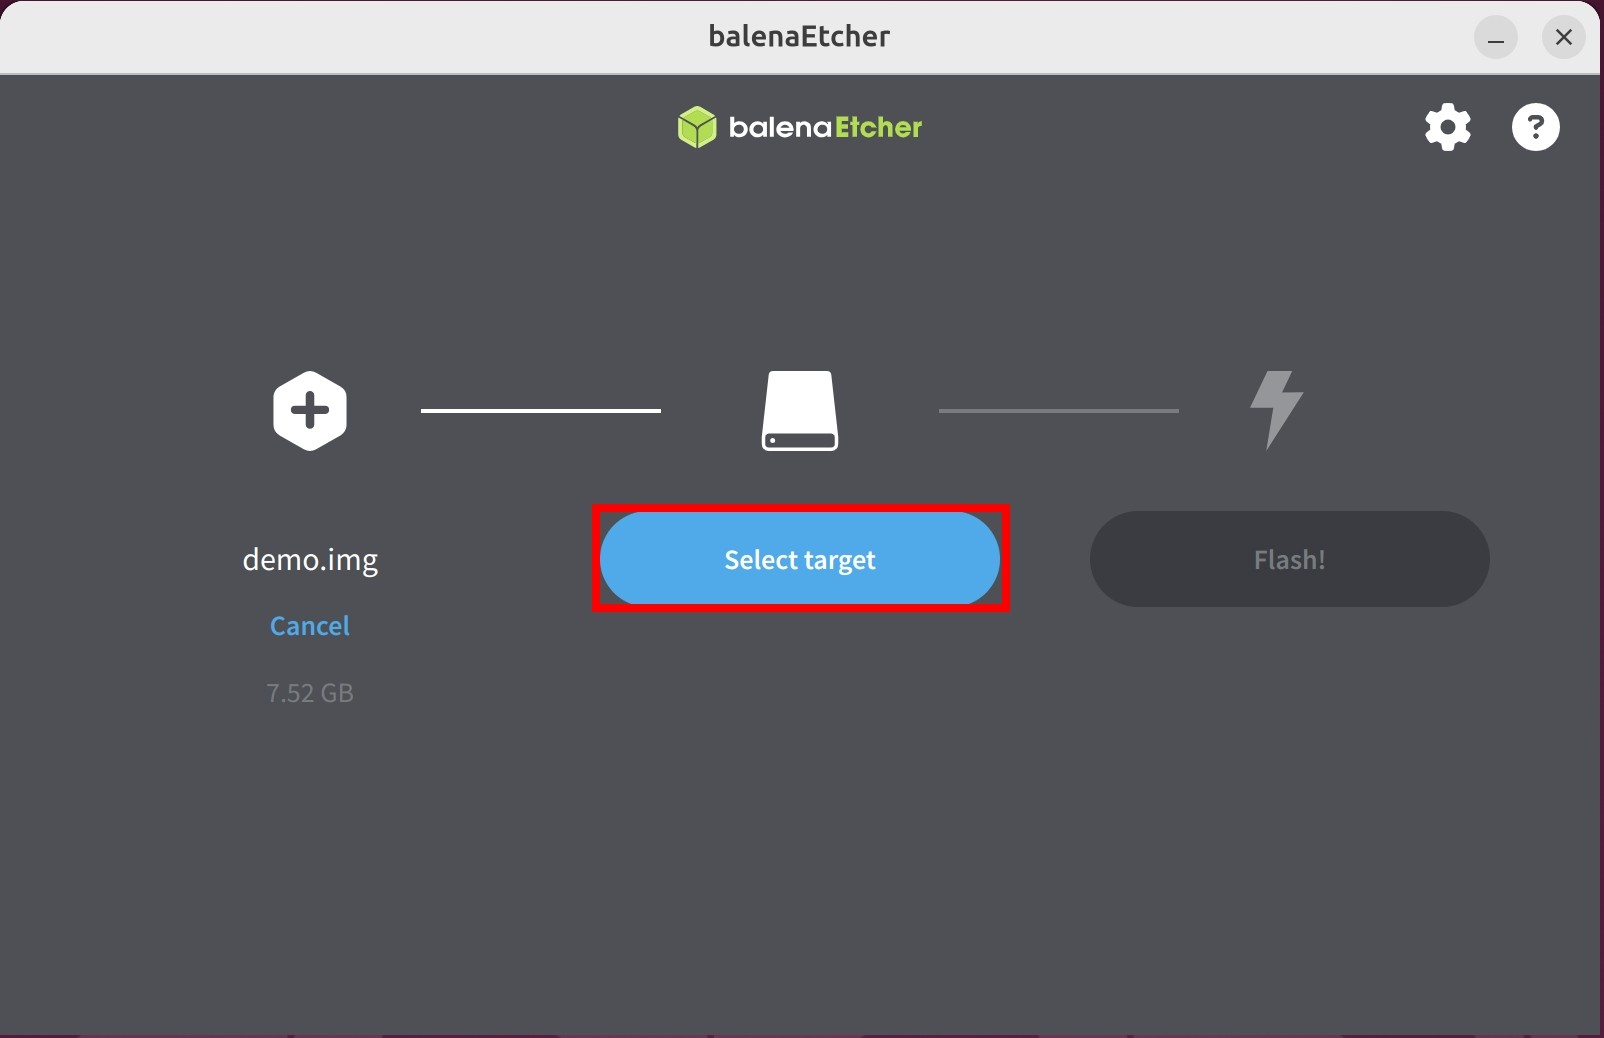
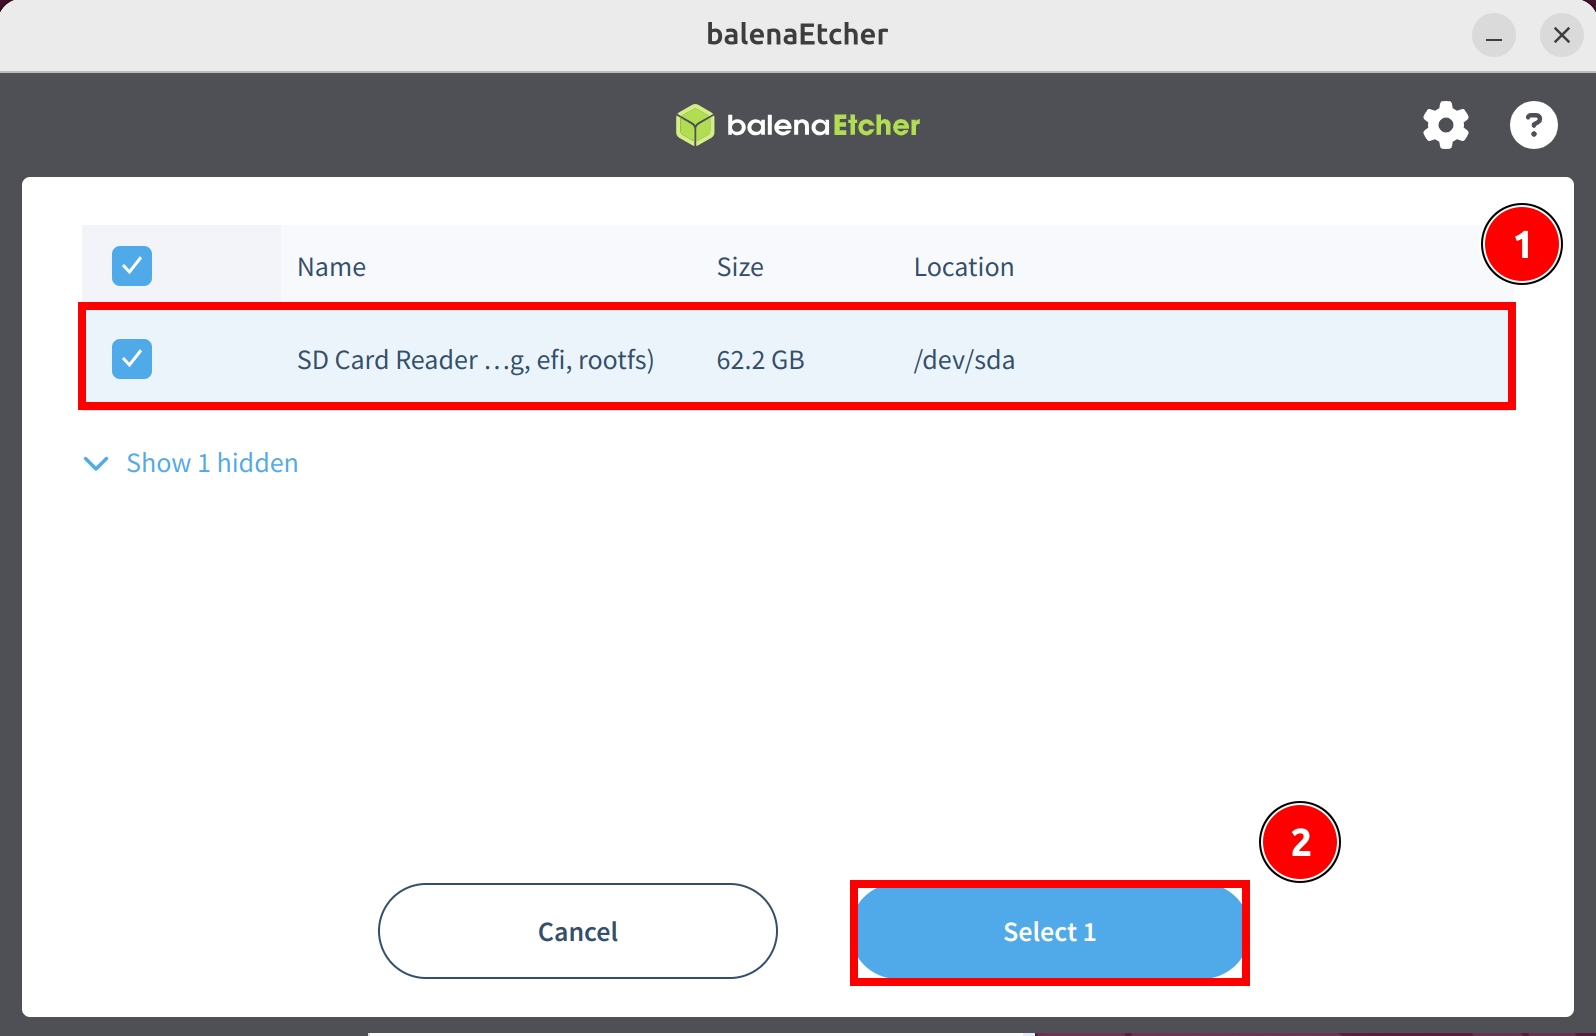
- Select the target disk: Click
Select targetand choose the disk device corresponding to your card reader.
Be very careful to select the correct disk, as Etcher will format the selected disk, potentially causing data loss!
① : Select the disk device where you want to install the system image
② : Click Select 1 to confirm your device selection
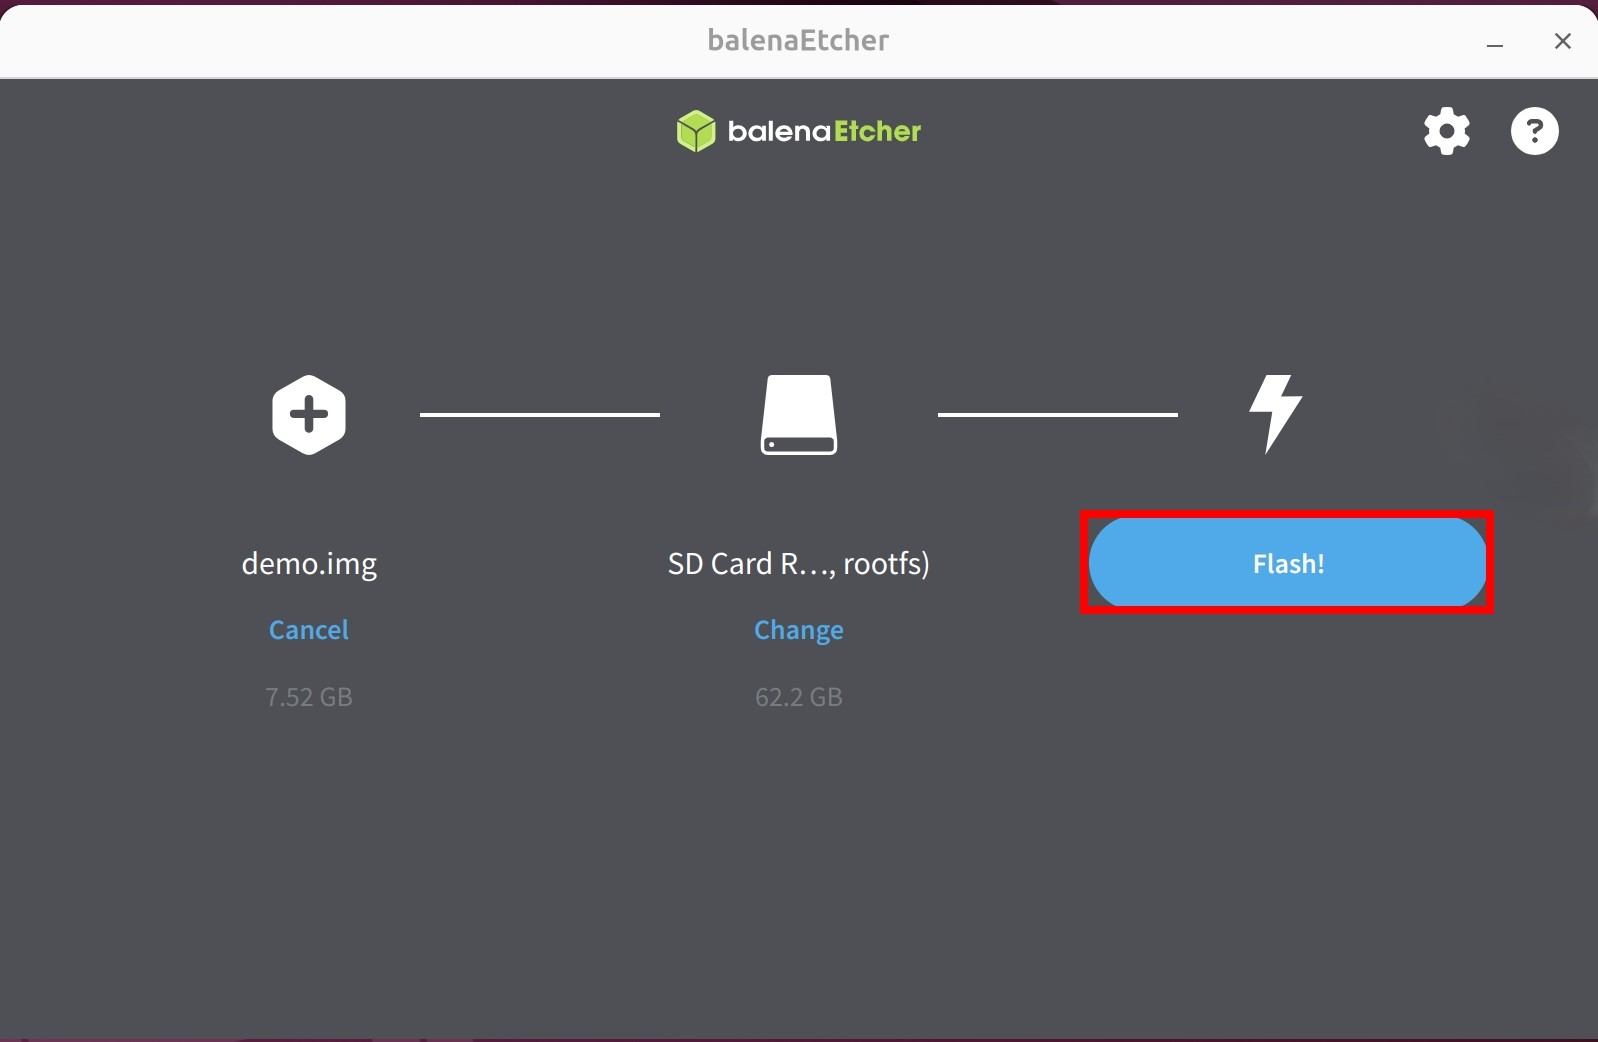
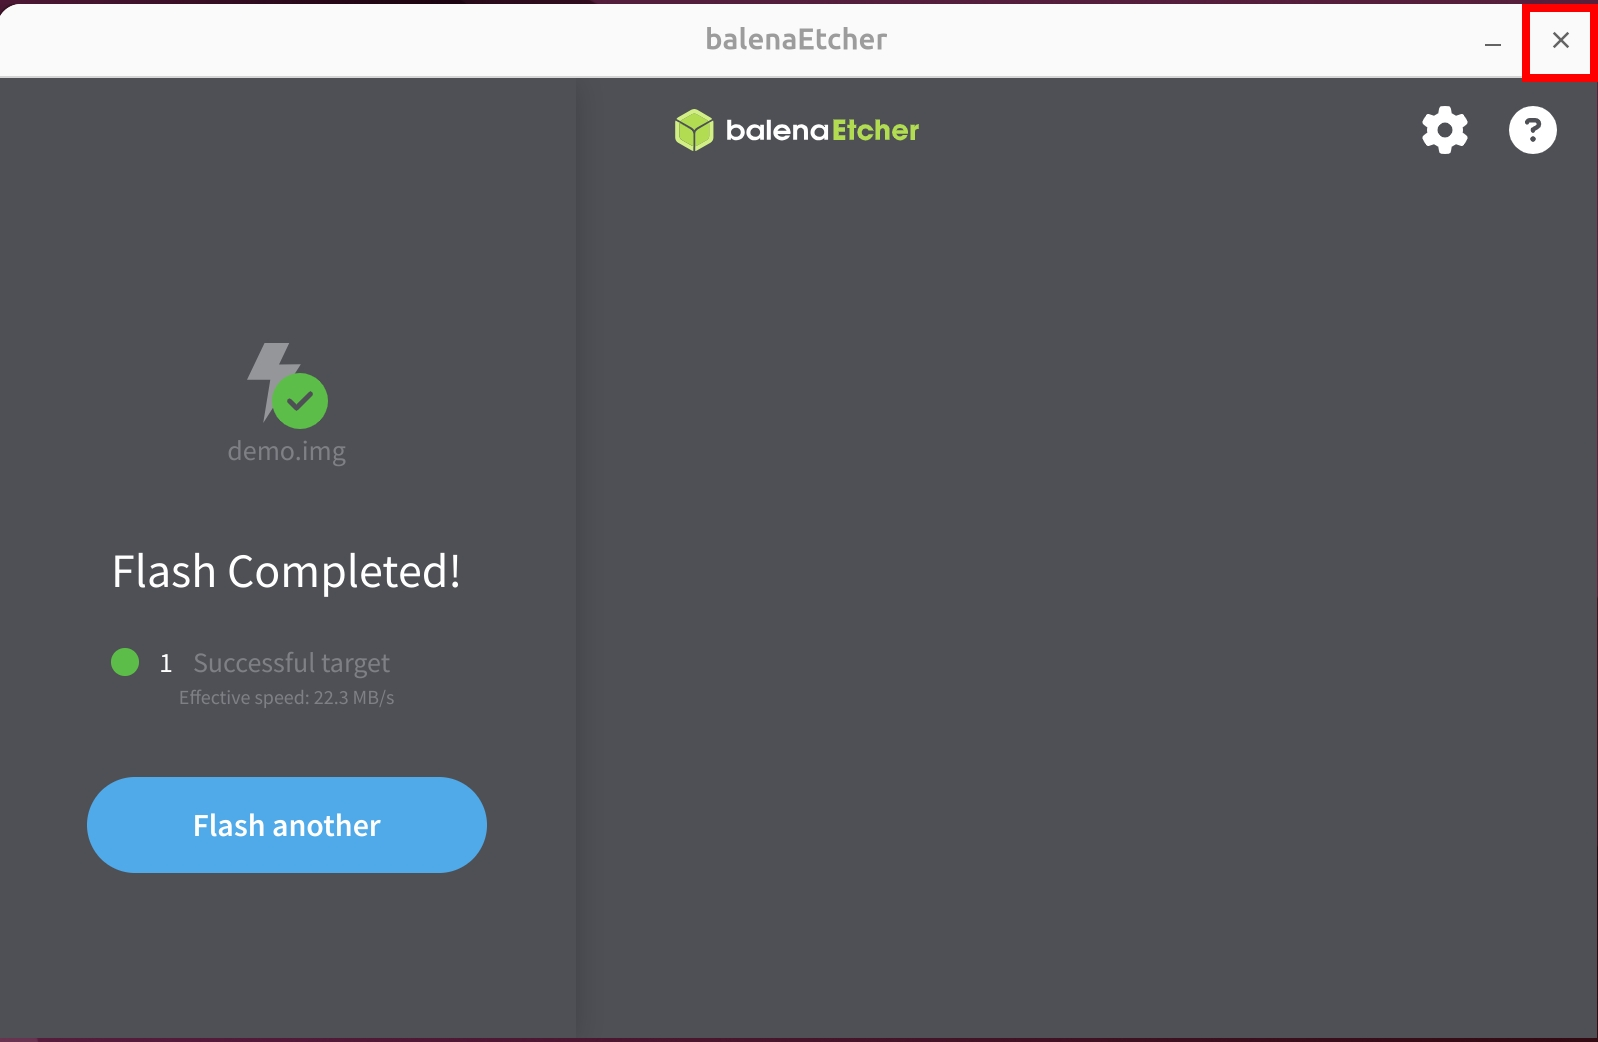
- Start writing the system image: Click the
Flashbutton and wait for the software to complete writing and verifying the system image.
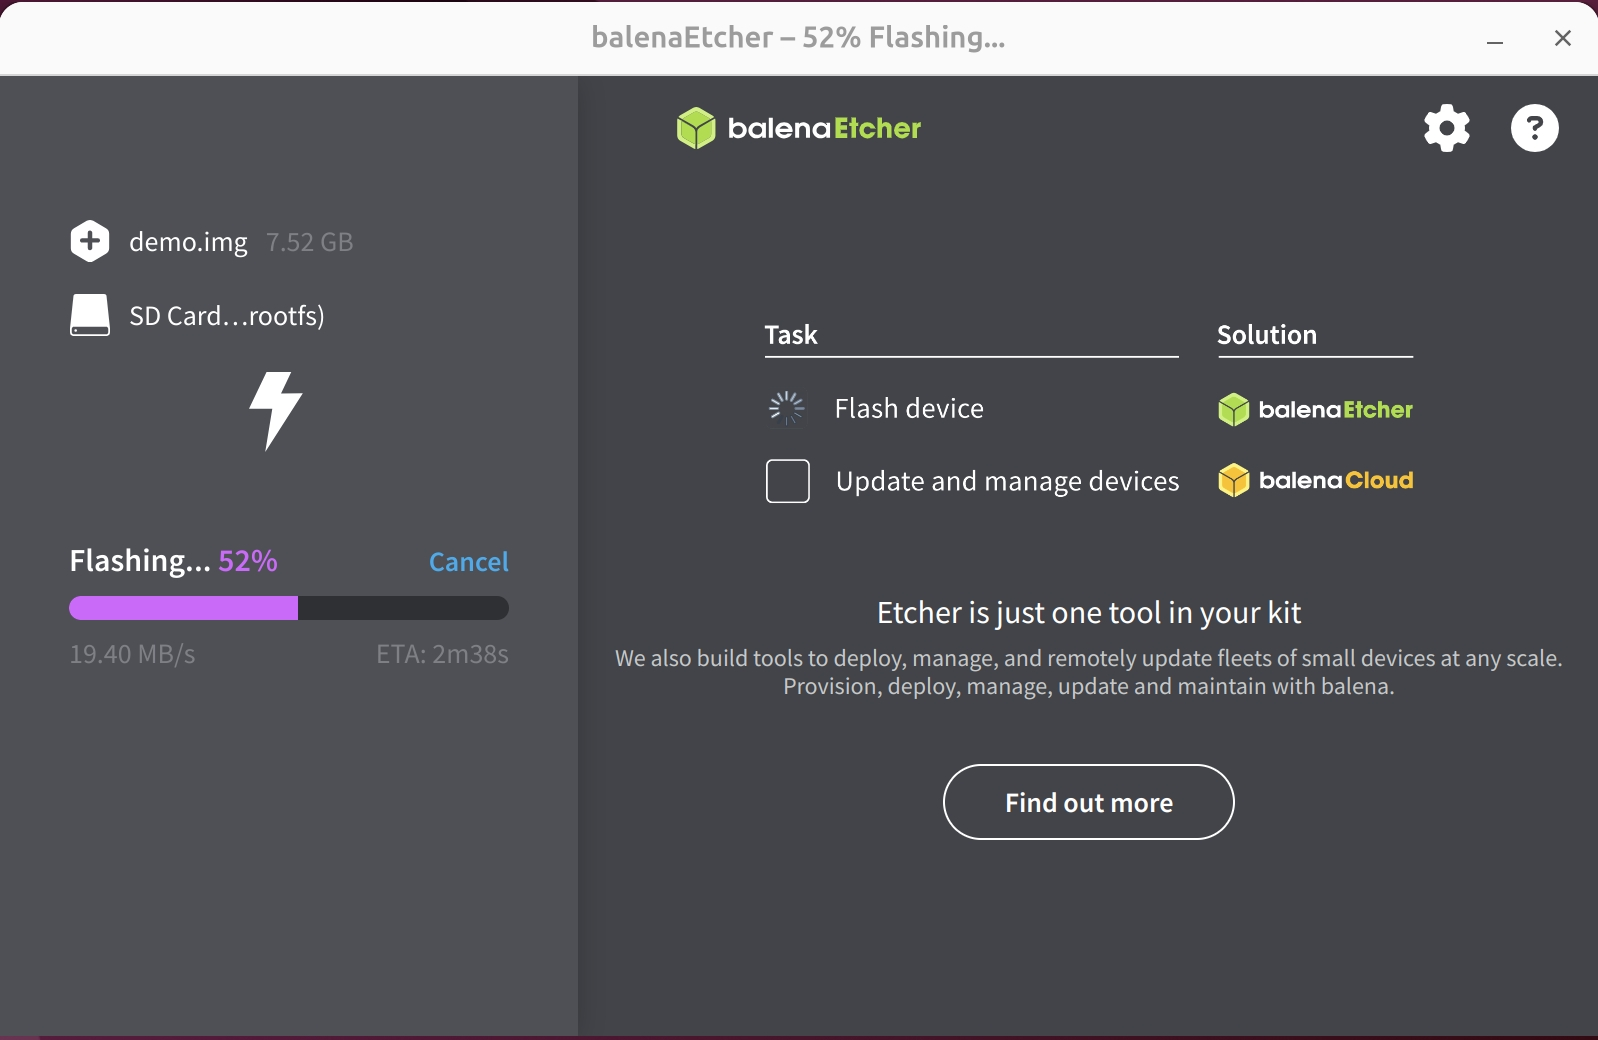
Waiting for system image to finish writing
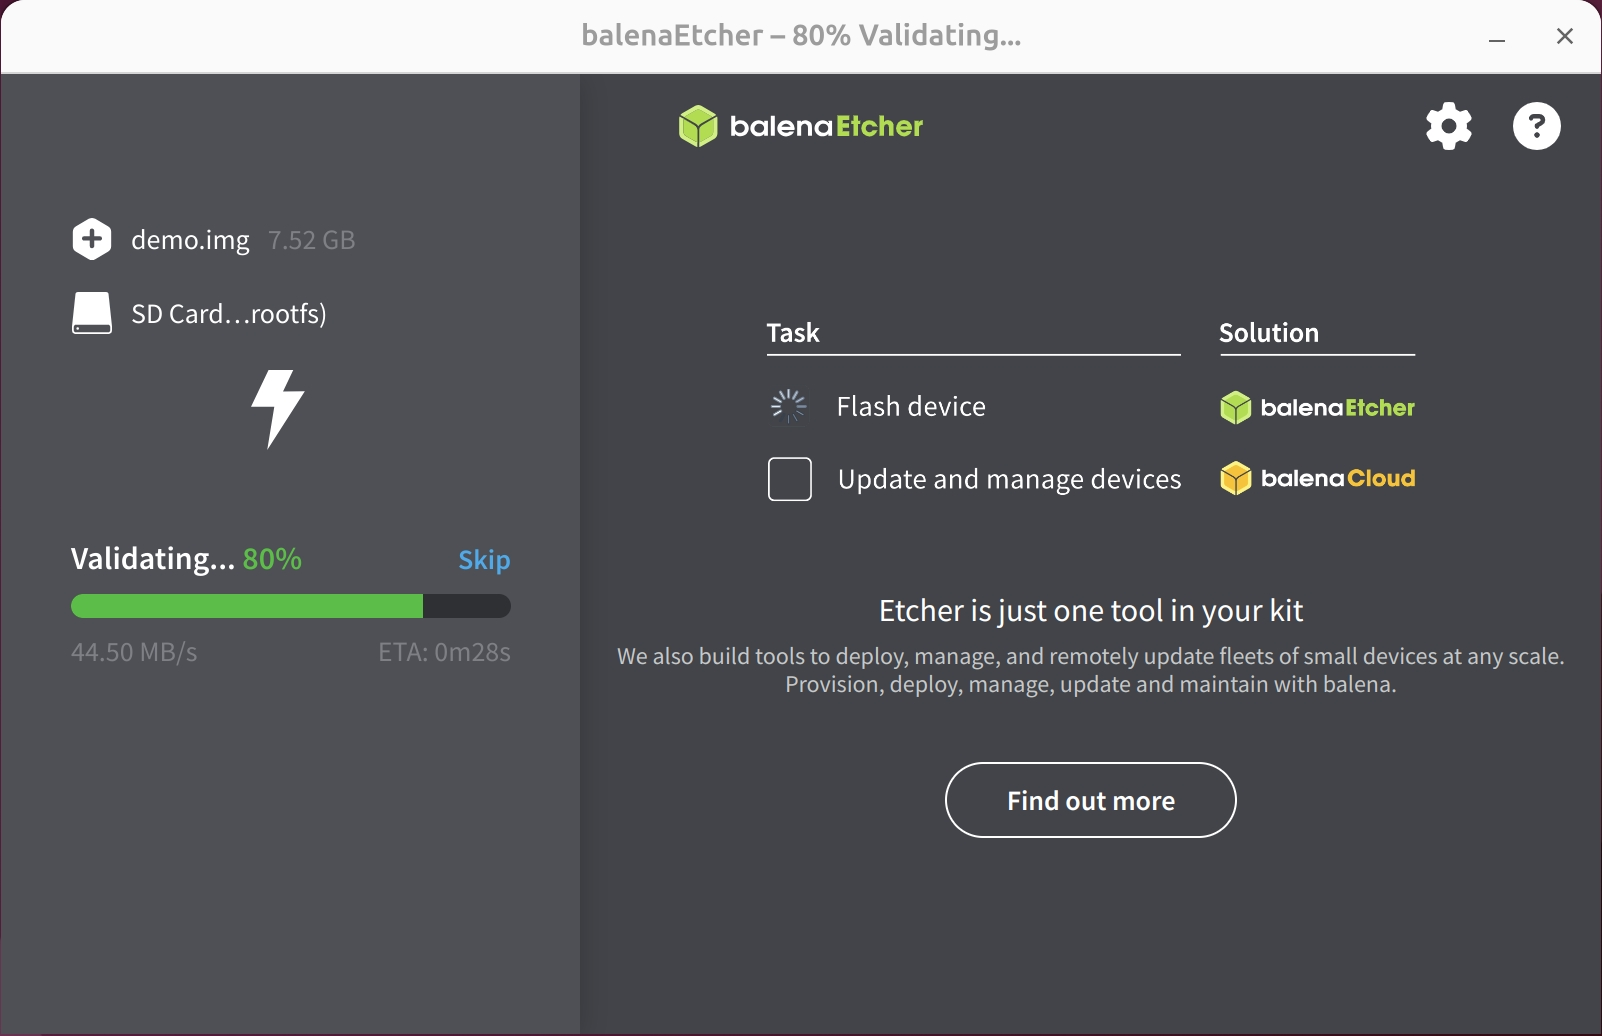
Waiting for verification to complete
- After successfully writing the system image, close the Etcher software!
For users with onboard eMMC, the system comes pre-installed with OpenWrt - no need to flash a system image.
Booting the System
- No eMMC System
- With Onboard eMMC System
After writing the system image to the microSD card, insert it into the Radxa E24C's microSD card slot, then power on the device using the 12V DC power adapter.
- Hardware Connection
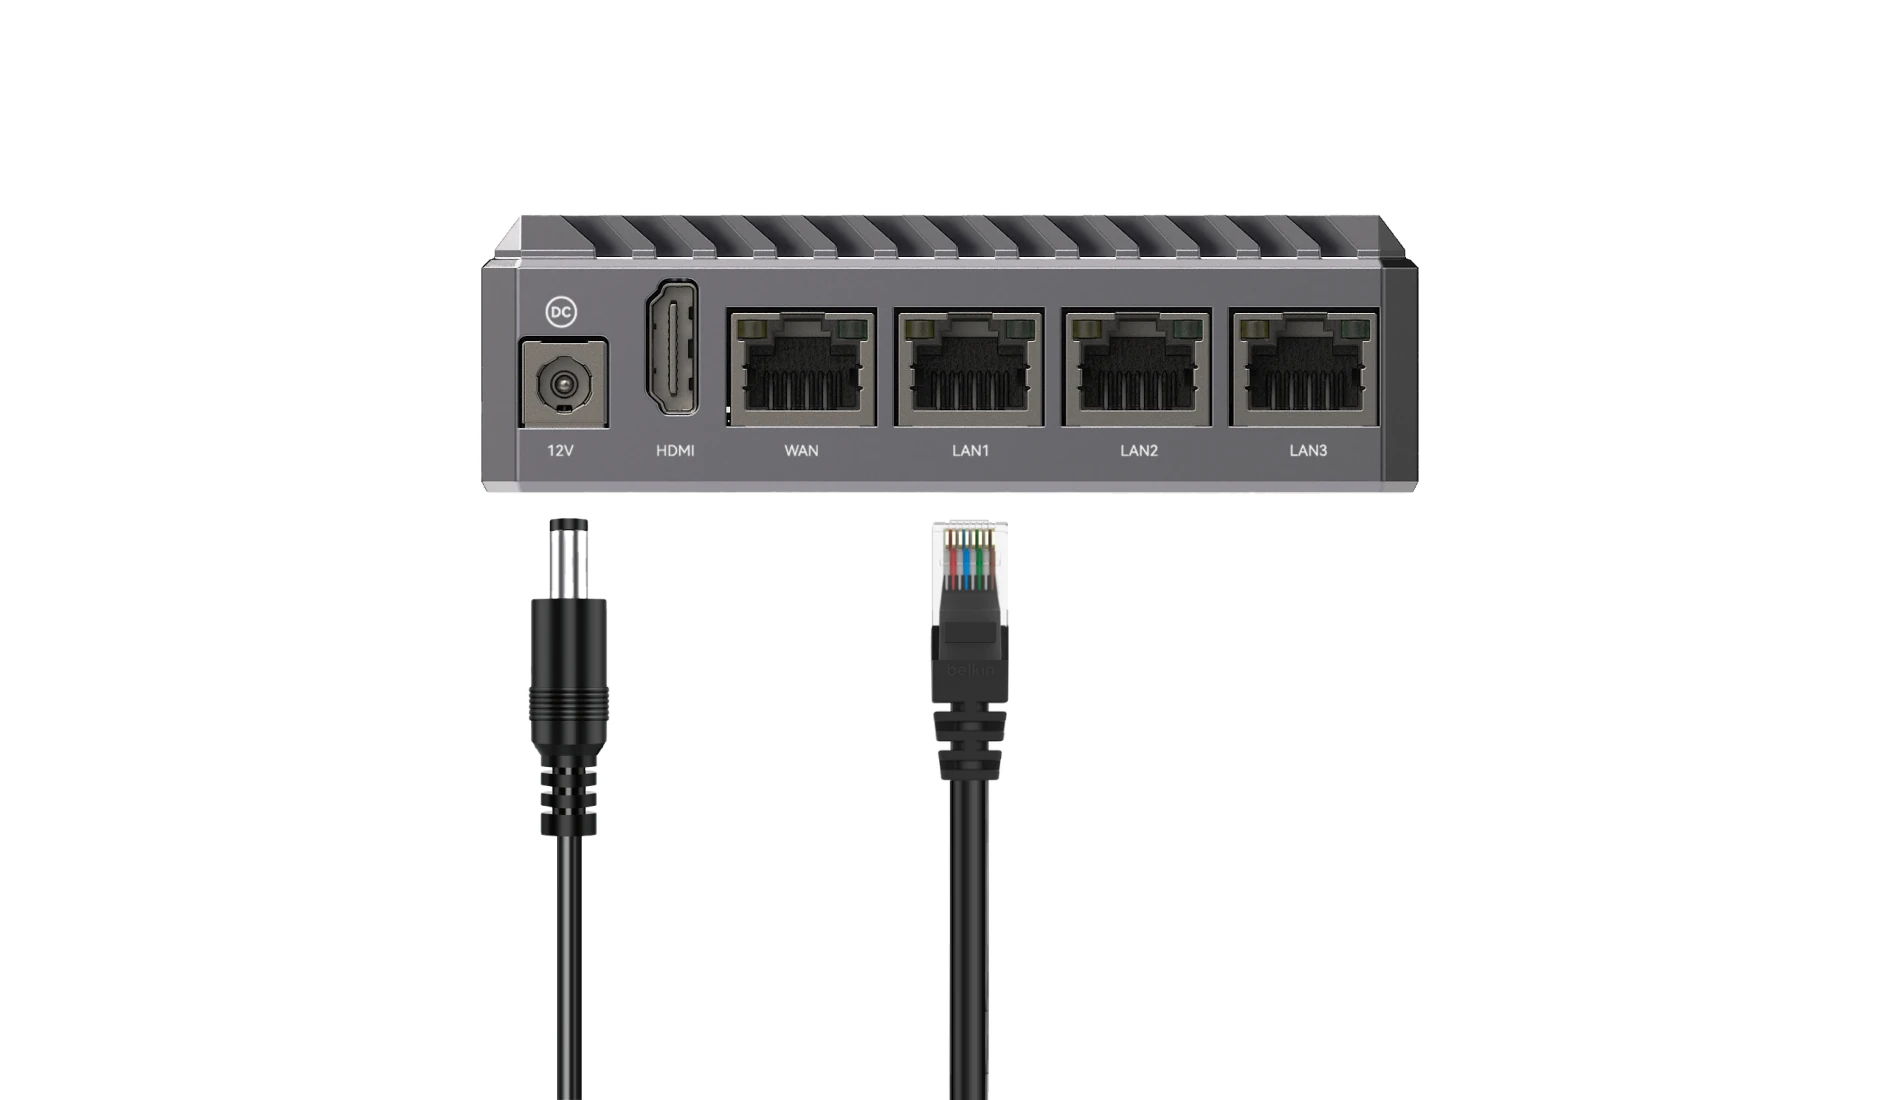
Connect one end of an Ethernet cable to the Radxa E24C's LAN port and the other end to your PC's Ethernet port. Then power on the device using the 12V DC power adapter. The Ethernet port's LED will blink, indicating a normal network connection.
- Accessing the Luci Interface
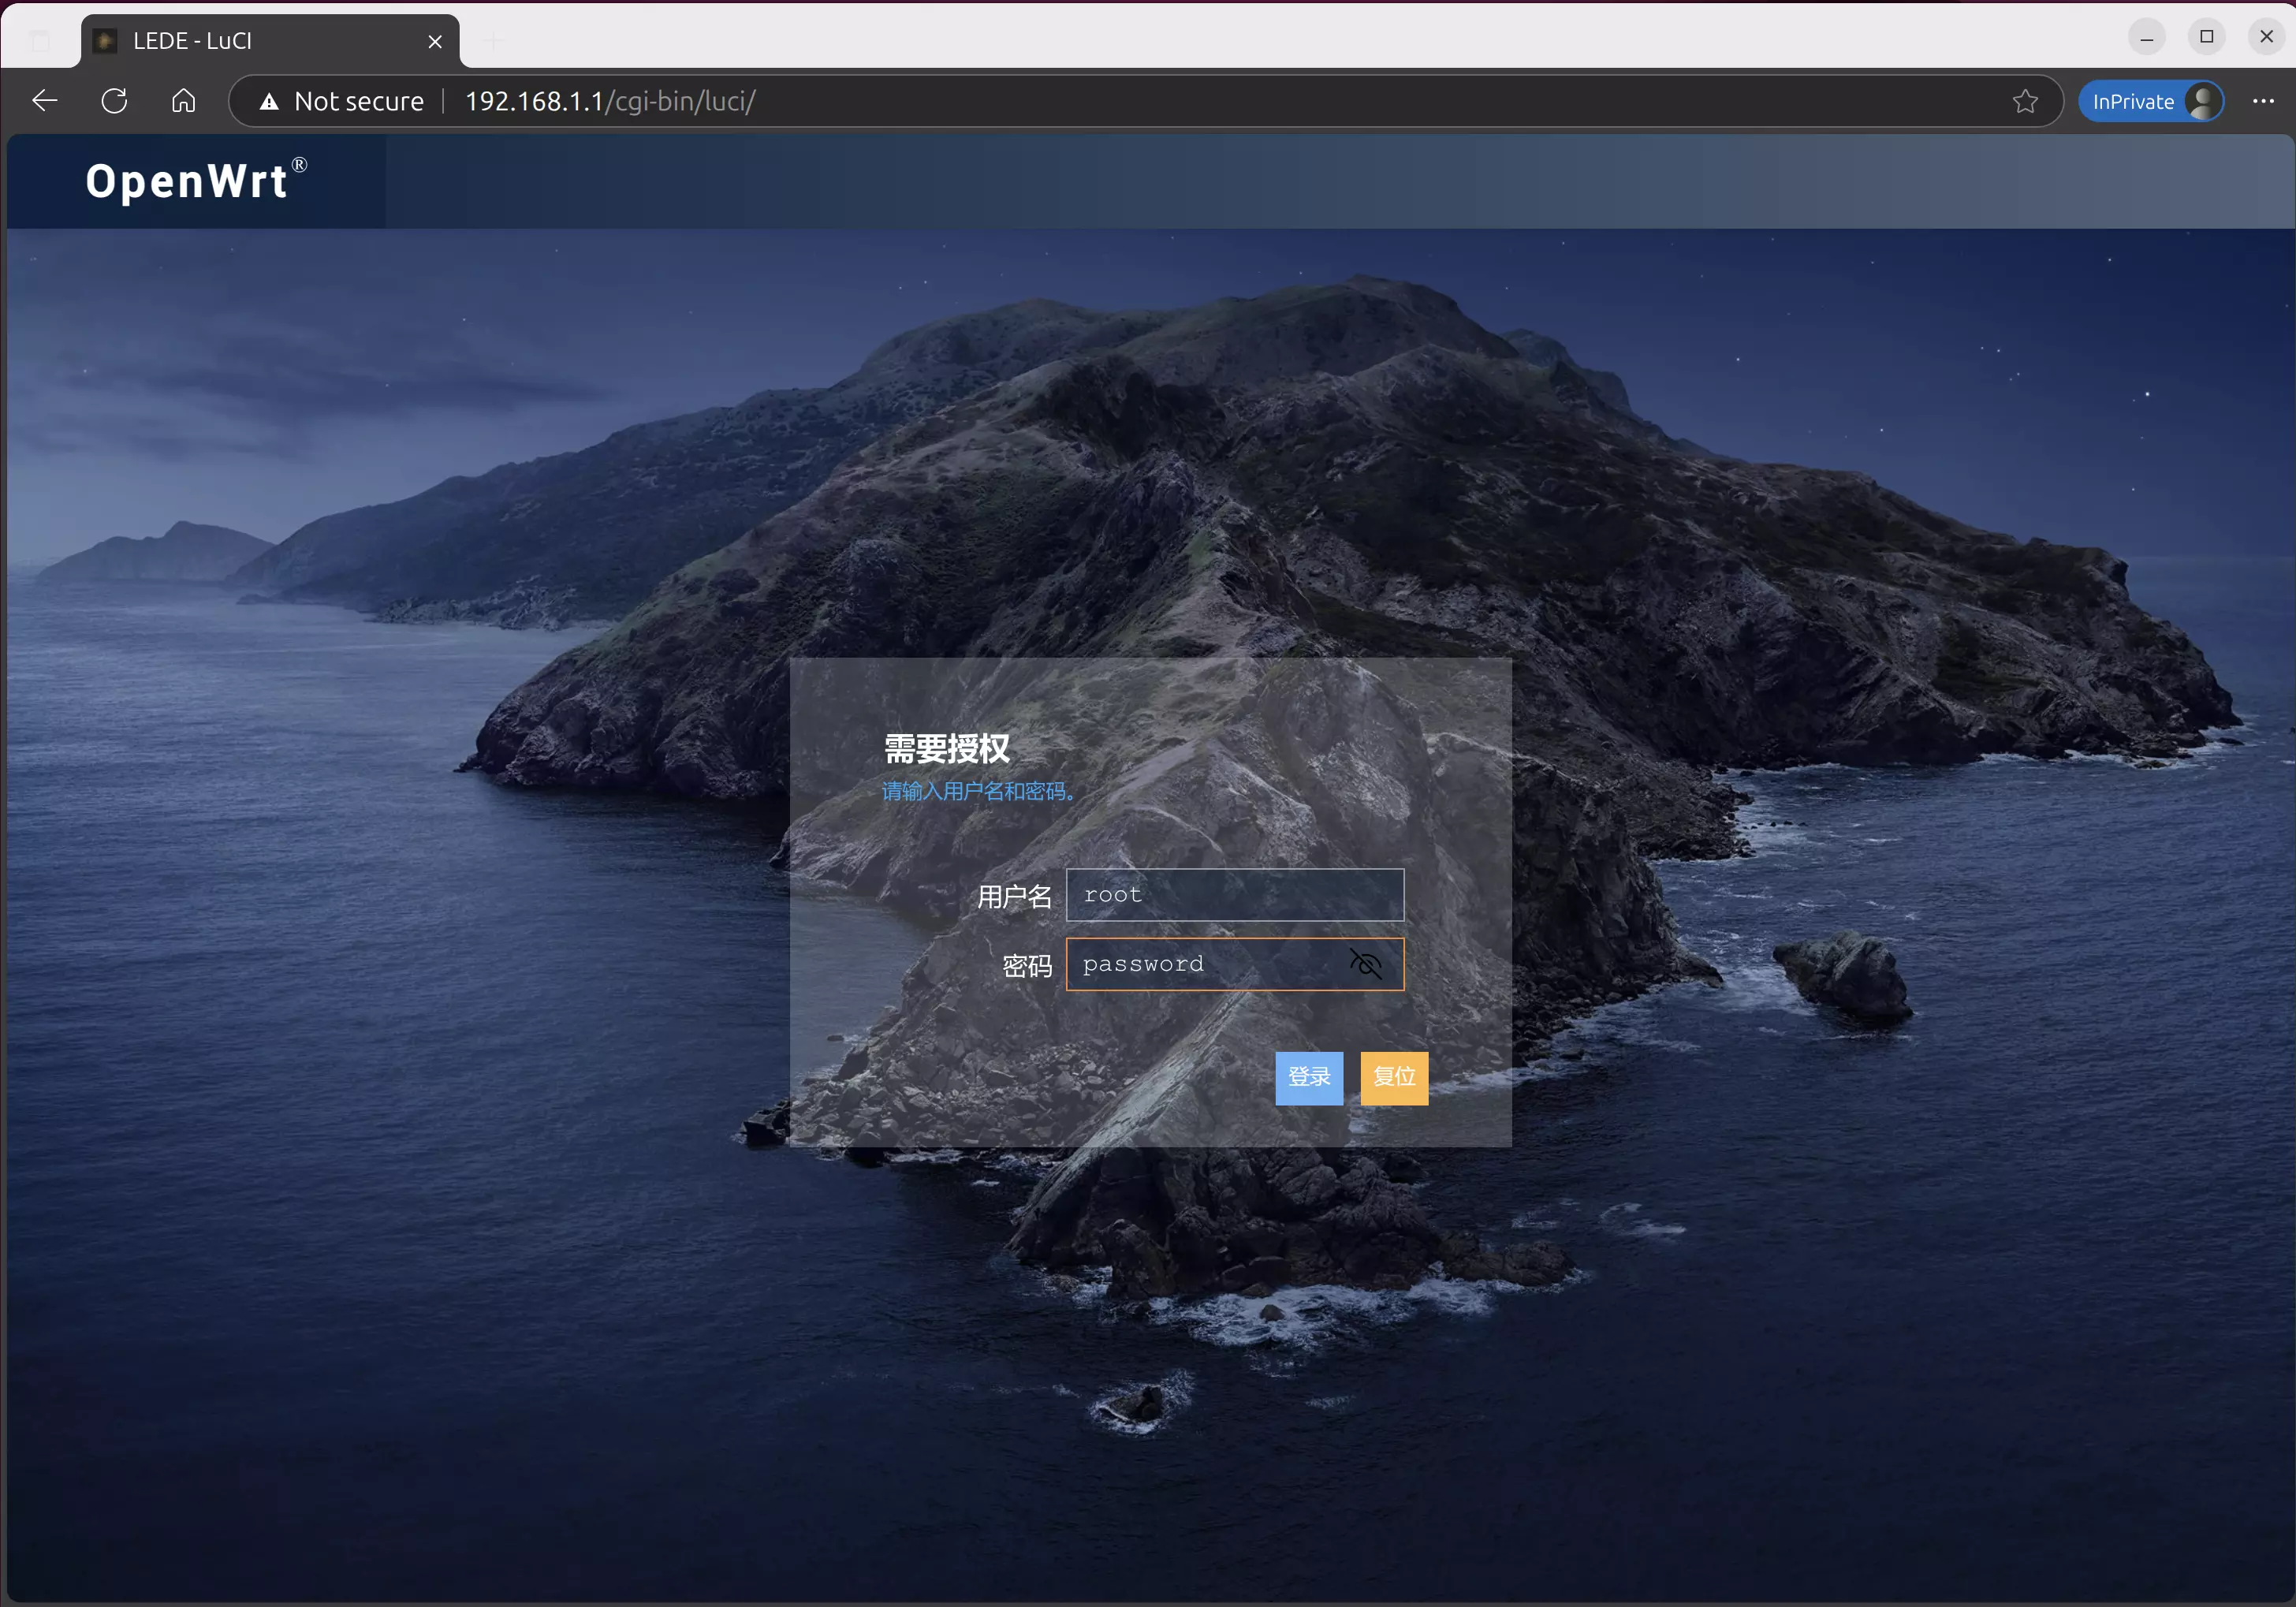
Open a web browser on your PC, enter http://192.168.1.1 in the address bar, and press Enter to access the system's Luci web configuration interface. Then log in with your username and password.
OpenWrt System
Username: root
Password: password
- System Management Interface
The Luci interface provides comprehensive system management features, including system status, network settings, software management, and hardware management.
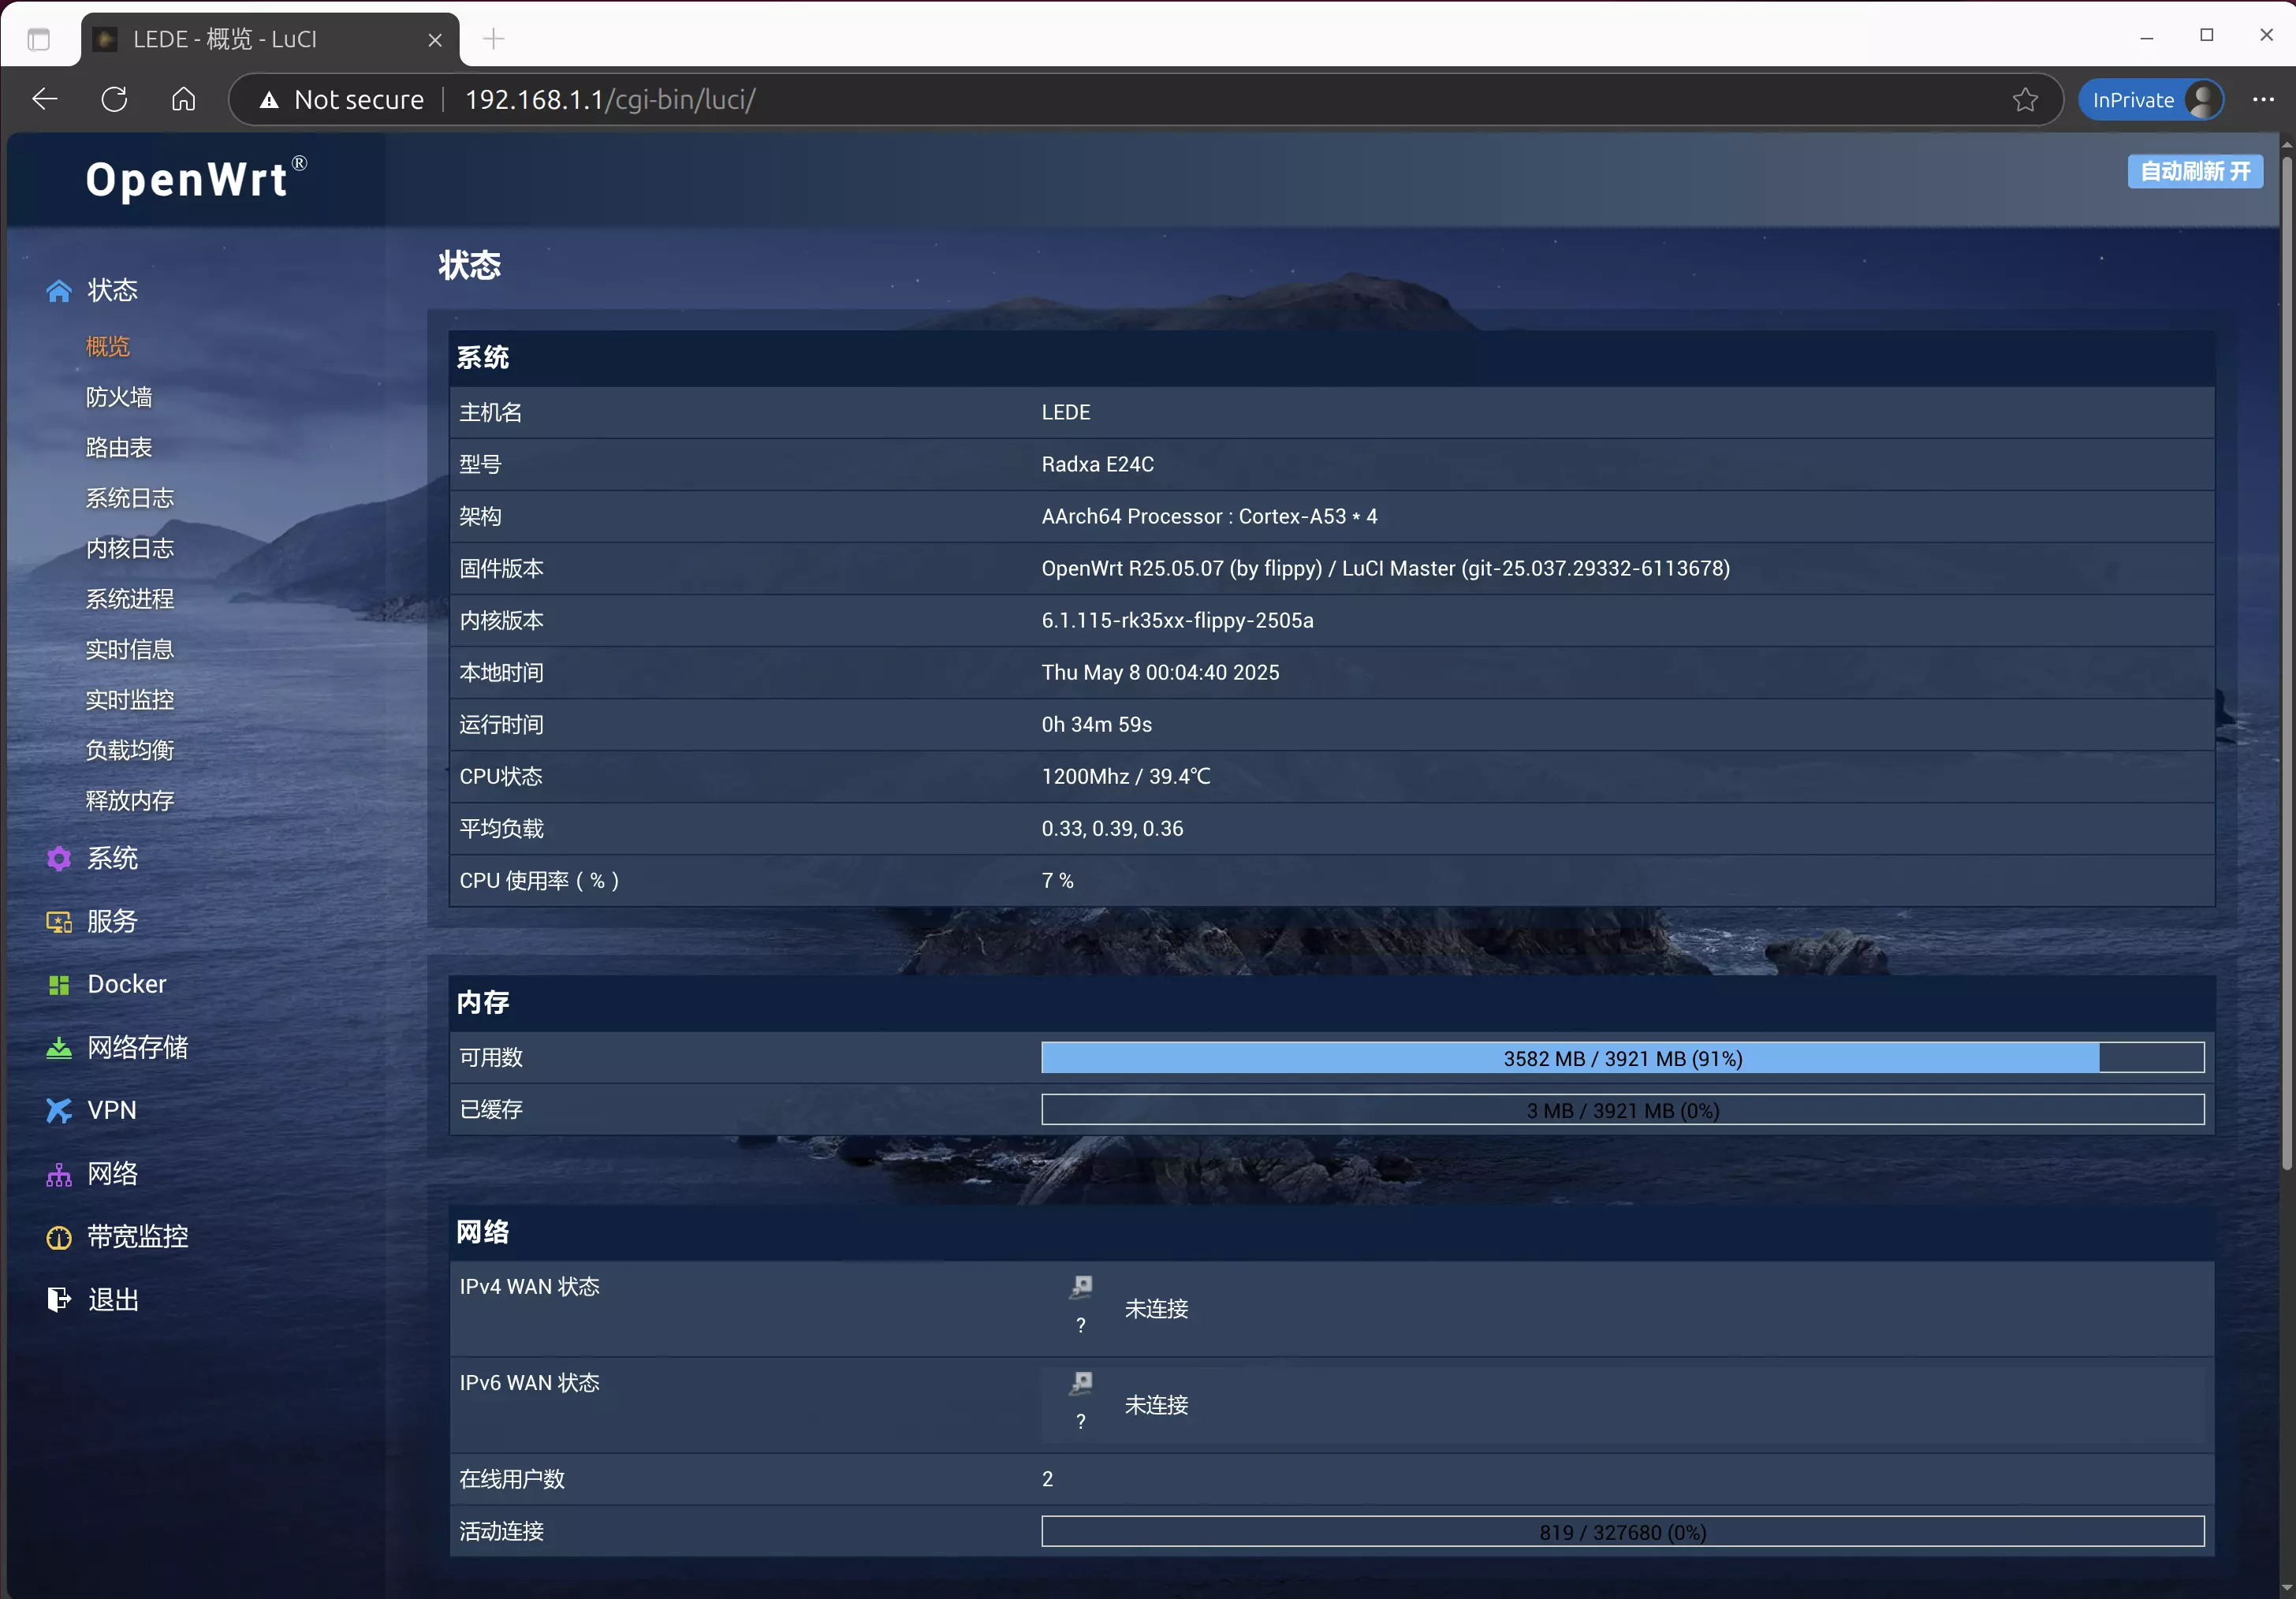
System Information
We provide two major operating systems: Debian Linux and OpenWrt. Please use the corresponding username and password to log in based on your system.
- Debian Linux
Username: radxa
Password: radxa
- OpenWrt
Username: root
Password: password
System Login (Serial Port)
If you have a monitor and HDMI cable, you can directly use the display to view and operate the system interface!
Hardware Connection
With the Radxa E24C powered on, connect the Type-A end of a USB Type-A to Type-C cable to your computer, and the Type-C end to the Radxa E24C debug port.
- Radxa E24C Serial Port Parameters
Baud Rate: 1500000
Data Bits: 8
Stop Bits: 1
No Parity
Serial Port Login
- Windows
- Linux
- macOS
Windows users are recommended to use PuTTY for serial port login to the Radxa E24C system.
- Using PuTTY
After connecting the Radxa E24C to your PC with a USB Type-A to Type-C cable, you can check the corresponding COM port in the Device Manager (in the example, COM4 corresponds to the Radxa E24C device in the current system).
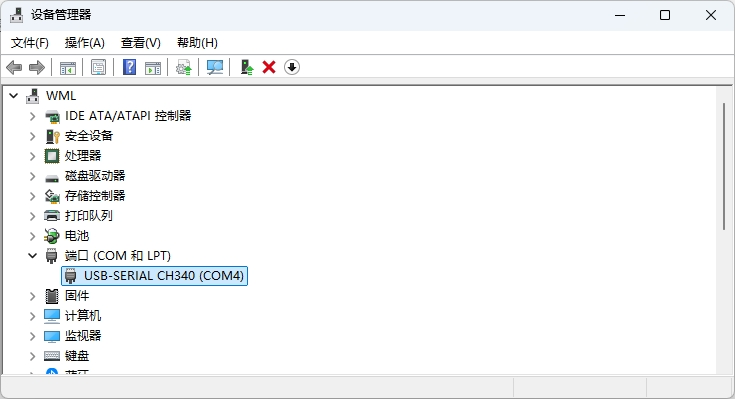
If the system fails to recognize the device or shows an exclamation mark, you need to install the CH340 driver manually and restart your system after installation.
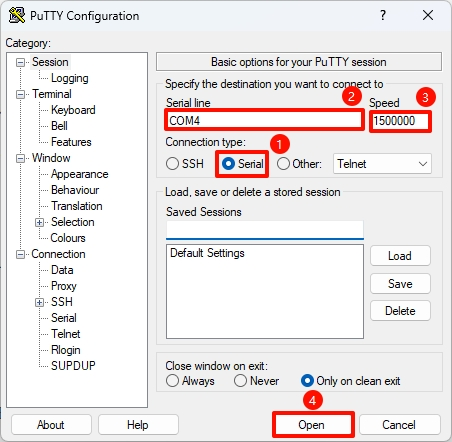
- Serial Port Login Options
① --> Connection type: Select Serial
② --> Serial line: Enter COM4 (based on the COM port shown in Device Manager)
③ --> Speed: Enter 1500000
④ --> Open: Connect to Radxa E24C system via serial port
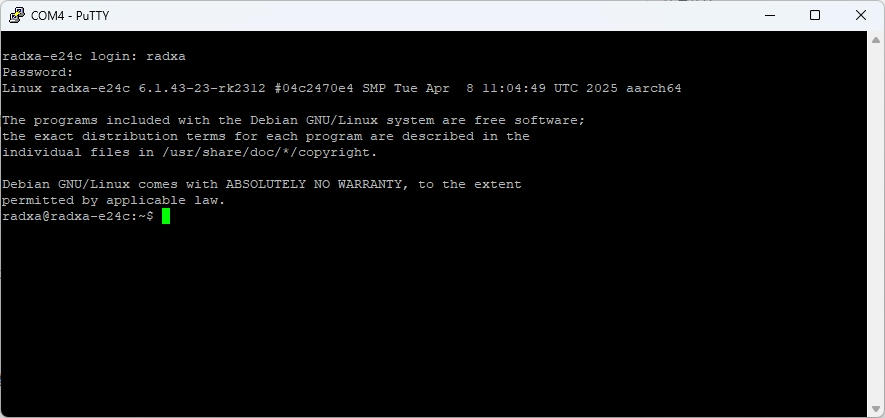
- Login to System
Press Enter in the terminal to see the login prompt, then log in using the appropriate username and password for your system.
Note that password input will not be displayed. Press Enter after entering your password.
Linux users are recommended to use the Screen utility for serial port login to the Radxa E24C system.
- Install Screen
sudo apt update
sudo apt install screen
- Find Serial Port Device
Open a terminal and use the ls command to check the serial port devices:
If there's only one serial device, it will typically be ttyUSB0.
If there are multiple serial devices, you can plug/unplug the USB device and observe which device number changes using the command below.
ls /dev/ttyUSB*
- Serial Port Login Options
To connect via Screen, you only need to specify the serial port and baud rate.
sudo screen /dev/ttyUSB0 1500000
- Login to System
Press Enter in the terminal to see the login prompt, then log in using the appropriate username and password for your system.
Note that password input will not be displayed. Press Enter after entering your password.
macOS users are recommended to use the Screen utility for serial port login to the Radxa E24C system.
If the system fails to recognize the device, you need to install the CH340 driver manually and restart your system after installation.
- Find Serial Port Device
Open a terminal and use the ls command to check the serial port devices.
Look for a device name similar to /dev/tty.wchusbserial14xx0. If there are multiple serial devices, you can plug/unplug the USB device and observe which device appears/disappears using the command below.
ls /dev/tty.*
- Serial Port Login Options
To connect via Screen, you only need to specify the serial port and baud rate.
screen /dev/tty.wchusbserial14xx0 1500000
- Login to System
Press Enter in the terminal to see the login prompt, then log in using the appropriate username and password for your system.
Note that password input will not be displayed. Press Enter after entering your password.