Quick Start Guide
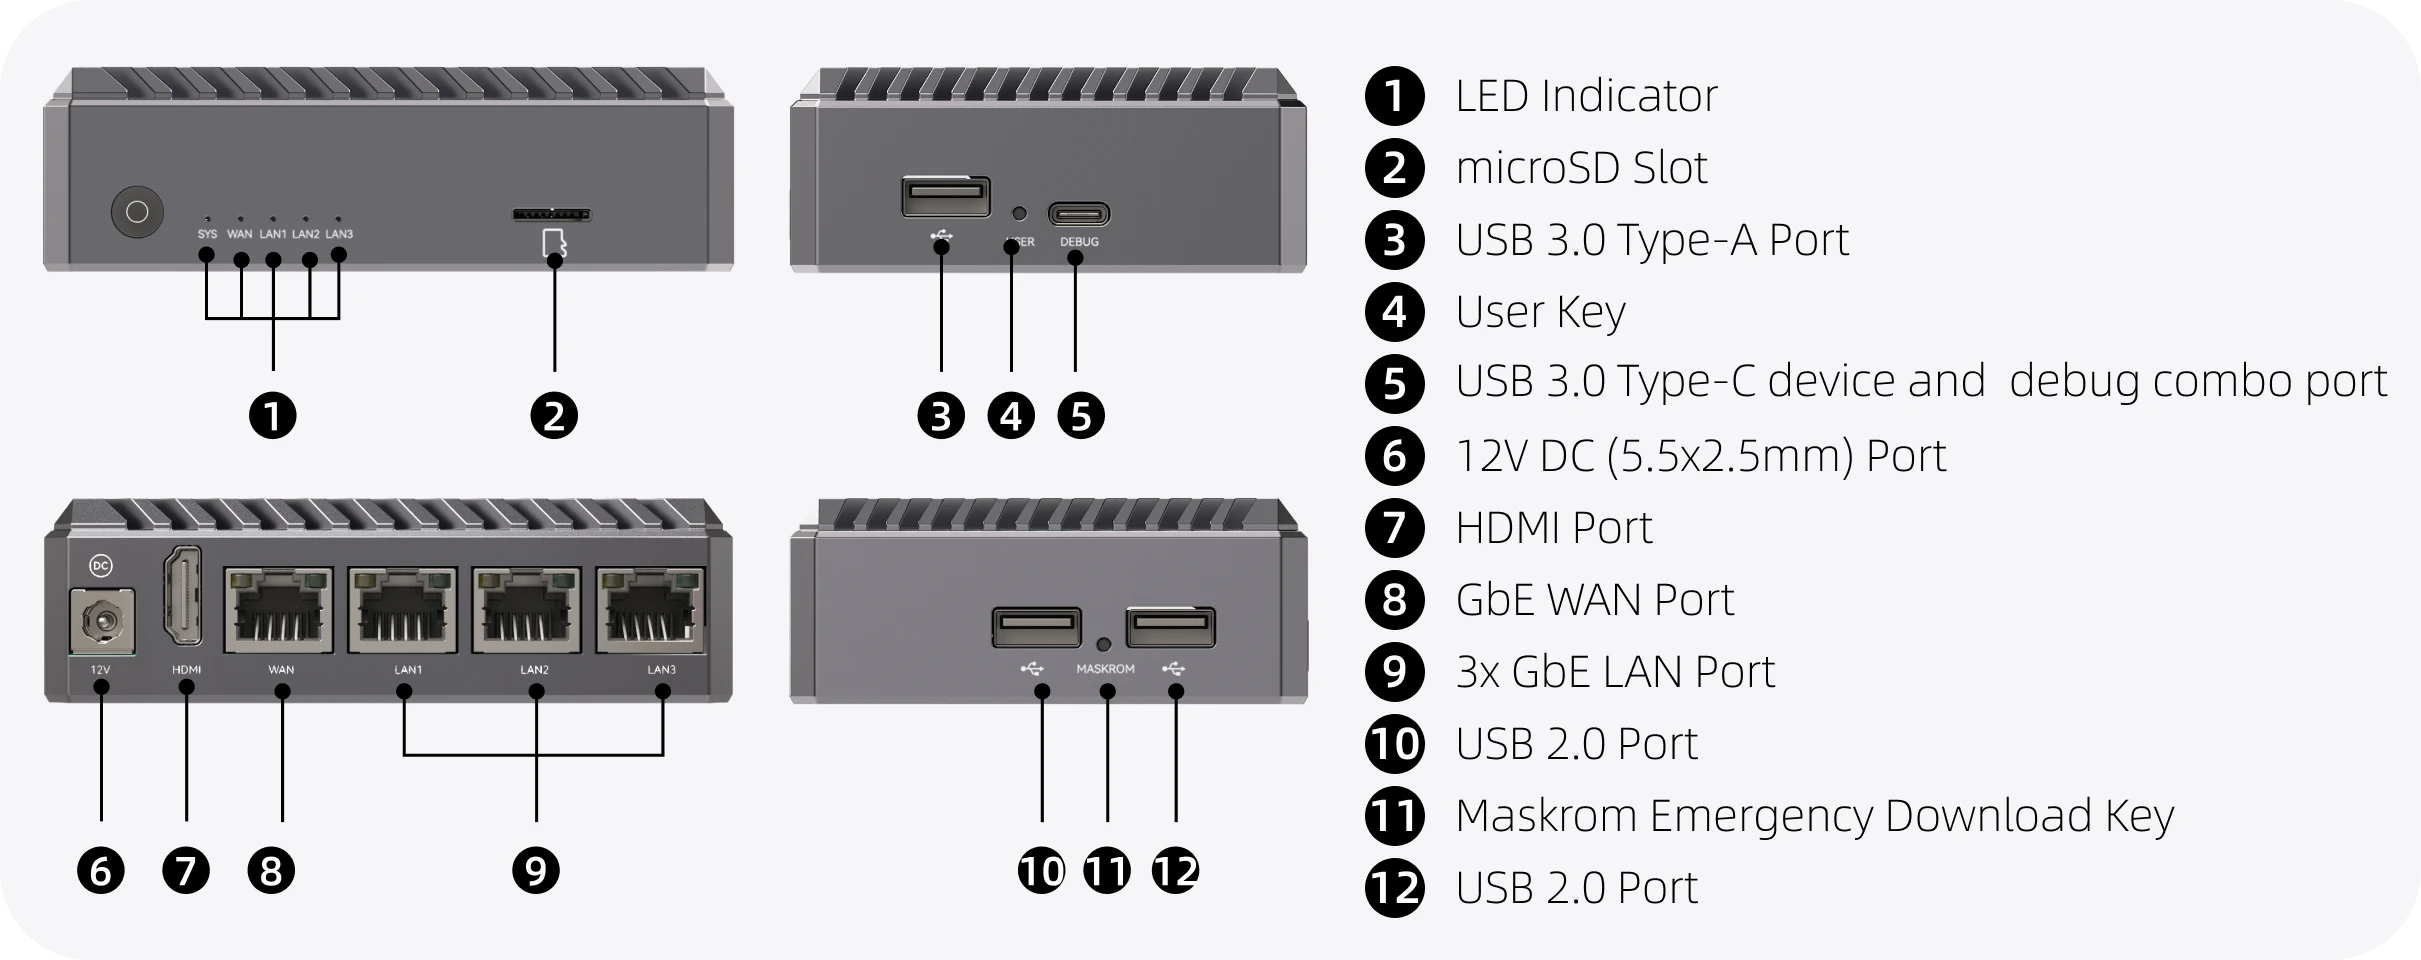
Physical View
E54C currently has multiple configurations: with case, board only, with onboard EMMC, without onboard EMMC. Please identify your product model before proceeding.
To start the Radxa E54C, you will need the following equipment:
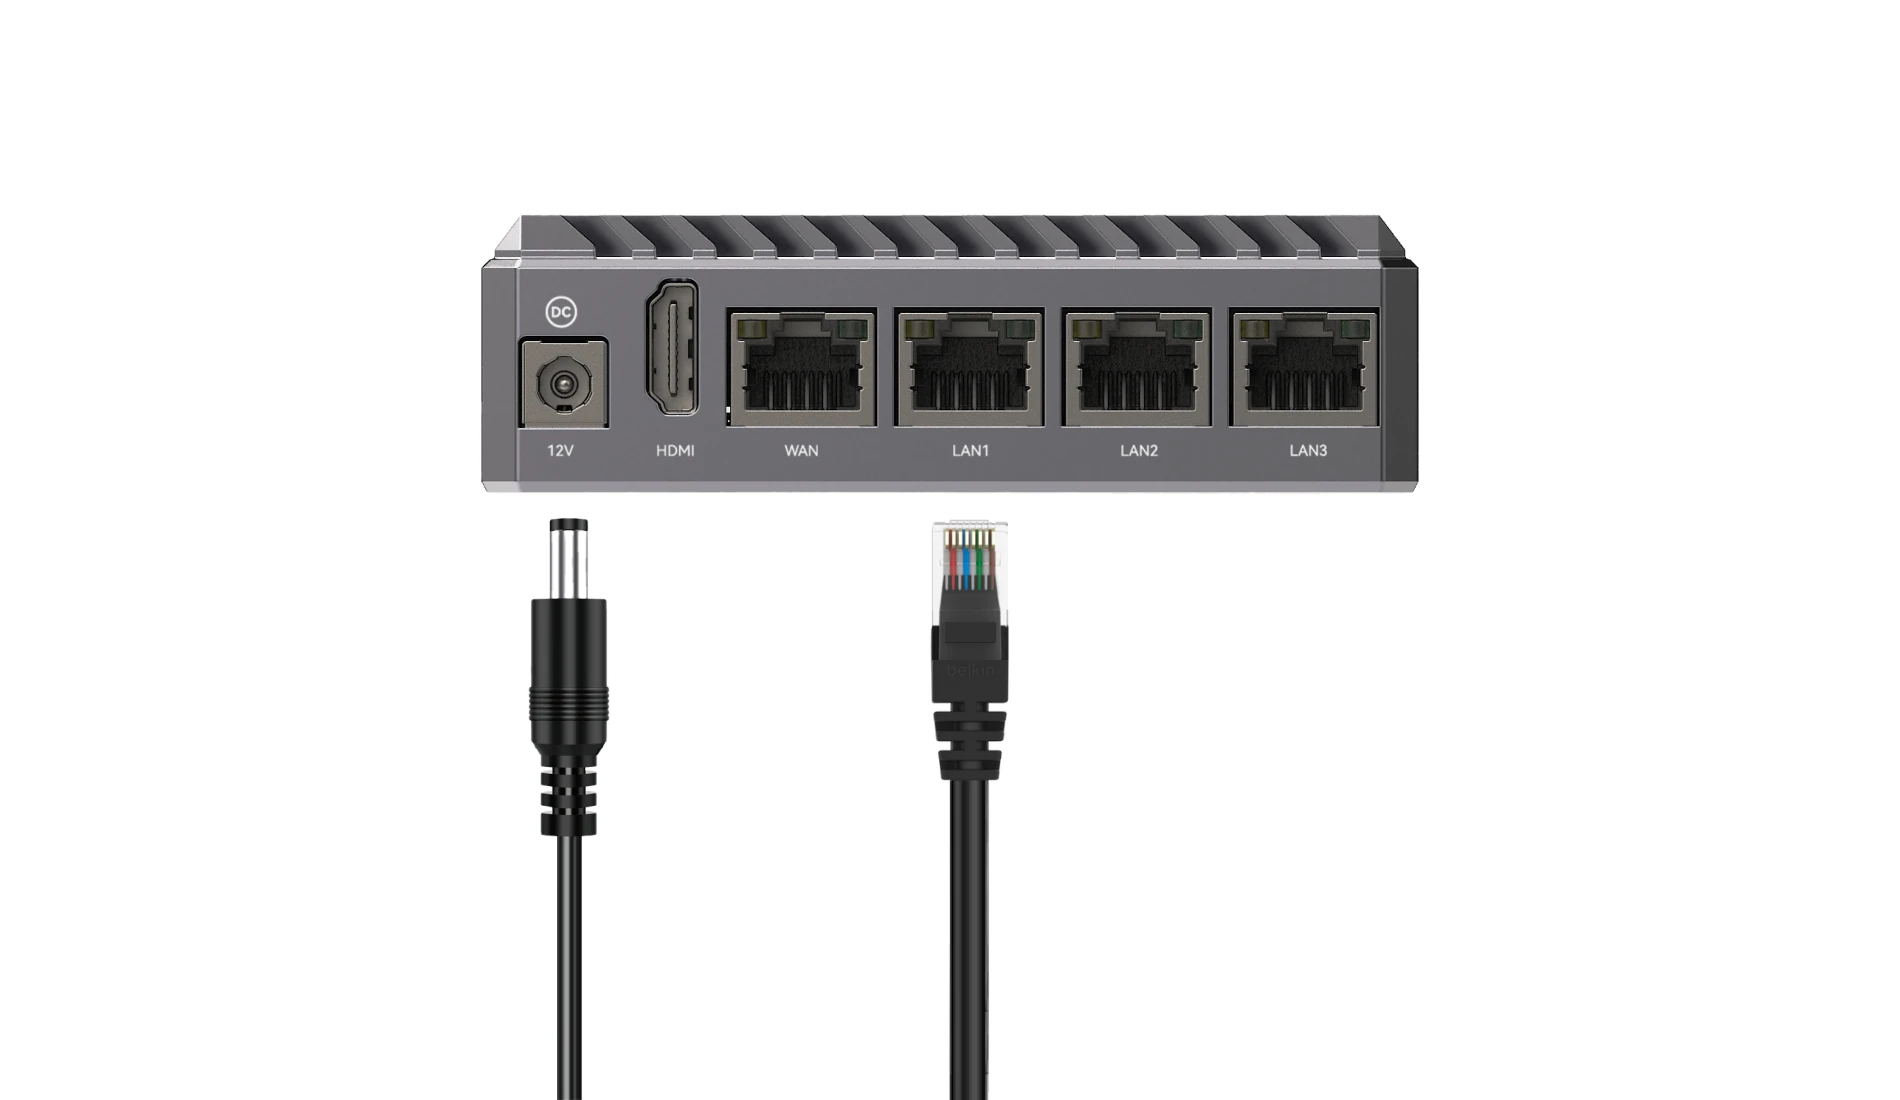
- A 12V/2A DC power adapter with a 5.5 x 2.5mm connector (E54C only supports 12V input). For more power supply details, please refer to Power Supply Solutions.
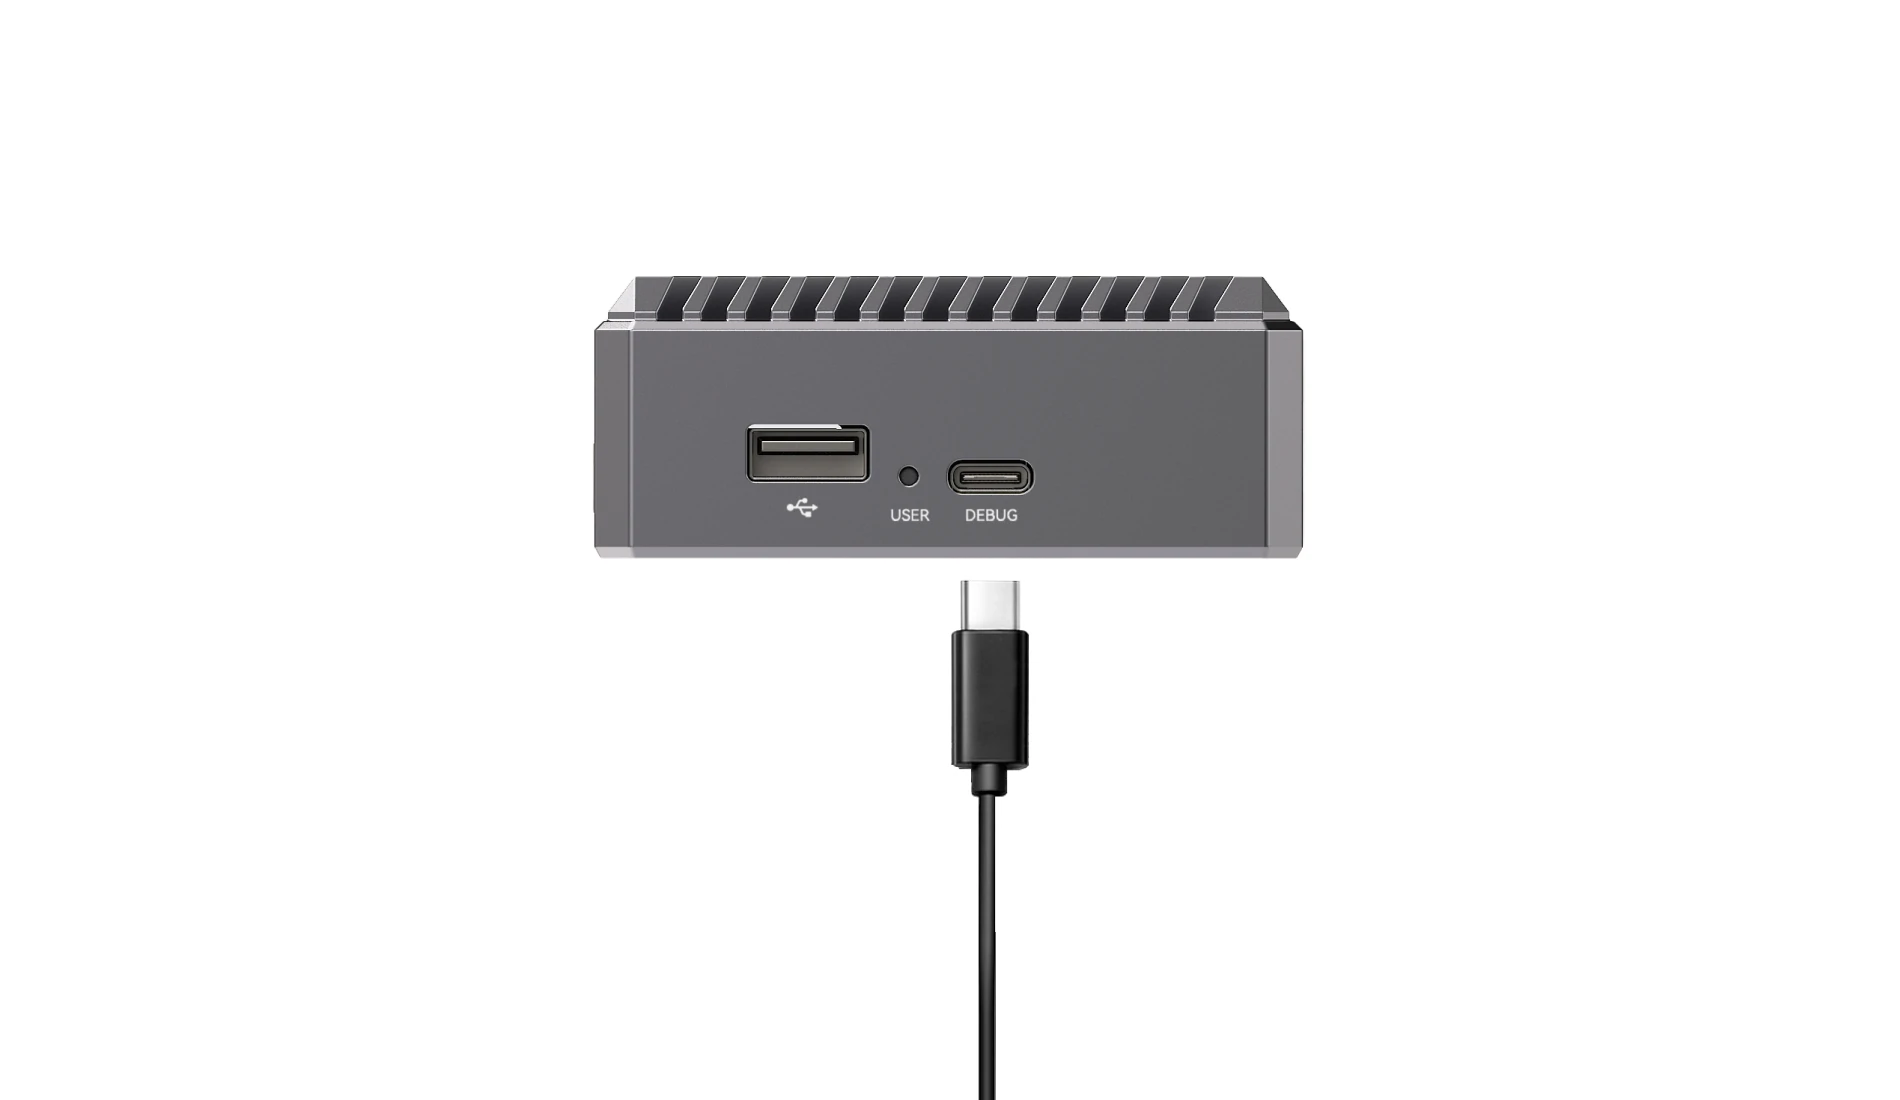
- A USB TYPE-A to TYPE-C data cable for debugging and accessing the system.
- Ethernet cables (to connect to the four Ethernet ports as needed)
- A microSD card and card reader for installing the operating system
Installing the Operating System
- Without onboard EMMC
- With onboard EMMC
For E54C without eMMC, you need to use a microSD card to install the system.
File Download
Please go to the Image Download Page to download the corresponding operating system image.
microSD Card Preparation
Insert the microSD card into the SD card reader, then plug the reader into a USB port on your PC
Image Flashing
Balena Etcher is a cross-platform and user friendly image file burning tool that we recommend you use.
- Download Etcher and install it.
- Windows
- Linux
Please download balenaEtcher-2.1.4.Setup.exe After the download is complete, there is no need to perform any additional actions. After downloading, you can double click it to open it without any additional operation.
Please download balena-etcher_2.1.4_amd64.deb. Once the download is complete, please install it by executing the following command in the terminal:
sudo dpkg -i balena-etcher_2.1.4_amd64.deb
-
Open Etcher

-
Click
Flash from fileto select the image to write to.
The downloaded system image is in compressed format. You must decompress it first before using Balena Etcher for image flashing.
-
Click
Select targetto select the device, please select carefully.
-
Click
Flash!Start writing and wait for the write progress bar to complete.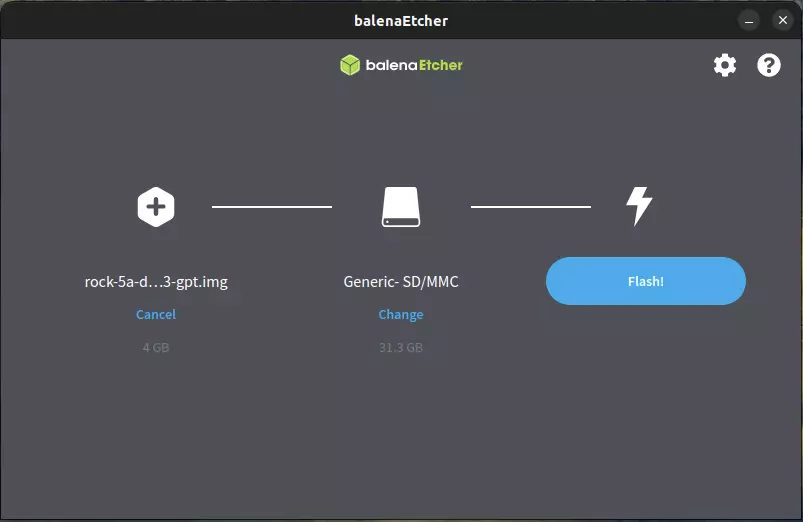
-
When writing the image successfully, Etcher will display
Flash Complete!.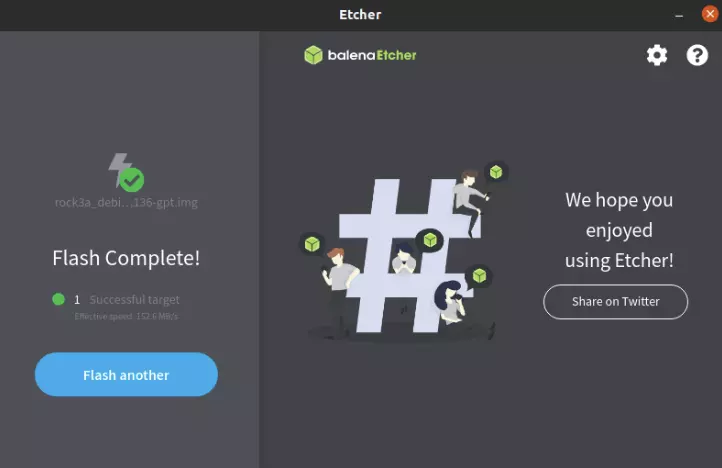
If there is an error in flashing, please try again.
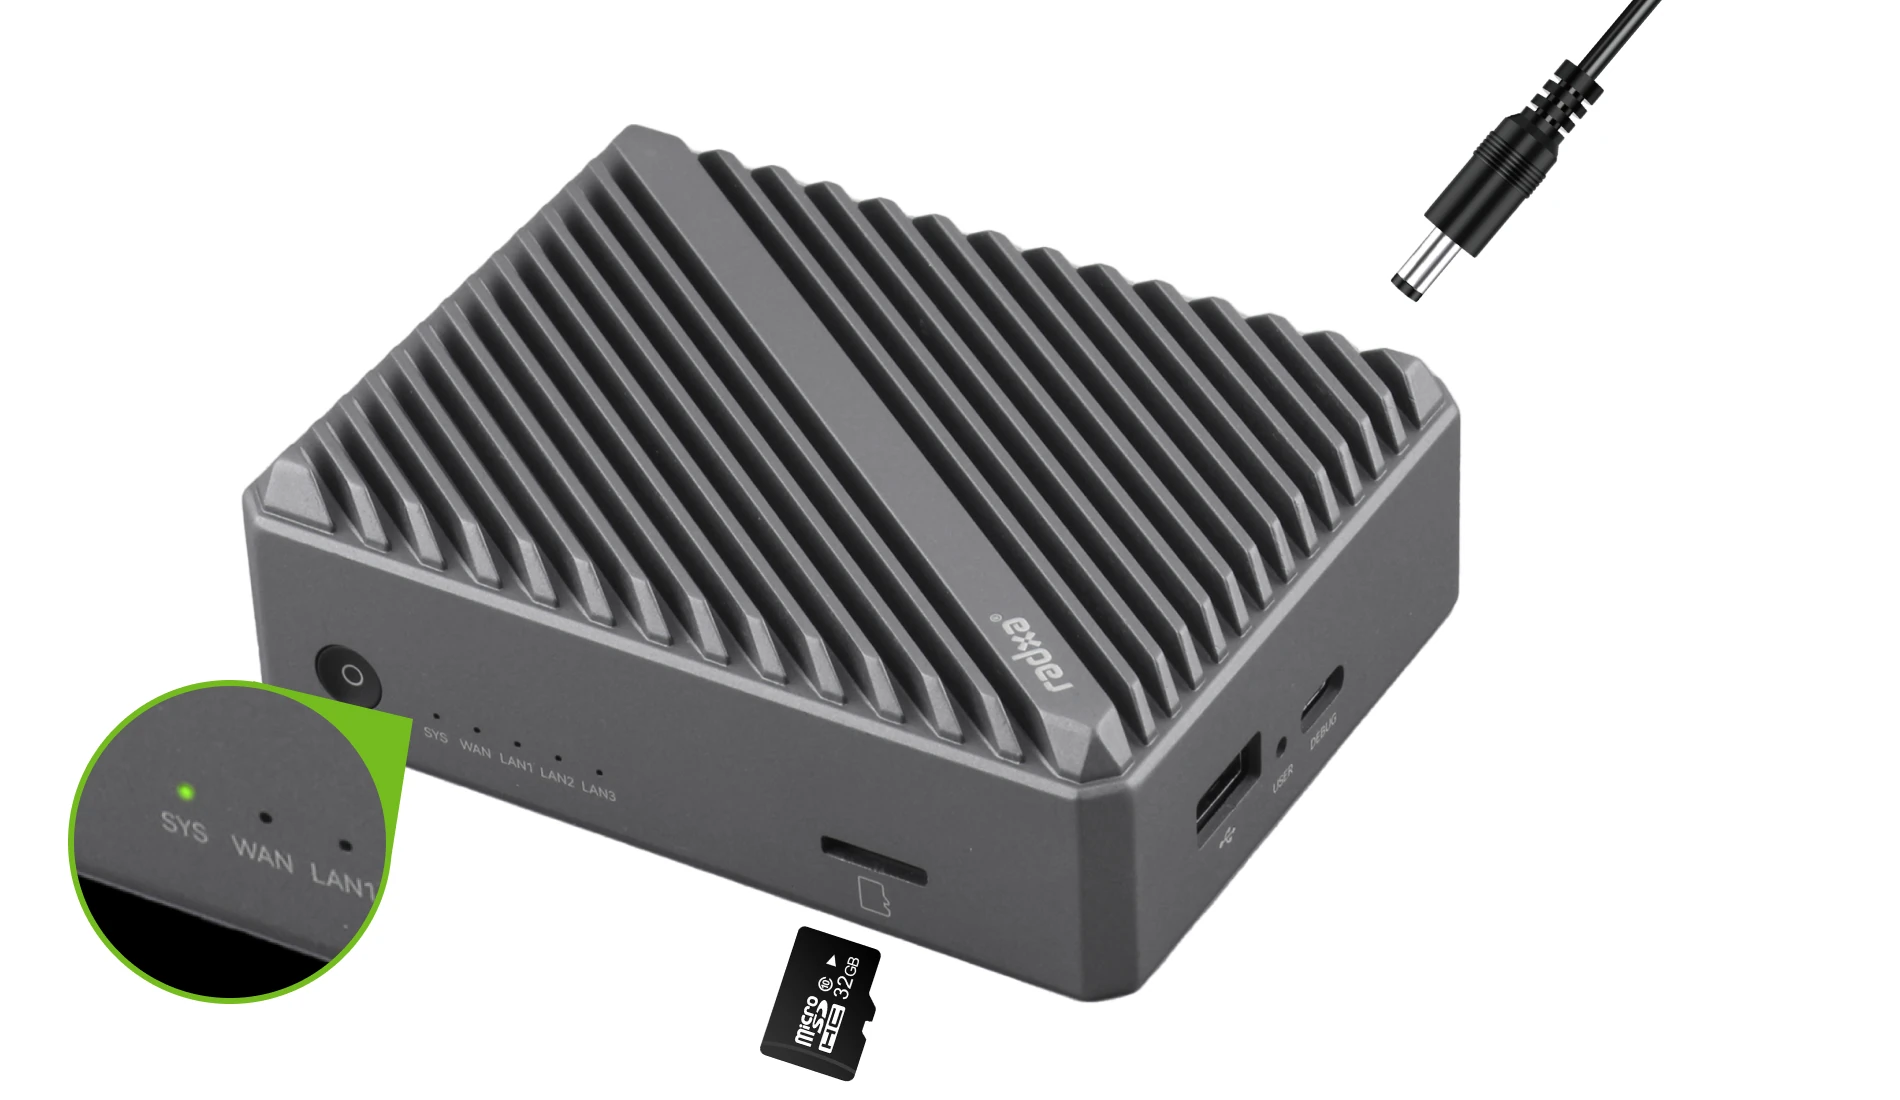
Starting the System
After successfully flashing the microSD Card as described above, insert the microSD Card into the microSD Card slot, then plug in the 12V DC adapter. The system will start automatically, and the SYS LED indicator will begin flashing.
Logging into the System
If starting with Debian system, the default username is radxa and the password is radxa
If starting with iStoreOS system, the default username is root and the password is password
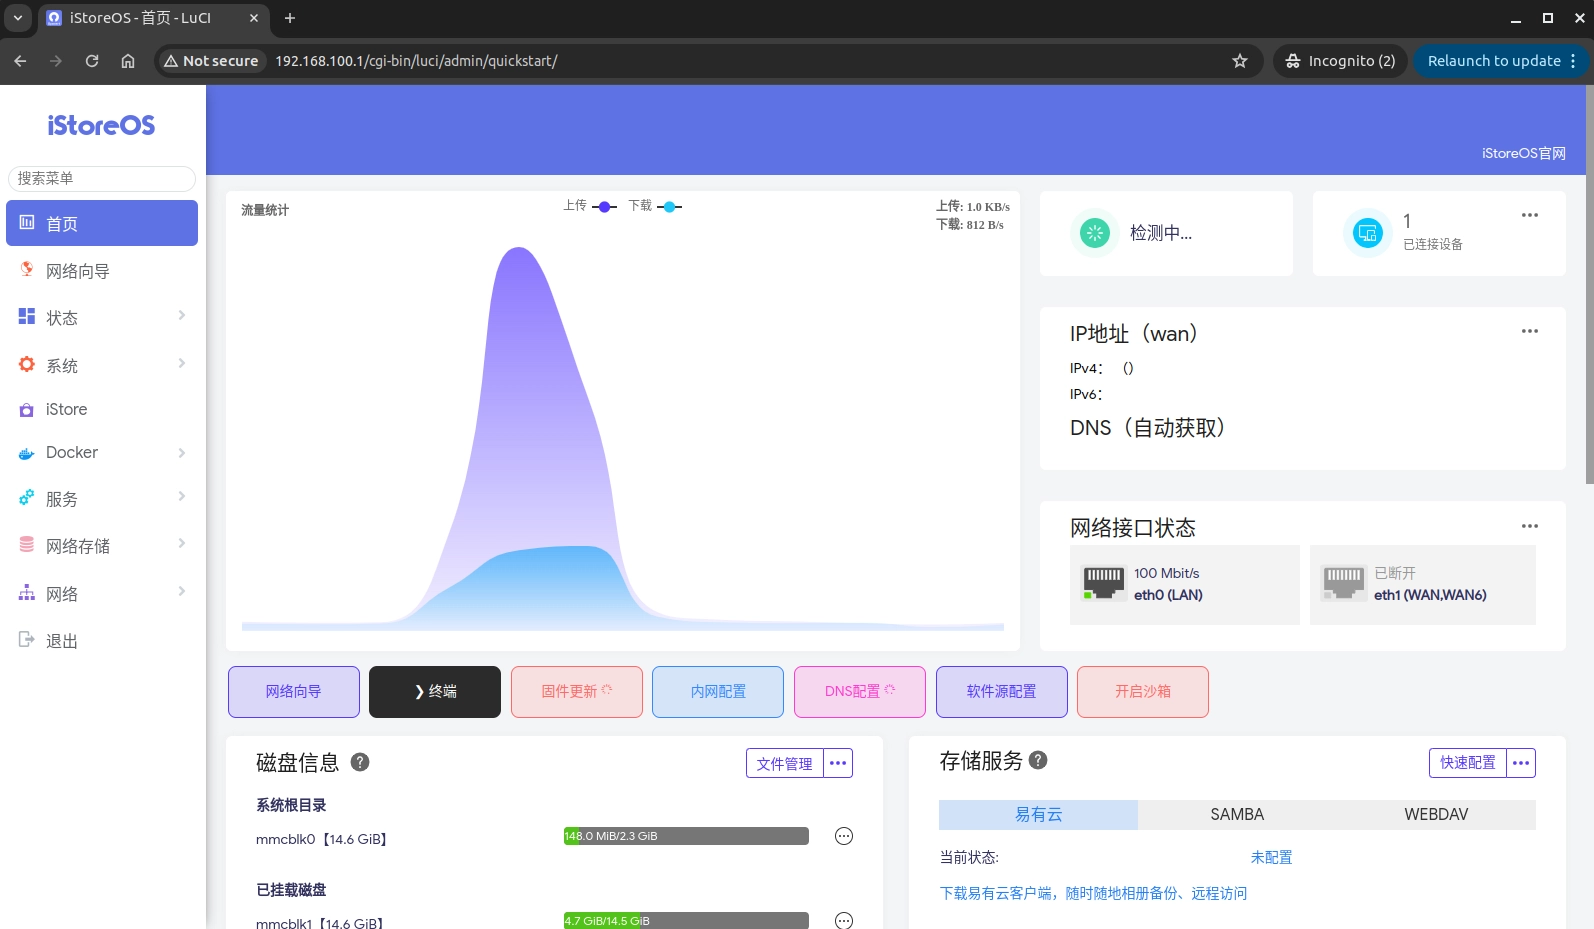
Comes with factory-installed iStoreOS system, which boots automatically when powered on, no flashing required.
Wiring and Power-Up
Connect one end of the Ethernet cable to your PC and the other end to the E54C's Ethernet LAN port. The RJ45 LED will begin to flash, indicating that the network connection is normal.
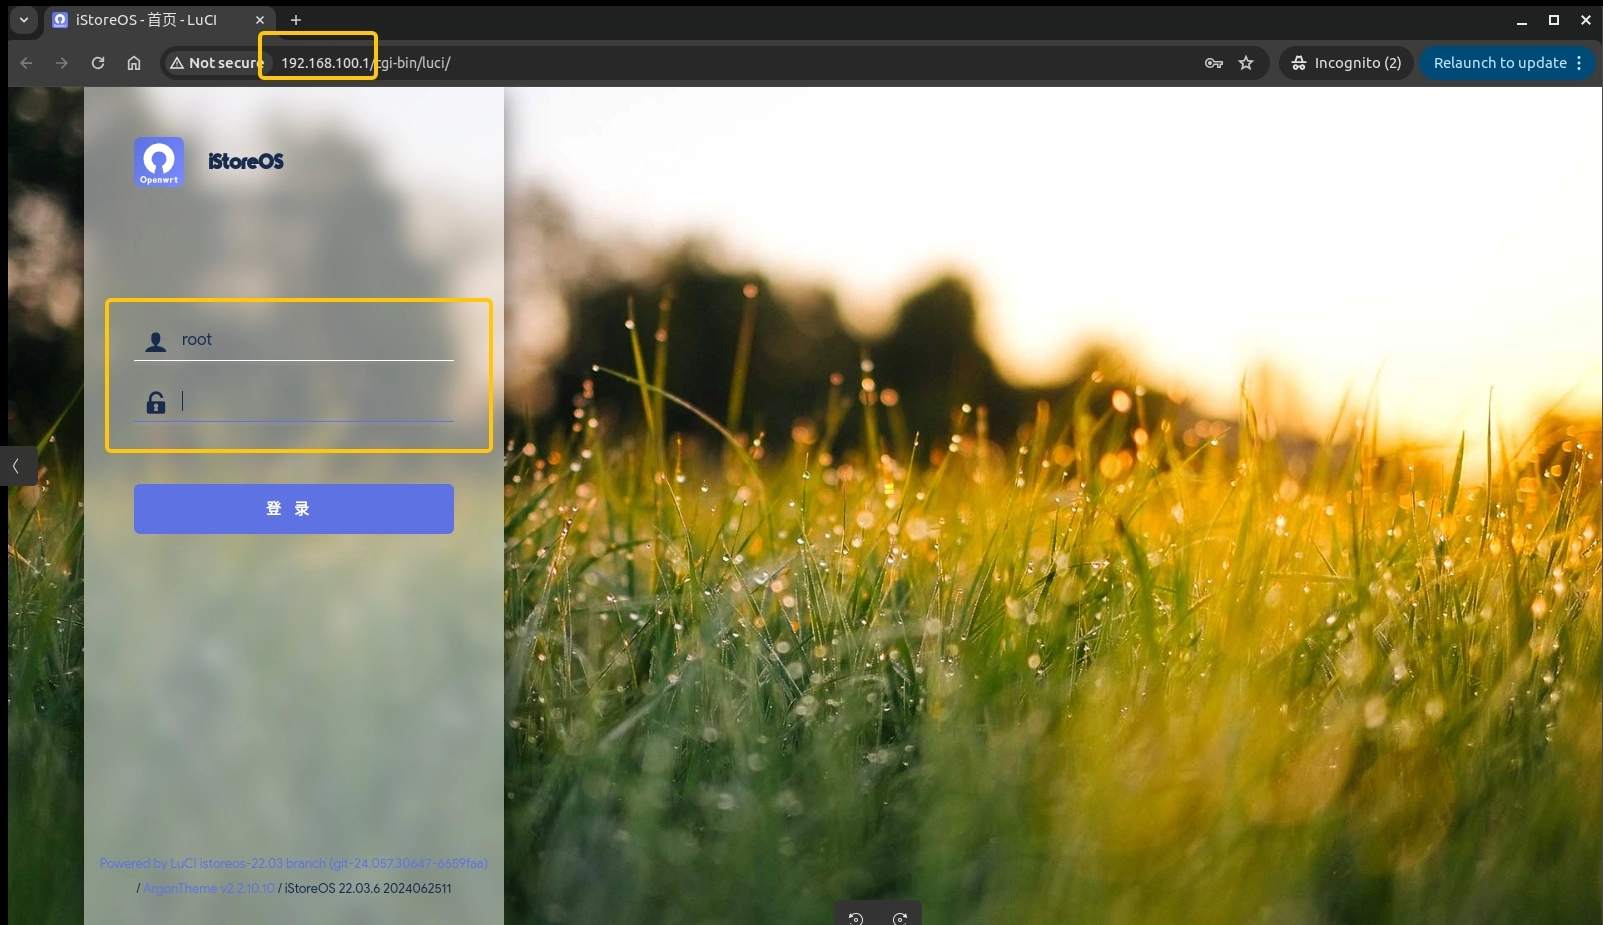
Login
Browser Login
On your PC, you can log in to the iStoreOS backend through a browser using iStoreOS's default IP 192.168.100.1. The default username for the iStoreOS backend is root and the password is password.
Serial Port Login
With the E54C powered on, connect the TYPE-A end of the USB TYPE-A to TYPE-C data cable to your computer and the TYPE-C end to the Radxa E54C debug port. Set the baud rate to 1500000 8n1
Windows System
Installing CH340 Driver
Connect the TYPE-A end of the USB TYPE-A to TYPE-C data cable to your computer and the TYPE-C end to the Radxa E54C debug port. Check in the computer's device manager if the CH340 driver is already installed

If not, please download and install the CH340 driver
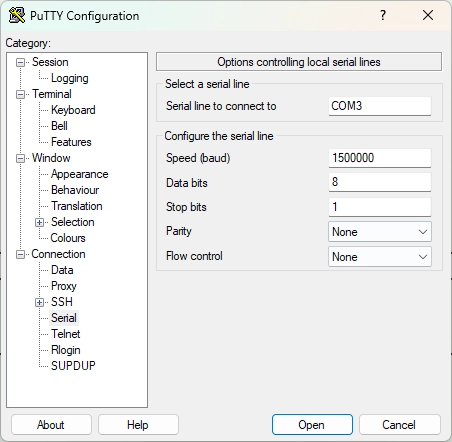
Using PuTTY to Connect
- Download and install PuTTY
- Open PuTTY and configure as follows:
- Select Serial for connection type
- Enter the COM port number in the Serial line field (check in device manager)
- Set Speed to 1500000
- Select Serial for Connection type
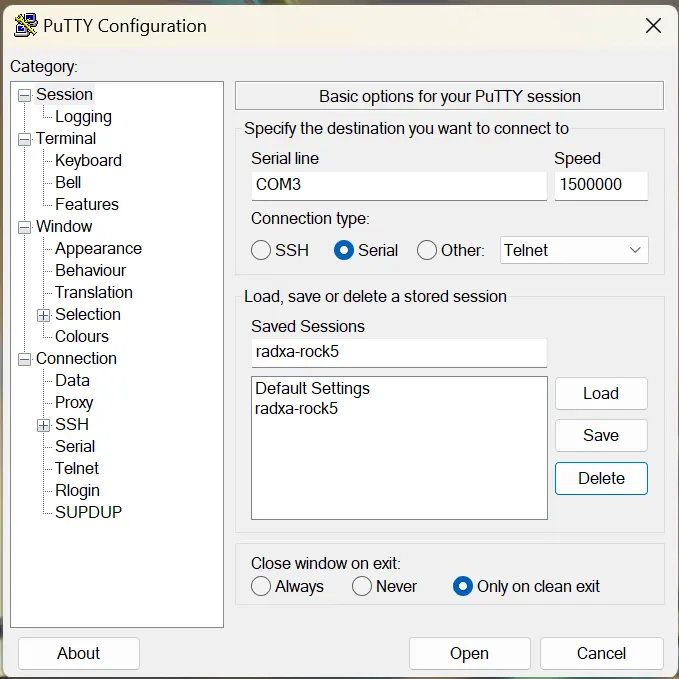
- In the left navigation bar, select Session, then:
- Write radxa-e54c in the Saved Sessions column, then press Save.
- Afterward, you can directly double-click on radxa-e54c to connect.
- Click the Open button to connect to the device.
macOS System
Installing CH340 Driver
- Download the CH340 driver
- Extract and install the driver
- Restart your computer
Using screen Command to Connect
- Open Terminal
- Enter the following command to view available serial port devices:
ls /dev/tty.*
- Find a device name similar to
/dev/tty.wchusbserial14xx0 - Use the following command to connect (replace the device name):
screen /dev/tty.wchusbserial14xx0 1500000
- To exit the screen session, press
Ctrl+Athen pressCtrl+\, then enteryto confirm.
Linux System
Using screen Command to Connect
- Install screen (if not already installed):
# Ubuntu/Debian
sudo apt-get install screen

# Fedora
sudo dnf install screen

# Arch Linux
sudo pacman -S screen
- Find the serial port device:
ls /dev/ttyUSB*
- Connect to the device (usually /dev/ttyUSB0):
sudo screen /dev/ttyUSB0 1500000
- To exit the screen session, press
Ctrl+Athen pressCtrl+\, then enteryto confirm.
Using minicom to Connect
- Install minicom:
# Ubuntu/Debian
sudo apt-get install minicom

# Fedora
sudo dnf install minicom

# Arch Linux
sudo pacman -S minicom
- Configure and connect with minicom:
sudo minicom -s
-
In the configuration menu:
- Select "Serial port setup"
- Set device to /dev/ttyUSB0
- Set baud rate to 1500000
- Set hardware flow control to No
- Save setup as default
- Exit and connect
-
To exit minicom, press
Ctrl+Athen pressX, then select "Yes" to confirm.