Install System to Onboard UFS
This guide explains how to install the system onto the onboard UFS of the Fogwise® AIRbox Q900.
Fogwise® AIRbox Q900 comes with 128GB onboard UFS.
Prerequisites
Entering EDL Mode
EDL Mode (Emergency Download Mode) is a low-level recovery mechanism designed by Qualcomm for devices with Qualcomm chipsets. It is used to forcibly flash firmware or repair critical data through the USB interface when the device cannot boot normally due to system crashes, failed firmware updates, or hardware failures.
- Press and hold the EDL button before powering on the board.
- Release the EDL button after the board is powered on, and it will automatically enter EDL mode.
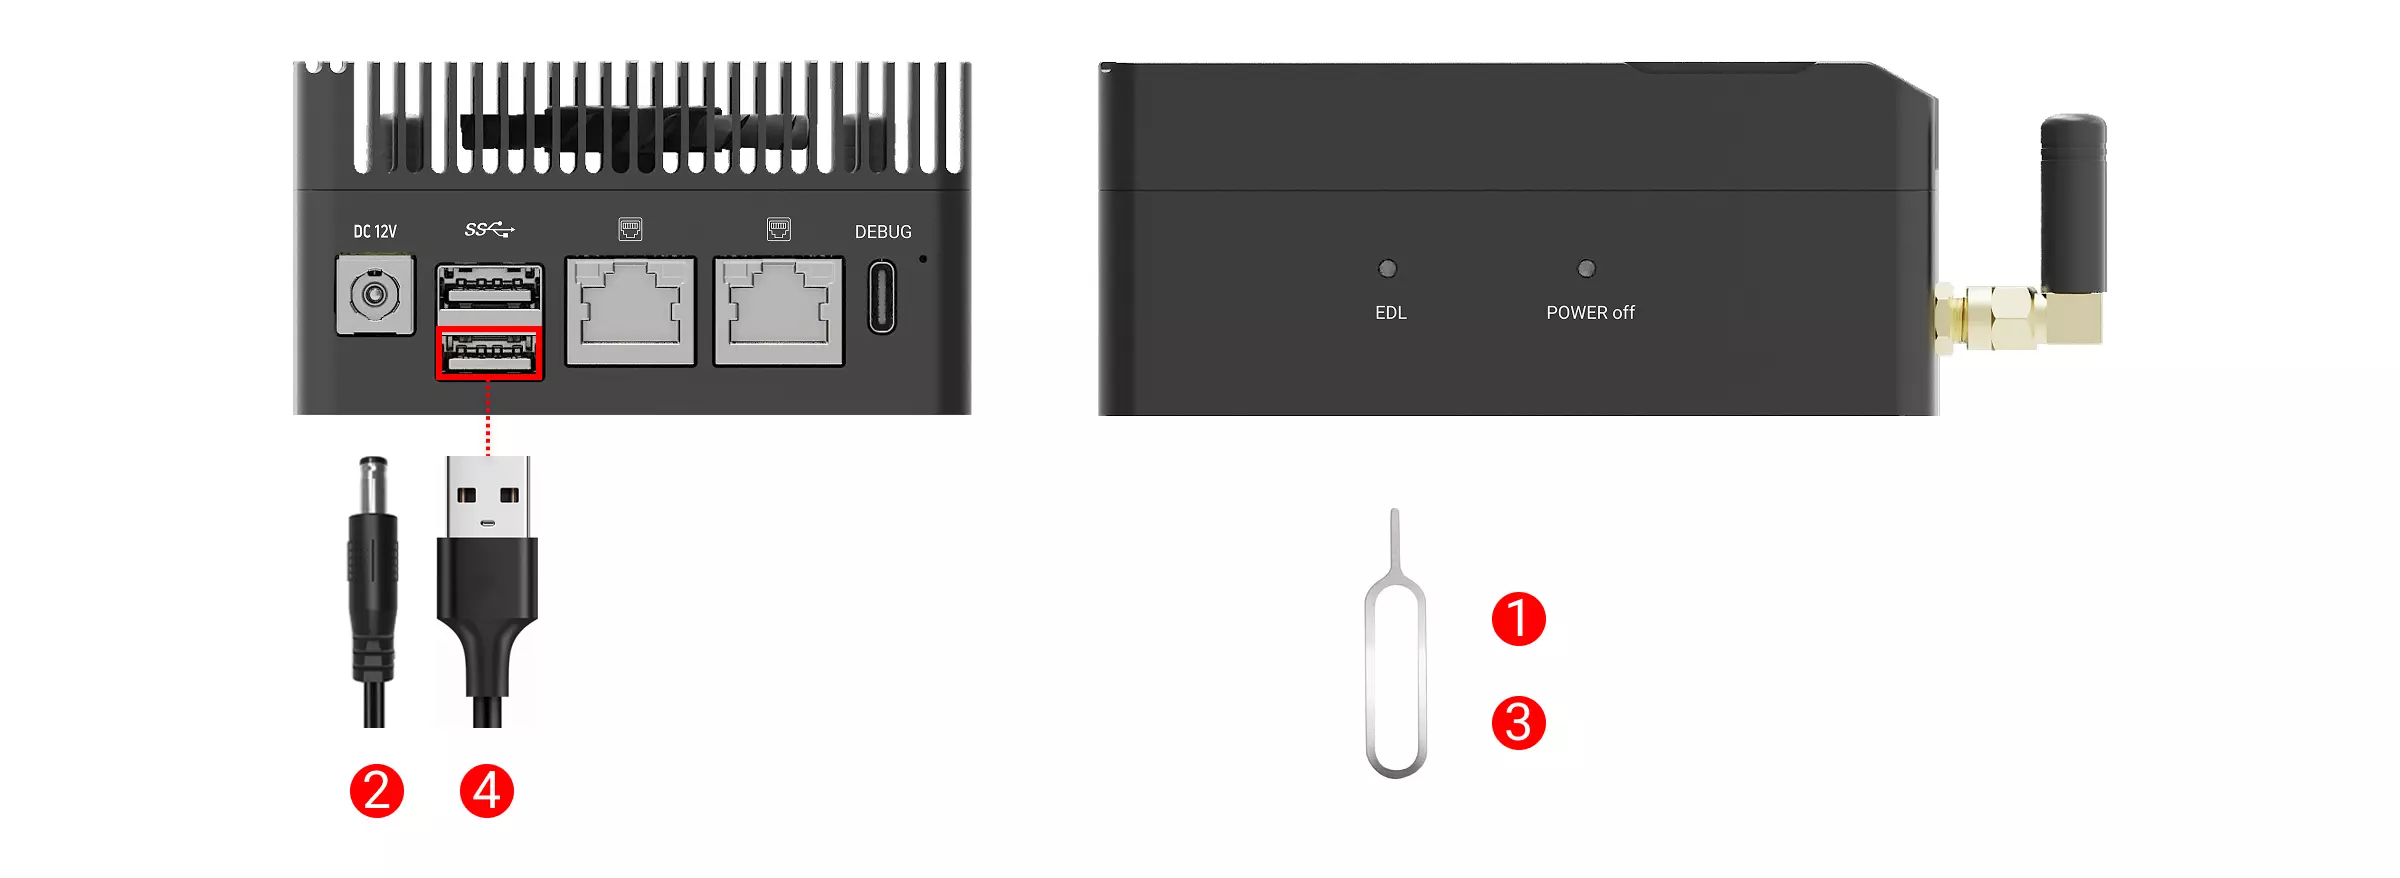
① : Press and hold the EDL button using a pin or toothpick
② : Power the board using a 12V DC power adapter
③ : Release the EDL button
④ : Connect the board's USB 3.1 OTG Type-A port to your computer's USB Type-A port using a dual-ended USB Type-A cable
Verifying EDL Mode
This section describes how to verify EDL mode on both Windows and Ubuntu systems.
- Windows
- Ubuntu
- Download the QDL tool
Go to the Resource Downloads page to download and extract the QDL tool (the QDL tool includes QDL software and QDL drivers).
- Install QDL Driver
Open the extracted QDL tool folder, locate the qcserlib.inf file, right-click on it, and select the Install option.
- Verify EDL Mode
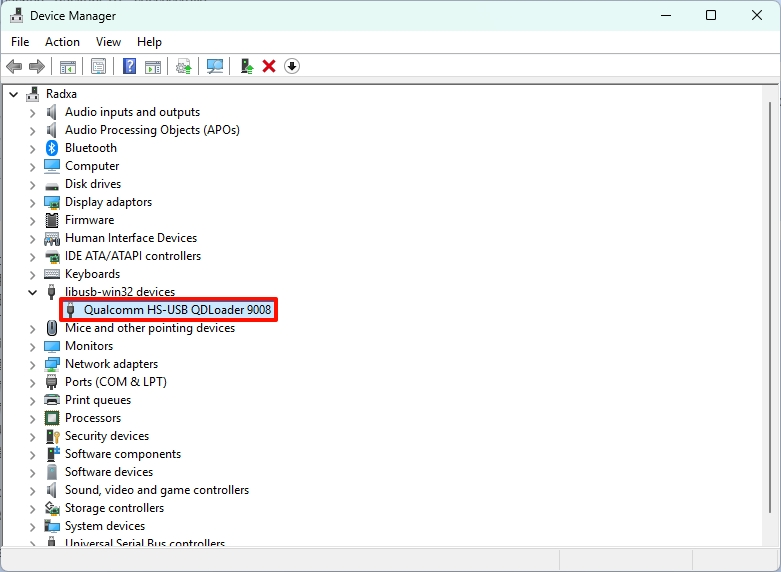
After successfully installing the driver, try unplugging and replugging the USB Type-A cable, then observe if the system's Device Manager interface refreshes and shows the Qualcomm HS-USB QDLoader 9008 device.
Use the lsusb command to check if the device has entered QDL mode.
lsusb
If the board has successfully entered QDL mode, the terminal will output something similar to:
Bus 001 Device 012: ID 05c6:9008 Qualcomm, Inc. Gobi Wireless Modem (QDL mode)
Installing the System
This section describes how to install the system onto the onboard UFS of the Fogwise® AIRbox Q900 on both Windows and Ubuntu systems.
Download Files
Go to the Resource Downloads page to download the boot firmware and system image files.
Set Environment Variables
Setting environment variables can simplify subsequent flashing operations and commands.
- Windows
- Ubuntu
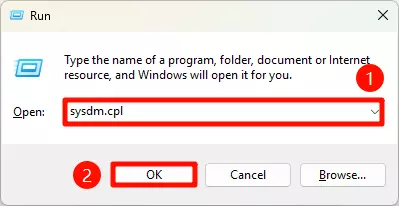
- Press
Win + Rto open the Run dialog, typesysdm.cpl, and clickOK.
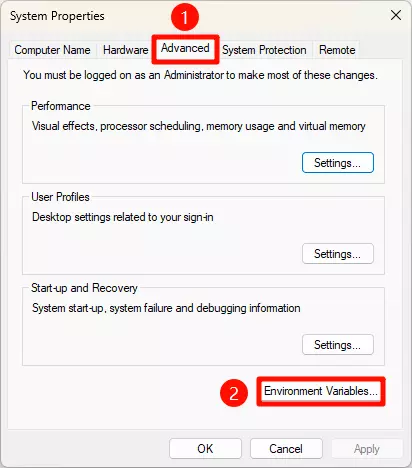
- In the
System Propertieswindow, click on theAdvancedtab, then click theEnvironment Variables...button.
- In the
Environment Variableswindow, double-click on thePathvariable underSystem variables.
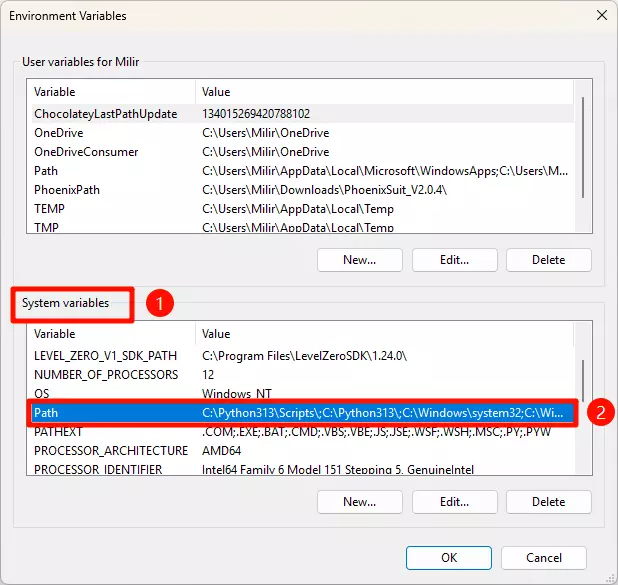
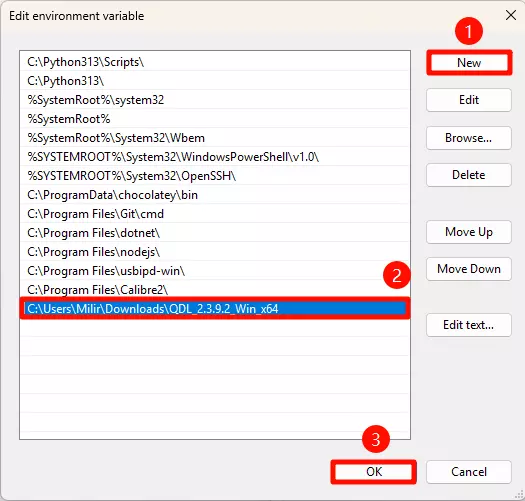
- In the
Edit Environment Variablewindow, click theNewbutton, enter the path to the QDL tool, and clickOK.
- After completing the above steps, reopen the terminal. If you can view the version information using the
qdlcommand, the setup was successful.
qdl
Terminal output example:
Usage: qdl [options] <prog.mbn> [<program> <patch> ...]
 -d, --debug                    Print detailed debug info
 -v, --version                  Print the current version and exit
 -n, --dry-run                  Dry run execution, no device reading or flashing
 -f, --allow-missing            Allow skipping of missing files during flashing
 -s, --storage=T                Set target storage type T: <emmc|nand|ufs>
 -l, --finalize-provisioning    Provision the target storage
 -i, --include=T                Set an optional folder T to search for files
 -S, --serial=T                 Select target by serial number T (e.g. <0AA94EFD>)
 -u, --out-chunk-size=T         Override chunk size for transaction with T
 -t, --create-digests=T         Generate table of digests in the T folder
 -D, --vip-table-path=T         Use digest tables in the T folder for VIP
 -h, --help                     Print this usage info

Example: qdl prog_firehose_ddr.elf rawprogram*.xml patch*.xml
- Check Path
Navigate to the QDL tool directory and use the realpath command to view the QDL tool's path.
realpath qdl
Terminal output example:
/home/user_name/download/QDL_2.3.9.2_Linux_x64/qdl
- Executable Permissions
Use the chmod command to add execute permissions to the QDL tool.
sudo chmod 777 qdl
- Create Symbolic Link
sudo ln -s /home/user_name/download/QDL_2.3.9.2_Linux_x64/qdl /usr/local/bin/qdl
- Verification
Open a terminal in any location, and if you can view the version information using the qdl command, it means the setup was successful.
qdl
Terminal output example:
Usage: qdl [options] <prog.mbn> [<program> <patch> ...]
 -d, --debug                    Print detailed debug info
 -v, --version                  Print the current version and exit
 -n, --dry-run                  Dry run execution, no device reading or flashing
 -f, --allow-missing            Allow skipping of missing files during flashing
 -s, --storage=T                Set target storage type T: <emmc|nand|ufs>
 -l, --finalize-provisioning    Provision the target storage
 -i, --include=T                Set an optional folder T to search for files
 -S, --serial=T                 Select target by serial number T (e.g. <0AA94EFD>)
 -u, --out-chunk-size=T         Override chunk size for transaction with T
 -t, --create-digests=T         Generate table of digests in the T folder
 -D, --vip-table-path=T         Use digest tables in the T folder for VIP
 -h, --help                     Print this usage info

Example: qdl prog_firehose_ddr.elf rawprogram*.xml patch*.xml
Provision UFS
Navigate to the qcs9075-provision folder, open a terminal, and use the following command to provision UFS.
qdl --storage ufs prog_firehose_ddr.elf provision_1_2.xml
Terminal output example:
Waiting for EDL device
waiting for programmer...
UFS provisioning succeeded
Flash SAIL
Navigate to the radxa-airbox-q900_noble_gnome_xxx\sail_nor folder, open a terminal, and use the following command to flash SAIL.
qdl --storage spinor prog_firehose_ddr.elf rawprogram0.xml patch0.xml
Waiting for EDL device
waiting for programmer...
flashed "SAIL_HYP" successfully
flashed "SAIL_HYP_BKUP" successfully
flashed "PrimaryGPT" successfully
flashed "BackupGPT" successfully
11 patches applied
Flash System Image
Navigate to the radxa-airbox-q900_noble_gnome_xxx folder, open a terminal, and use the following command to flash the system image.
qdl prog_firehose_ddr.elf rawprogram*.xml patch*.xml
Terminal output example:
Waiting for EDL device
waiting for programmer...
flashed "efi" successfully at 40329kB/s
flashed "system" successfully at 3630kB/s
flashed "PrimaryGPT" successfully
flashed "BackupGPT" successfully
flashed "xbl_a" successfully
flashed "xbl_b" successfully
flashed "xbl_config_a" successfully
flashed "xbl_config_b" successfully
flashed "PrimaryGPT" successfully
flashed "BackupGPT" successfully
flashed "xbl_a" successfully
flashed "xbl_b" successfully
flashed "xbl_config_a" successfully
flashed "xbl_config_b" successfully
flashed "PrimaryGPT" successfully
flashed "BackupGPT" successfully
flashed "PrimaryGPT" successfully
flashed "BackupGPT" successfully
flashed "aop_a" successfully
flashed "shrm_a" successfully
flashed "uefi_a" successfully
flashed "uefisecapp_a" successfully
flashed "xbl_ramdump_a" successfully
flashed "dtb_a" successfully at 32768kB/s
flashed "tz_a" successfully
flashed "hyp_a" successfully
flashed "devcfg_a" successfully
flashed "cpucp_a" successfully
flashed "multiimgoem_a" successfully
flashed "multiimgqti_a" successfully
flashed "imagefv_a" successfully
flashed "aop_b" successfully
flashed "dtb_b" successfully at 65536kB/s
flashed "imagefv_b" successfully
flashed "shrm_b" successfully
flashed "uefi_b" successfully at 3912kB/s
flashed "uefisecapp_b" successfully
flashed "xbl_ramdump_b" successfully
flashed "tz_b" successfully
flashed "hyp_b" successfully
flashed "devcfg_b" successfully
flashed "cpucp_b" successfully
flashed "multiimgoem_b" successfully
flashed "multiimgqti_b" successfully
flashed "toolsfv" successfully
flashed "PrimaryGPT" successfully
flashed "BackupGPT" successfully
65 patches applied
partition 1 is now bootable
Using the System
After completing the above operations, you can use the Fogwise® AIRbox Q900 by following the Quick Start guide.
Other Operation
Erase System on UFS
Boot AIRbox Q900 to EDL mode.
Navigate to the radxa-airbox-q900_noble_gnome_xxx/partition_ufs folder, open a terminal, and use the following command to erase UFS.
qdl --storage ufs ../prog_firehose_ddr.elf rawprogram*_BLANK_GPT.xml
Terminal output example:
flashed "PrimaryGPT" successfully
flashed "PrimaryGPT" successfully
flashed "PrimaryGPT" successfully
flashed "PrimaryGPT" successfully
flashed "PrimaryGPT" successfully
0 patches applied