linkr.now Introduction
linkr.now is a browser-based device discovery and management platform that can discover and centrally manage multiple Linkr devices on the LAN without installing a client.
Main features include:
-
View the controlled device screen and perform remote operations
-
Use auxiliary functions such as text paste, screenshot, screen recording, and custom shortcuts
-
Configure Ethernet, USB NIC, Wi-Fi, and Wi-Fi hotspot
-
Manage virtual disks and mount ISO, IMG images
-
Upgrade firmware and manage users, device names, and system reset settings
Usage Guide
Accessing linkr.now shows a simple usage guide:
-
Connect Device: Prompts for hardware connection of the Linkr device.
-
Access & Scan: Authorize local network access permissions and scan for Linkr devices on the LAN.
-
Select Device: Select the Linkr device to control.
-
Device Management Interface: Management/control interface of the controlled device.
The first 3 steps are automatically guided by the website. This tutorial mainly introduces the functions of the device management interface.
Device Management Interface
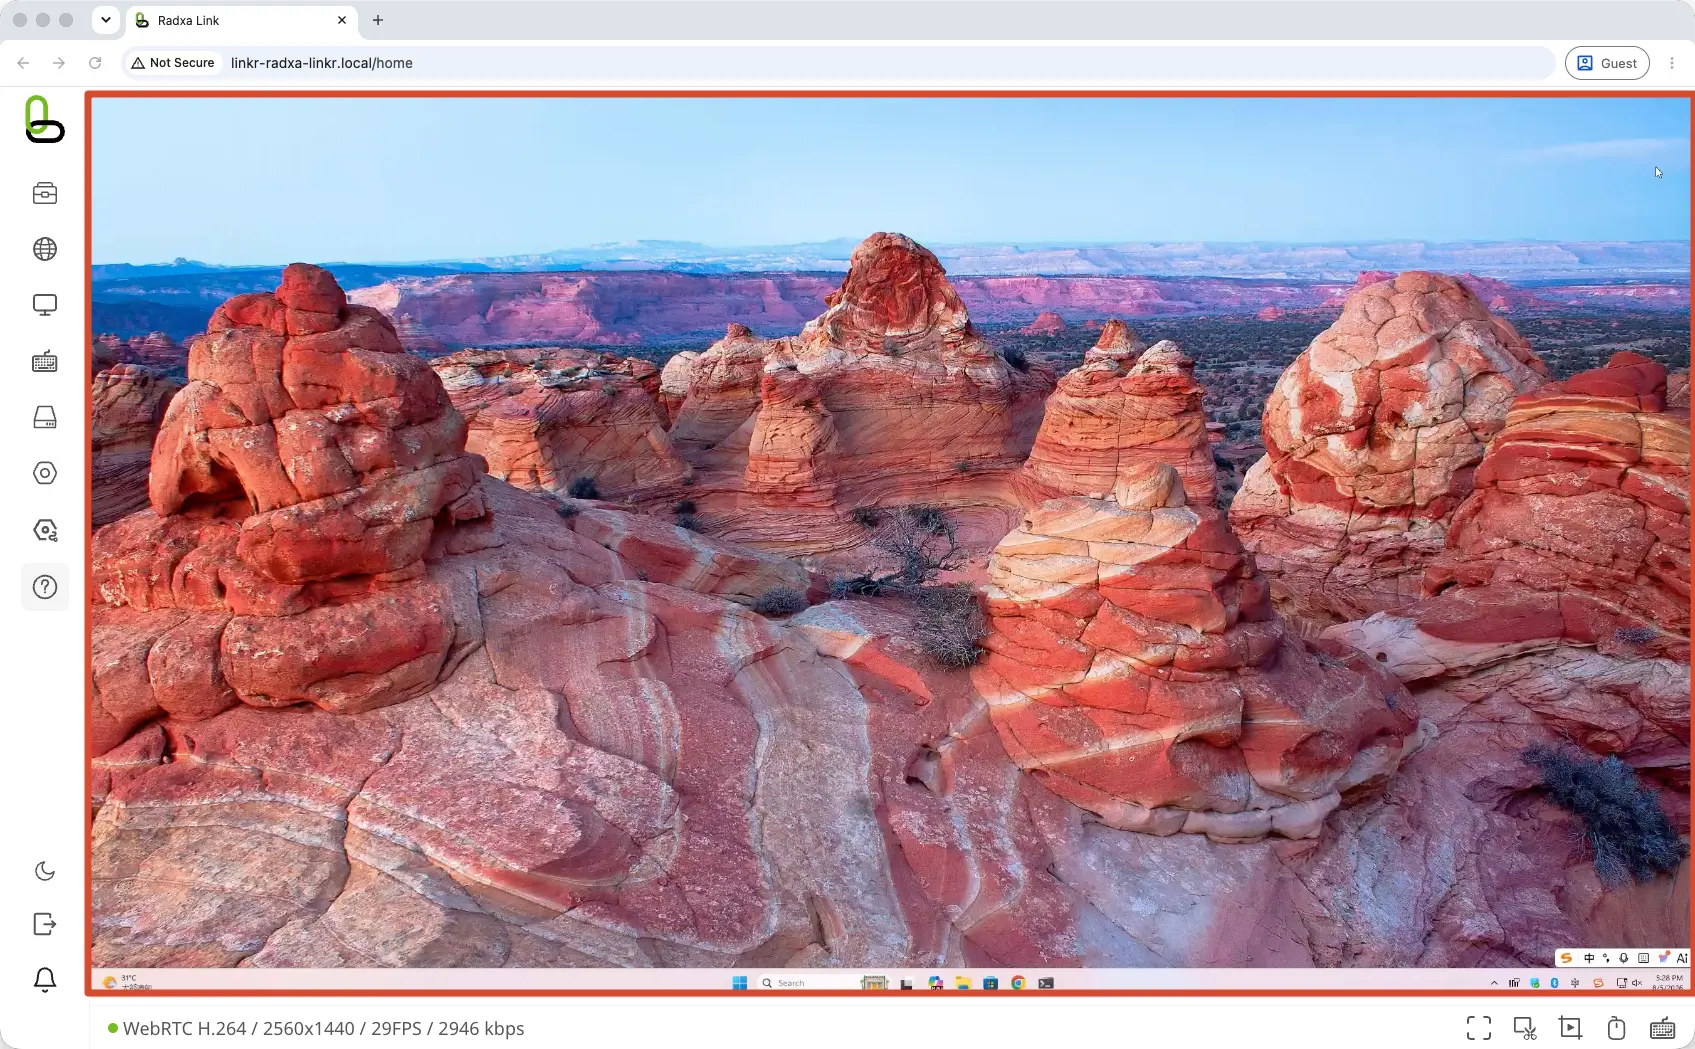
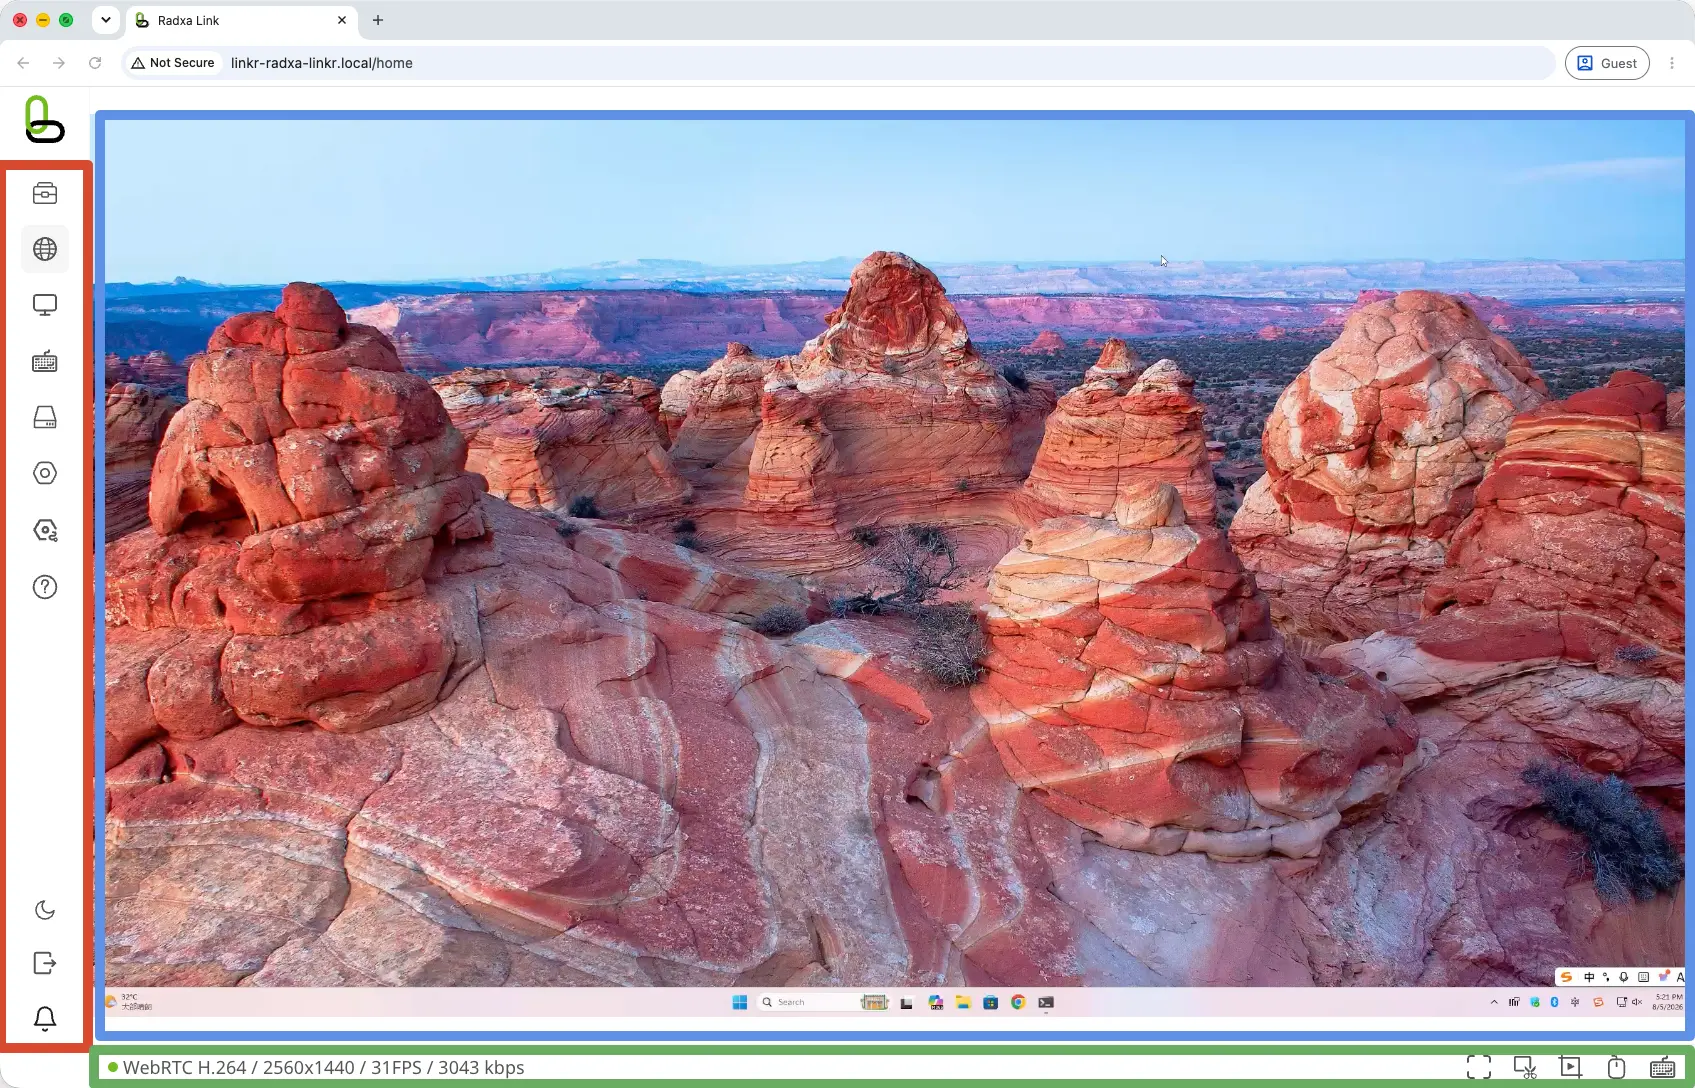
The device management interface is mainly divided into 3 areas:
-
Side area (red area in the figure): Main function area, including network settings, screen settings, keyboard & mouse, virtual devices, system settings, advanced settings, etc.
-
Bottom area (green area in the figure): Status bar and toolbar, showing connection information and common tools such as fullscreen, screenshot, screen recording, and on-screen keyboard.
-
Center area (blue area in the figure): The controlled device's system screen.
Main Function Area (Side)
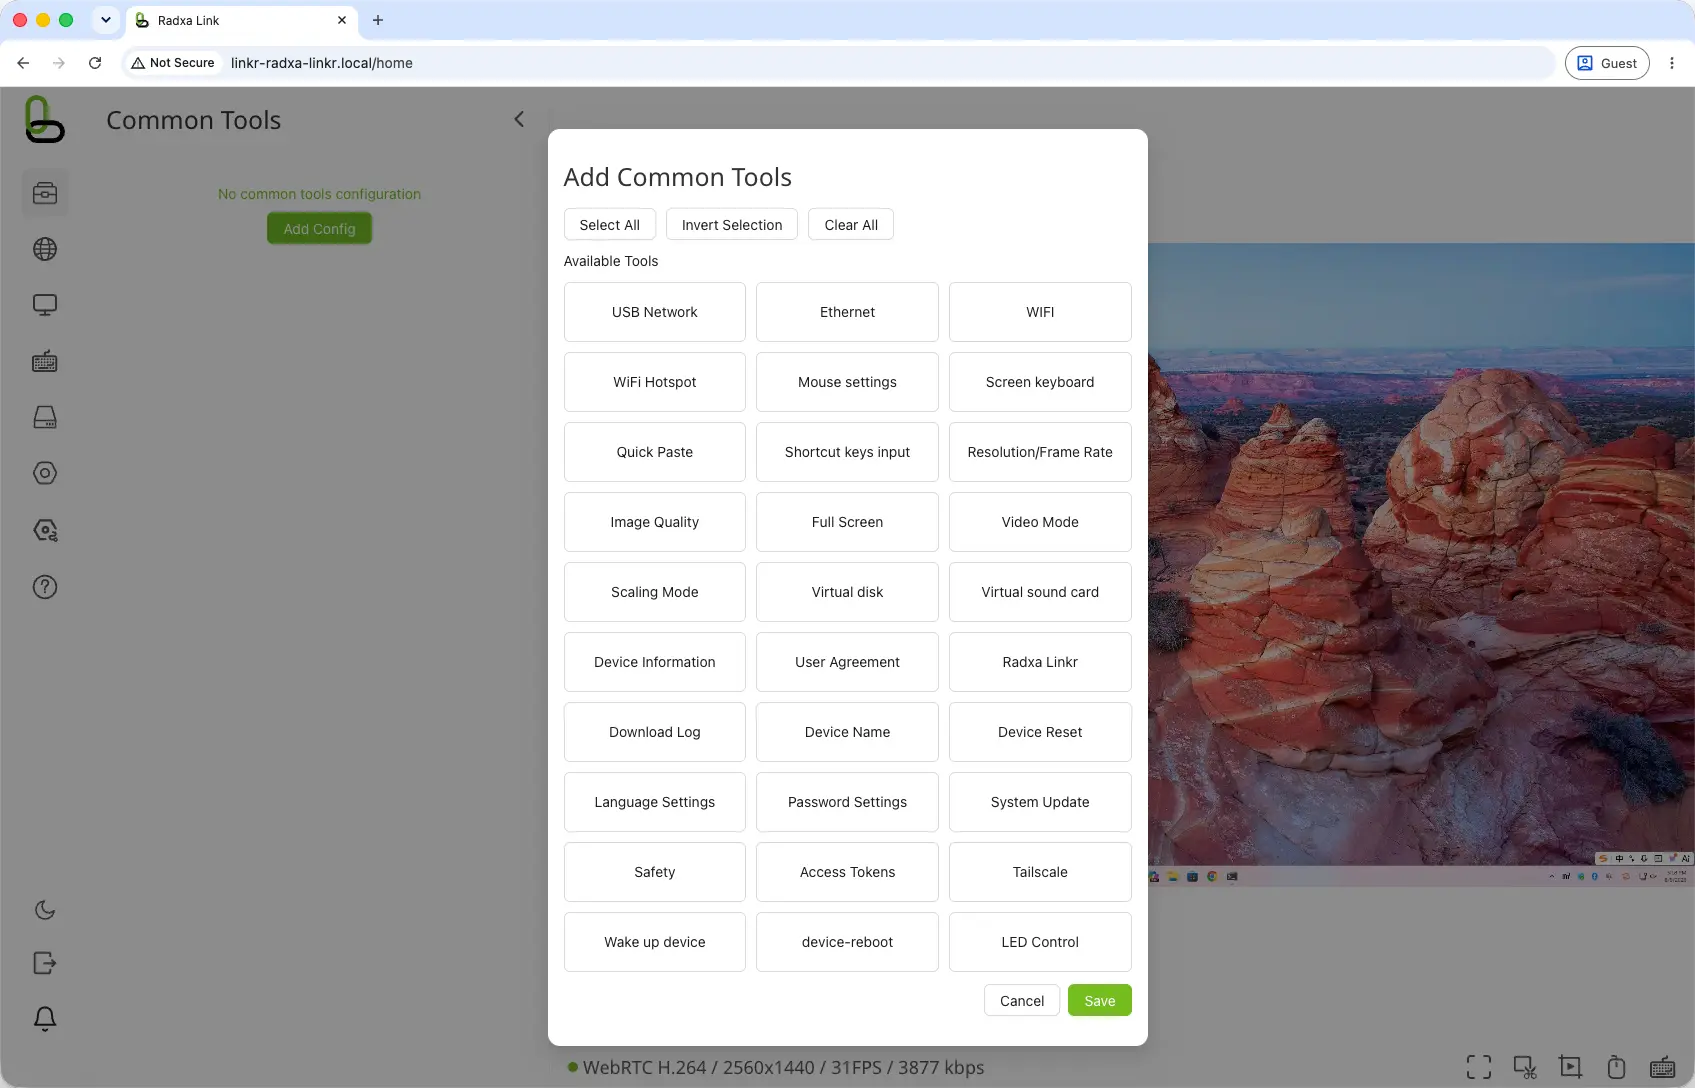
Common Tools
You can customize the aggregation area to add some commonly used tools here, avoiding frequent switching and searching for settings.
Network Settings
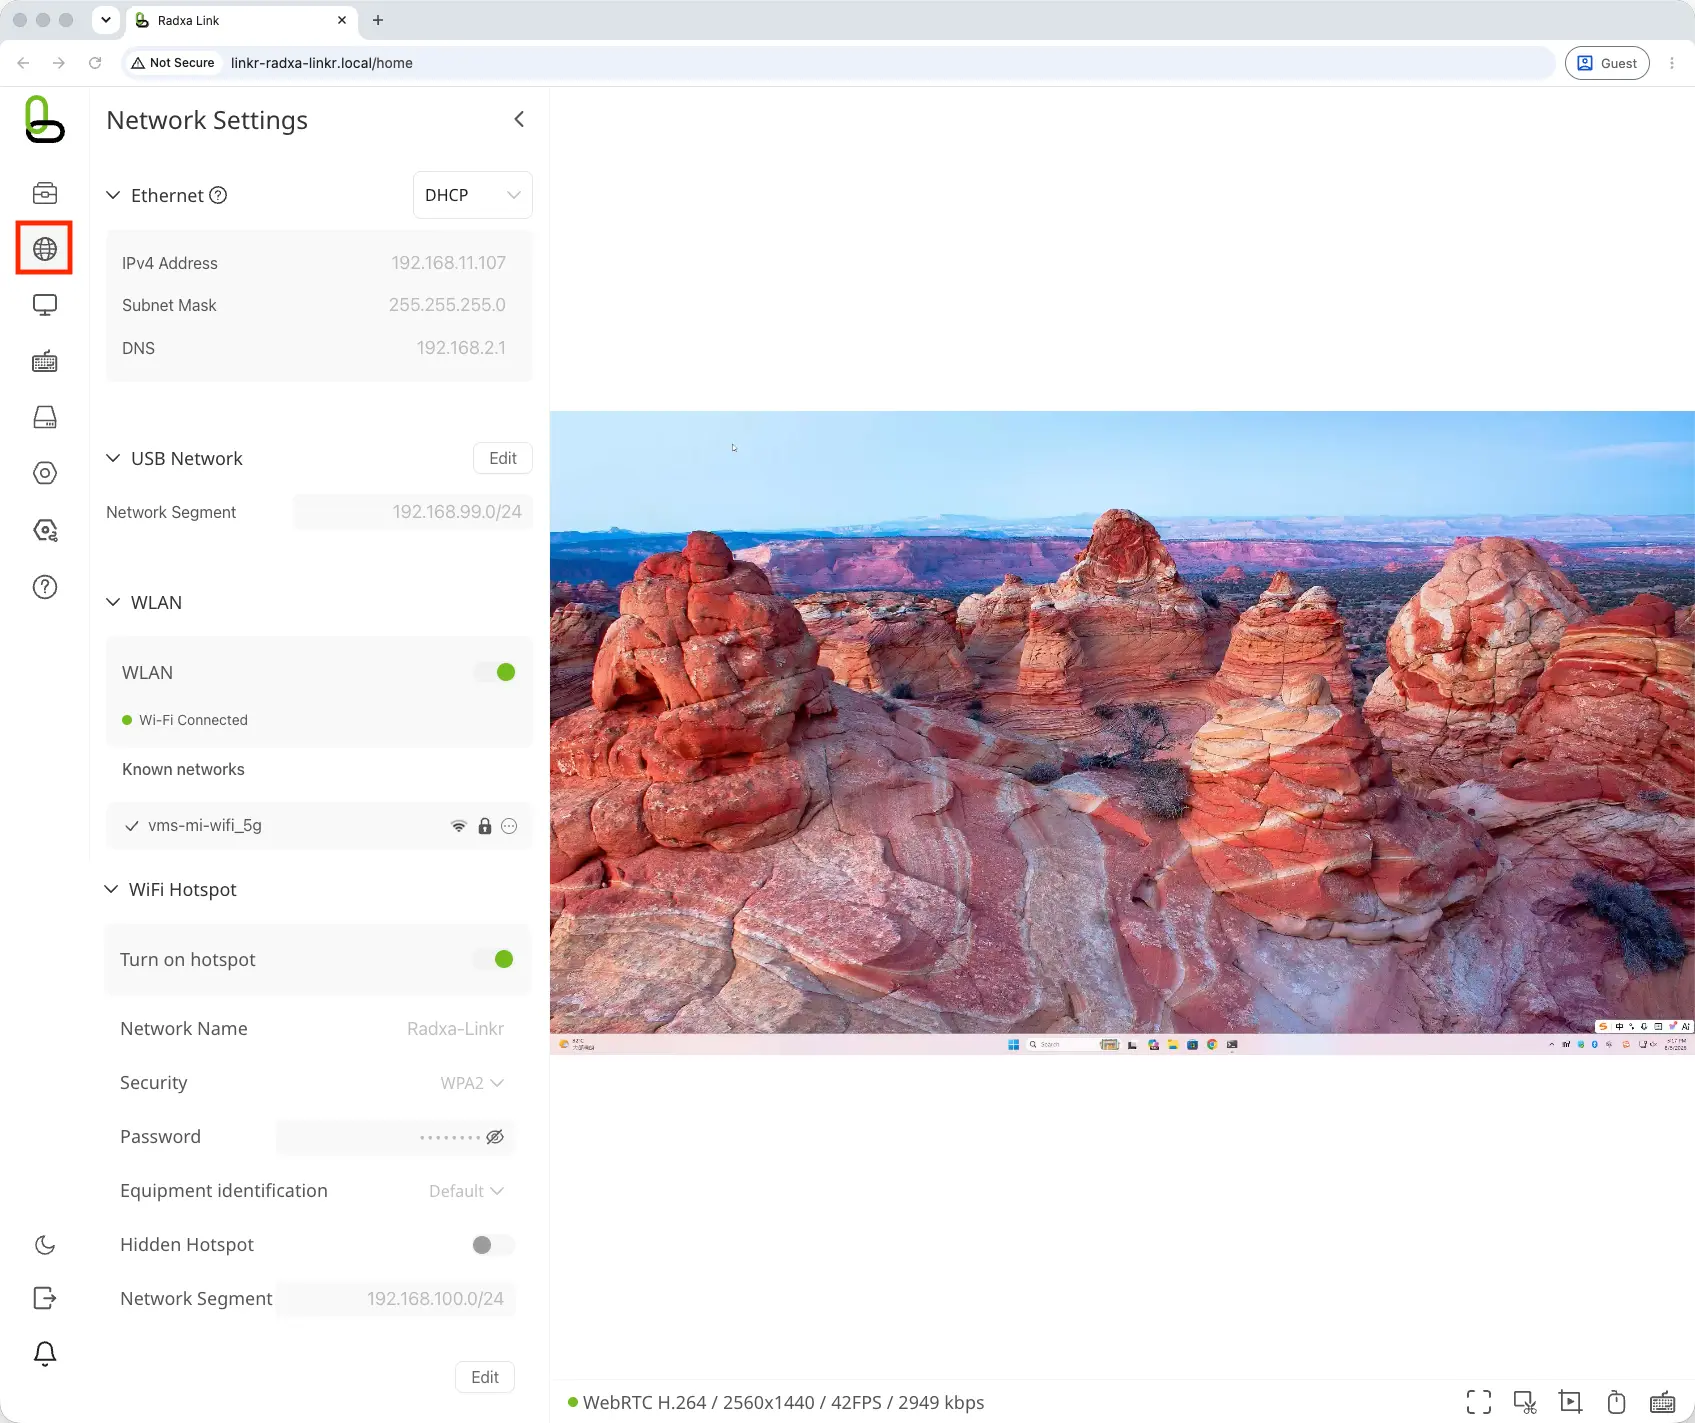
Used to view network status and configure the Linkr's network connection method.
- Ethernet
Connect the Linkr to the LAN via a wired network. Supports DHCP automatic acquisition of network parameters, or manual setting of IPv4 address, subnet mask, gateway, and DNS.
- USB NIC
Establish a direct connection network between the Linkr and the host via USB-C, suitable for first-time configuration and local debugging. Supports custom USB NIC subnet.
- Wi-Fi
Connect the Linkr to the wireless LAN. Supports scanning or manually adding networks, and can configure DHCP or manual IP.
- Wi-Fi Hotspot
Use the Linkr as a wireless access point for the host to connect directly, suitable for scenarios without an available LAN or for temporary direct connection. Supports setting hotspot name, security mode, password, hidden hotspot, and hotspot subnet.
-
When manually setting the subnet, please use CIDR format, e.g.,
192.168.99.0/24. -
Ethernet, USB NIC, Wi-Fi, and Wi-Fi hotspot should use different subnets to avoid network conflicts.
-
After modifying the IP address or subnet, the current connection may be interrupted. Please re-access the management interface using the new IP address.
-
When creating a Wi-Fi hotspot using WPA2 mode, the password length must be no less than 8 characters.
Screen Settings
Used to adjust the display mode of the remote screen and video transmission parameters.
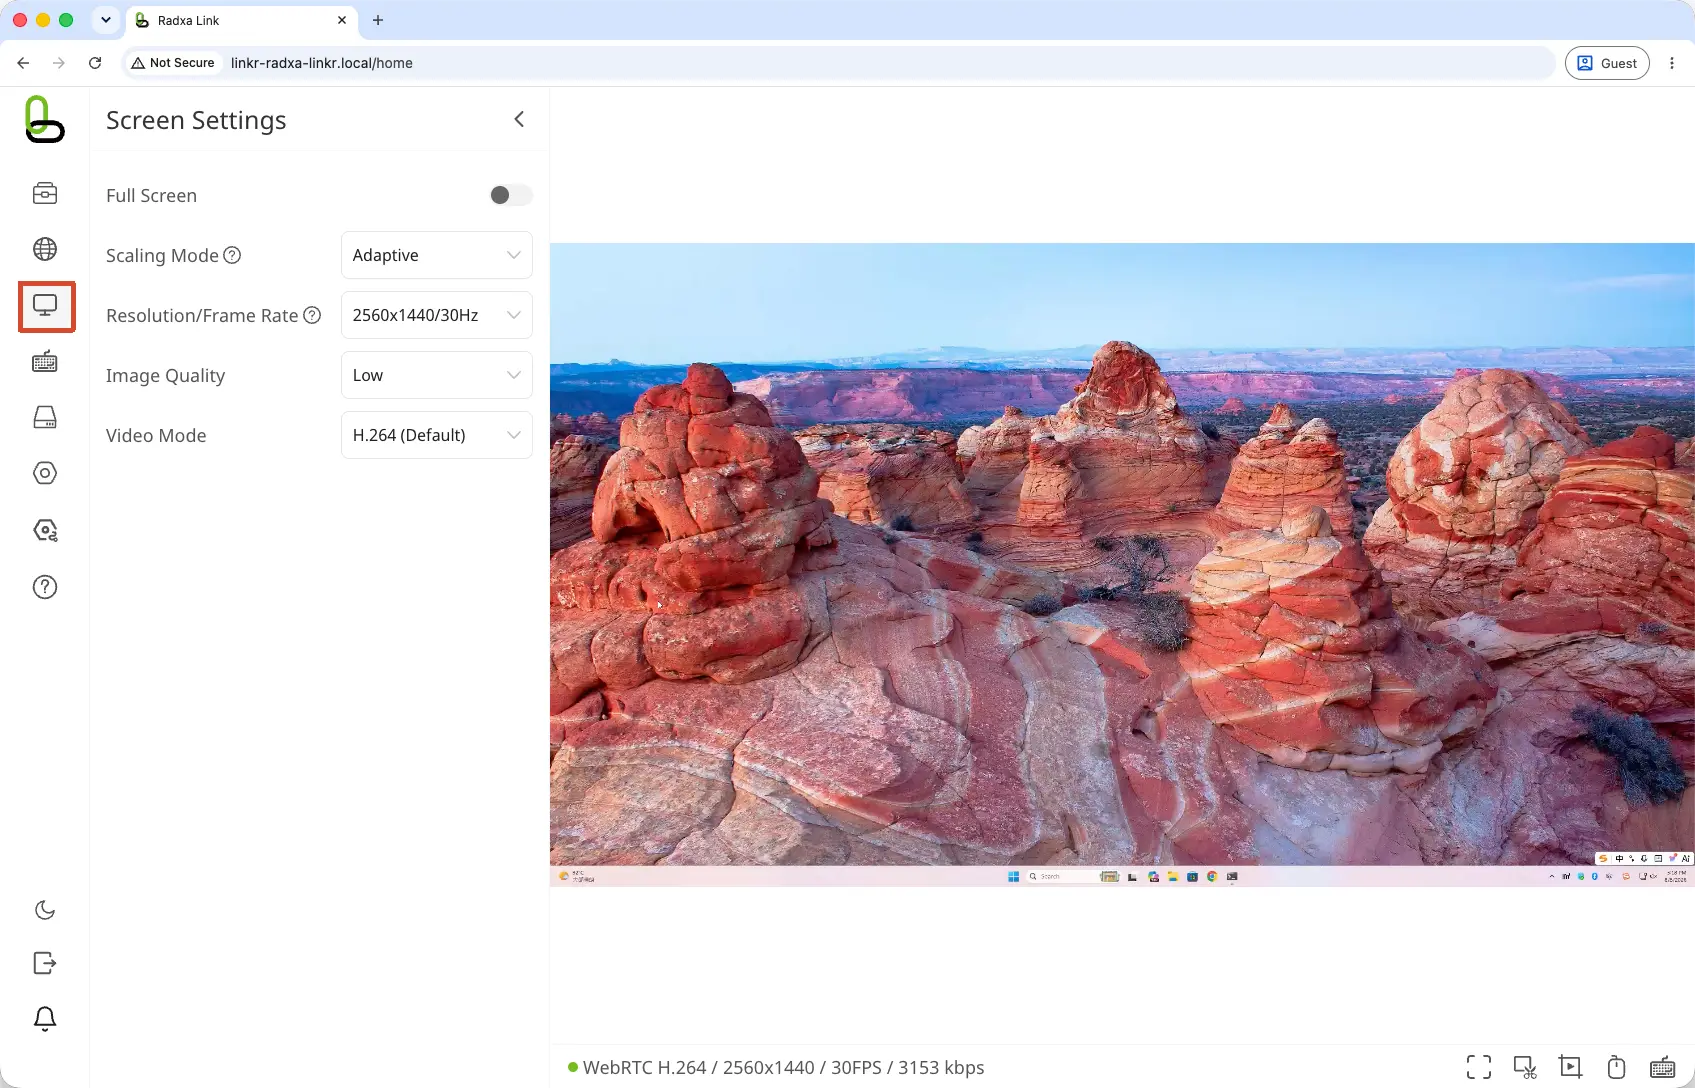
- Fullscreen
Switch the remote control screen to browser fullscreen display, suitable for long-term operation or immersive use.
- Zoom Mode
Set how the screen is displayed in the browser window.
-
Adaptive: Scale according to window size, display the full screen.
-
Normal: Display the screen at original ratio.
- Resolution & Frame Rate (EDID)
Set the display resolution and refresh rate recognized by the controlled device via HDMI. Suitable for resolving abnormal screen output, or specifying a specific resolution and frame rate.
- Image Quality
Adjust the clarity and transmission smoothness of the remote screen. Higher image quality requires higher network bandwidth.
- Video Mode
Set the video encoding format used by the remote screen.
-
H.264: High encoding efficiency, lower bandwidth occupation, recommended for daily use.
-
MJPEG: Better compatibility, suitable for environments where H.264 cannot be used normally.
-
After modifying the resolution or frame rate, the controlled device's screen may be briefly interrupted.
-
When the network condition is poor, you can lower the image quality to improve screen smoothness.
-
It is recommended to use H.264 first; switch to MJPEG when compatibility issues occur.
Keyboard & Mouse
Used to configure remote input methods and improve keyboard and mouse operation efficiency.
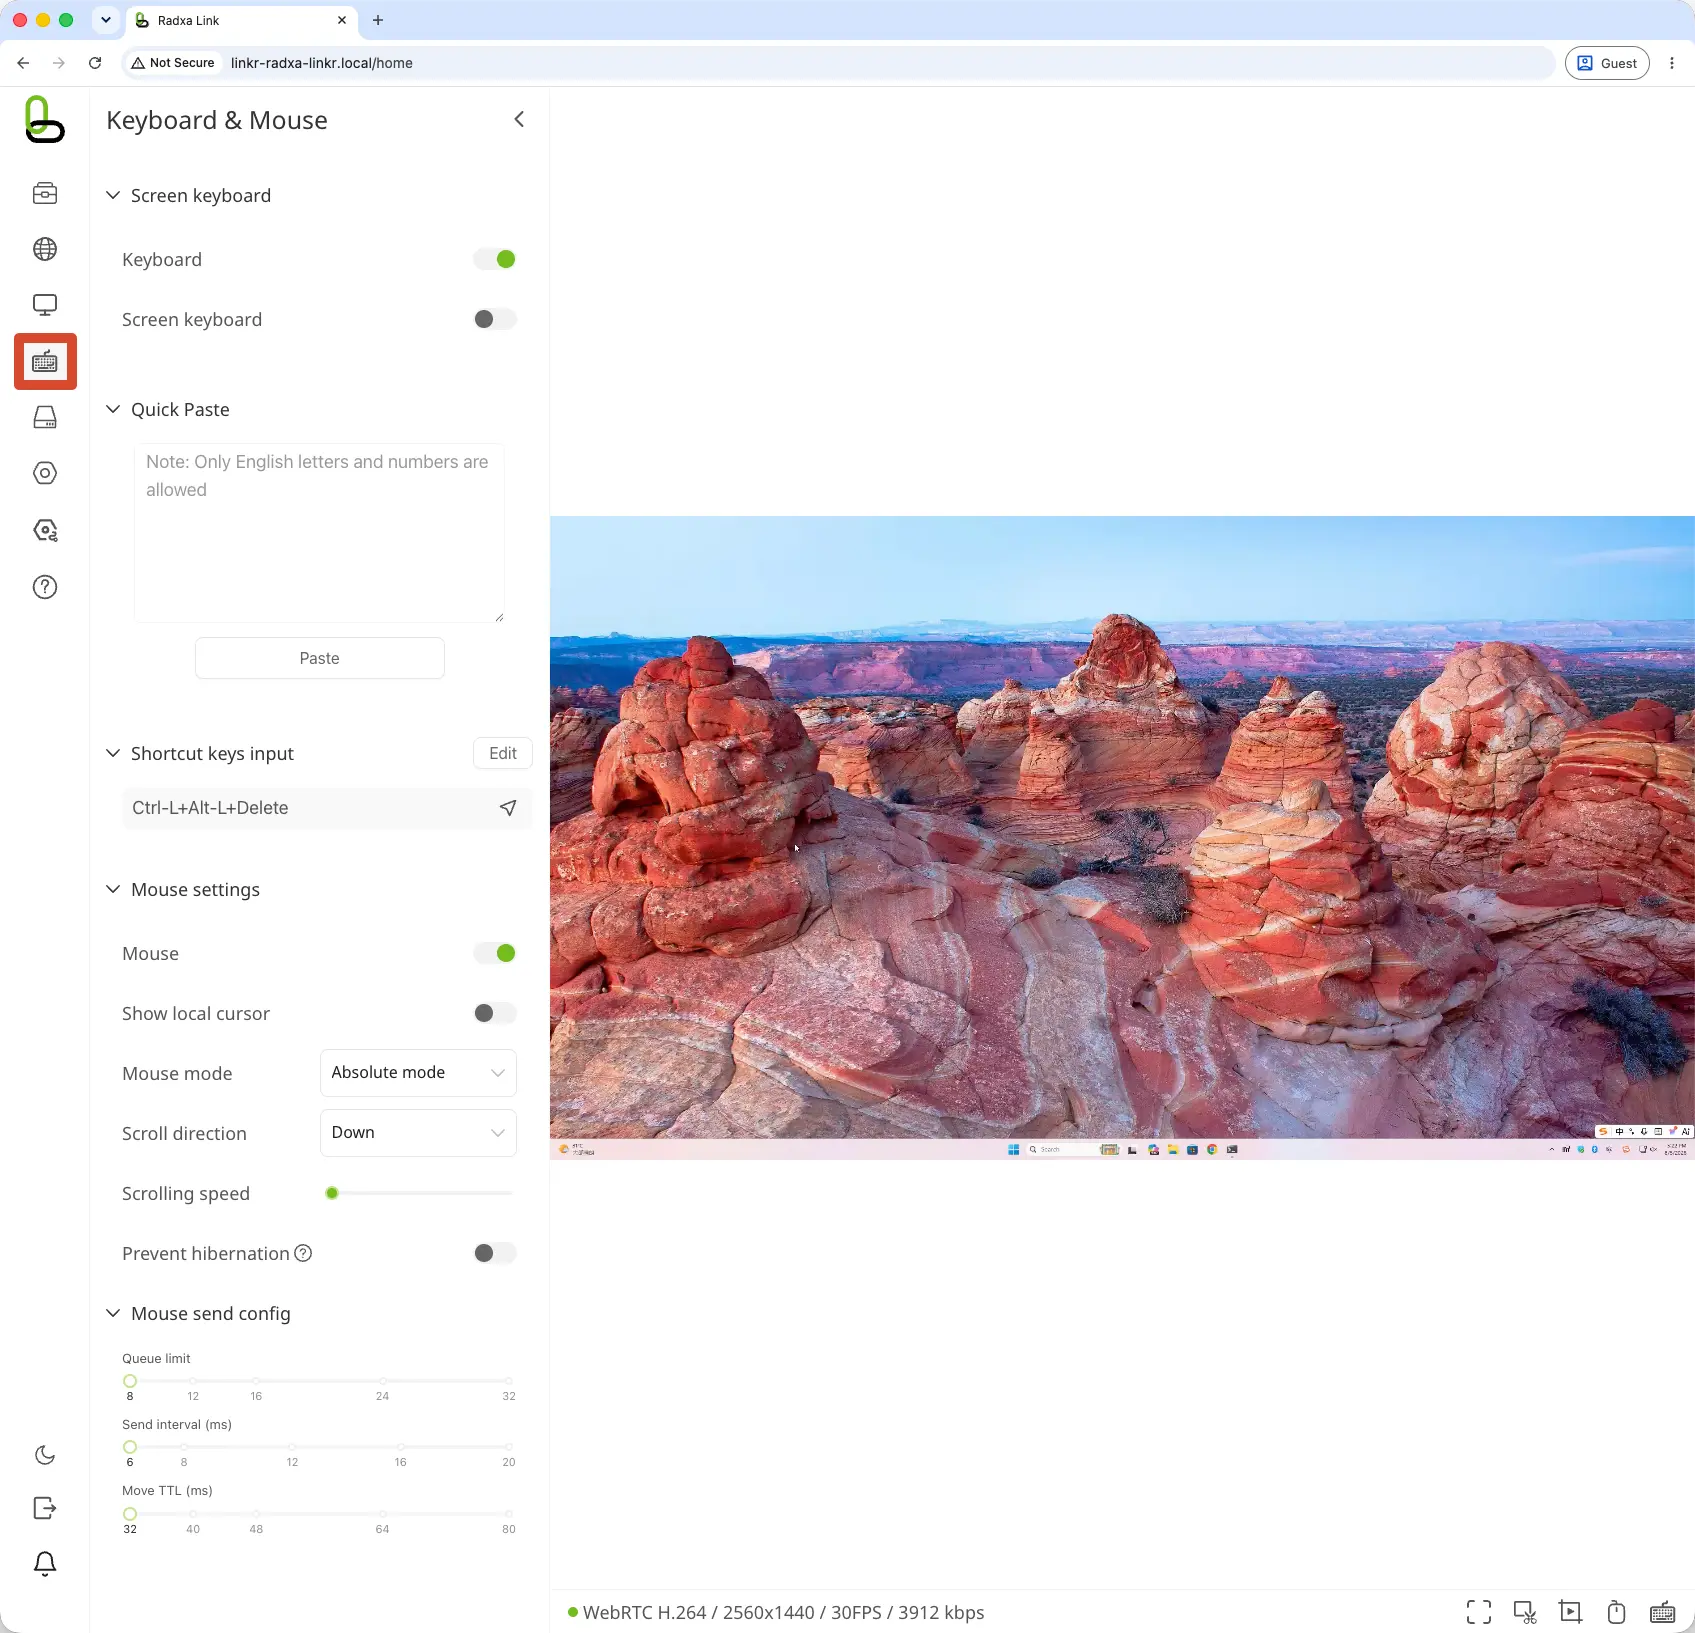
- On-screen Keyboard
Turn the virtual keyboard on or off, suitable for touch devices or scenarios without a physical keyboard.
- Quick Paste
Quickly input text to the controlled device, and supports viewing, reusing, and clearing paste history. Suitable for inputting longer text such as commands and paths.
- Shortcut Key Input
Add and send custom key combinations, suitable for performing common system operations.
- Mouse Settings
Supports enabling or disabling mouse input, displaying the local mouse, and configuring mouse mode, sensitivity, wheel direction, and scroll speed.
-
Absolute mode: The browser pointer position is consistent with the controlled device pointer position, suitable for desktop operations.
-
Relative mode: Controls the controlled device pointer according to the mouse movement amount, suitable for BIOS, games, or some special systems.
-
In relative mode, you can adjust mouse sensitivity to improve the operation feel.
-
After enabling "Prevent Sleep", the Linkr will periodically send mouse activity to prevent the controlled device from entering sleep due to long-term no operation.
Virtual Devices
Used to manage virtual disks and mount system images or maintenance images to the controlled device.
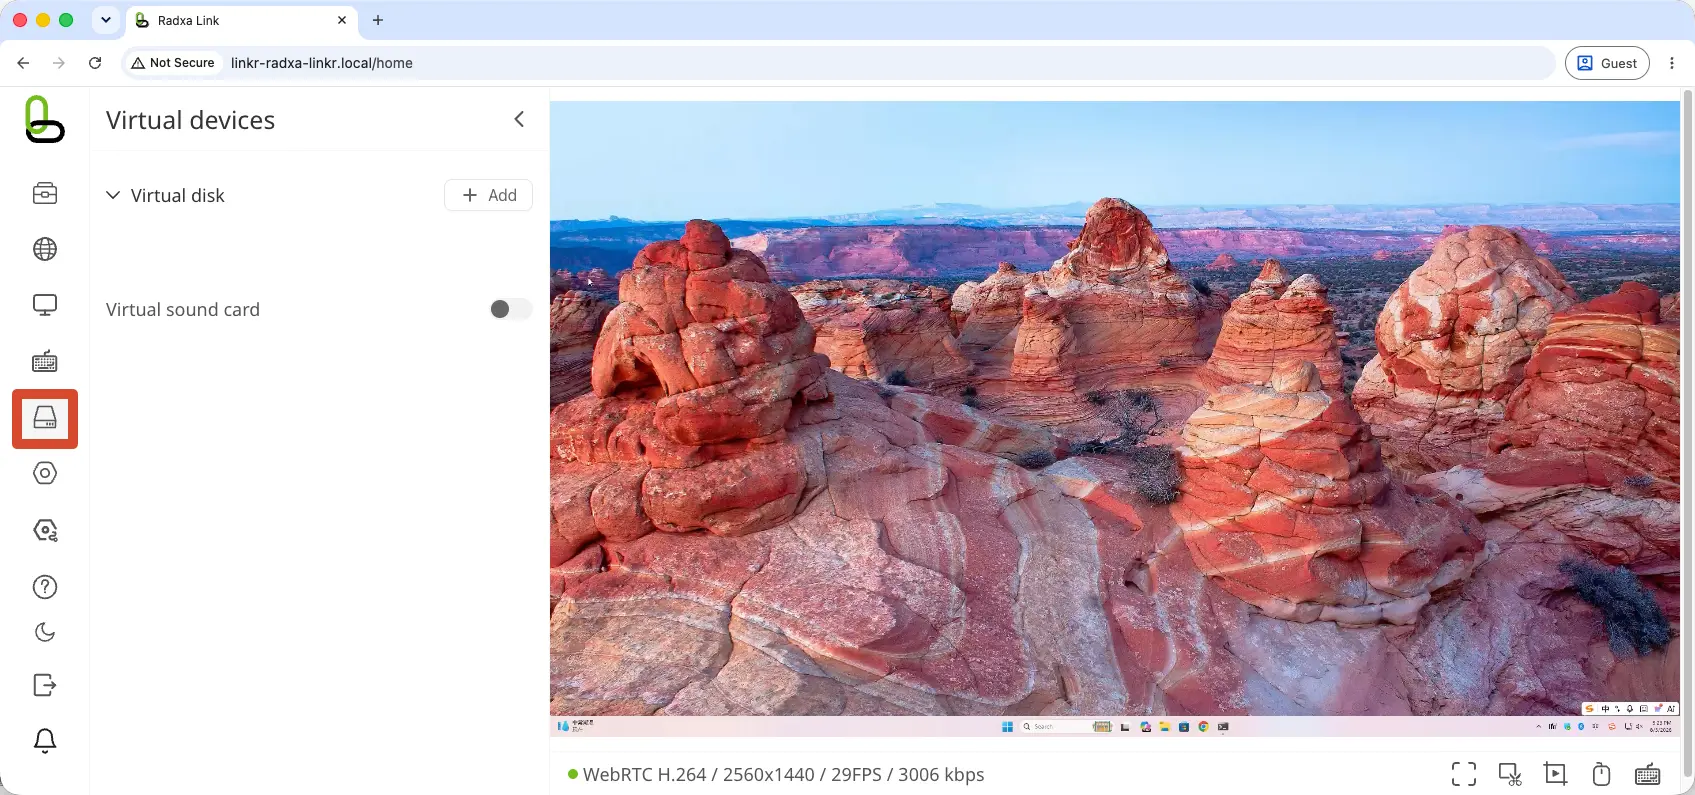
- Virtual Disk
Supports uploading, mounting, unmounting, and deleting ISO, IMG images, and can view storage space and upload progress.
After mounting the image, the controlled device will recognize it as a USB storage device, which can be used to install the system, load drivers, or perform offline maintenance.
-
Only
.isoand.imgformat image files are supported. -
Please confirm that the Linkr has sufficient available storage space before uploading.
- Virtual Sound Card
Simulate a USB sound card on the controlled device and transmit the controlled device's audio to the browser for playback.
System Settings
Used to manage the Linkr's account, device information, and system maintenance functions.
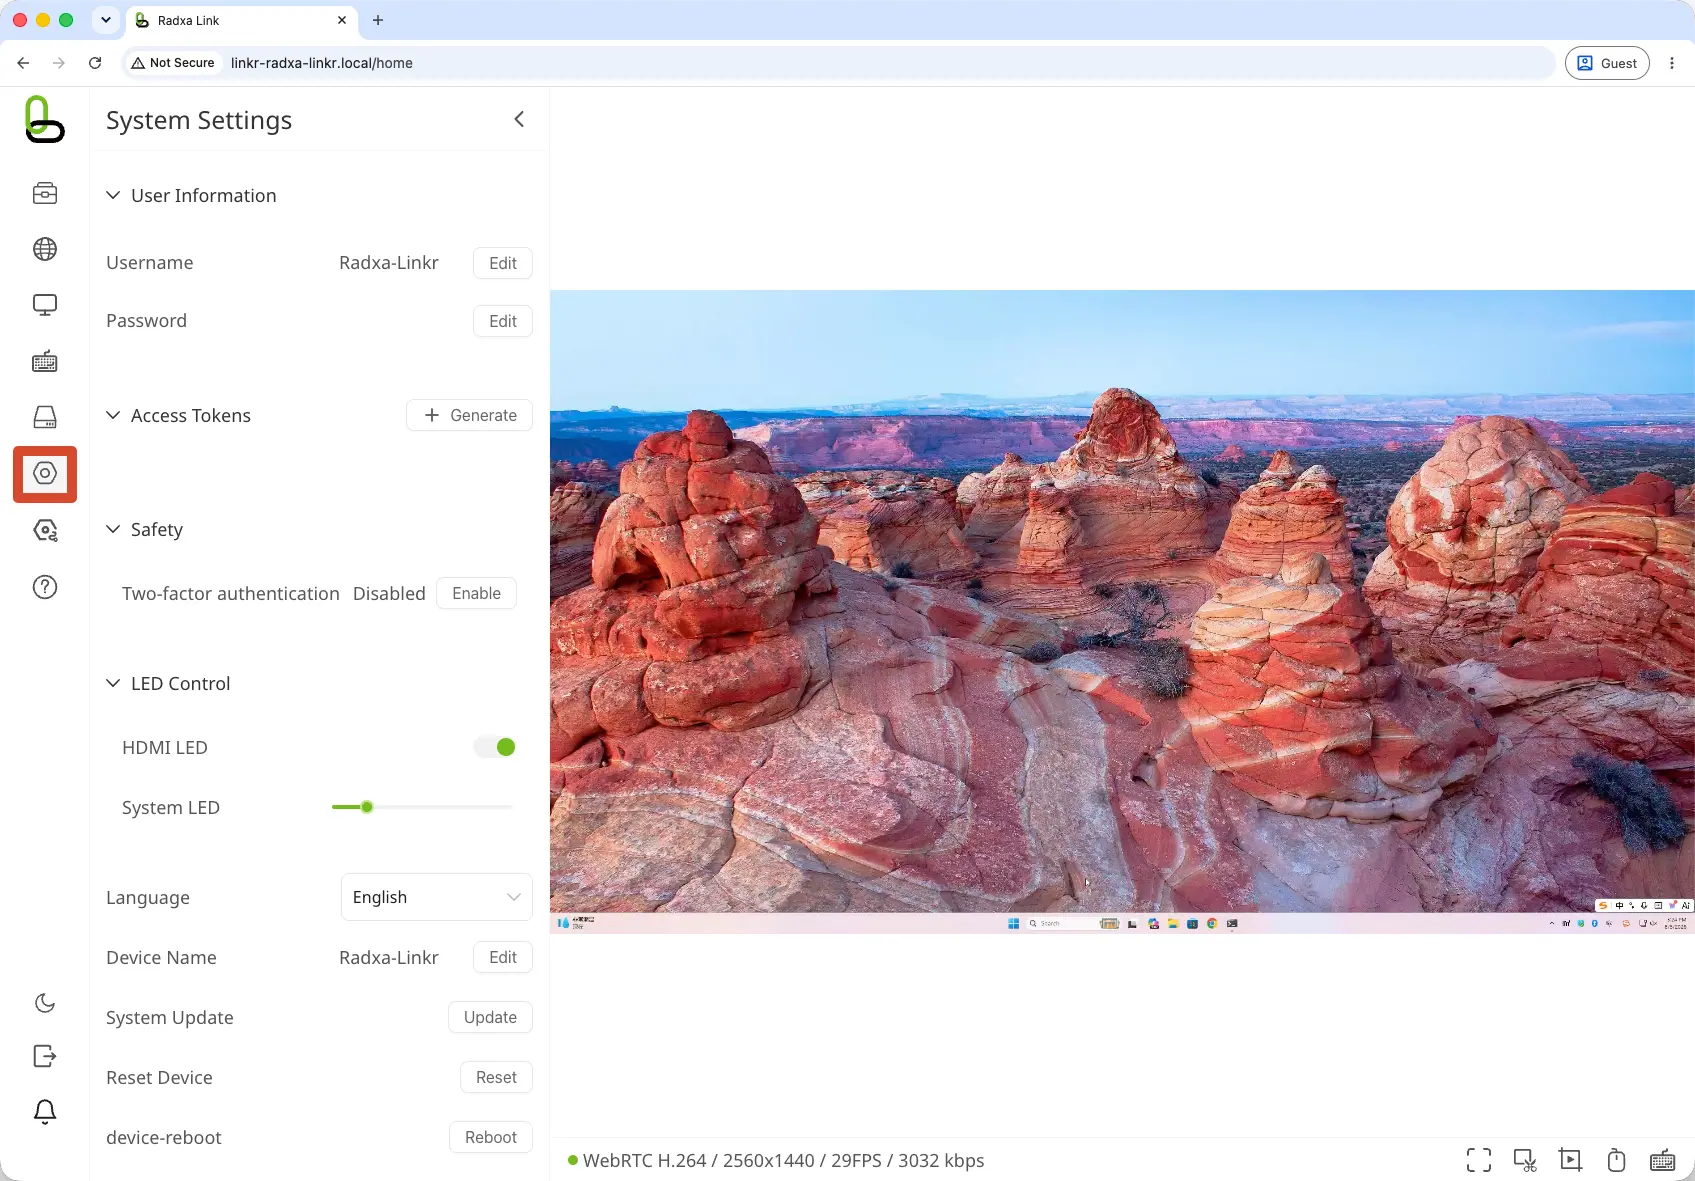
- User Information
Modify the login username and password, used to manage access identity and login security.
- Access Token
Create and delete API Keys for scripts, AI agents, or automation tools to access Linkr interfaces.
- Security
Enable or disable two-factor authentication (2FA).
After enabling, in addition to the username and password, a one-time code generated by the authenticator is required when logging in, further improving account security.
-
Before enabling 2FA, please complete the binding in the authenticator app and confirm that the verification code works normally.
-
Please keep the recovery information safe to avoid being unable to log in after changing or losing the verification device.
- LED Control
Adjust the display state of the Linkr status indicators.
-
HDMI Indicator: Turn the HDMI video status indicator on or off.
-
System Indicator: Adjust the brightness of the system status indicator.
- Language
Switch the display language of the management interface, supporting Simplified Chinese and English.
- Device Name
Modify the device's display name for easy identification of different Linkr devices in the LAN and device list.
- System Update
Upload a local upgrade package, view the update progress, and complete the firmware upgrade.
- Reset Device
Restore the Linkr to the default state and clear the current system configuration.
- Restart Device
Restart the Linkr device.
Advanced Settings
Used to configure the Linkr's remote access and device wakeup functions.
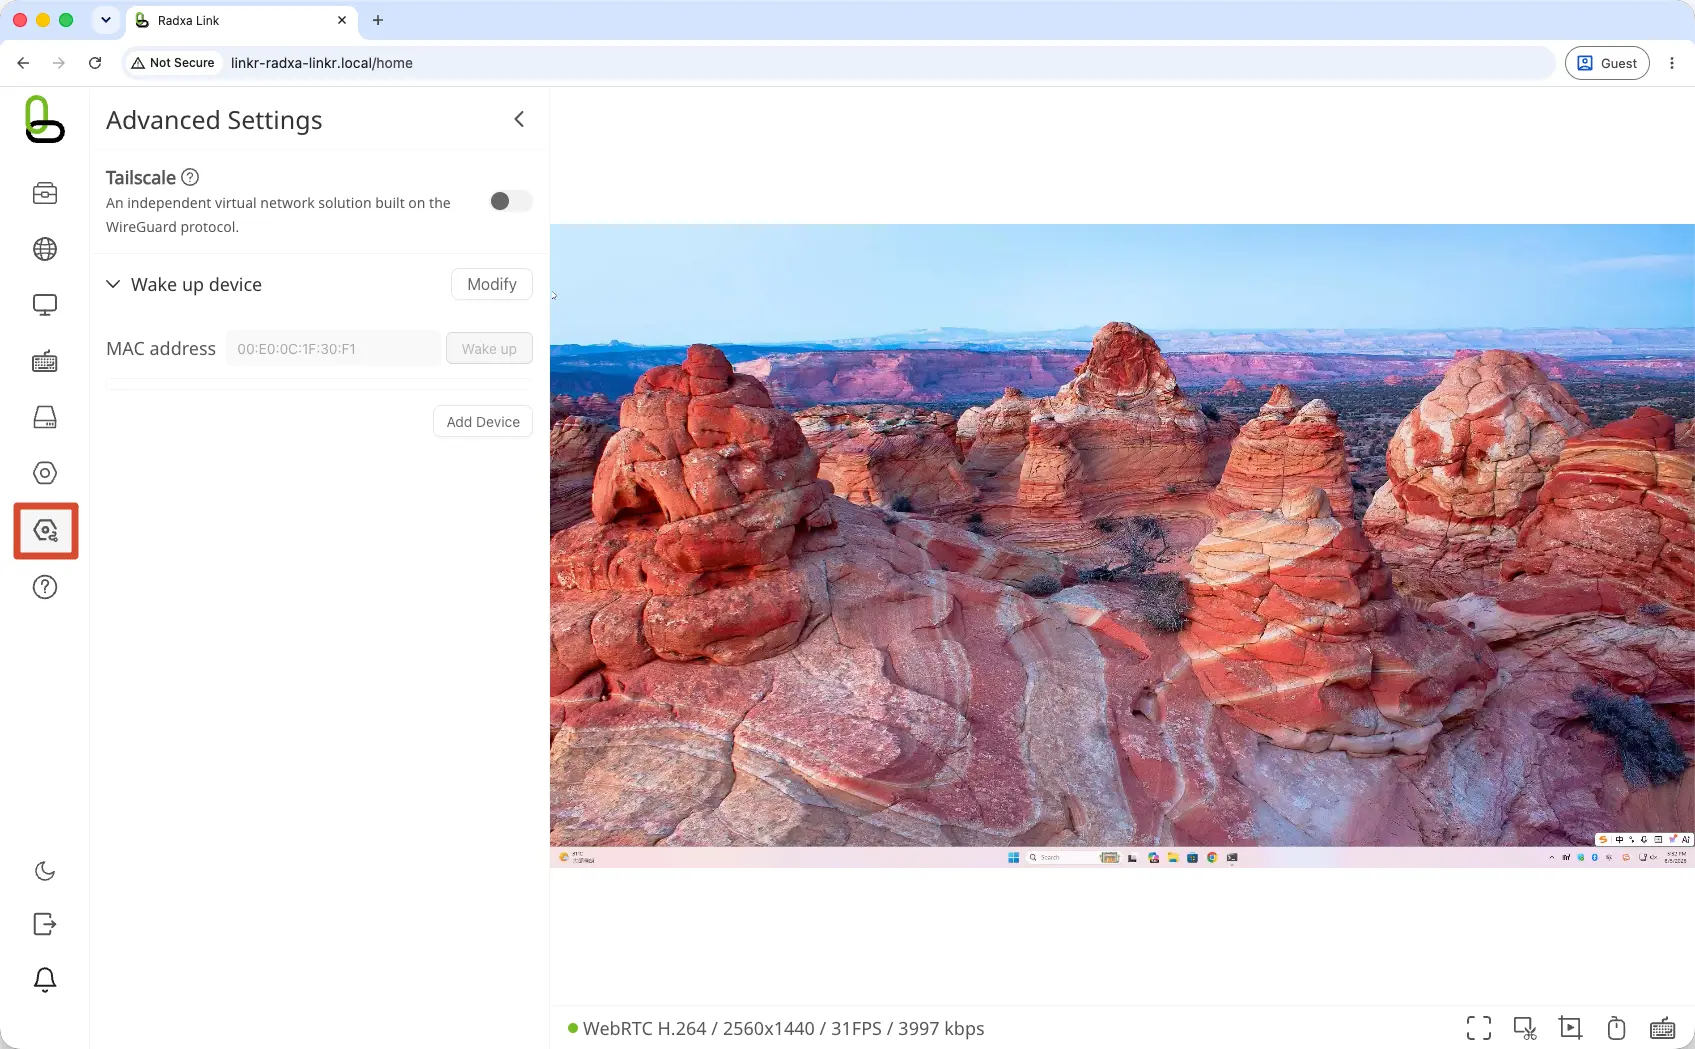
- Tailscale
Connect the Linkr to the Tailscale network to achieve secure cross-LAN access. Suitable for remote O&M or scenarios where the Linkr cannot be accessed directly via the local network.
- MAC Device Wakeup
Send a wakeup command to the controlled device via the network to achieve remote power-on. Suitable for devices that support Wake-on-LAN (WoL).
-
Before using Tailscale, please ensure the Linkr is connected to the internet via Ethernet or Wi-Fi.
-
Before using MAC device wakeup, you need to enable Wake-on-LAN in the controlled device's BIOS and operating system.
-
Please ensure the filled MAC address belongs to the NIC used by the controlled device for network wakeup.
-
When the device is powered off or the hardware does not support Wake-on-LAN, it cannot be woken up via this feature.
About
Used to view the Linkr's device information, product information, and related agreements, and export operation logs.
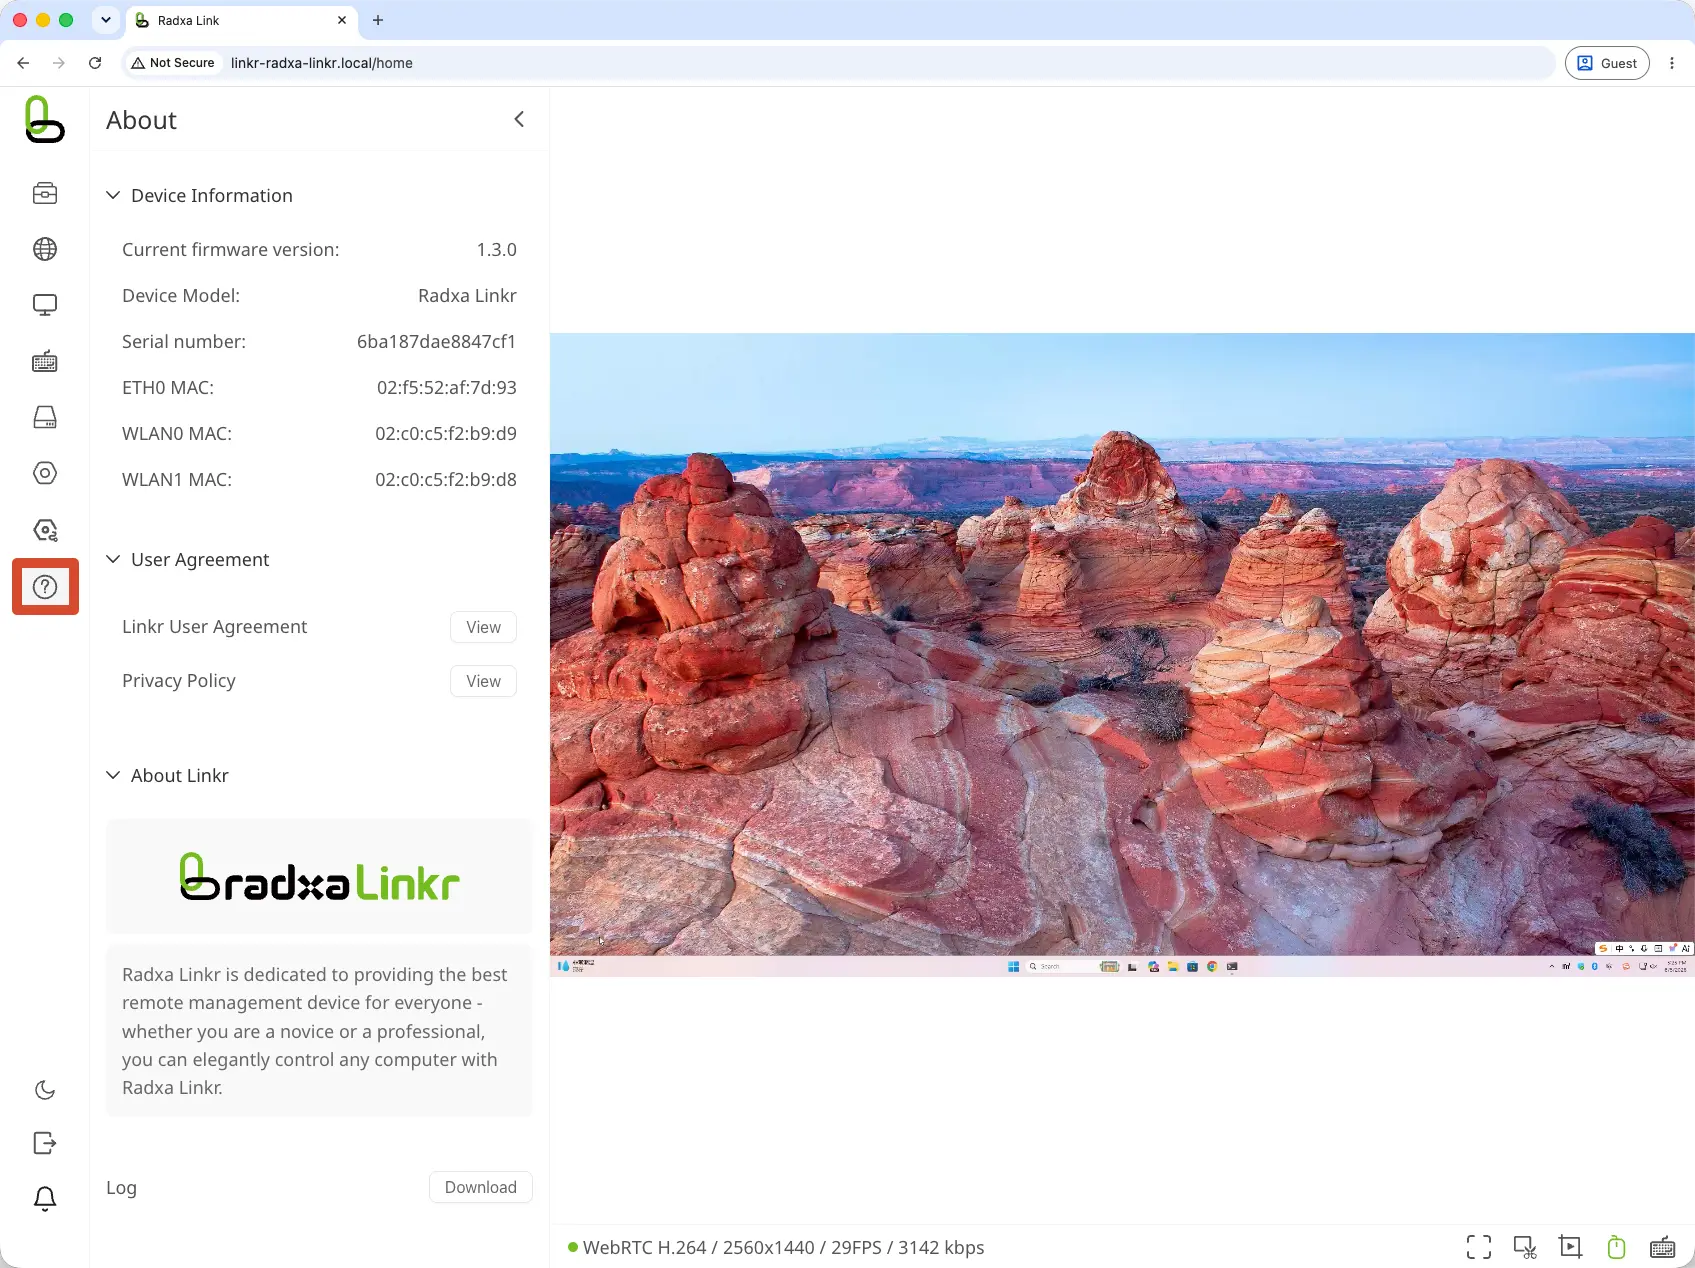
- Device Information
View firmware version, device model, serial number, MAC address, and other information.
- User Agreement
View the Radxa Linkr End User License Agreement.
- About Linkr
View product introduction and related information.
- Logs
Export device operation logs for troubleshooting and technical support.
When contacting technical support, it is recommended to provide the device model, serial number, firmware version, and log file together for quick problem locating.
Global Operations
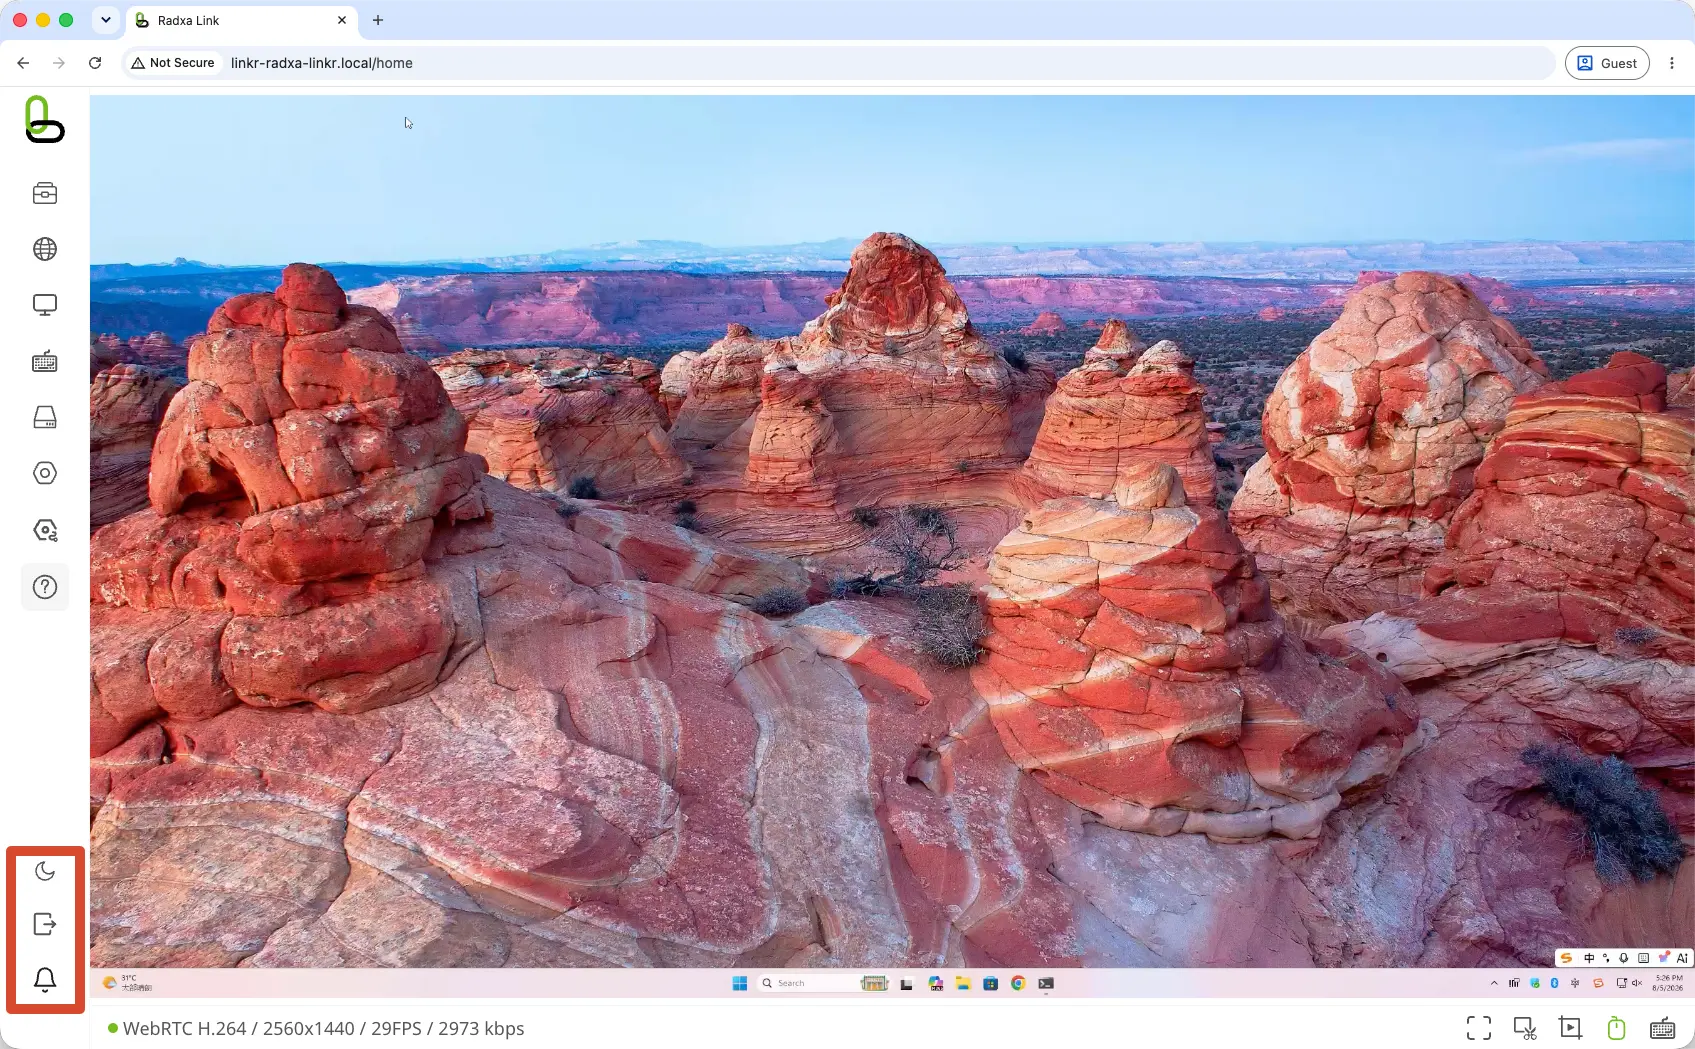
- Theme Switch
Switch between light or dark display mode.
- Log Out
End the current login state and return to the login page.
- Message Notification
View task progress and device status notifications.
Status / Toolbar (Bottom)
Located at the bottom of the remote screen, used to view the current video status and quickly perform common operations.
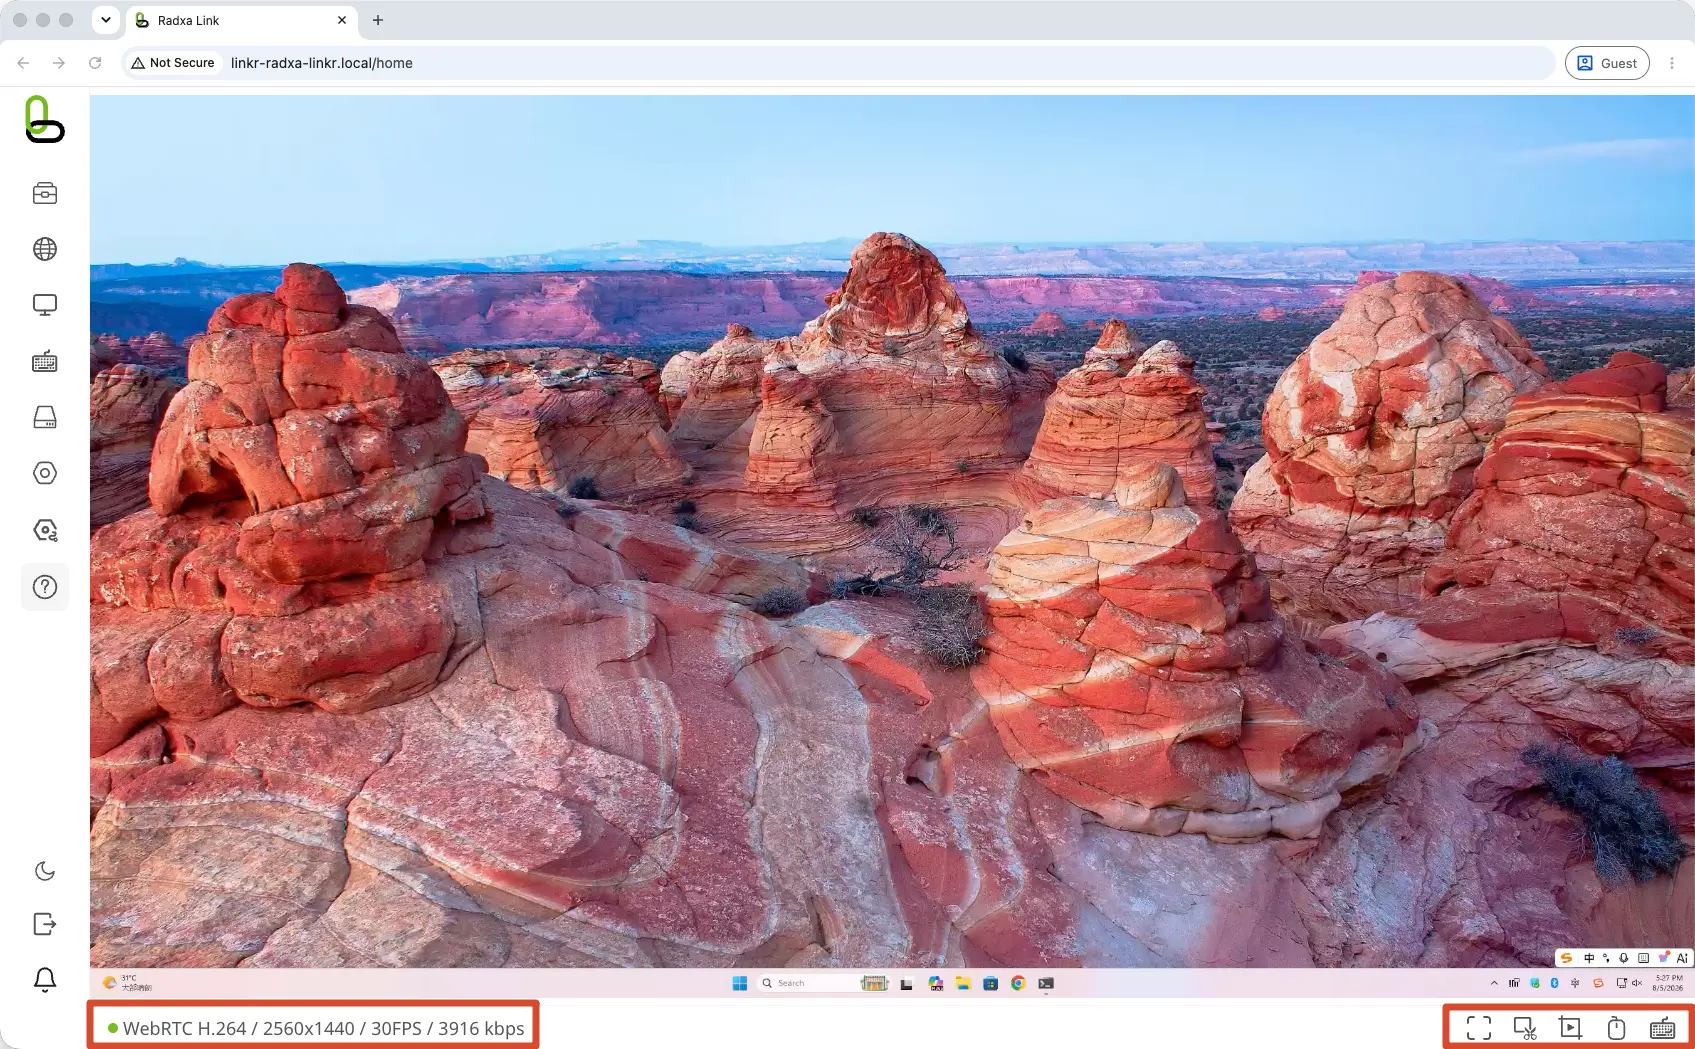
Status Bar
Used to display real-time connection and transmission information of the remote video: connection status / transmission protocol / video encoding / resolution / frame rate / bitrate
Toolbar
Provides common operations during remote control:
- Fullscreen
Switch the remote screen to fullscreen display.
- Screenshot
Capture the current remote screen, and supports preview or saving.
- Screen Recording
Start or stop recording the remote screen, and supports preview and downloading the recording file.
- Mouse Control
Quickly enable or disable mouse input, and can control the display of the local mouse pointer.
- On-screen Keyboard
Turn the virtual keyboard on or off, suitable for touch devices or scenarios without a physical keyboard.
Controlled Device Screen (Center)
Used to display the real-time screen output by the controlled device via HDMI, and receive keyboard and mouse operations.