Windows Host
File Download
Please go to Download Page to download Loader file and System Image
Install RKDevTool
RKDevTool is Rockchip's software for USB burning on Windows platform. If RKDevTool is not installed on your Windows host, please follow the steps below to install it.
Please download and extract the following files to install RKDevTool:
- RKDevTool v2.96 (Includes Chinese documentation)
- DriverAssistant v5.0
Installation of drivers
Download and unzip DriverAssistant, then execute DriverInstall.exe and click the Install Driver button to install the driver.
If you have already installed another version of driver, please click Uninstall Driver to uninstall the driver first, and then reinstall it again.
Install RKDevTool
unzip RKDevTool_Release_v2.96_zh.zip ,click RKDevTool.exe to open.
Enter Maskrom mode
What is Maskrom mode?
Maskrom mode, also known as Loader mode, is a special boot mode typically used for recovering or repairing problematic devices.
This mode allows users to interact directly with the device's hardware without needing the operating system.
In Maskrom mode, users can communicate with the device via a computer or other interface and execute a series of commands to resolve issues with the device.On MacOS:
Results after executing lsusb: Output:Bus 000 Device 004: ID 2207:350b Fuzhou Rockchip Electronics Co., Ltd. Composite Device
On Linux:
Results after executing lsusb: Output:Bus 001 Device 030: ID 2207:350b Fuzhou Rockchip Electronics Company
On Windows:
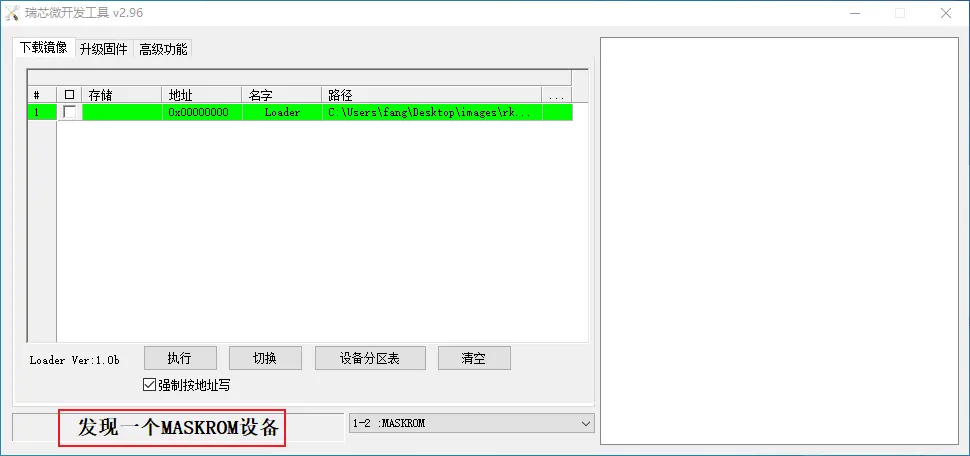
Open RKDevTool, and you will see the device status as "Found One MASKROM Device."
How to enter Maskrom mode
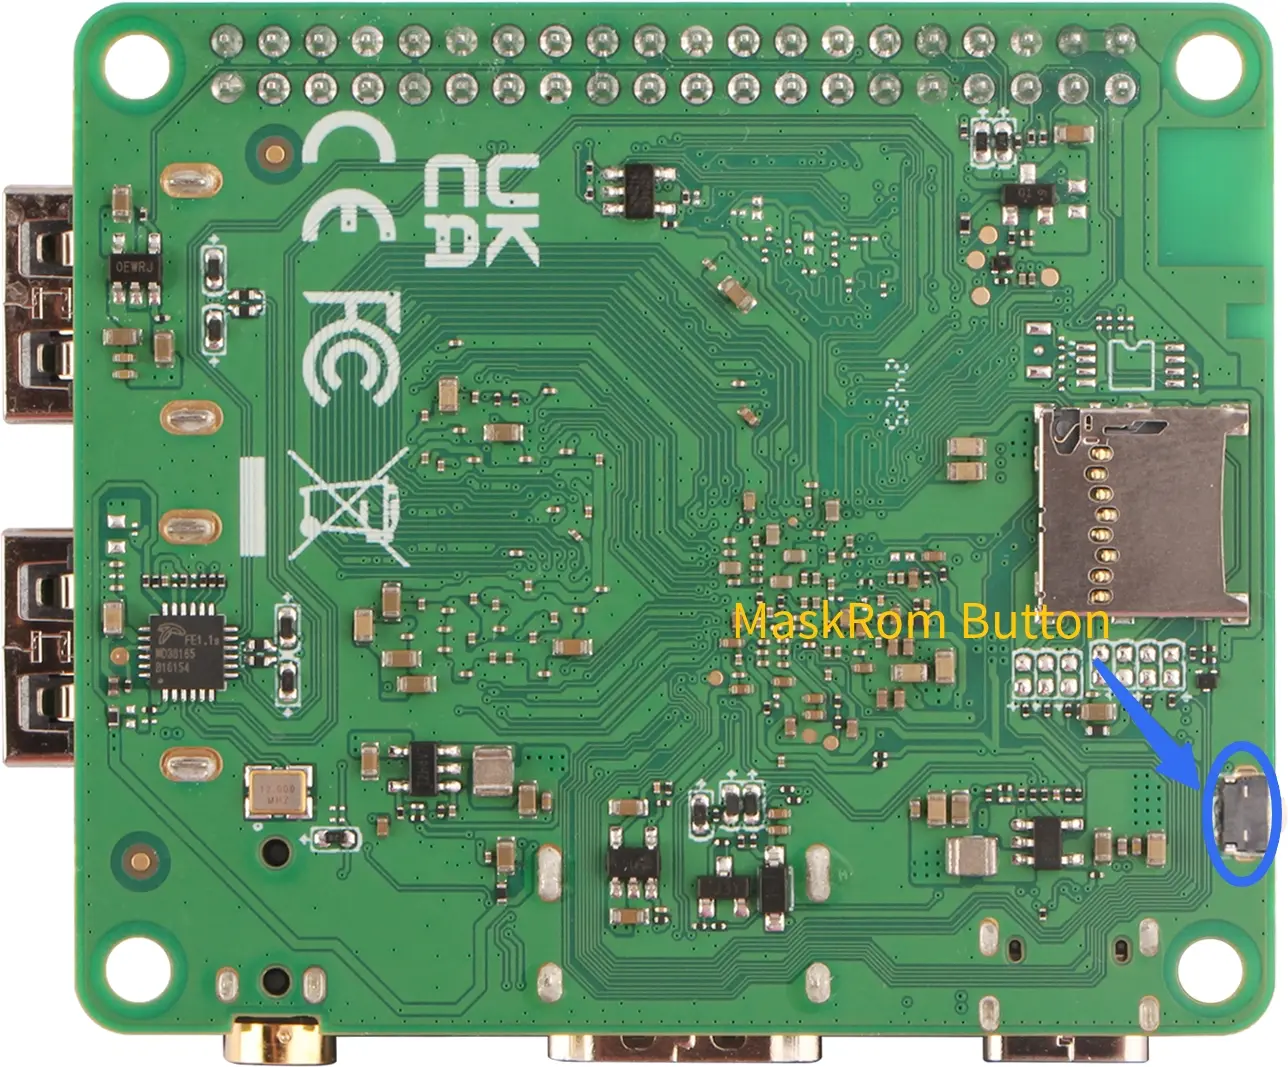
- Press and hold the Maskrom button.
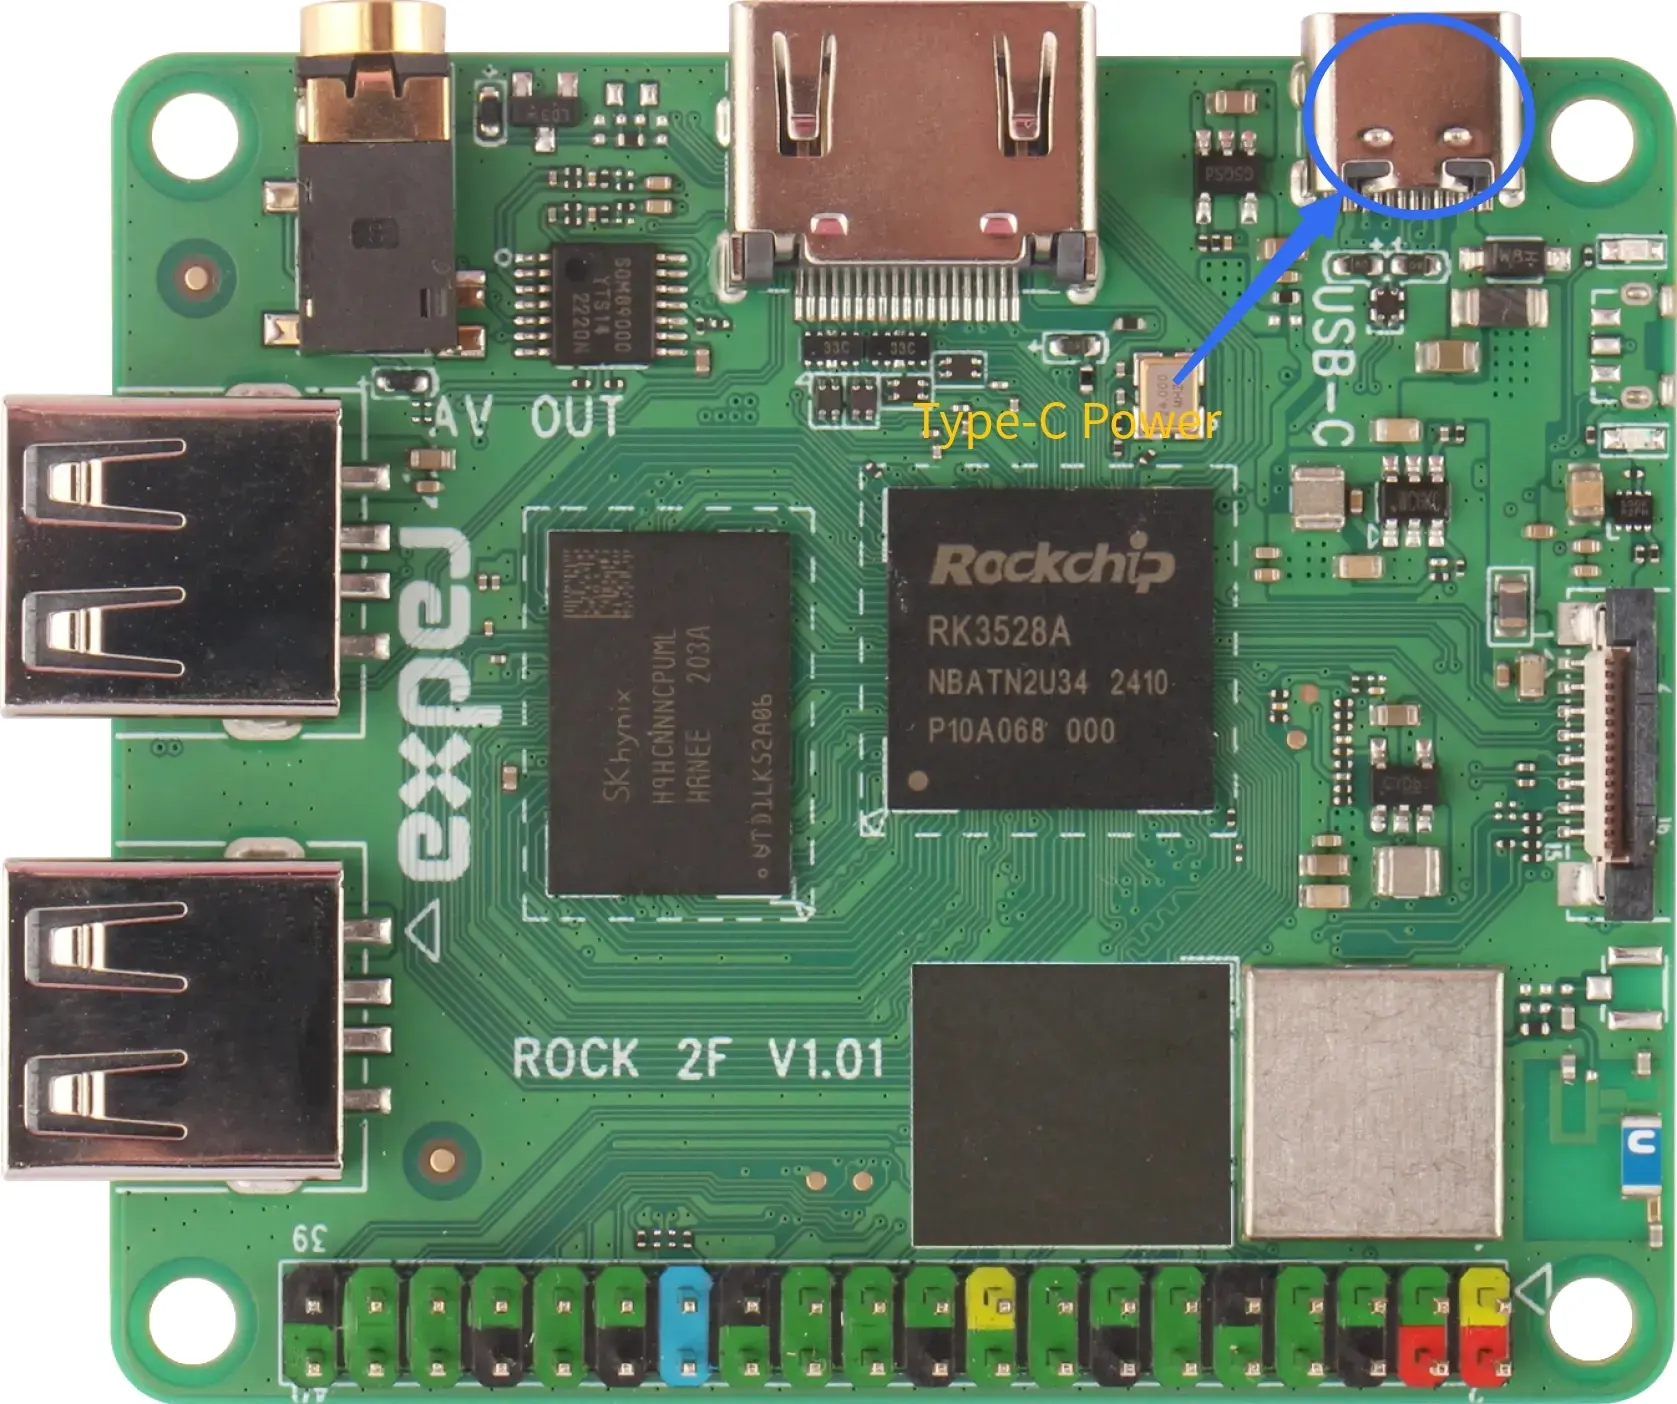
- Power on the device (Connect the USB A-to-C cable to the Type-C Power port of the ROCK 2F, and plug the other end into a power source).
- Under normal circumstances, the device should enter Maskrom mode.


If the operation is normal, RKDevTool will prompt A MASKROM device was found.

Flash images into storage media.
eMMC
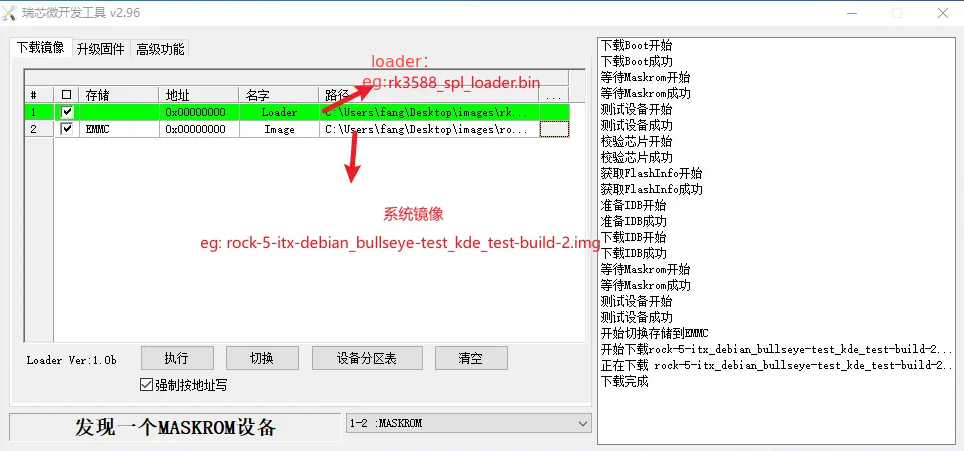
- Select Loader (see File Download section above, the loader in picture below is just a example).
- Right click, select Add item, select eMMC as the storage media.
- Select the system image (see above section on file download, you need to unzip it into .img format after downloading, the image in the picture below is just a example).
- Click Execute to start burning

If there is a prompt Download complete, it means the burning is complete, the system will be restarted automatically after burning, and you can log in to the system via HDMI or serial port.