Installing System to eMMC
We can directly install the Android system into the eMMC module. Please refer to the Installing System to microSD Card section. This article mainly describes how to install the Android system in update format to the ROCK 4A/4B/4A+/4B+/4SE eMMC via Maskrom mode.
File Downloads
Download the ROCK 4A/4B/4SE system images from the resource download page.
Entering Maskrom Mode
- With onboard eMMC
- Without onboard eMMC
- Remove the microSD card and disconnect the power
- If there is an SPI Nor Flash on the board, short the SPI Nor Flash pins
- Connect to the PC host using a USB-A to USB-A cable from the OTG port
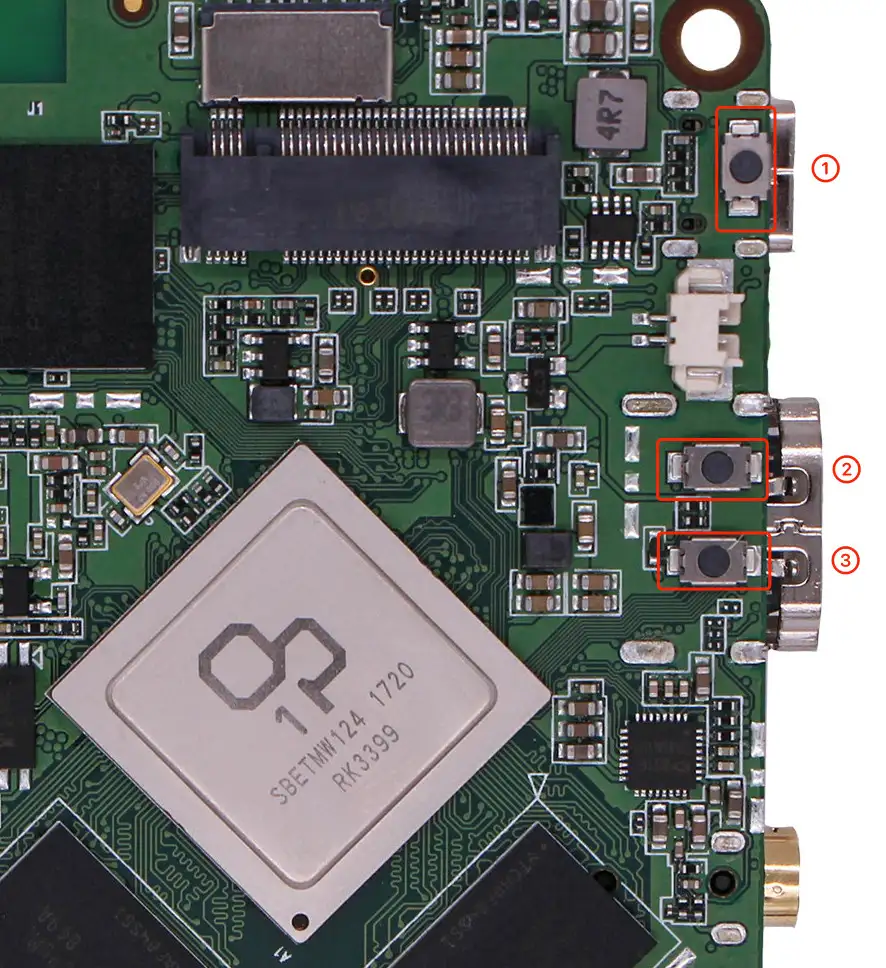
- Press and hold the Maskrom button
- Connect the power cable while holding the button, then release the Maskrom button. If the power LED stays solid green, you've successfully entered Maskrom mode
- Remove the microSD card and disconnect the power
- If there is an SPI Nor Flash on the board, short the SPI Nor Flash pins
- Connect to the PC host using a USB-A to USB-A cable from the OTG port
- Connect the power cable. If the power LED stays solid green, you've successfully entered Maskrom mode
- Insert the eMMC module
Installing the System
- MacOS/Linux
- Windows
- Please download and extract the following file to install the upgrade_tool:
- Confirm that the Radxa ROCK 4AB SE has entered Maskrom mode
$ sudo upgrade_tool ld
Program Log will save in the /root/upgrade_tool/log/
List of rockusb connected(1)
DevNo=1	Vid=0x2207,Pid=0x330c,LocationID=19	Mode=Maskrom
$ sudo upgrade_tool uf rock4xx-android-xx-update.img
- Download and extract the following files to install RKDevTool:
- RKDevTool v2.96 (includes Chinese documentation)
- DriverAssitant v5.14
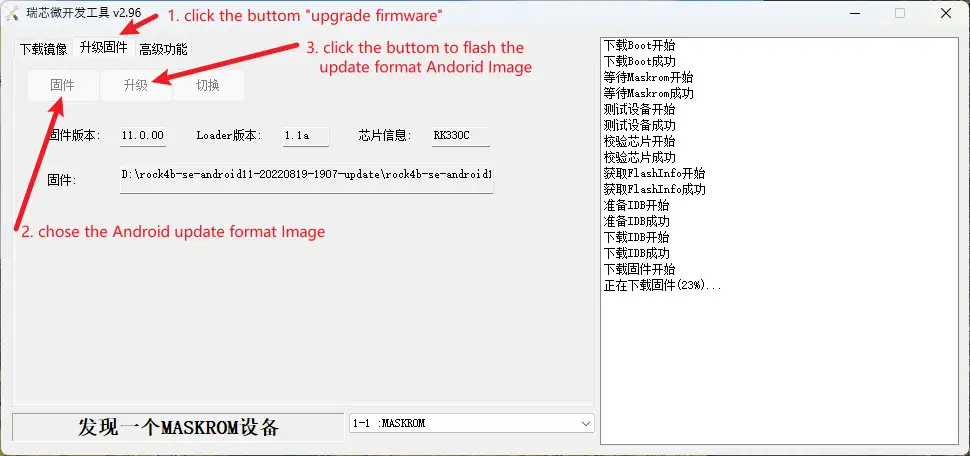
- Select "Upgrade Firmware"
- Click "Firmware" to select the Android Image in update format
- Click "Upgrade"
- The system will automatically boot after flashing is complete