Flashing SPI Boot Firmware
You can think of the SPI boot firmware as the BIOS/UEFI in your personal computer. Just as a PC's BIOS/UEFI is responsible for initializing essential hardware (such as memory, hard drives, keyboards, etc.) before the operating system (like Windows or Linux) starts up, the SPI boot firmware on embedded devices serves a similar role.
The core task of the SPI boot firmware is to initialize critical hardware, such as:
- DDR Memory: Prepares the memory space for the main system operation.
- Clock Frequencies: Sets the operating speed for different parts of the chip.
- Storage Controllers: Enables the system to access storage devices like Micro SD cards, UFS modules, or M.2 NVMe SSDs.
- GPIO (General-Purpose Input/Output) Pins: Configures pin functions for connecting various peripherals.
After completing these initializations, the SPI boot firmware loads the operating system kernel from eMMC / SD card / NVMe SSD / USB drive. This SPI boot firmware is typically stored in a special storage chip on the motherboard called SPI Nor Flash, which is similar to the chip on a PC motherboard that stores the BIOS/UEFI.
When Do You Need to Flash SPI Boot Firmware?
The Radxa ROCK 4D comes pre-installed with compatible SPI boot firmware. If your device is working normally or you haven't performed any operations to erase the SPI Nor Flash, you typically don't need to perform this step.
You only need to reflash the SPI boot firmware in the following situations:
- SPI Flash Content is Corrupted: Similar to a PC's BIOS becoming corrupted and failing to boot
- Firmware Version Upgrade Needed: To gain support for new features or fix known issues
- Specific Development Requirements: For example, starting with a blank SPI Flash or needing to boot an unofficially supported system
- Learning and Exploration Purposes: To gain a deeper understanding of the device's underlying boot mechanism
This tutorial will guide you through the process of flashing the SPI boot firmware, which is an additional step to write the initial bootloader on top of the regular system installation.
Obtaining the Latest SPI Boot Firmware
You need to boot the ROCK 4D using a microSD card. You can refer to the Quick Start guide to complete this step.
After successfully booting the system and ensuring the network connection is working, open the ROCK 4D terminal command line and use the Rsetup tool to update the system.
sudo rsetup
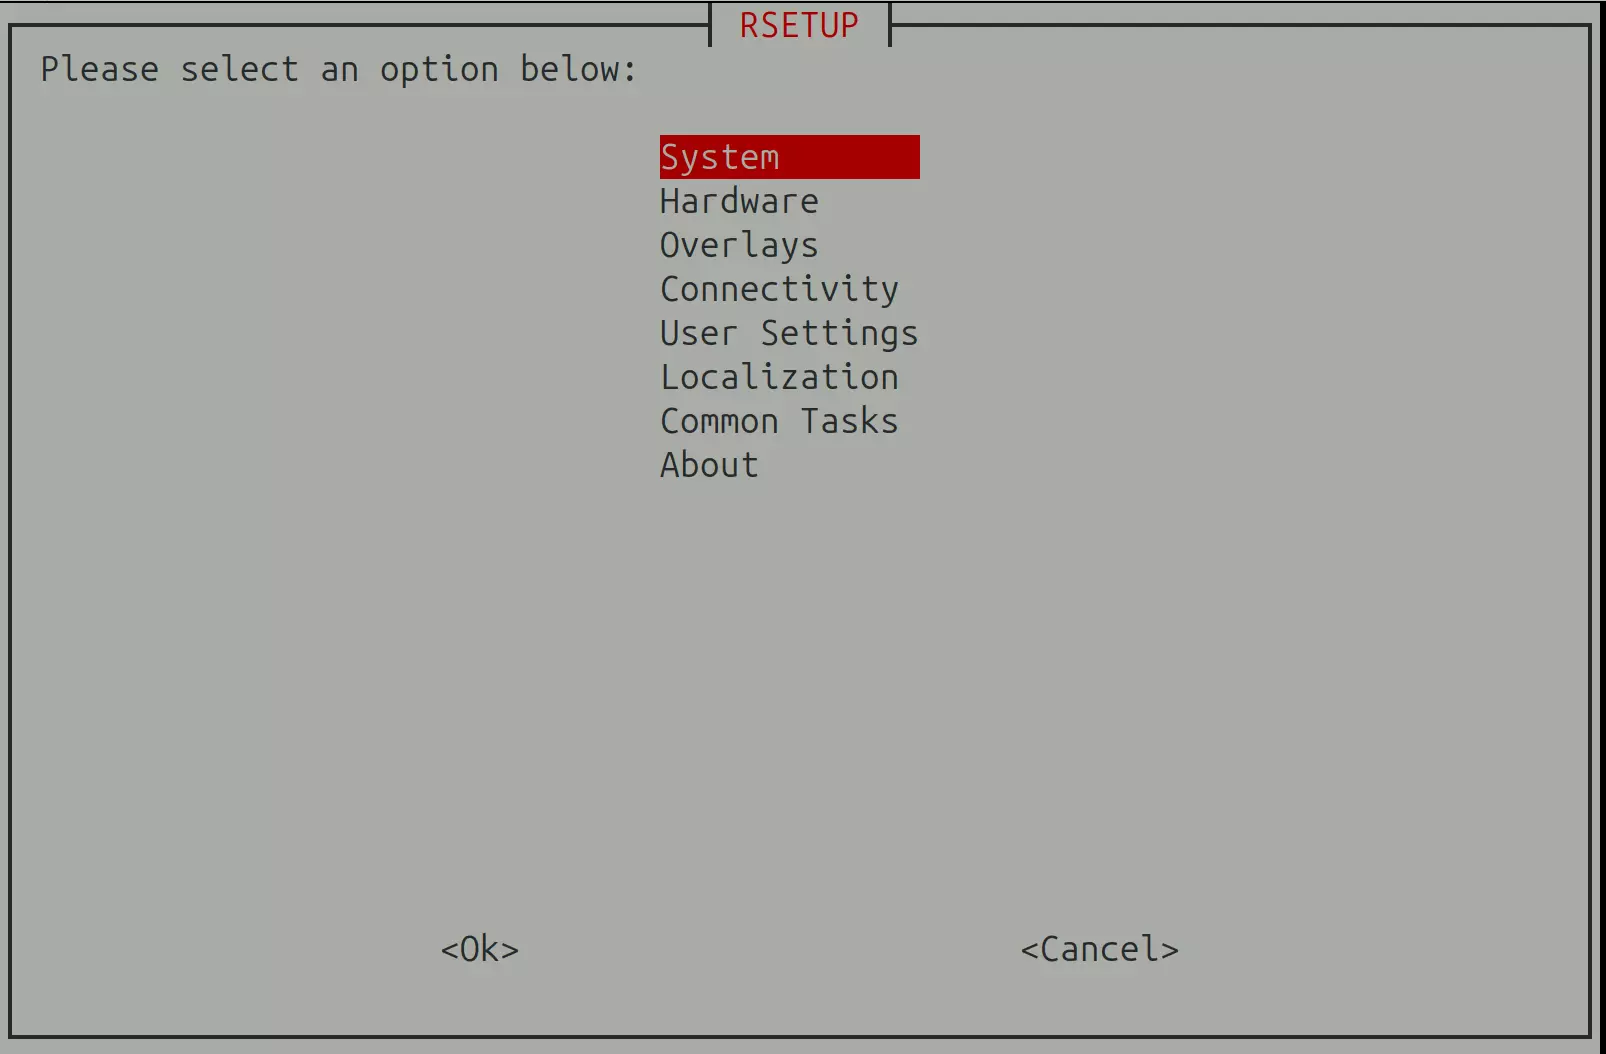
Rsetup Home Interface
Rsetup Tool Guide: For detailed usage instructions, refer to Rsetup Tool
- Select Option: The corresponding option will be highlighted
- Confirm Selection: Press
Enter - Cancel Selection: Press
ESC - Navigate Options: Use
Up,Down,Left,Rightarrow keys - Multiple Selection Interface: Press
Spaceto select,Enterto confirm selection
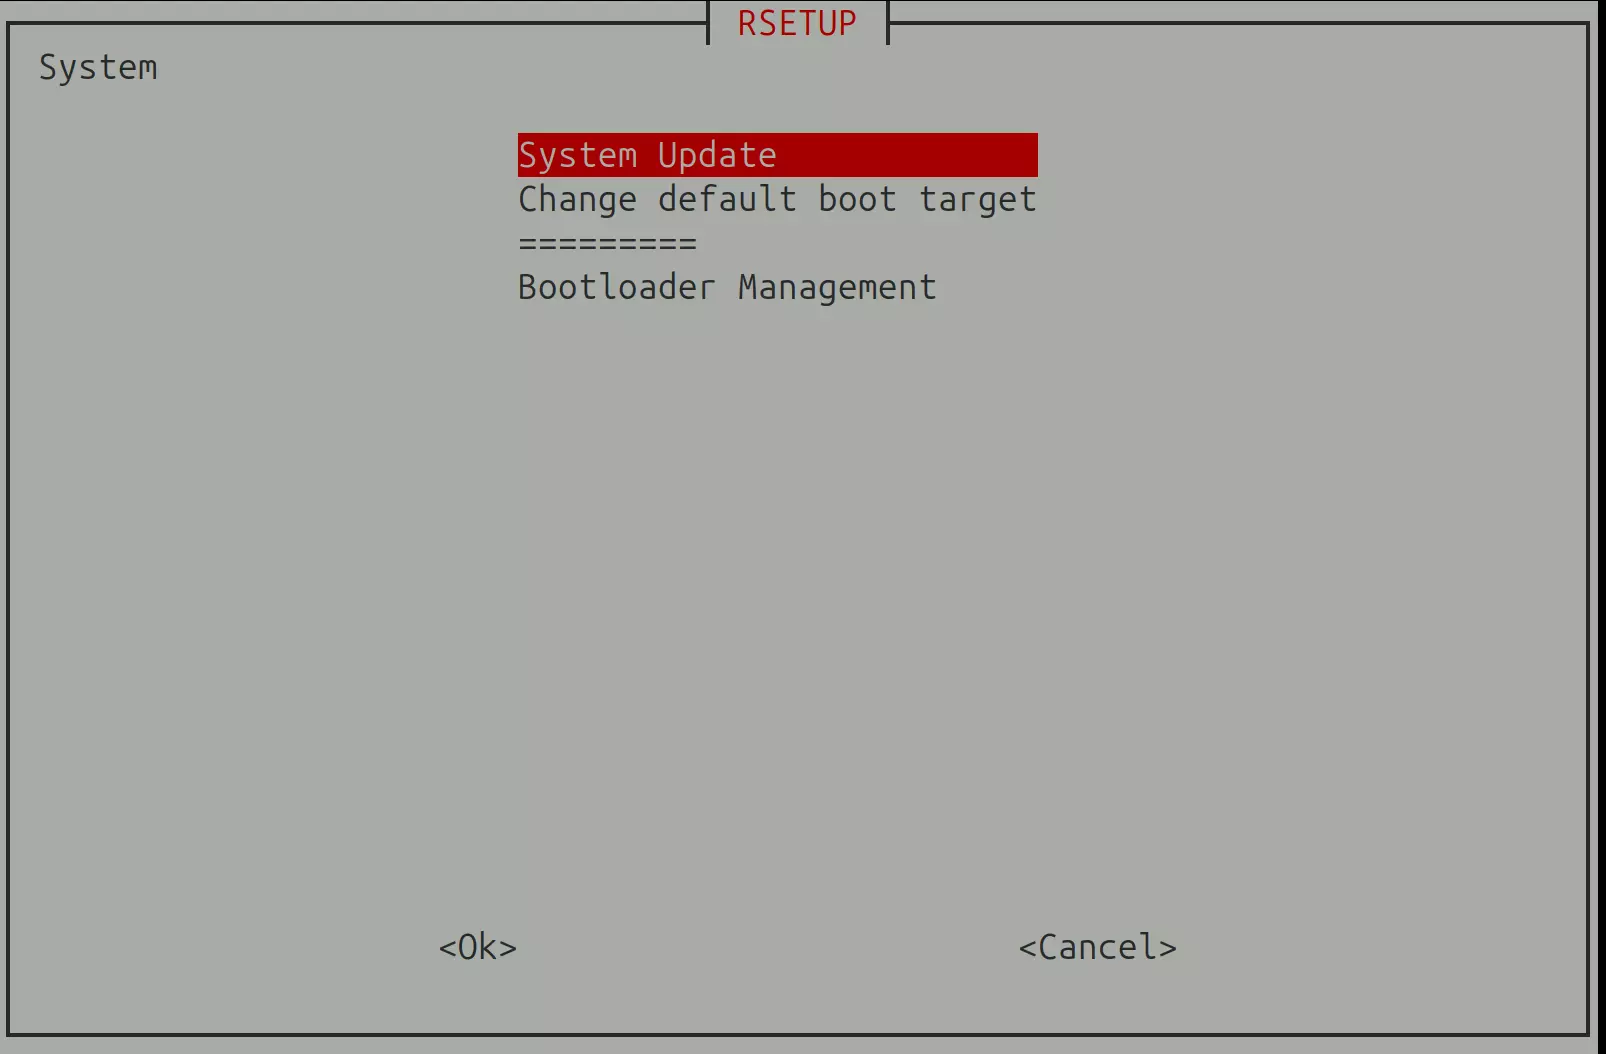
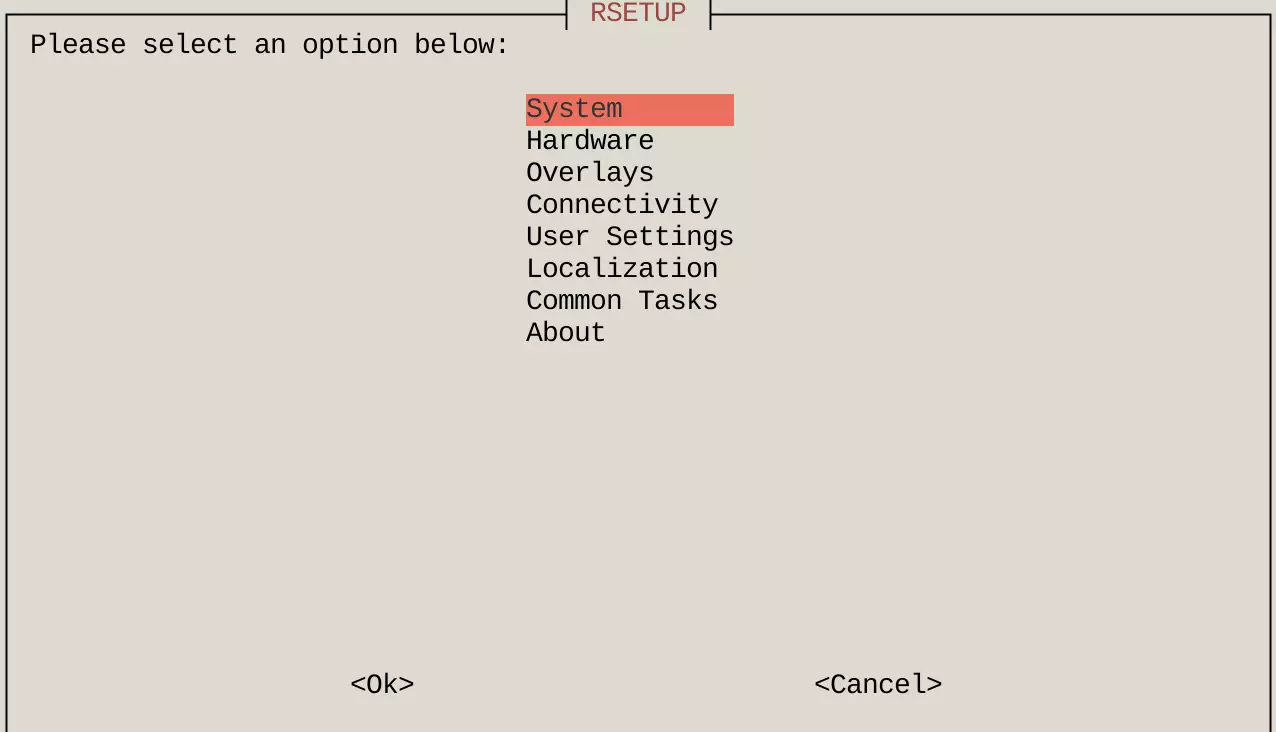
In the Rsetup tool, select System → System Update:
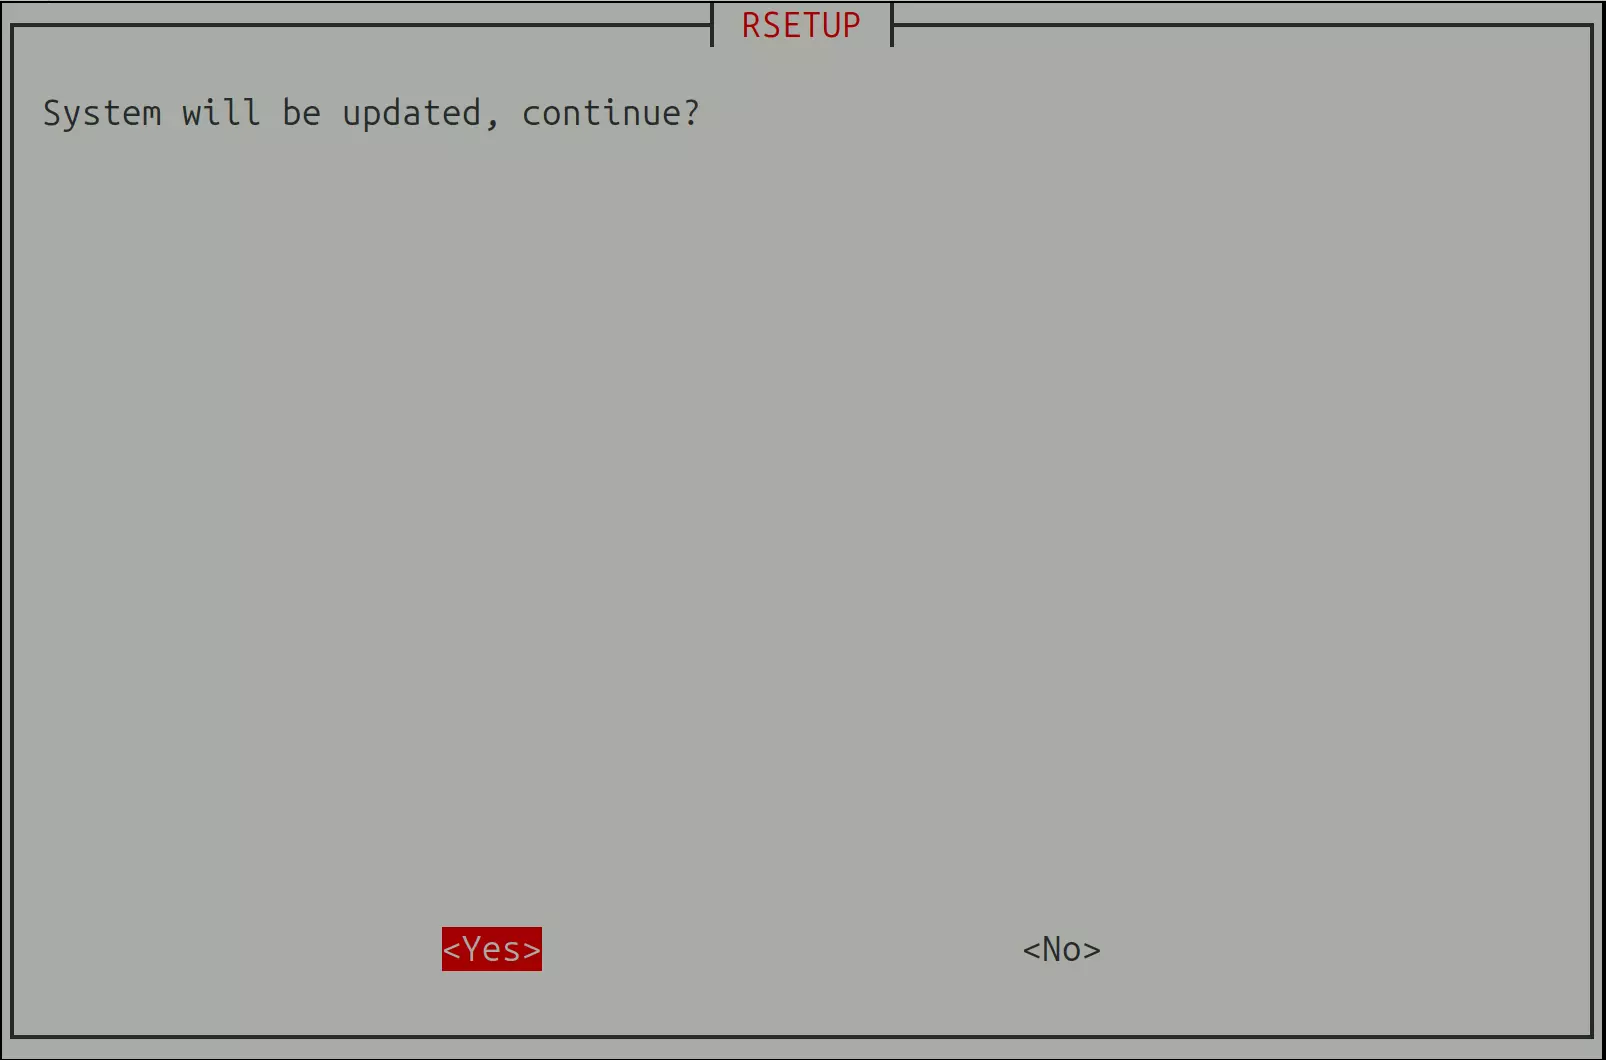
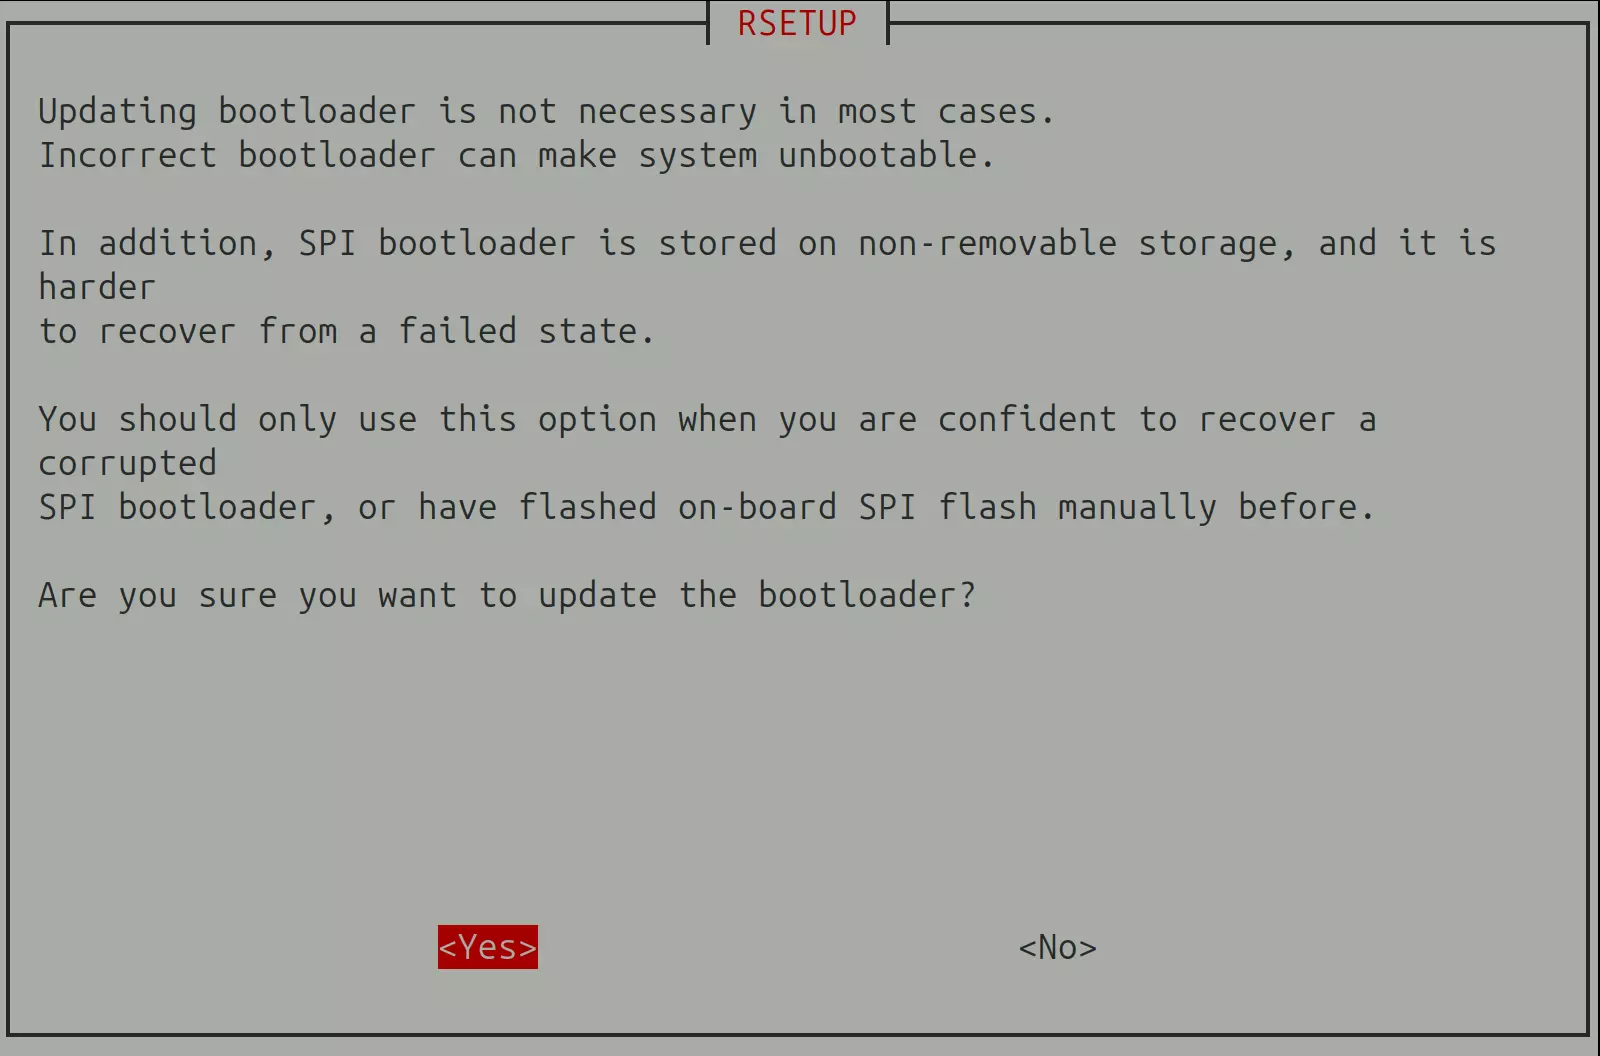
Select 'yes' to continue, then follow the on-screen prompts to complete the remaining operations:
After completing all operations, use the following command to reboot the system.
sudo reboot
Flashing the SPI Boot Firmware
After the system reboots, open the Rsetup tool again.
Select System → Bootloader Management → Update SPI Bootloader:
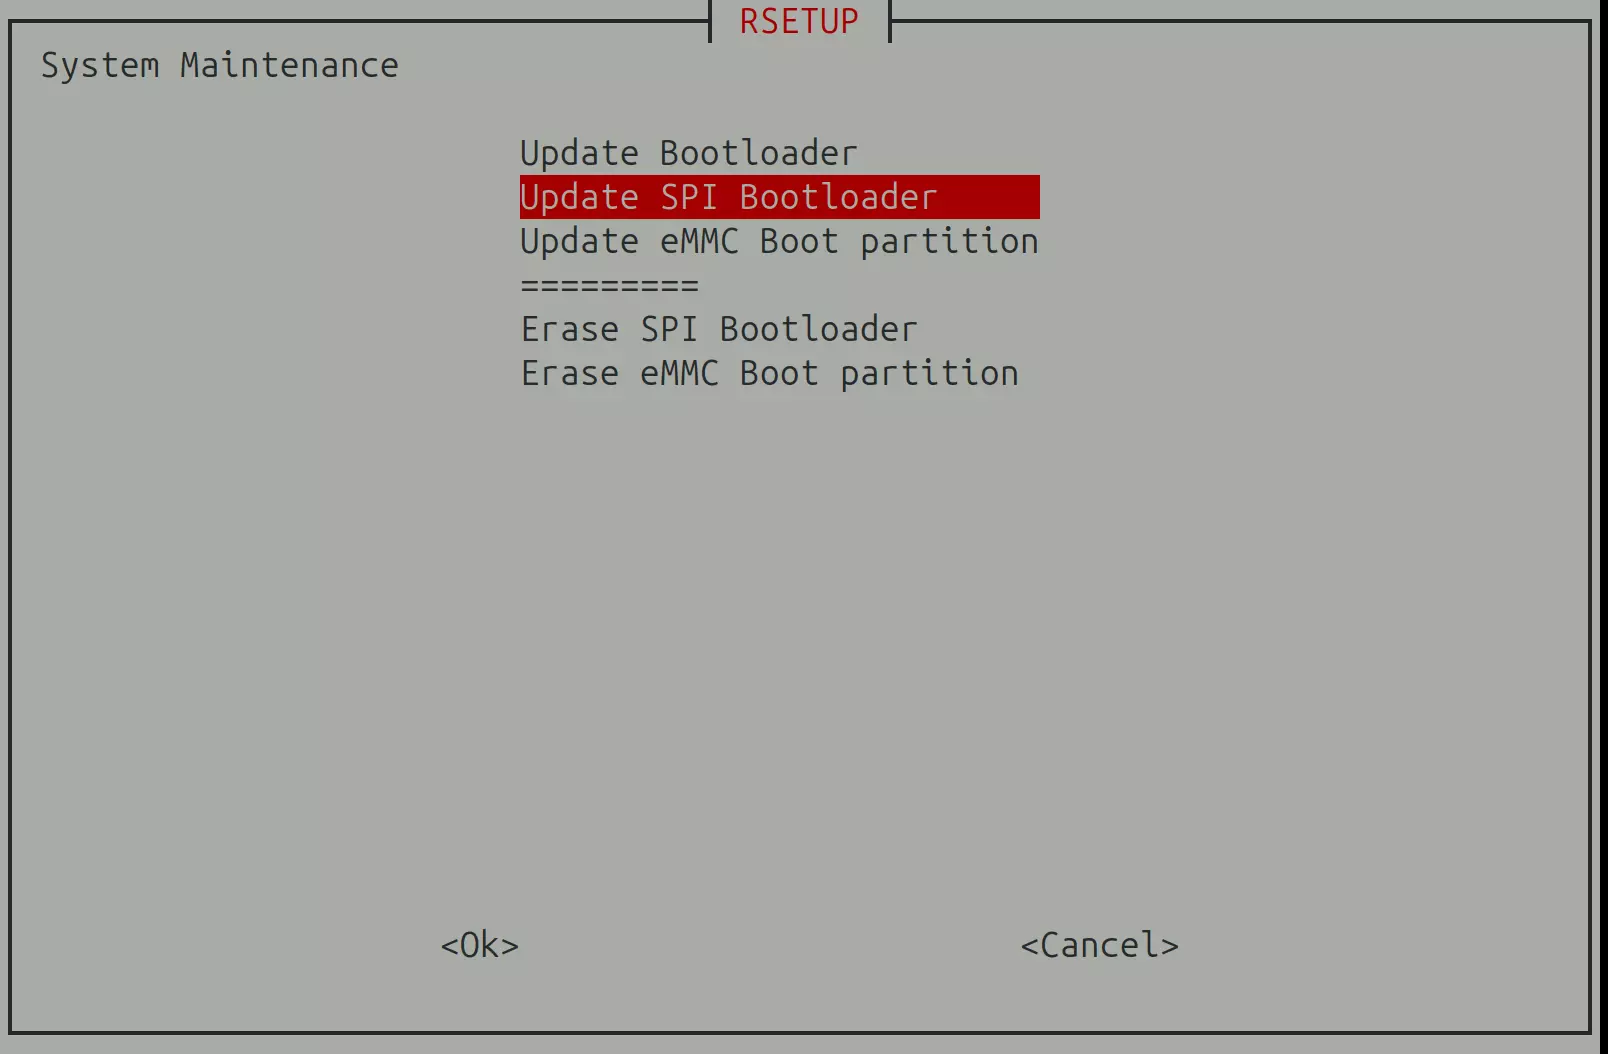
Select 'yes' to continue, then follow the on-screen prompts to complete the remaining operations.
Select the Bootloader file to install: If there are multiple Bootloader options, prioritize the one with the 'spi' suffix.
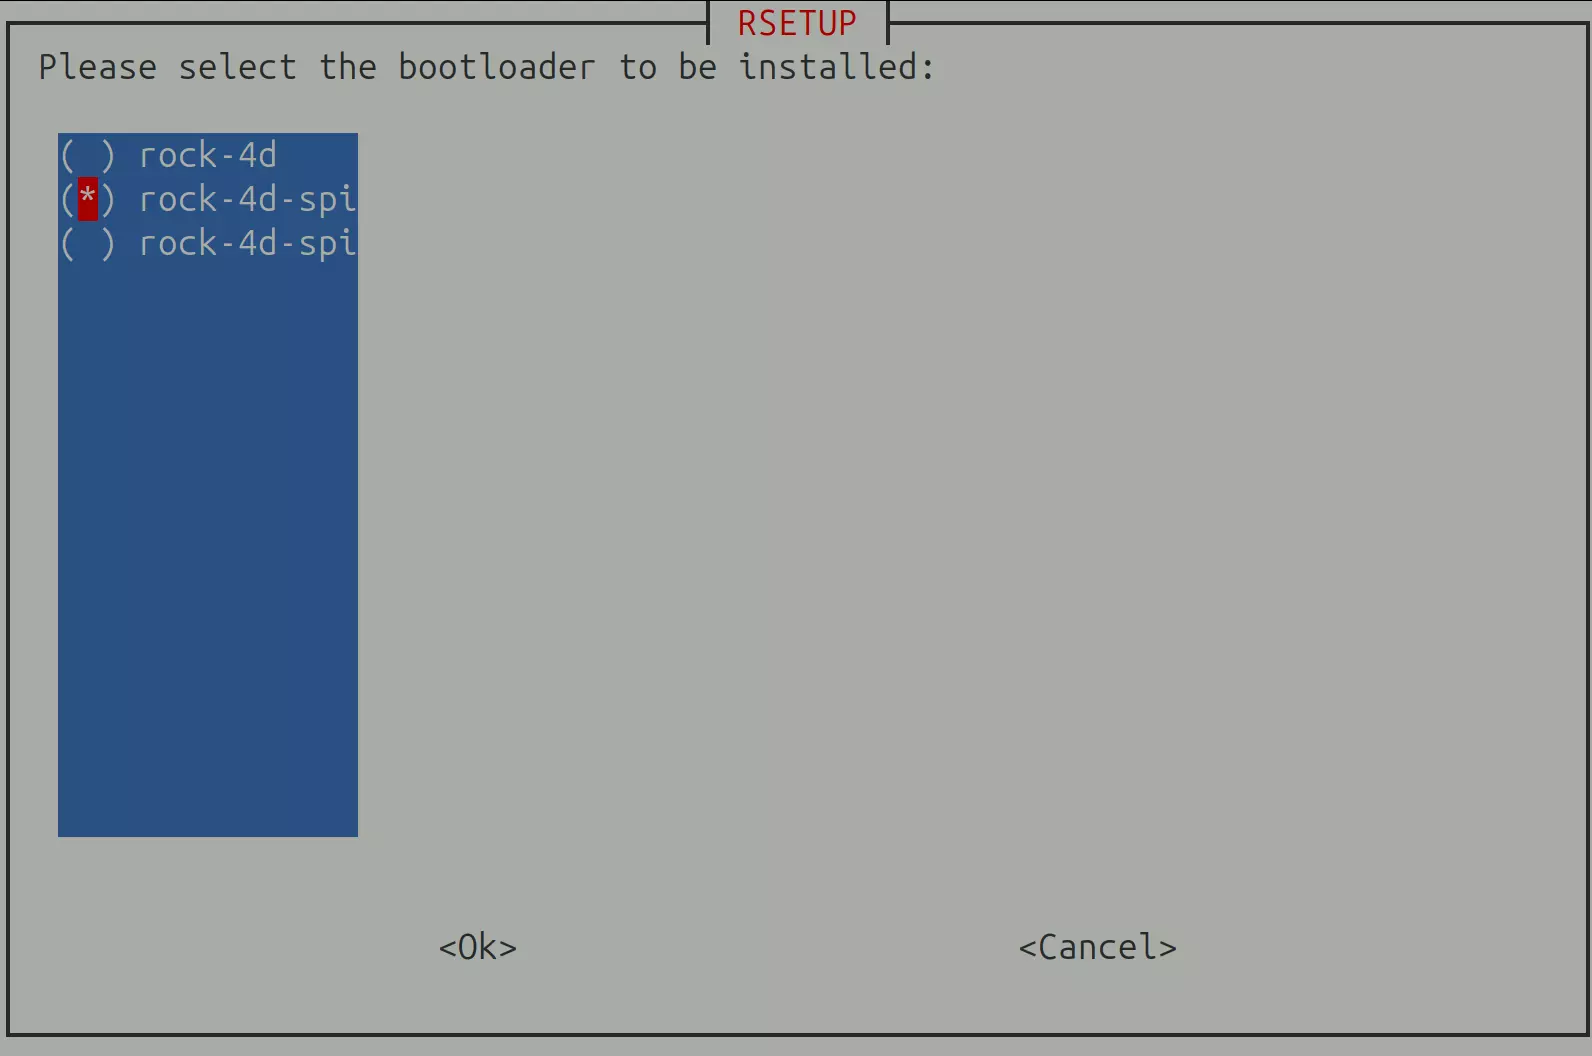
The system will automatically download the latest spi.img and flash it to the SPI Nor Flash.

After completing all operations, use the following command to reboot the system.
sudo reboot
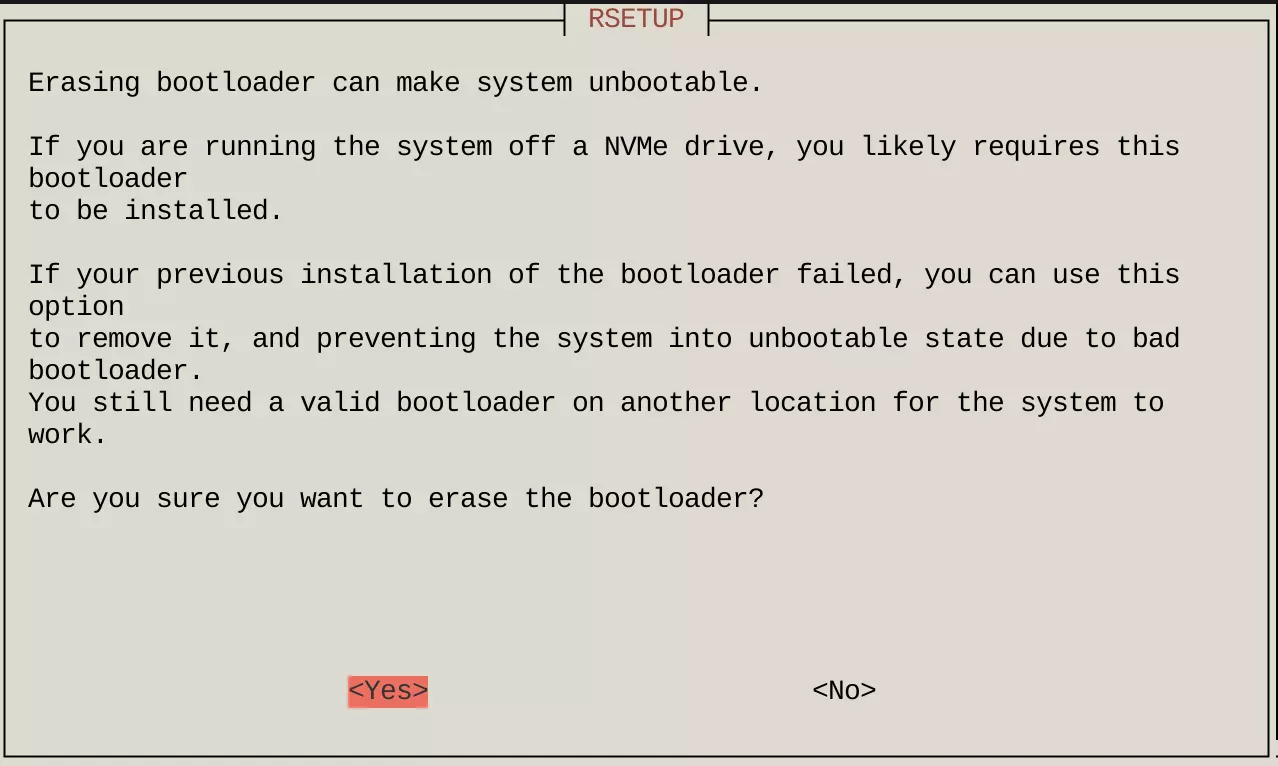
Erasing SPI Boot Firmware
Erasing the SPI Flash will remove the SPI boot firmware stored in it. After erasure, all data in the SPI Flash will be cleared, and the system will be unable to boot.
Enter the rsetup command in the terminal to launch the Rsetup tool interface.
rsetup
- Use the arrow keys to select the
Systemoption, then press Enter to confirm.
- Use the arrow keys to select the
Bootloader Managementoption, then press Enter to confirm.

- Use the arrow keys to select the
Erase SPI Bootloaderoption, then press Enter to confirm.
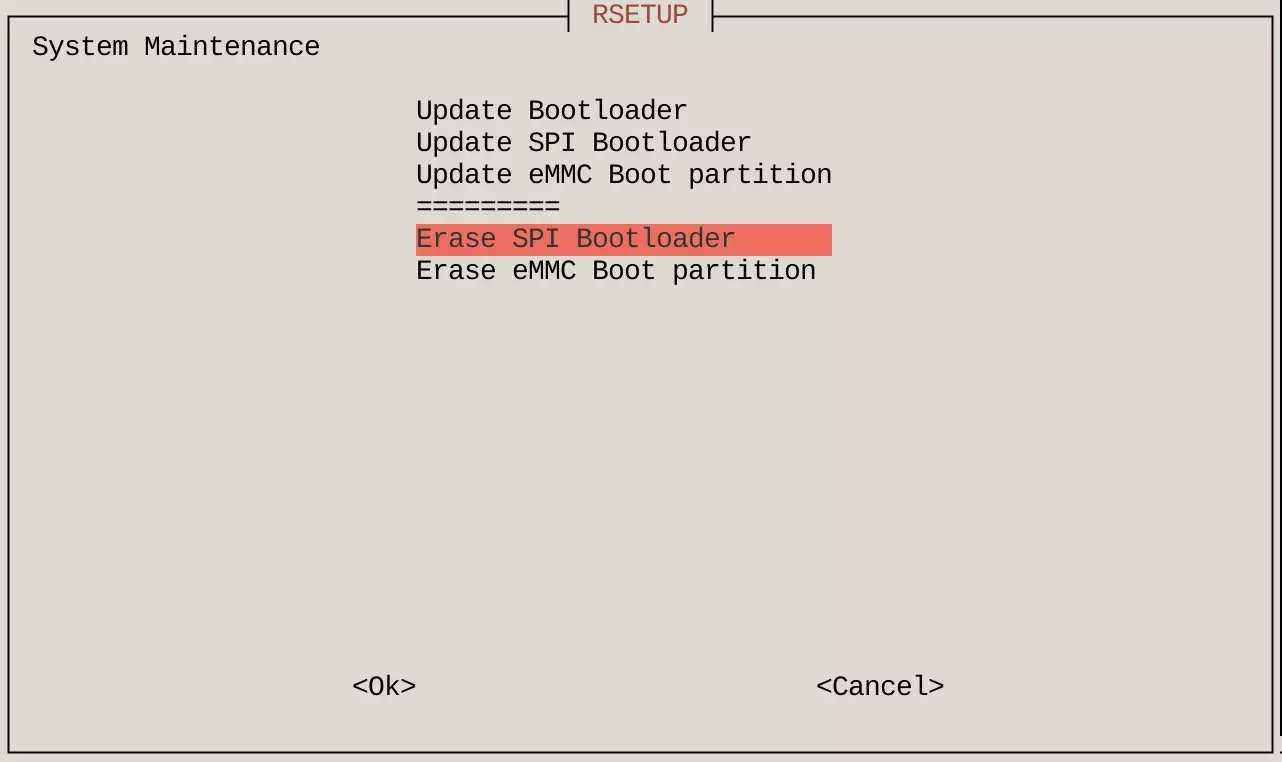
- In the pop-up confirmation window, select
YESand press Enter to confirm.
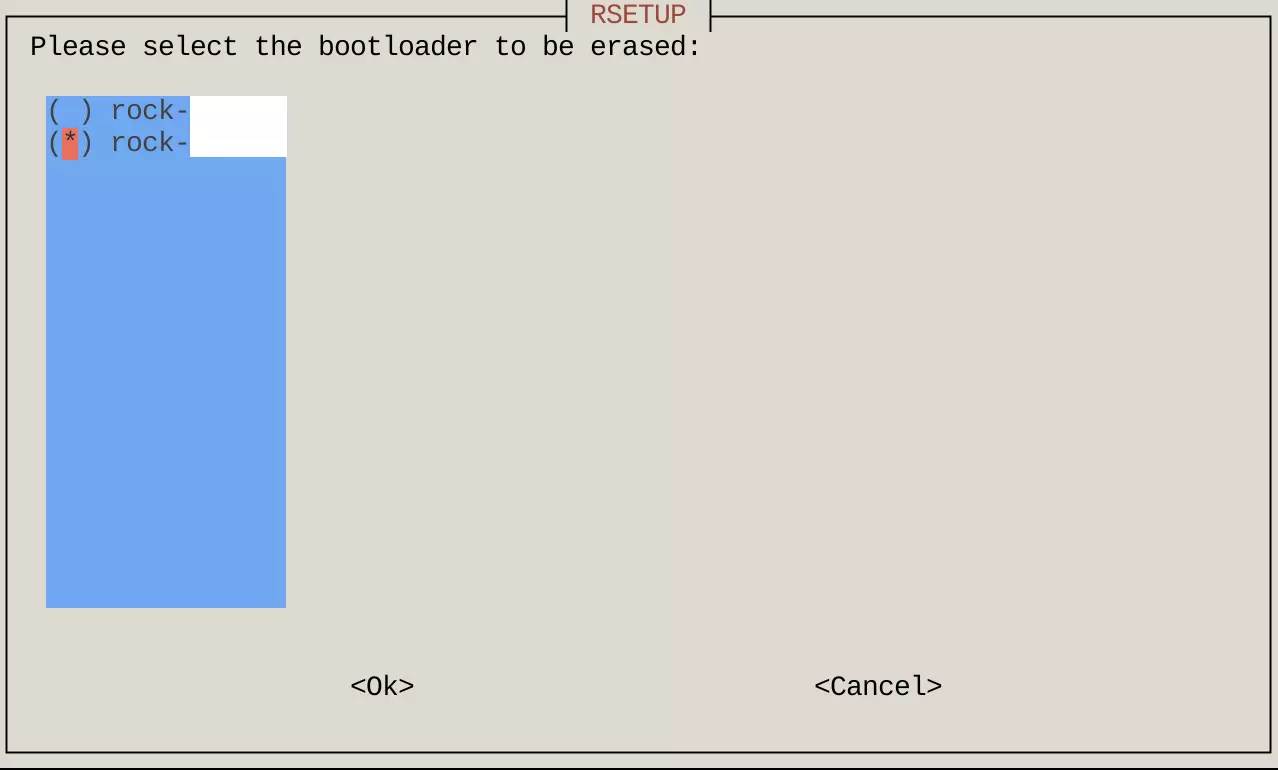
- Press the spacebar to check the corresponding file name, then press Enter to confirm the erase operation. If there are multiple options, you can perform the erase operation on each one sequentially.
A * appearing in the checkbox indicates that the option is enabled, while no * means the option is disabled.
- Reboot the system for the SPI Flash erase operation to take effect.