Quick Start
This chapter is designed to help you quickly get started with the Radxa ROCK 4D. Follow this guide to begin using your device.
Product Overview
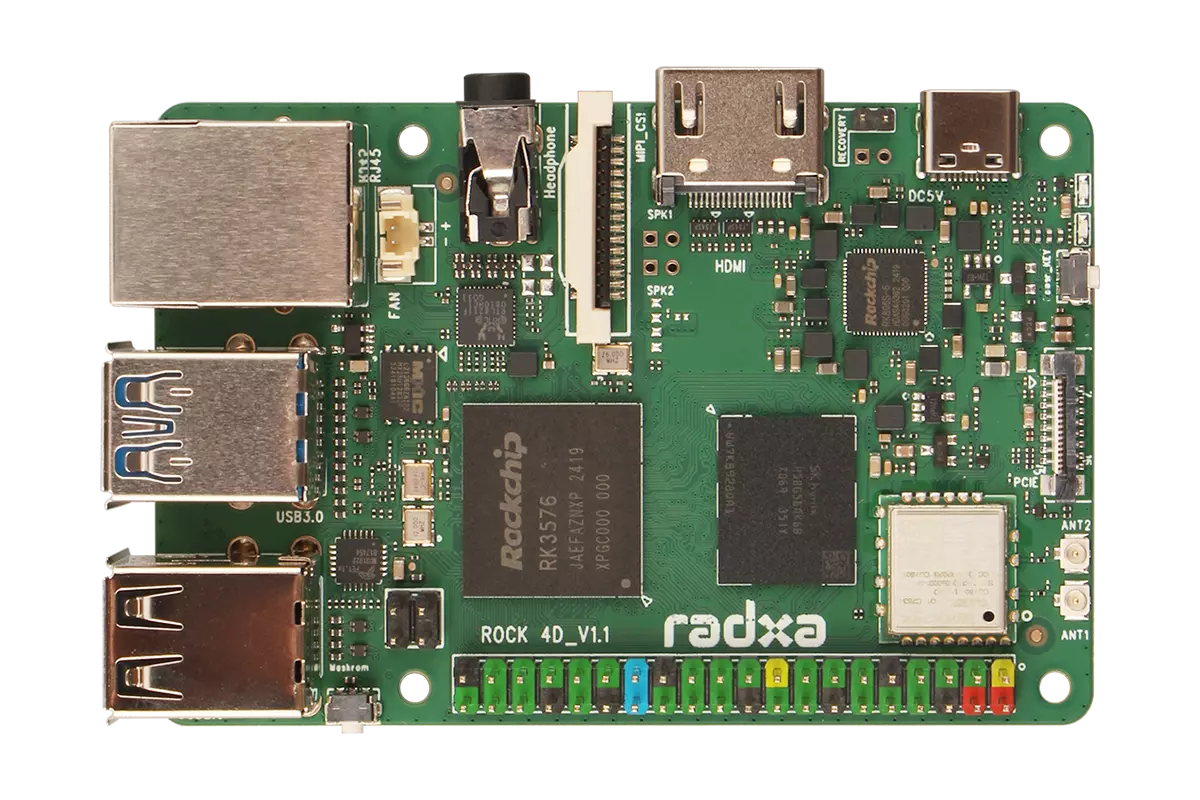
ROCK 4D Front View
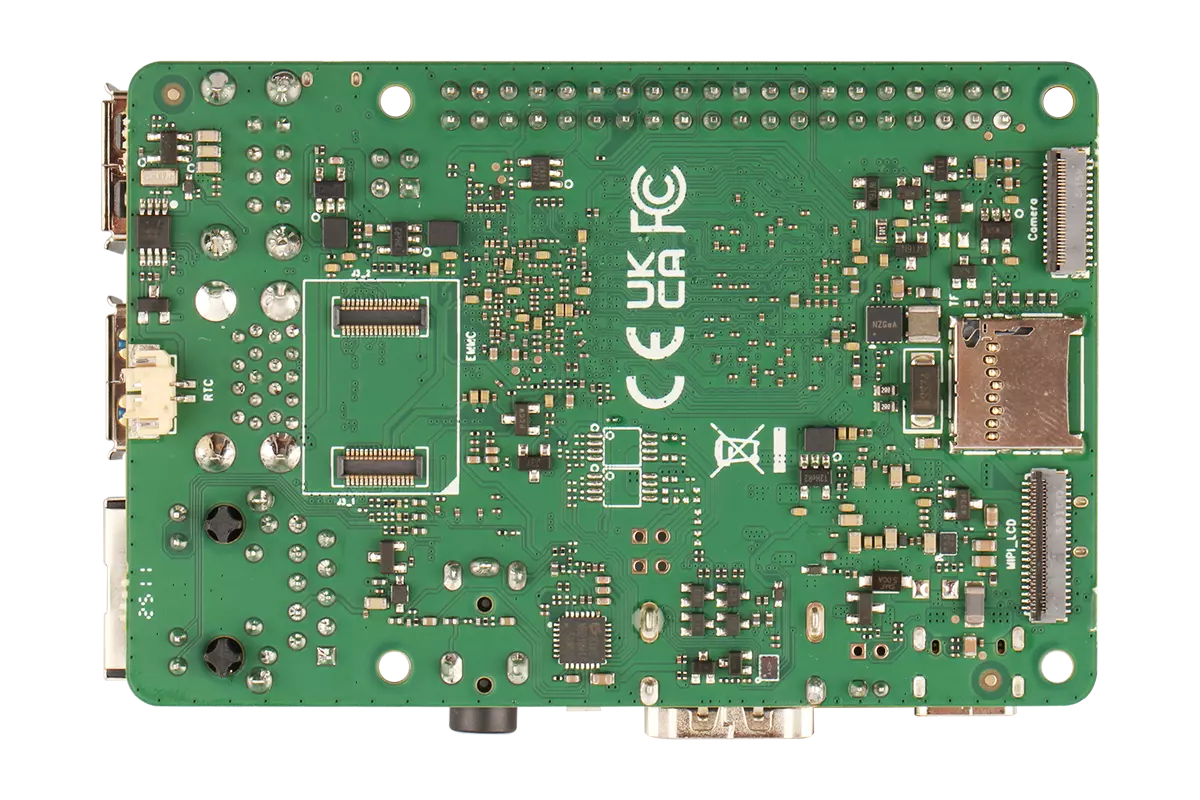
ROCK 4D Rear View
Prerequisites
Hardware Requirements
To complete all the steps in this quick start guide, you'll need to prepare the following hardware in advance:
- Motherboard: Radxa ROCK 4D
- Boot media: microSD card
- USB-to-TTL serial cable (optional): For serial debugging and login
- Display (optional): HDMI monitor and HDMI cable
- Power adapter: Type-C power adapter (supports PD protocol, 5V input, recommended current ≥3A)
Note: You'll need either a USB-to-TTL serial cable or a display. We recommend using a display with the ROCK 4D for both usage and development.
For users with different development needs, we recommend the following additional accessories to speed up your familiarization and development process:
- Beginners
Required accessories: Power adapter, boot media, display, HDMI cable
- Developers
Required accessories: Power adapter, boot media, debug cable (USB-to-TTL serial cable)
Note: The display allows you to view the system interface and perform graphical operations!
Board Power Supply
The ROCK 4D supports both Type-C and GPIO power input. We recommend using a Type-C power adapter. Ensure your power adapter provides 5V power input and is compatible with the PD protocol.
The ROCK 4D only supports 5V power input, with a recommended current of 3A or higher to ensure stable operation of all peripherals.
Recommended power adapters:
-
Standard Type-C power adapter (5V input, supports PD protocol, recommended current ≥3A)
Boot Media
While the ROCK 4D supports booting from microSD cards, NVMe, and UFS, this quick start guide will focus on booting from a microSD card.
Serial Debugging
The ROCK 4D supports serial debugging via a USB-to-TTL serial cable. You'll need to connect the cable to the UART0_TX, UART0_RX, and GND pins on the ROCK 4D.
Writing the System Image
You'll need to download the system image file to your PC and then write it to a microSD card.
Downloading the System Image
Visit the Downloads page on your PC to download the system image package for the ROCK 4D. After downloading, extract the package to get the *.img file, which is the system image to be written to your microSD card.
The downloaded system image is a compressed file that must be extracted before writing to the SD card. Writing the compressed file directly to the SD card may result in system write or boot failures.
Writing the System Image
Insert the microSD card into a card reader, then connect the card reader to your PC's USB port.

- Image Flashing Software: Balena Etcher
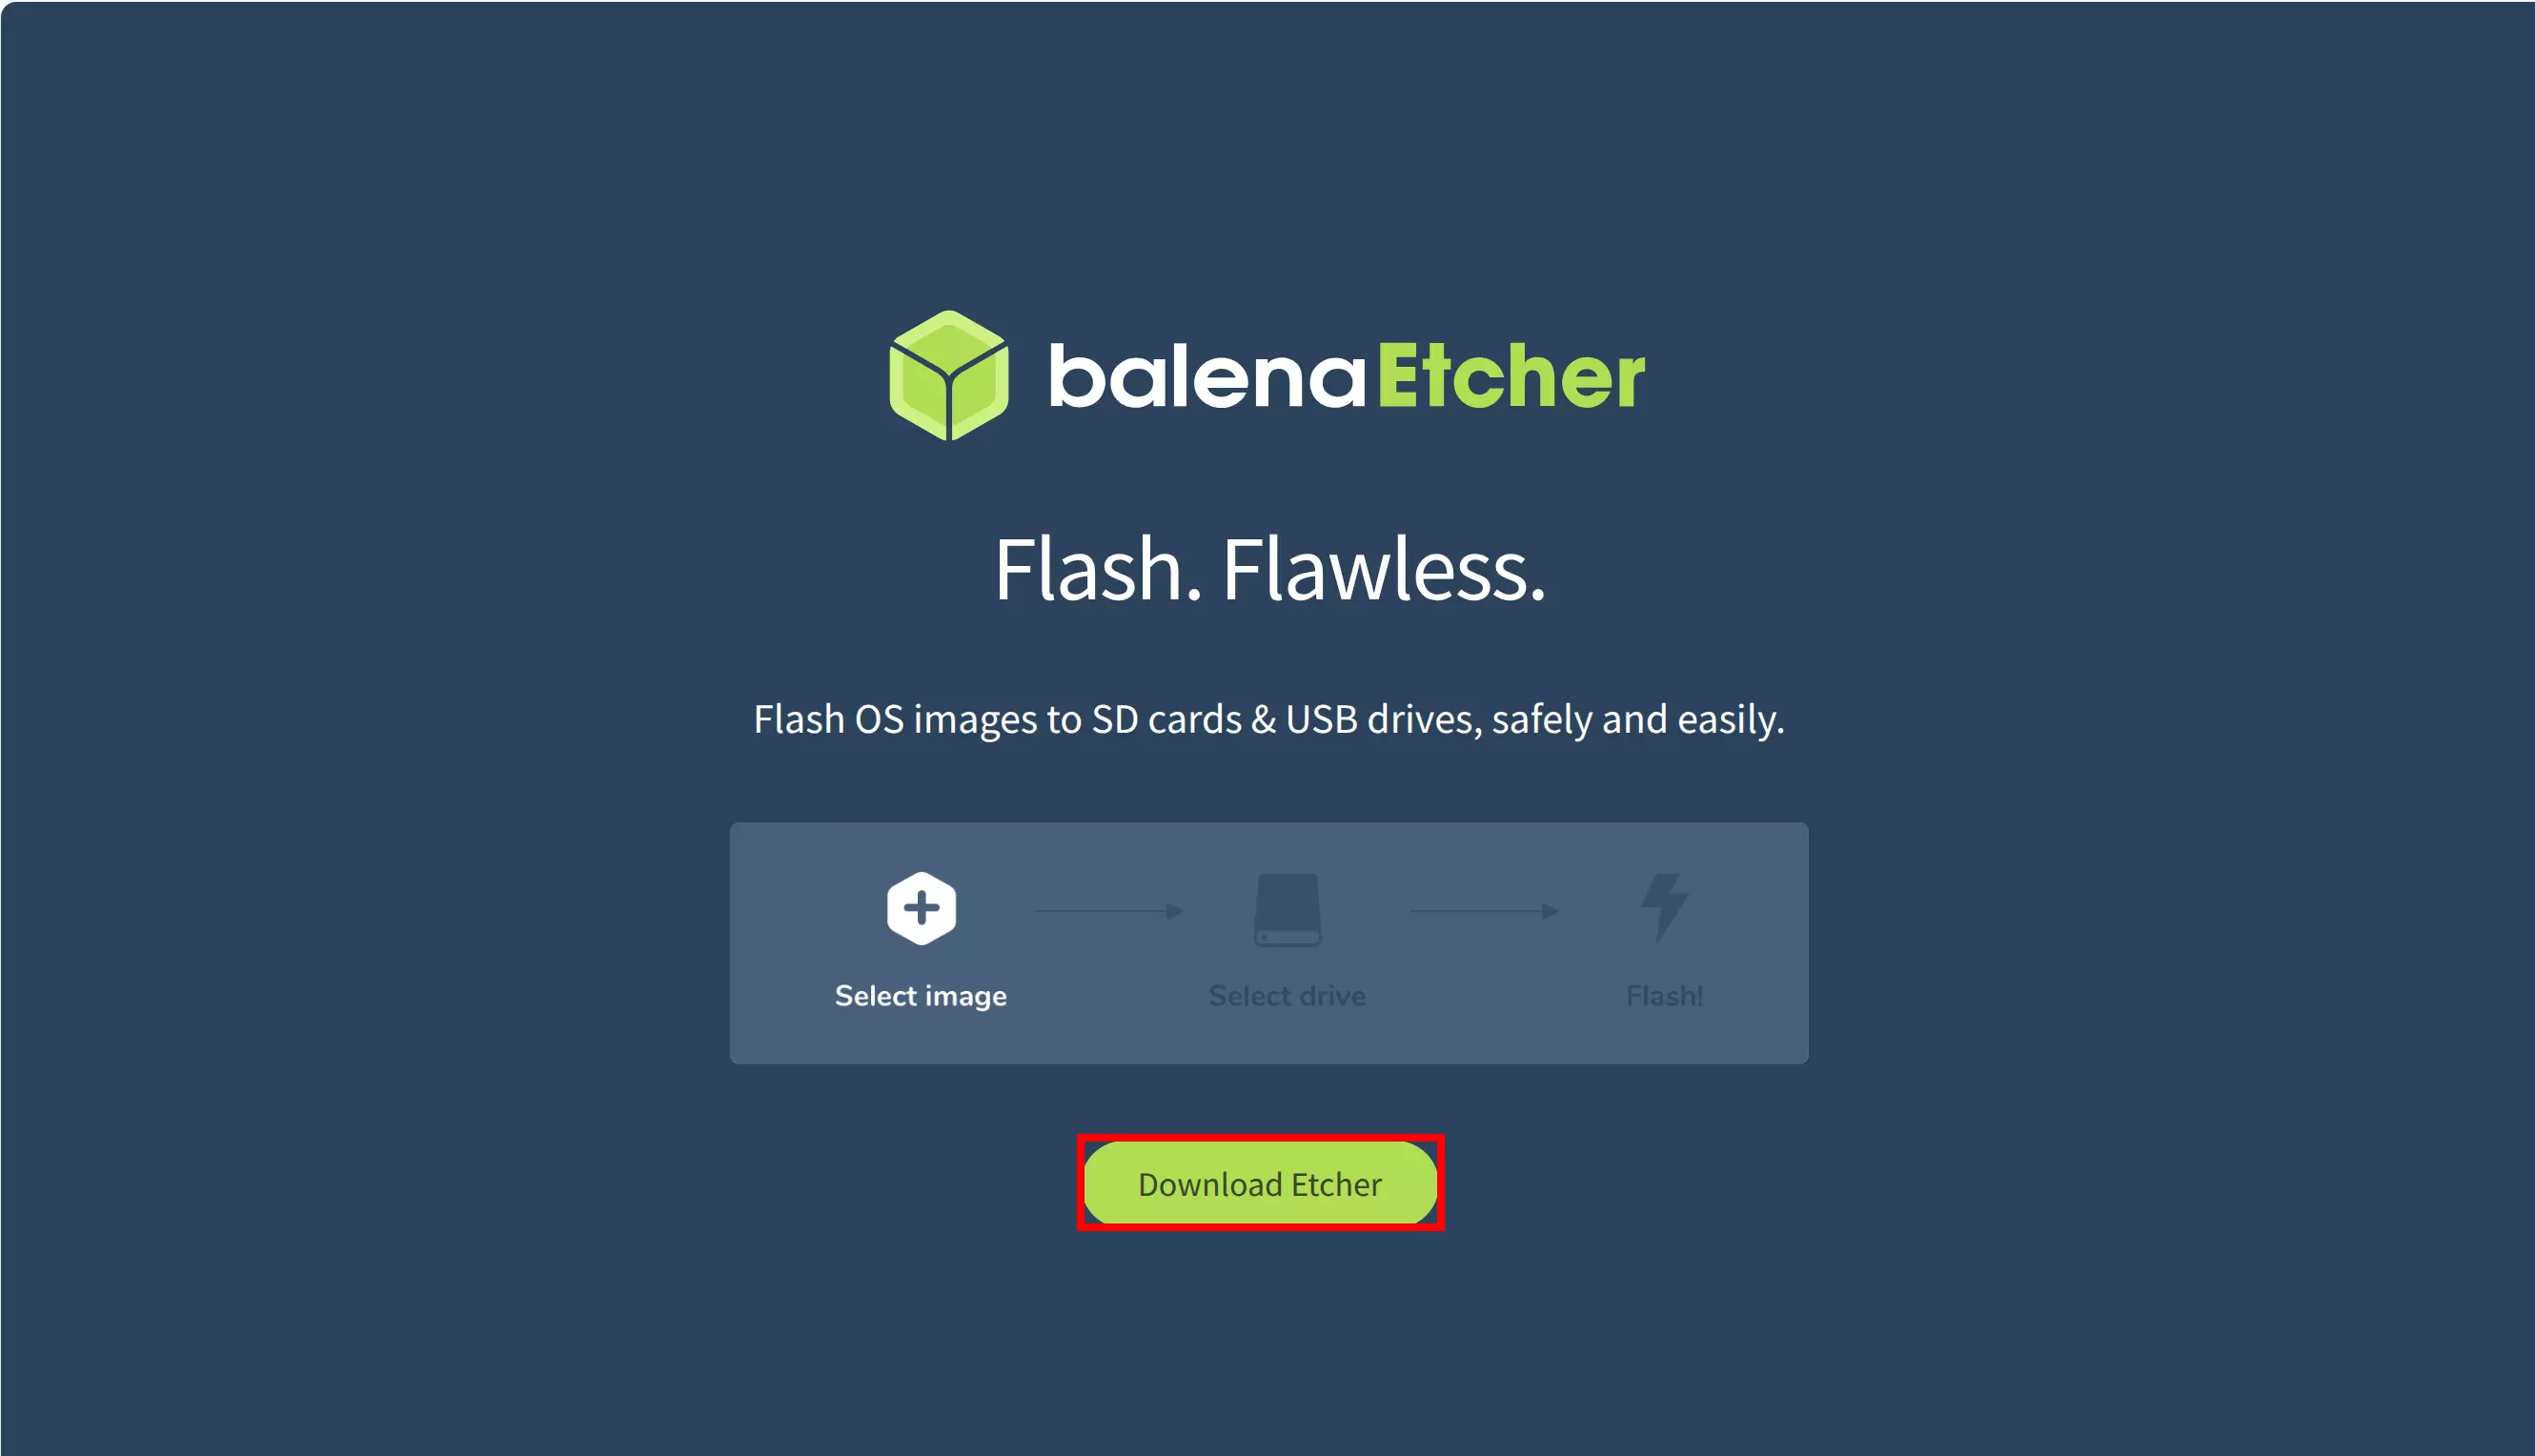
We recommend using Balena Etcher, an open-source image flashing tool developed by Radxa's partner Balena. This software is user-friendly, powerful, and supports Windows, Linux, and macOS.
Download the software for your system from the official website: balenaEtcher
On the download page, select the appropriate version for your operating system.
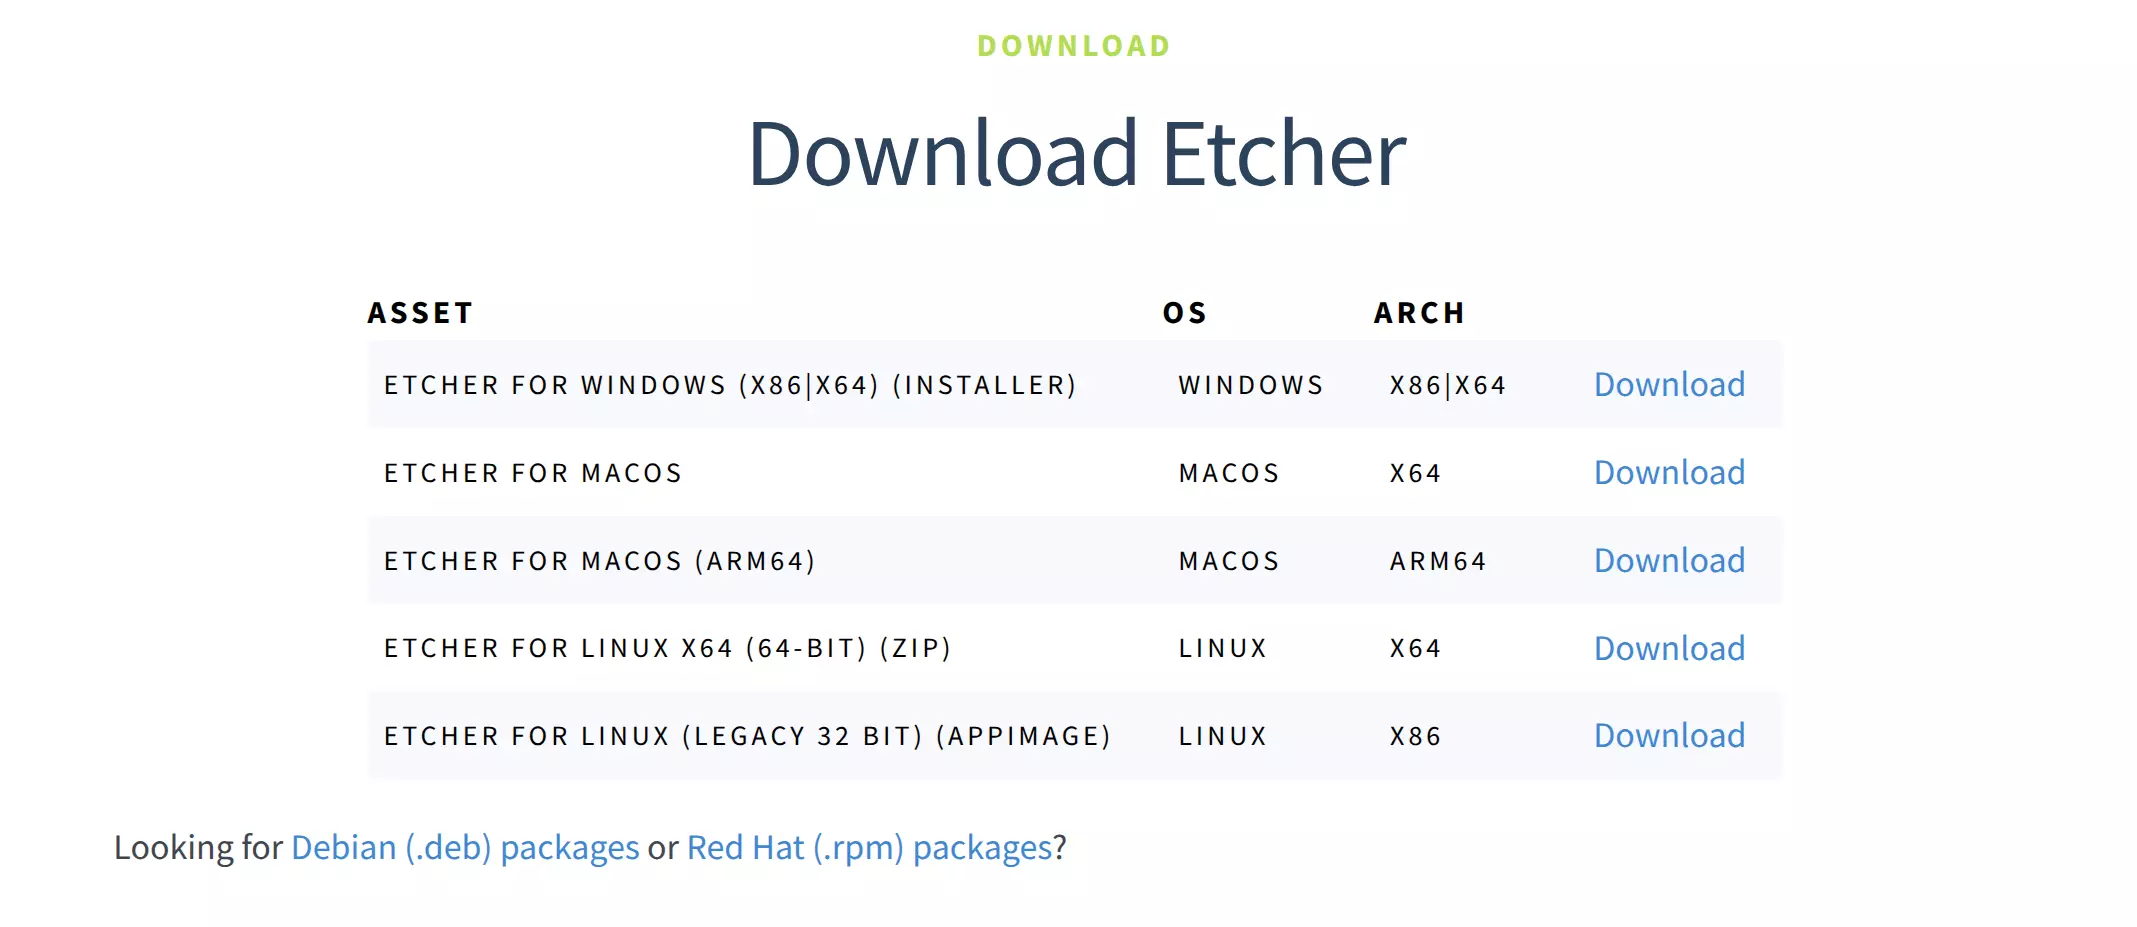
For Windows and Linux, simply run the downloaded file - no installation is required!
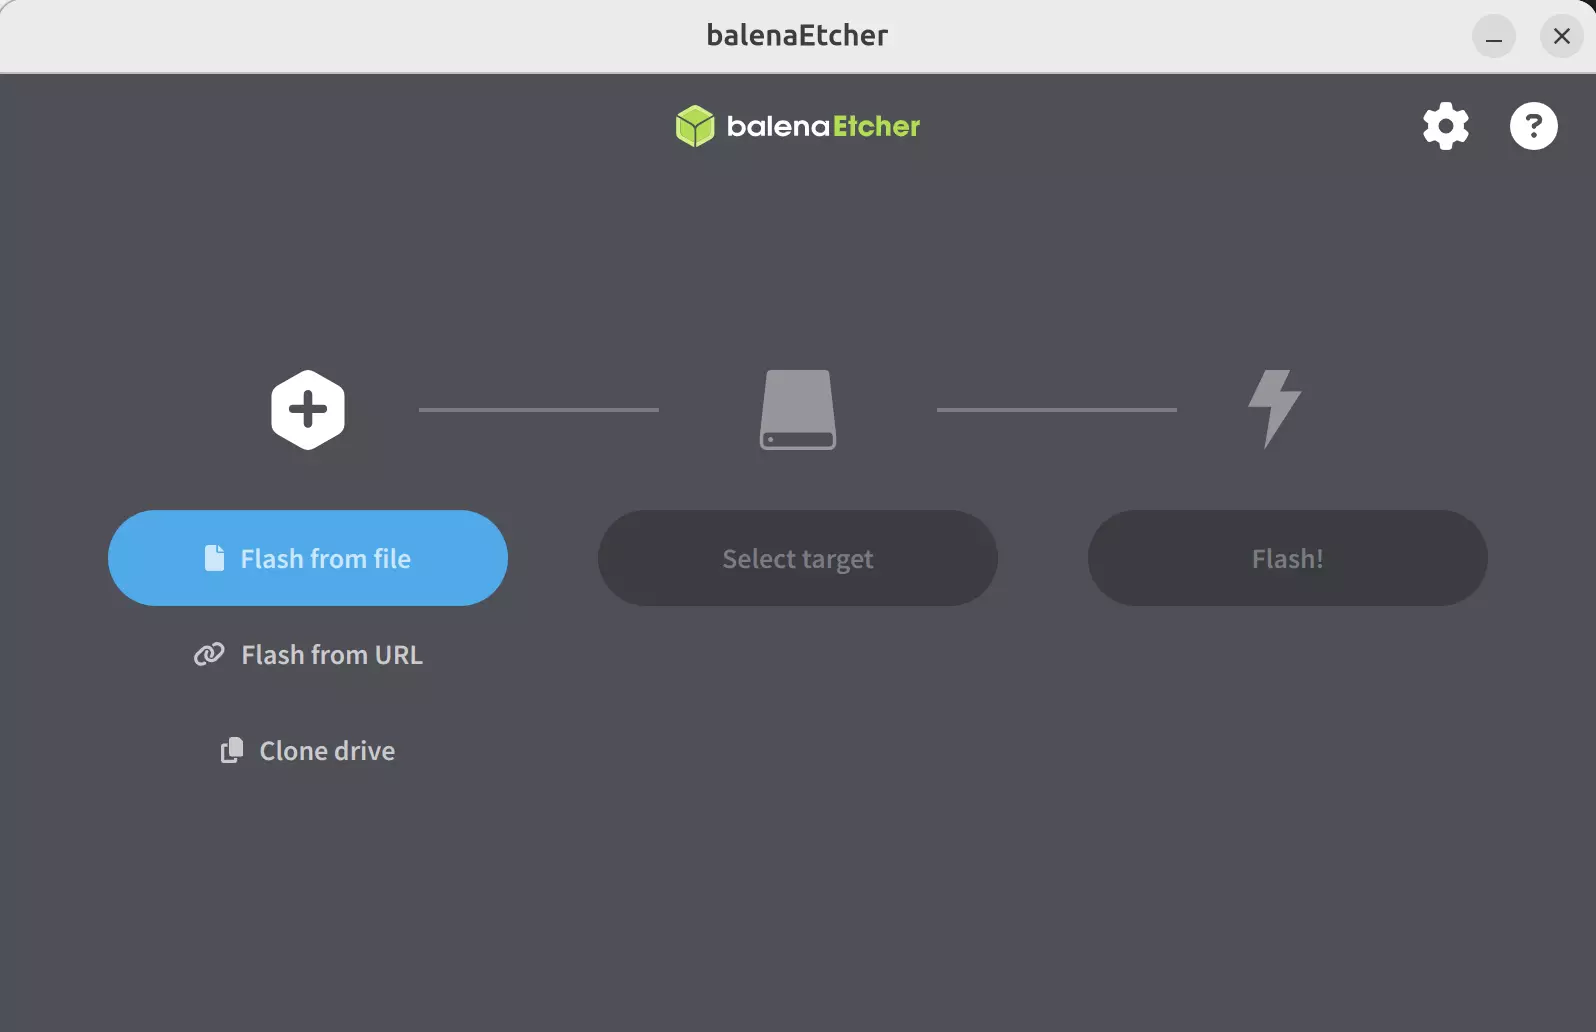
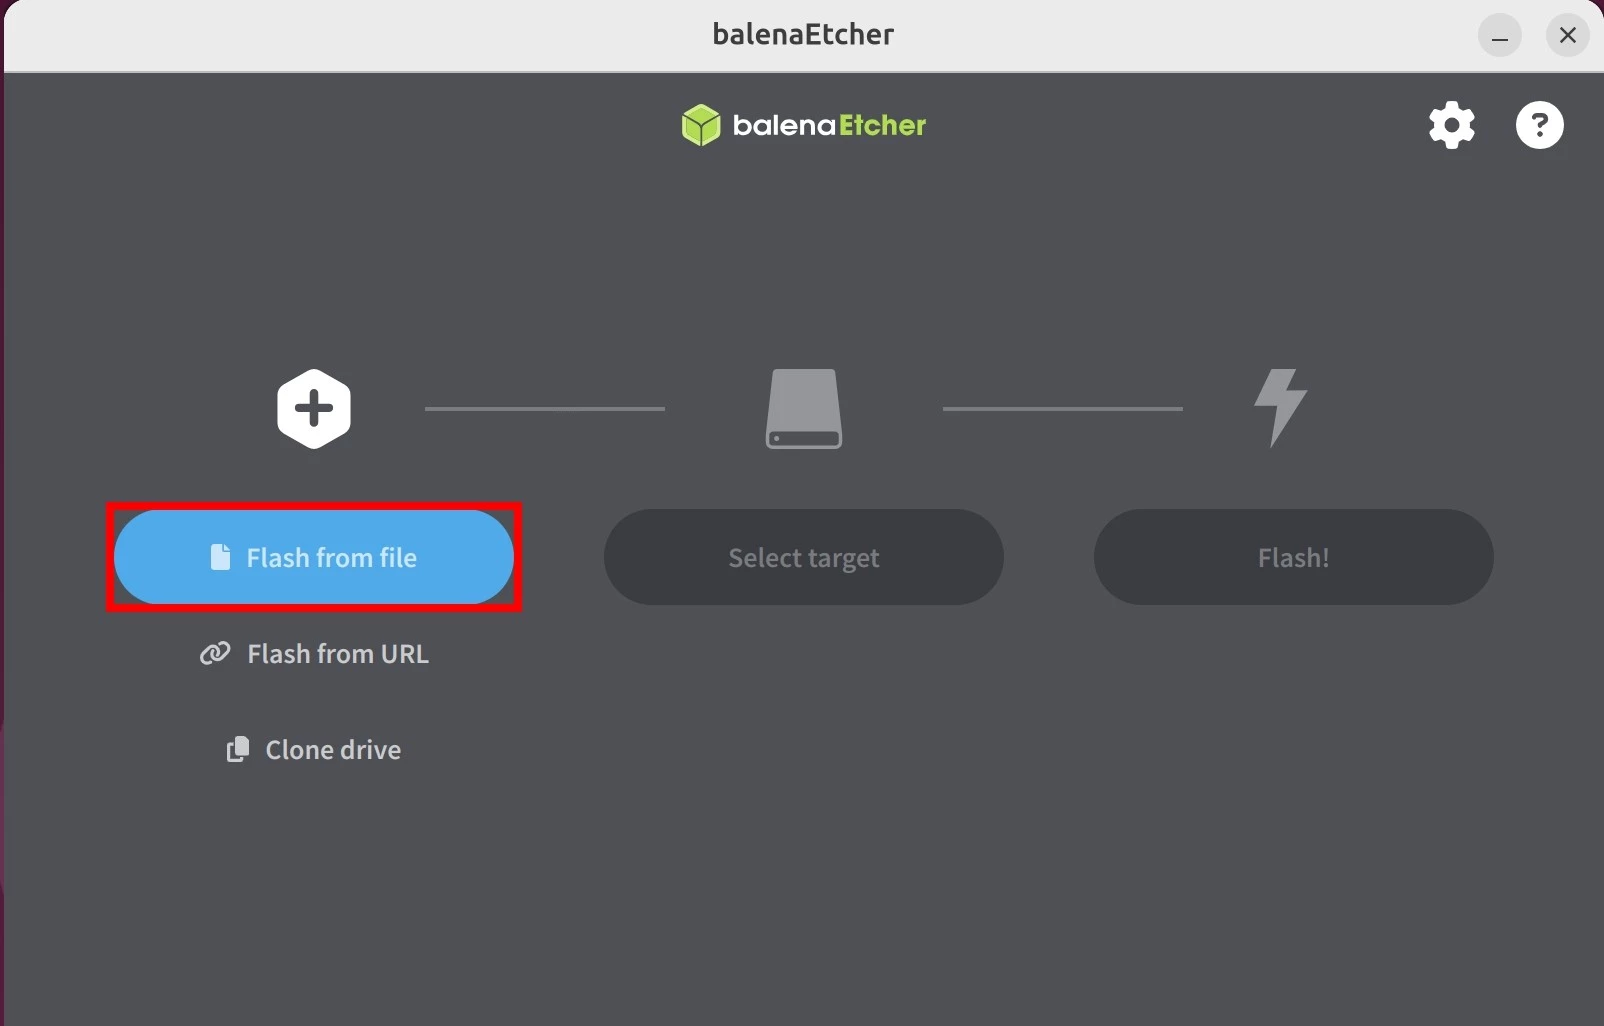
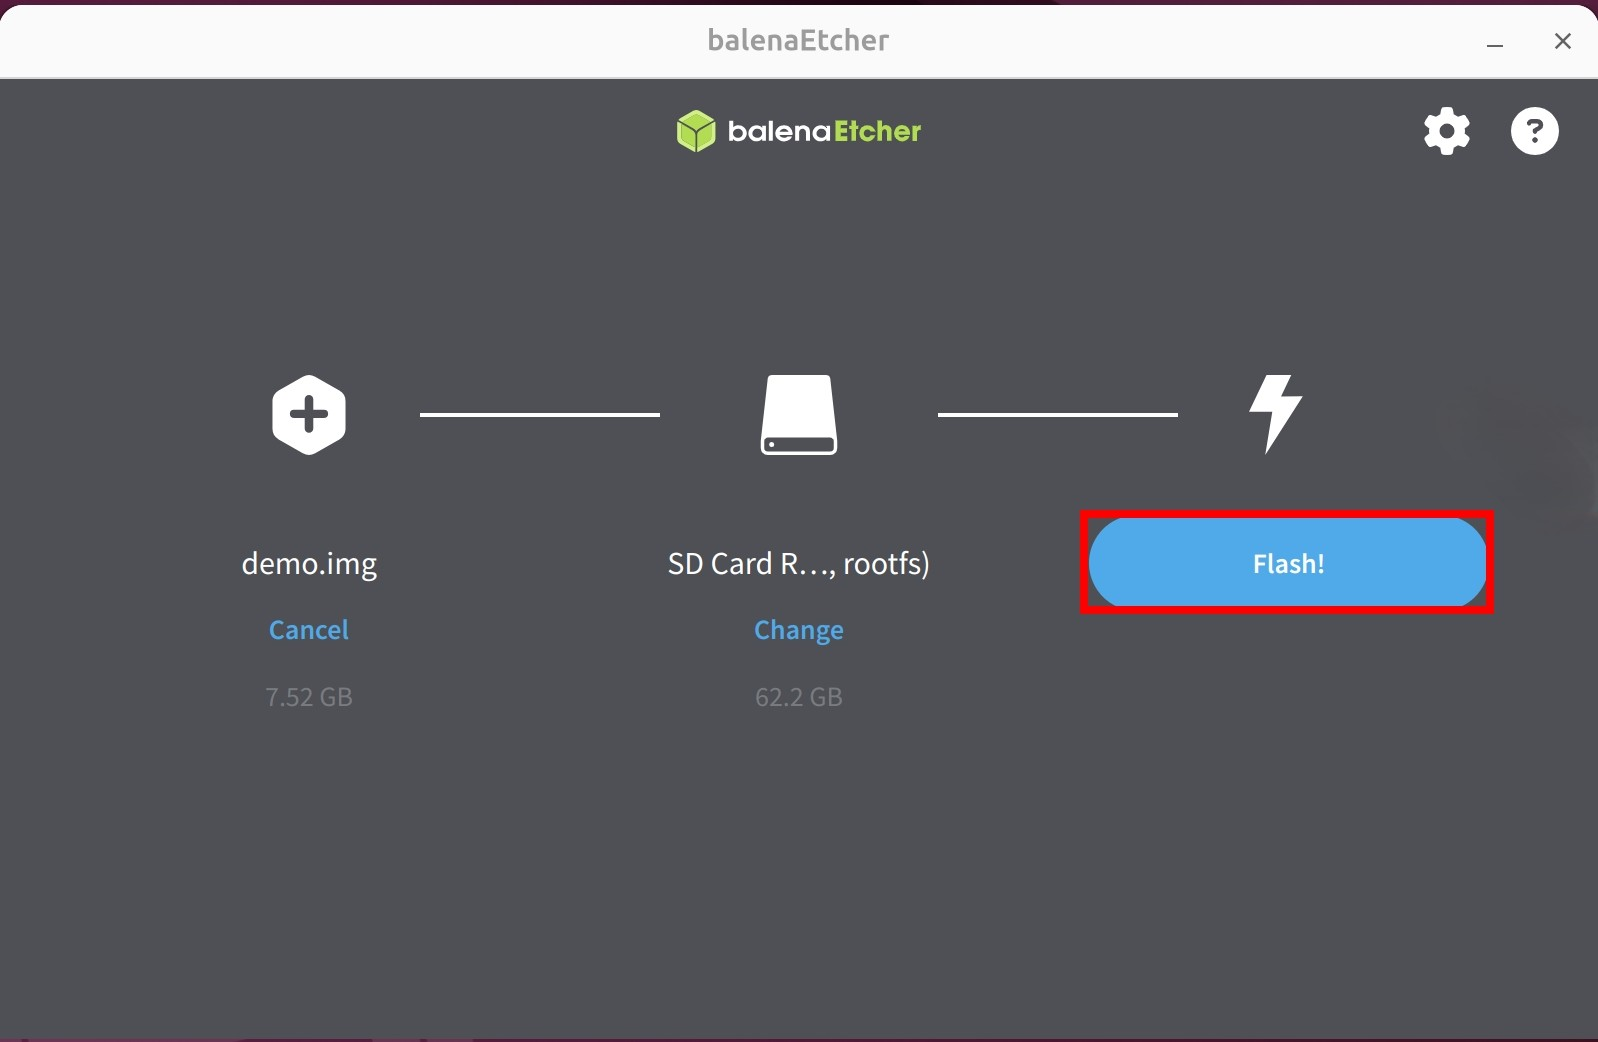
- Flashing the System Image
- Select the system image: Click
Flash from fileand choose the extracted system image file you downloaded earlier.
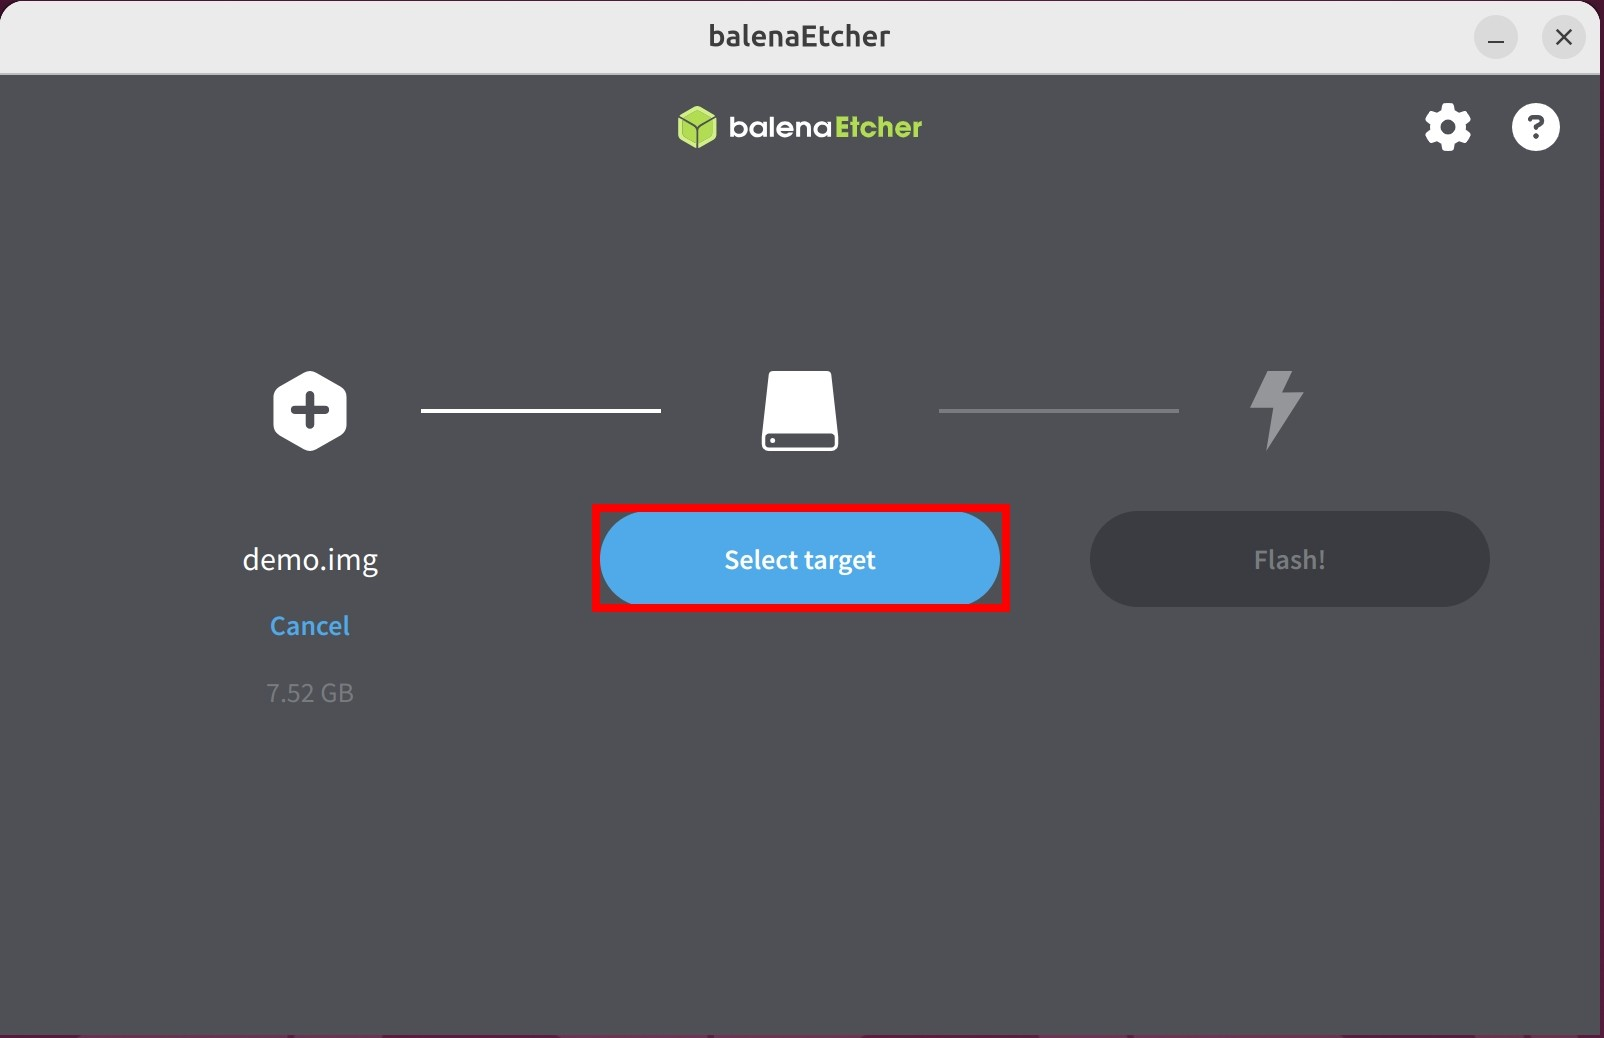
- Select the target device: Click
Select targetand choose the disk device corresponding to your card reader.
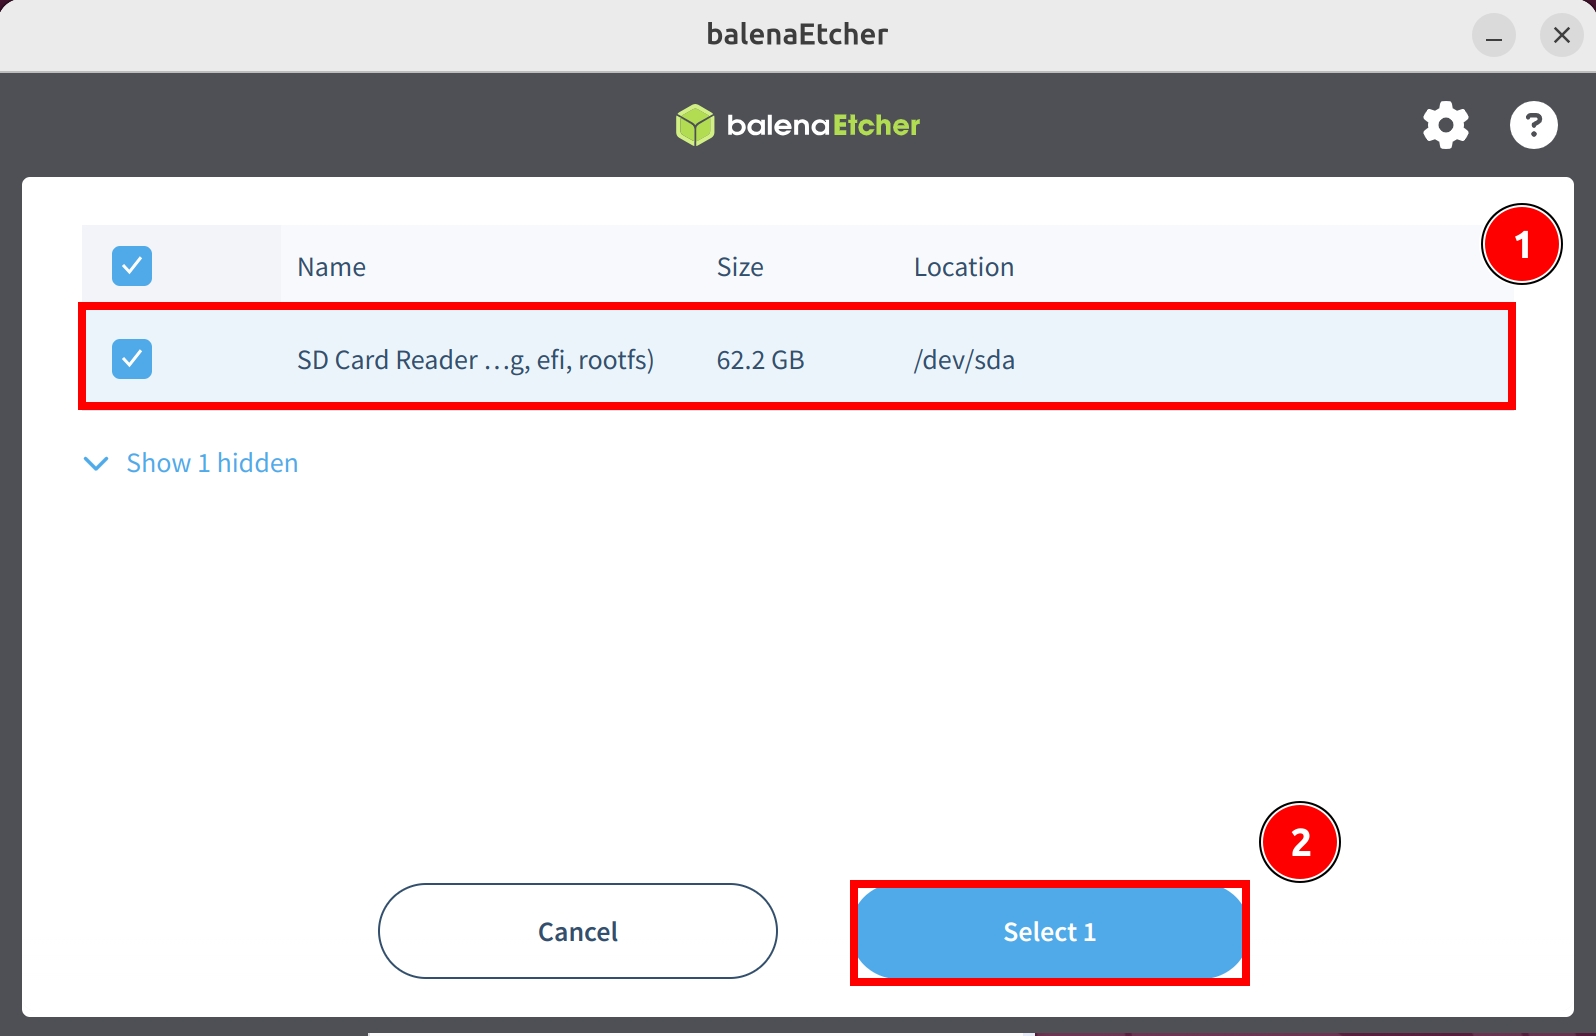
Be extremely careful to select the correct disk! Selecting the wrong disk will result in data loss as Etcher will format the selected disk.
① : Select the disk device where you want to install the system image
② : Click Select 1 to confirm your device selection
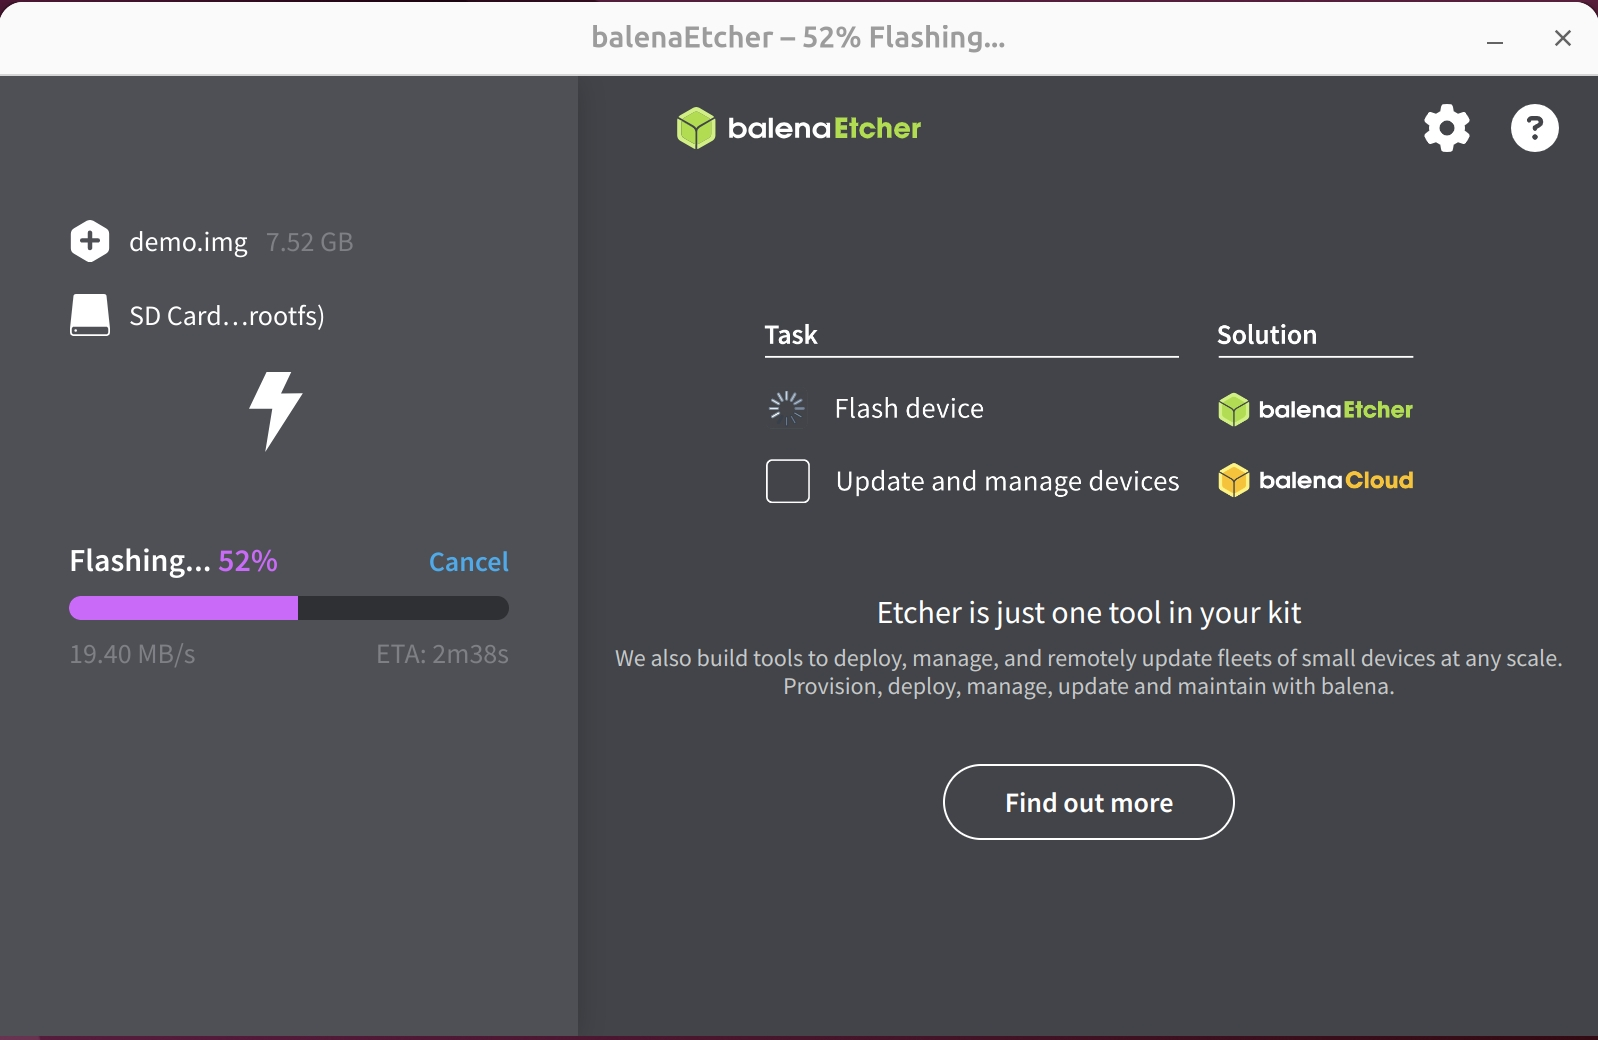
- Start writing the system image: Click the
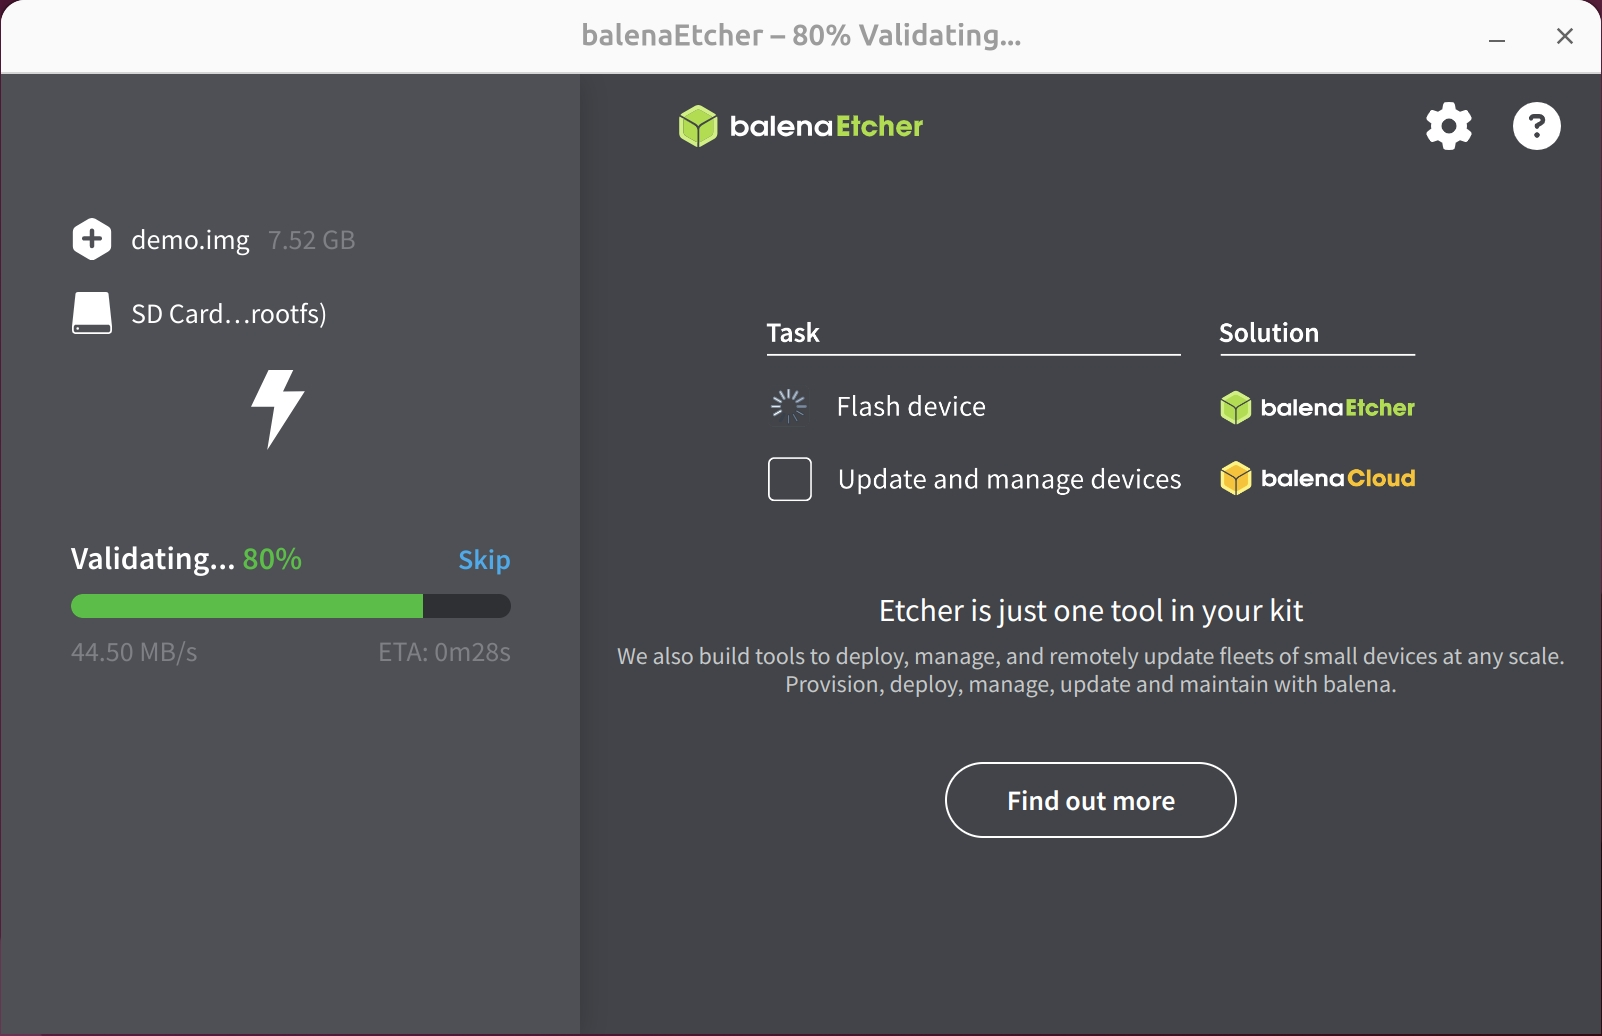
Flash!button and wait for the software to write and verify the system image automatically.
Waiting for the system image to finish writing
Waiting for verification to complete
- After successfully writing the system image, close the Etcher software!
System Information
When using our provided system image for the first time, you'll need to log in with the default username and password.
- Debian Linux
Username: radxa
Password: radxa
Booting the System
After writing the system image to your microSD card, insert it into the ROCK 4D's microSD card slot. Then, power on the system using a 5V Type-C power adapter.
When the system boots, both the blue and green LEDs will light up simultaneously. After a few seconds, the green LED will stay lit while the blue LED blinks, indicating a successful system boot.
Usage recommendations:
-
If you have a display, connect it to the ROCK 4D using an HDMI cable after booting to view the system interface directly.
-
If you don't have a display, you can use a serial debugging tool to view system output, confirm successful boot, and log in to use the ROCK 4D.
Serial Console Login
We recommend using Tabby terminal emulator for serial console login and debugging. It supports multiple platforms including Windows, Linux, and macOS.
- ROCK 4D Serial Port Parameters
Baud rate: 1500000
Data bits: 8
Stop bits: 1
Parity: None
Hardware Connection
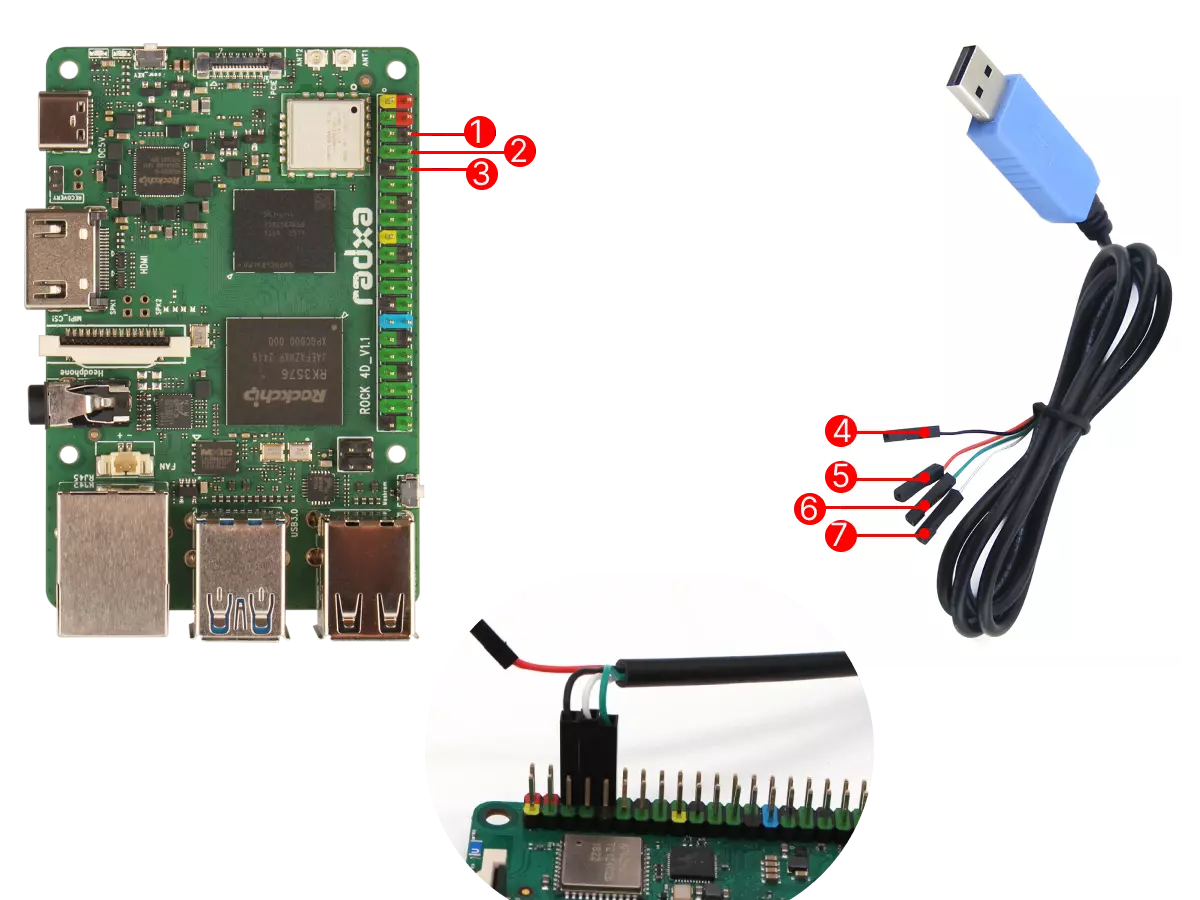
When using a USB-to-TTL serial cable for debugging with the ROCK 4D, ensure the pins are connected correctly to prevent hardware damage to the board.
Connect the USB end of the USB-to-TTL serial cable to your PC, and connect the other end to the ROCK 4D's GPIO UART pins.
| No. | Pin Function | Connection Method |
|---|---|---|
| ① | ROCK 4D: GND (Pin6) | Connect to GND pin of USB cable |
| ② | ROCK 4D: UART0_TX (Pin8) | Connect to RX pin of USB cable |
| ③ | ROCK 4D: UART0_RX (Pin10) | Connect to TX pin of USB cable |
| ④ | USB Cable: GND (Black wire) | Connect to GND pin of ROCK 4D |
| ⑤ | USB Cable: RX (White wire) | Connect to UART0_TX of ROCK 4D |
| ⑥ | USB Cable: TX (Green wire) | Connect to UART0_RX of ROCK 4D |
| ⑦ | USB Cable: VCC (Red wire) | Do not connect |
Pinout and Connection Diagram
Using Tabby Terminal
Tabby is a powerful cross-platform terminal emulator that supports various protocols including serial and SSH.
Installing Tabby
Download and install Tabby from the official Tabby website.
-
Windows
Select the
.exefile that matches your system architecture. -
Linux
Select the
.debfile that matches your system architecture. -
macOS Select the
.dmgfile that matches your system architecture.
Using Tabby (Serial Connection)
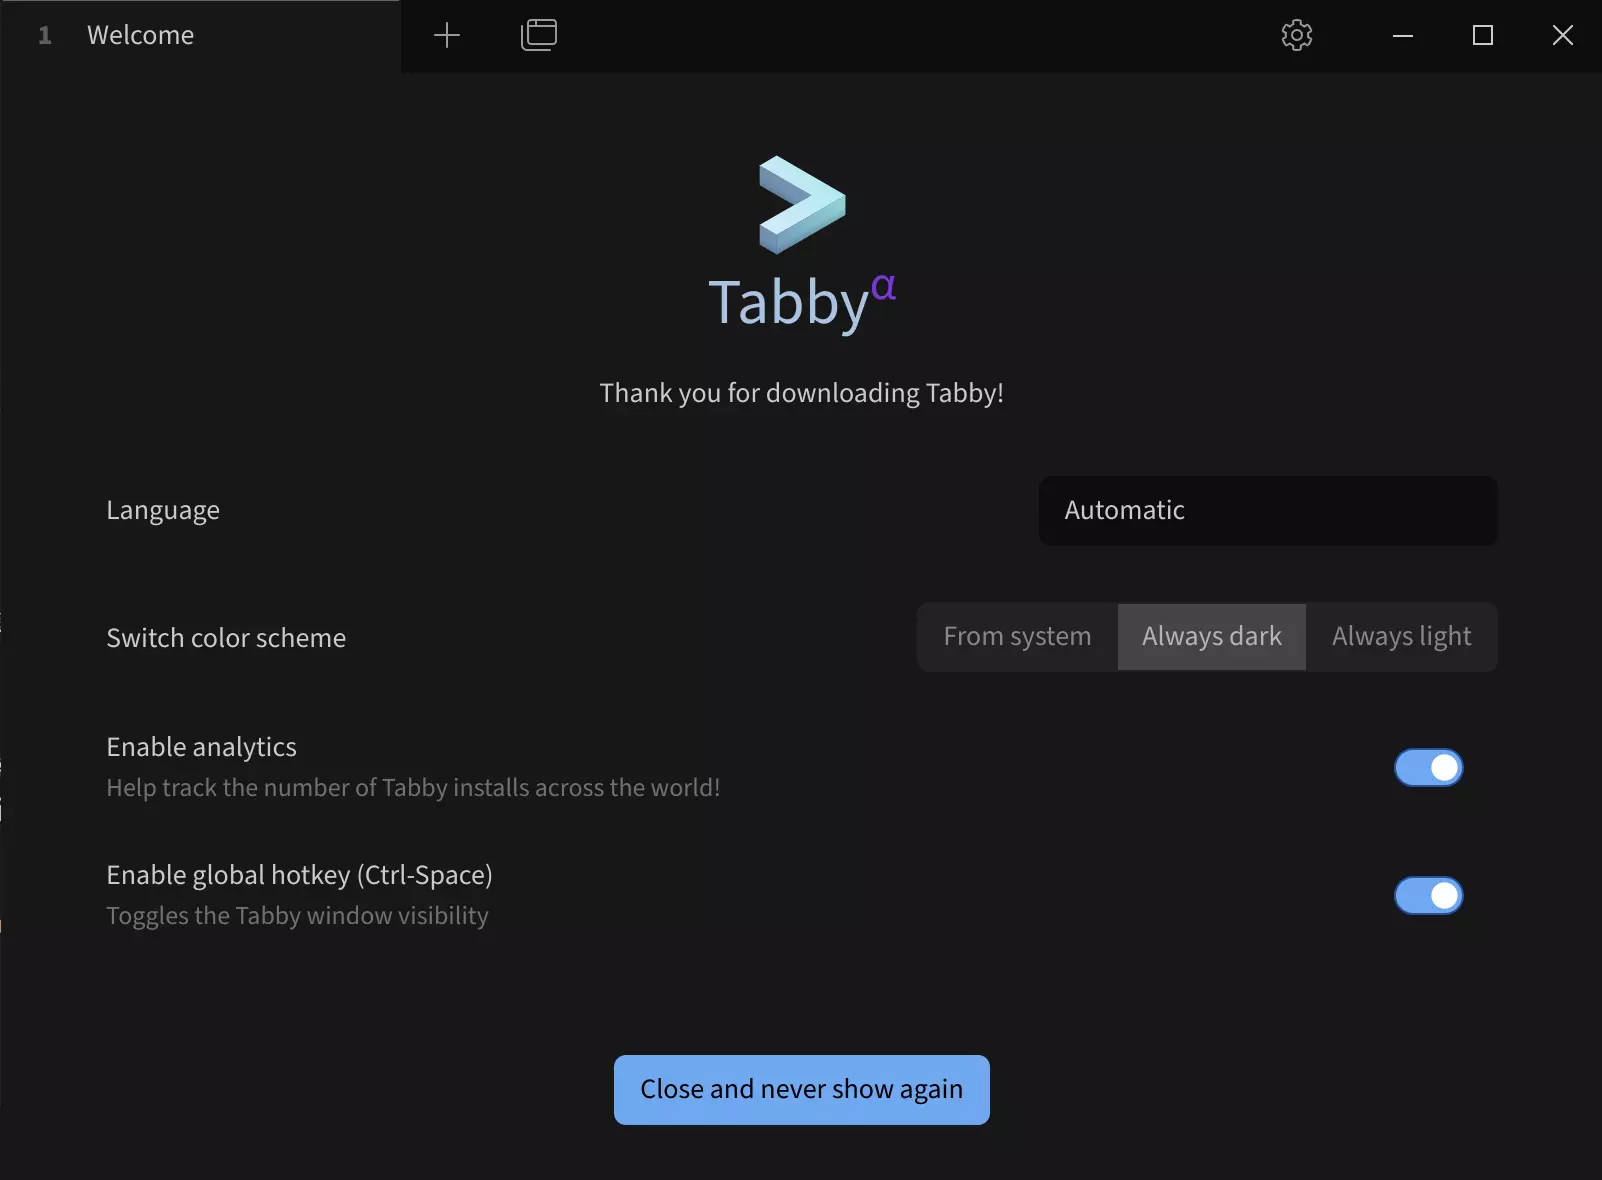
Double-click the Tabby application icon to launch it.
Tabby Main Interface
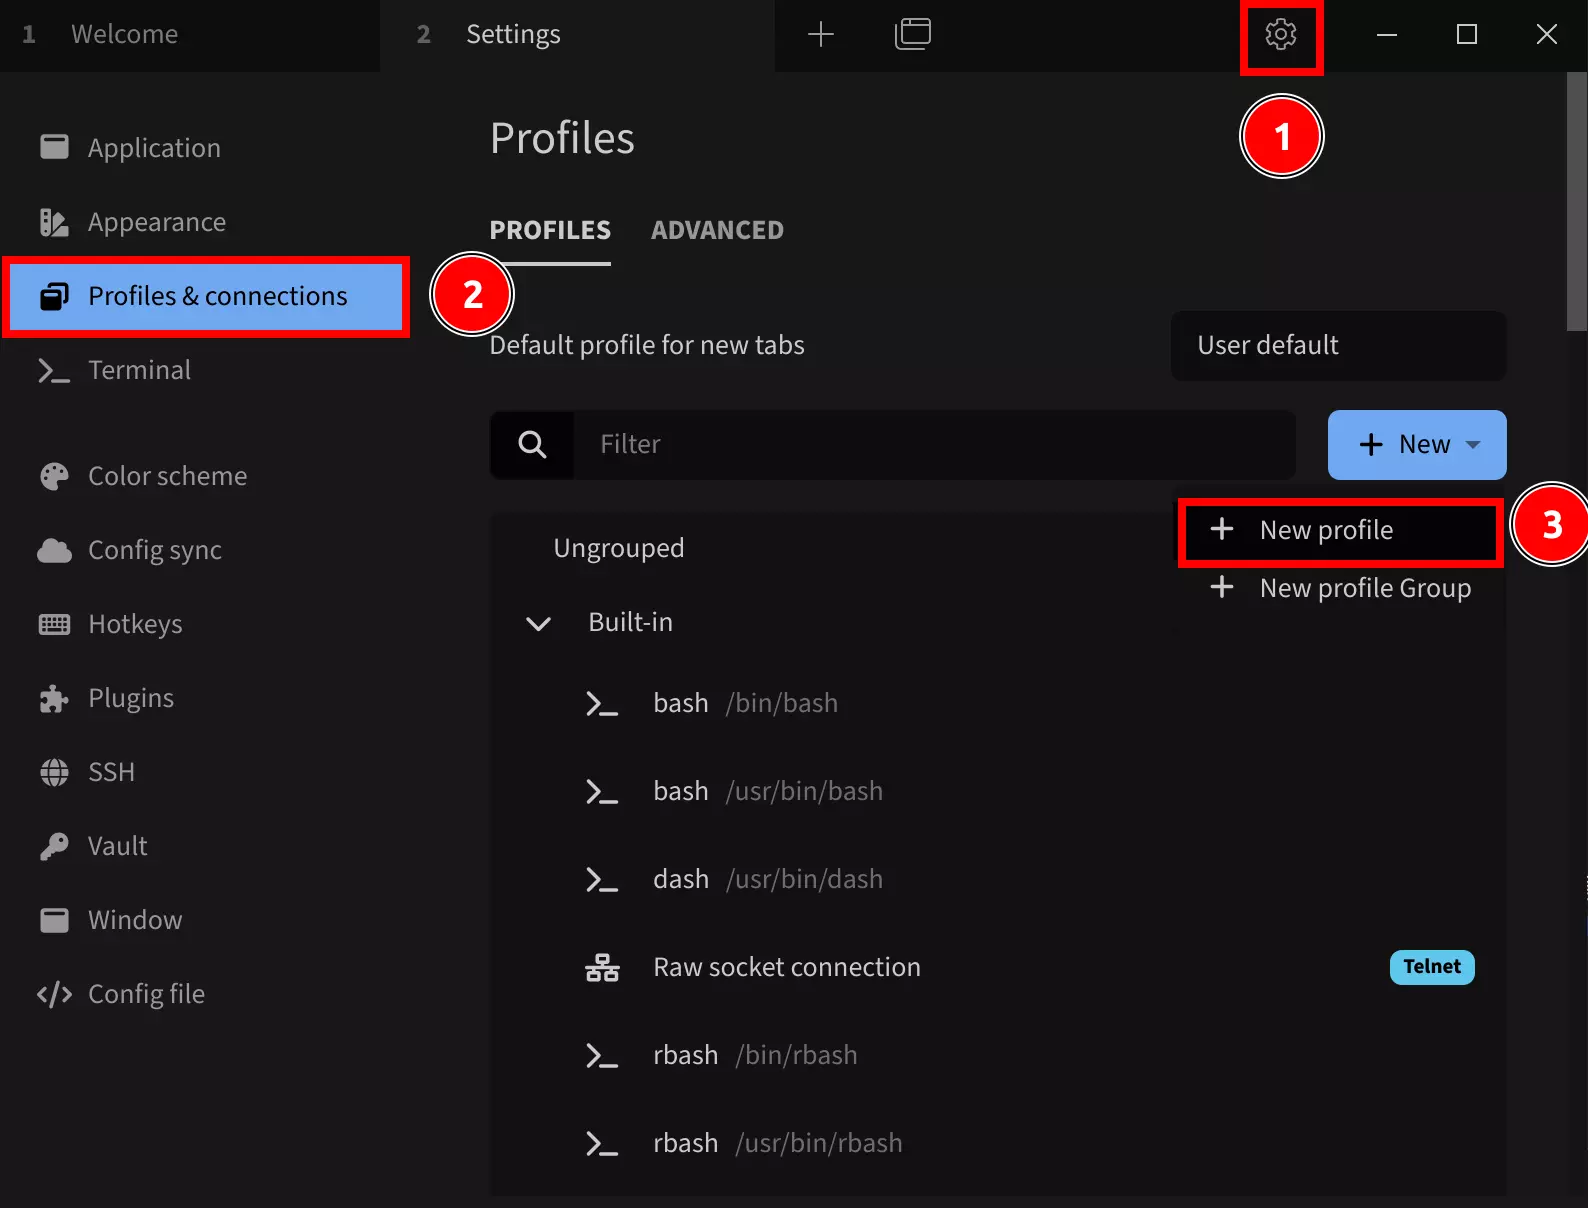
To set up a serial connection:
①. Click the Settings icon (gear icon)
②. Select Profiles & connections
③. Click New profile
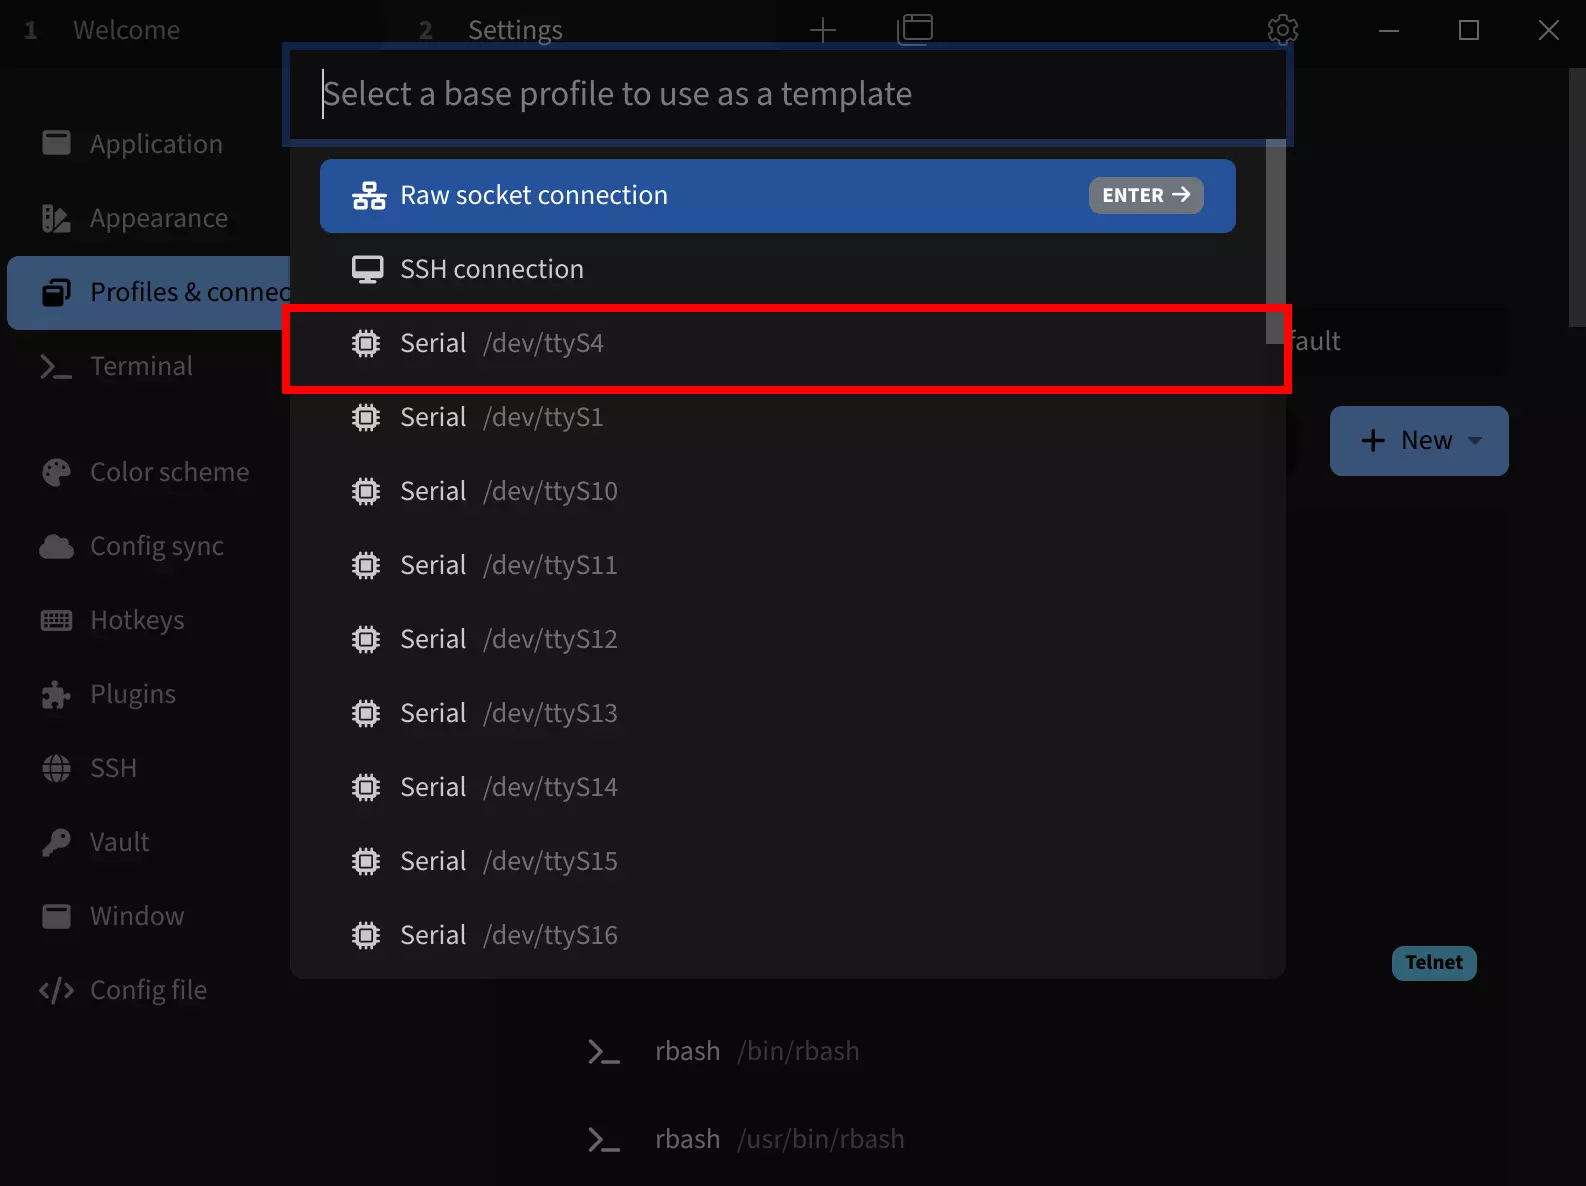
Select a base configuration template:
Choose any Serial template. You can modify the device name, port, baud rate, and other parameters in the next screen.
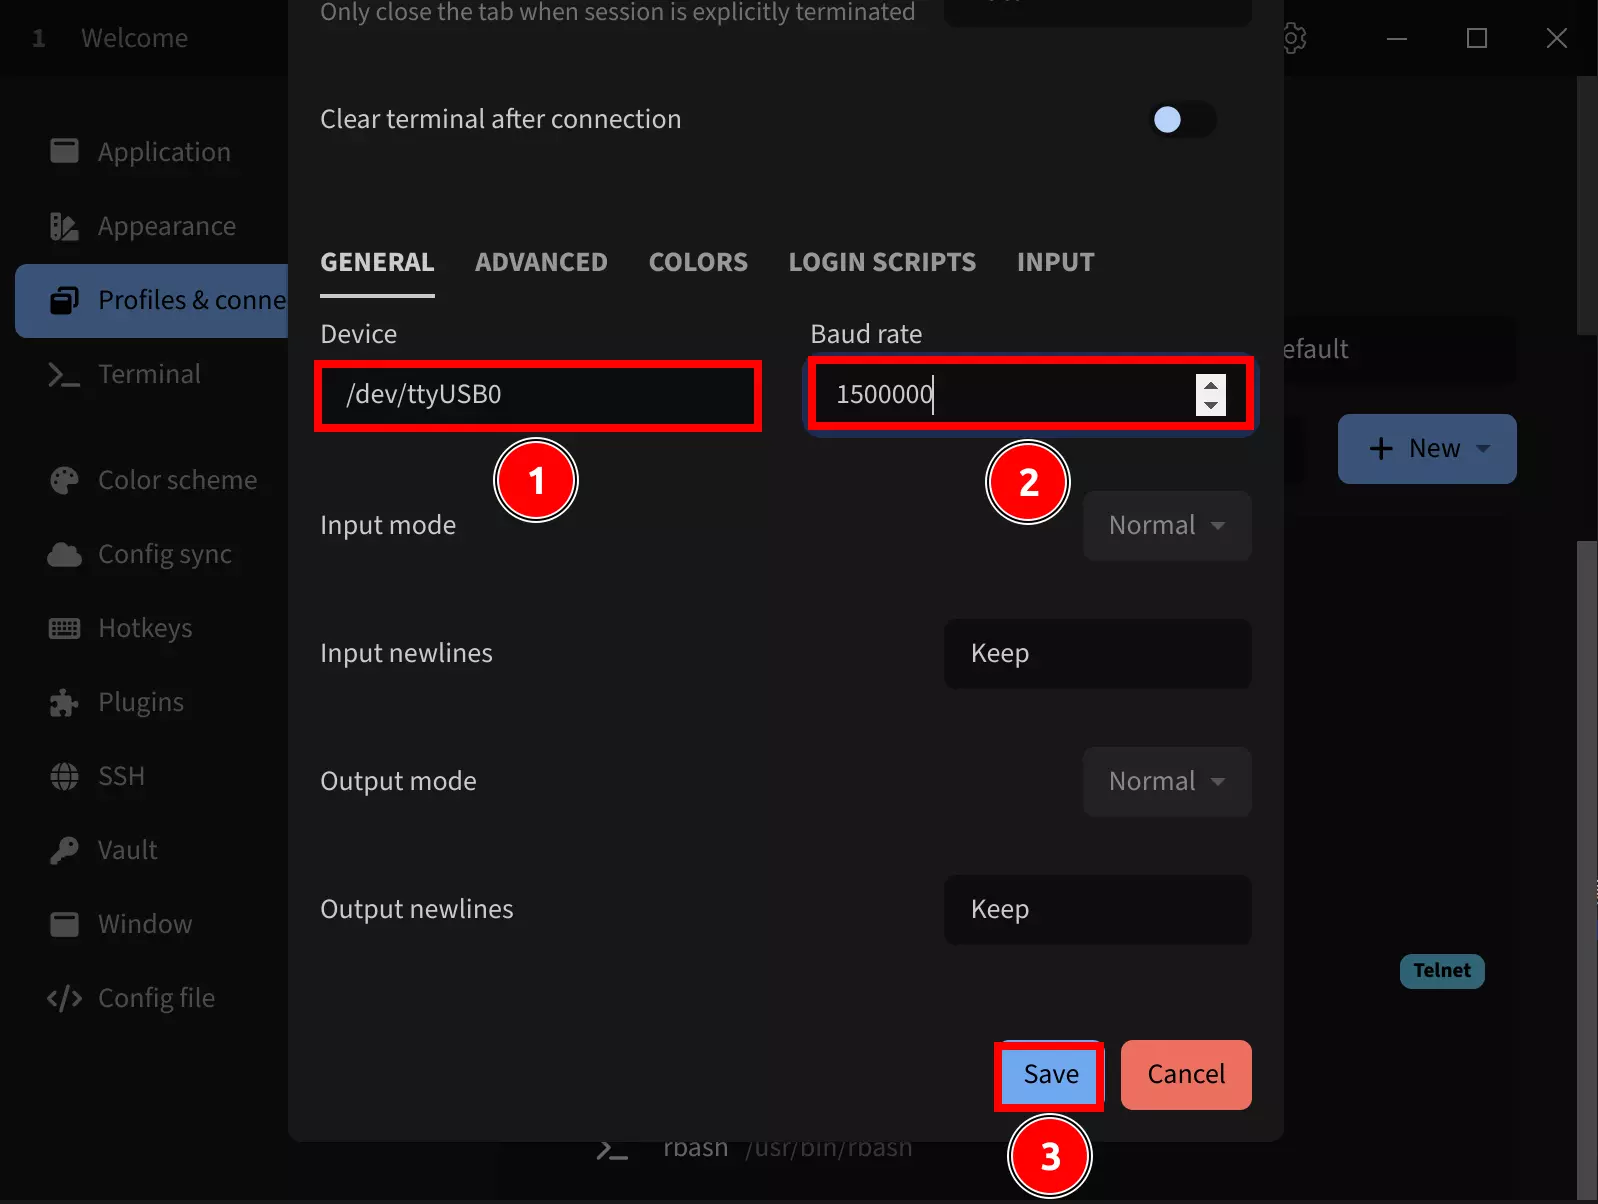
After selecting the Serial template, configure these parameters:
Name: Set a connection name (recommended: use your product name)
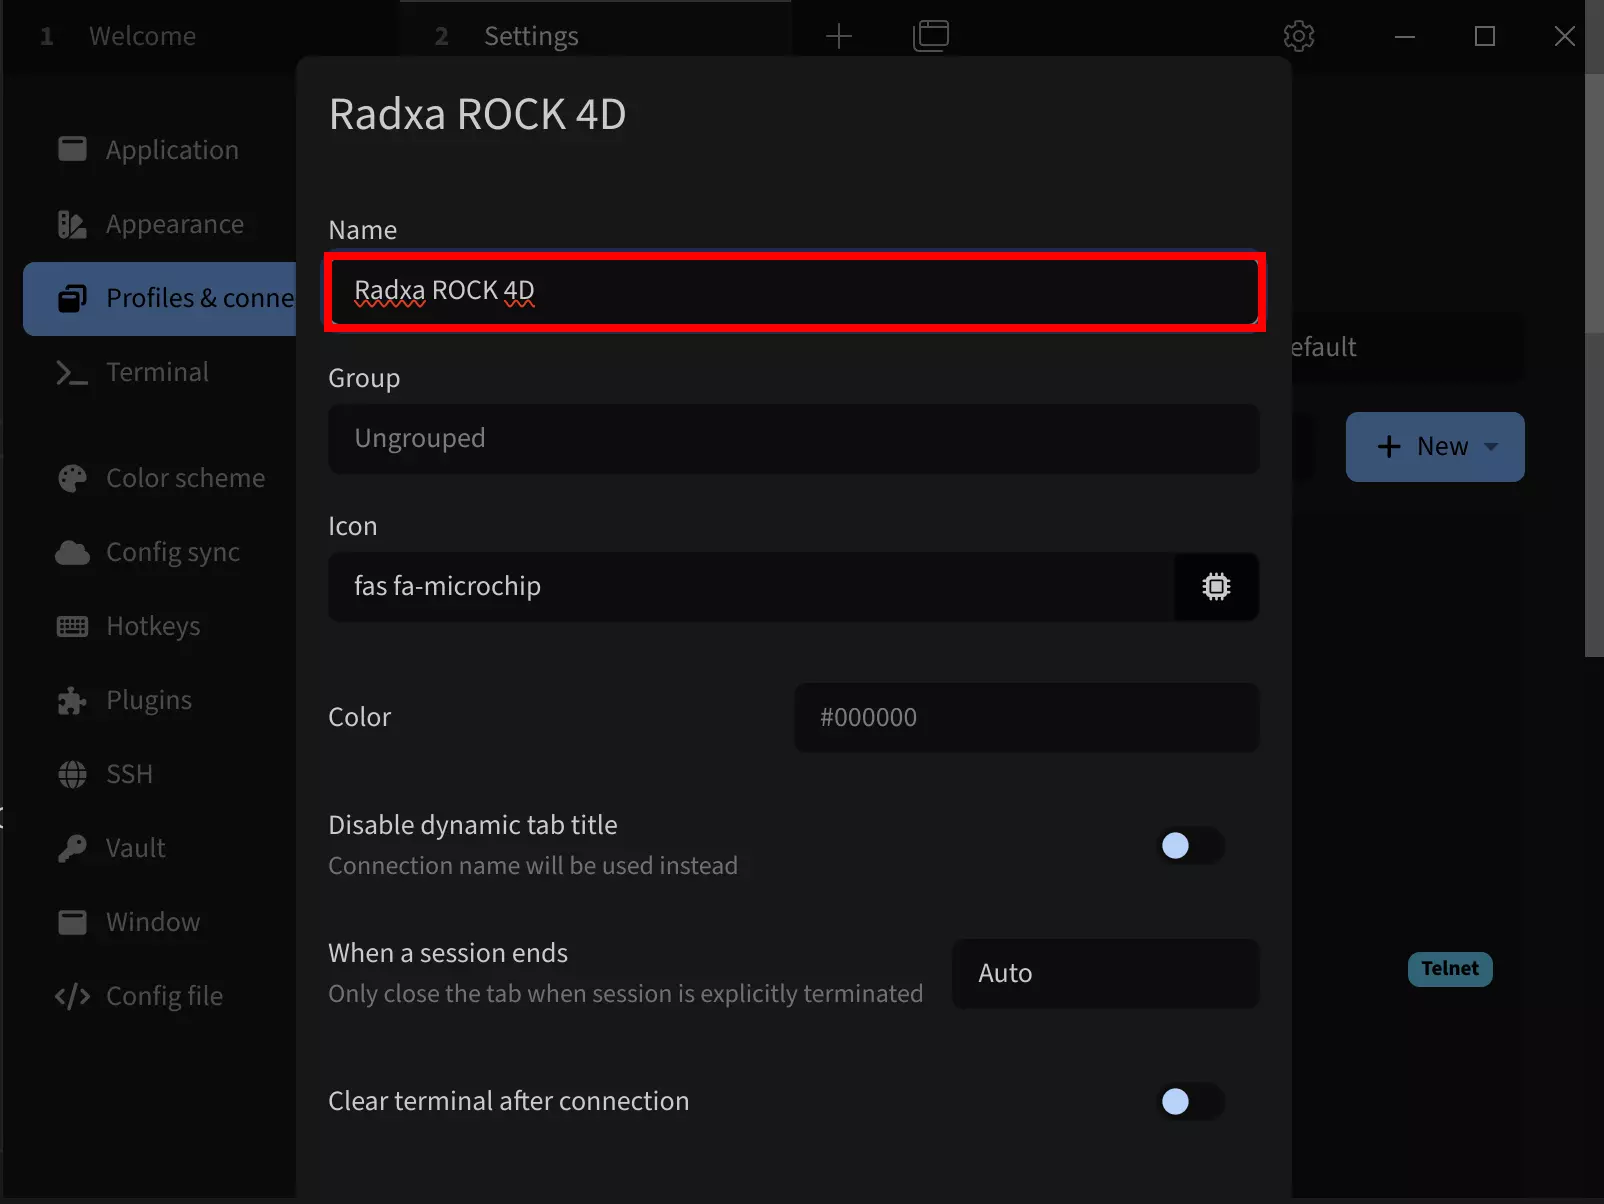
①. Device: Set the serial port (typically /dev/ttyUSB0 if only one serial device is connected)
②. Baud rate: Set to 1500000
③. Click Save to save the configuration
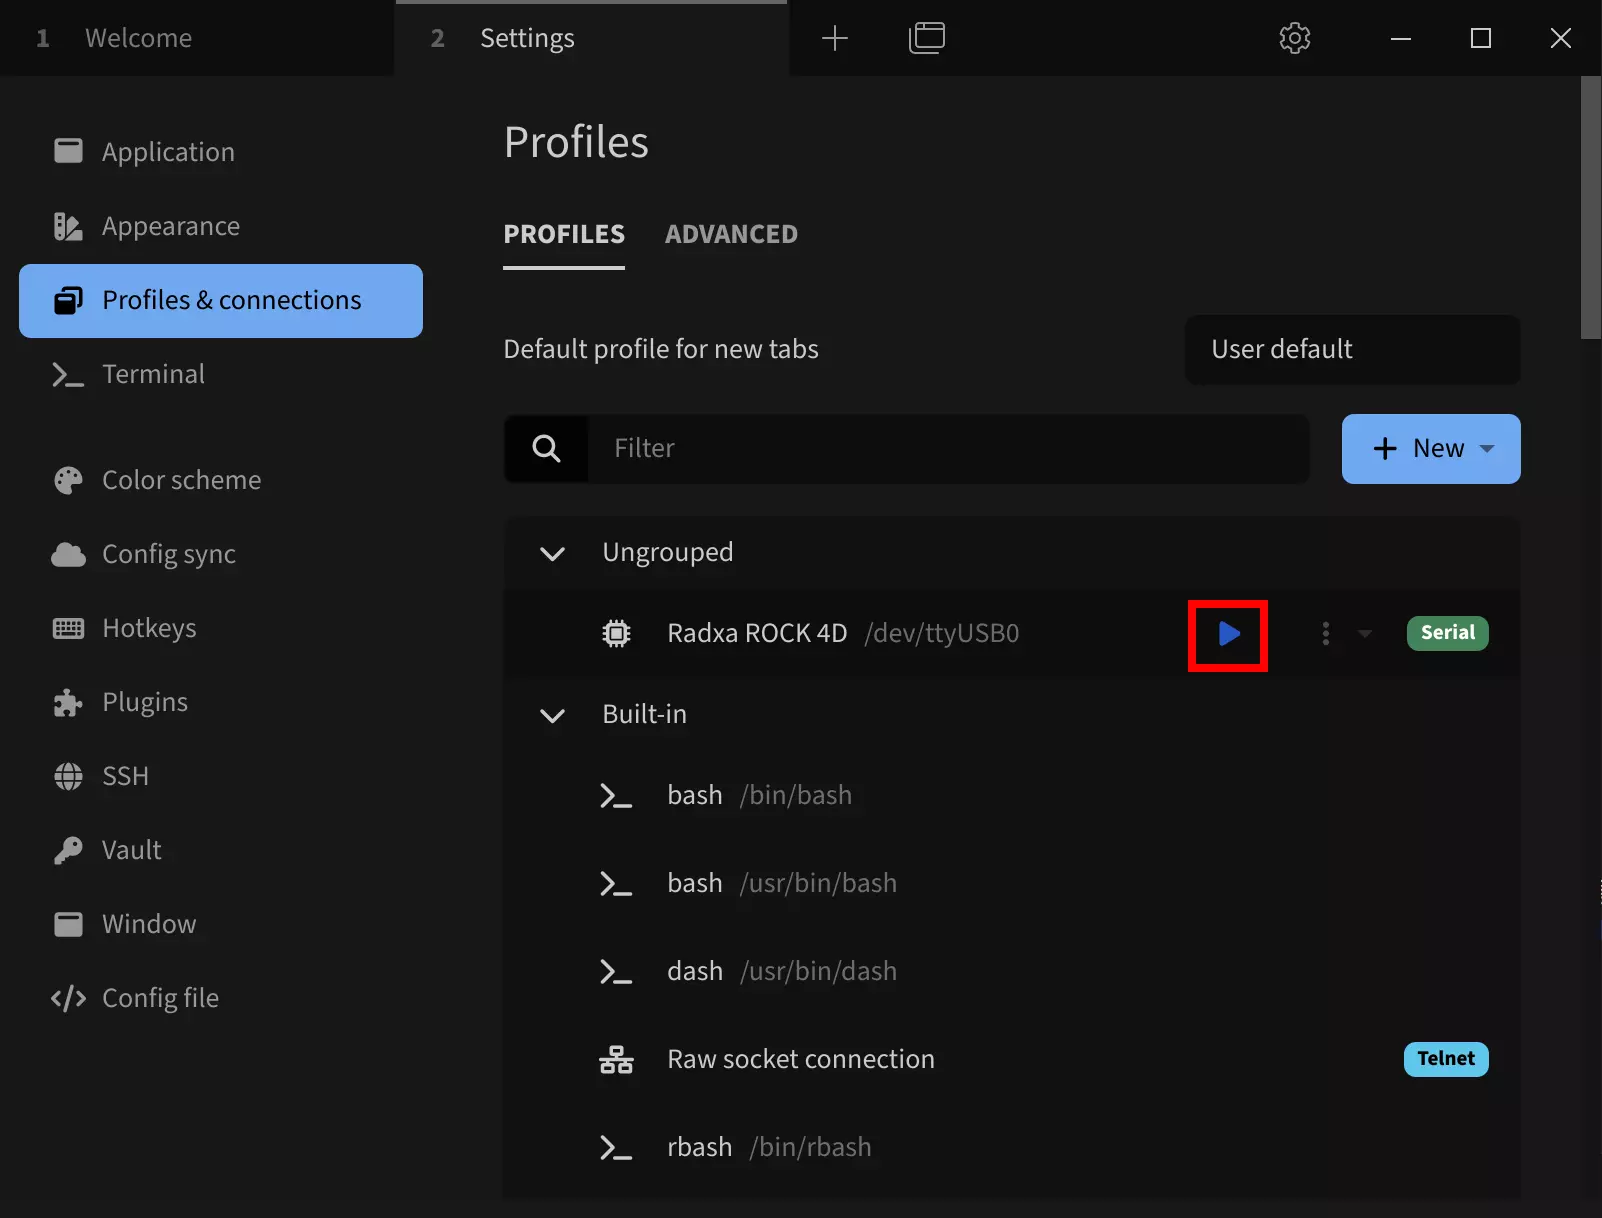
Click the run button to connect to the serial device:
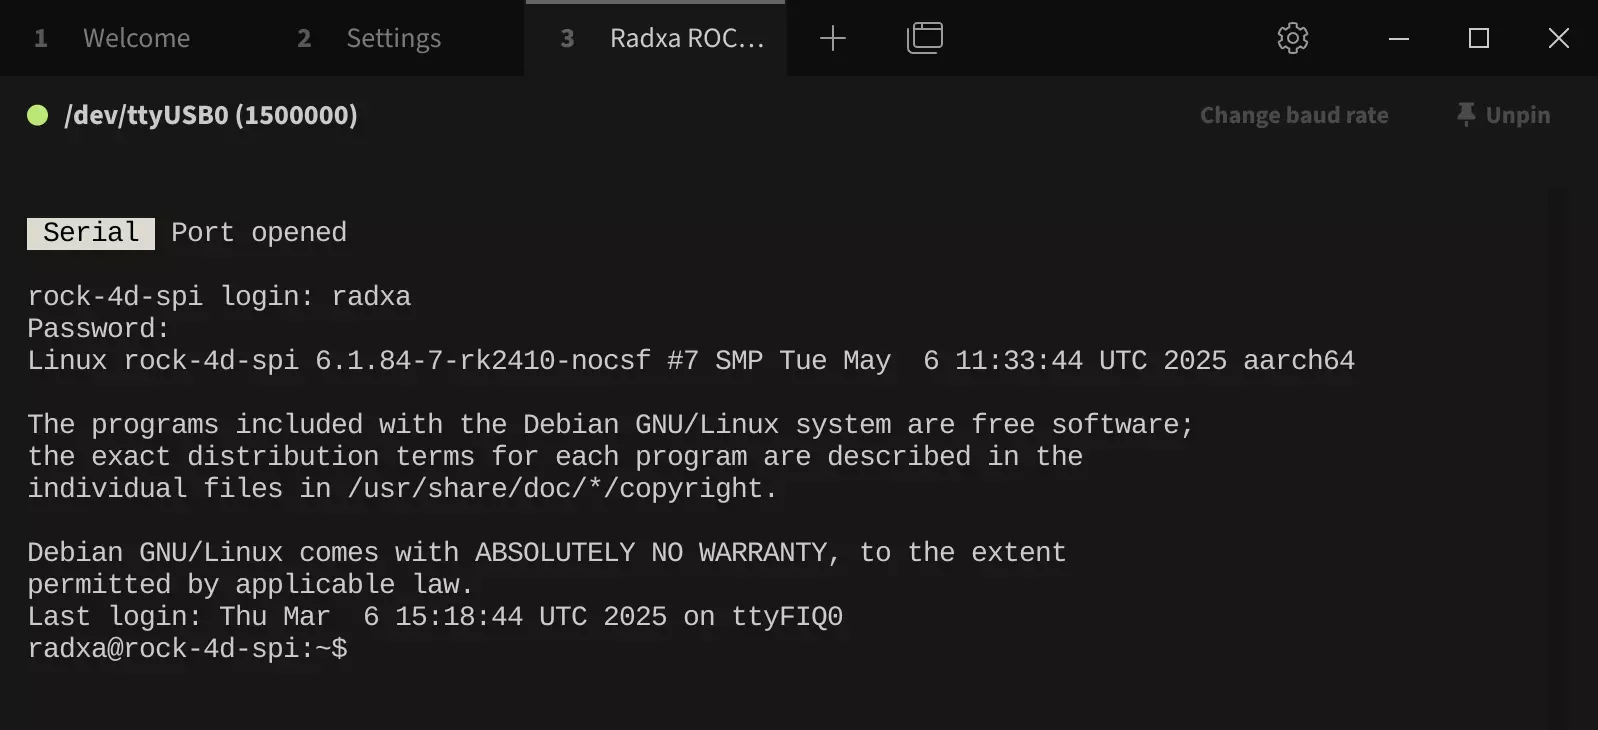
After successful connection, press Enter to see the login prompt. Then log in using your system's username and password (note that the password won't be displayed as you type - just type it and press Enter).
If you encounter the error Error: Permission denied, cannot open /dev/ttyUSB0 when opening the serial port, follow these troubleshooting steps:
- Check if the serial device is properly connected
- Verify serial device permissions
For Linux systems, if you encounter insufficient permissions, run the following command to grant all users access to the serial device:
sudo chmod 777 /dev/ttyUSB0
- Check if the serial device is being used by another program
System Usage
With Display
If you're using the ROCK 4D with a monitor, the system usage becomes straightforward as you can operate it through the graphical interface displayed on your screen.
Headless Mode
If you're using the ROCK 4D with only a USB-to-TTL serial cable, you can operate the system through a serial terminal.
For users in headless mode, here are some recommendations to help you get started quickly:
- Network Configuration
Simply connect an Ethernet cable to your ROCK 4D to ensure network connectivity.
- Serial Debugging
You can view system output information (such as IP address, boot messages, etc.) through serial debugging.
- SSH Remote Access
Configure SSH remote access to log in to your system directly via SSH, eliminating the need for a serial cable.
- VNC Remote Access
If your system has a graphical interface, setting up VNC remote access allows you to view the system display without a monitor.