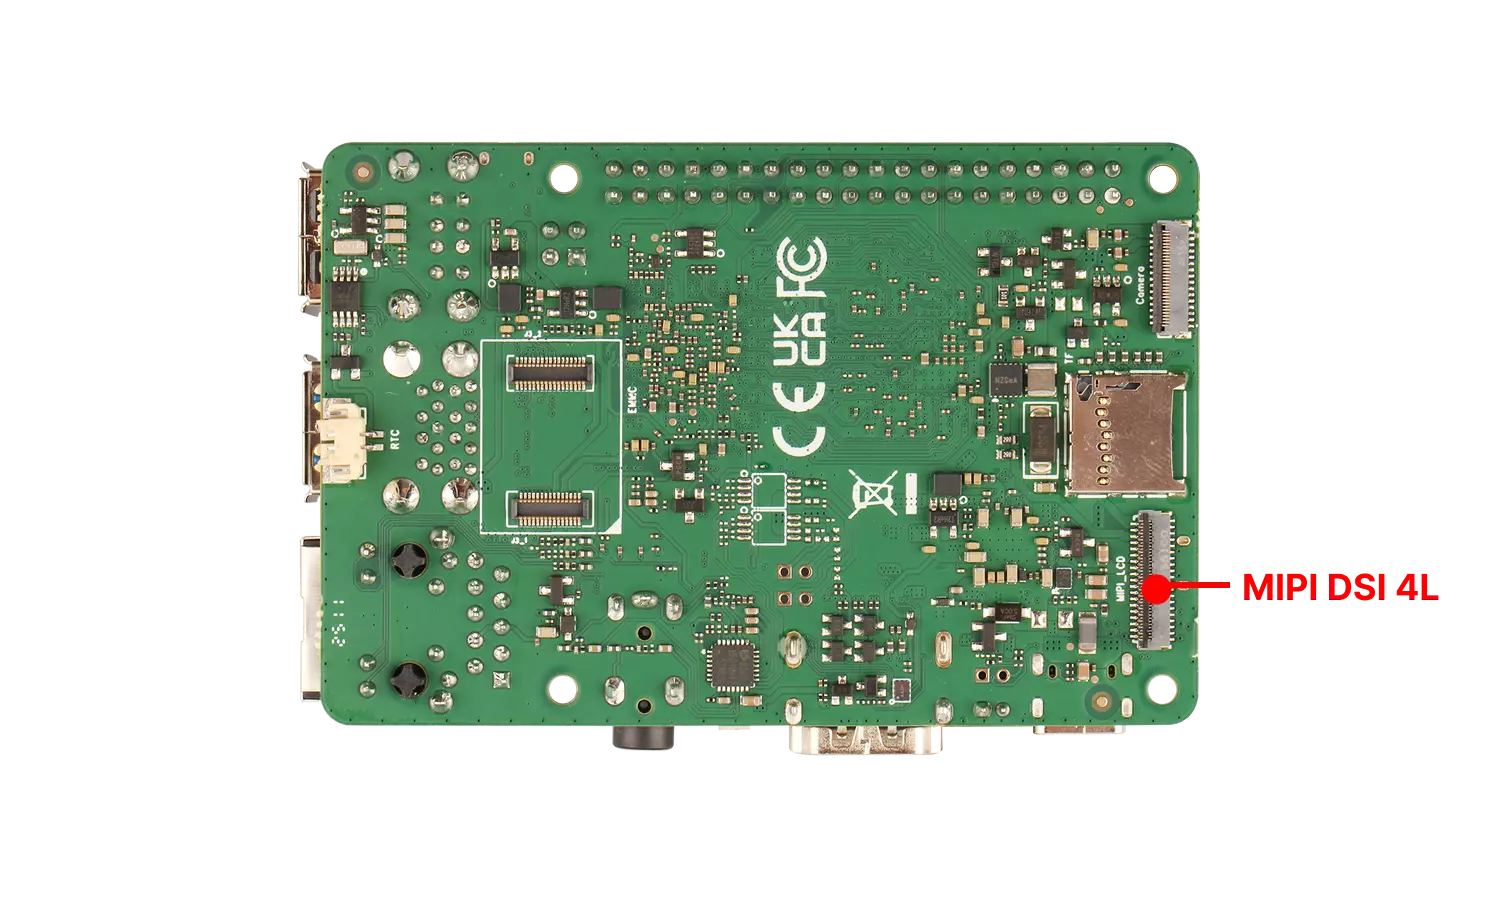
MIPI DSI Interface
The Radxa ROCK 4D features one onboard MIPI DSI interface for connecting displays, supporting resolutions up to 2K.
Supported Displays
List of displays tested and confirmed working with ROCK 4D:
| Model | Resolution |
|---|---|
| Radxa Display 8 HD | 800×1280 |
User Guide
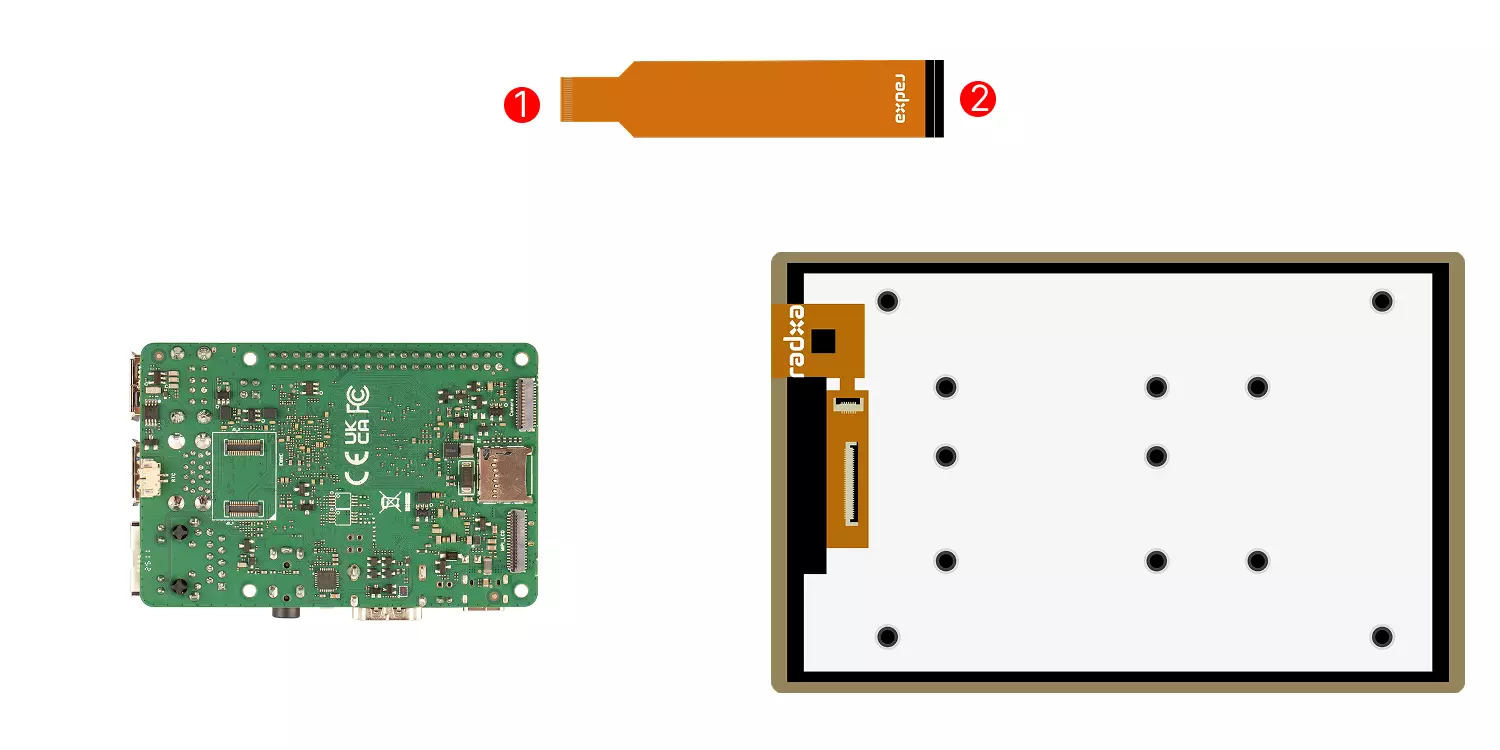
To connect a display using the MIPI DSI interface, the ROCK 4D requires a dedicated FPC cable (FPC cable specification: 39-pin 0.3mm SBC to 40-pin 0.5mm Display).
- Cable Connection Guide
①. Connect to the ROCK 4D's MIPI DSI interface with the gold fingers (metal contacts) facing toward the mainboard.
②. Connect to the display's interface with the gold fingers (metal contacts) facing toward the display.
Enabling the Display
- Open a terminal and enter the
rsetupcommand to configure display options:
radxa@radxa-4d$
rsetup
- Use the arrow keys to select the
Overlaysoption, then press Enter.
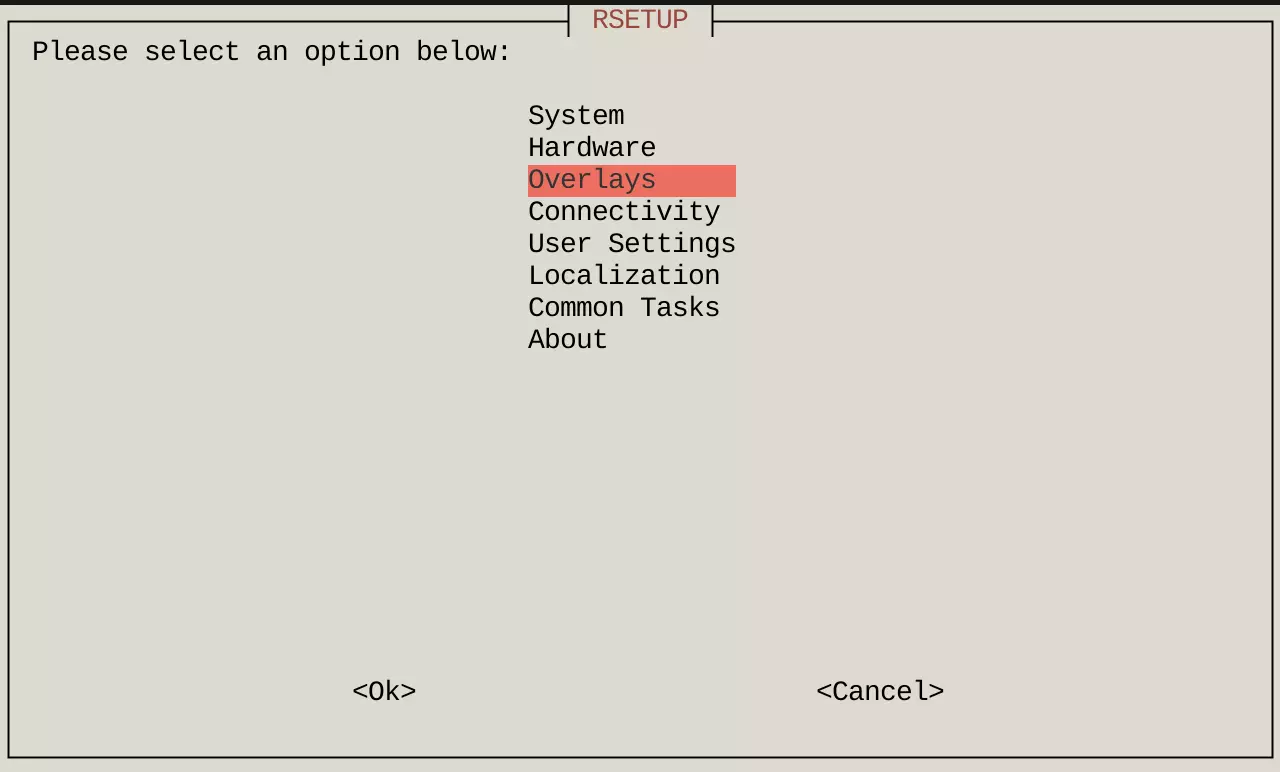
- Select
Manage overlaysand press Enter.
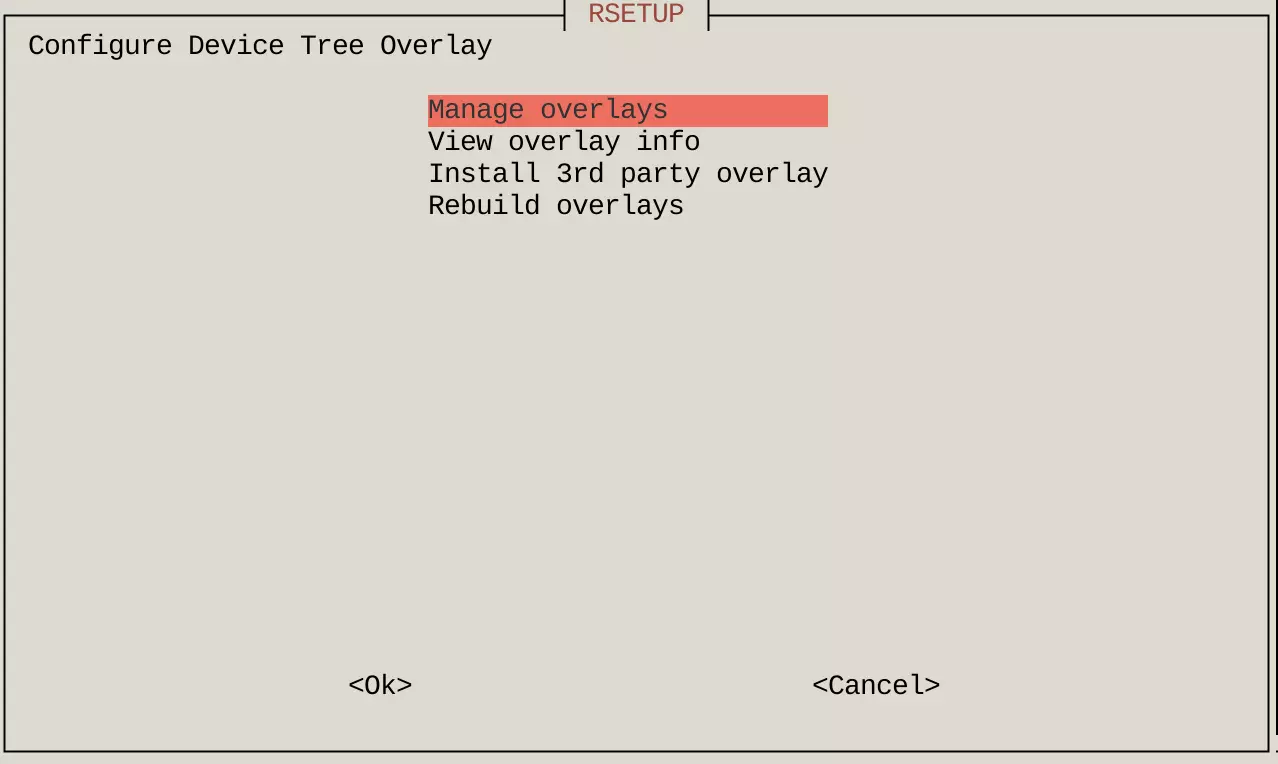
- Use the arrow keys to select
Enable Radxa Display 8 HD, press Space to check the option, then press Enter to confirm.
tip
An asterisk * in the checkbox indicates the option is enabled.

- Reboot the system for the changes to take effect. The display should now work properly.
Interface Specifications
tip
For detailed interface specifications, please refer to the Hardware Design: Schematics in the download section.
| Pin# | Name | Pin# | Name | Pin# | Name |
|---|---|---|---|---|---|
| 1 | LCD_3V3 | 15 | GND | 29 | GND |
| 2 | LCD_3V3/VCC_1V8_S0 | 16 | MIPI_DPHY_DSI_TX_D2N | 30 | LCD_3V3 |
| 3 | NC | 17 | MIPI_DPHY_DSI_TX_D2P | 31 | LCD_3V3 |
| 4 | LCD_RESET_1 | 18 | GND | 32 | GND |
| 5 | NC | 19 | MIPI_DPHY_DSI_TX_D3N | 33 | GND |
| 6 | GND | 20 | MIPI_DPHY_DSI_TX_D3P | 34 | VCC_LEDK2 |
| 7 | MIPI_DPHY_DSI_TX_D0N | 21 | GND | 35 | VCC_LEDK2 |
| 8 | MIPI_DPHY_DSI_TX_D0P | 22 | GND | 36 | NC |
| 9 | GND | 23 | TP_RST_LCD | 37 | NC |
| 10 | MIPI_DPHY_DSI_TX_D1N | 24 | VCC_TP | 38 | VCC_LEDA2 |
| 11 | MIPI_DPHY_DSI_TX_D1P | 25 | TP_INT_LCD | 39 | VCC_LEDA2 |
| 12 | GND | 26 | TP_SDA_LCD | 40 | GND |
| 13 | MIPI_DPHY_DSI_TX_CLKN | 27 | TP_SCL_LCD | 41 | GND |
| 14 | MIPI_DPHY_DSI_TX_CLKP | 28 | GND |