UART Debugging
UART debugging is a core method in embedded development for interacting with development boards through a serial communication interface (UART). Using a serial port tool, you can view system output and perform debugging.
Hardware Requirements
- Development Board: Radxa ROCK 4D
- USB-to-TTL Serial Cable: Connect the board's UART0 interface to your PC's USB port
- Power Adapter: For powering the development board (supports PD protocol, 5V power input)
Hardware Connection
You need to connect the USB-to-TTL serial cable to the ROCK 4D's UART0_TX, UART0_RX, and GND pins.
When using a USB-to-TTL serial cable with the ROCK 4D for UART debugging, ensure the pins are connected correctly to prevent hardware damage to the board.
Connect the USB end of the serial cable to your PC, and the other end to the ROCK 4D's GPIO UART pins.
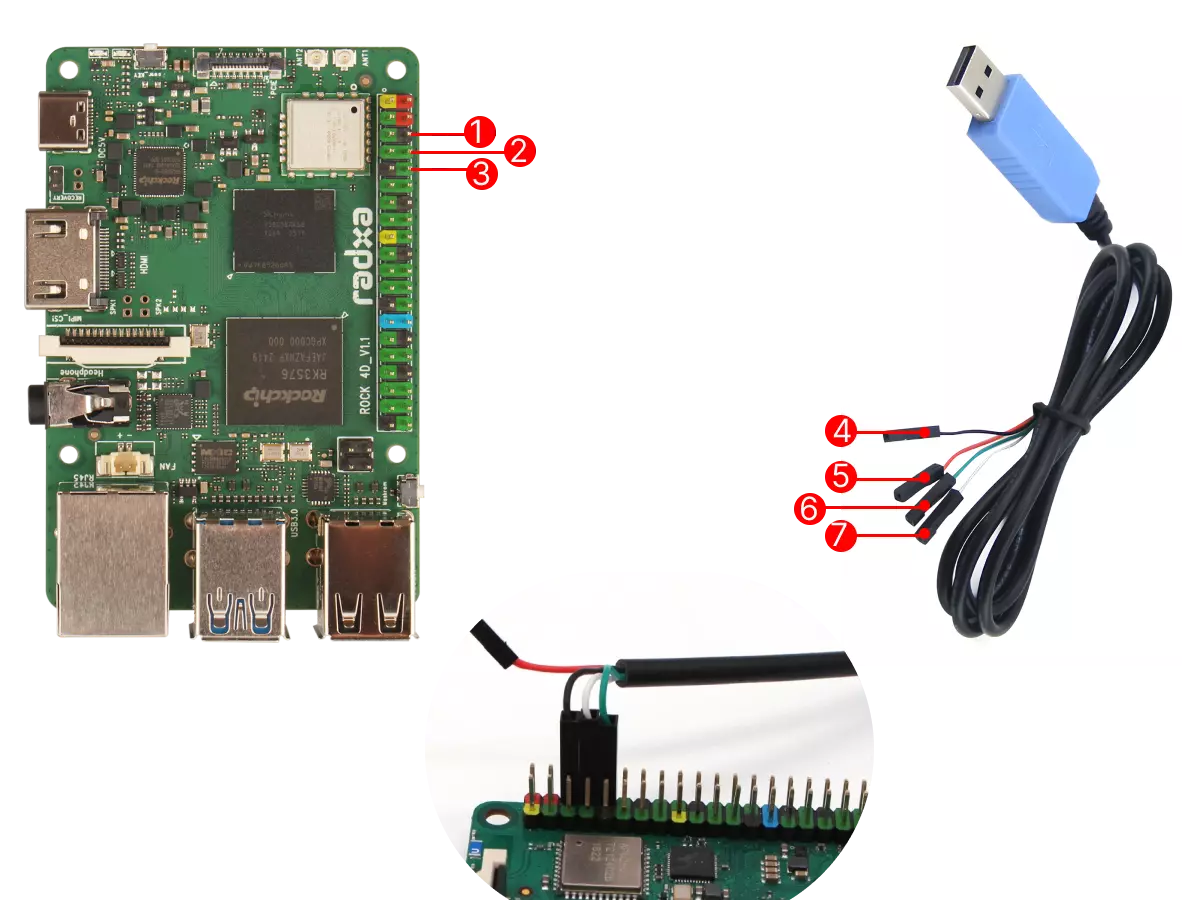
Pin Description and Connection Diagram
| No. | Pin Function | Connection Method |
|---|---|---|
| ① | ROCK 4D: GND (Pin6) | Connect to GND pin of USB-TTL cable |
| ② | ROCK 4D: UART0_TX (Pin8) | Connect to RX pin of USB-TTL cable |
| ③ | ROCK 4D: UART0_RX (Pin10) | Connect to TX pin of USB-TTL cable |
| ④ | USB-TTL Cable: GND (Black) | Connect to ROCK 4D's GND pin |
| ⑤ | USB-TTL Cable: RX (White) | Connect to ROCK 4D's UART0_TX pin |
| ⑥ | USB-TTL Cable: TX (Green) | Connect to ROCK 4D's UART0_RX pin |
| ⑦ | USB-TTL Cable: VCC (Red) | Leave unconnected |
Serial Port Login
We recommend using Tabby software for serial port login and debugging, which supports multiple platforms including Windows, Linux, and MacOS.
- ROCK 4D Serial Communication Parameters
Baud Rate: 1500000
Data Bits: 8
Stop Bits: 1
Parity: None
Using Tabby
Tabby is a powerful cross-platform serial port debugging tool that supports various protocols including serial and SSH.
Installing Tabby
Download and install Tabby from the official Tabby website.
- Windows
Select the appropriate .exe file based on your system architecture.
- Linux
Choose the .deb file that matches your system architecture.
- MacOS
Download the .dmg file for your system architecture.
Using Tabby (Serial Port)
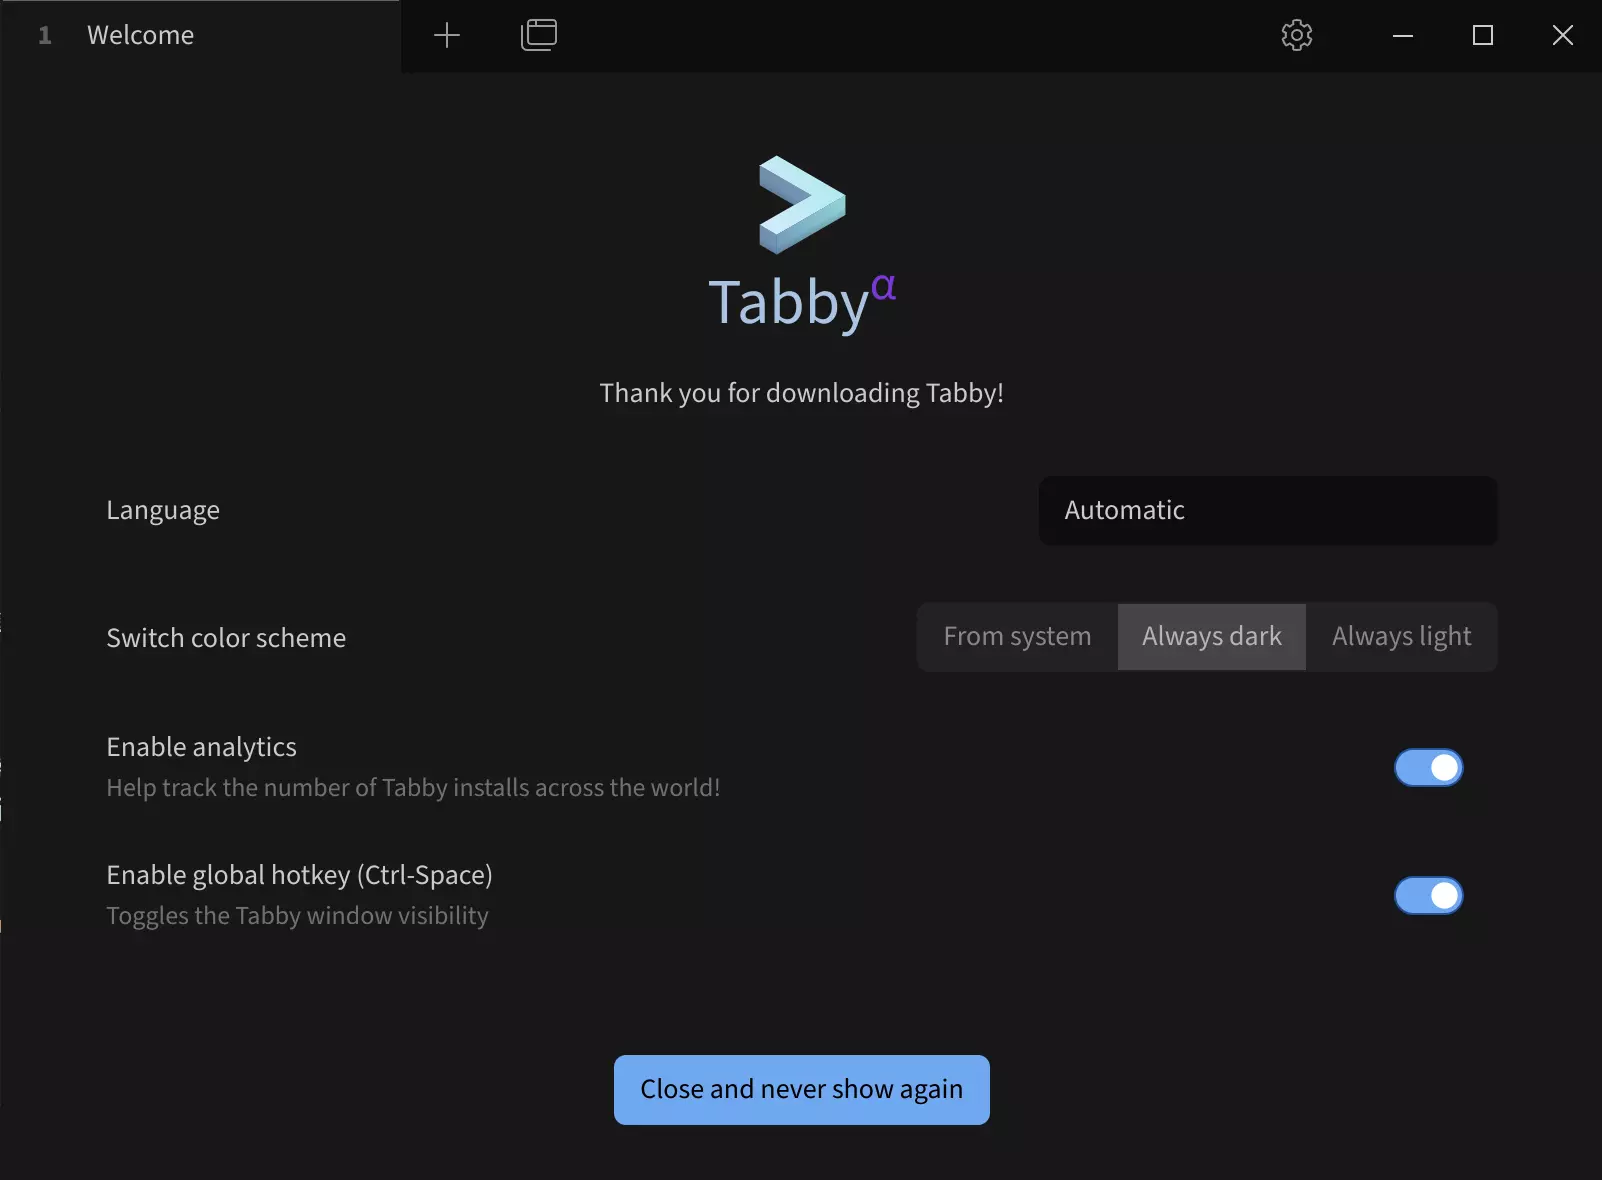
Double-click the Tabby icon to launch the application.
Tabby Main Interface
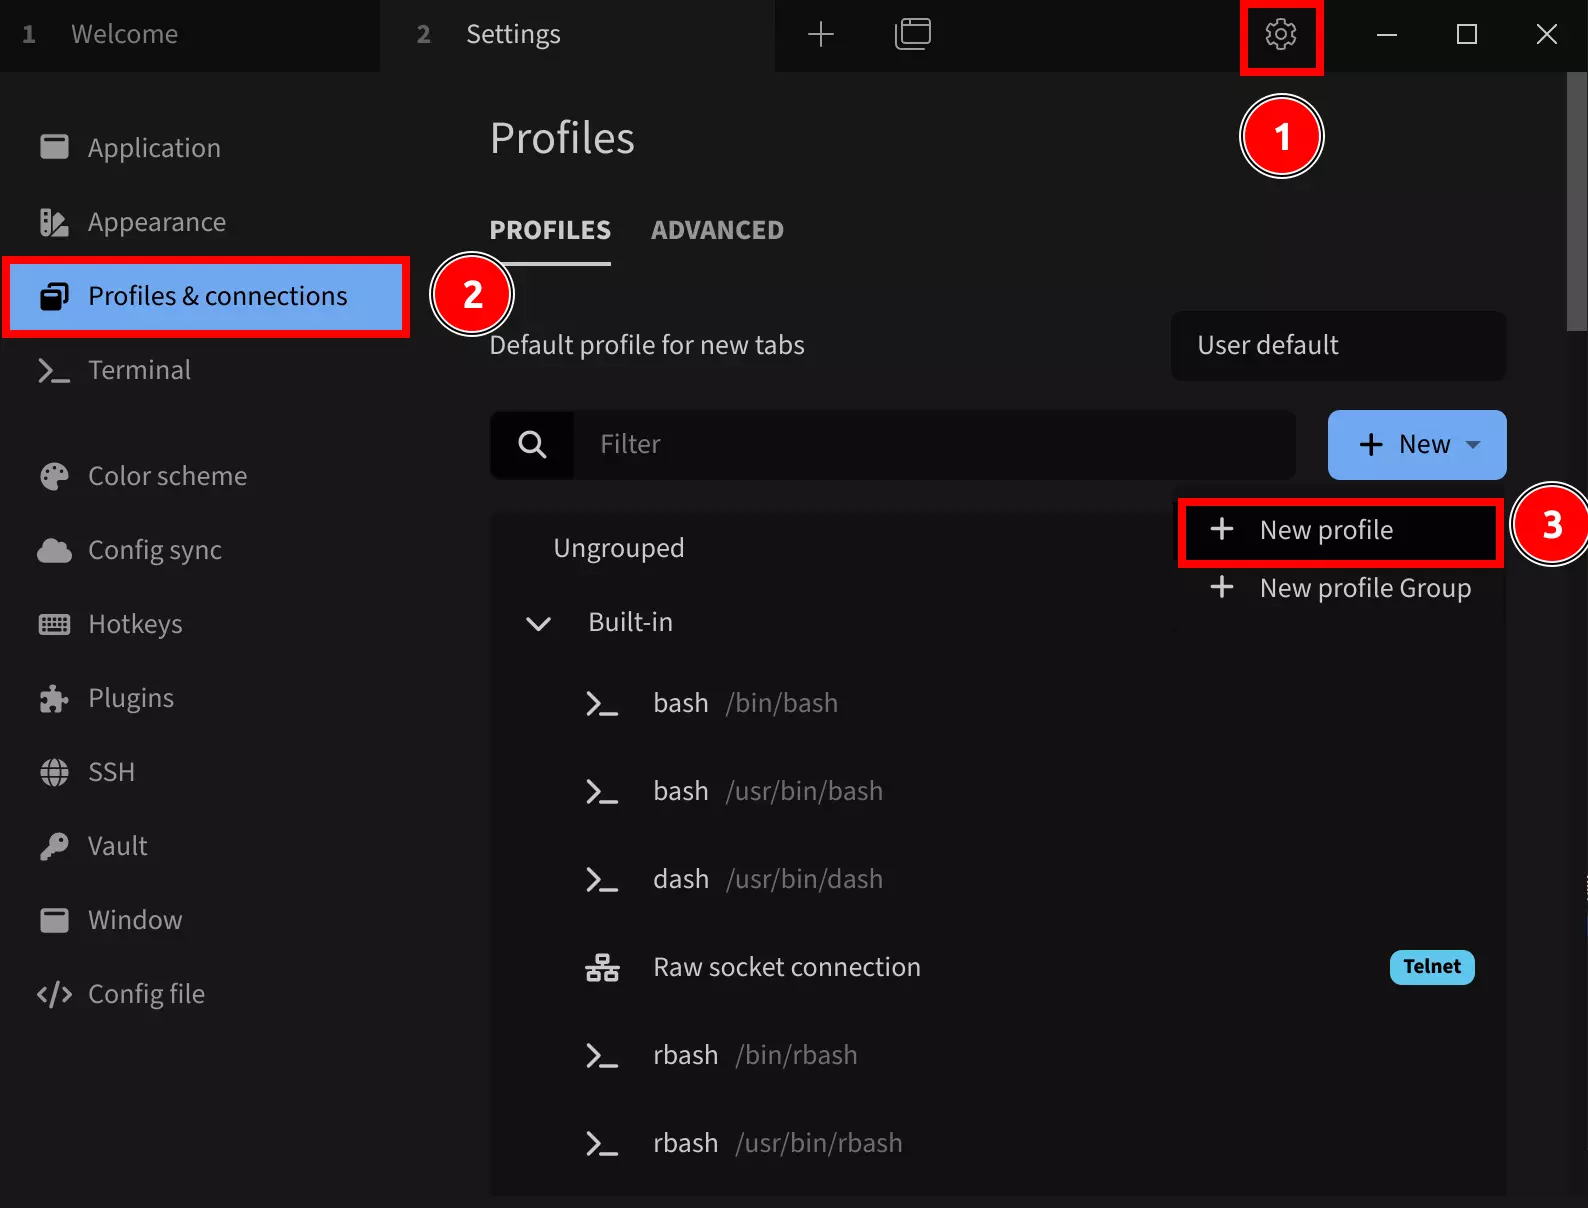
Configure the serial port connection:
① --> Settings: Click to access settings
② --> Profiles & connections: Click to configure connection settings
③ --> New profile: Click to add a new configuration
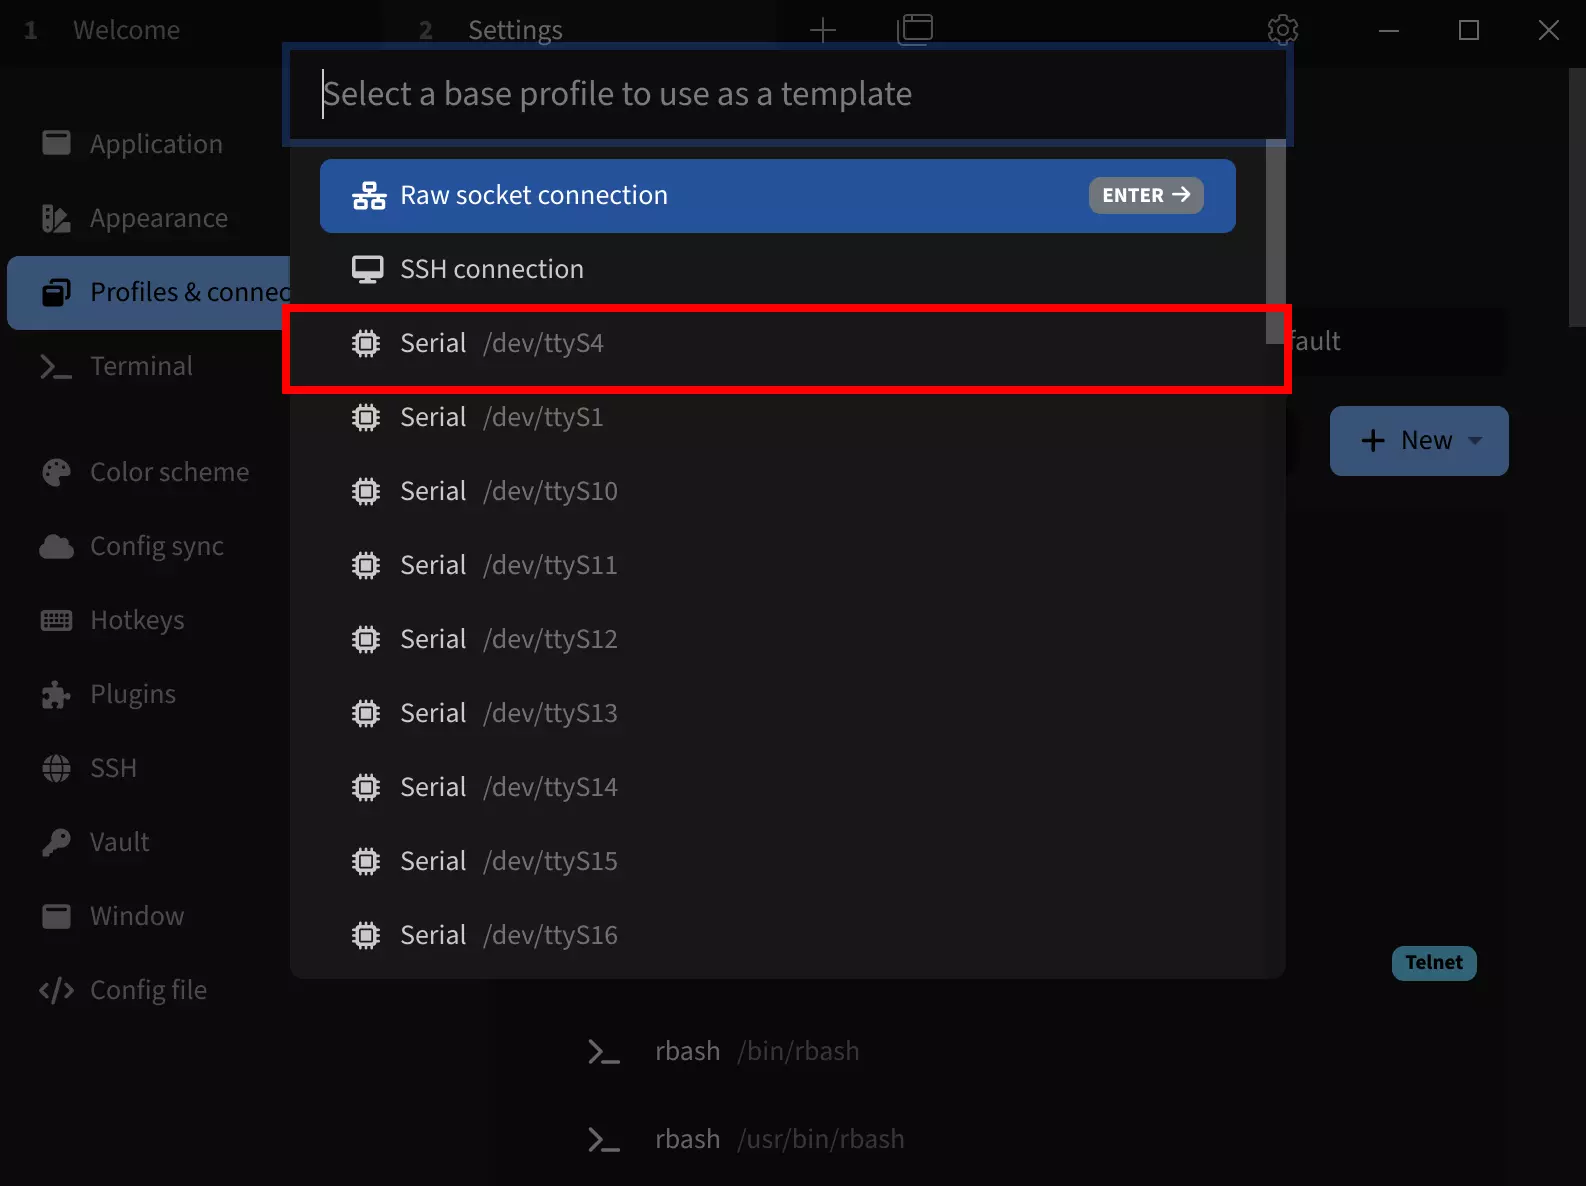
Select a base configuration template:
Choose any Serial template. You can modify parameters like device name, serial port device number, and baud rate in the subsequent interface.
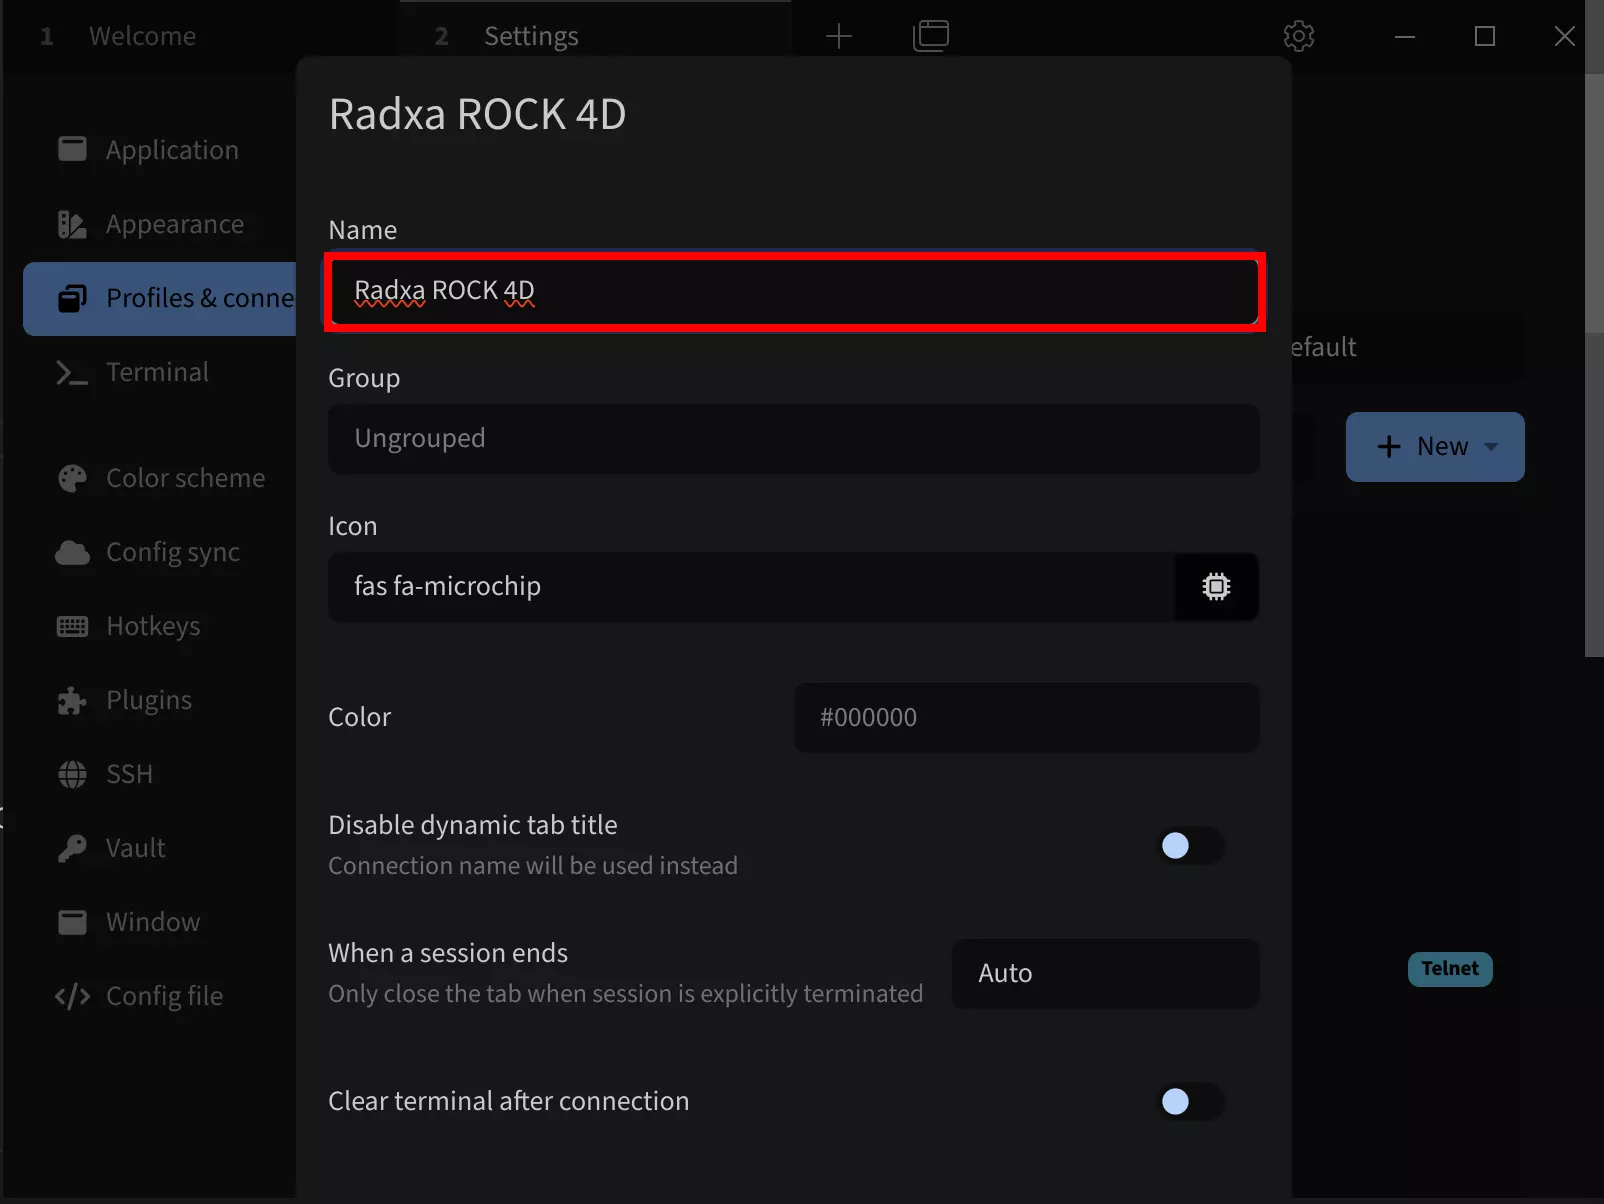
After selecting the Serial template, modify the following parameters:
Name: Set a connection name (recommended to use the product name)
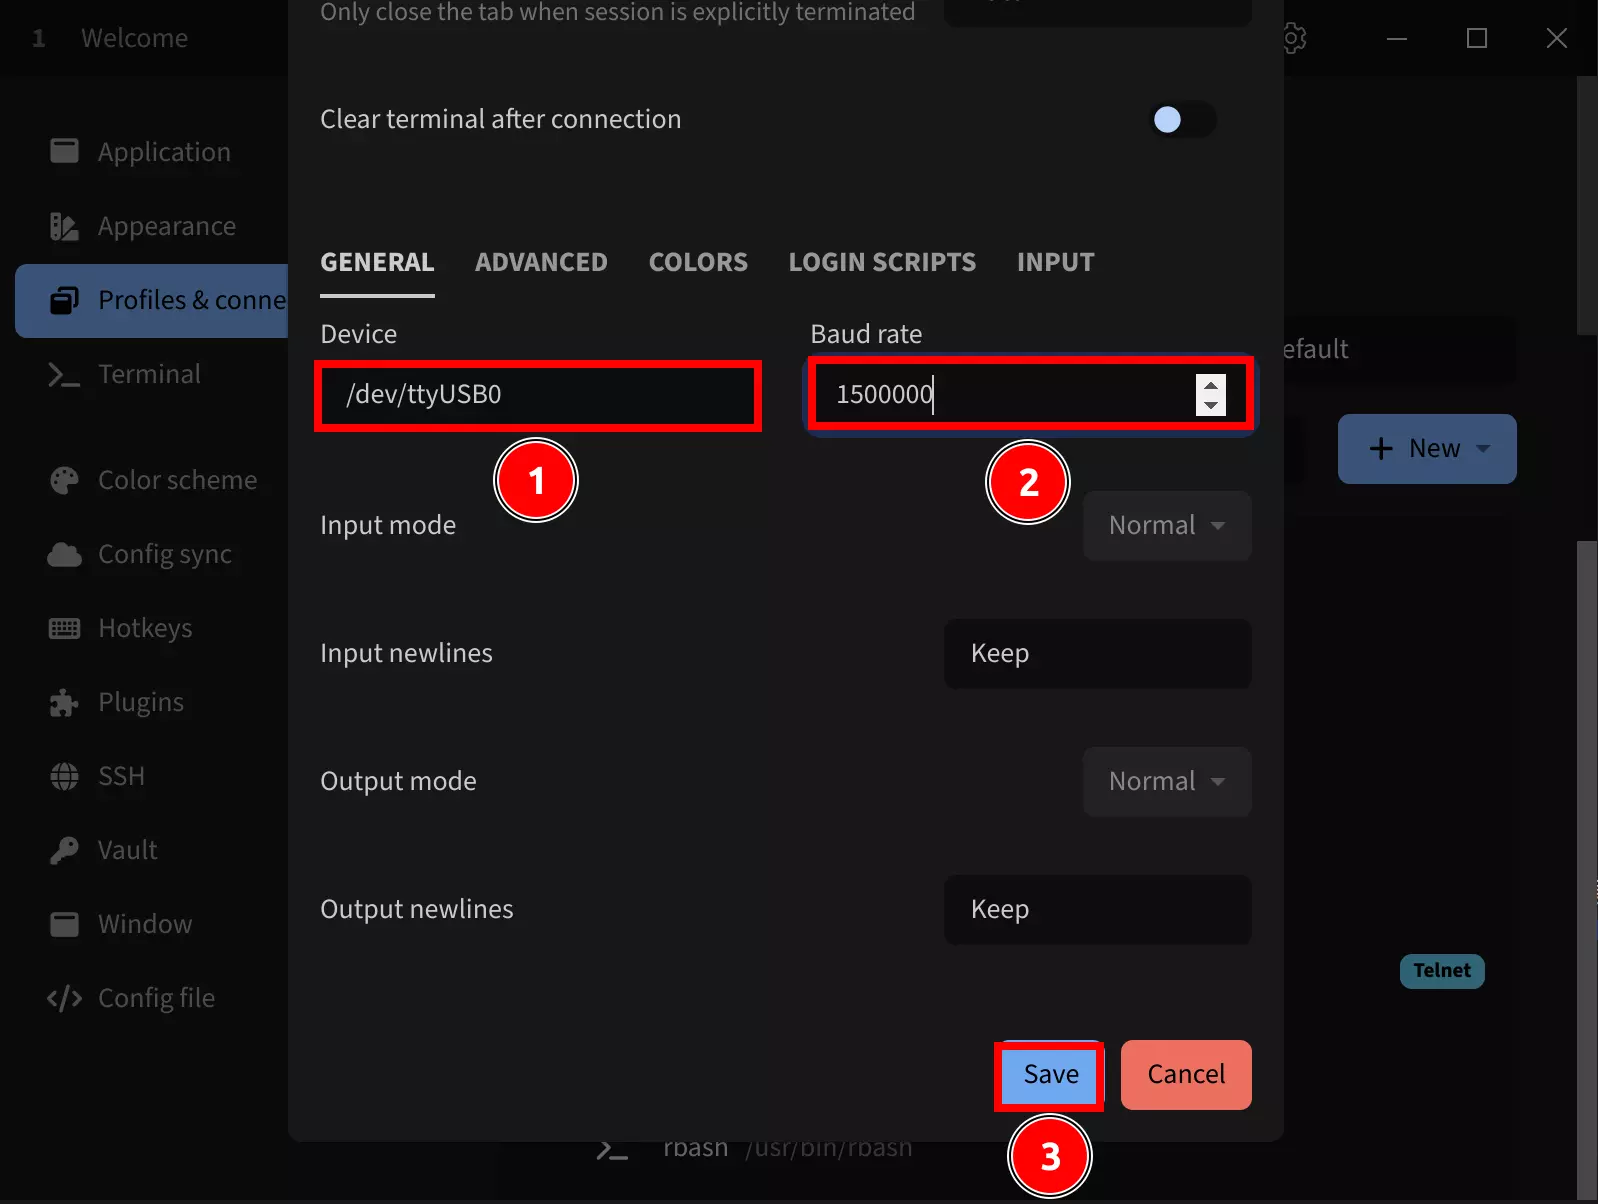
① --> Device: Set the serial port device (typically /dev/ttyUSB0 if only one serial device is connected)
② --> Baud rate: Set to 1500000
③ --> Save: Save the configuration
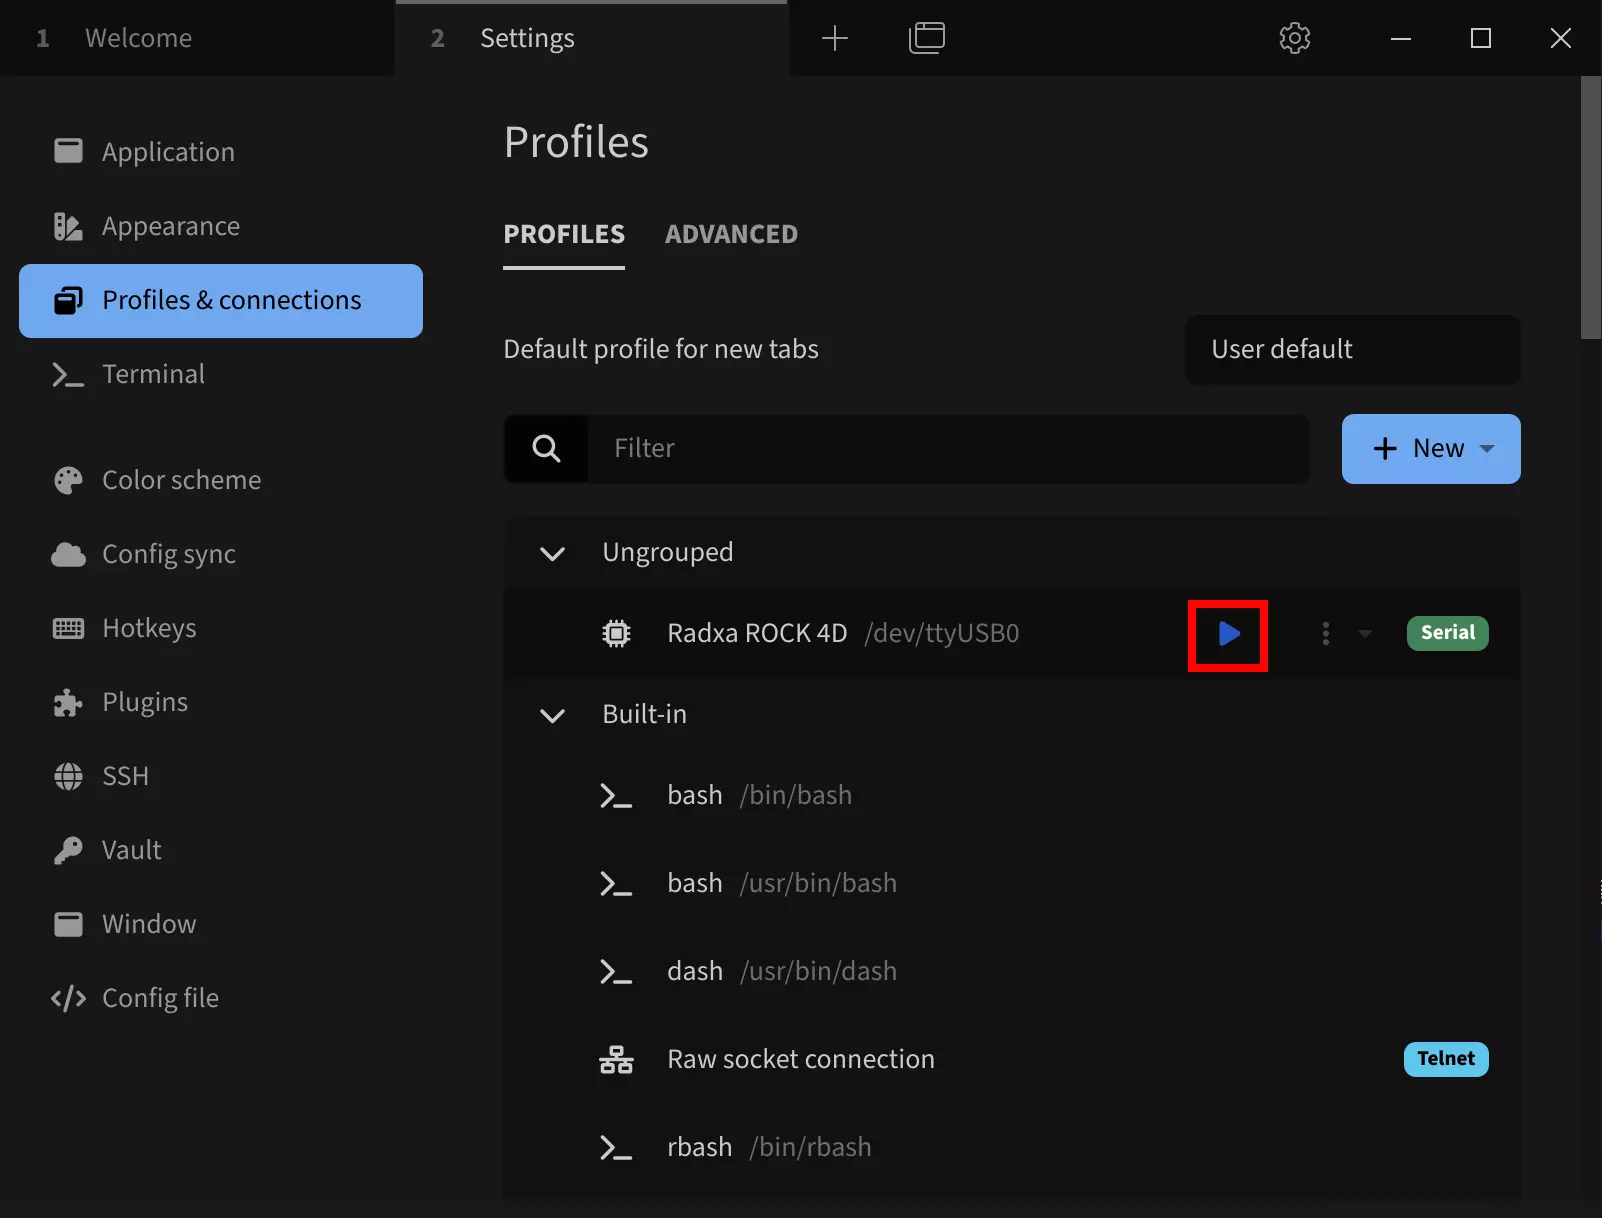
Click the run button to connect to the serial device:
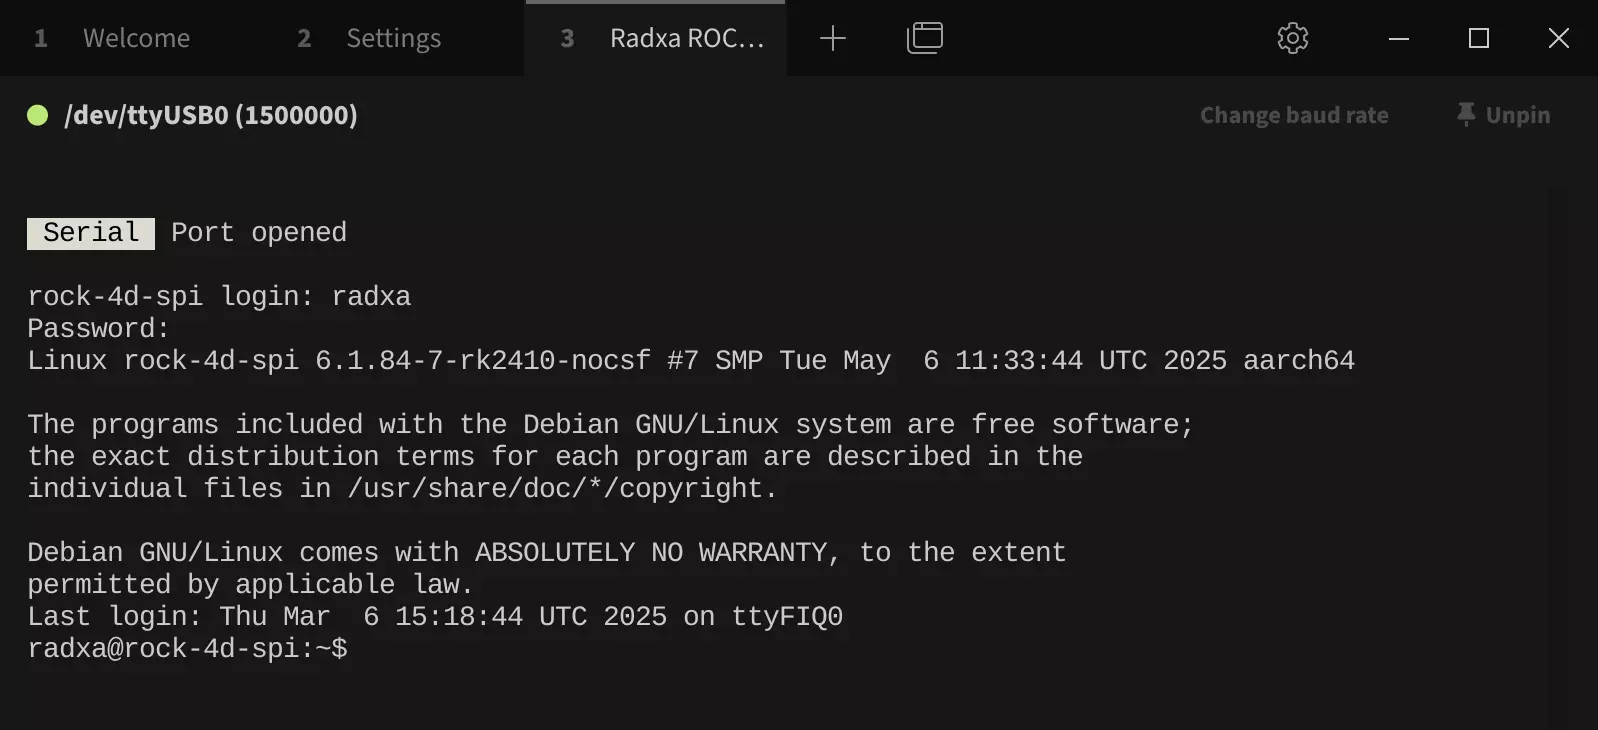
After a successful connection, press Enter to see the login prompt. Then enter your system username and password (the password won't be displayed as you type; press Enter after entering it).
If you encounter the error Error: Permission denied, cannot open /dev/ttyUSB0 when opening the serial port, follow these troubleshooting steps:
-
Check if the serial device is properly connected
-
Verify serial device permissions
For Linux systems, if the serial device lacks sufficient permissions, run the following command to grant all users access to the serial device:
sudo chmod 777 /dev/ttyUSB0
- Check if the serial device is being used by another program