OpenCV
Introduction
OpenCV (Open Source Computer Vision Library) is a library of programming functions primarily used for real-time computer vision.
Application Areas
-
Image processing and analysis: OpenCV can be used to perform a variety of image processing and analysis operations, such as image enhancement, filtering, edge detection, morphological operations, colour space conversion and so on.
-
Target detection and tracking: OpenCV can be used for target detection and tracking, such as face recognition, vehicle recognition, pedestrian detection, etc.
-
Machine vision and industrial automation: OpenCV can be used for machine vision and industrial automation applications, such as automatic detection and classification, industrial quality control, etc.
-
Video Analysis and Processing: OpenCV can be used for video analysis and processing, such as motion detection, object tracking, video compression, video coding and decoding.
-
Medical Image Processing: OpenCV can also be used for medical image processing and analysis, such as segmentation, alignment, reconstruction of medical images.
-
Intelligent traffic system: OpenCV can be used for intelligent traffic system, including licence plate recognition, traffic flow statistics, road damage detection, etc.
Installation
APT Installation
- C++ Lib
- Python Lib
sudo apt install libopencv-dev
pip3 install opencv-python
Compile and install
- Go to the OpenCV website to download the required version (4.10 for example).
wget https://github.com/opencv/opencv/archive/refs/tags/4.10.0.zip
- Decompression
unzip 4.10.0.zip
- Install the required packages
sudo apt-get install build-essential cmake git unzip pkg-config libjpeg-dev libpng-dev libavcodec-dev libavformat-dev libswscale-dev libgtk2.0-dev libcanberra-gtk* libgtk-3-dev libgstreamer1.0-dev gstreamer1.0-gtk3 \
libgstreamer-plugins-base1.0-dev gstreamer1.0-gl libxvidcore-dev libx264-dev python3-dev python3-numpy python3-pip libtbb2 libtbb-dev libdc1394-22-dev libv4l-dev v4l-utils \
libopenblas-dev libatlas-base-dev libblas-dev liblapack-dev gfortran libhdf5-dev libprotobuf-dev libgoogle-glog-dev libgflags-dev protobuf-compiler -y
- Compilation
mkdir build
cd build
cmake ..
make -j$(nproc)
sudo make install
sudo ldconfig
Sample Code
Here are some simple examples in Python.
Feature detection
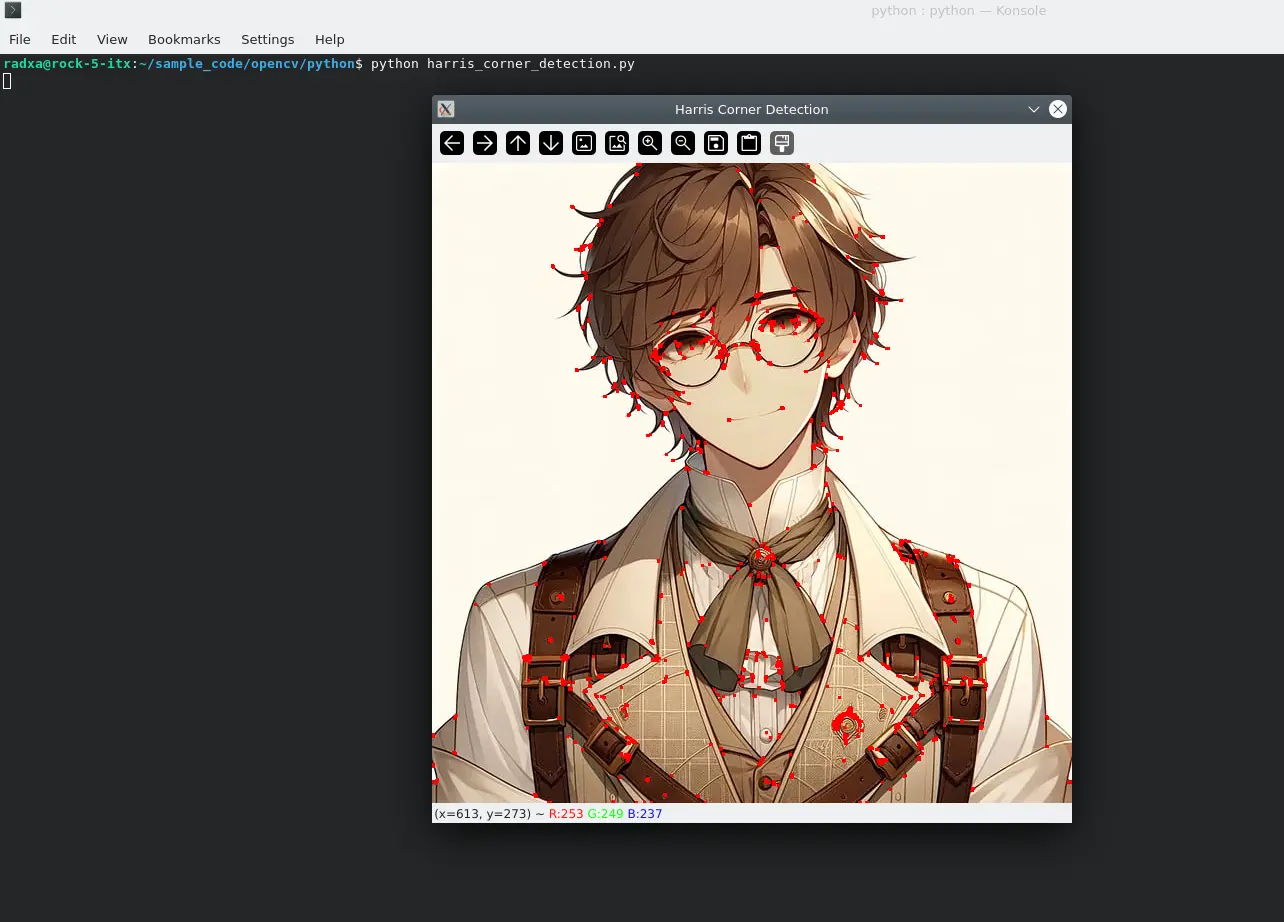
- Harris corner detection
harris_corner_detection.py
#!/usr/bin/env python3
# -*- encoding: utf-8 -*-

import cv2
import numpy as np

# Read image
img = cv2.imread('./pic1.png')
gray = cv2.cvtColor(img, cv2.COLOR_BGR2GRAY)

# Harris corner detection
gray = np.float32(gray)
dst = cv2.cornerHarris(gray, 2, 3, 0.08)
dst = cv2.dilate(dst, None)
img[dst > 0.01 * dst.max()] = [0, 0, 255]

# Display image
cv2.imshow('Harris Corner Detection', img)
cv2.waitKey(0)
cv2.destroyAllWindows()
Renderings:
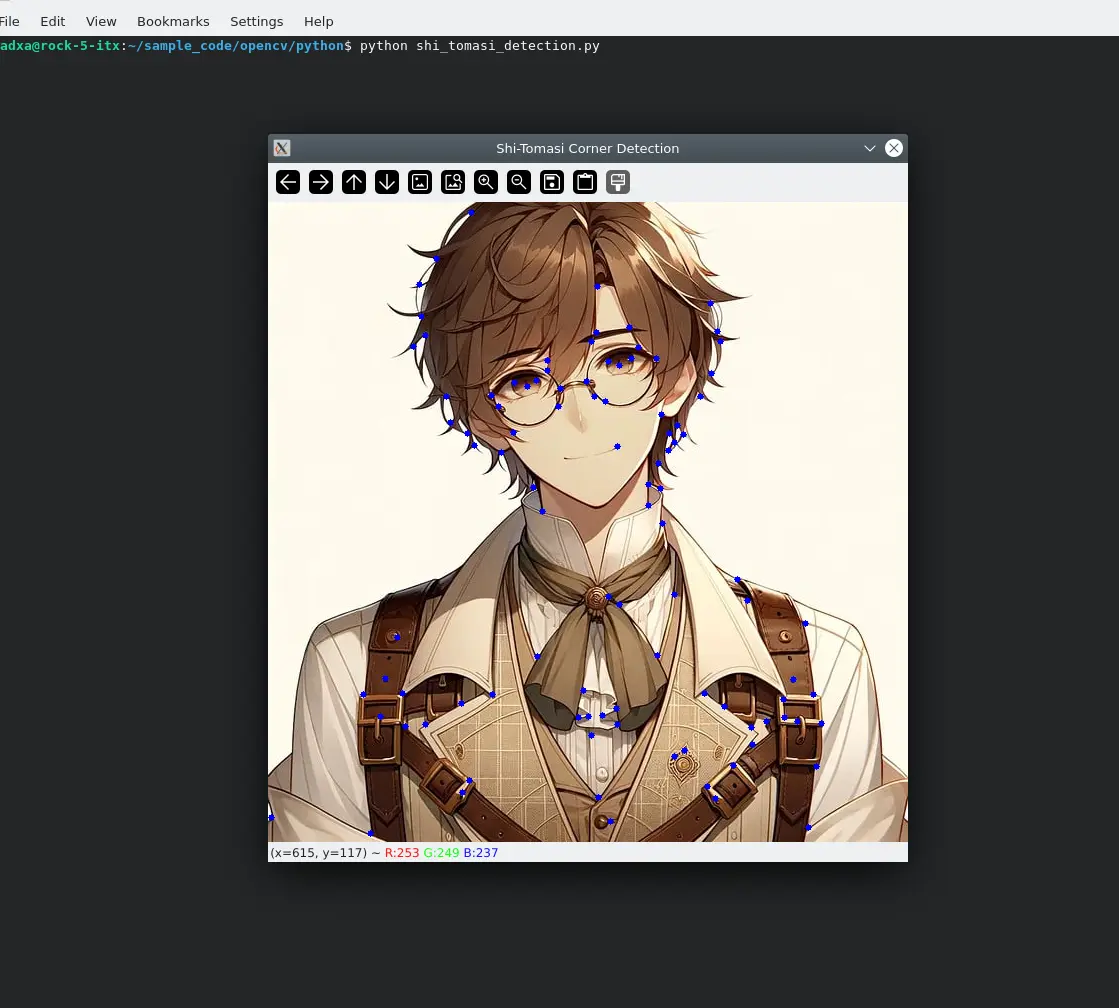
- Shi-Tomasi Corner Point Detection
shi_tomasi_detection.py
import cv2
import numpy as np

# Read the image
img = cv2.imread('./pic1.png')

# Convert to greyscale
gray = cv2.cvtColor(img, cv2.COLOR_BGR2GRAY)

# Using Shi-Tomasi corner detection
corners = cv2.goodFeaturesToTrack(gray, maxCorners=100, qualityLevel=0.01, minDistance=10, blockSize=3)

# If a corner point is detected, it is converted to integer format and plotted
if corners is not None:
    corners = np.int0(corners)
    for corner in corners:
        x, y = corner.ravel()
        cv2.circle(img, (x, y), 3, 255, -1)

# Display image
cv2.imshow('Shi-Tomasi Corner Detection', img)
cv2.waitKey(0)
cv2.destroyAllWindows()
Renderings:
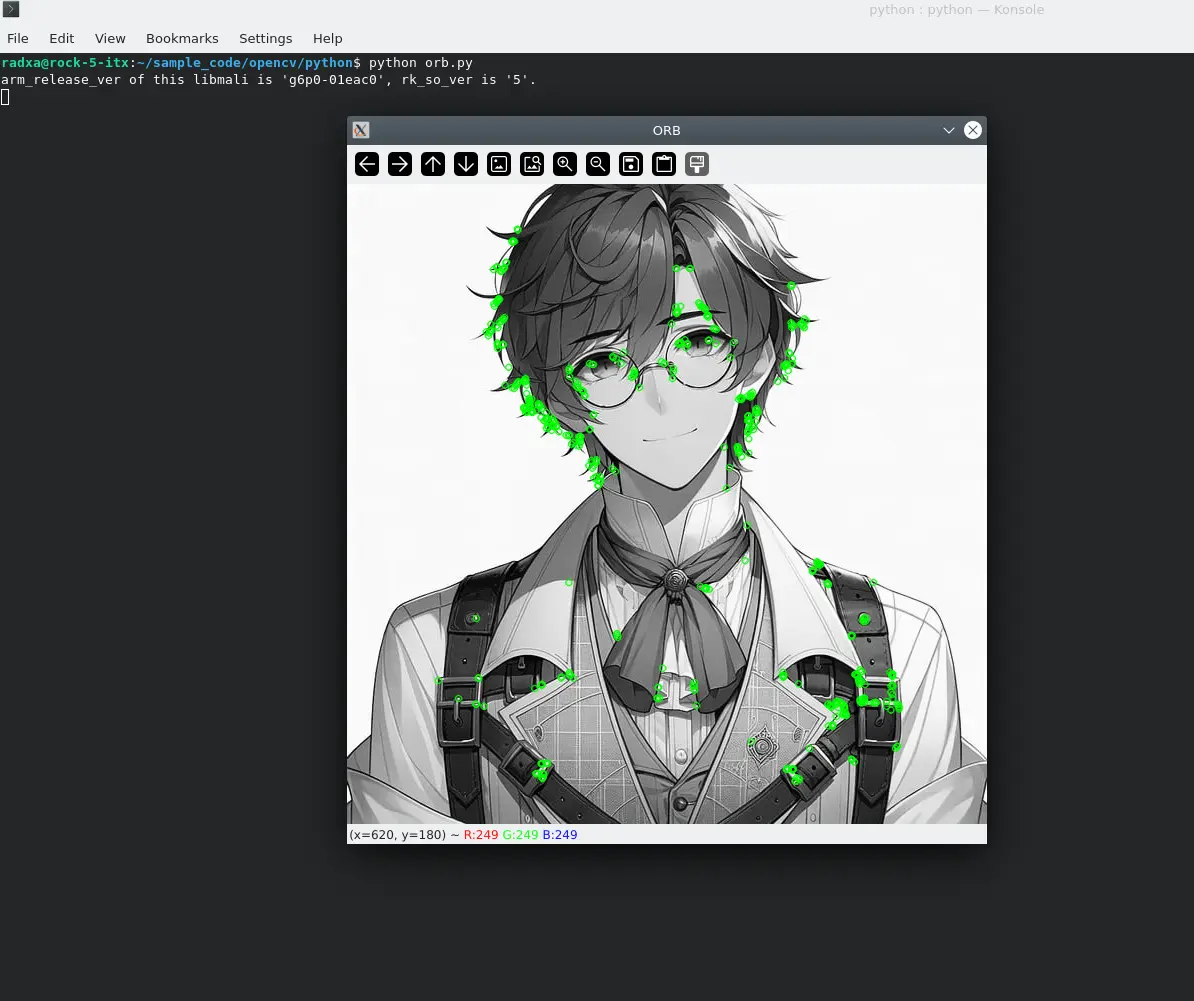
- ORB Feature Detection
pip install opencv-contrib-python
orb.py
import cv2
import numpy as np

# Read the image
img = cv2.imread('pic1.png')
gray = cv2.cvtColor(img, cv2.COLOR_BGR2GRAY)

# Create ORB objects
orb = cv2.ORB_create()

# Detect keypoints and compute descriptors
kp, des = orb.detectAndCompute(gray, None)

# Mapping key points
img = cv2.drawKeypoints(gray, kp, img, color=(0,255,0), flags=0)

# Display image
cv2.imshow('ORB', img)
cv2.waitKey(0)
cv2.destroyAllWindows()
Renderings:
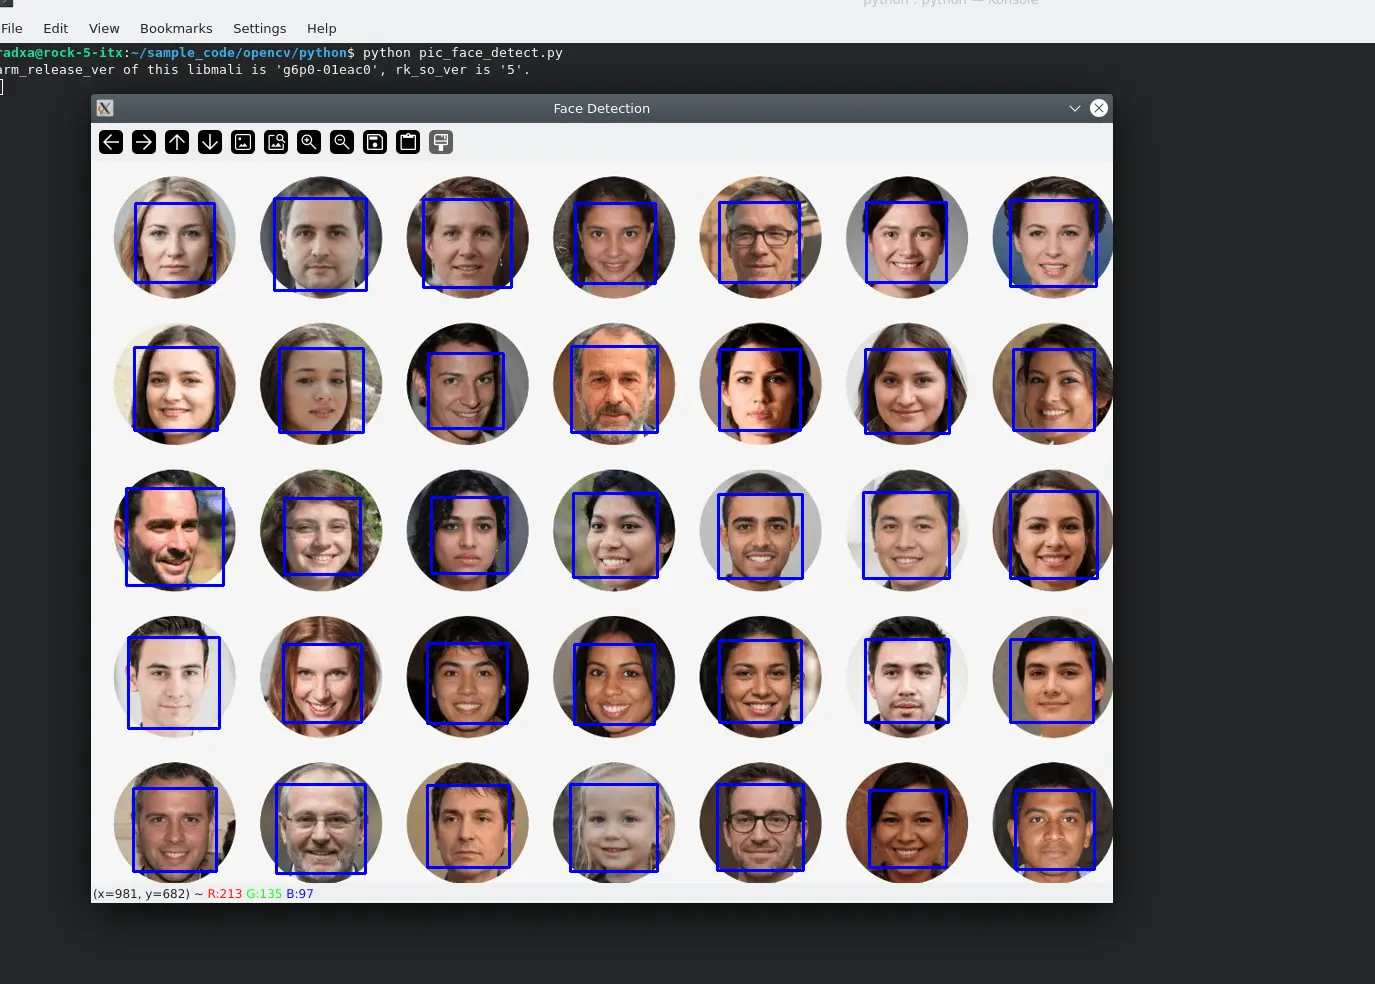
Face recognition
- Image-based
pic_face_detect.py
import cv2

# Load pre-trained Haar feature classifier for face detection
face_cascade = cv2.CascadeClassifier(cv2.data.haarcascades + 'haarcascade_frontalface_default.xml')

# Read the image of the face to be detected
image_path = 'face-synthesis-online01.png'
image = cv2.imread(image_path)

# Convert to greyscale
gray = cv2.cvtColor(image, cv2.COLOR_BGR2GRAY)

# Detect faces in images using cascade classifiers
faces = face_cascade.detectMultiScale(gray, 1.3, 5)

# Draw a rectangle around each detected face
for (x, y, w, h) in faces:
	cv2.rectangle(image, (x, y), (x+w, y+h), (255, 0, 0), 2)

# Display image
cv2.imshow('Face Detection', image)

while True:
	if cv2.waitKey(100)==27:
		cv2.destroyAllWindows()
Renderings:
- Camera-based
camera_face_detect.py
import cv2

# Load pre-trained Haar feature classifier for face detection
face_cascade = cv2.CascadeClassifier(cv2.data.haarcascades + 'haarcascade_frontalface_default.xml')

# Read the images captured by the camera(default /dev/video11 on rk3588)
cap = cv2.VideoCapture(11)

# Loop through each frame
while True:
    # Read a frame from the camera
    ret, frame = cap.read()

    # If the read is successful, the image is converted to greyscale
    if ret:
        gray = cv2.cvtColor(frame, cv2.COLOR_BGR2GRAY)

        # Detect faces in images using cascade classifiers
        faces = face_cascade.detectMultiScale(gray, 1.3, 5)

        # Draw a rectangle around each detected face
        for (x, y, w, h) in faces:
            cv2.rectangle(frame, (x, y), (x+w, y+h), (255, 0, 0), 2)
            print("detect a face")

        # Display image
        cv2.imshow('Face Detection', frame)

        # Press 'q' to exit the loop
        if cv2.waitKey(1) & 0xFF == ord('q'):
            break

# Release the camera and close all windows
cap.release()
cv2.destroyAllWindows()
The demo opens the camera and frames the recognised face.
Video clip
video_cut.py
import cv2

def video():
    videoCapture = cv2.VideoCapture('./test.mp4')

    # saved as test_video_new.mp4, frame of saved video: 40,  Size of saved video: 1920 * 1080
    videoWriter = cv2.VideoWriter('./test_video_new.mp4', cv2.VideoWriter_fourcc('X','V','I','D'), 40, (1920, 1080))

    while True:
        success, frame = videoCapture.read()
        if success:
            videoWriter.write(cv2.resize(frame, size))
        else:
            print('break')
            break

    # Release the object, otherwise it may not be opened externally
    videoWriter.release()


if __name__ == '__main__':
    video()
    print("program runs successfully !")
The program will adjust the original video frame rate to 40 and resize it to 1920 * 1080.