Convert a Custom-Trained YOLO Model
This document explains how to convert your own trained YOLO models to RKNN and run them on-device with a Rockchip NPU. Many users can run the YOLO demos in RKNN Model Zoo, but struggle when converting custom-trained models.
This guide applies to:
- ultralytics-yolov5
- yolov6
- yolov7
- ultralytics-yolov8
- yolov10
- YOLOX
- ultralytics-yolo11
- YOLO-World
This guide uses a custom-trained yolo11n model as an example (head detection). The model and test data were provided by Radxa community user @sanskarjainba-hub.
Why custom models often fail to convert
The YOLO models shipped in RKNN Model Zoo usually include extra post-processing blocks or have different output layouts compared to your own exported models. For example, the official YOLO11 model in RKNN Model Zoo outputs multiple heads, while a typical custom model may output a single head.
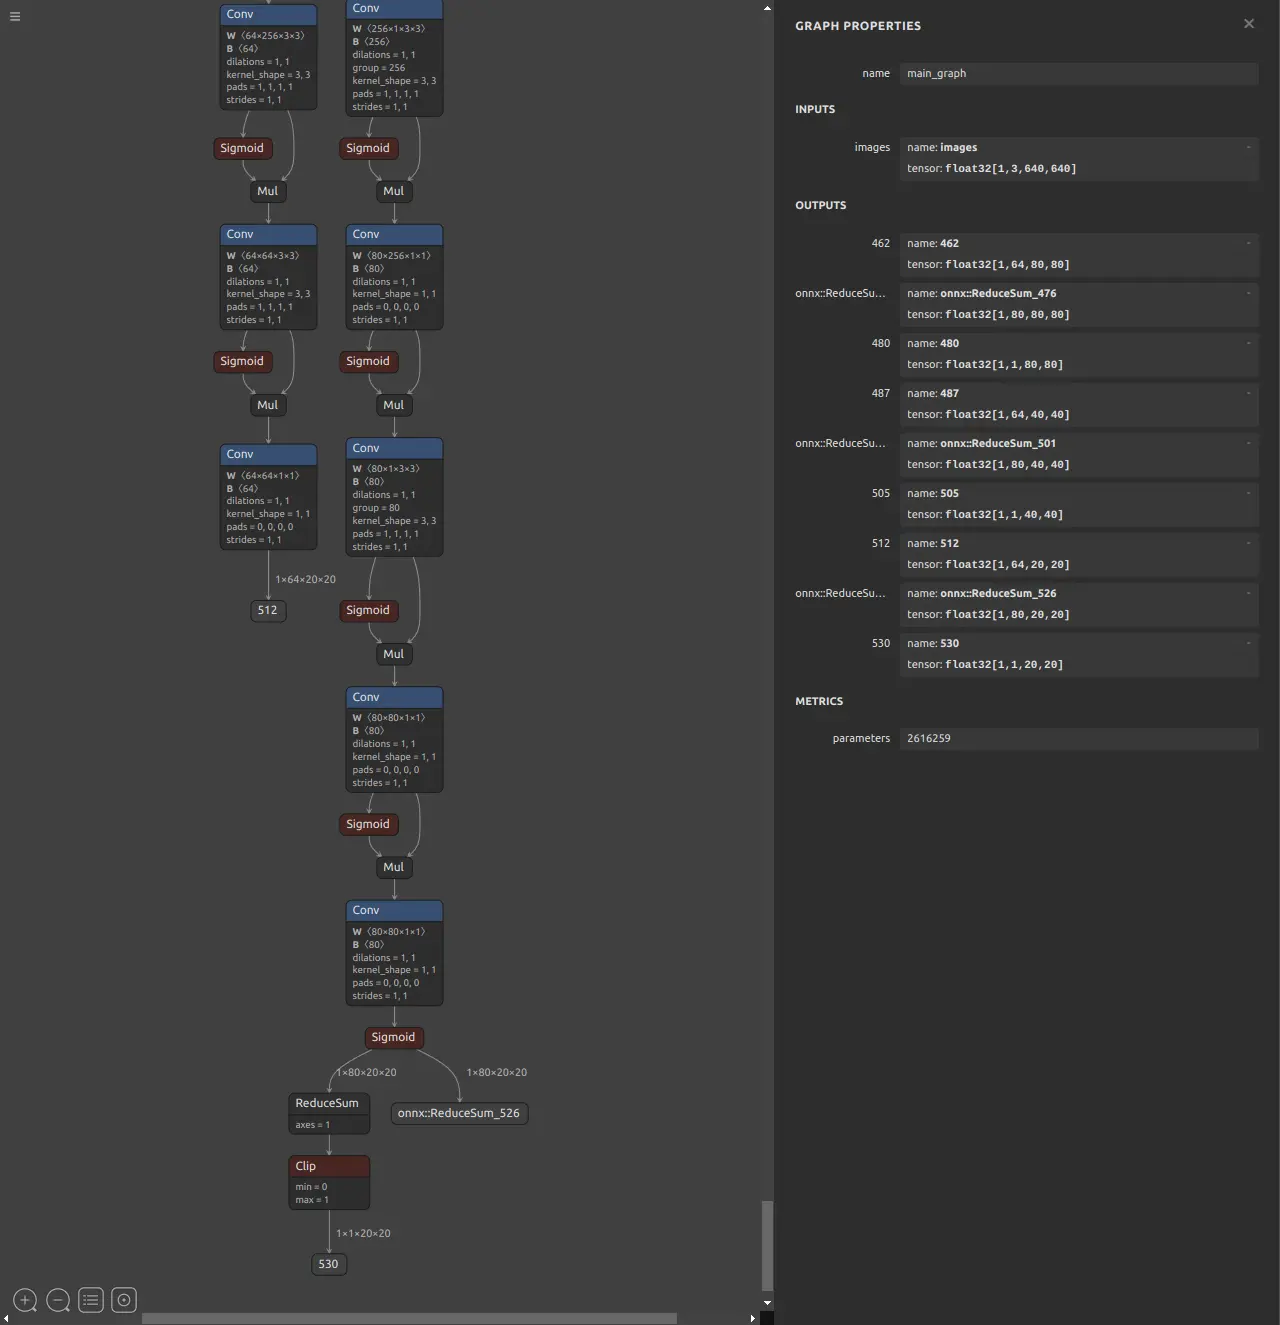
Output layout of the YOLO11n model from RKNN Model Zoo
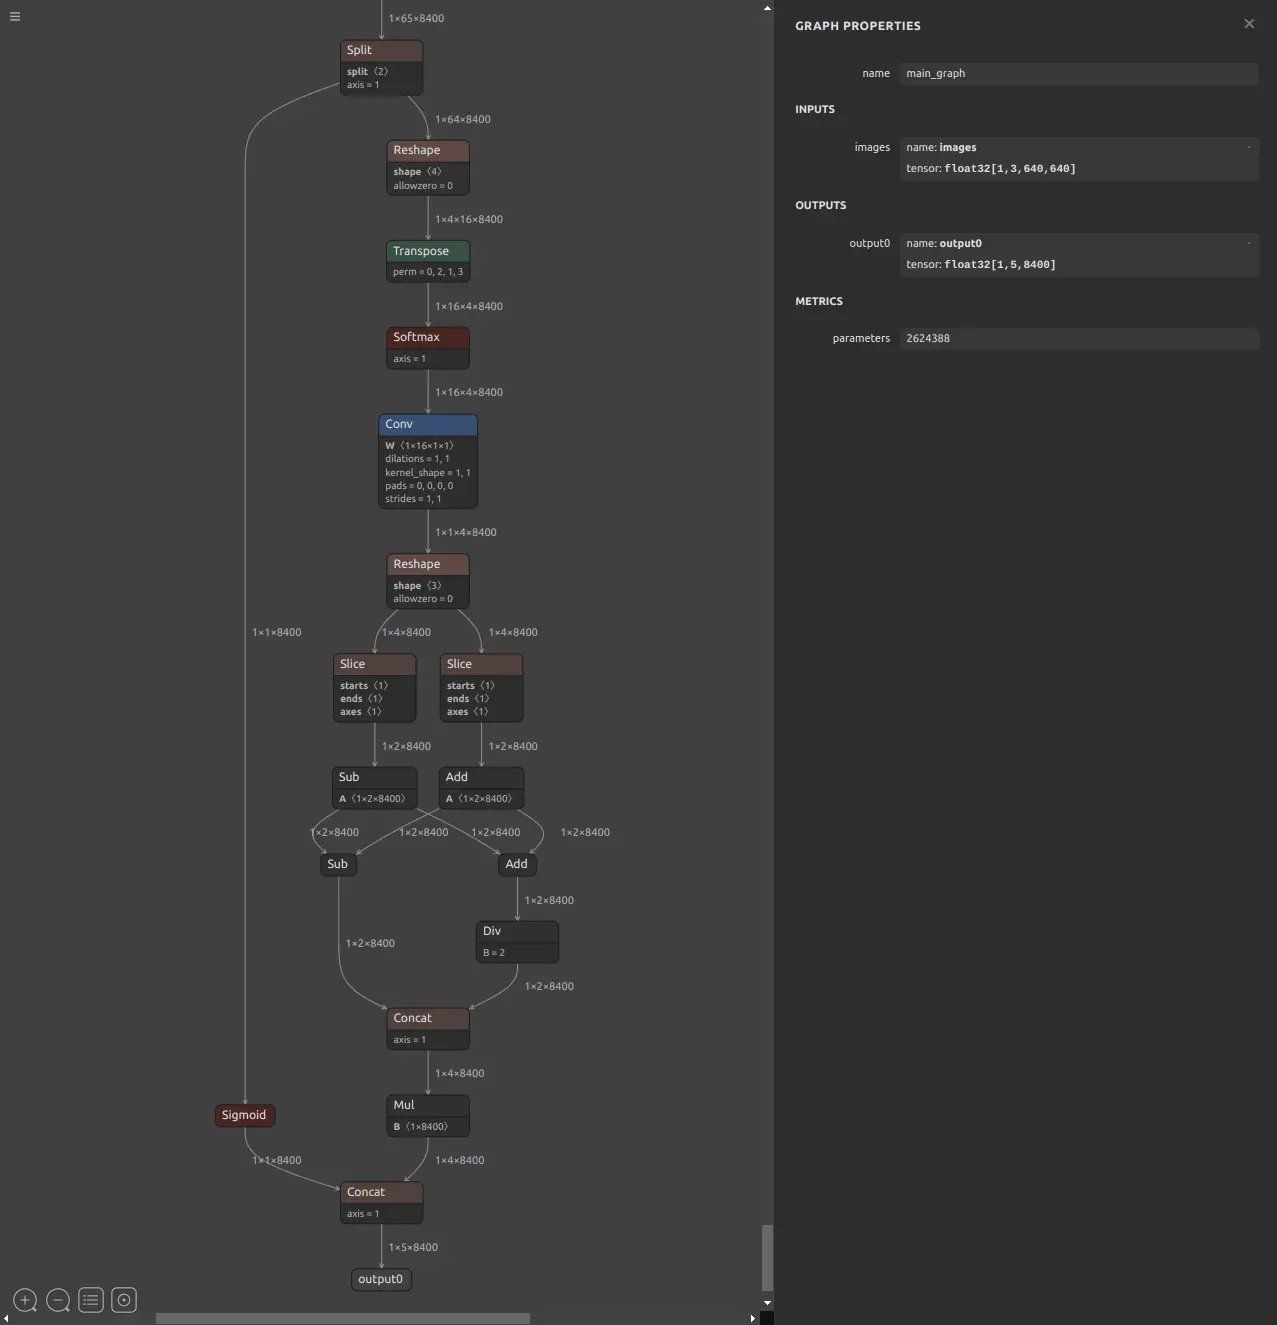
Output layout of a custom-trained YOLO11n model
Typical differences:
- Remove post-processing layers inside the model (post-process outputs are not quantization-friendly).
- Move DFL / decode logic to CPU-side post-processing (often faster on NPU overall).
- Optionally add helper outputs to speed up threshold filtering during post-processing.
When you remove these blocks, you must do post-processing on the CPU (you can reuse implementations from RKNN Model Zoo).
Model conversion approaches
There are two practical approaches:
-
FP16 / mixed quantization (keep your existing post-processing)
- Fastest path, minimal code changes.
- Performance improvement is limited compared to a fully optimized INT8 pipeline.
-
INT8 quantization (use RKNN Model Zoo post-processing)
- Best performance.
- Requires adjusting the model output structure and using external post-processing.
Prepare the model and test input
Have your PyTorch model (e.g. best.pt) and a test image.

Test image
Baseline: CPU inference with the PyTorch model
Run a baseline with ultralytics on the device:
pip3 install -U ultralytics
yolo predict model=best.pt source="../test_img/frame_00304.jpg"
Example output:
image 1/1 ...: 384x640 3 PERSONs, 268.8ms
Speed: ... 268.8ms inference ...
In this example, the PyTorch CPU inference time is 268.8 ms.
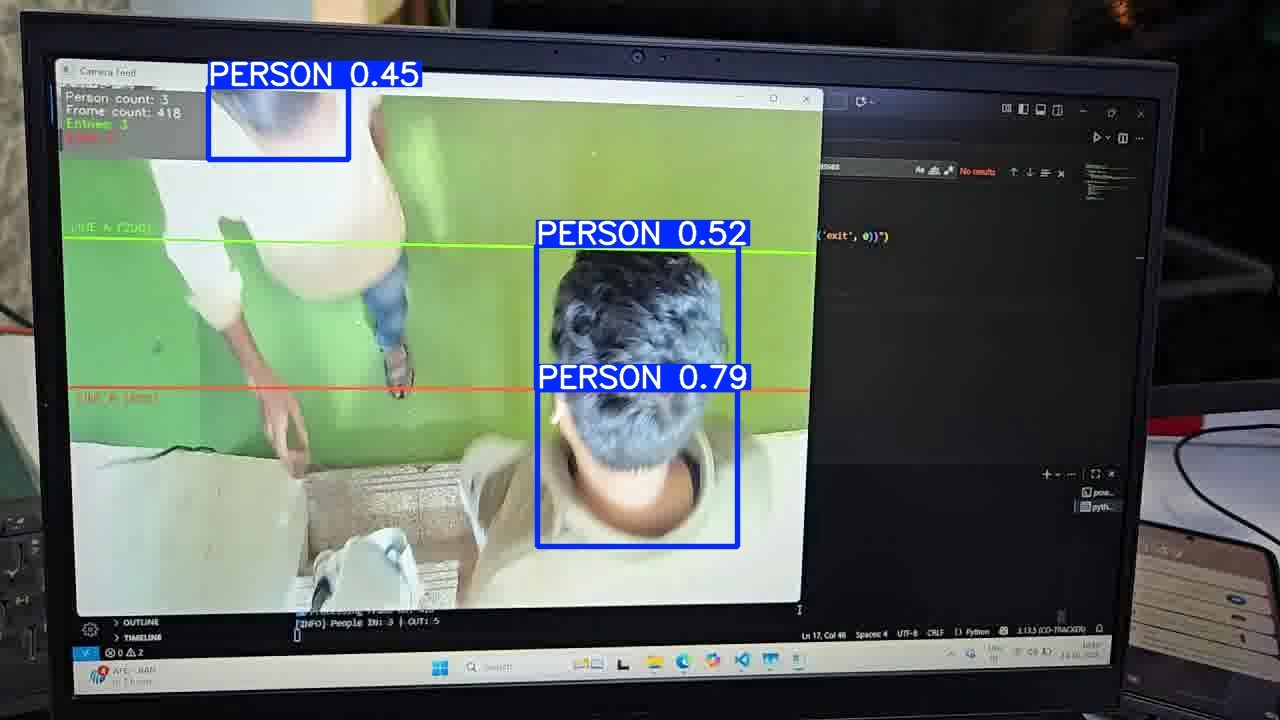
best.pt inference result
Approach A: FP16 RKNN (minimal changes)
Convert with Ultralytics (recommended for Ultralytics models)
If your model is an Ultralytics model, you can convert directly:
yolo export model=best.pt format=rknn name=rk3588
The result will be saved to ./best_rknn_model.
Run inference with the FP16 RKNN model
Copy the best_rknn_model folder to the device and run:
yolo predict model="./best_rknn_model" source="../test_img/frame_00304.jpg"
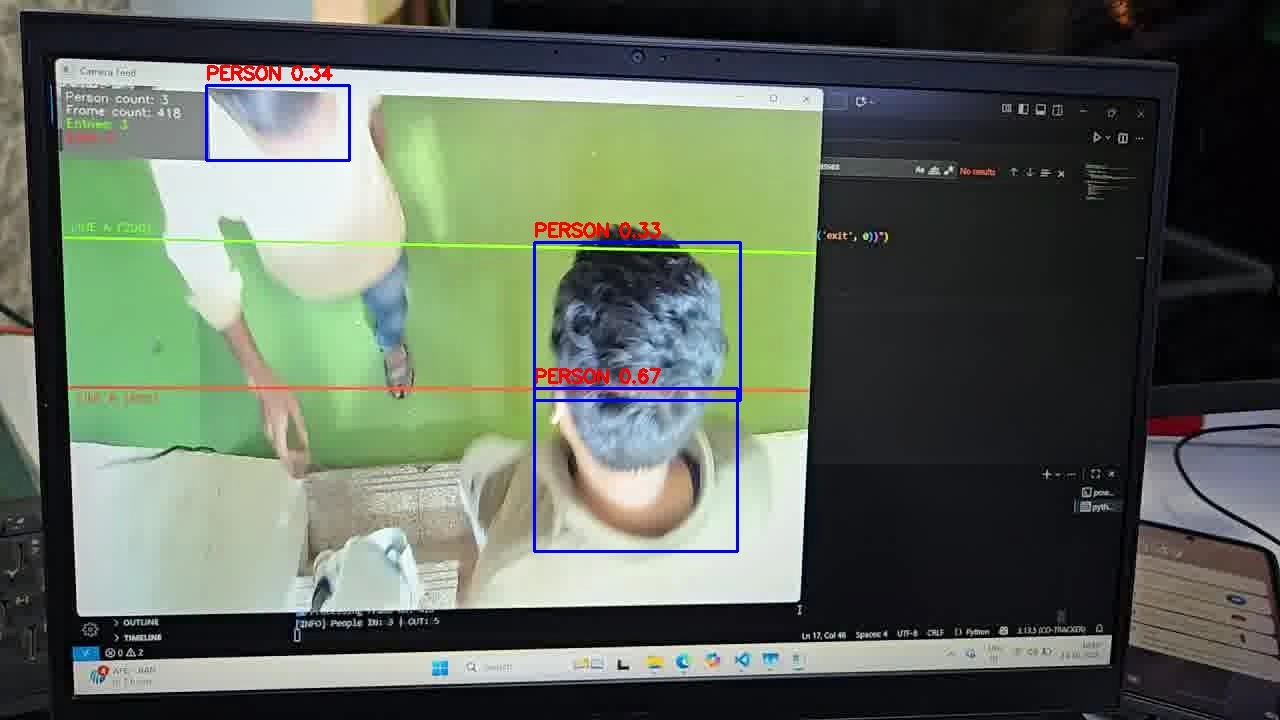
Example output:
image 1/1 ...: 640x640 3 PERSONs, 64.3ms
Speed: ... 64.3ms inference ...
In this example, FP16 RKNN inference time is 64.3 ms.

FP16 RKNN inference result
Convert with Model Zoo scripts (non-Ultralytics models)
If your model is not an Ultralytics export, RKNN Model Zoo provides python/convert.py scripts under the corresponding YOLO example directories.
Export your model to ONNX first and then convert to RKNN with quant_dtype=fp.
See: Deploy YOLOv5 on the Device.
Approach B: INT8 RKNN (best performance)
Quantizing YOLO models to INT8 usually requires removing in-model post-processing and using external post-processing (Model Zoo style).
Rockchip provides optimized conversion repos for different YOLO versions:
Follow the README for your model family to export an optimized ONNX, then convert to INT8 RKNN with your calibration dataset.
Example (YOLO11):
git clone https://github.com/airockchip/ultralytics_yolo11.git
After converting, run inference on-device using RKNN Model Zoo-style post-processing.

ONNX inference result (after structure changes)
INT8 RKNN inference result
Performance summary (example)
| Model | Type | Backend | Time |
|---|---|---|---|
best.pt | FP32 | CPU | 268.8 ms |
best.onnx | FP32 | CPU | 112.08 ms |
best_fp.rknn | FP16 | NPU | 64.3 ms |
best_int8.rknn | INT8 | NPU | 18.74 ms |
In this example, moving a custom YOLO11n model from CPU to NPU improves inference time from 268.8 ms to 18.74 ms (~14× speedup) while keeping comparable detection results.