Install OS to Onboard eMMC
This guide describes how to install the operating system to the onboard eMMC.
This guide applies to Radxa ROCK Pi E boards with onboard eMMC.
Hardware Preparation
You need to prepare the following hardware before proceeding with the installation.
Installation/Boot
- Radxa ROCK Pi E
- Power supply: Use Type-C to Type-A cable to connect PC for power and data transfer
Install OS
Installing the OS will format the eMMC. Please backup any important data before proceeding.
Download Files
Download Loader File
Go to the Resource Download page to download the corresponding Loader file.
Download System Image
On your PC, visit the Resource Download page and find the official OS image.
After downloading, extract the system image file. The resulting *.img file is the system image to be flashed to the eMMC.
Install RKDevTool
RKDevTool is a USB flashing software developed by Rockchip for Windows/Linux/macOS platforms, designed to simplify and accelerate the development and debugging process for Rockchip series chips.
- Windows
- Linux
- macOS
- Install Driver
Download and extract DriverAssistant.
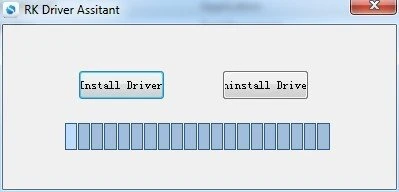
Find the DriverInstall.exe file and run it as administrator:
Install driver: Click Install Driver
Uninstall driver: Click Uninstall Driver
If you have previously installed a different version of the driver, please uninstall it first before installing.
- Download RKDevTool
Download RKDevTool, then extract the downloaded file. RKDevTool.exe is the executable program - double-click to open it.
- Install rkdeveloptool
Open the system terminal or command line and run the following commands:
sudo apt-get update
sudo apt-get install -y libudev-dev libusb-1.0-0-dev dh-autoreconf pkg-config libusb-1.0 build-essential git wget
git clone https://github.com/rockchip-linux/rkdeveloptool
cd rkdeveloptool
autoreconf -i
./configure
make -j $(nproc)
sudo cp rkdeveloptool /usr/local/sbin/
- Verify Version
After installing RKDevTool, use the following command to check the version:
rkdeveloptool -V
- Install HomeBrew
HomeBrew is a free and open-source package manager that simplifies the process of installing software for macOS users.
If HomeBrew is not installed, follow the installation guide:
/bin/bash -c "$(curl -fsSL https://raw.githubusercontent.com/Homebrew/install/HEAD/install.sh)"
- Install rkdeveloptool
Open the system terminal or command line and run the following commands:
brew install automake autoconf libusb pkg-config git wget
git clone https://github.com/rockchip-linux/rkdeveloptool
cd rkdeveloptool
autoreconf -i
./configure
make -j $(nproc)
cp rkdeveloptool /opt/local/sbin/
- Verify Version
After installing RKDevTool, use the following command to check the version:
rkdeveloptool -V
Enter Maskrom Mode
We need to put ROCK Pi E into Maskrom mode, then install the system to the onboard eMMC using this mode.
When the board has no system boot media (i.e., no microSD card is inserted in the microSD slot), the system will automatically enter Maskrom mode.
The specific steps are as follows:
- Before powering on the ROCK Pi E, use USB-to-DuPont cable to connect ROCK Pi E and PC
| Pin Function | Connection |
|---|---|
| ROCK Pi E : GND (Pin14) | Connect to GND pin of USB cable |
| ROCK Pi E : USB20DM (Pin16) | Connect to Data- pin of USB cable |
| ROCK Pi E : USB20DP (Pin18) | Connect to Data+ pin of USB cable |
- After successful connection, power on the board with a power adapter
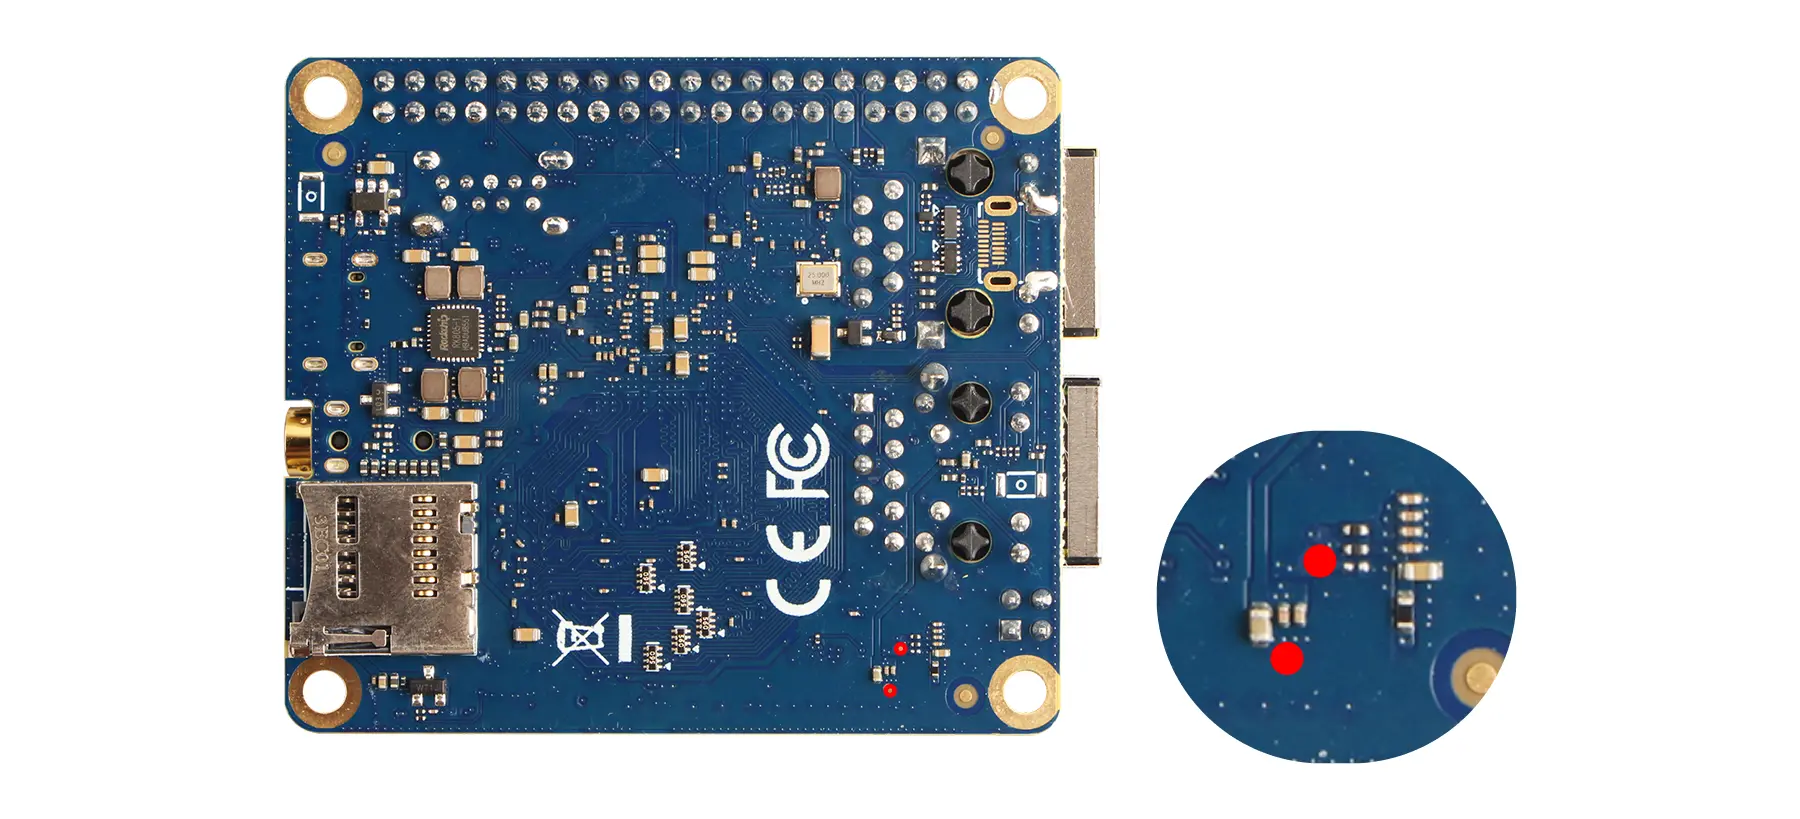
If the onboard eMMC has a system installed, short the Maskrom solder pads on the back of the board before powering on to enter Maskrom mode.
Using RKDevTool
When the device enters Maskrom mode, RKDevTool will automatically detect it. If the device is not detected, follow the steps to enter Maskrom mode again.
Check Maskrom Device
- Windows
- Linux/MacOS
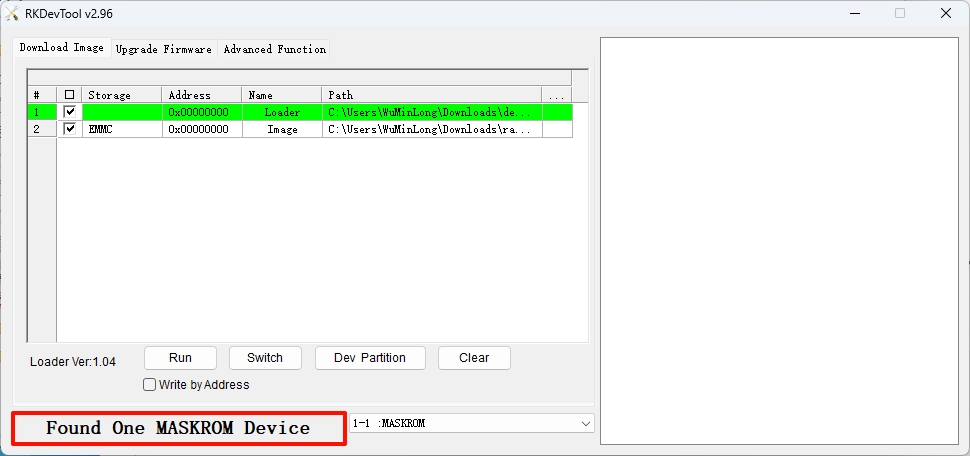
Open RKDevTool to view the detected device information:
Use rkdeveloptool ld to view detected device information:
sudo rkdeveloptool ld
Output similar to: Device detected in Maskrom mode
DevNo=1 Vid=0x2207,Pid=0x330e,LocationID=101 Maskrom
Flash System Image
- Windows
- Linux/MacOS
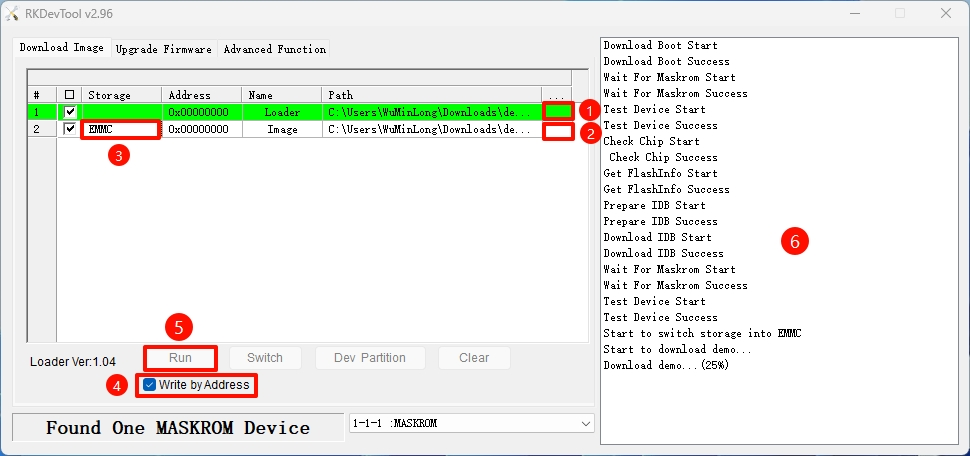
In RKDevTool, perform the following operations:
- ①: Select Loader file
- ②: Select system image
- ③: Select eMMC as storage medium
- ④: Check
Write by Address - ⑤: Start execution (flash Loader and system)
- ⑥: Operation feedback
Open system terminal or command line and execute the following.
- Run Loader
Replace <loader-file>.bin with the actual Loader file name you downloaded.
sudo rkdeveloptool db <loader-file>.bin
On success, terminal shows:
Downloading bootloader succeeded.
- Flash System Image
Replace <system-image>.img with the actual system image filename.
sudo rkdeveloptool wl 0 <system-image>.img
- Reboot Device
sudo rkdeveloptool rd