Quick Start
This guide helps you quickly get started with the Radxa ROCK Pi E. Follow the steps below to set up your board.
Product Overview
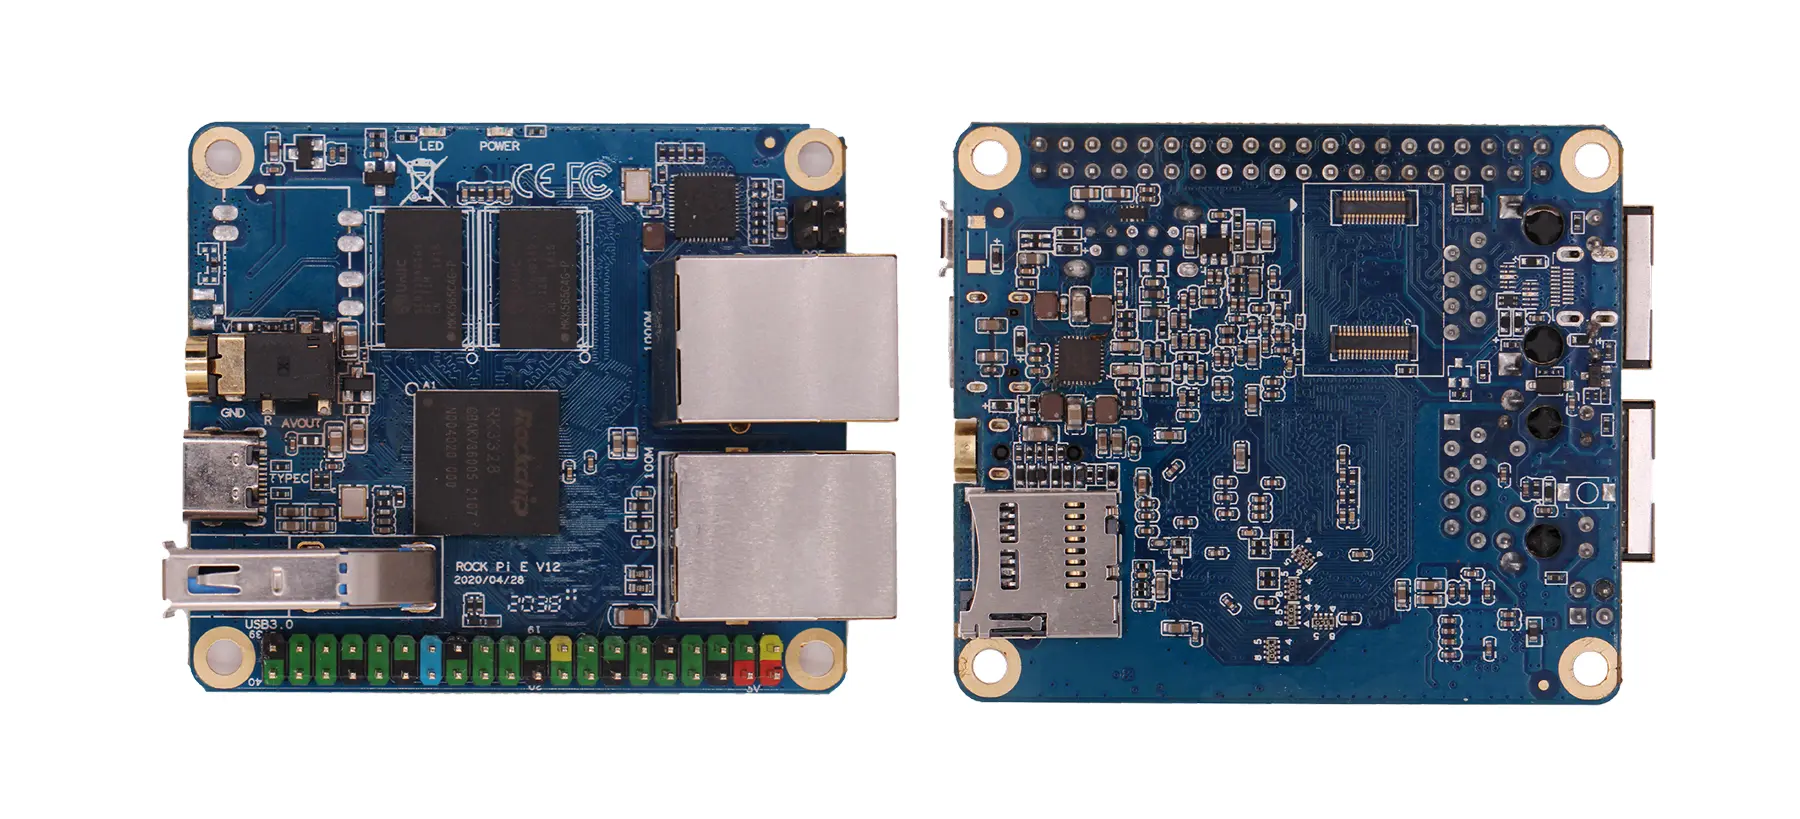
- ROCK Pi E V1.20
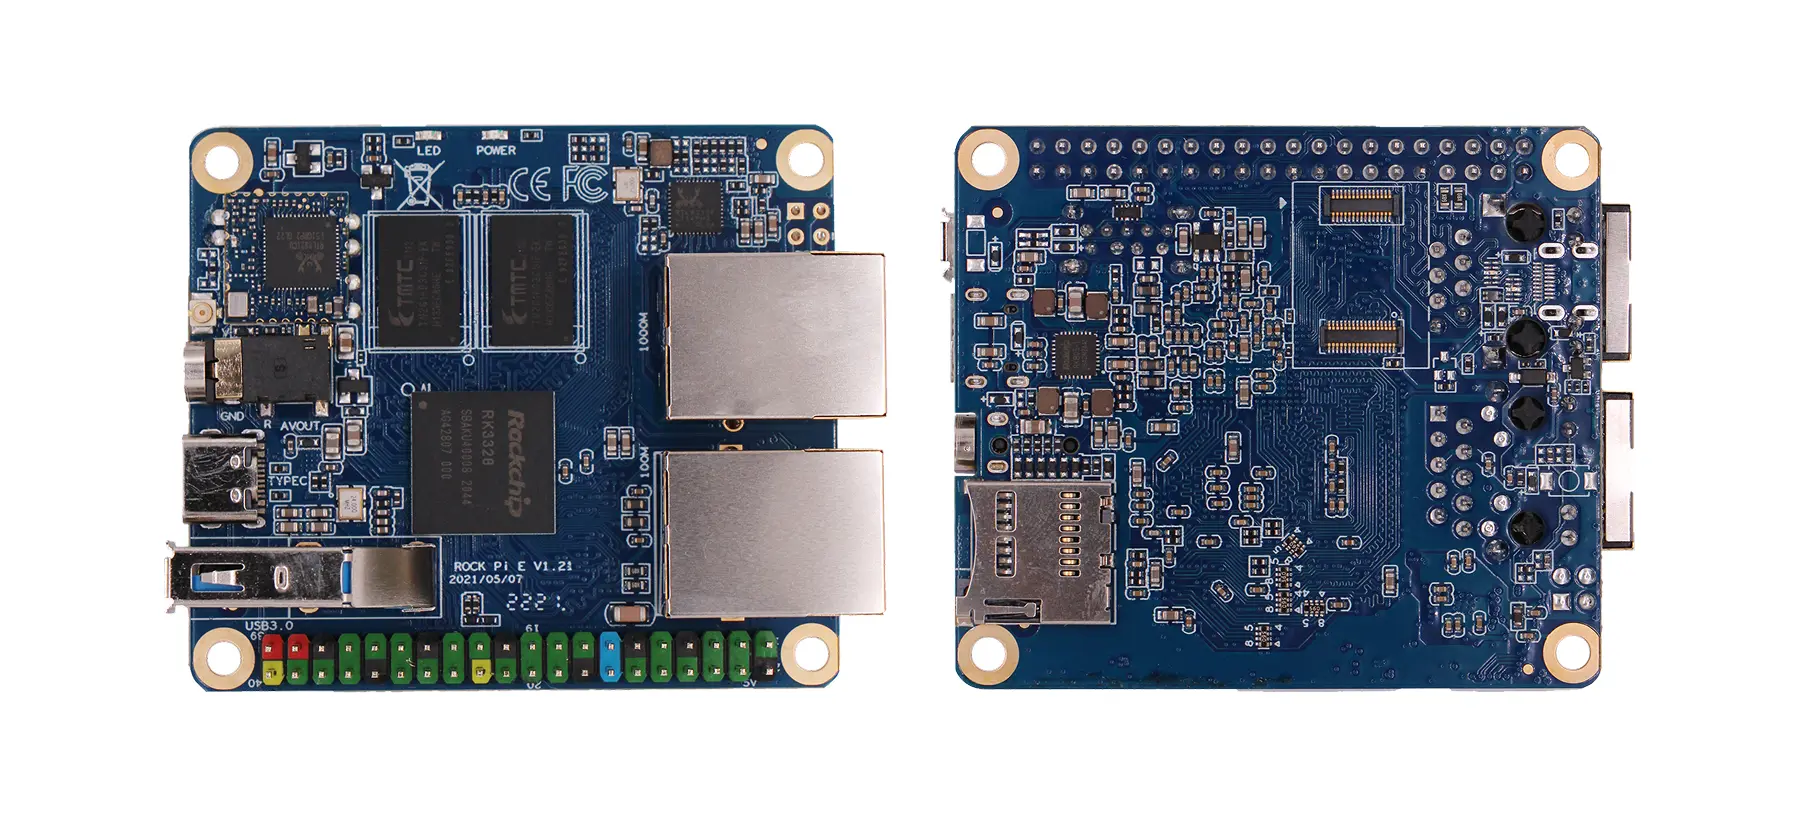
- ROCK Pi E V1.21
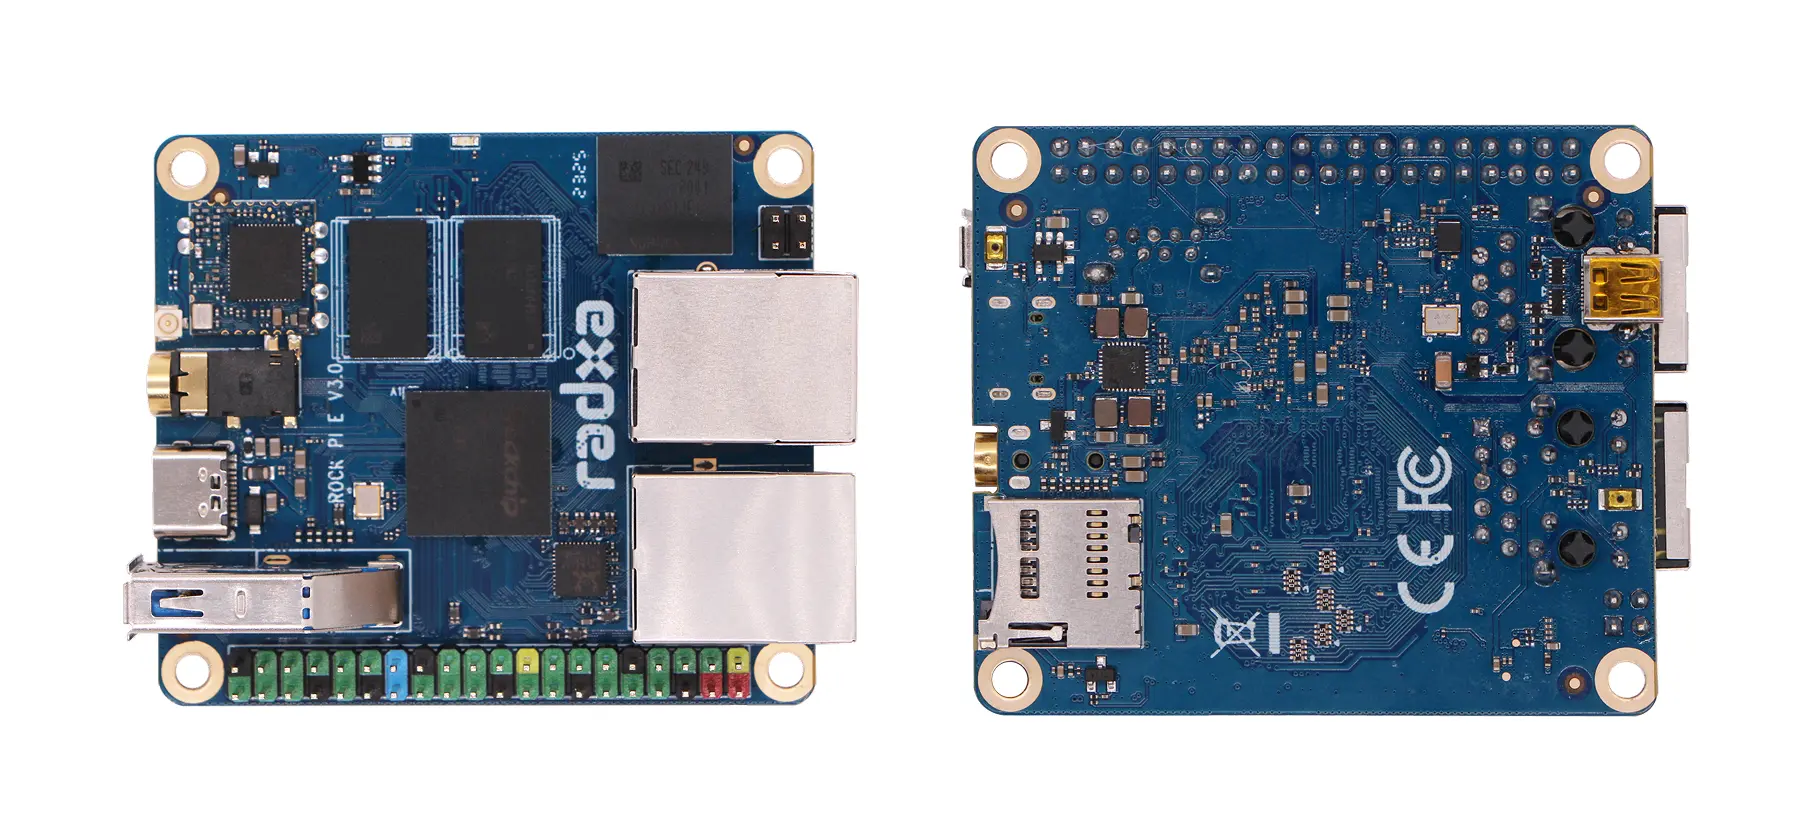
- ROCK Pi E V1.30
Prerequisites
You need to prepare the following hardware to complete the quick start guide:
- Board: Radxa ROCK Pi E
- System boot media: microSD card
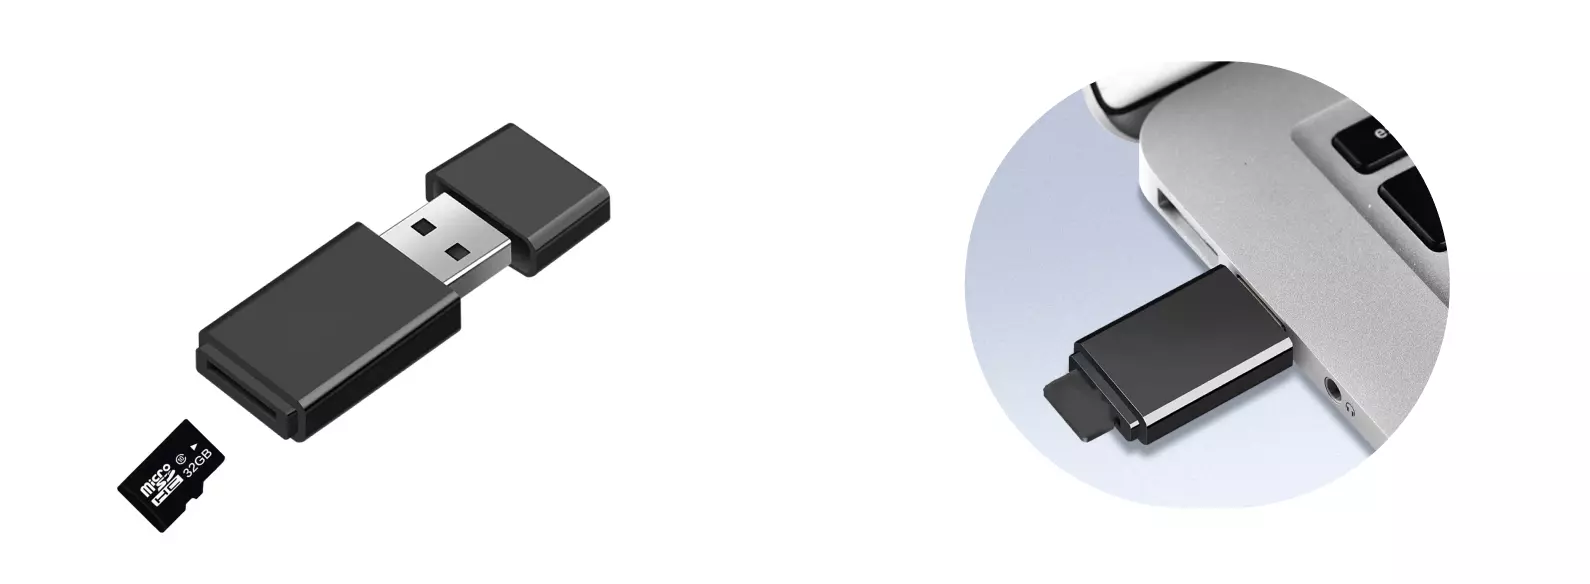
- microSD card reader: For reading/writing microSD card
- USB serial cable: For serial debugging and login
- Power supply: 5V Type-C power adapter
The ROCK Pi E board only supports 5V power input. It is recommended to use a power supply with 2A or higher current to ensure stable operation of all peripherals.
Recommended power supplies:
-
Standard Type-C power adapter (5V input, PD protocol support, 2A or higher recommended)
Install OS
This section mainly describes how to install the system to microSD card.
Installing the OS will completely format the microSD card. All data will be permanently deleted!
Please confirm before proceeding:
- There is no important data on the microSD card, or you have completed data backup
- You have selected the correct storage device to avoid formatting other disks
Hardware Connection
Insert the microSD card into the microSD card reader, then insert the microSD card reader into your computer.
Download System Image
Please visit the Resource Download page to download the system image.
The image file is in .img.xz compressed format. After downloading, you need to extract it first to get the .img format image file before use.
Flash System Image
Use Balena Etcher software to flash the system image to the microSD card.
For Balena Etcher installation and usage, please refer to the Etcher Usage guide.
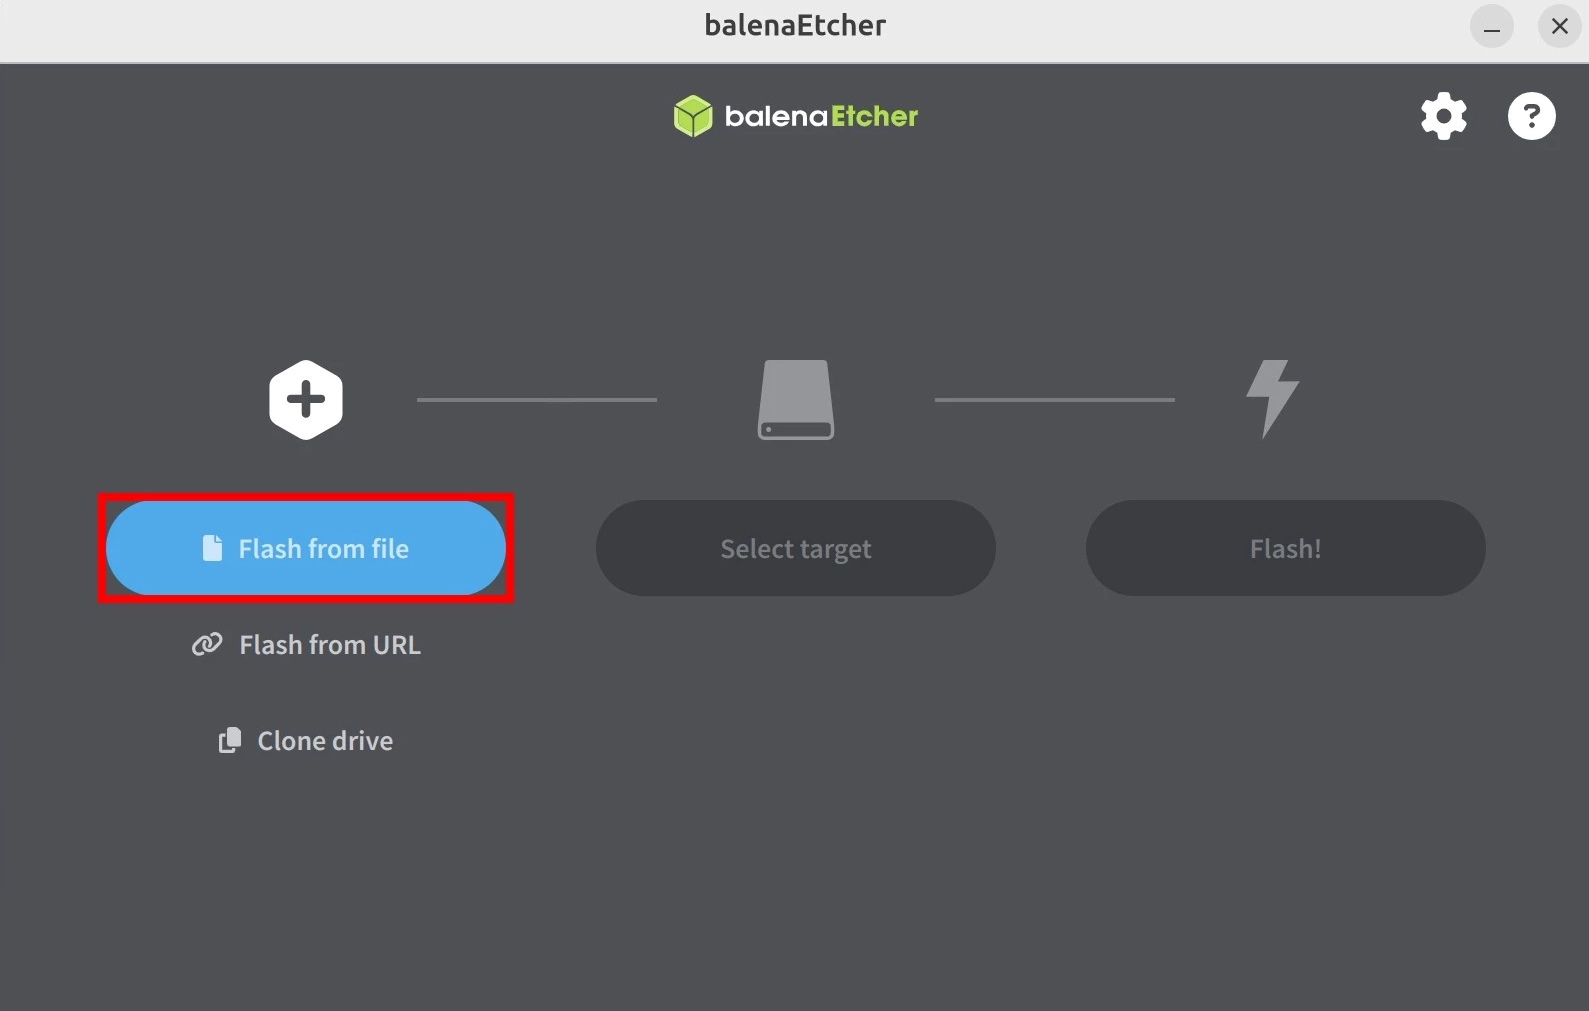
Select System Image
Click Flash from file and select the system image file you downloaded and extracted earlier.
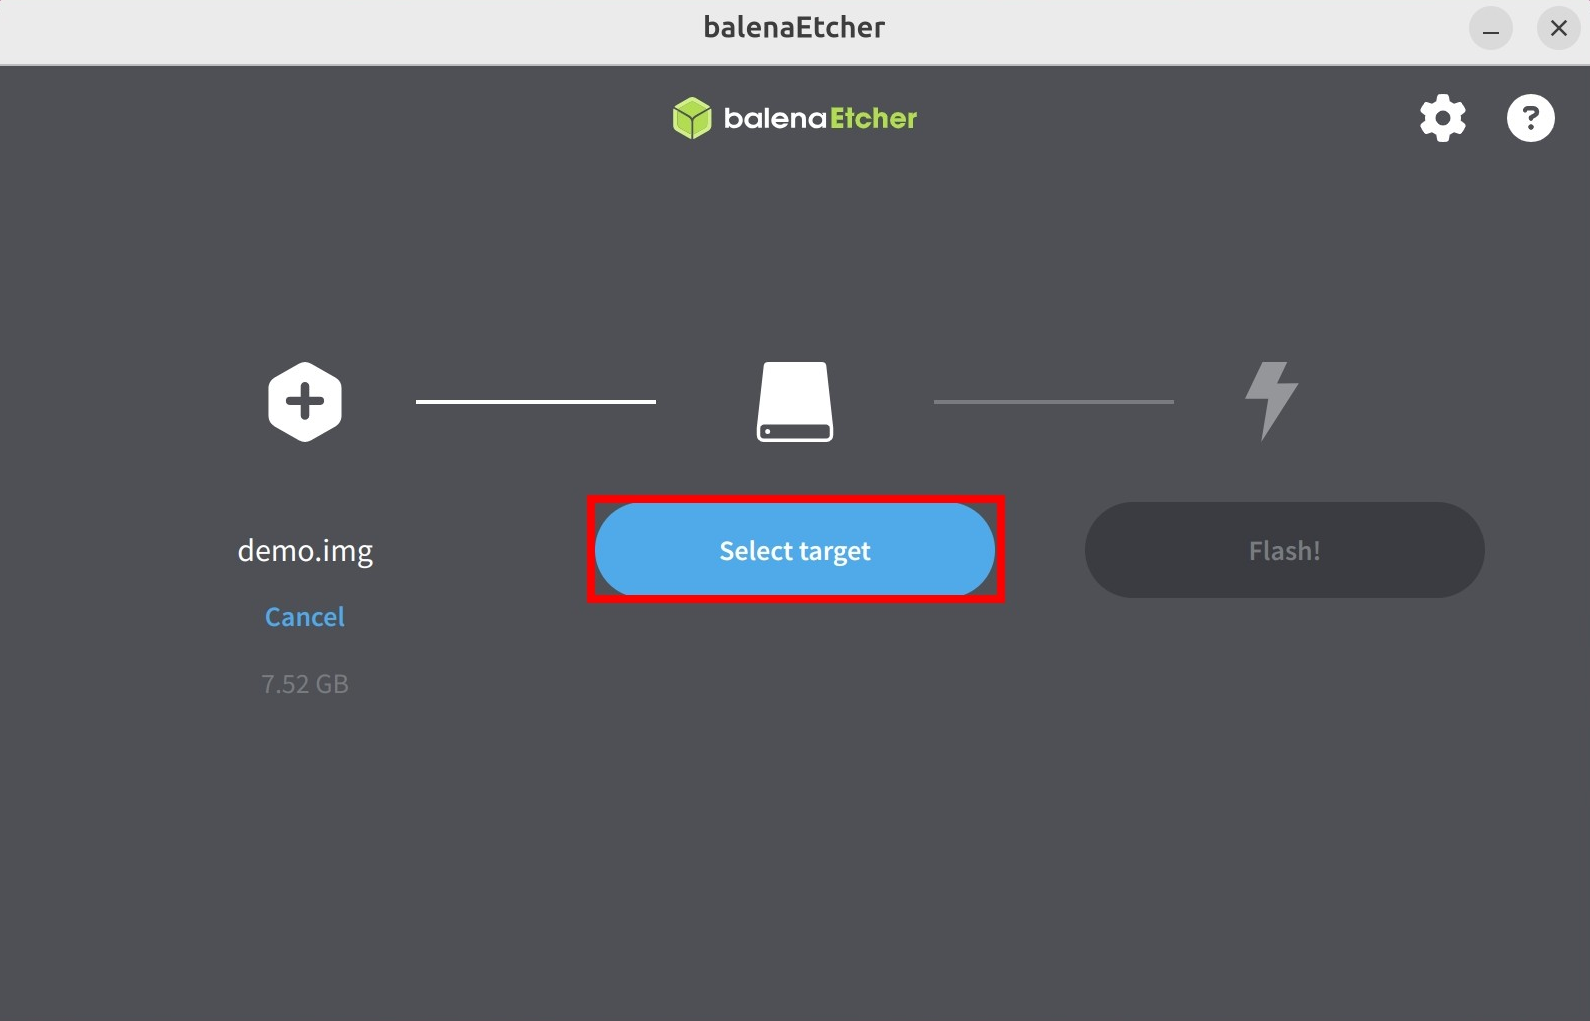
Select Target Device
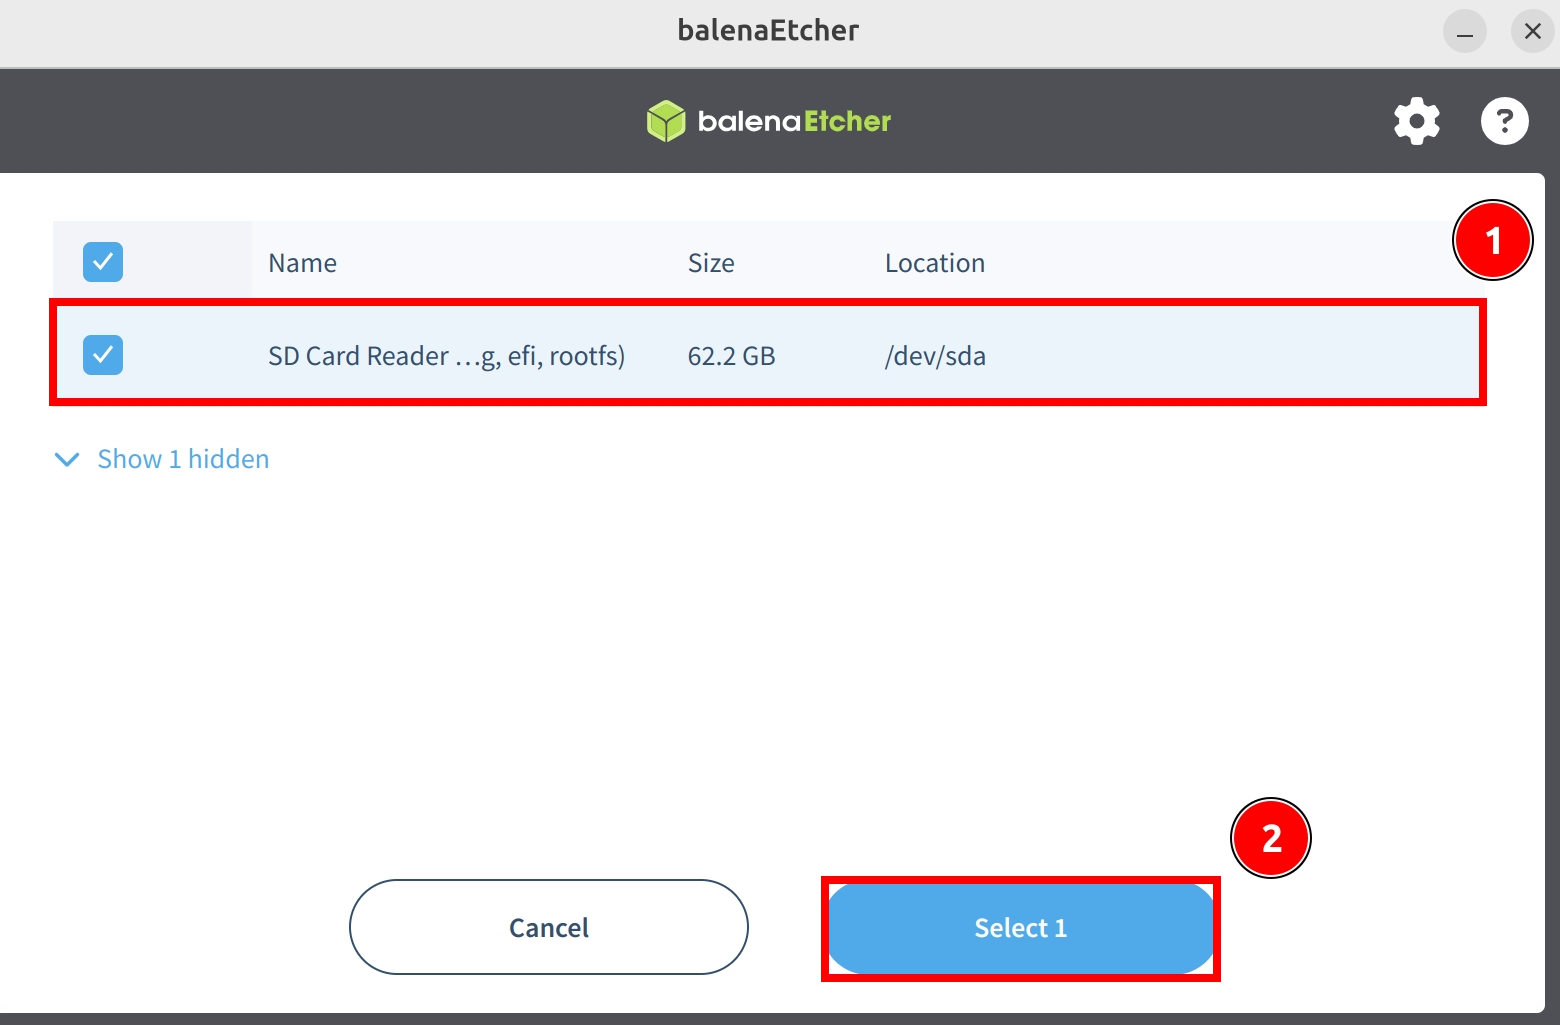
Click Select target and select the microSD card device.
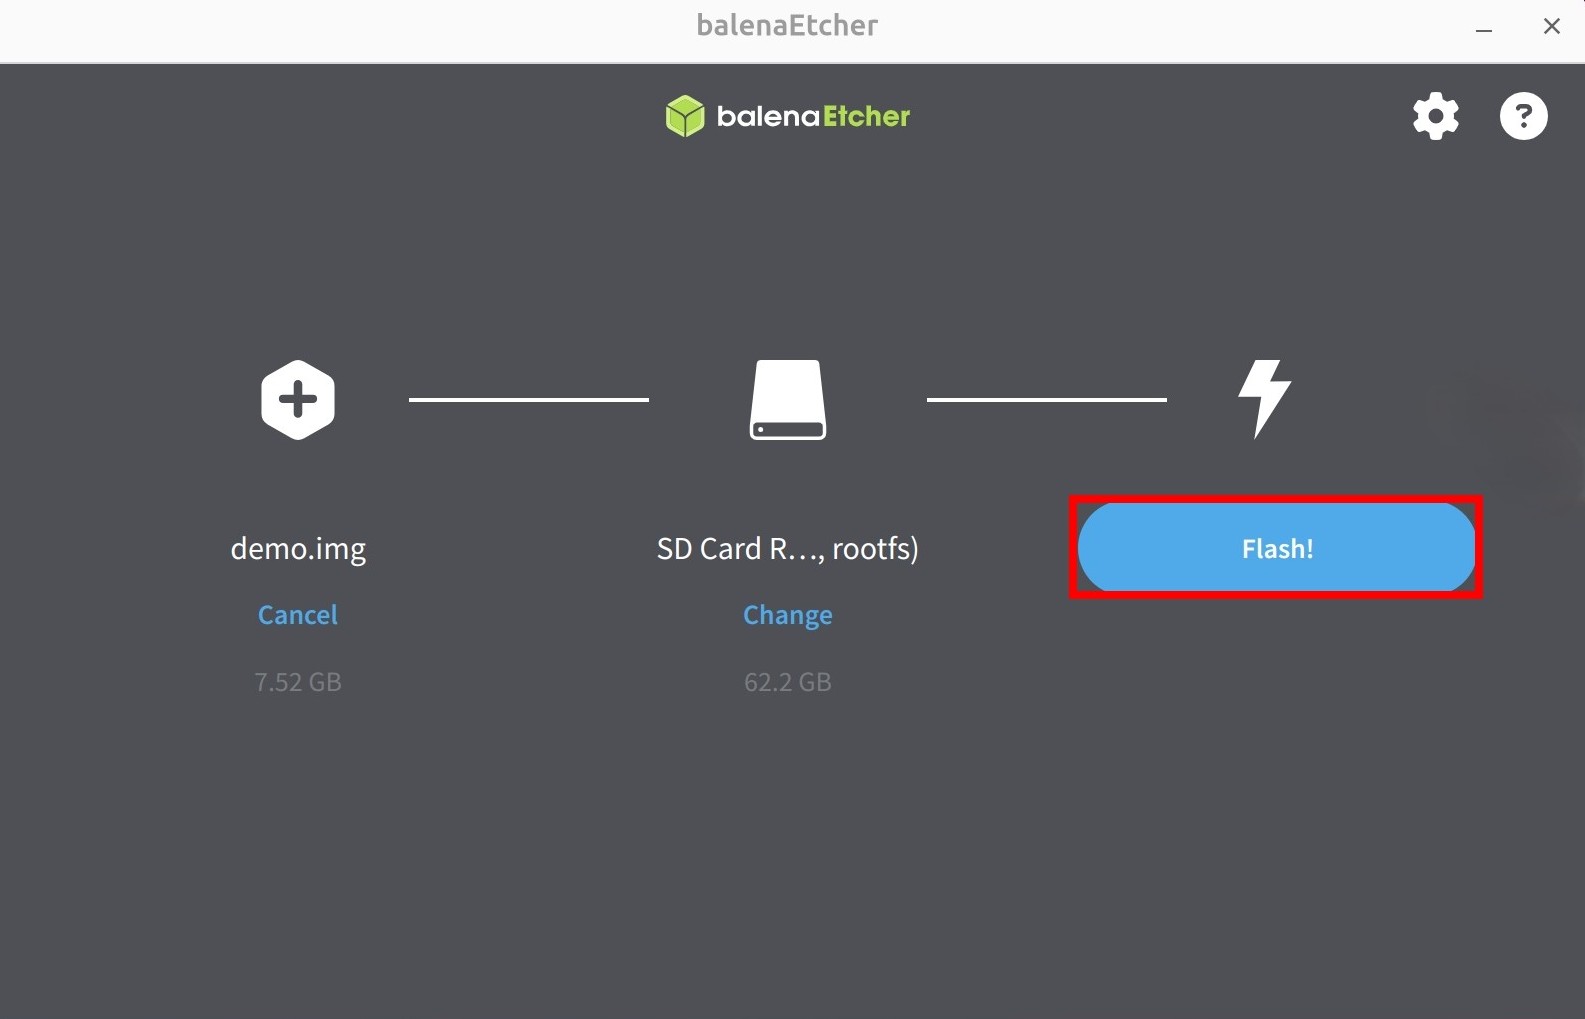
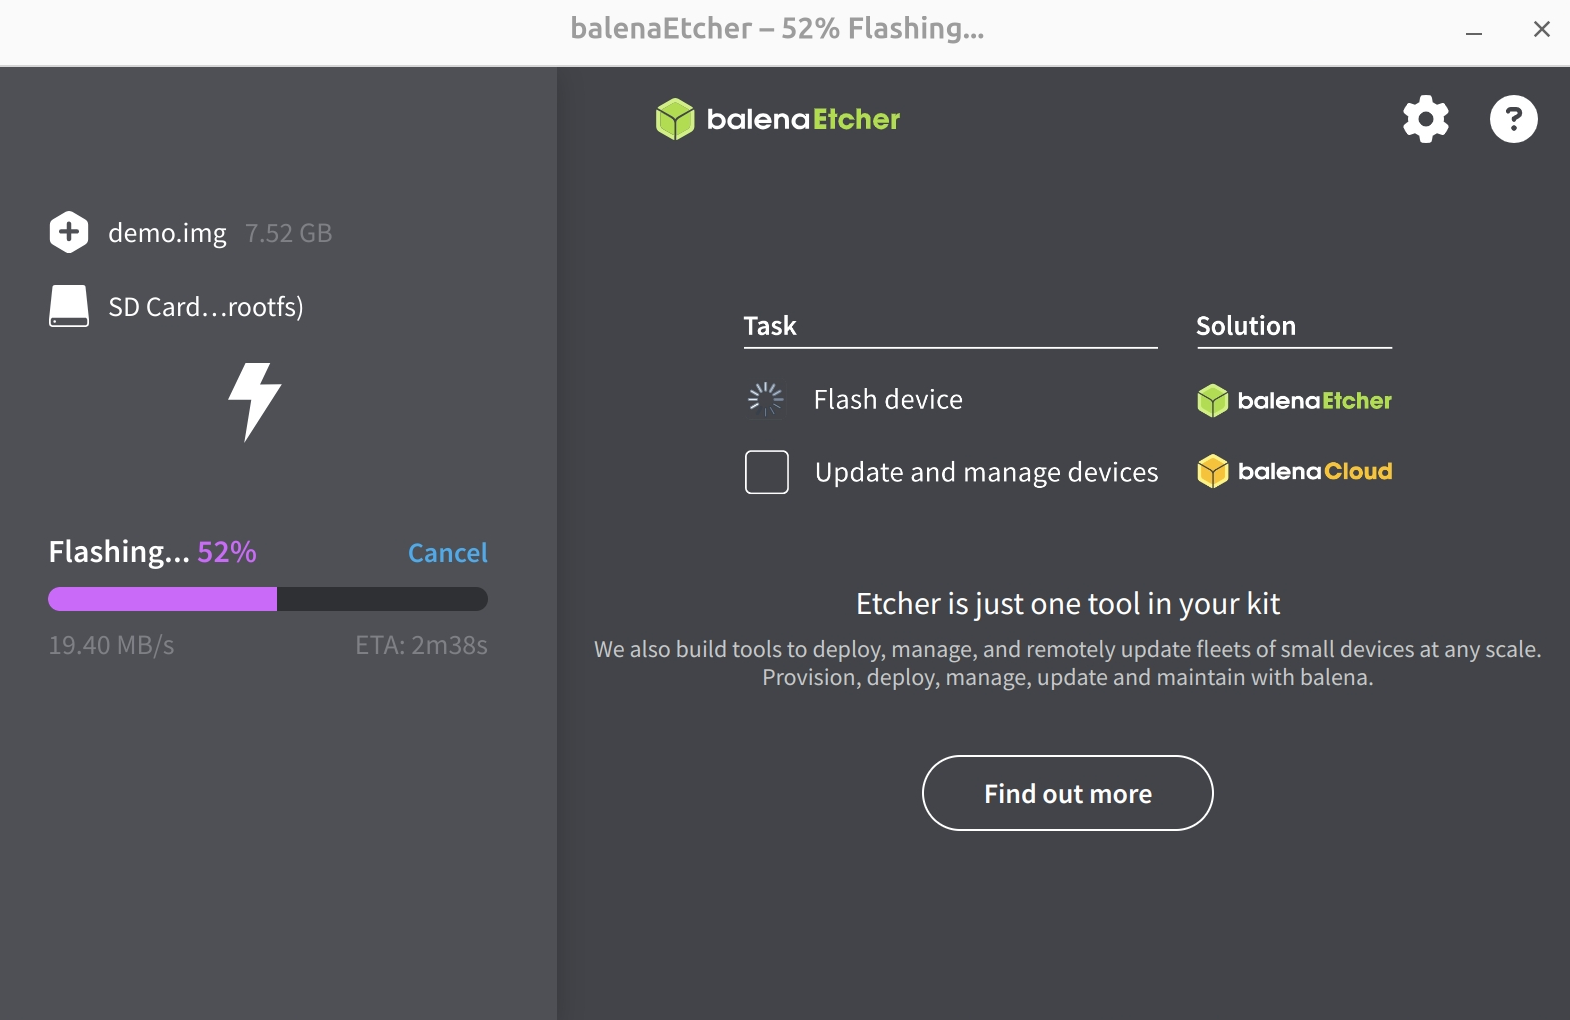
Start Flashing
Click Flash! to start flashing the system image to the microSD card.
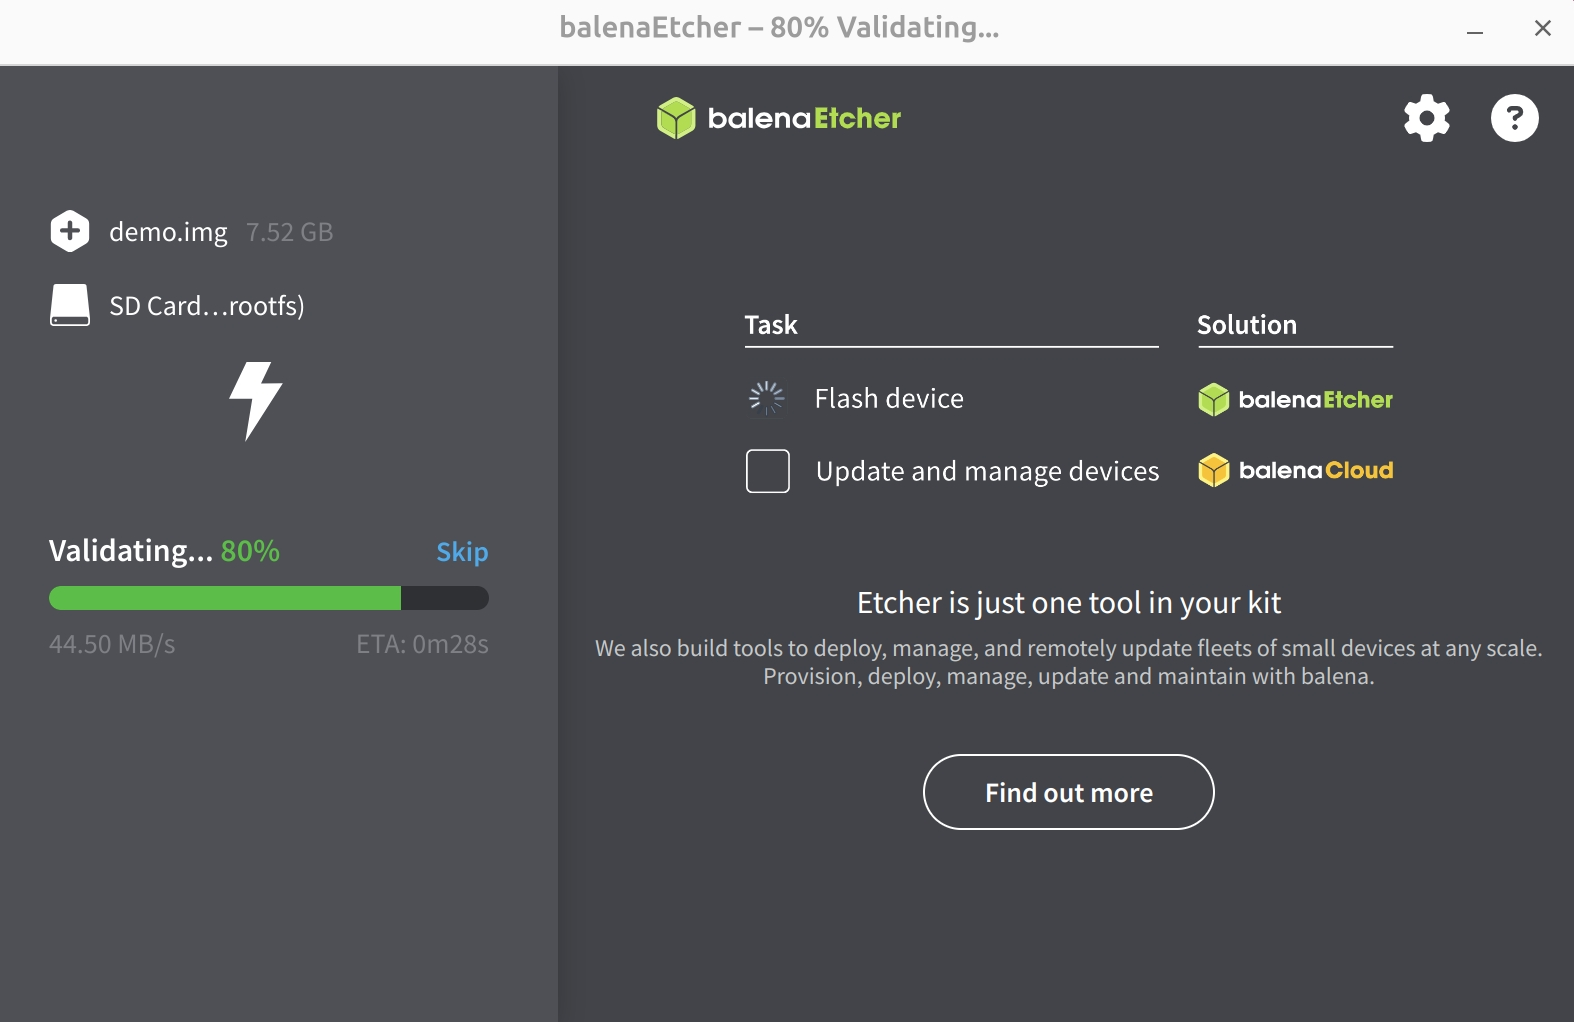
Wait for installation to complete
Wait for verification to complete
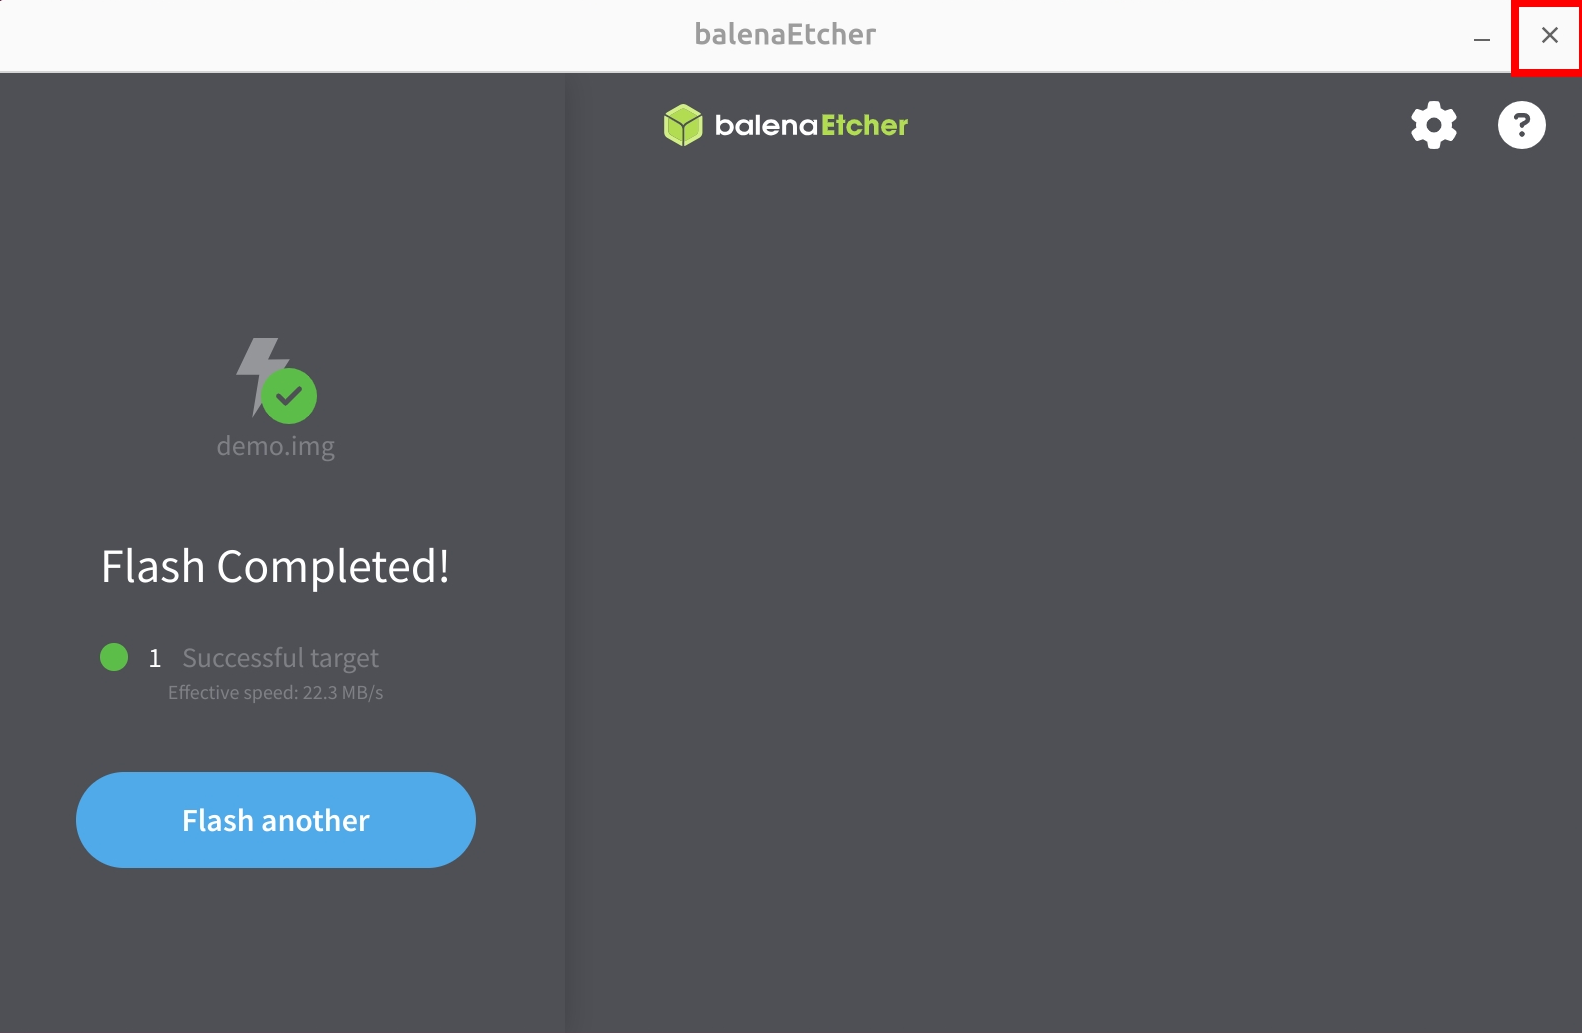
After successfully flashing the system image, close Etcher!
Using the System
After completing the system image installation, insert the microSD card into the ROCK Pi E's microSD slot, then power on the system using a 5V Type-C power adapter.
Serial Login
We recommend using Tabby software for serial login and debugging. It supports Windows, Linux, MacOS, and other platforms.
- ROCK Pi E serial parameters
Baud rate: 1500000
Data bits: 8
Stop bits: 1
Parity: None
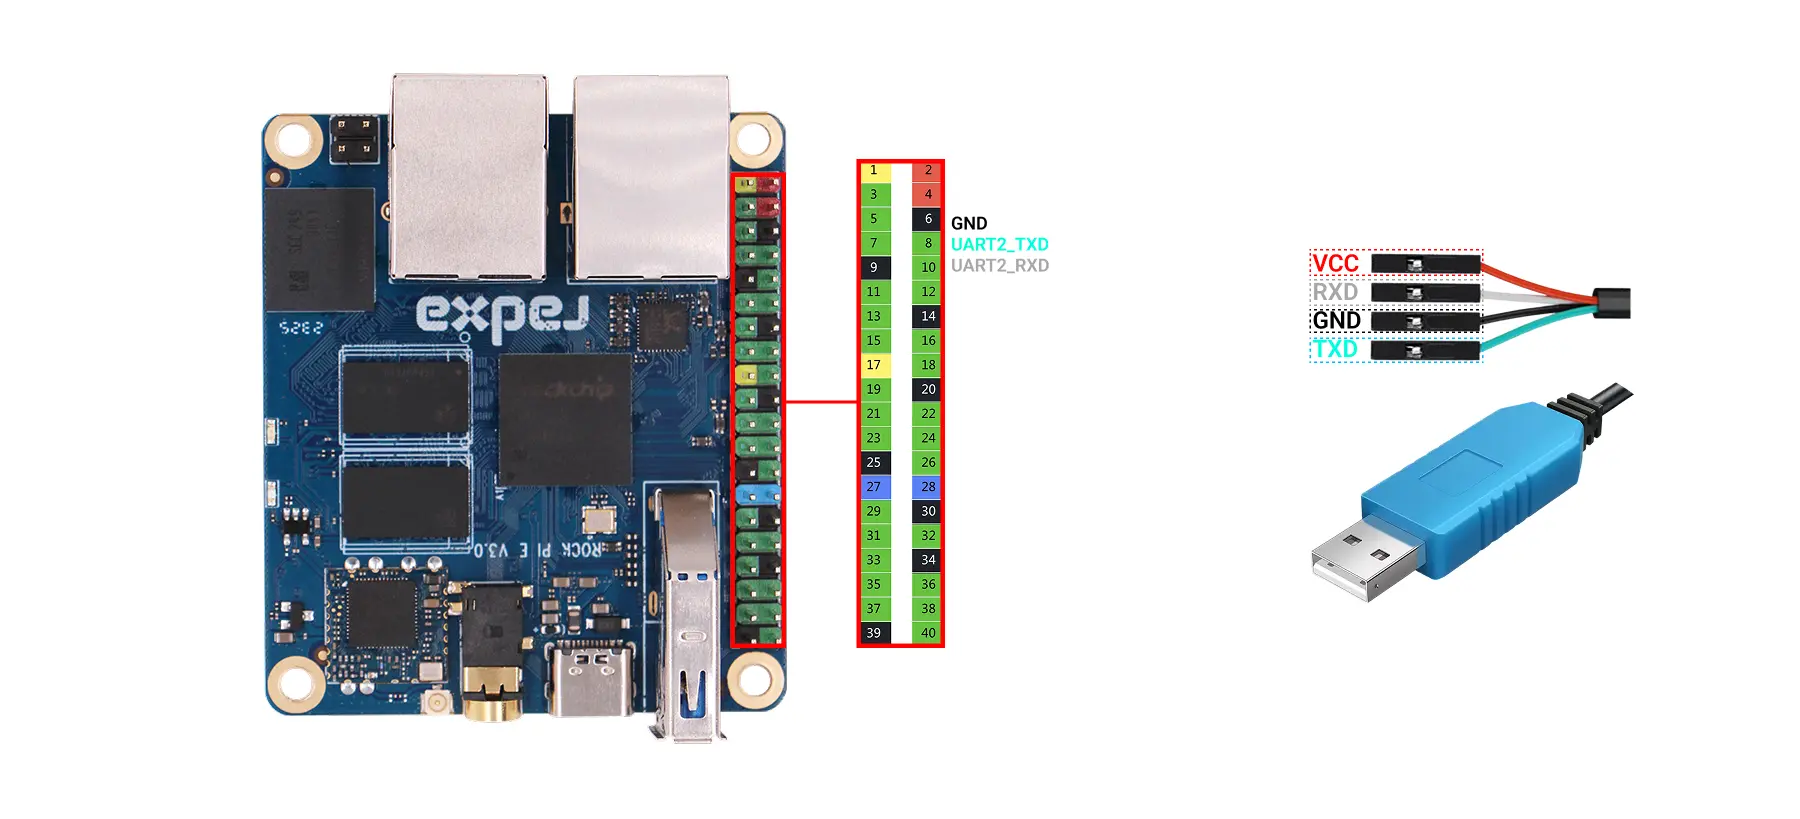
Hardware Connection
When using USB serial cable for serial debugging with ROCK Pi E, please ensure correct pin connections. Incorrect wiring may cause hardware damage to the board.
Do not connect the VCC interface (red wire) of the USB serial cable to avoid damage from incorrect connection.
Connect the USB interface of the USB serial cable to the PC, and connect the other end to the ROCK Pi E's GPIO serial pins.
| Pin Function | Connection |
|---|---|
| ROCK Pi E : GND (Pin6) | Connect to GND pin of USB serial cable (black wire) |
| ROCK Pi E : UART2_TX (Pin8) | Connect to RXD pin of USB serial cable (white wire) |
| ROCK Pi E : UART2_RX (Pin10) | Connect to TXD pin of USB serial cable (green wire) |
Note: USB-to-serial cables from different manufacturers may have different wire colors. Please connect according to the actual pin functions.
Using Tabby
Tabby is a powerful cross-platform serial debugging tool supporting serial port, SSH, and other protocols.
Tabby Installation
Download and install Tabby software from the Tabby official website.
- Windows
Choose .exe file for installation based on your system architecture.
- Linux
Choose .deb file for installation based on your system architecture.
- MacOS
Choose .dmg file for installation based on your system architecture.
Using Tabby (Serial)
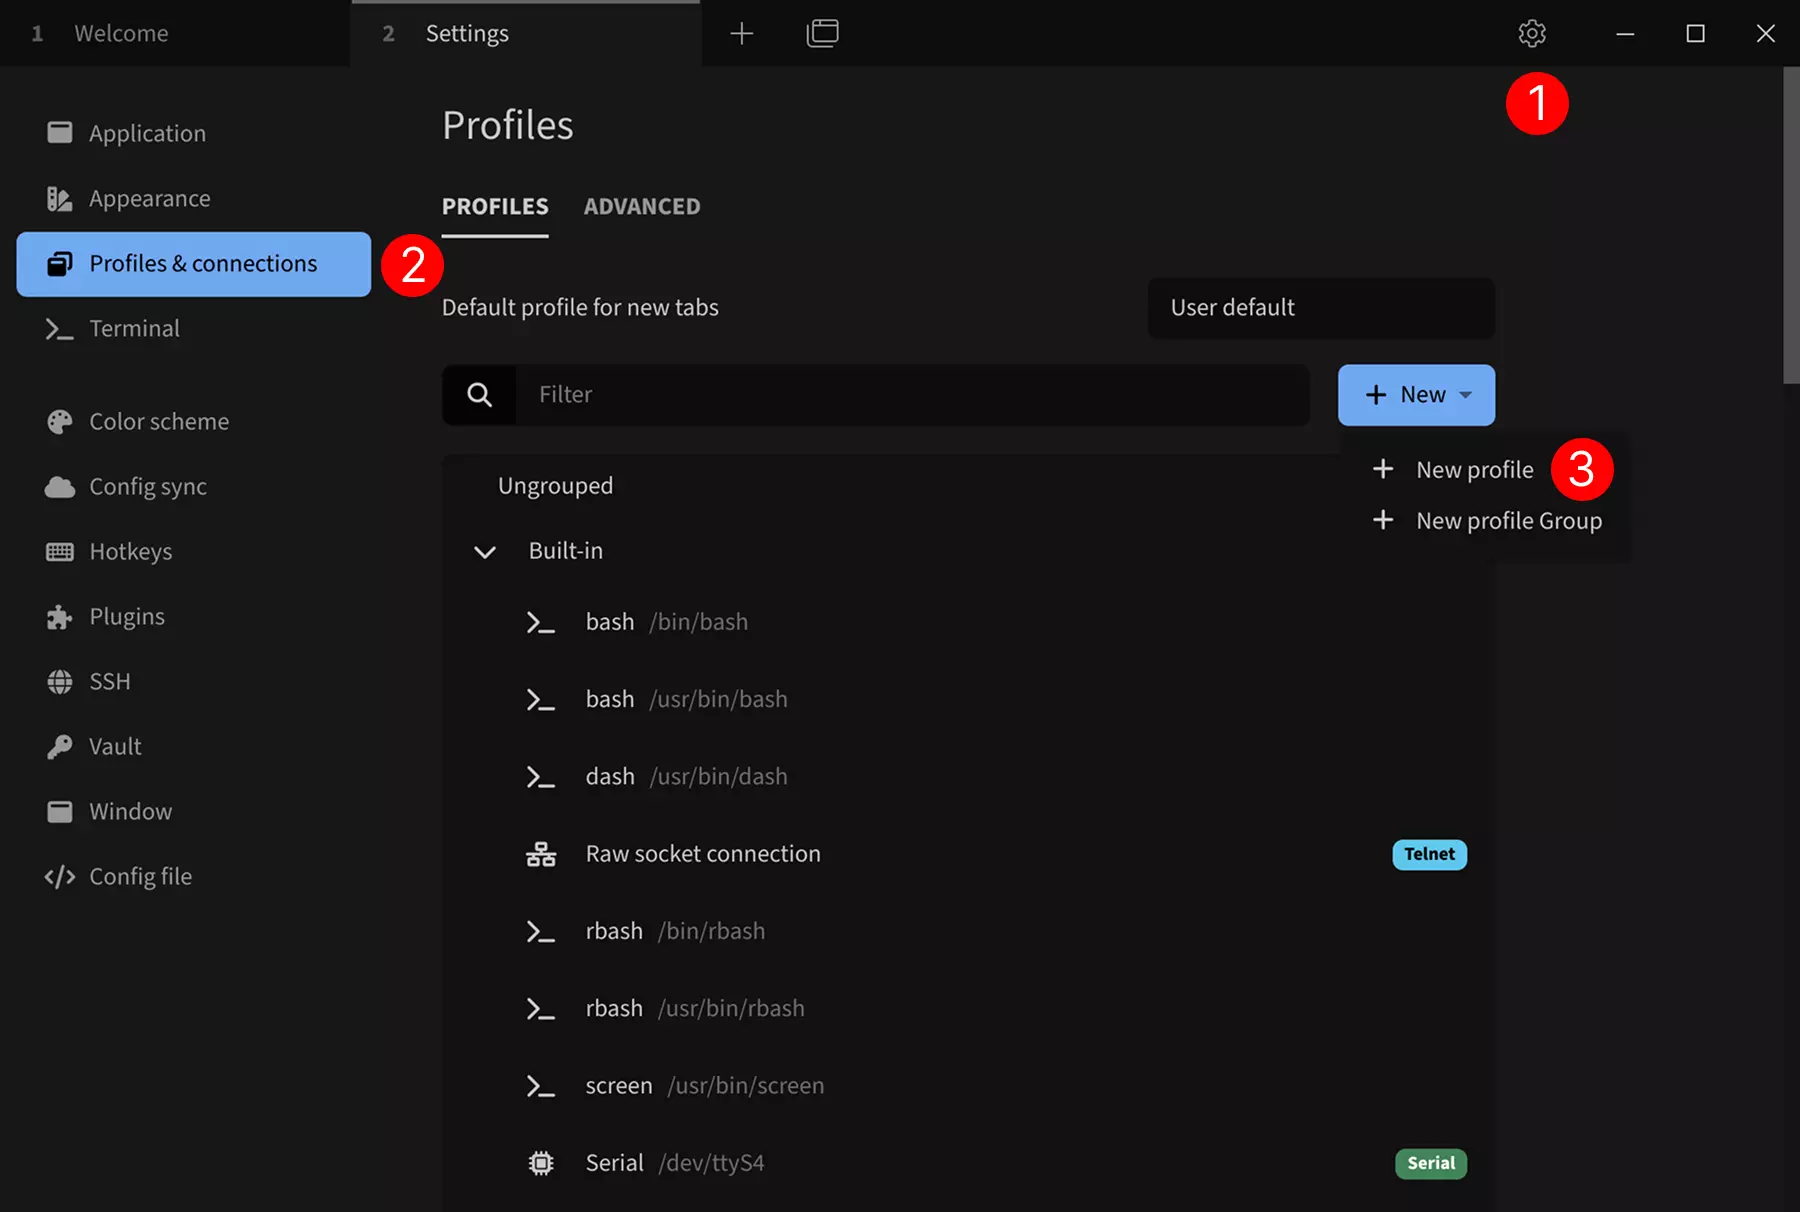
Double-click the Tabby icon to open Tabby software.
Set up serial connection:
① --> Settings: Click settings option
② --> Profiles & connections: Click configure connection option
③ --> New profile: Click to add new profile option
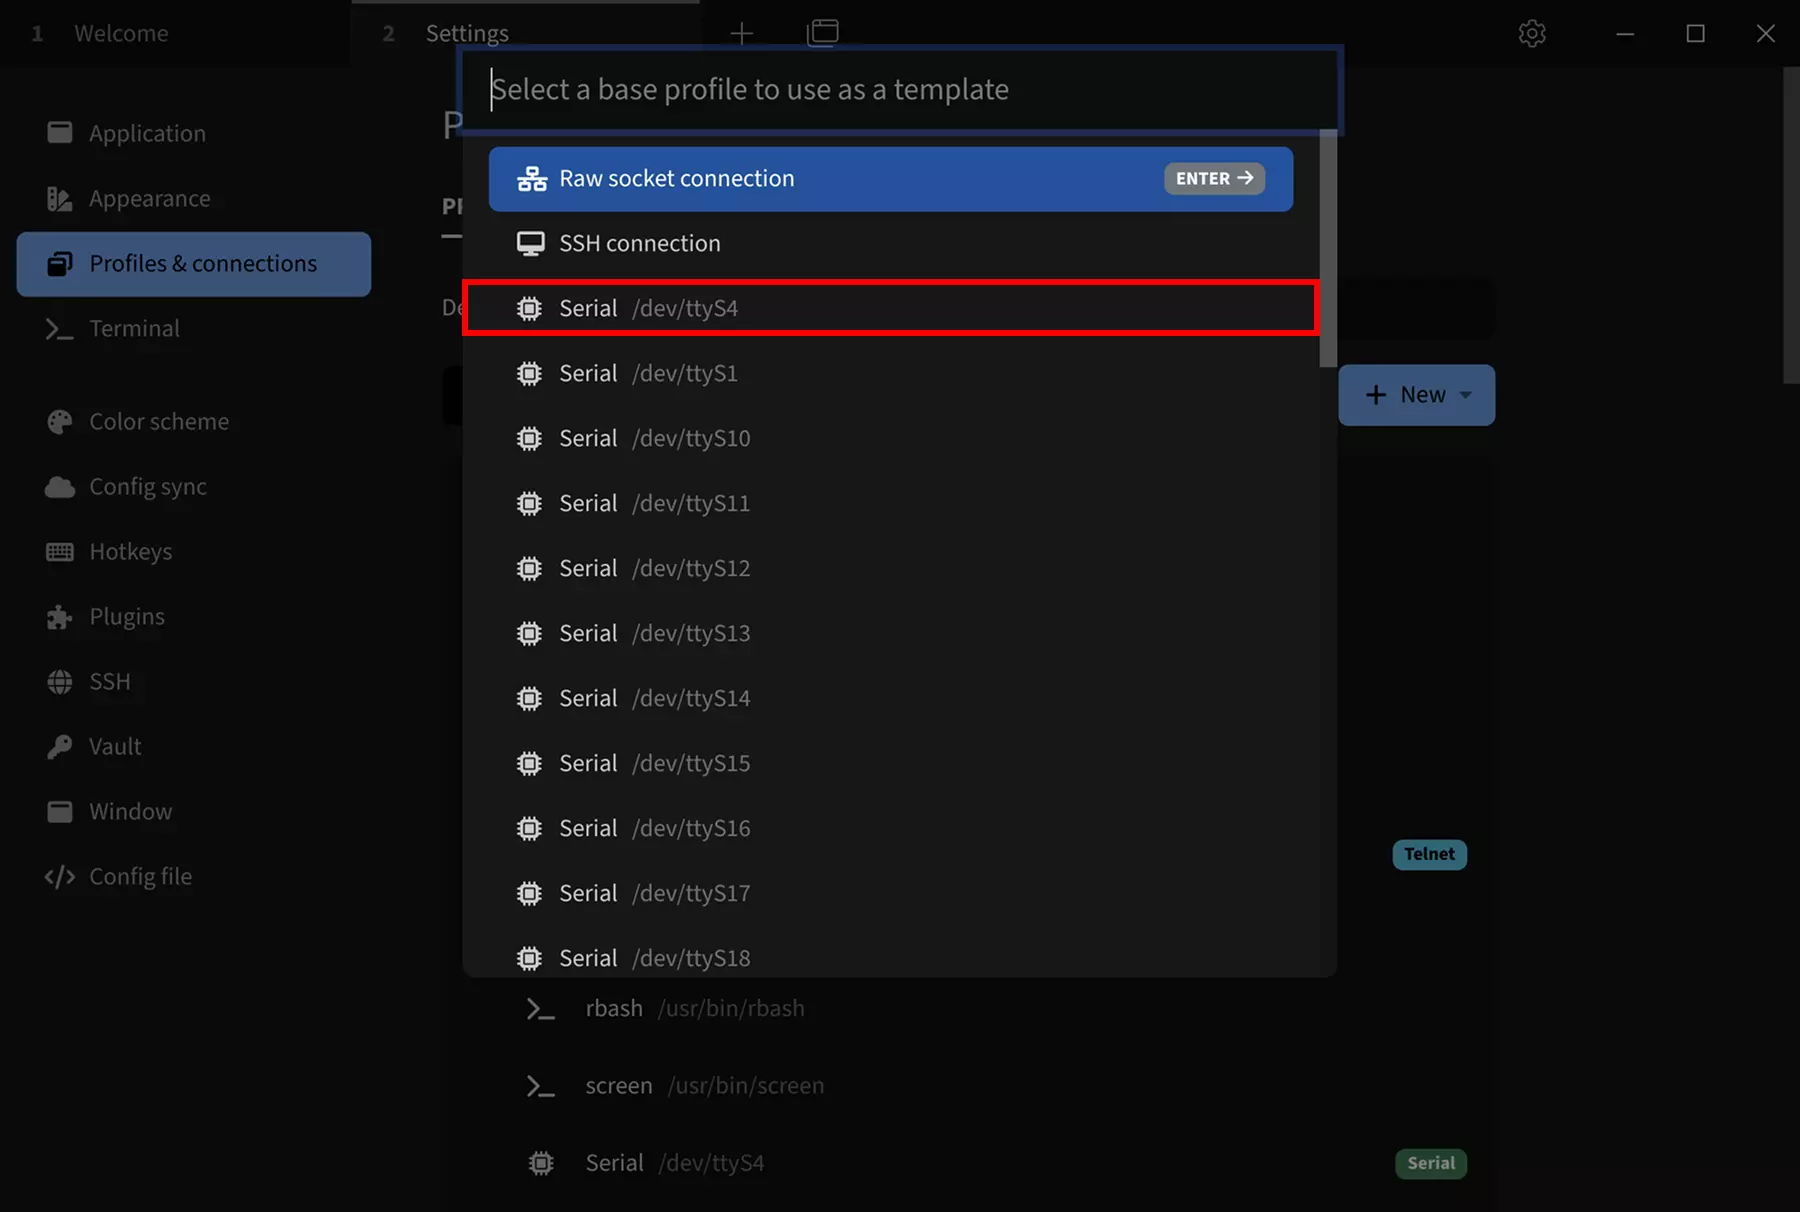
Select a base configuration as template: Choose any Serial template. You can modify the device name, serial port number, baud rate, and other parameters in the following configuration interface.
After selecting Serial template, modify the following parameters:
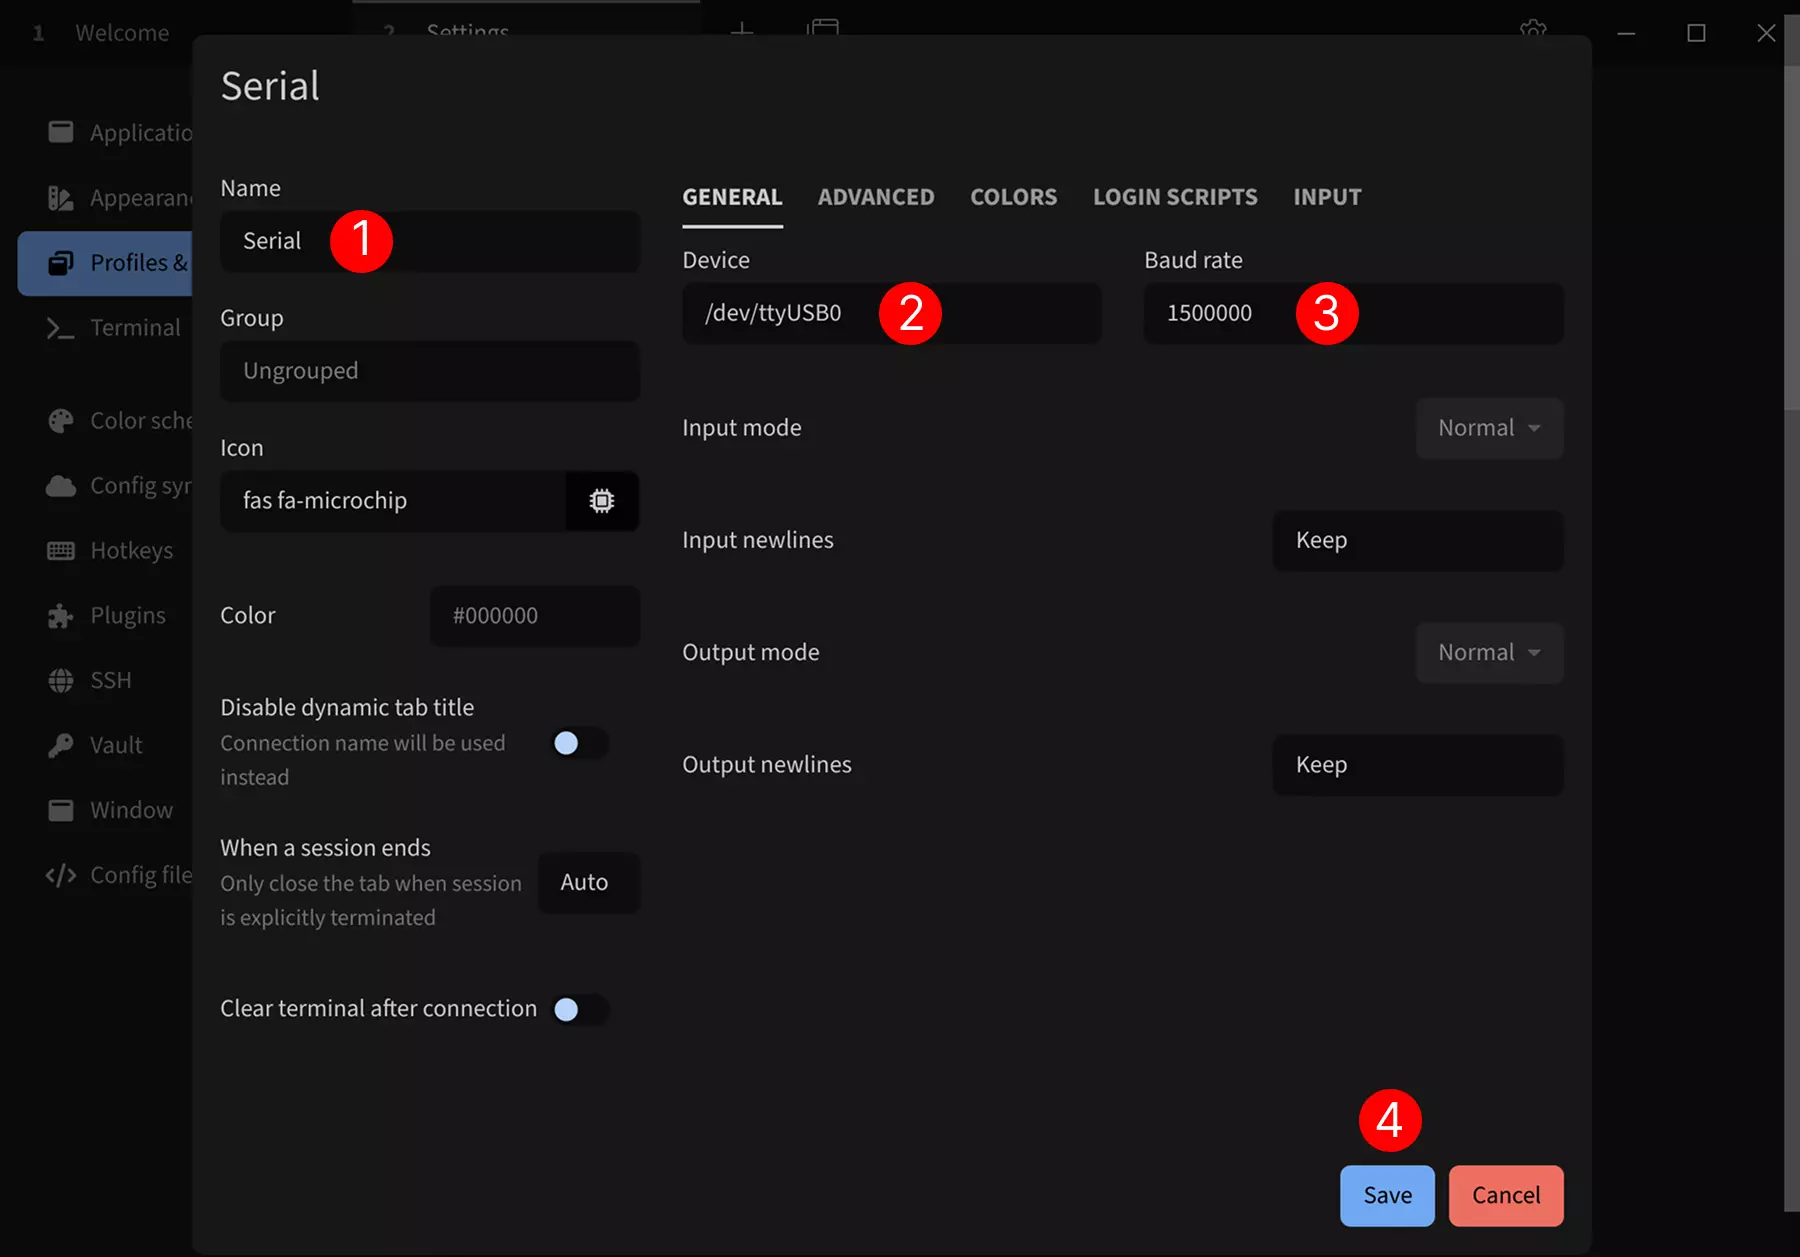
① --> Name: Set connection name, it is recommended to use the product name
② --> Device: Set serial port number. If only one serial device is connected, it is usually /dev/ttyUSB0
③ --> Baud rate: Set baud rate to 1500000
④ --> Save: Save configuration
Click the run button to connect to the serial device:
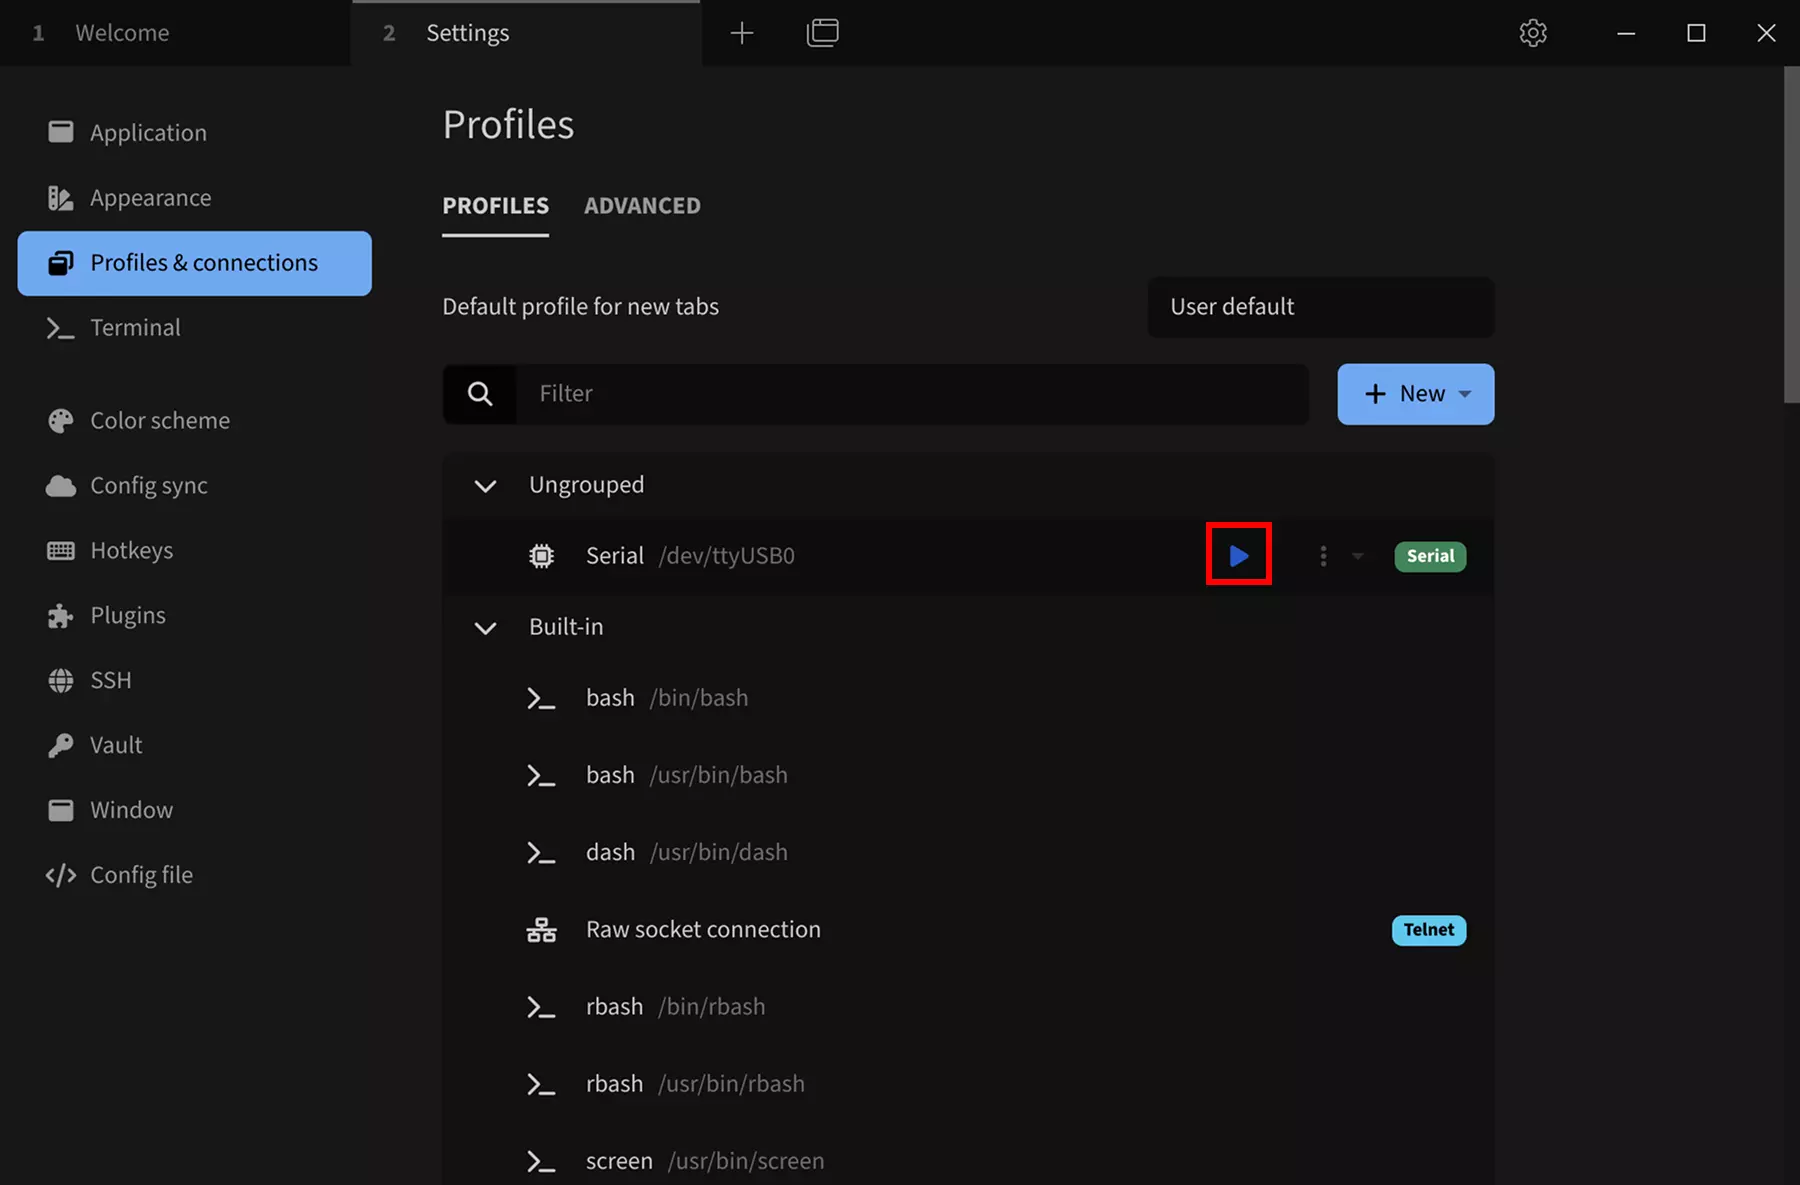
After successful connection, press Enter to show login information. Then use the username and password for your system to log in (password input will not be displayed in terminal, enter password and press Enter to log in).

If you see Error: Permission denied, cannot open /dev/ttyUSB0 when opening the serial port!
Please troubleshoot as follows:
-
Check if the serial device is properly connected
-
Check serial device permissions
Taking Linux system as an example. If the serial device permissions are insufficient, run the following command in terminal to give all users access to the serial device:
sudo chmod 777 /dev/ttyUSB0
- Check if the serial device is occupied by another program