MIPI CSI
Supported List
| Camera Name | Sensor Model | Resolution |
|---|---|---|
| Radxa Camera 8M 219 | IMX219 | 8 million pixels |
| Raspberry Pi Camera V2 | IMX219 | 8 million pixels |
| Raspberry Pi Camera v1.3 | OV5647 | 5 million pixels |
Usage Instructions
The Raspberry Pi Compute Module 4 IO Board has two CSI interfaces: CAM0 and CAM1.
When using CAM0 or DISP0, you need to short-circuit the location on the board as shown in the image below.
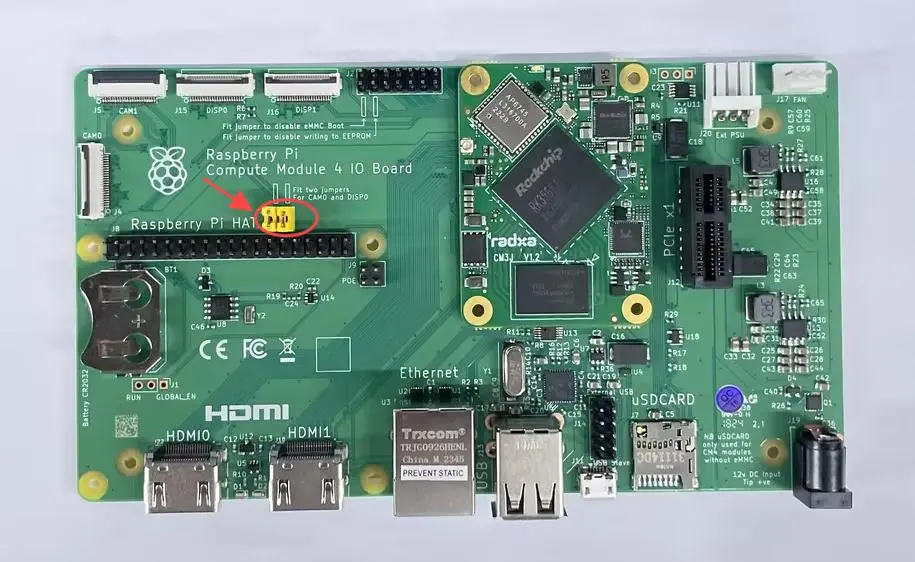
Radxa Camera 8M 219
-
Connect
- Connect to the Raspberry Pi Compute Module 4 IO Board using an FPC cable, as shown in the image below:
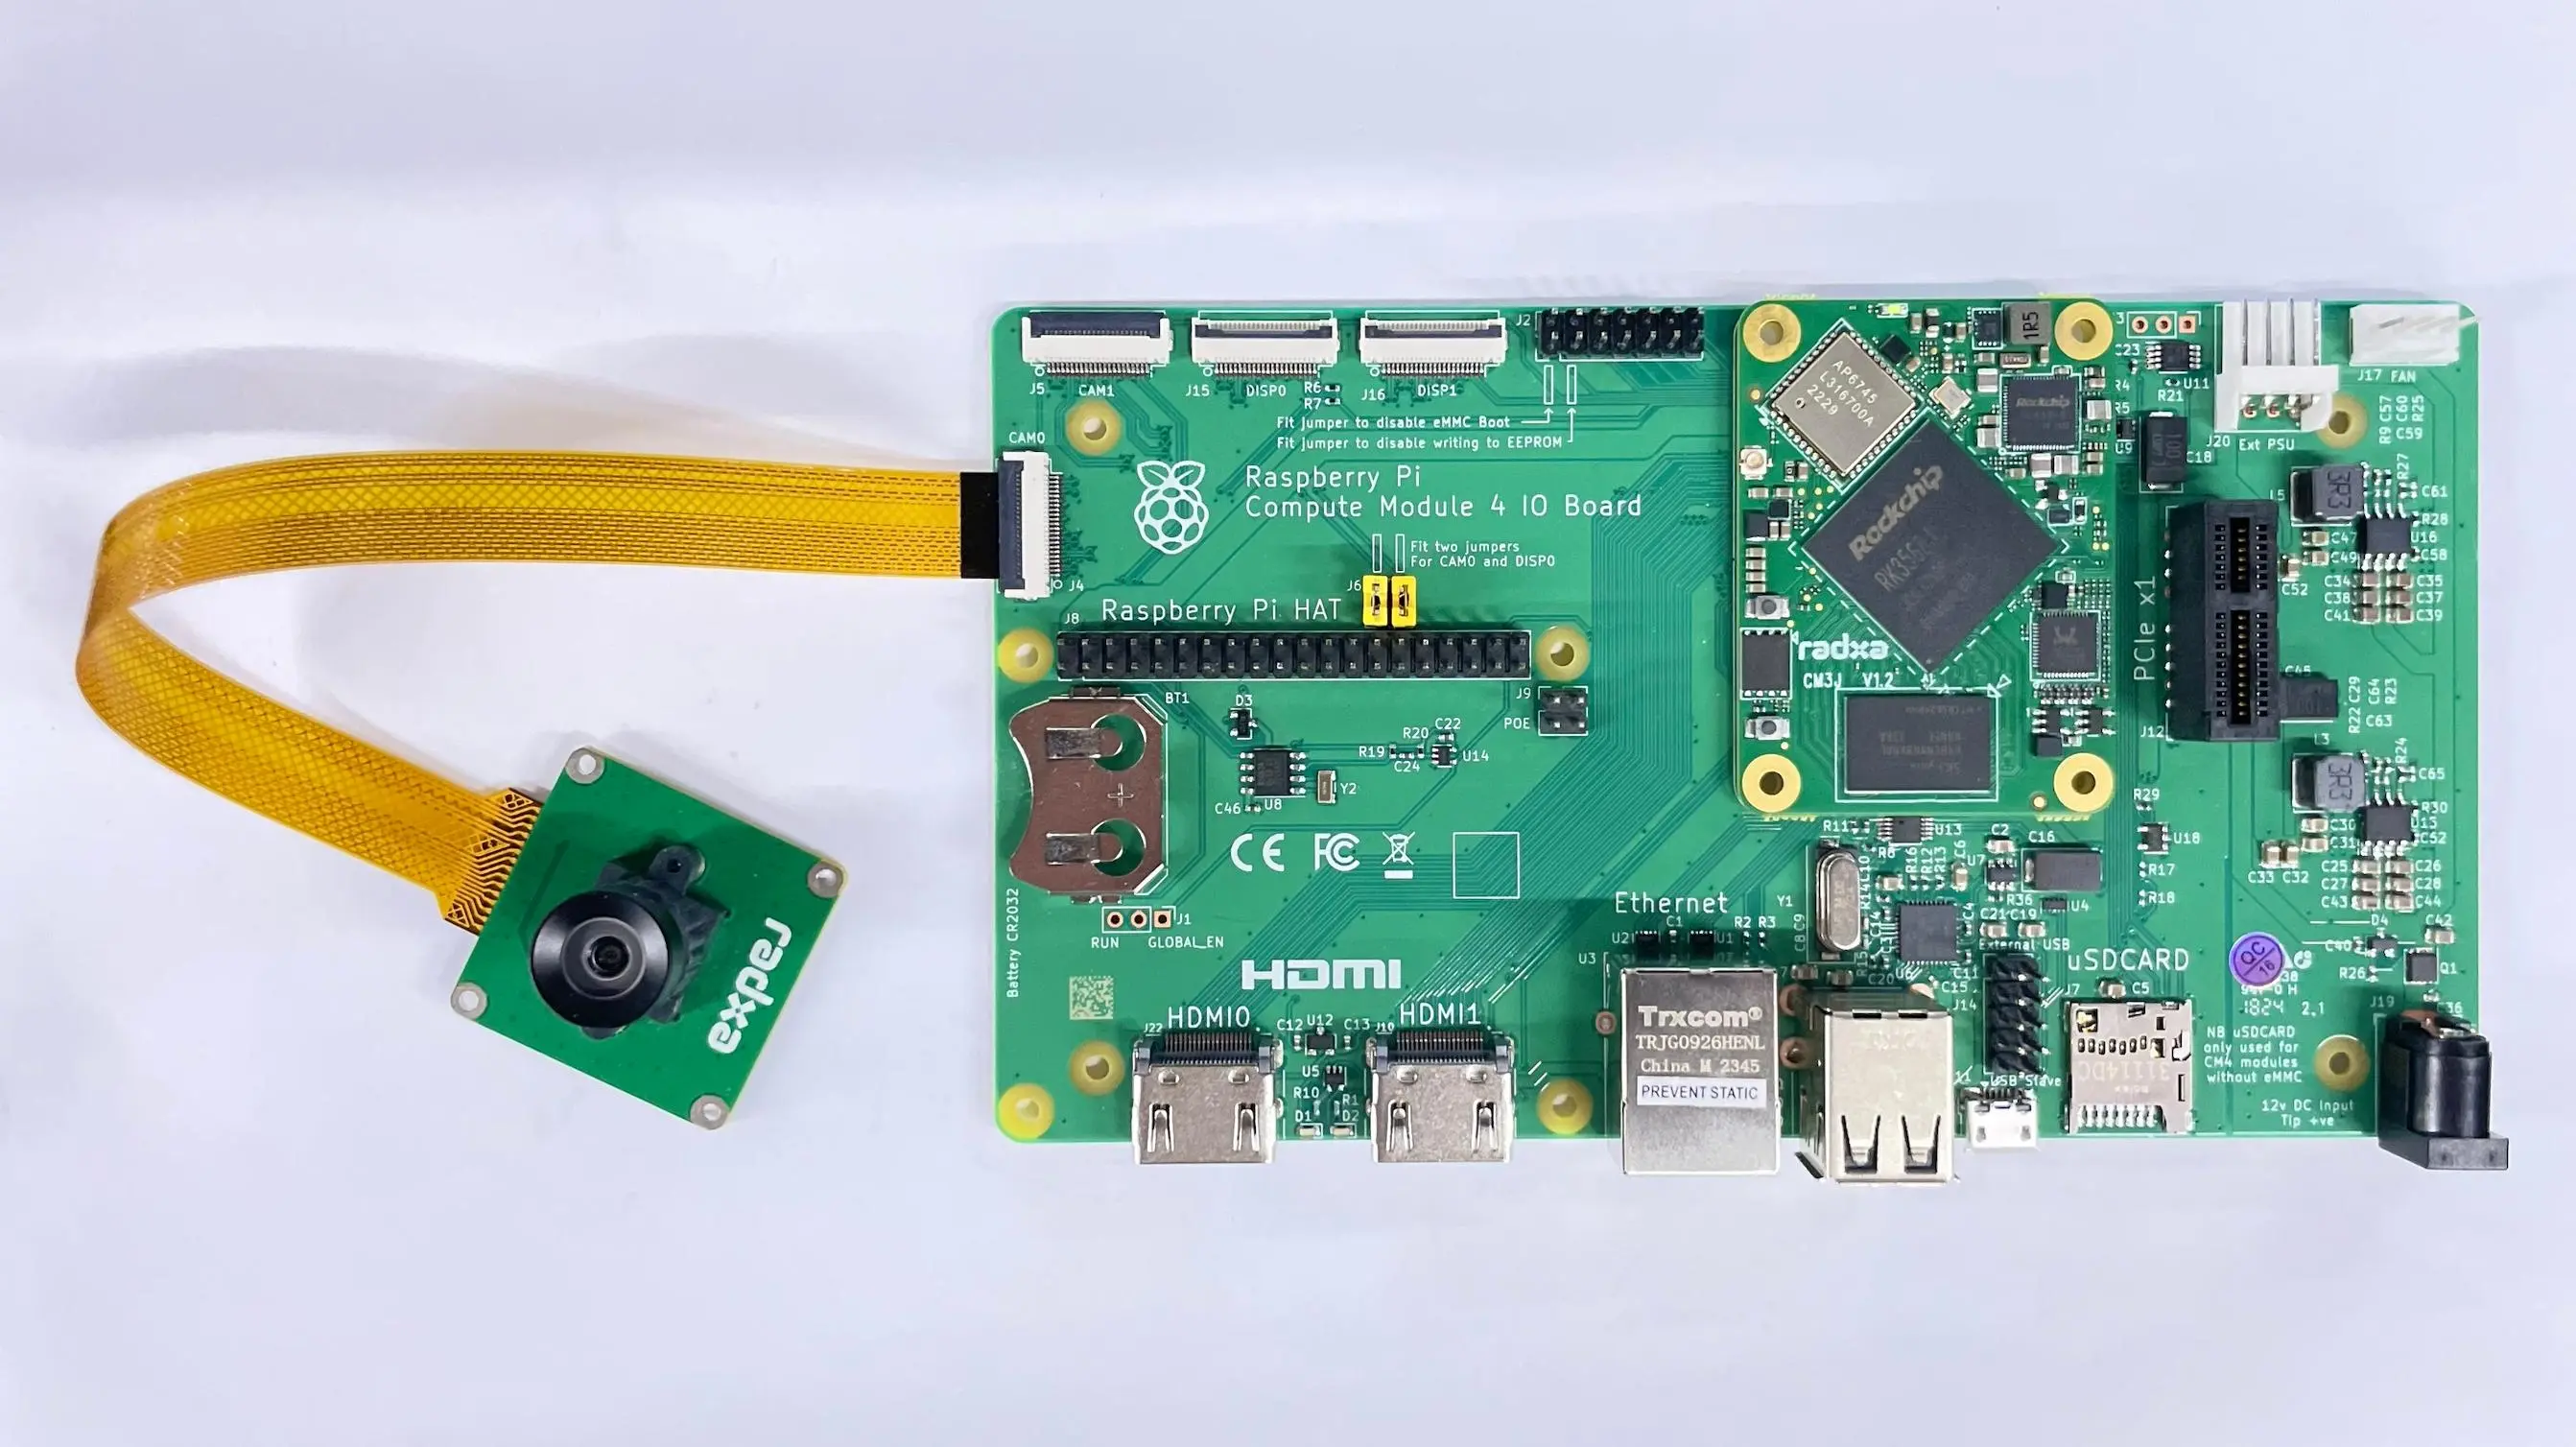
- Connect to the Raspberry Pi Compute Module 4 IO Board using an FPC cable, as shown in the image below:
-
Use
rsetupto open the corresponding overlay.-
Use the Ctrl + T shortcut to open the terminal, then run the
rsetupcommand:radxa@radxa-cm3j-rpi-cm4-io:~$ rsetup -
Enable the Radxa Camera 8M 219 Overlay through the overlays device tree configuration.
tipPlease enable the "Enable Radxa Camera 8M on CAM0/CAM1" overlay.
After successfully enabling "[*] Enable Radxa Camera 8M on CAM0/CAM1", exit and reboot to apply the configuration.
-
Raspberry Pi Camera V2
-
Connect
- Connect to the Raspberry Pi Compute Module 4 IO Board using an FPC cable, as shown in the image below:
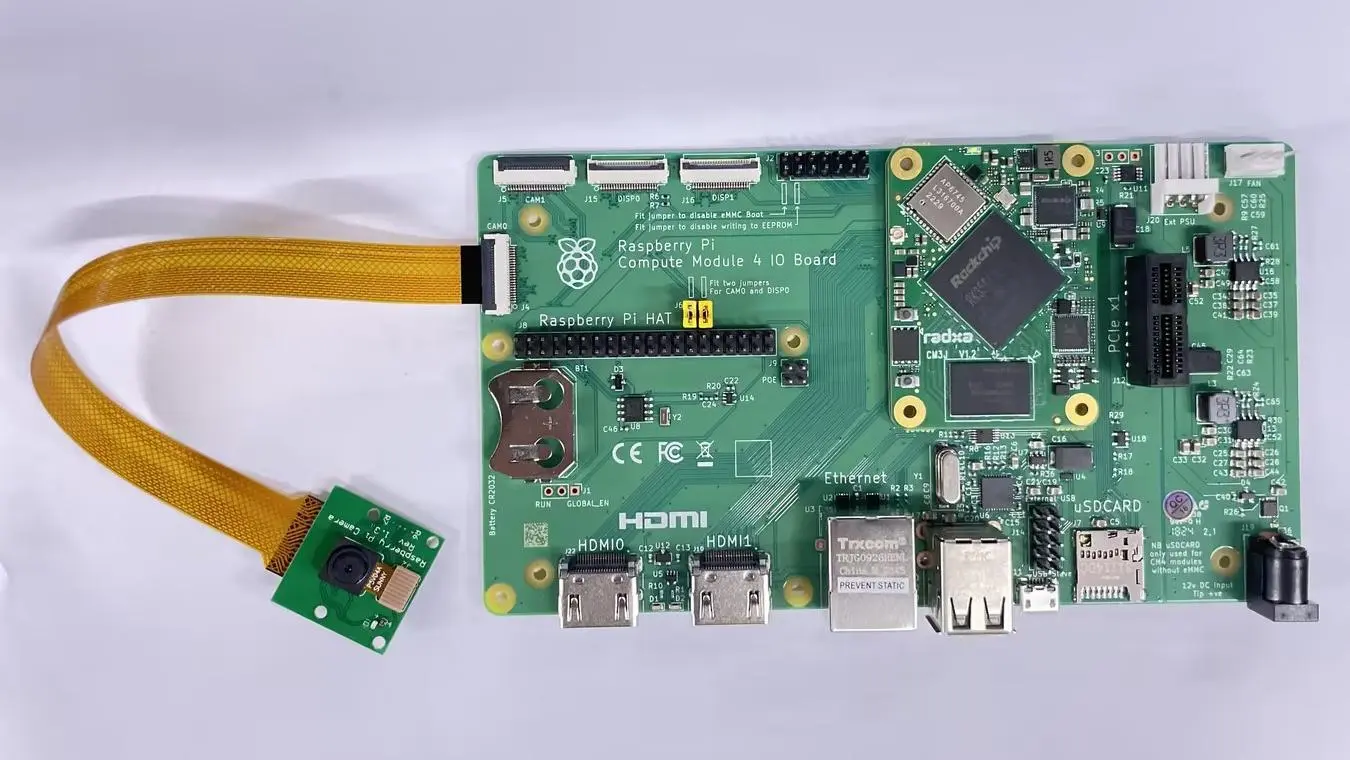
- Connect to the Raspberry Pi Compute Module 4 IO Board using an FPC cable, as shown in the image below:
-
Use
rsetupto open the corresponding overlay.-
Use the Ctrl + T shortcut to open the terminal, then run the
rsetupcommand:radxa@radxa-cm3j-rpi-cm4-io:~$ rsetup -
Enable the Raspberry Pi Camera V2 Overlay through the overlays device tree configuration.
tipPlease enable the "[] Enable Raspberry Pi Camera V2 on CAM0/CAM1" overlay.
After successfully enabling "[*] Enable Raspberry Pi Camera V2 on CAM0/CAM1", exit and reboot to apply the configuration.
-
Raspberry Pi Camera v1.3
-
Connect
- Connect to the Raspberry Pi Compute Module 4 IO Board using an FPC cable, as shown in the image below:
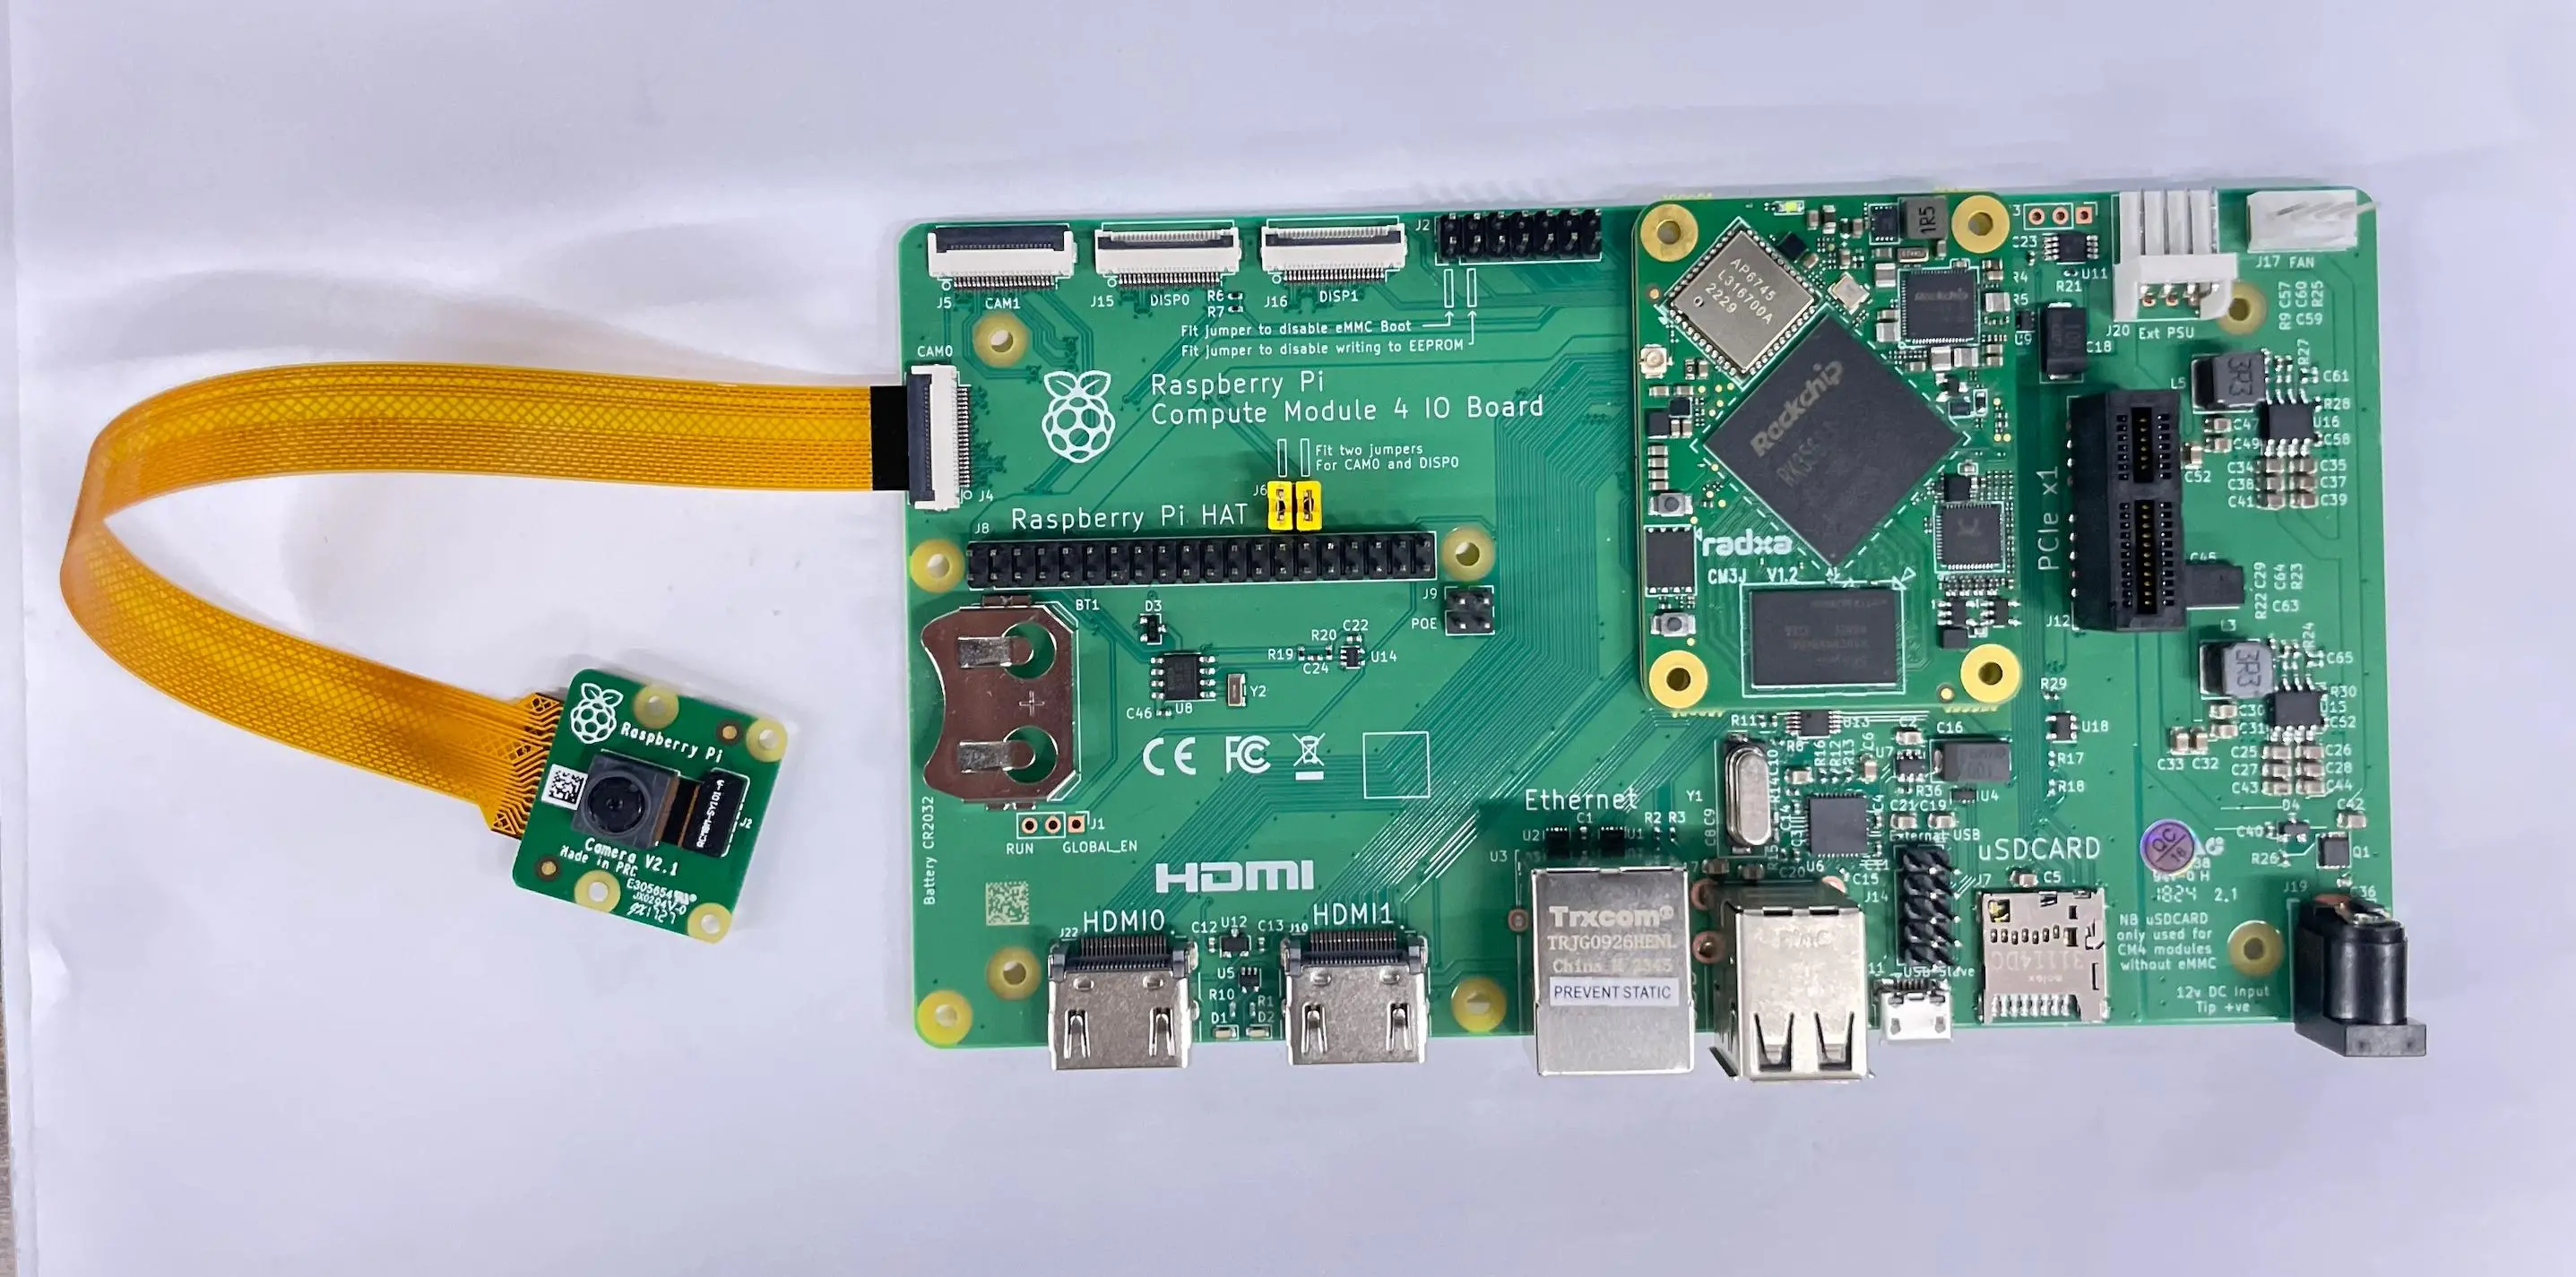
- Connect to the Raspberry Pi Compute Module 4 IO Board using an FPC cable, as shown in the image below:
-
Use
rsetupto open the corresponding overlay.-
Use the Ctrl + T shortcut to open the terminal, then run the
rsetupcommand:radxa@radxa-cm3j-rpi-cm4-io:~$ rsetup -
Enable the Raspberry Pi Camera v1.3 Overlay through the overlays device tree configuration.
tipPlease enable the "[] Enable Raspberry Pi Camera v1.3 on CAM0/CAM1" overlay.
After successfully enabling "[*] Enable Raspberry Pi Camera v1.3 on CAM0/CAM1", exit and reboot to apply the configuration.
-
Test
-
Preview
-
Open the terminal and enter the following command to open the camera preview:
gst-launch-1.0 v4l2src device=/dev/video0 io-mode=4 ! videoconvert ! video/x-raw,format=NV12,width=1920,height=1080 ! xvimagesink;
-
-
Take Photo
-
Open the terminal and enter the following command to take a photo using the camera:
gst-launch-1.0 v4l2src device=/dev/video0 io-mode=4 ! videoconvert ! video/x-raw,format=NV12,width=1920,height=1080 ! jpegenc ! multifilesink location=file.name.jpg;
-
-
Record video
-
Open the terminal and enter the following command to start recording a video with the camera:
gst-launch-1.0 v4l2src num-buffers=512 device=/dev/video0 io-mode=4 ! videoconvert ! video/x-raw, format=NV12, width=1920, height=1080, framerate=30/1 ! tee name=t ! queue ! mpph264enc ! queue ! h264parse ! mpegtsmux ! filesink location=/home/radxa/file.name.mp4
-