Quick Start
This guide helps you get started with Radxa NX4 quickly. When used with the Radxa NX4 IO Board, it enables quick validation of Radxa NX4 features.
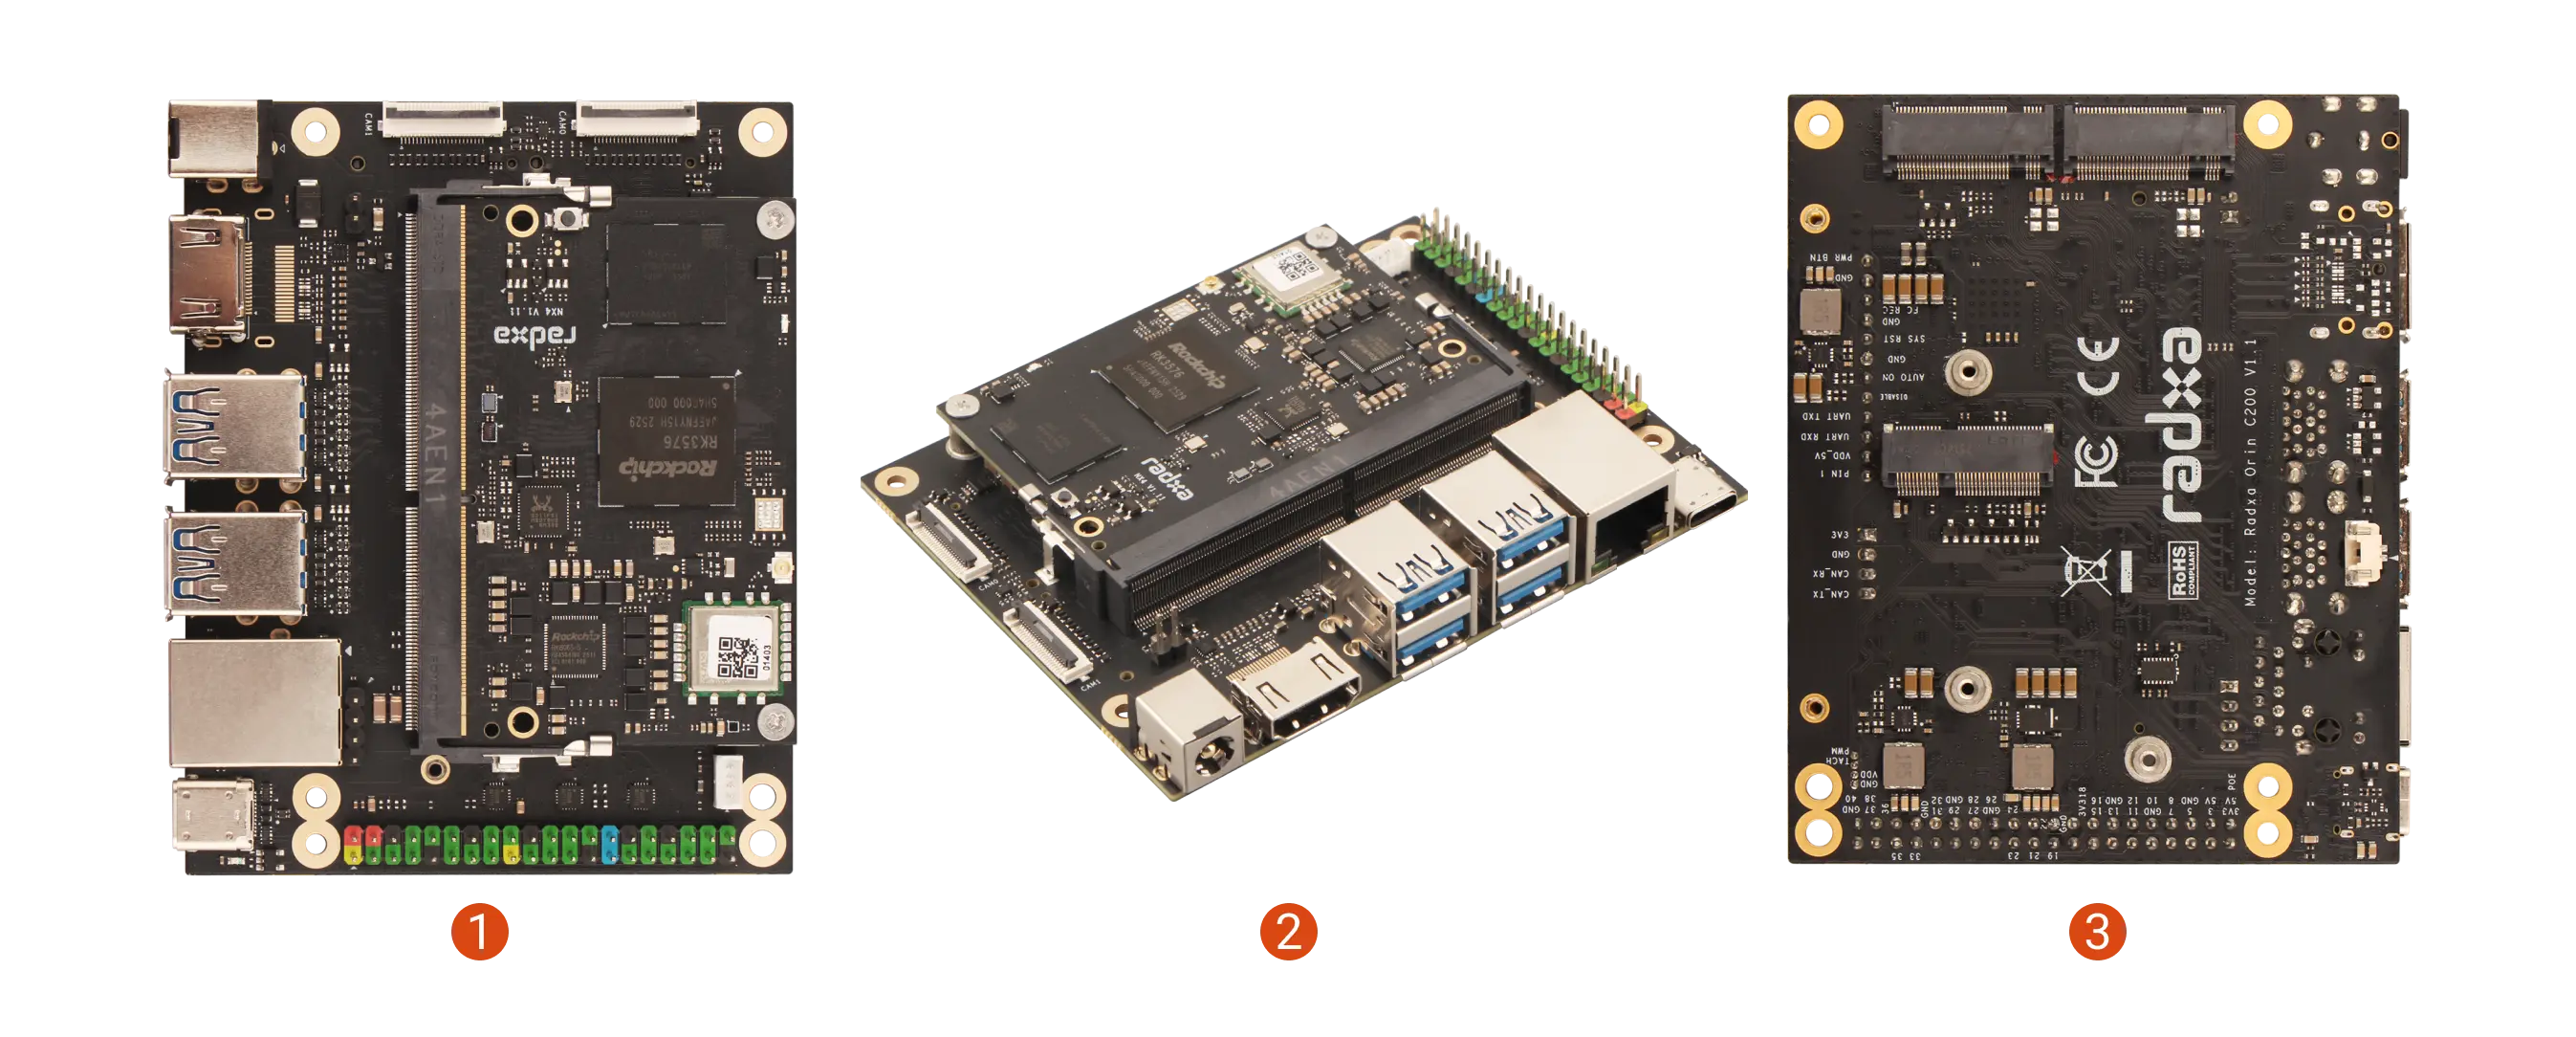
Product images
The Radxa NX4 Development Kit consists of Radxa NX4 and the Radxa NX4 IO Board, and can be used to quickly validate compute module functionality.
| Product | No. | View | No. | View | No. | View |
|---|---|---|---|---|---|---|
| Radxa NX4 Development Kit | ① | Top view | ② | Side view | ③ | Bottom view |
Prerequisites
Prepare the following hardware in advance:
- Radxa NX4 Development Kit
- Power supply: DC5525 power adapter (9 - 20V)
- Boot media: onboard eMMC
- Display: HDMI cable and a monitor
- Input devices: keyboard and mouse (for GUI operation)
- Radxa DC 60W Power Adapter (recommended)
- Any DC power adapter that supports 9-20V can be used. A power rating of 40W or above is recommended.
Install the system
This section mainly describes how to install a system image to the onboard eMMC of Radxa NX4.
Installing the system will completely format the eMMC. All data will be permanently erased!
Before proceeding, confirm that:
- There is no important data on the eMMC, or you have completed a backup.
Install RKDevTool
RKDevTool is a software developed by Rockchip for USB flashing on Windows/Linux/MacOS platforms, designed to simplify and accelerate the development and debugging process for Rockchip series chips.
- Windows
- Linux
- MacOS
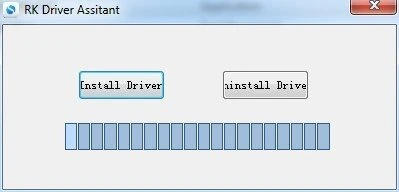
- Install Drivers
Download and extract the DriverAssistant v5.14 file.
Locate the DriverInstall.exe file and run it as administrator:
To install drivers: Click the Install Driver option
To uninstall drivers: Click the Uninstall Driver option
If you have previously installed other versions of the driver, please uninstall them before installing the new one.
- Download RKDevTool
Download the RKDevTool utility, then extract the downloaded file. The RKDevTool.exe is the executable program - simply double-click to launch the software.
- Install rkdeveloptool
Open your system terminal or command line and run the following commands to install:
sudo apt-get update
sudo apt-get install -y libudev-dev libusb-1.0-0-dev dh-autoreconf pkg-config libusb-1.0 build-essential git wget
git clone https://github.com/rockchip-linux/rkdeveloptool
cd rkdeveloptool
autoreconf -i
./configure
make -j $(nproc)
sudo cp rkdeveloptool /usr/local/sbin/
- Verify Installation
After installing RKDevTool, you can check the version number using the following command:
rkdeveloptool -V
- Install HomeBrew
HomeBrew is a free and open-source package manager that simplifies the process of installing software for MacOS users.
If you don't have HomeBrew installed, you can install it using the following command:
/bin/bash -c "$(curl -fsSL https://raw.githubusercontent.com/Homebrew/install/HEAD/install.sh)"
- Install rkdeveloptool
Open your system terminal or command line and run the following commands to install.
It is recommended to install directly via a third-party Homebrew Tap, no manual compilation needed:
brew tap IgorKha/rkdeveloptool
brew install rkdeveloptool
If the Tap installation fails, you can also compile from source. macOS does not support $(nproc), use make directly. main.cpp uses variable-length arrays (VLA), macOS Clang does not allow VLA in C++ by default, so you need to declare the variable as const first.
brew install automake autoconf libusb pkg-config
git clone https://github.com/rockchip-linux/rkdeveloptool
cd rkdeveloptool
autoreconf -i
./configure
sed -i '' 's/int nSectorSize = 512;/const int nSectorSize = 512;/' main.cpp
make
cp rkdeveloptool /opt/homebrew/bin/
- Verify Installation
After installing RKDevTool, you can check the version number using the following command:
rkdeveloptool -V
Enter Maskrom mode
About Maskrom Mode
In Rockchip platform development, RKDevTool is a commonly used flashing tool. We can enter Maskrom mode and use RKDevTool to flash the firmware.
Maskrom mode is the "hardware first-aid kit" for embedded devices, enabling device recovery by directly accessing the chip's low-level interfaces.
Maskrom mode is a built-in low-level recovery mode in Rockchip chips. When the device cannot boot from any storage media (eMMC, SD card, etc.), we can use RockUSB protocol to rewrite the device firmware.
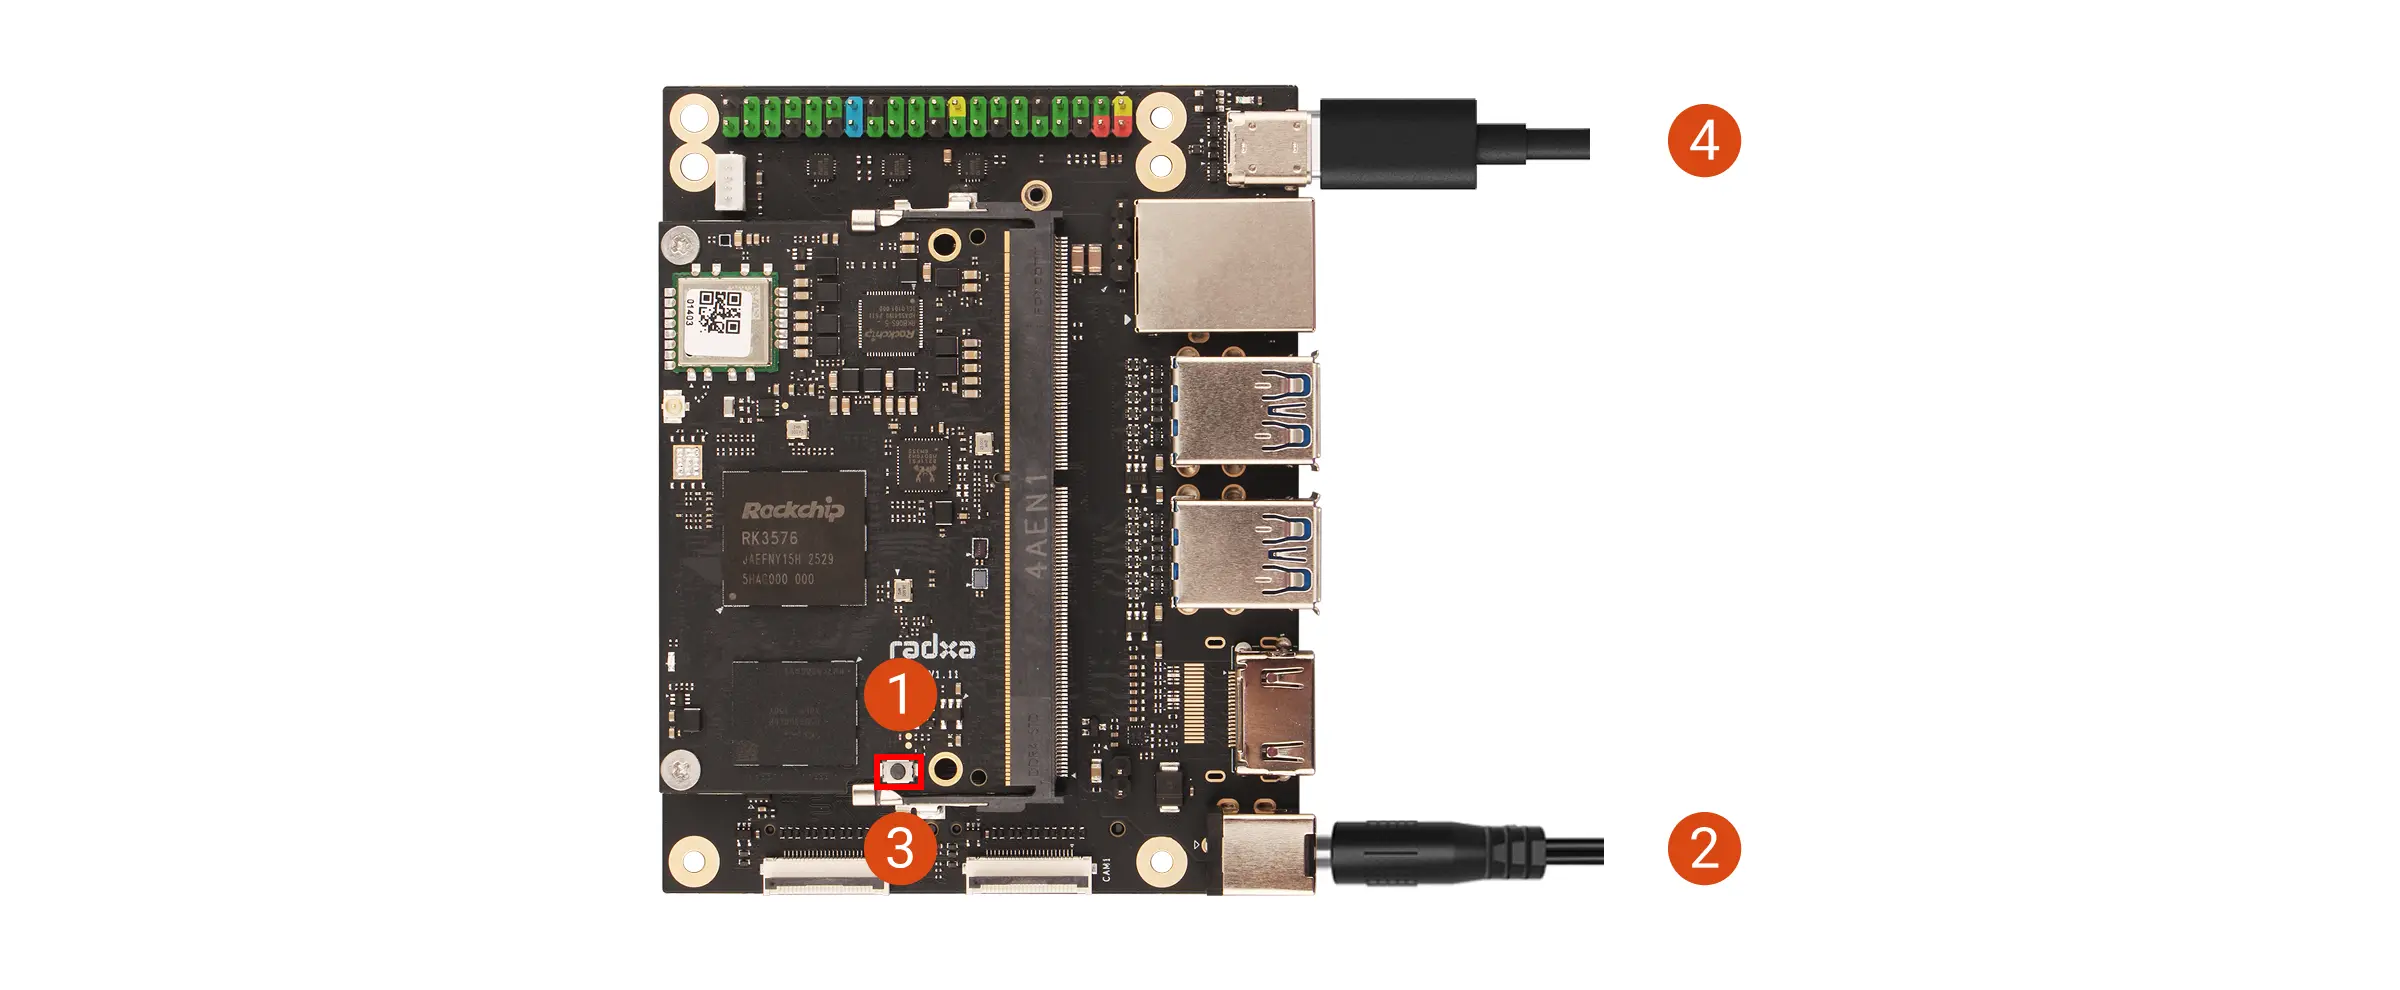
Entering Maskrom Mode
Our board features a dedicated Maskrom button. To enter Maskrom mode, press and hold the Maskrom button before powering on the board. The system will detect the button press and automatically enter Maskrom mode.
Detailed steps:
① : Press and hold the Maskrom button
② : Power on the board using the power adapter
③ : Release the Maskrom button
④ : Connect the board's OTG port to your computer's USB port using a data cable
After the board enters Maskrom mode, you can use the RKDevTool to verify the mode.
Verifying Maskrom Mode
- Windows
- Linux / MacOS
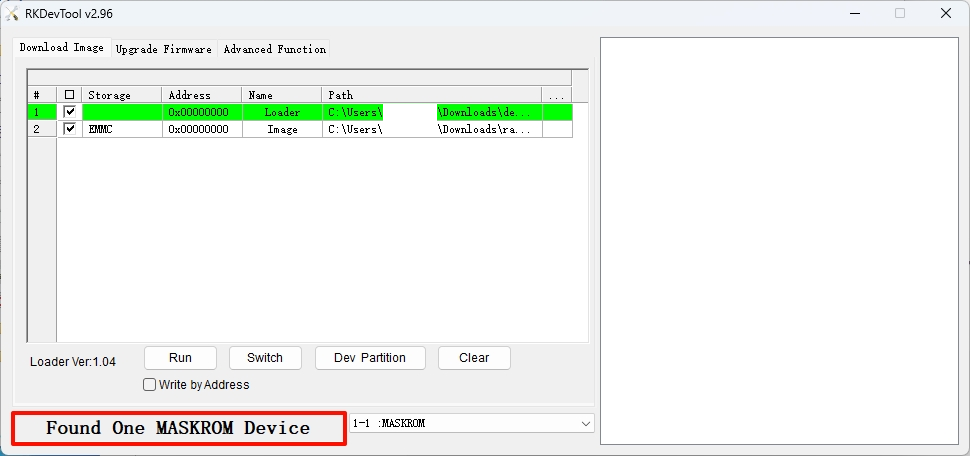
On Windows, open the RKDevTool. The software will automatically detect if the board is in Maskrom mode.
If the board is in Maskrom mode, the bottom left corner of the software will display Found One MASKROM Device.
On Linux/MacOS, you can use the RKDevTool to verify if the board is in Maskrom mode.
Use the rkdeveloptool ld command to check the Maskrom mode status.
sudo rkdeveloptool ld
If the terminal outputs a message similar to the following, the board is in Maskrom mode:
DevNo=1 Vid=0x2207,Pid=0x350e,LocationID=109 Maskrom
Install the system to eMMC
This guide explains how to use the RKDevTool to flash a system image to an eMMC.
Note: Ensure the board is in Maskrom mode and properly recognized by the system.
- Windows
- Linux / MacOS
On Windows, open the RKDevTool and follow these steps to install the system to the eMMC.
① : Select the corresponding Loader file for your board
② : Select the corresponding system image file for your board (extract the downloaded image archive before use)
③ : Choose the eMMC option as the system storage medium
④ : Check the Write by Address option
⑤ : Click the RUN button to execute all operations
⑥ : Monitor the operation progress through this interface
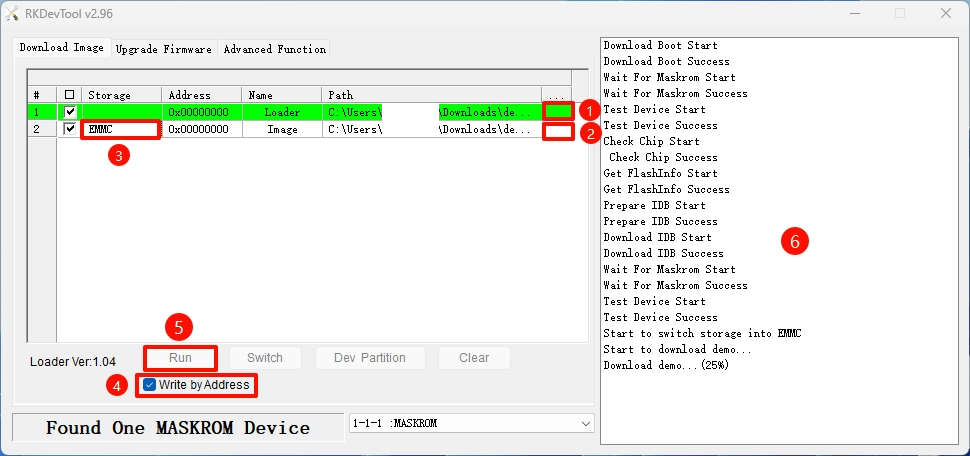
Disconnect the board from the PC, then power cycle the device. The system will automatically boot from the eMMC.
On Linux/MacOS, use the terminal command line to install the system to the eMMC.
- Run the Loader file
Replace demo.bin with the Loader file corresponding to your board.
sudo rkdeveloptool db demo.bin
- Install the system image
Replace demo.img with the system image corresponding to your board.
sudo rkdeveloptool wl 0 demo.img
- Reboot the system
Disconnect the board from the PC, then power cycle the device. The system will automatically boot from the eMMC.
sudo rkdeveloptool rd
Boot the system
After the installation completes, connect an HDMI display, then re-plug the power adapter to boot the system.
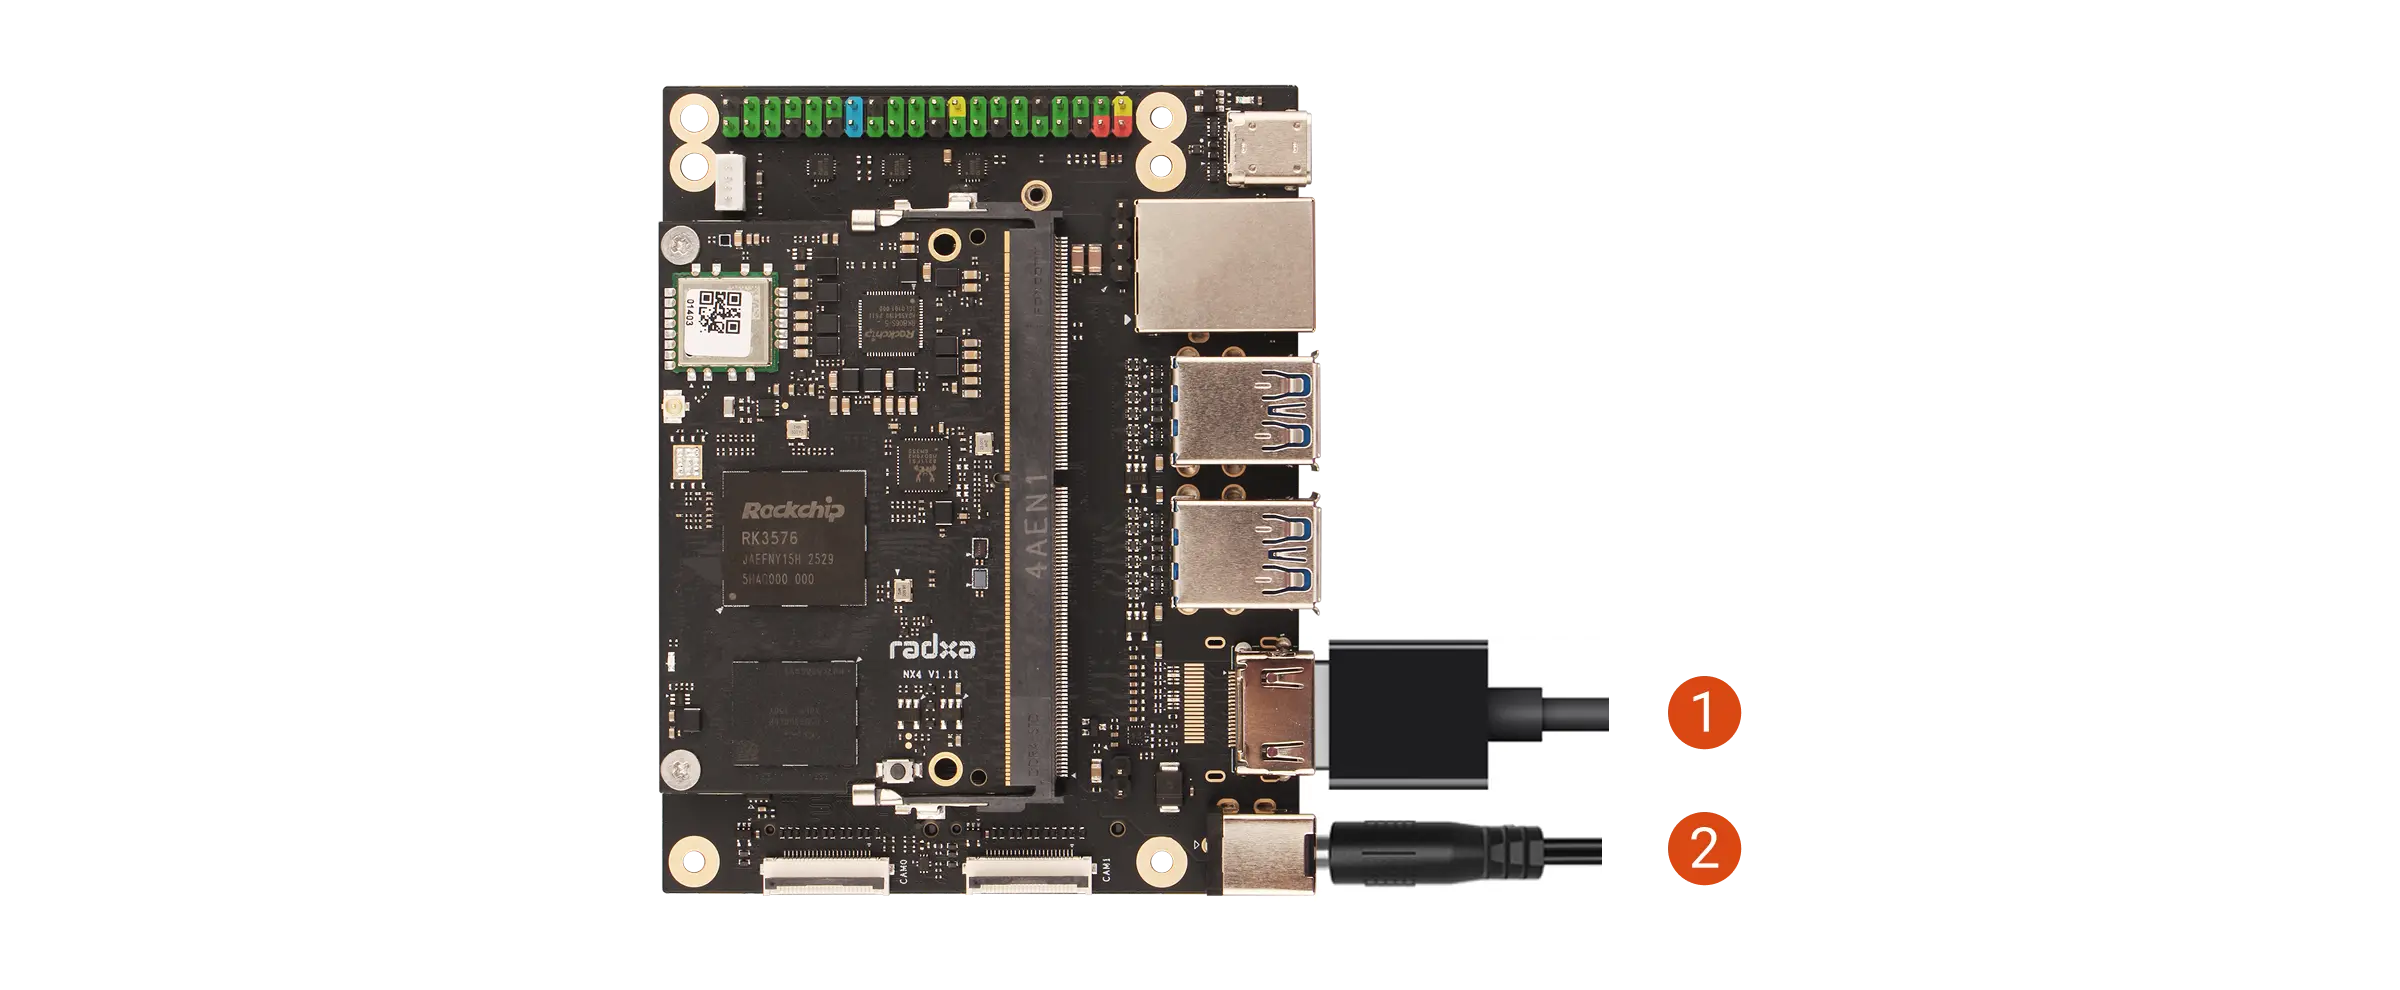
①: Connect the monitor and the board with an HDMI cable.
②: Power the Radxa NX4 Development Kit with a power adapter.
After the system boots normally, the power LED on the Radxa NX4 IO Board lights up green, and the status LED on Radxa NX4 blinks blue.
Log in
When you boot the system for the first time, log in using the default username and password.
The default credentials for Radxa OS are:
| Item | Value |
|---|---|
| Username | radxa |
| Password | radxa |
Use the system
After logging in successfully, you can start configuring the system and developing on the Radxa NX4 Development Kit.