Install System to Onboard eMMC
Flash System Image
This guide explains how to use the RKDevTool to flash a system image to an eMMC.
Note: Ensure the board is in Maskrom mode and properly recognized by the system.
- Windows
- Linux / MacOS
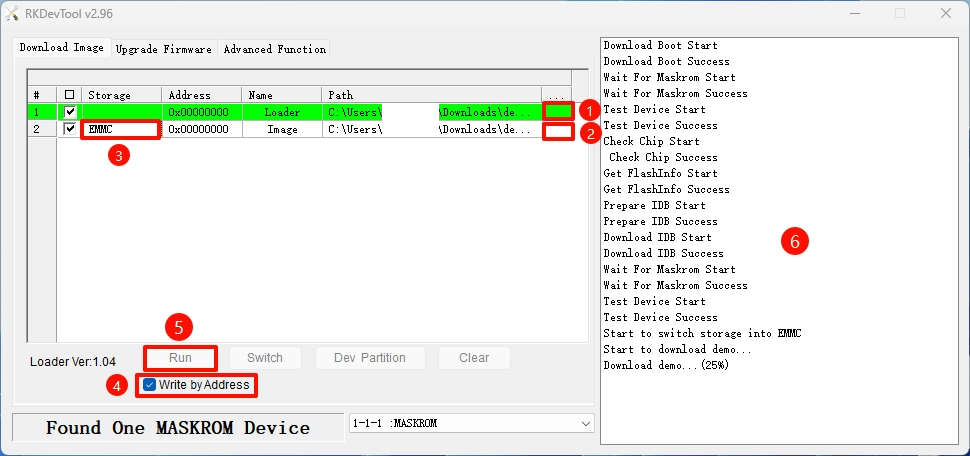
On Windows, open the RKDevTool and follow these steps to install the system to the eMMC.
① : Select the corresponding Loader file for your board
② : Select the corresponding system image file for your board (extract the downloaded image archive before use)
③ : Choose the eMMC option as the system storage medium
④ : Check the Write by Address option
⑤ : Click the RUN button to execute all operations
⑥ : Monitor the operation progress through this interface
Disconnect the board from the PC, then power cycle the device. The system will automatically boot from the eMMC.
On Linux/MacOS, use the terminal command line to install the system to the eMMC.
- Run the Loader file
Replace demo.bin with the Loader file corresponding to your board.
sudo rkdeveloptool db demo.bin
- Install the system image
Replace demo.img with the system image corresponding to your board.
sudo rkdeveloptool wl 0 demo.img
- Reboot the system
Disconnect the board from the PC, then power cycle the device. The system will automatically boot from the eMMC.
sudo rkdeveloptool rd
Boot the System
After the system installation is complete, connect the HDMI display, then re-plug the power adapter to boot the system.
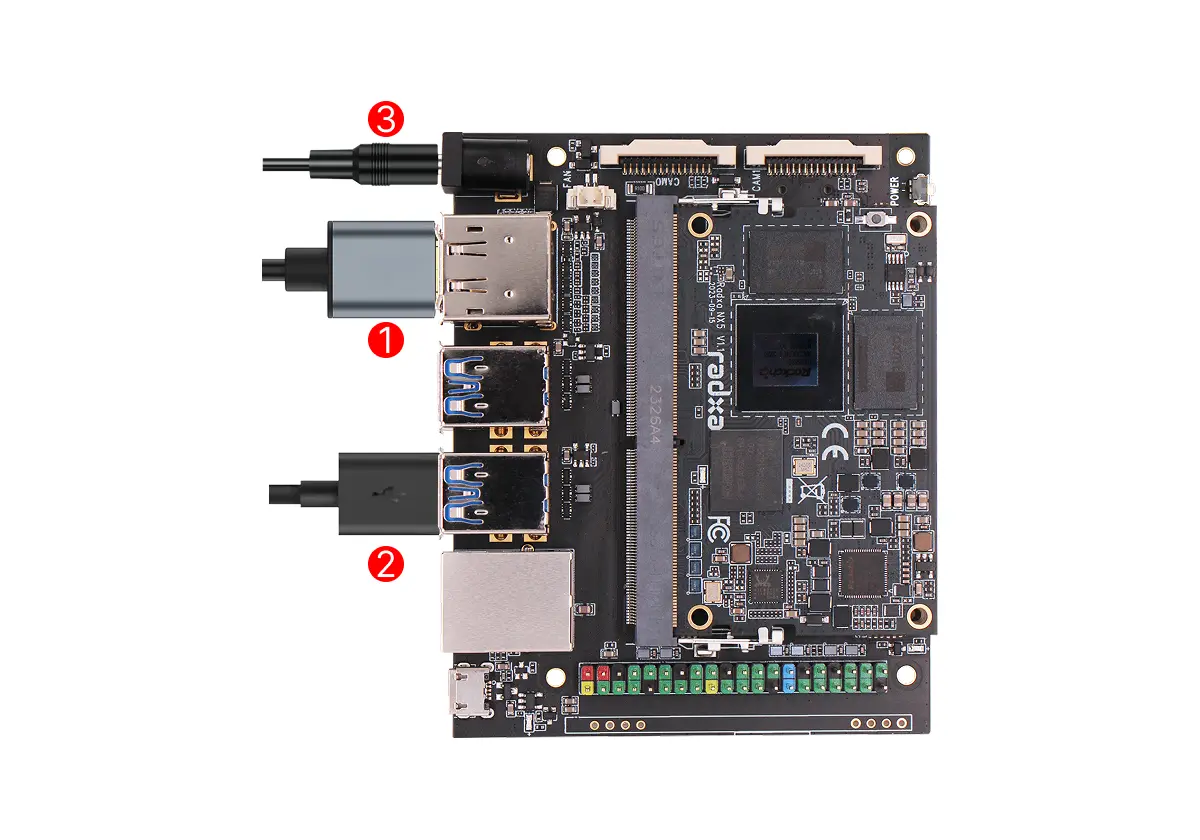
①: Connect the display and the board using an HDMI or DP cable
②: Connect a mouse or keyboard using the USB-A interface
③: Power the board using a 5V DC power adapter
If the board is powered normally, the Radxa NX5 IO Board power indicator LED will light up green. The monitor will display the Android system desktop.
Note: The Radxa NX5 IO Board system status indicator LED will not light up.