Camera Usage
This guide uses the Raspberry Pi Camera V2 as an example to explain how to use a camera with the C200.
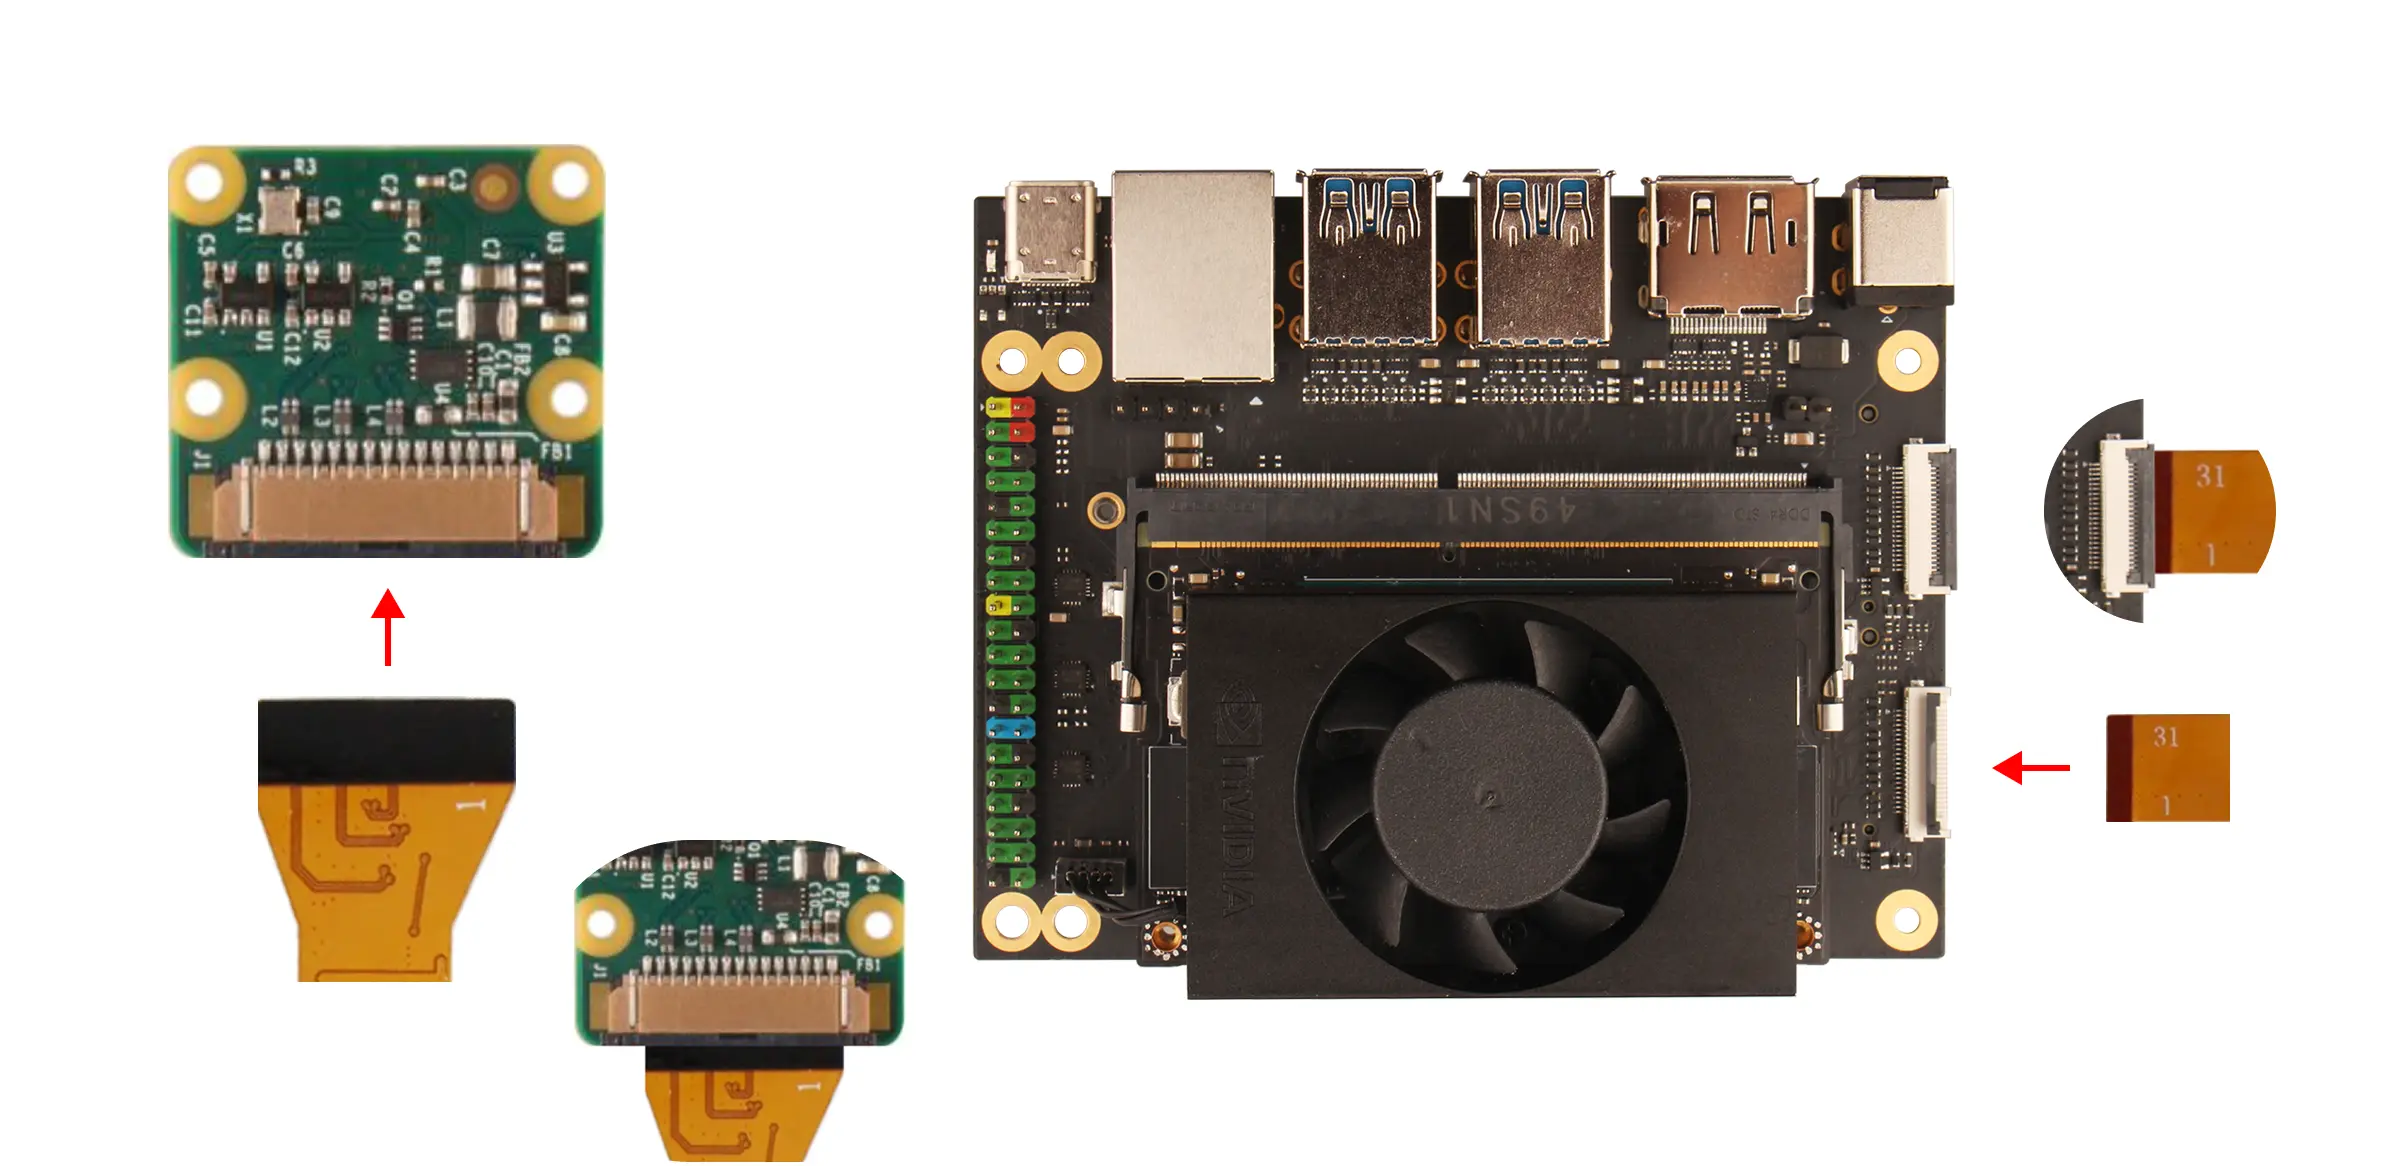
Hardware Connection
Connect the Raspberry Pi Camera V2 module to the CSI connector on the Radxa C200 development kit.
Software Preparation
If you are using the system image for the Radxa C200 Development Kit (Jetson Orin Nano Image), you need to manually copy the device tree file to enable camera support.
Copy the Device Tree File
Open a terminal on the board and run the following command:
sudo cp /boot/tegra234-p3768-0000+p3767-0001-nv.dtb /boot/dtb/kernel_tegra234-p3768-0000+p3767-0001-nv.dtb
Enable the Camera
Open a terminal on the board and run the following command:
sudo /opt/nvidia/jetson-io/jetson-io.py
Select the options in the following order: Configure Jetson 24pin CSI Connector -> Configure for compatible hardware -> Camera IMX219 Dual -> Save pin changes -> Save and reboot to configure pins. After the system reboots, the camera will be ready to use.
Install Dependencies
Open a terminal on the board and run the following command:
sudo apt-get install nvidia-l4t-gstreamer -y
Preview the Camera
Open a terminal on the board and run the following command to view the camera feed.
nvgstcapture-1.0