Install System via Command Line
Users of the Radxa C200 Orin Development Kit who need to enter MAXN_SUPER mode should follow this tutorial to install the system.
- Only supports booting from NVMe SSDs
- The installation will erase the Radxa custom BIOS firmware and NVMe data, please back up in advance
Environment Setup
We need to download NVIDIA's official Driver Package (BSP) and Sample Root Filesystem files to the local machine and extract them to the specified directory.
Hardware Configuration
It is recommended to perform the system installation on a host running Ubuntu 22.04. If you are using a virtual machine to run Ubuntu 22.04, ensure the mainboard remains connected to the virtual machine during the system flashing process.
- Ubuntu 22.04
Download Files
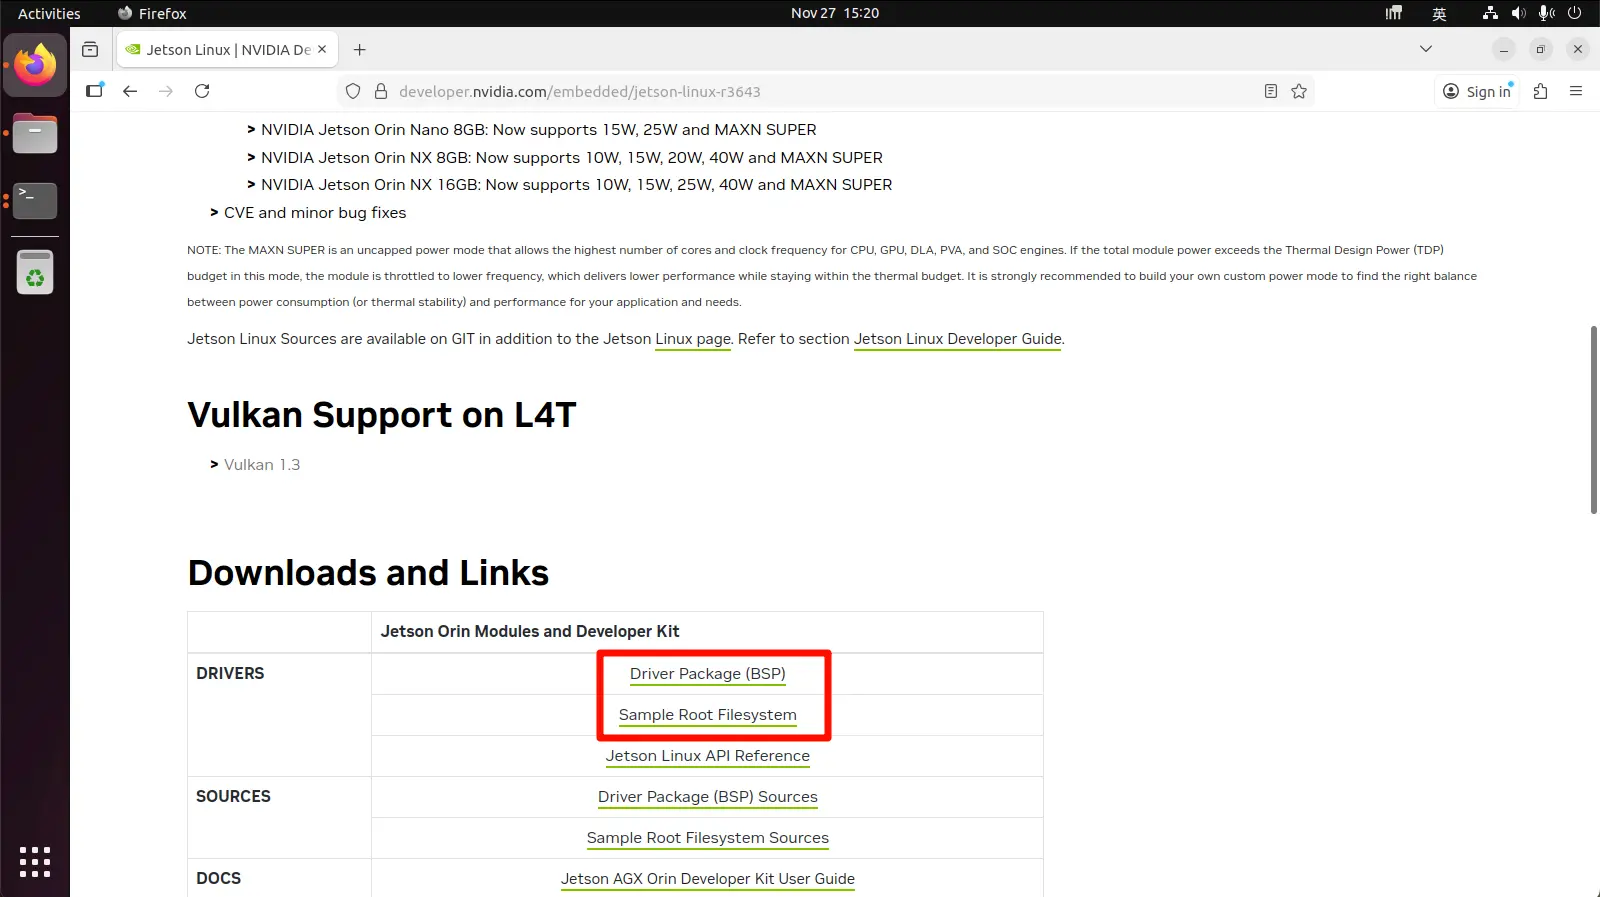
Visit the NVIDIA Jetson Linux 36.4.3 download page to download the Driver Package (BSP) and Sample Root Filesystem files.
Extract Files
Open a terminal in the download directory and extract the files to the specified directory.
tar xf Jetson_Linux_R36.4.3_aarch64.tbz2
sudo tar xpf Tegra_Linux_Sample-Root-Filesystem_R36.4.3_aarch64.tbz2 -C Linux_for_Tegra/rootfs/
cd Linux_for_Tegra/
Install Environment
Run the l4t_flash_prerequisites.sh script to install the Jetson Linux development environment, including all necessary tools and dependencies.
sudo ./tools/l4t_flash_prerequisites.sh
Install Components to Root Filesystem
Run the apply_binaries.sh script to install NVIDIA Jetson components to the root filesystem.
sudo ./apply_binaries.sh
Install System
Install the system to the NVMe SSD using the command line.
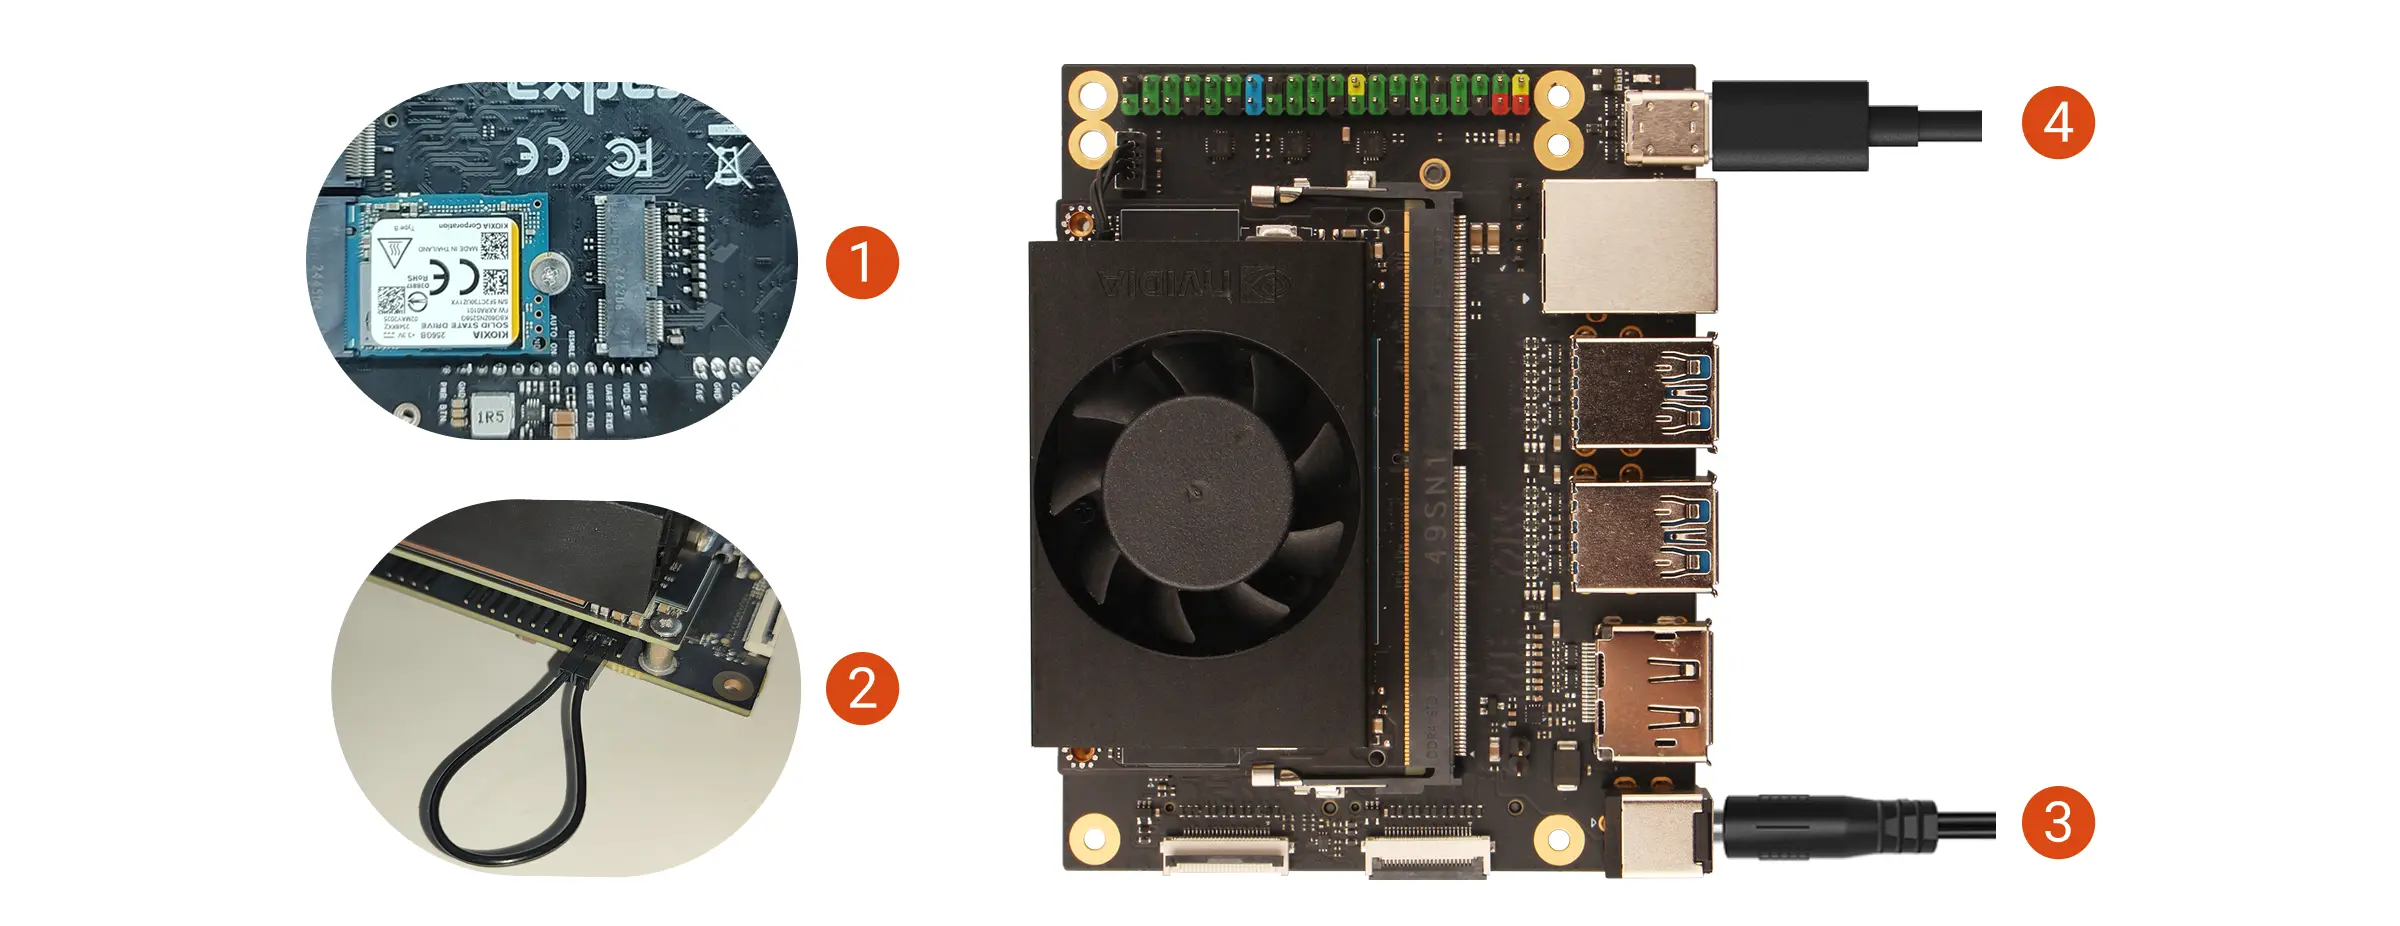
Hardware Connection
- Install the NVMe SSD into the M.2 M Key slot of the Radxa C200 Orin Development Kit
- Use a jumper cap or DuPont wire to short the FC REC and GND pins
- Power on the Radxa C200 Orin Development Kit using the power adapter
- Connect the mainboard to your computer using a USB Type-C cable
To enter Recovery Mode, simply ensure the FC REC pin is connected to GND during the boot process. You can remove the jumper cap or DuPont wire during the system flashing process.
Flash System
Run the following command in the terminal to flash the system to the NVMe SSD on the mainboard.
sudo ./tools/kernel_flash/l4t_initrd_flash.sh --external-device nvme0n1p1 -c tools/kernel_flash/flash_l4t_t234_nvme.xml -p "-c bootloader/generic/cfg/flash_t234_qspi.xml" --showlogs --network usb0 jetson-orin-nano-devkit-super internal
After successful flashing, the terminal will display the message Flash is successful.
Note: If you're using Ubuntu 22.04 in a virtual machine, the connection between the virtual machine and the mainboard might be interrupted during the flashing process. Please reconnect the device to the virtual machine promptly to avoid connection timeout errors!
Using the System
After successfully flashing the system, it will reboot. You can connect a DP cable and monitor, then follow the on-screen prompts to complete the initial system setup.
After completing the initial system configuration, check if the jumper cap or DuPont wire connecting the FC REC pin and GND pin has been removed to prevent the system from directly entering Recovery Mode on the next boot.