Installing System via SDK Manager
The Radxa C200 IO board cannot enter MAXN_SUPER mode through SDK Manager, but other functions work normally.
- Only supports booting from NVMe SSDs
- The installation will erase the Radxa pre-installed BIOS firmware and NVMe data, please back up in advance
Environment Setup
We need to download and install the SDK Manager, and then use it to install the system.
Hardware Configuration
It is recommended to perform the system installation on a host running Ubuntu 22.04. If you are using a virtual machine to run Ubuntu 22.04, ensure the mainboard remains connected to the virtual machine during the system flashing process.
- Ubuntu 22.04
Download SDK Manager
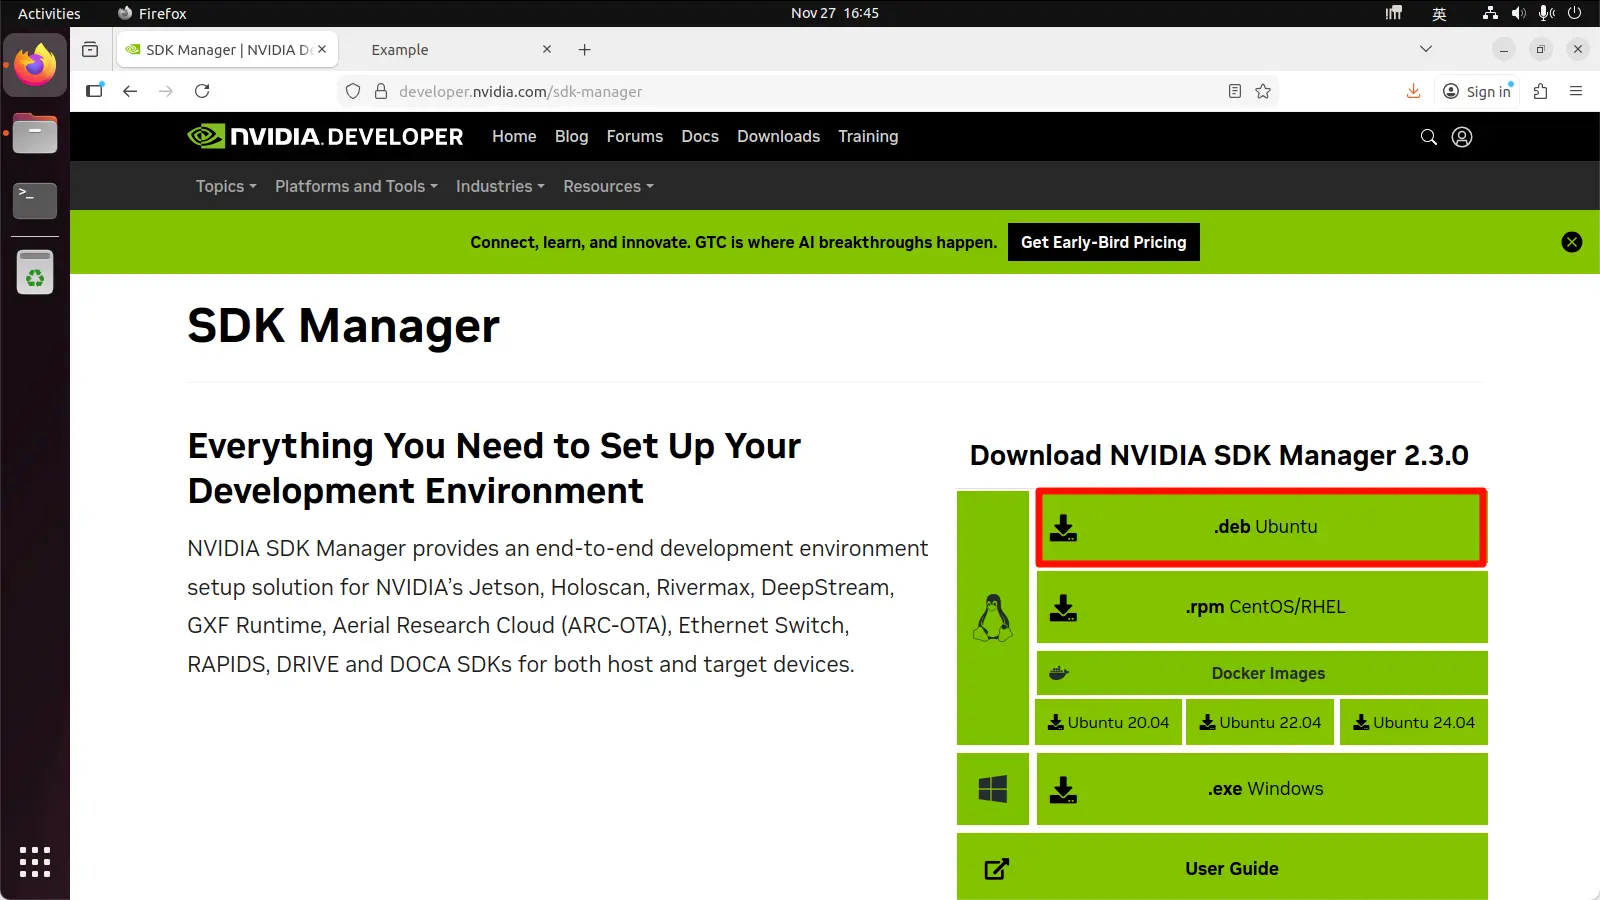
Visit the NVIDIA SDK Manager download page to download the SDK Manager.
Downloading the SDK Manager requires an NVIDIA account. If you don't have one, you'll need to register first.
Install SDK Manager
Open a terminal in the download directory and run the following command to install the SDK Manager:
sudo dpkg -i sdkmanager_xxx_amd64.deb
If you encounter the error dpkg: error processing package sdkmanager during installation, run the following commands:
sudo apt --fix-broken install -y
sudo dpkg -i sdkmanager_xxx_amd64.deb
Install System
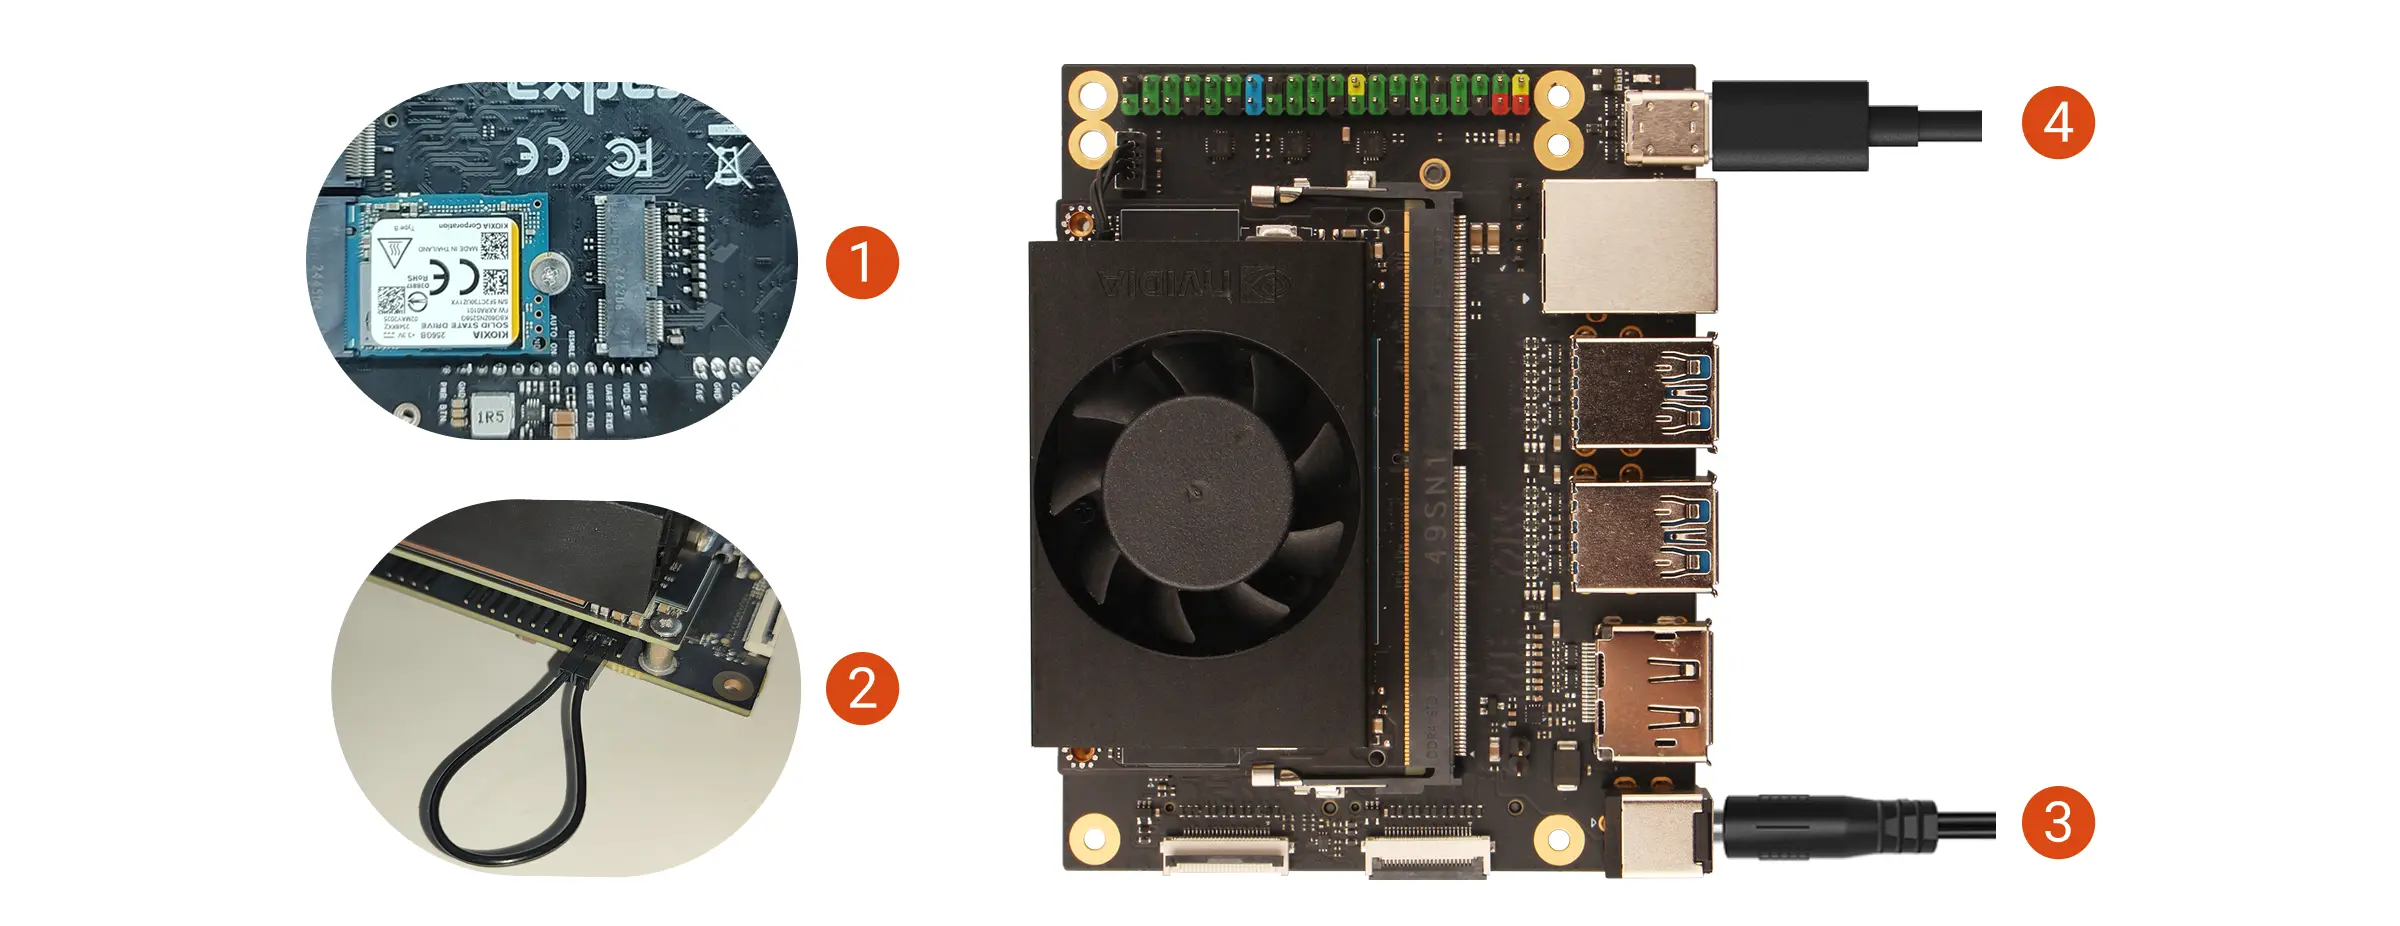
Hardware Connection
- Install the NVMe SSD into the M.2 M Key slot of the Radxa C200 Orin Development Kit
- Use a jumper cap or DuPont wire to short the FC REC and GND pins
- Power on the Radxa C200 Orin Development Kit using the power adapter
- Connect the mainboard to your computer using a USB Type-C cable
To enter Recovery Mode, simply ensure the FC REC pin is connected to GND during the boot process. You can remove the jumper cap or DuPont wire during the system flashing process.
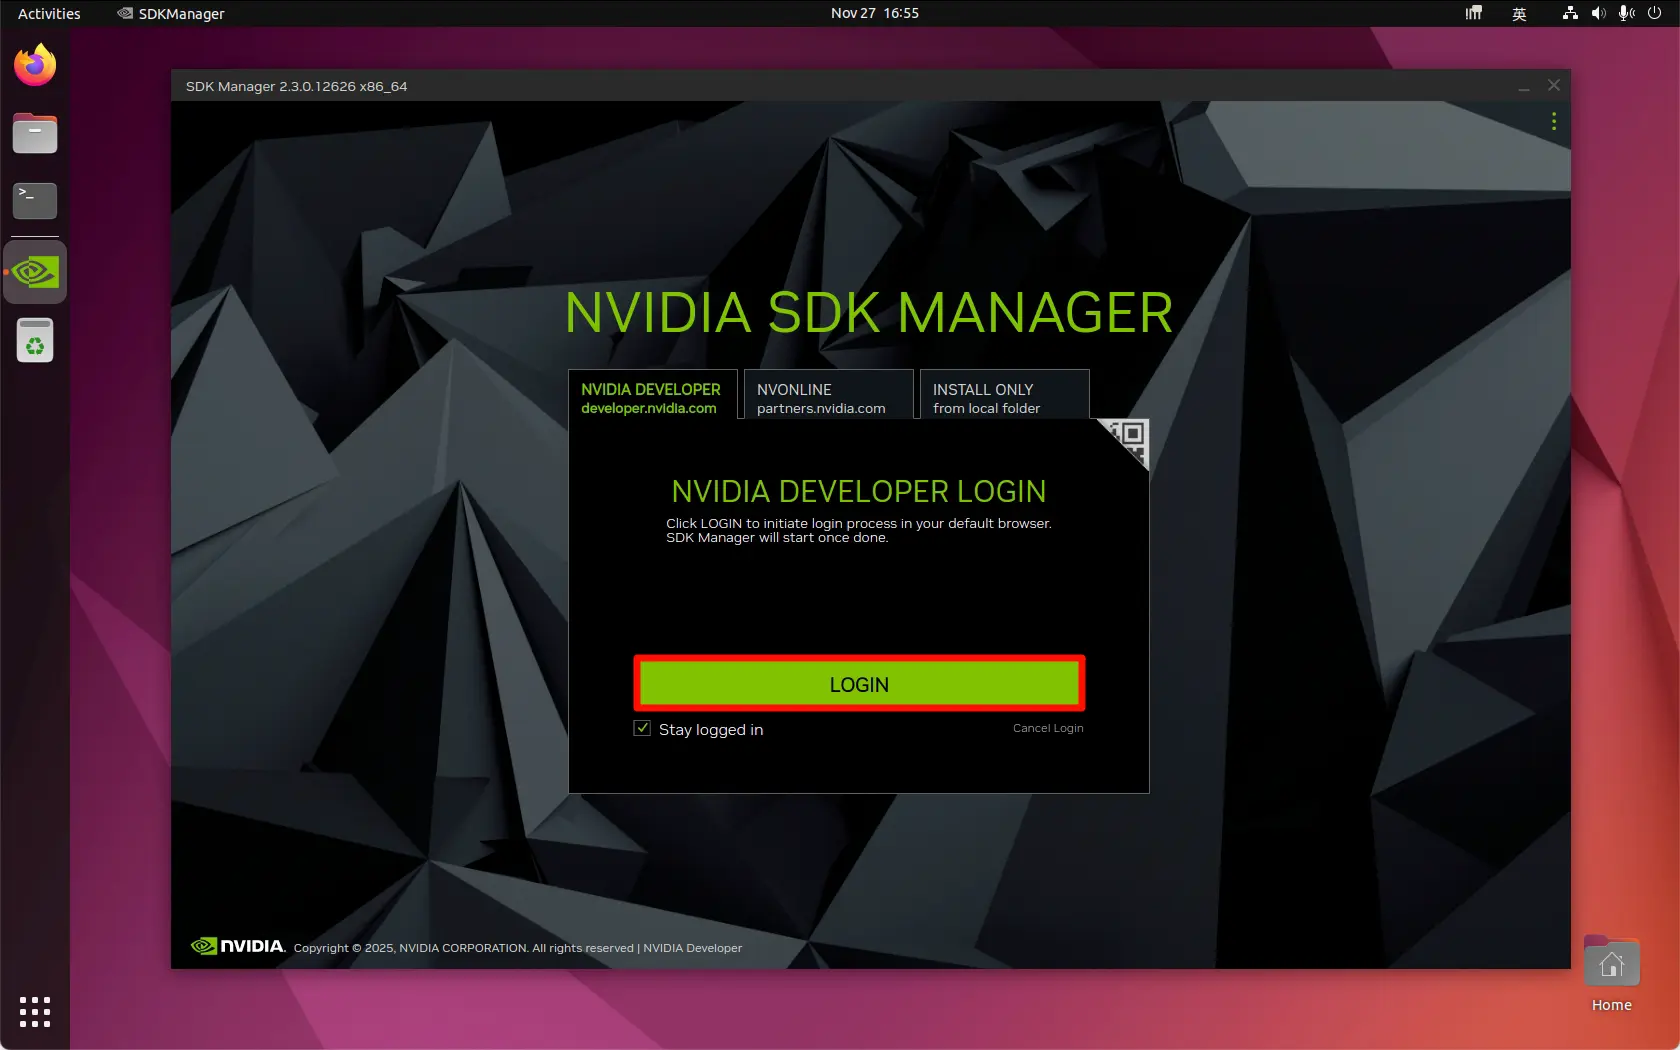
Using SDK Manager
Open the SDK Manager application and log in with your NVIDIA account.
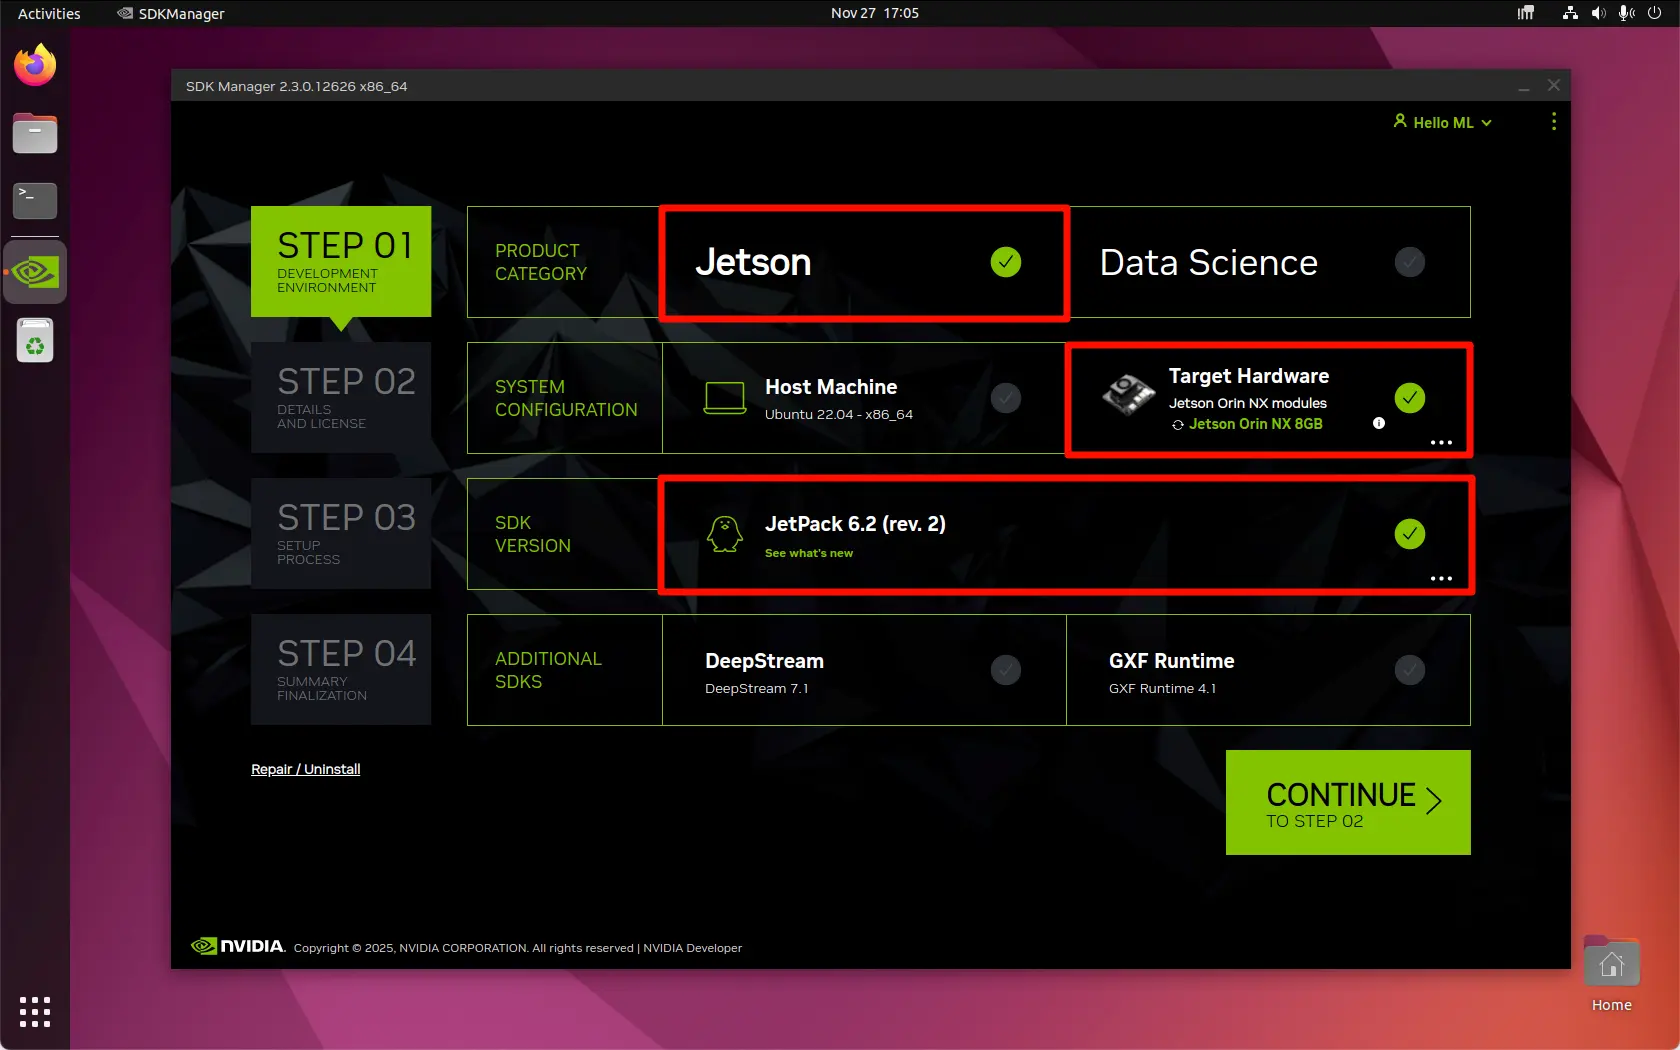
STEP 1
Select your mainboard model and Jetpack version. It's recommended to follow the options shown below, then click the CONTINUE button.
If you have specific environment requirements, you can choose the options on this interface accordingly.
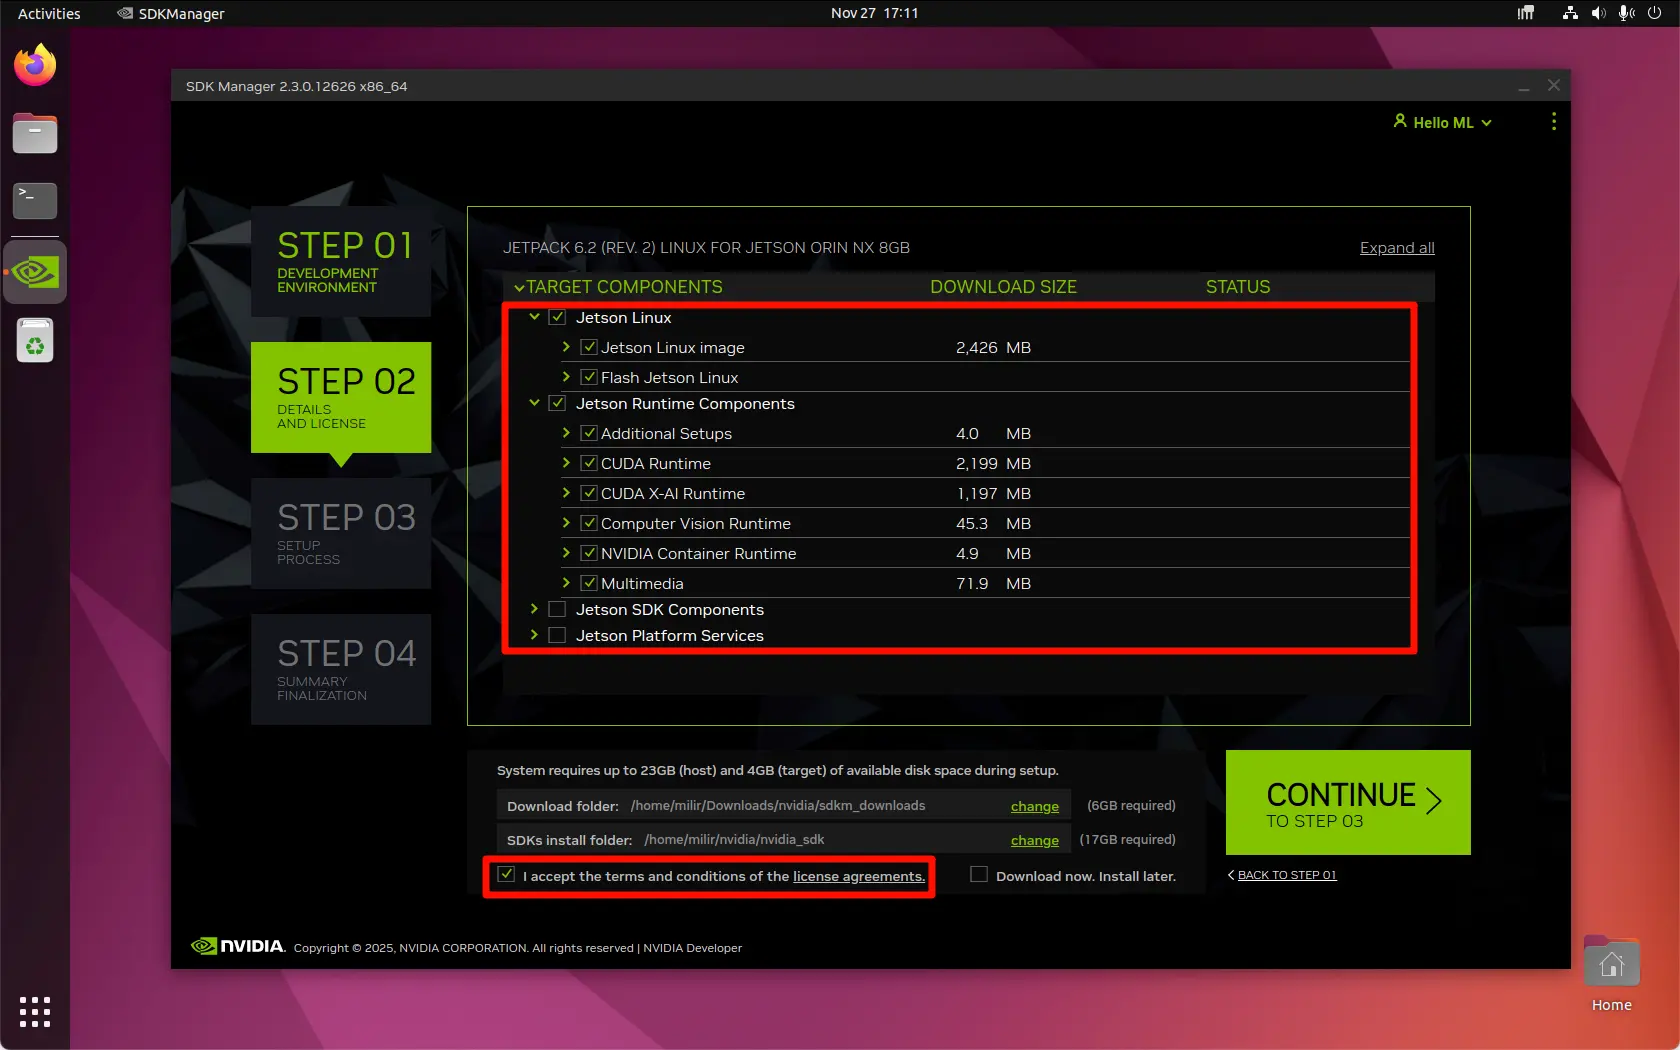
STEP 2
Select the components you want to install and check the box to accept the agreement. After making your selections, click the CONTINUE button.
Some components may require the mainboard to be connected to the internet. It's recommended to use an Ethernet cable for the mainboard during this process.
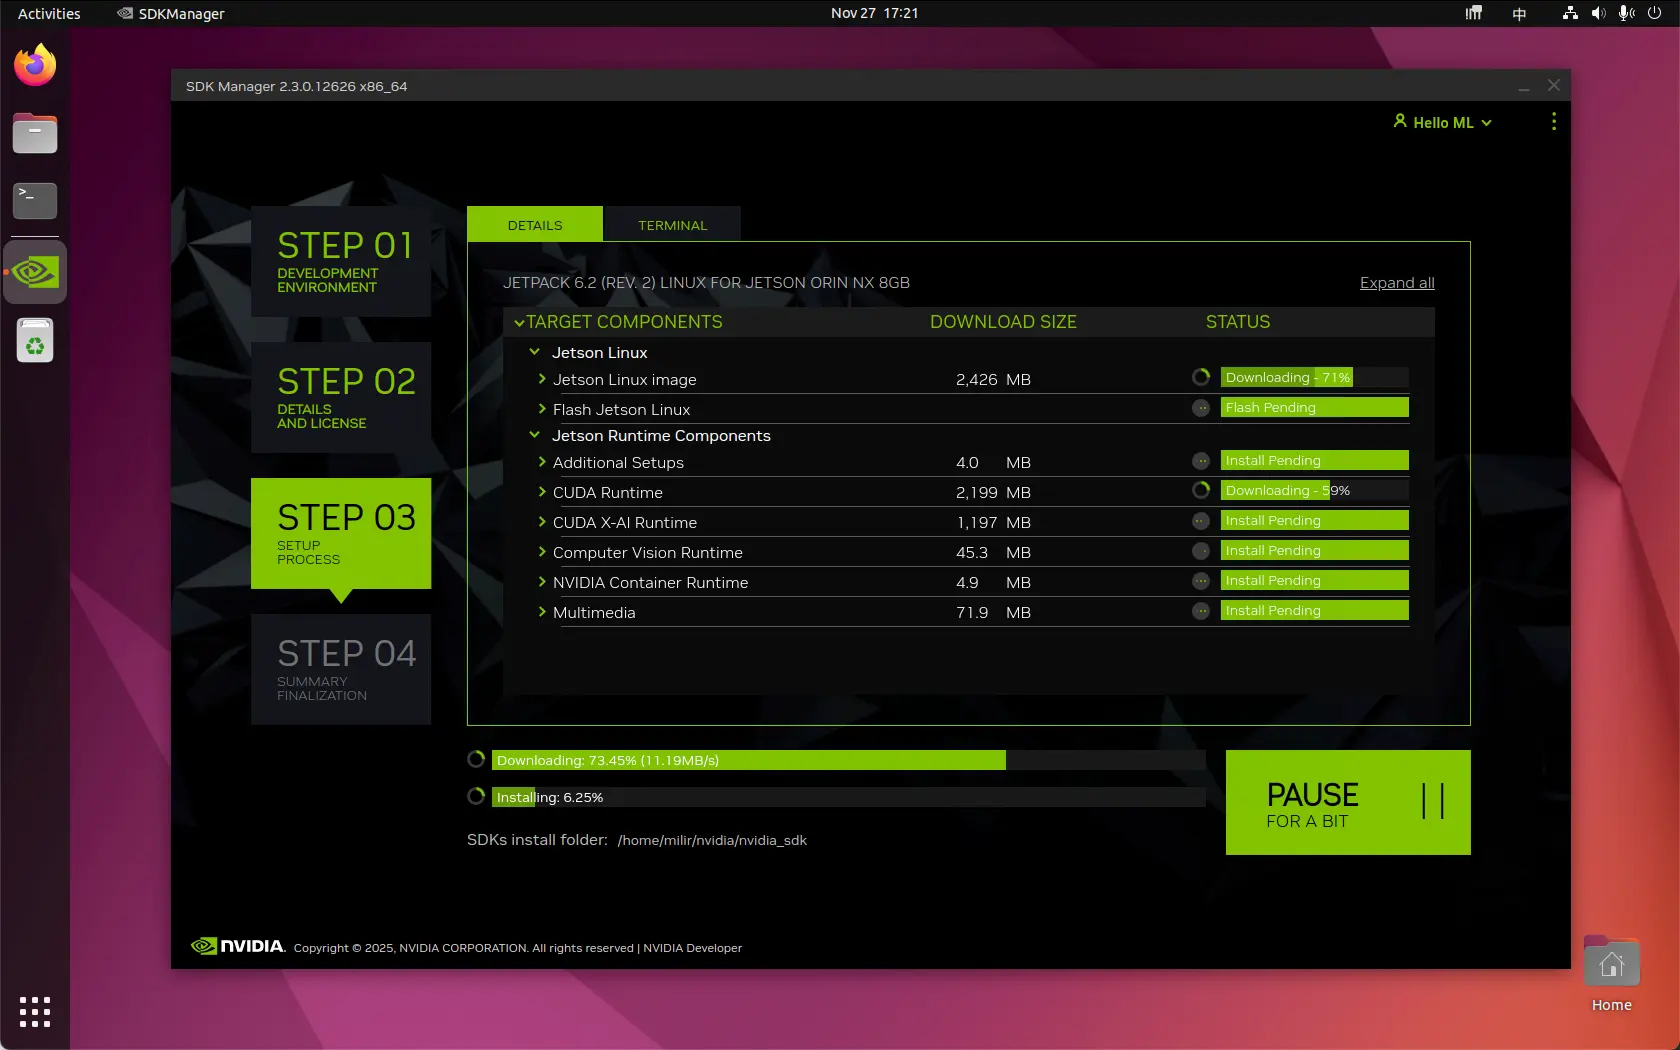
STEP 3
This screen shows the download and installation progress of the components. Wait for the installation to complete.
Note: If you're using Ubuntu 22.04 in a virtual machine, the connection between the virtual machine and the mainboard might be interrupted during the flashing process. Please reconnect the device to the virtual machine promptly to avoid connection timeout errors!
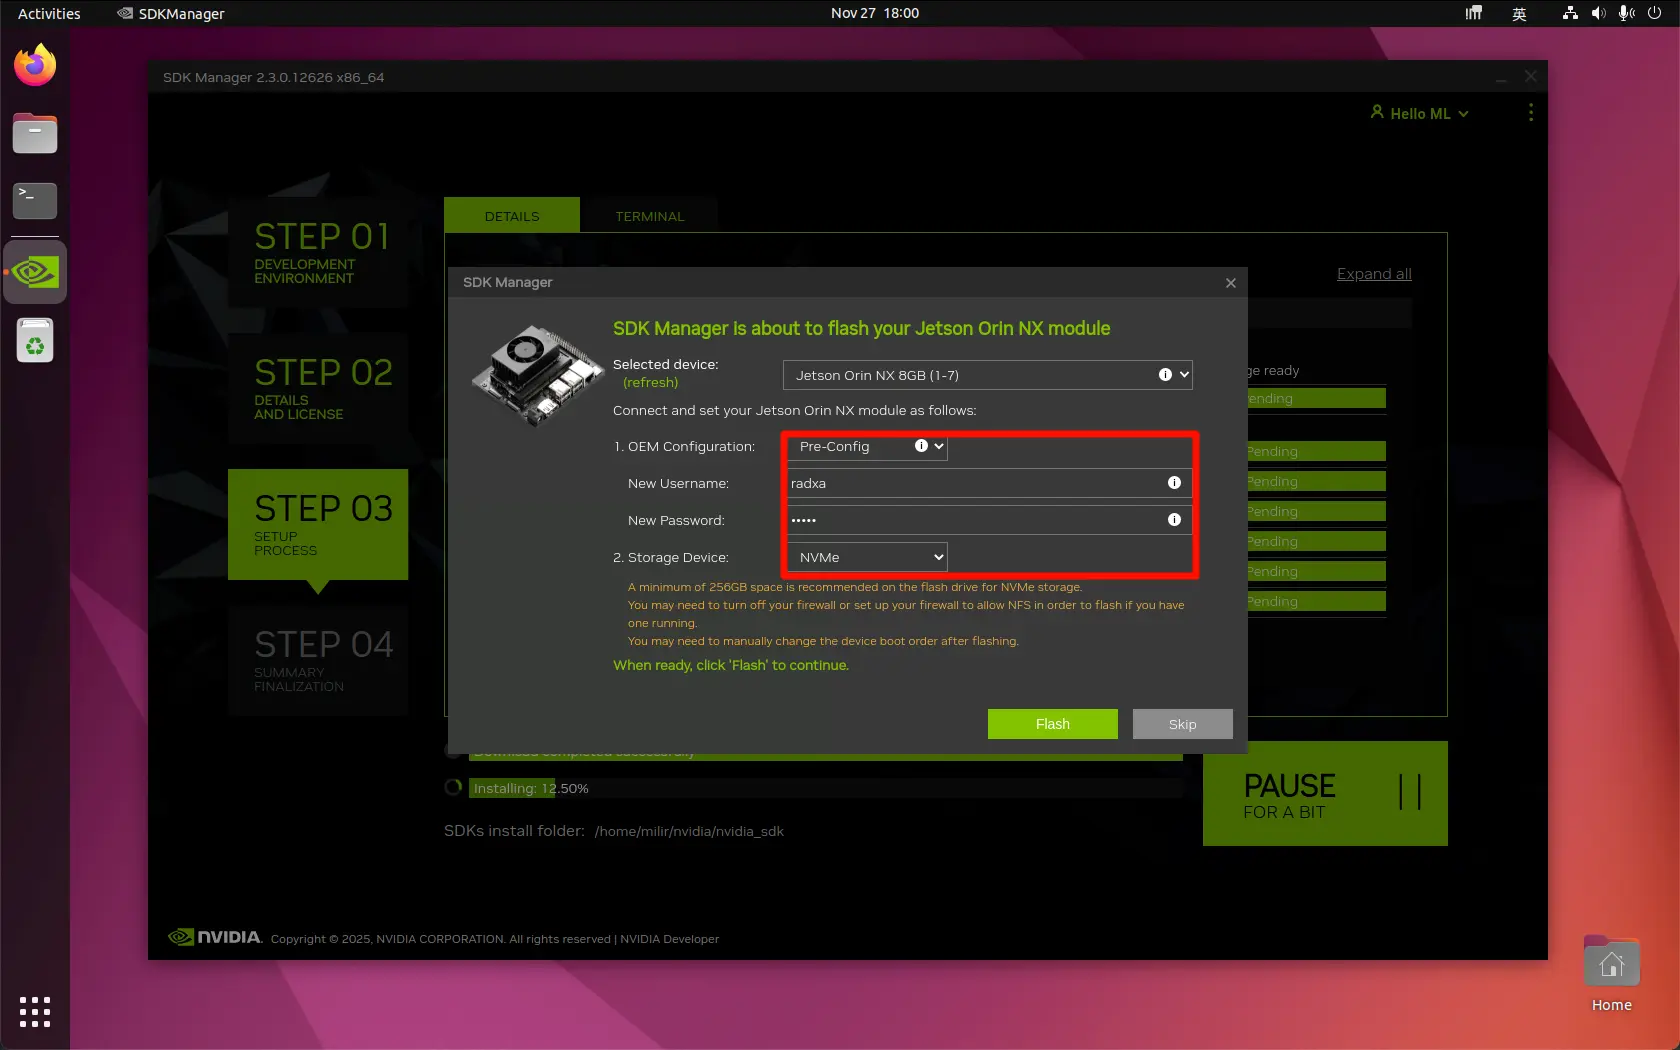
Select the mainboard model, OEM configuration, and system storage medium, then click the Flash button to continue with the system installation.
OEM configuration supports two modes: Pre-Config and Runtime.
Pre-Config: Allows setting up user information in advance
Runtime: Set up user information after system boot
If components are selected, you need to use the Pre-Config method to set up user information in advance, as this information will be required during component installation.
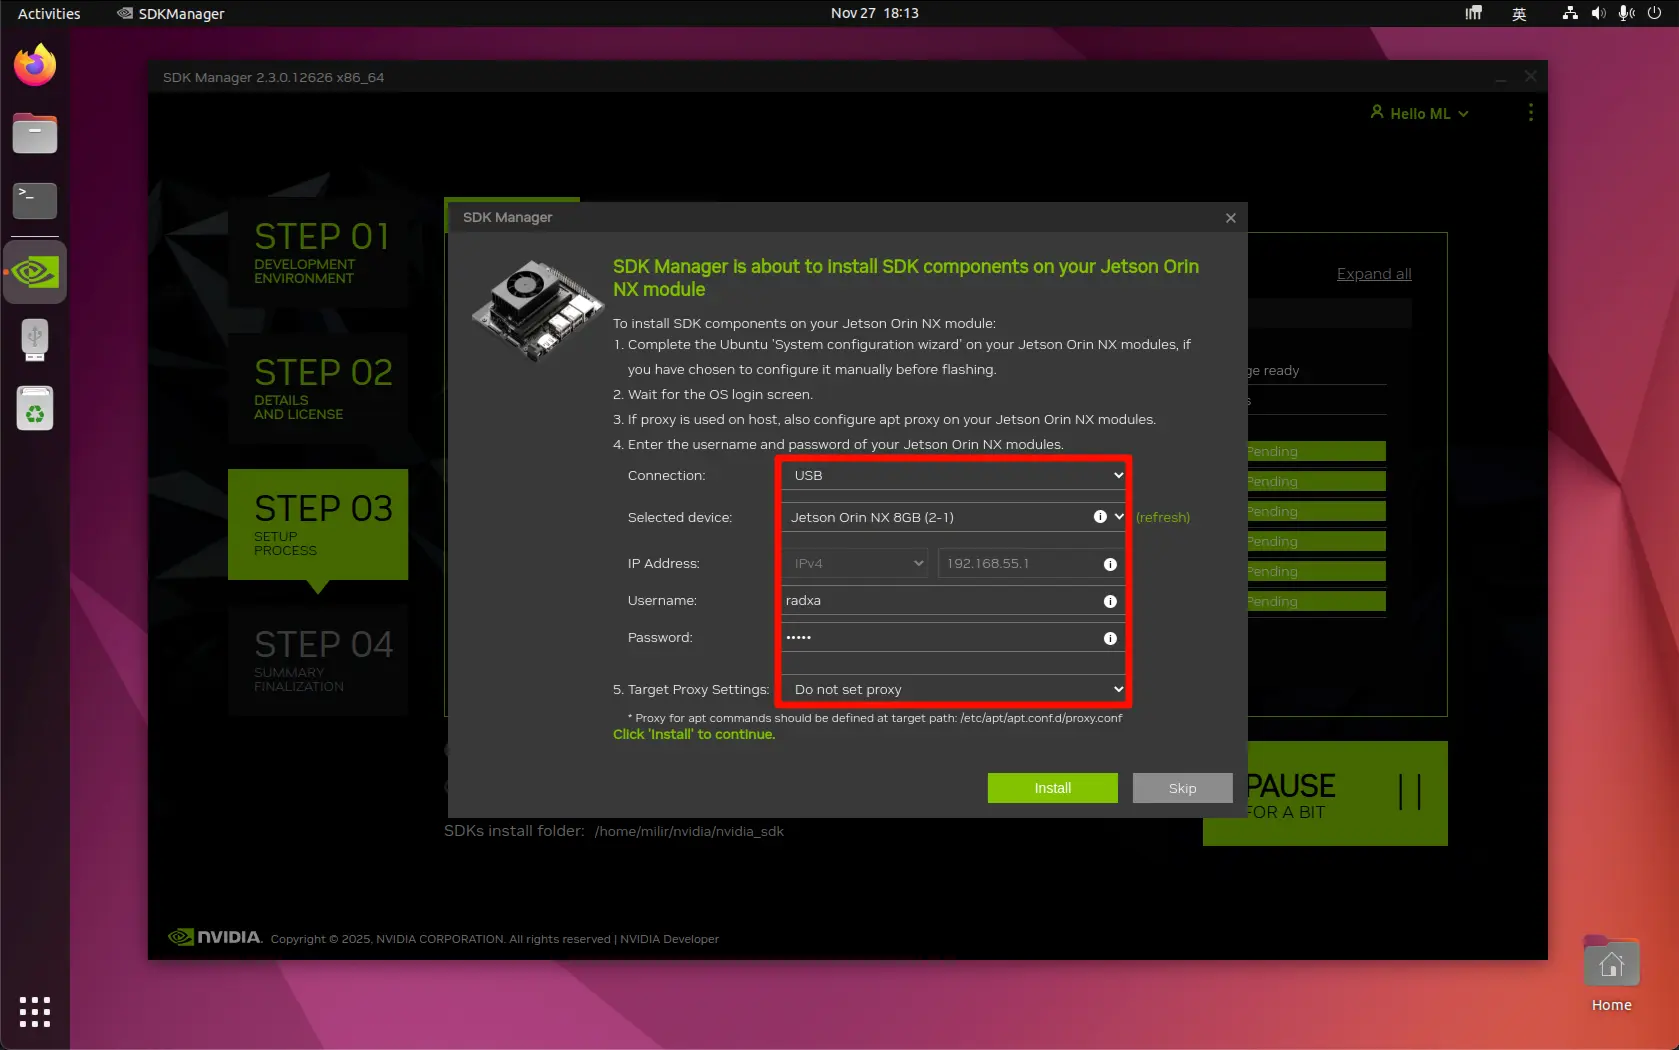
After confirming that the information required for component installation is correct, click the Install button to continue with the component installation.
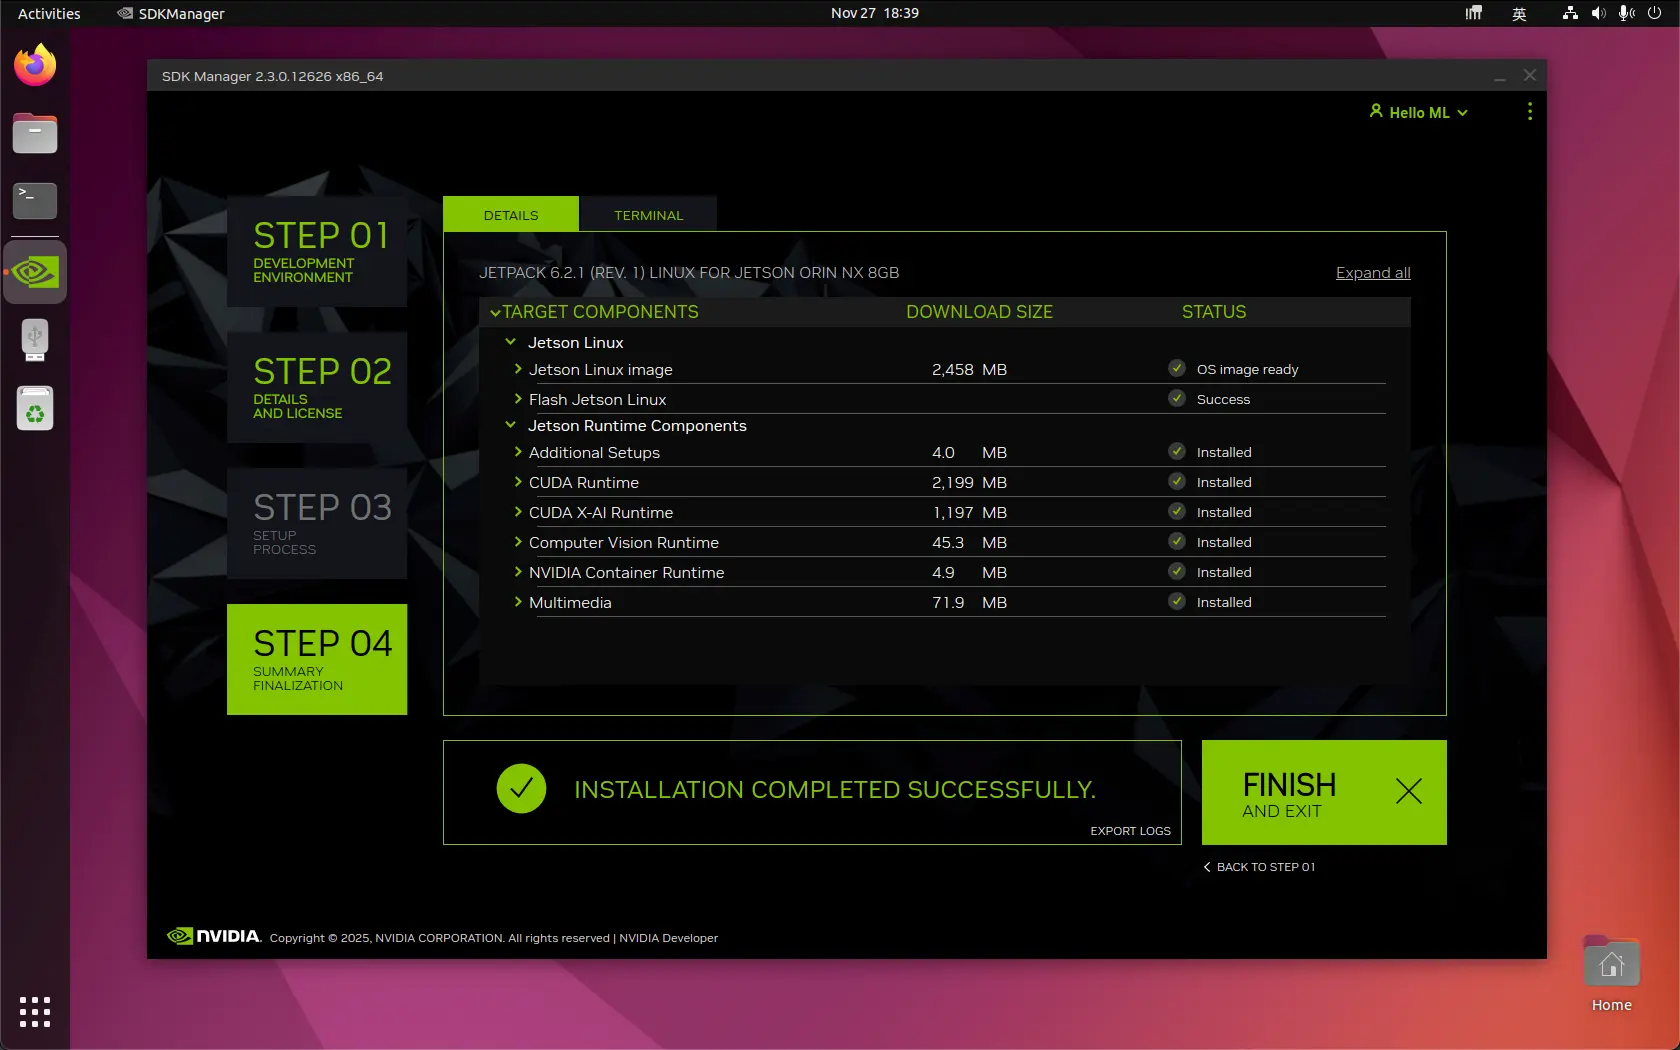
STEP 4
After completing the system and component installation, click the Finish button to close the SDK Manager.
Using the System
After successfully flashing the system, the system will reboot. You can connect a DP cable and monitor, then follow the on-screen prompts to complete the initial system setup.
After completing the initial system configuration, remove the jumper cap or DuPont wire connecting the FC REC pin and GND pin to prevent the system from directly entering Recovery Mode on the next boot.