Quick Start
This guide helps you quickly get started with the Radxa VMARC-Q9075 Development Kit.
The onboard 128GB UFS of the Radxa VMARC-Q9075 Development Kit comes with an operating system preinstalled. You can use the product simply by powering it on, without installing an operating system.
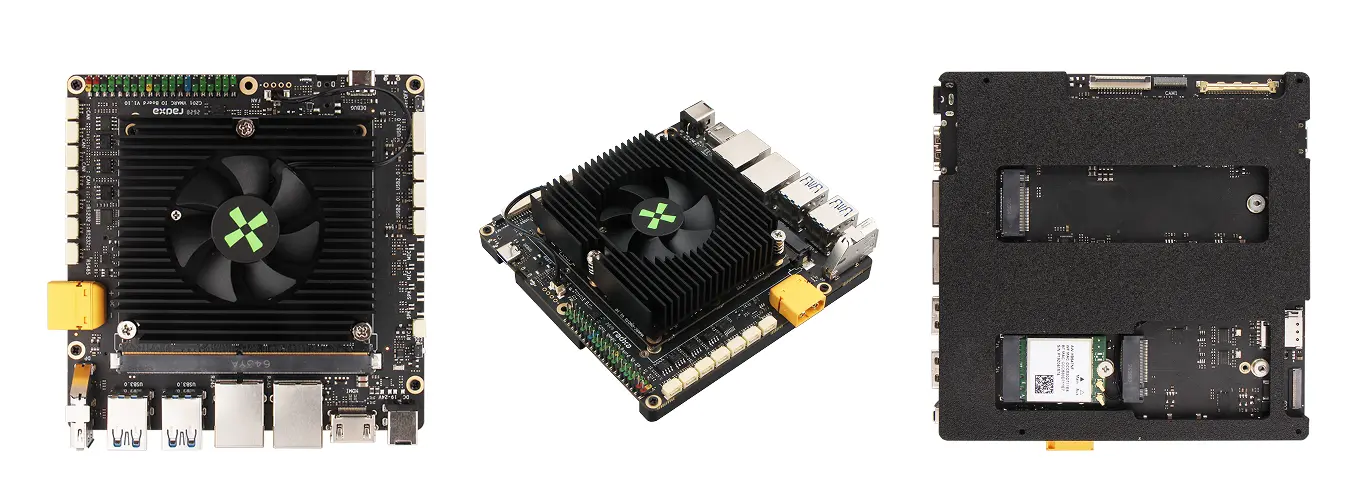
Product Views
| Product | No. | View | No. | View | No. | View |
|---|---|---|---|---|---|---|
| Radxa VMARC-Q9075 Development Kit | ① | Top view | ② | Side view 1 | ③ | Back view |
Prerequisites
Hardware Requirements
Prepare the following hardware in advance:
- Development kit: Radxa VMARC-Q9075 Development Kit
- Power supply: 19V DC power adapter (recommended; supports 19–24V DC input through the DC5525 jack)
- Input devices: Keyboard and mouse
- Display device: Monitor and HDMI cable for displaying the system interface
The Radxa VMARC-Q9075 Development Kit includes:
- Radxa VMARC-Q9075
- Radxa VMARC-Q9075 IO Board
- Active cooler
- Wireless module
- Protective base
- Power adapter
Hardware Connections
Connect peripherals such as a monitor, keyboard, and mouse to the Radxa VMARC-Q9075 Development Kit. Finally, power the development kit with a 19–24V DC power adapter.
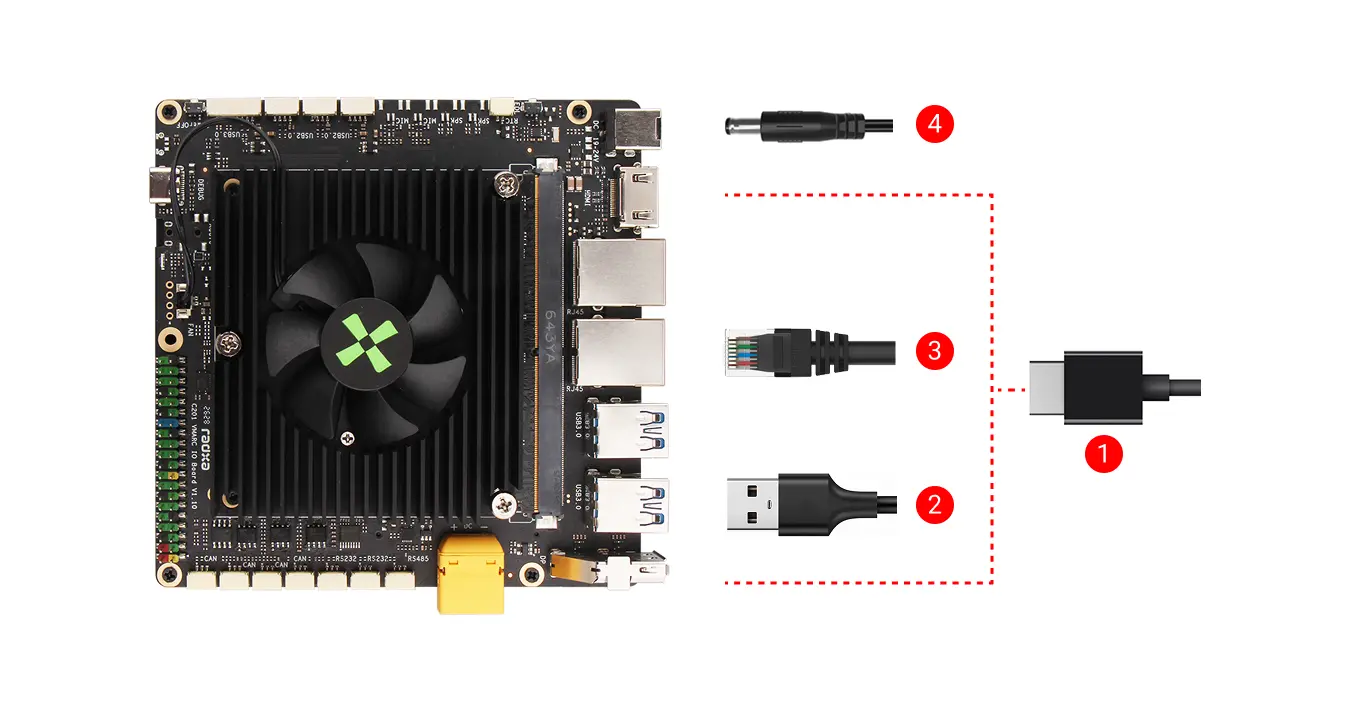
①: Connect the monitor to the board using an HDMI or DP cable.
②: Connect a mouse or keyboard to a USB Type-A port.
③: Connect the router to the board using an Ethernet cable (optional; the development kit includes a wireless module and can connect to a network over Wi-Fi).
④: Power the Radxa VMARC-Q9075 Development Kit using the power adapter.
Start the System
Power on the Radxa VMARC-Q9075 Development Kit using the power adapter. After the system starts successfully, the system interface appears on the monitor.
Log In to the System
When starting the system for the first time, log in with the default username and password.
The default credentials are:
| Username | Password |
|---|---|
| radxa | radxa |
Use the System
After logging in successfully, you can configure and use the system on the Radxa VMARC-Q9075 Development Kit.