TPU-MLIR Usage
Table of Contents
If you haven't set up the TPU-MLIR runtime environment yet, please refer to the previous section.
Model Conversion
In this example, we'll take yolov5s.onnx as an example to demonstrate how to compile and migrate an ONNX model to run on the SG2300X TPU platform. The model compilation in this section is all done in the TPU-MLIR docker installed in the previous section.
Convert to MLIR
-
Create a working directory at the same level as TPU-MLIR, and place the required model and dataset (calibration dataset, test dataset) in the working directory.
mkdir yolov5s && cd yolov5s
wget https://github.com/ultralytics/yolov5/releases/download/v6.0/yolov5s.onnx
cp -r ../tpu-mlir/regression/dataset/COCO2017/ .
cp -r ../tpu-mlir/regression/image/ . -
Convert ONNX to MLIR
If the model takes images as input, we need to understand the model's preprocessing before conversion. If the model takes preprocessed npz files as input, preprocessing is not required. For yolov5s on the official website, the input images are in rgb format, with each value multiplied by 1/255, resulting in mean and scale values of
0.0,0.0,0.0and0.0039216,0.0039216,0.0039216, respectively.The command for model conversion is as follows:
mkdir build && cd build
model_transform.py \
    --model_name yolov5s \
    --model_def ../yolov5s.onnx \
    --input_shapes [[1,3,640,640]] \
    --mean 0.0,0.0,0.0 \
    --scale 0.0039216,0.0039216,0.0039216 \
    --keep_aspect_ratio \
    --pixel_format rgb \
    --test_input ../image/dog.jpg \
    --test_result yolov5s_top_outputs.npz \
--mlir yolov5s.mlirmodel_transform.pywill produce an intermediate format model mlir, which will be used to generate the corresponding platform-specific and precision-specific bmodel usingmodel_deploy.py.Explanation of
model_transform.pyparameters:Parameter Required Description model_name Yes Model name model_def Yes Model definition file ( .onnx,.pt,.tflite, or.prototxt)model_data No Specify the model weight file, required for caffe models (corresponding to .caffemodelfile)input_shapes No Input shape, for example, [[1,3,640,640]](2D array), supports multiple inputsresize_dims No The original image size to be resized. If not specified, it will be resized to the model's input size keep_aspect_ratio No Whether to maintain the aspect ratio when resizing. Default is False. If set, zeros will be padded in the insufficient part mean No Mean value of each channel of the image. Default is 0.0, 0.0, 0.0 scale No Scaling factor for each channel of the image. Default is 1.0, 1.0, 1.0 pixel_format No Image type, can be rgb, bgr, gray, or rgbd output_names No Output names. If not specified, the model's output will be used; otherwise, the specified names will be used as outputs test_input No Input file for validation, can be image, npy, or npz. If not specified, no validation will be performed test_result No Output file to save validation results excepts No Names of network layers to be excluded from validation, separated by commas debug No If debug is enabled, the model file will be retained; otherwise, it will be deleted after conversion is complete mlir Yes Output mlir file name (including path)
Generate bmodel
MLIR to F32 bmodel
model_deploy.py \
  --mlir yolov5s.mlir \
  --quantize F32 \
  --processor bm1684x \
  --test_input yolov5s_in_f32.npz \
  --test_reference yolov5s_top_outputs.npz \
  --model yolov5s_1684x_f32.bmodel
Explanation of model_deploy.py parameters:
| Parameter | Required | Description |
|---|---|---|
| mlir | Yes | Mlir file |
| quantize | Yes | Quantization type (F32/F16/BF16/INT8) |
| processor | Yes | Platform the model will use. Currently only supports bm1684x/bm1684/cv183x/cv182x/cv181x/cv180x, more TPU platforms will be supported in the future |
| calibration_table | No | Path to the quantization table. Required for INT8 quantization |
| tolerance | No | Minimum similarity tolerance between MLIR quantization and MLIR fp32 inference results |
| correctnetss | No | Minimum similarity tolerance between simulator and MLIR quantization inference results. Default is 0.99,0.90 |
| excepts | No | Names of network layers to be excluded from validation, separated by commas |
| debug | No | If debug is enabled, the model file will be retained; otherwise, |
it will be deleted after conversion is complete | | model | Yes | Output model file name (including path) | | dynamic | No | Dynamic code generation for supporting dynamic shapes |
MLIR to F16 bmodel
model_deploy.py \
  --mlir yolov5s.mlir \
  --quantize F16 \
  --processor bm1684x \
  --model yolov5s_1684x_f16.bmodel
MLIR to INT8 bmodel
-
Generate the calibration table. Before converting to INT8 model, run
run_calibration.pyto obtain the calibration table; prepare around 100 to 1000 images depending on the situation. -
Using the calibration table, generate symmetric or asymmetric bmodels for INT8. If symmetric meets the requirements, asymmetric is generally not recommended because the performance of asymmetric models is slightly worse than symmetric models.
-
Here's an example using 100 images from COCO2017 to run
run_calibration.py:run_calibration.py yolov5s.mlir \
--dataset ../COCO2017 \
--input_num 100 \
-o yolov5s_cali_table -
Compile to INT8 symmetric quantization model, execute the following command:
model_deploy.py \
    --mlir yolov5s.mlir \
    --quantize INT8 \
    --calibration_table yolov5s_cali_table \
    --chip bm1684x \
    --model yolov5s_1684x_int8_sym.bmodel
After compilation, a file named
yolov5s_1684x_int8_sym.bmodelwill be generated.
Compile to INT8 Asymmetric Quantization Model
To convert to INT8 asymmetric quantization model, execute the following command:
model_deploy.py \
    --mlir yolov5s.mlir \
    --quantize INT8 \
    --asymmetric \
    --calibration_table yolov5s_cali_table \
    --chip bm1684x \
    --model yolov5s_1684x_int8_asym.bmodel
After compilation, a file named yolov5s_1684x_int8_asym.bmodel will be generated.
Compile to Mixed Precision Model
If the INT8 symmetric quantization model incurs unacceptable precision loss, perform the following steps after completing the INT8 symmetric quantization model:
-
Use
run_qtable.pyto generate a mixed precision quantization table, with the following parameters:run_qtable.py yolov5s.mlir \
--dataset ../COCO2017 \
--calibration_table yolov5s_cali_table \
--chip bm1684x \
--min_layer_cos 0.999 \ # Use default value 0.99 if you want, the program will detect the original int8 model already meet the 0.99 cos and directly skip the following step
--expected_cos 0.9999 \
-o yolov5s_qtableFunction of
run_qtable.pyparameters:Parameter Name Required Description None Yes Specify the mlir file dataset No Specify the directory of the input samples, where images, npz, or npy corresponding to the samples are placed data_list No Specify the sample list, either with dataset must be selected calibration_table Yes Input calibration table chip Yes Specify the platform the model will be used, supports bm1684x/bm1684/cv183x/cv182x/cv181x/cv180x fp_type No Specify the float type used for mixed precision, supports auto,F16,F32,BF16, default is auto, which means automatically selected by the program internally input_num No Specify the number of input samples, default is 10 expected_cos No Specify the minimum cos value of the output layer of the network. Generally, it is set to 0.99. The smaller the value, the more layers may be set to float calculation min_layer_cos No Specify the minimum value of the cos for each layer's output, if it is lower than this value, it will try to set float calculation, generally the default is 0.99 debug_cmd No Specify the debugging command string, for development use, default is empty o Yes Output mixed precision quantization table -
Generate mixed precision bmodel
model_deploy.py \
    --mlir yolov5s.mlir \
    --quantize INT8 \
    --quantize_table yolov5s_qtable \
    --calibration_table yolov5s_cali_table \
    --chip bm1684x \
    --model yolov5s_1684x_mix.bmodel
Performance Comparison
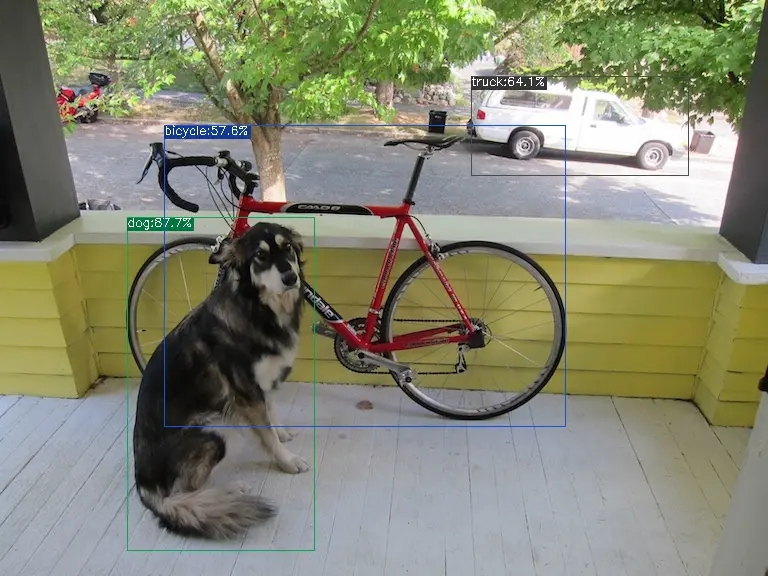
In TPU-MLIR, there is a yolov5 example written in python, the source code path is tpu-mlir/python/samples/detect_yolov5.py, used for object detection on images. Reading this code can help understand how the model is used: preprocess to get the model's input, then inference to get the output, and finally post-processing. Use the following code to validate the execution results of onnx/f32/int8.
-
The execution method for the onnx model is as follows, obtaining dog_onnx.jpg:
detect_yolov5.py \
    --input ../image/dog.jpg \
    --model ../yolov5s.onnx \
    --output dog_onnx.jpg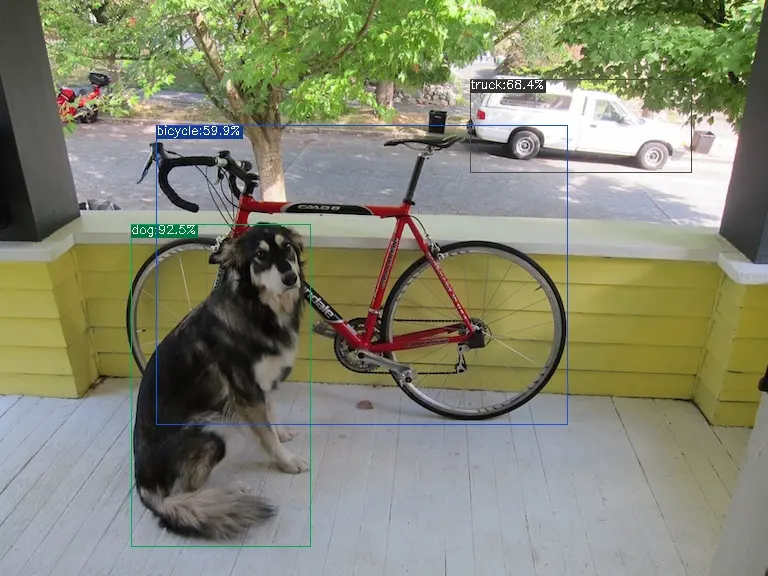
-
The execution method for the f32 bmodel is as follows, obtaining dog_f32.jpg:
detect_yolov5.py \
    --input ../image/dog.jpg \
    --model yolov5s_1684x_f32.bmodel \
    --output dog_f32.jpg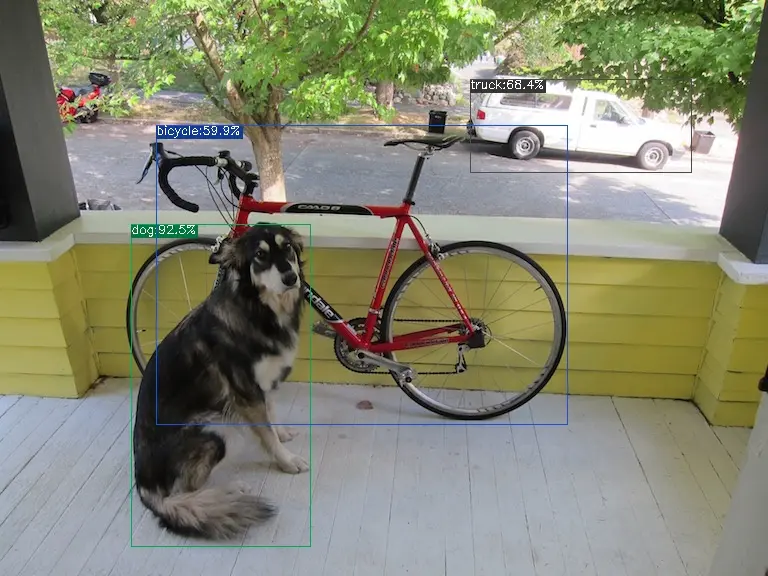
-
The execution method for the f16 bmodel is as follows, obtaining dog_f16.jpg:
detect_yolov5.py \
    --input ../image/dog.jpg \
    --model yolov5s_1684x_f16.bmodel \
    --output dog_f16.jpg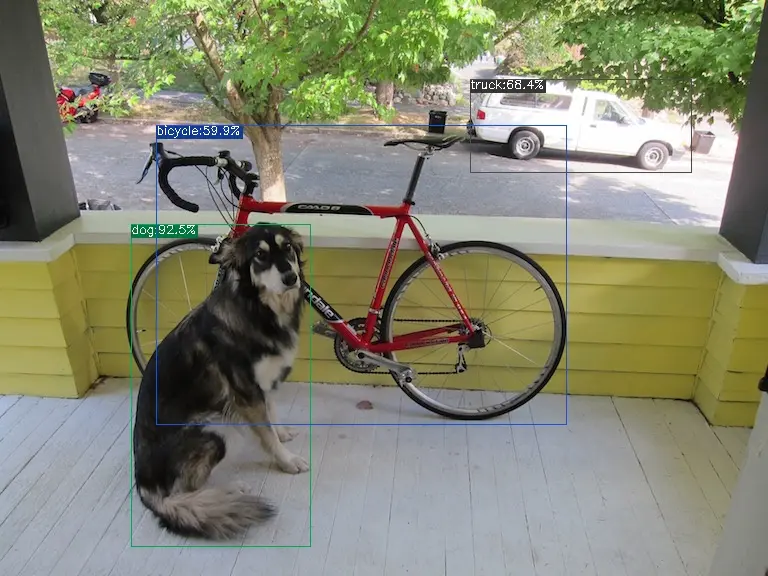
-
The execution method for the int8 symmetric bmodel is as follows, obtaining dog_int8_sym.jpg:
detect_yolov5.py \
    --input ../image/dog.jpg \
    --model yolov5s_1684x_int8_sym.bmodel \
    --output dog_int8_sym.jpg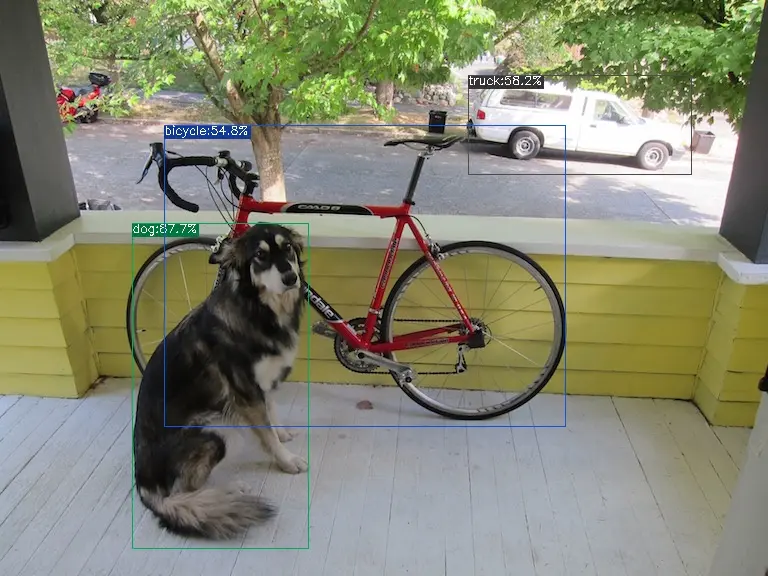
-
The execution method for the int8 asymmetric bmodel is as follows, obtaining dog_int8_asym.jpg:
detect_yolov5.py \
    --input ../image/dog.jpg \
    --model yolov5s_1684x_int8_asym.bmodel \
    --output dog_int8_asym.jpg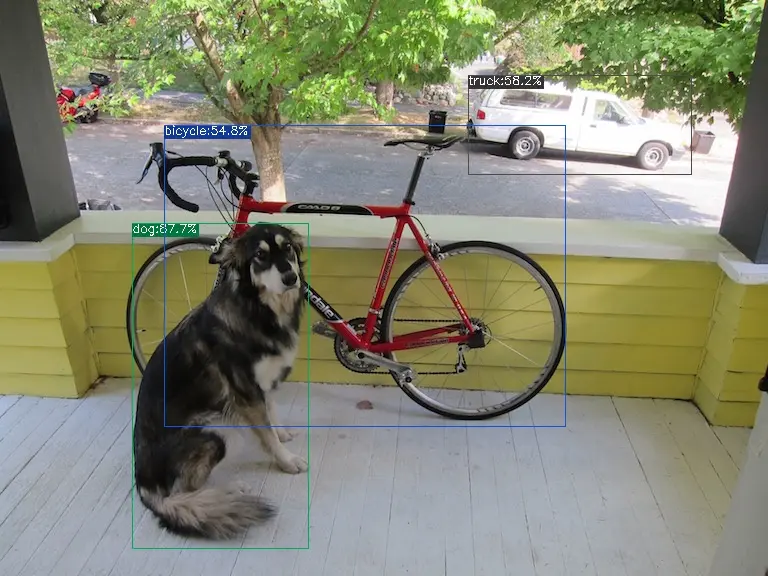
-
The execution method for the mixed precision bmodel is as follows, obtaining dog_mix.jpg:
detect_yolov5.py \
    --input ../image/dog.jpg \
    --model yolov5s_1684x_mix.bmodel \
    --output dog_mix.jpg