Wake on LAN
Turn on the WOL function
tip
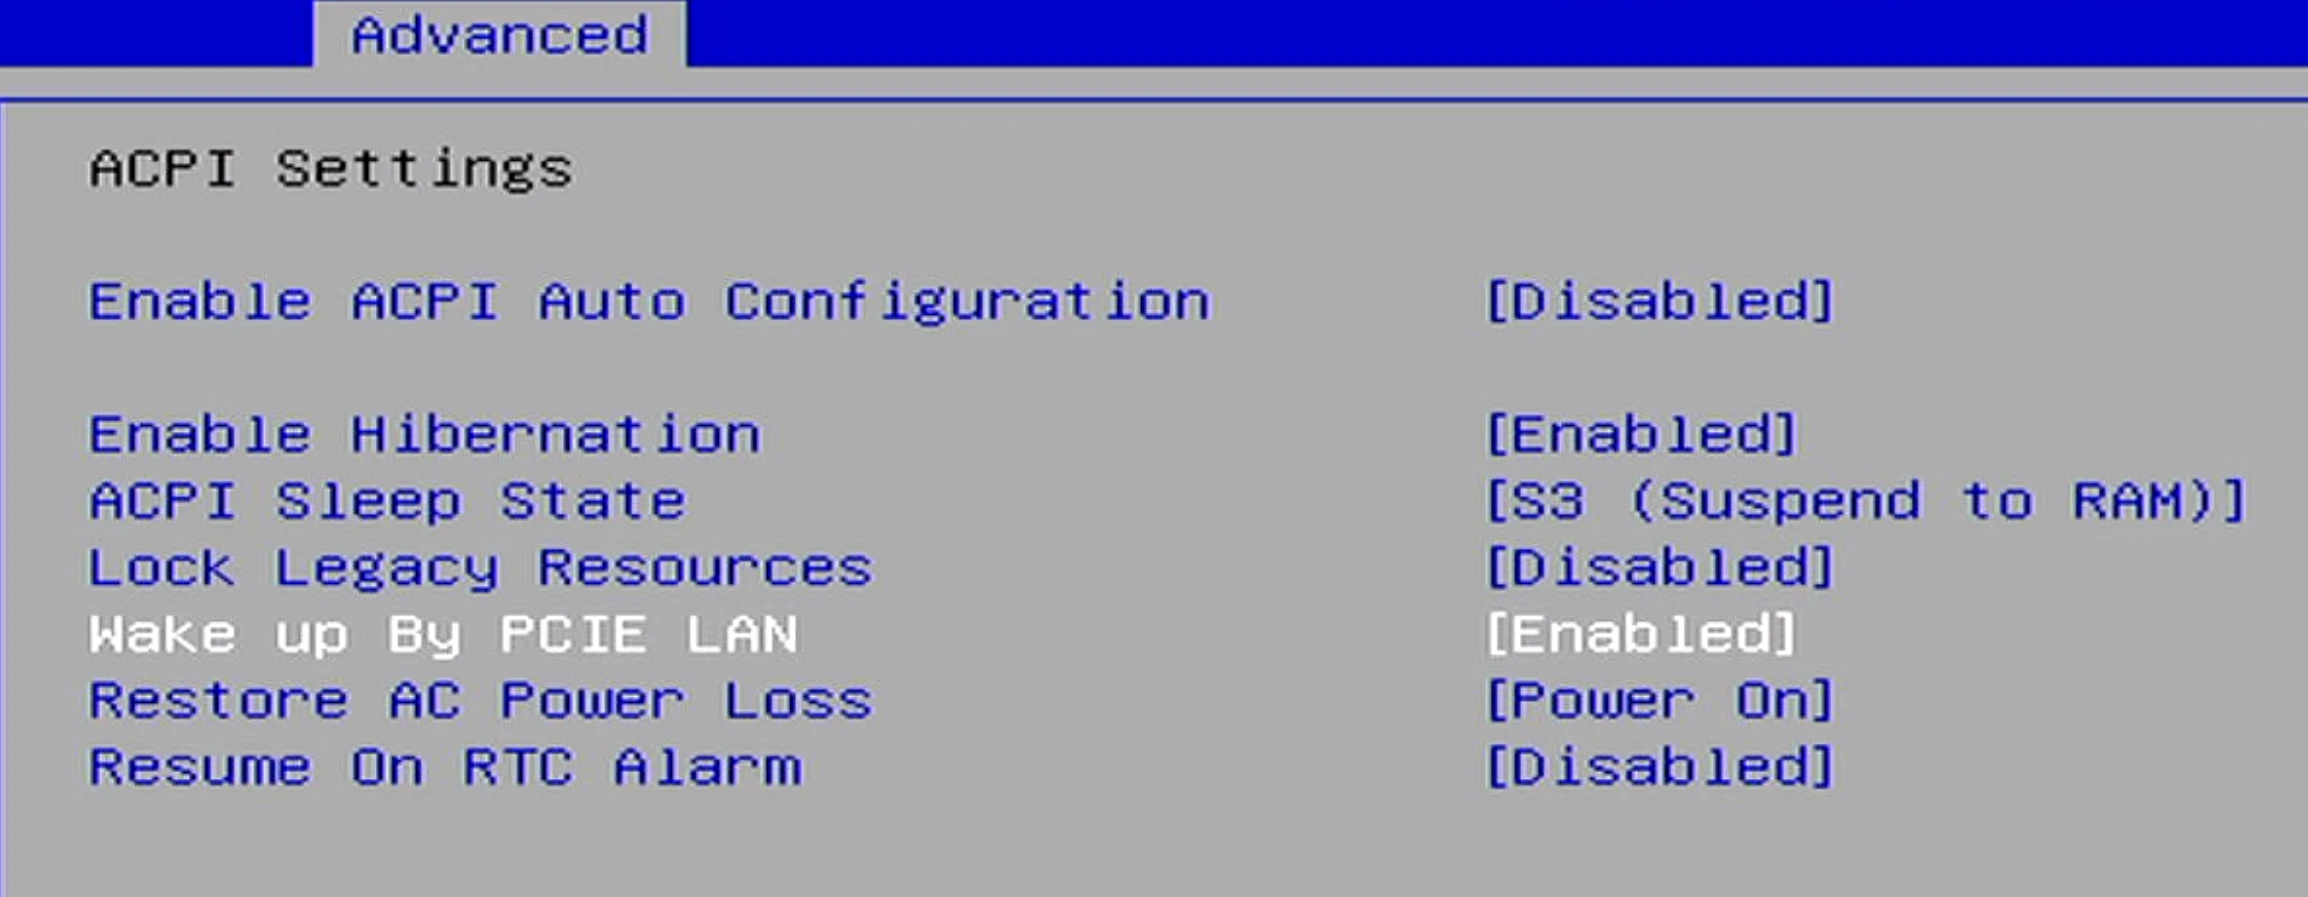
Default Wake On LAN (WOL) Functionality Disable in the BIOS
- Power on the system and press the DEL key to access the BIOS settings.
- On the Advanced--ACPI setting page, set the Wake up by PCIE LAN option to enable
WOL Functionality Usage
tip
Using Windows System as an Example
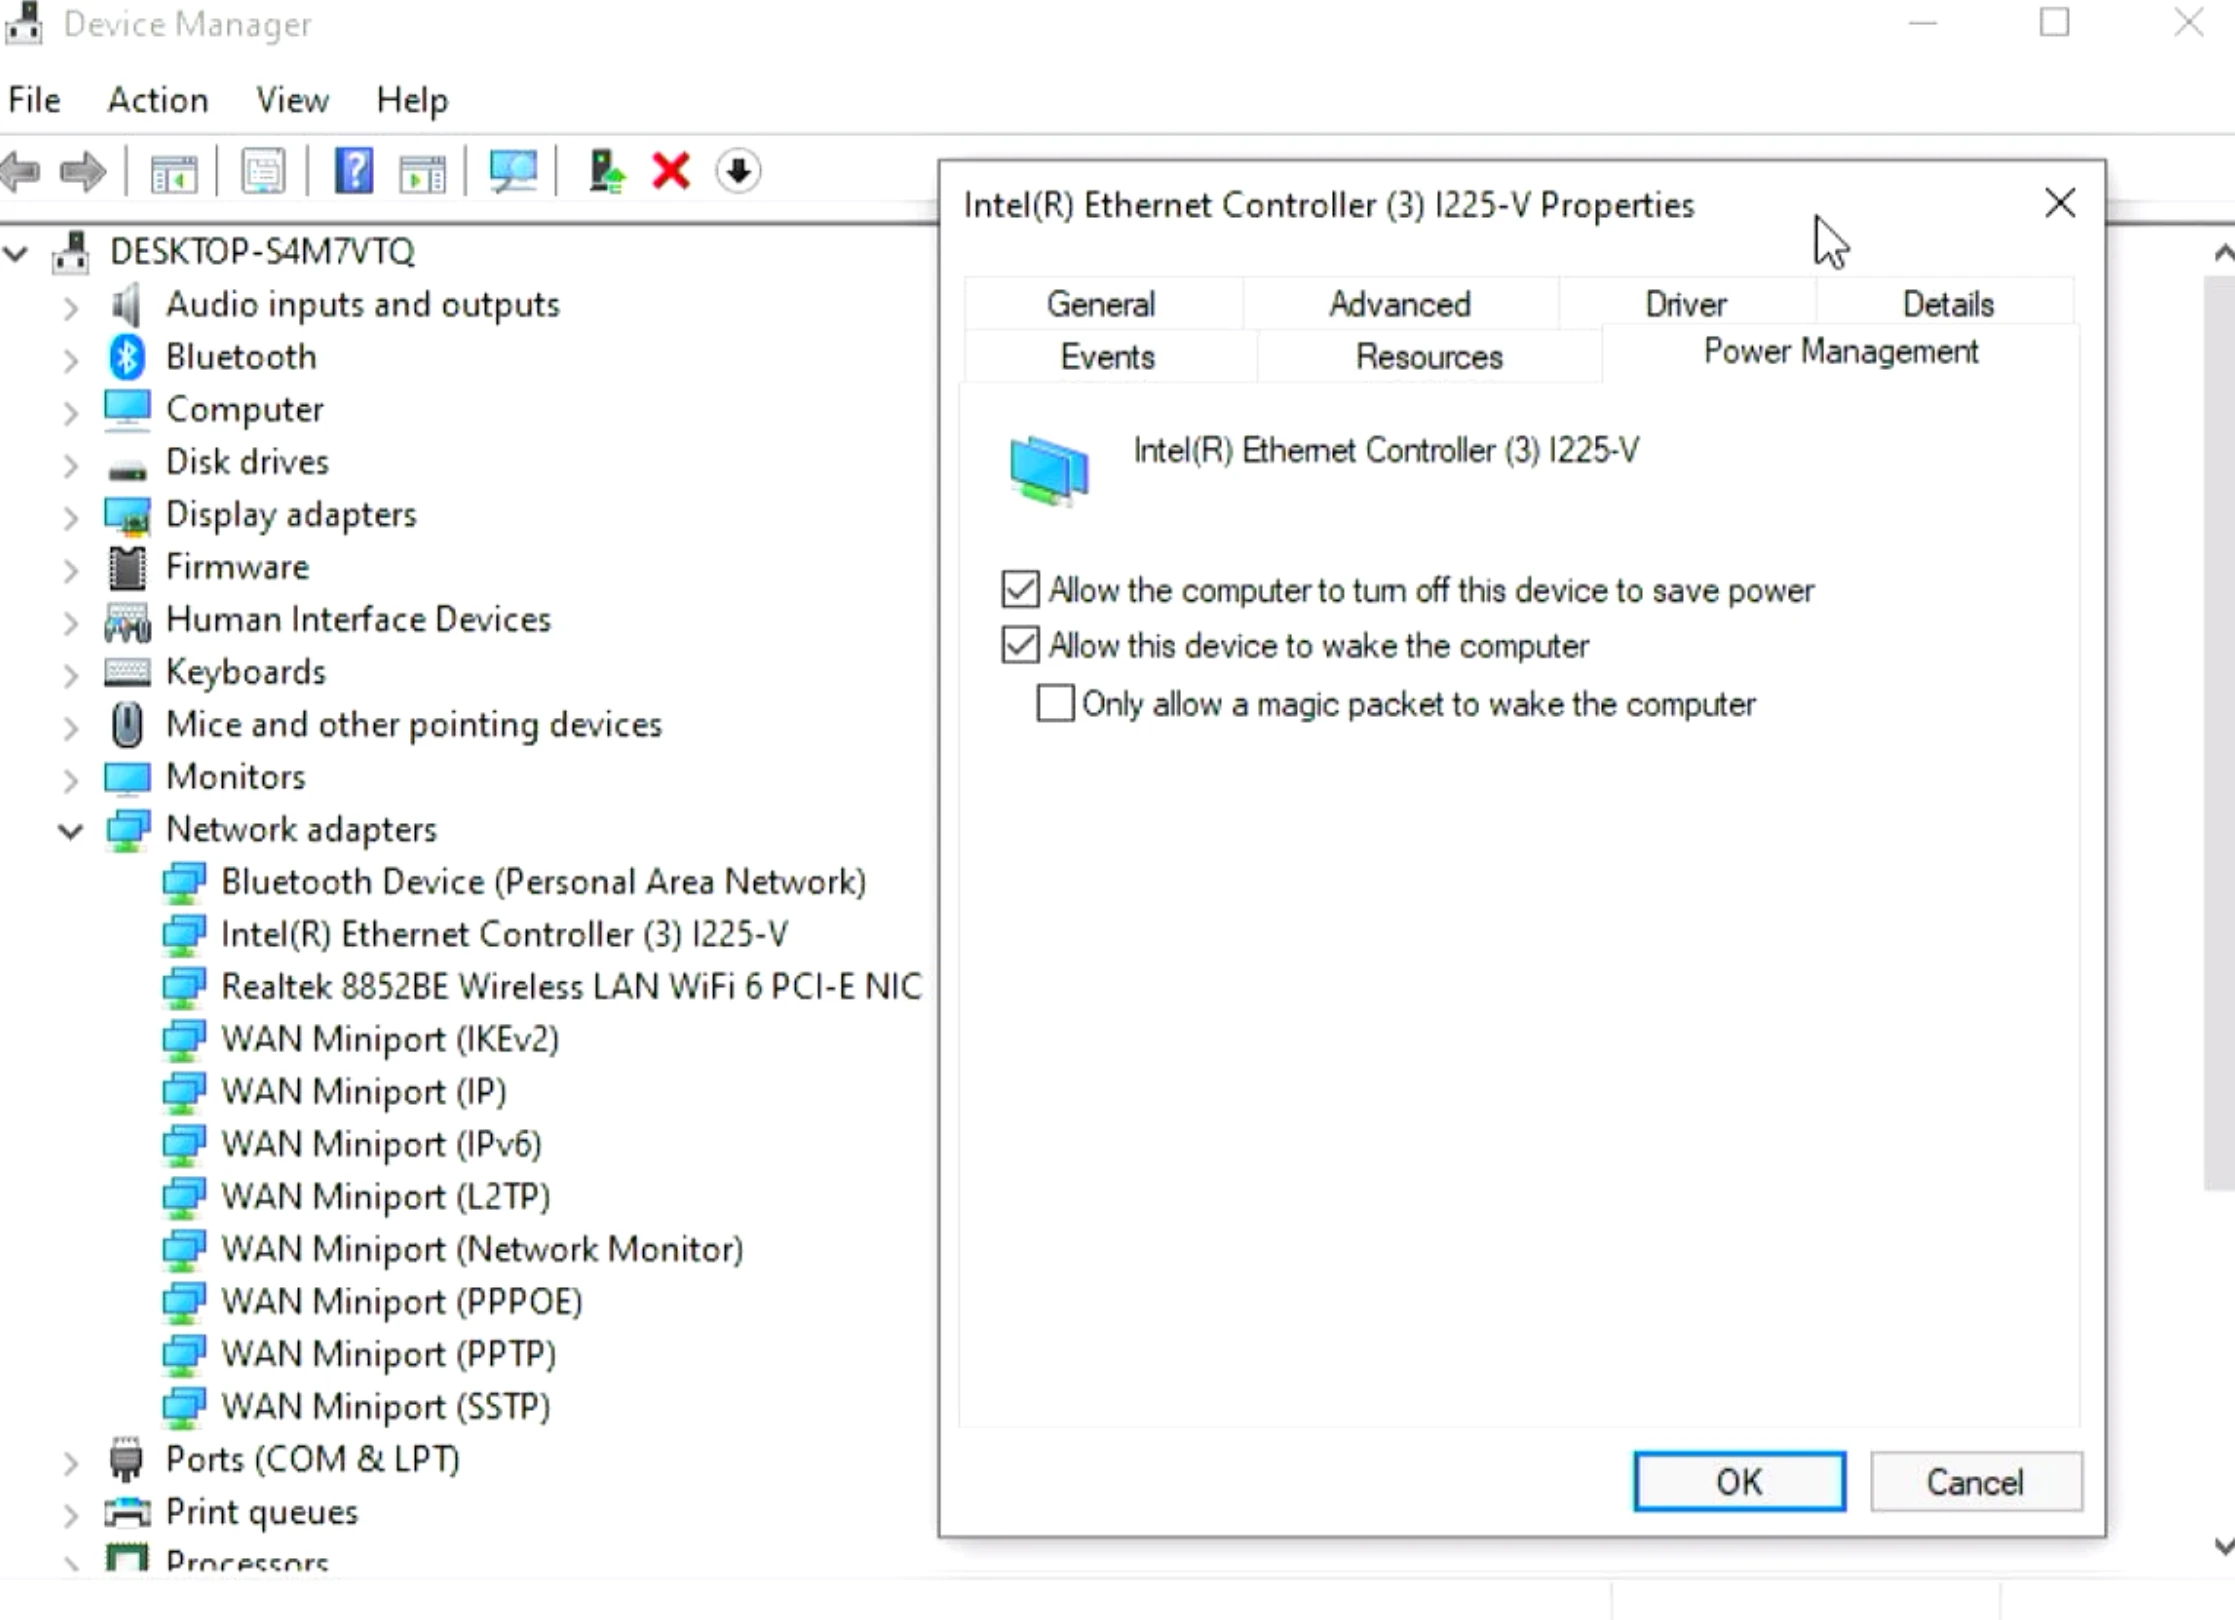
Enabling WOL Function
- Access the Windows system and open the Device Manager.
- Locate the network card device, Intel Ethernet Controller.
- Open the properties and navigate to the Power Management page.
- Check the option "Allow this device to wake the computer."
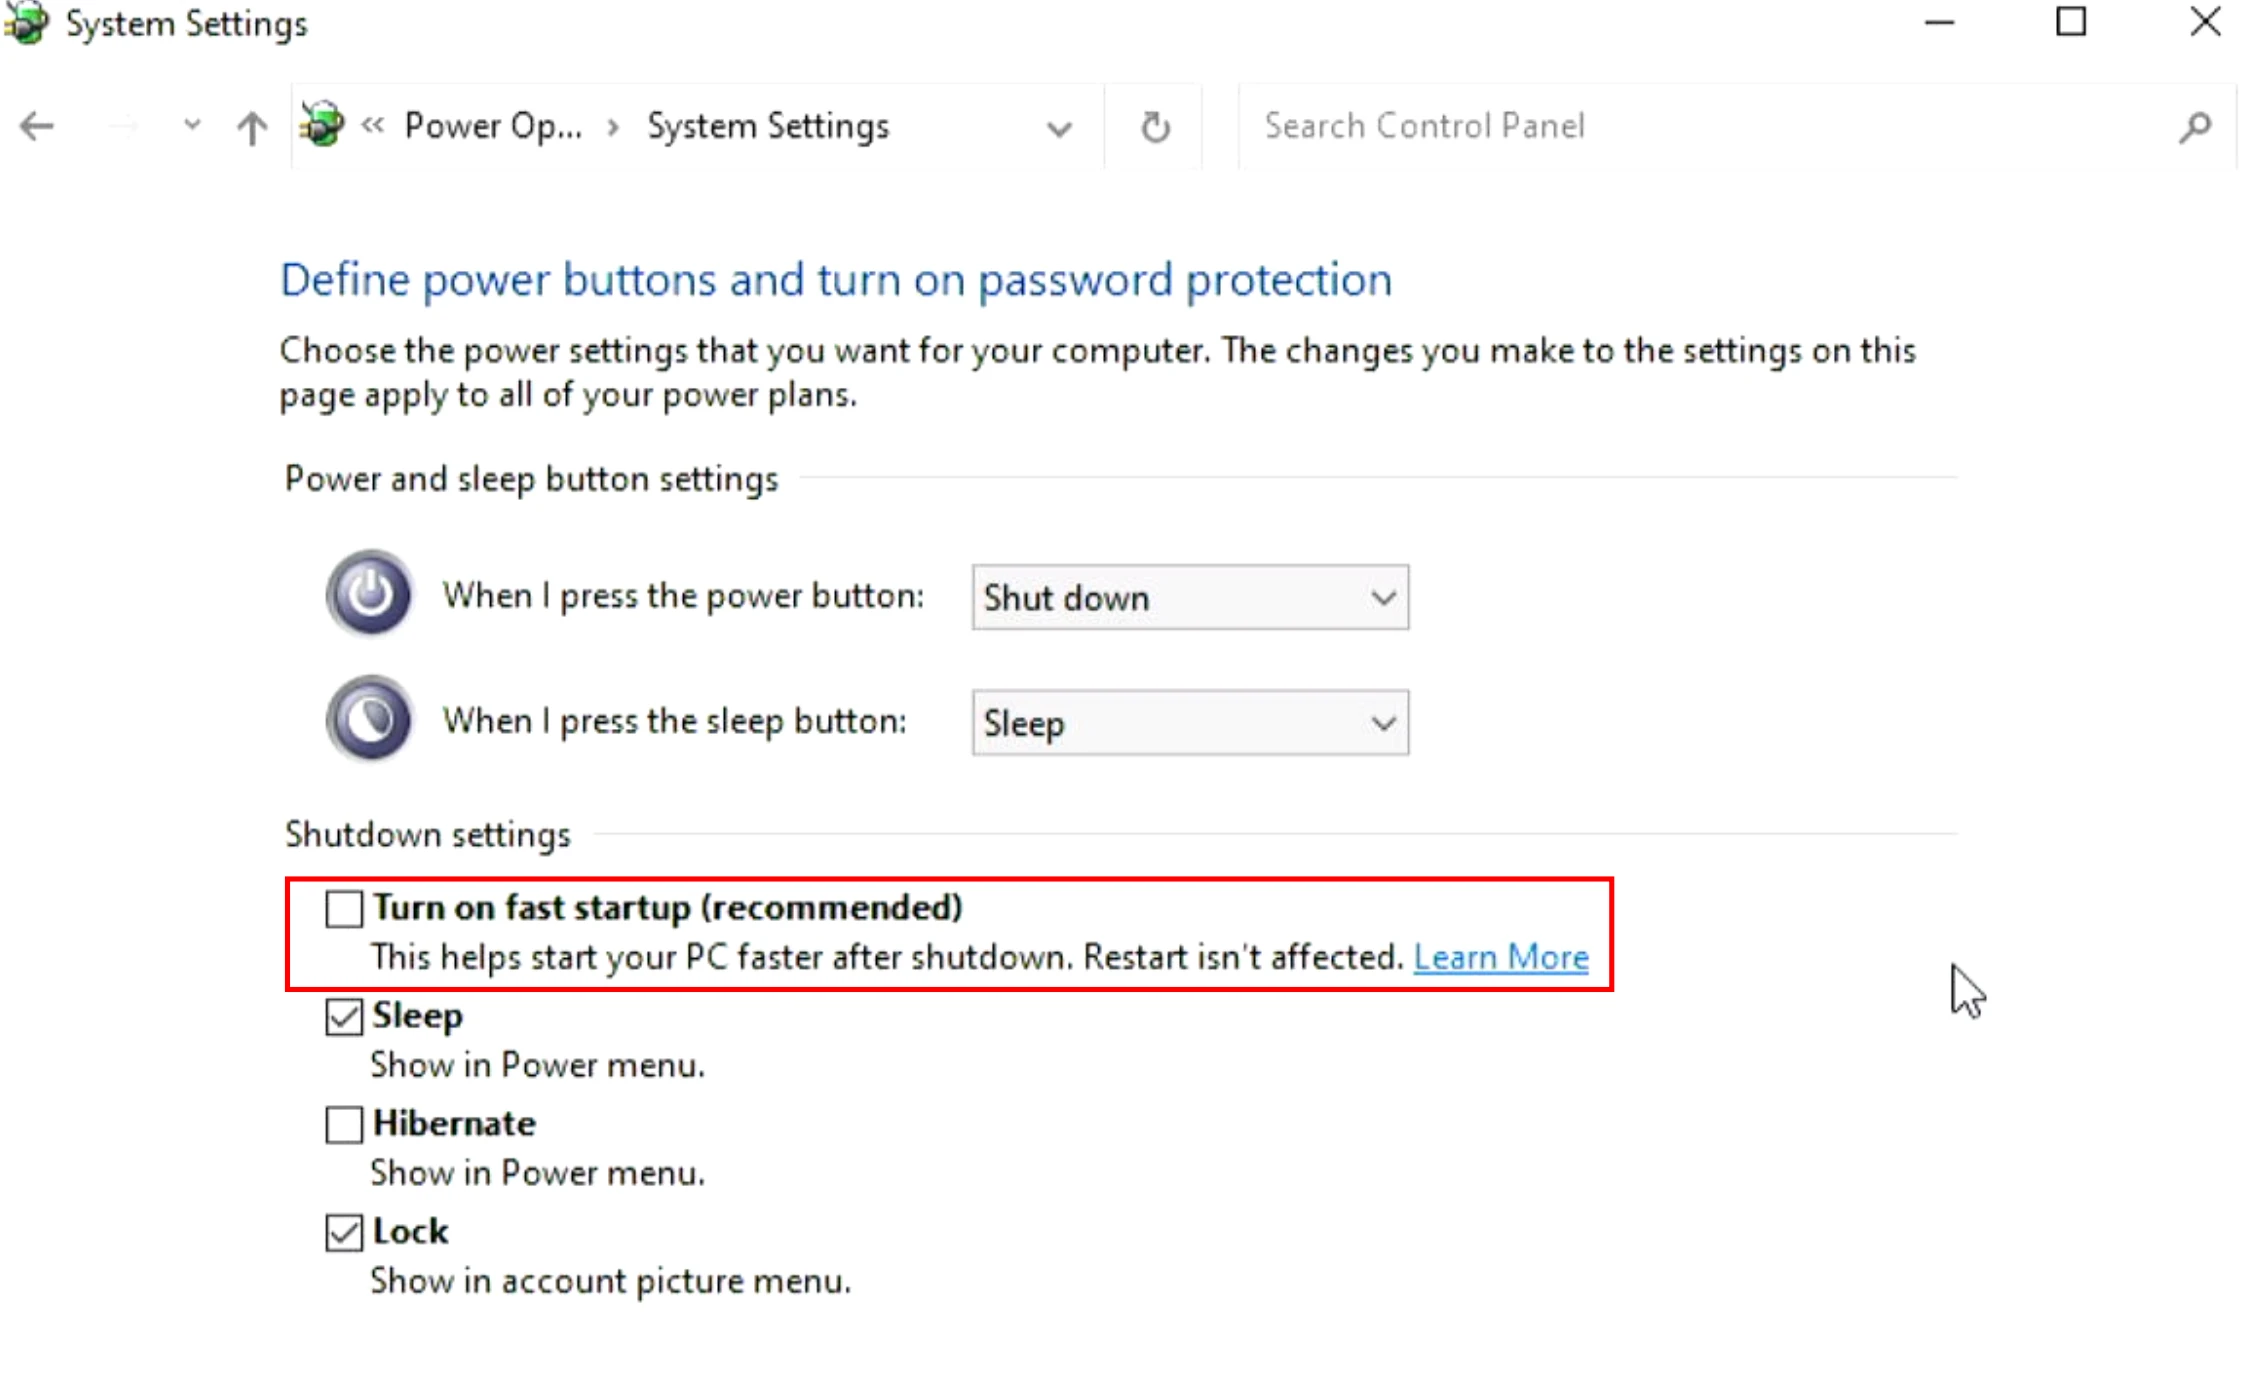
- WOL from Power off(S5) requires Windows Fast Startup to be turned off
- Open Windows setting-->System-->Power & sleep-->Additional power settings-->Choose What the power buttons do-->Change settings that are currently unavailable
- Uncheck "Turn on fast startup"
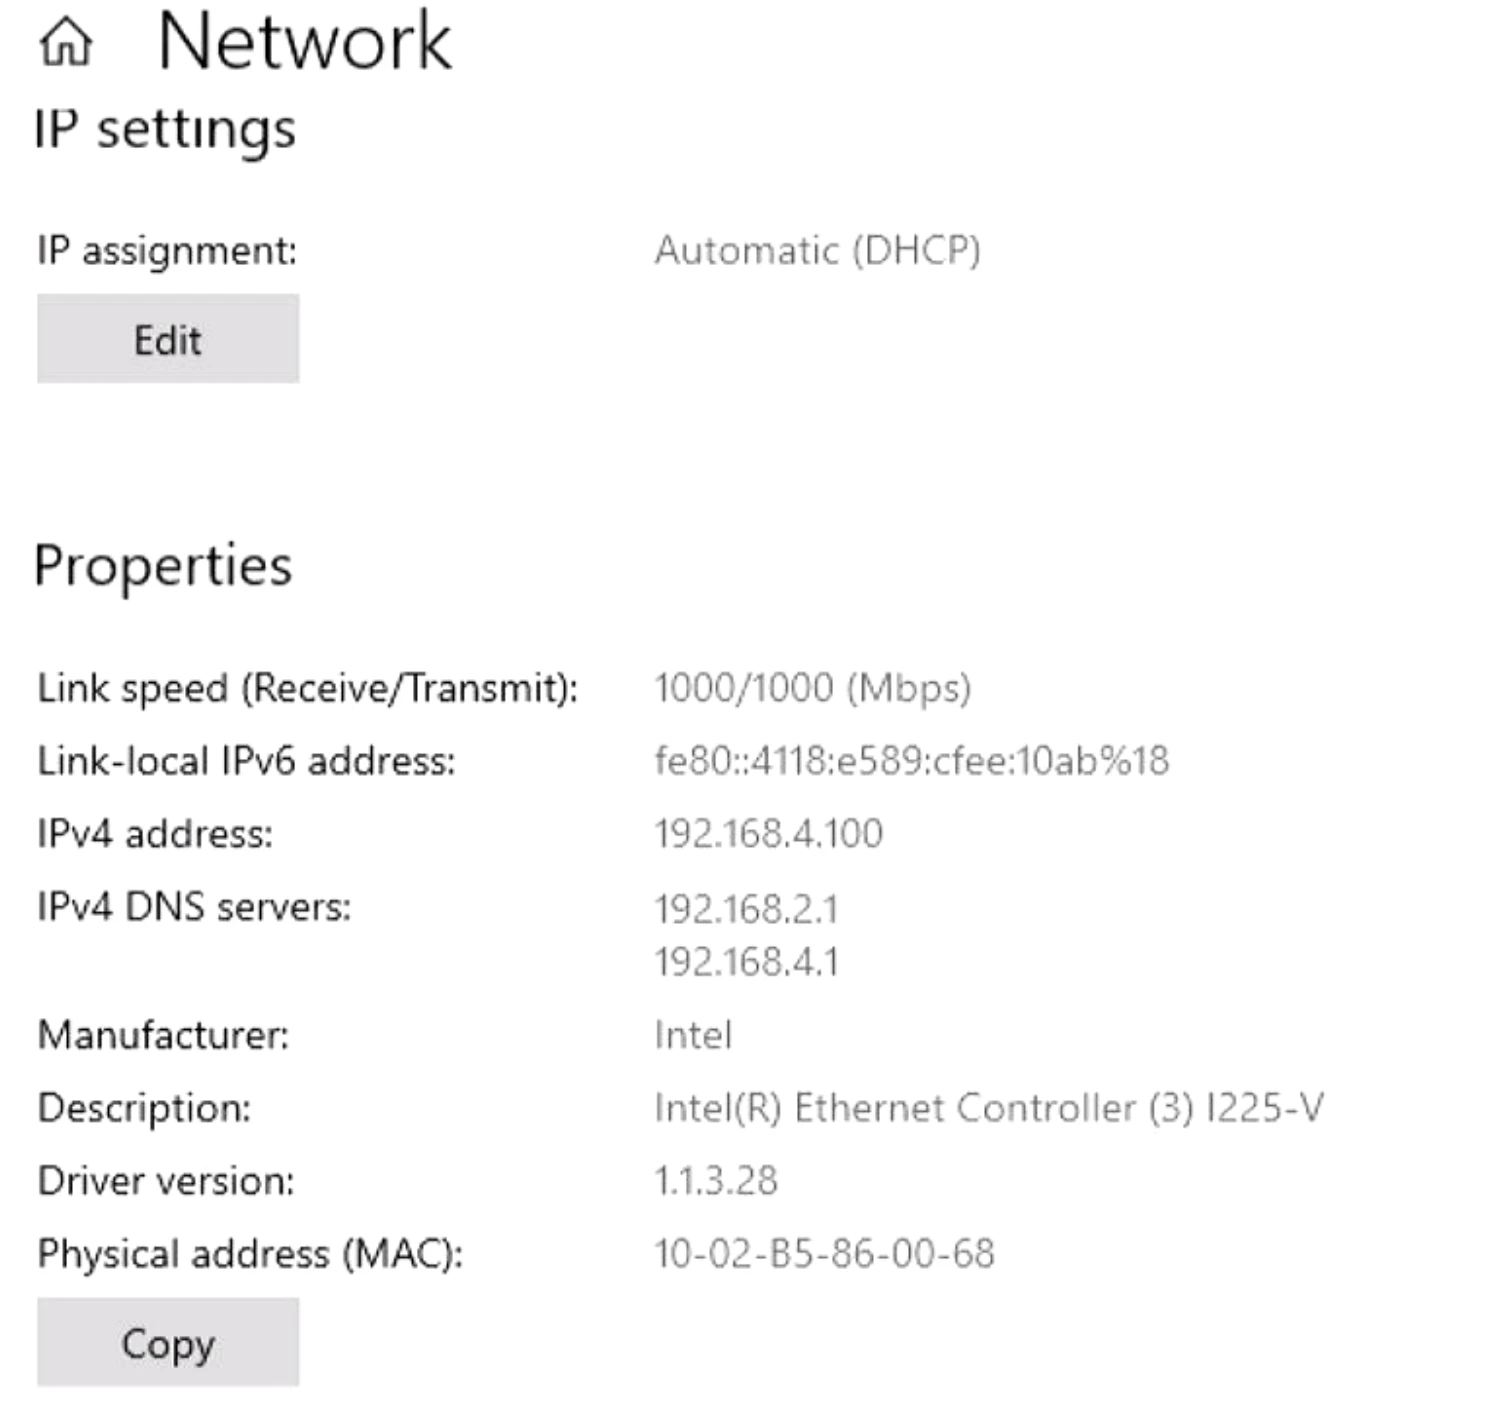
Recording Network Card MAC Address
- Connect Radxa X4 to the local network using an Ethernet cable.
- Open Windows Settings and select Network & Internet.
- Access the Properties interface, and at the bottom, locate the Physical Address (MAC).
- Take note of the network card's MAC address (e.g., 10-02-B5-86-00-68) while maintaining the network connection.
- Power off Radxa X4; note that Radxa X4's power should remain connected in this step.
LAN Wake-Up
tip
Using Wake On LAN Software for Wake-Up
- Employ any other terminal device (Windows PC) within the same local network to send a network wake-up magic packet (multiple methods available; using Microsoft's WOL software as an example).
- Install the Wake On LAN software.
- Open the Wake On LAN software, input any Device Name for identification (for convenience), enter the previously recorded MAC address of Radxa X4's network card, and click "Wake."
- At this point, Radxa X4 will be awakened from a powered-off state.