Quick Start
This guide helps you get started with Radxa X5 quickly.
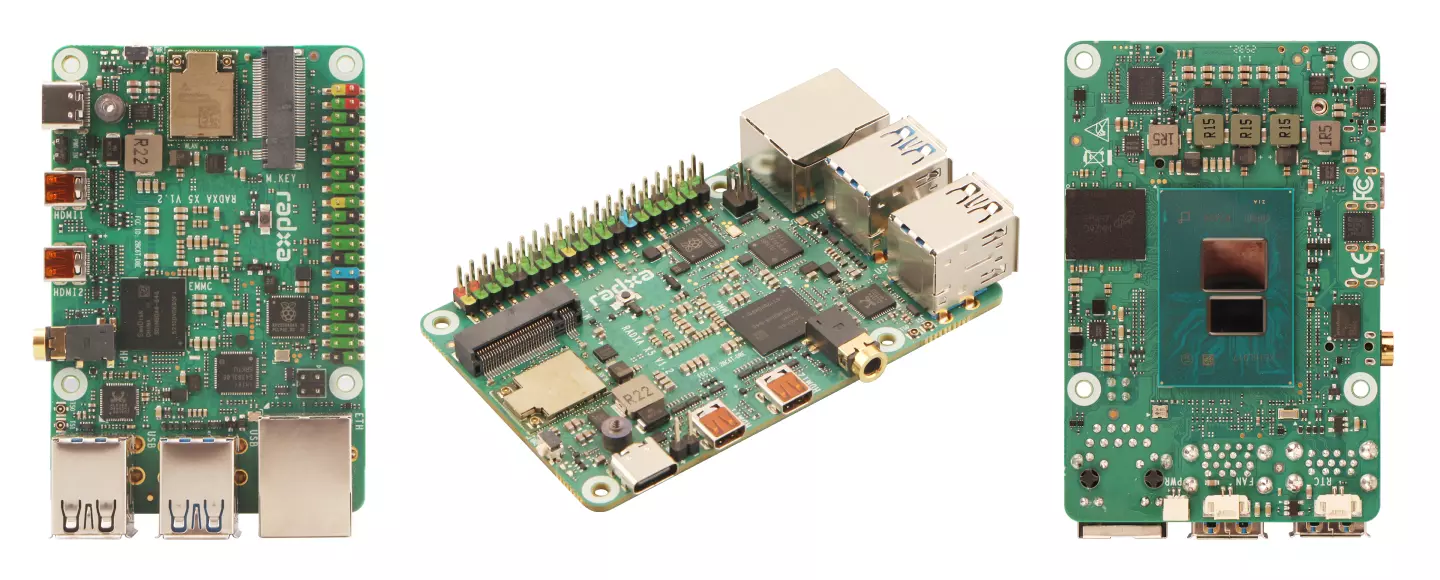
Product Overview
| Position | View | Position | View | Position | View |
|---|---|---|---|---|---|
| Left | X5 Front View | Center | X5 Back View | Right | X5 Side View |
Prerequisites
Hardware
Prepare the following hardware:
- Board: Radxa X5
- Power: USB Type-C power adapter (PD / QC compatible) or a 12V DC power adapter
- Boot USB drive
- Target install drive: SSD (M.2 M Key 2230) or onboard eMMC
- Display: Micro HDMI to HDMI cable and a monitor (for GUI output)
- Input devices: keyboard and mouse (for GUI operation)
Radxa X5 supports power input via USB Type-C (PD / QC compatible) or 12V DC. Use a sufficiently rated power adapter to ensure stable operation with peripherals.
Install an OS
You need to prepare a bootable USB drive first, then use it to install the OS onto the onboard eMMC or an NVMe SSD.
Download an OS image
Choose an OS image that fits your needs. This guide uses Windows 11 as an example.
Create a bootable USB drive
Use Rufus to create a bootable USB drive.
Download Rufus
Go to Rufus Downloads and download Rufus.
Create the bootable drive
Open Rufus and follow the steps below:
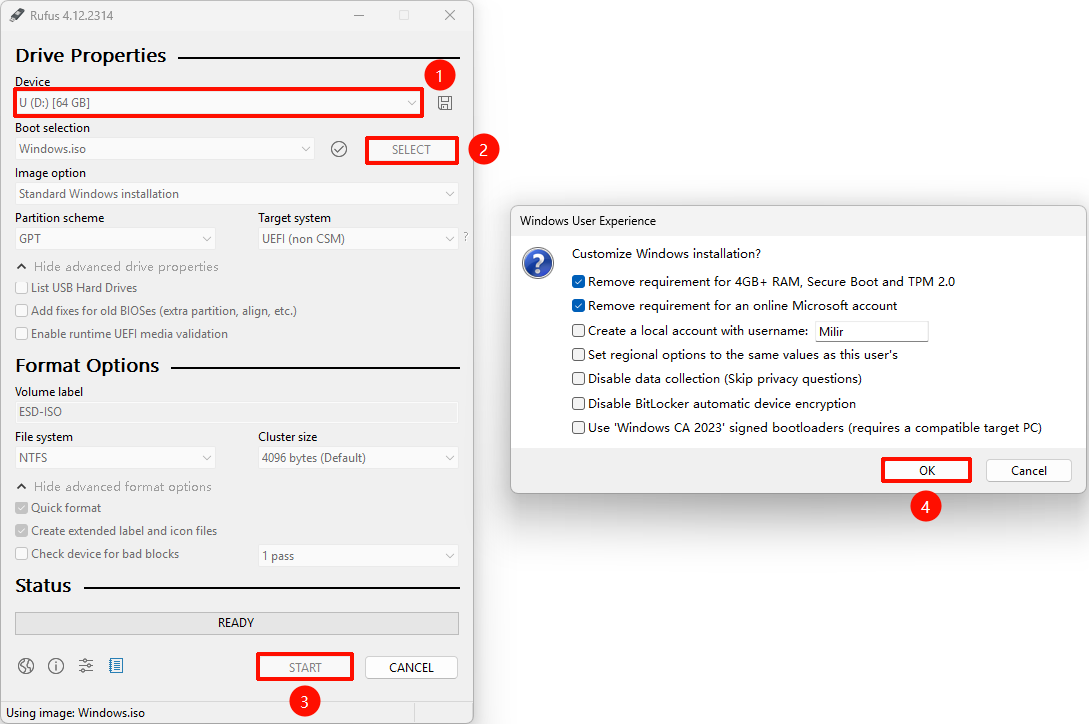
①: Select the USB drive
②: Select the downloaded OS image
③: Start
④: Customize Windows settings if prompted, then click OK
Leave other options at their defaults unless you have specific requirements.
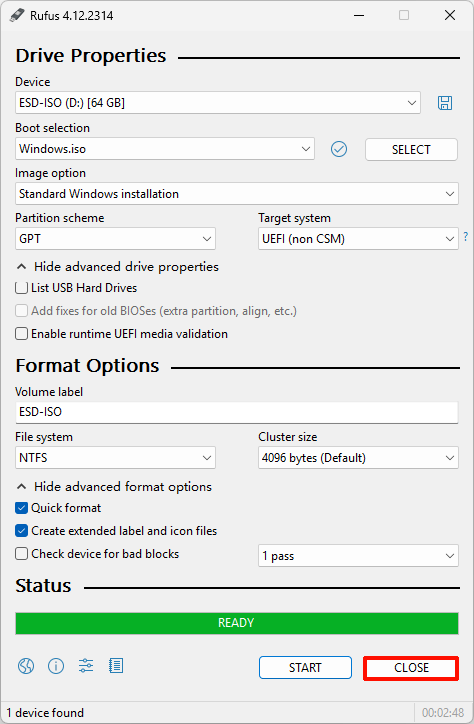
Bootable drive created
Wait until Rufus finishes. It will show Ready when complete.
Install the OS
Plug the bootable USB drive into a USB Type-A port. Connect the monitor, keyboard, and mouse, then power on the board.
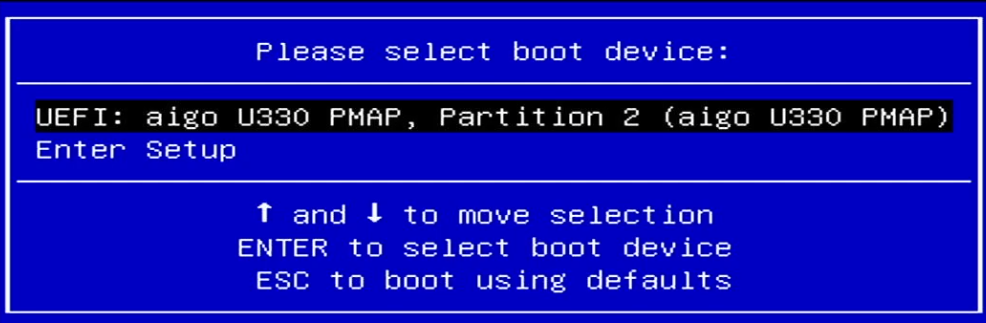
Enter the boot menu
After power-on, press F7 to enter the boot menu, then select the USB boot entry.
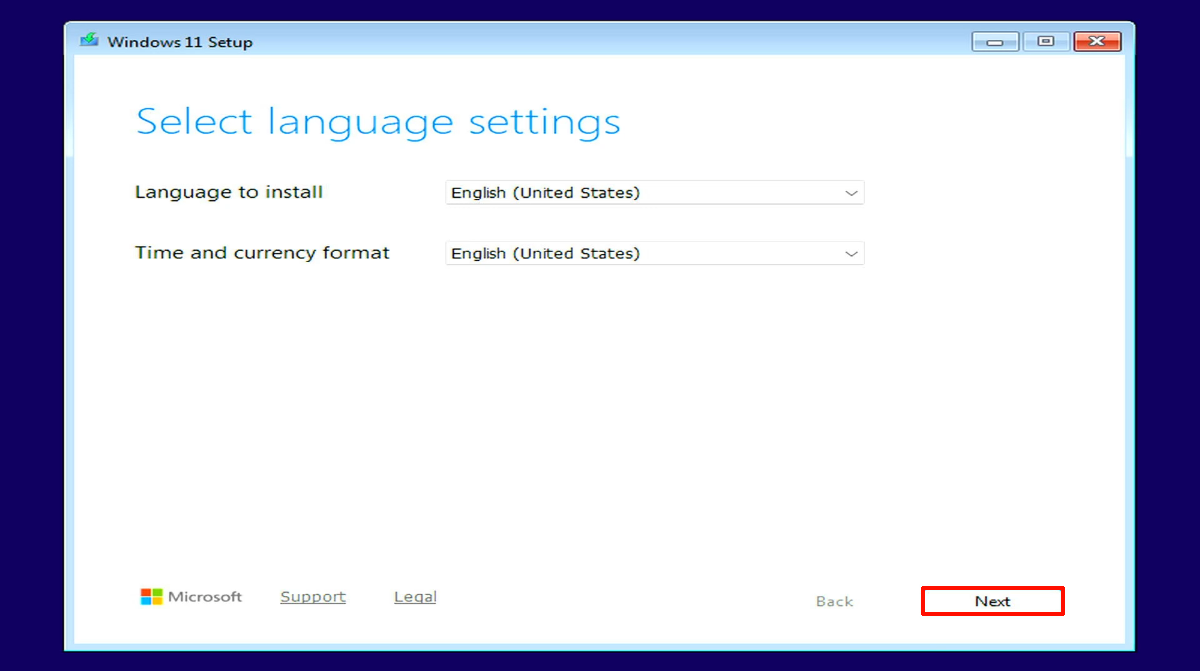
Language
Select English (United States), then click Next.
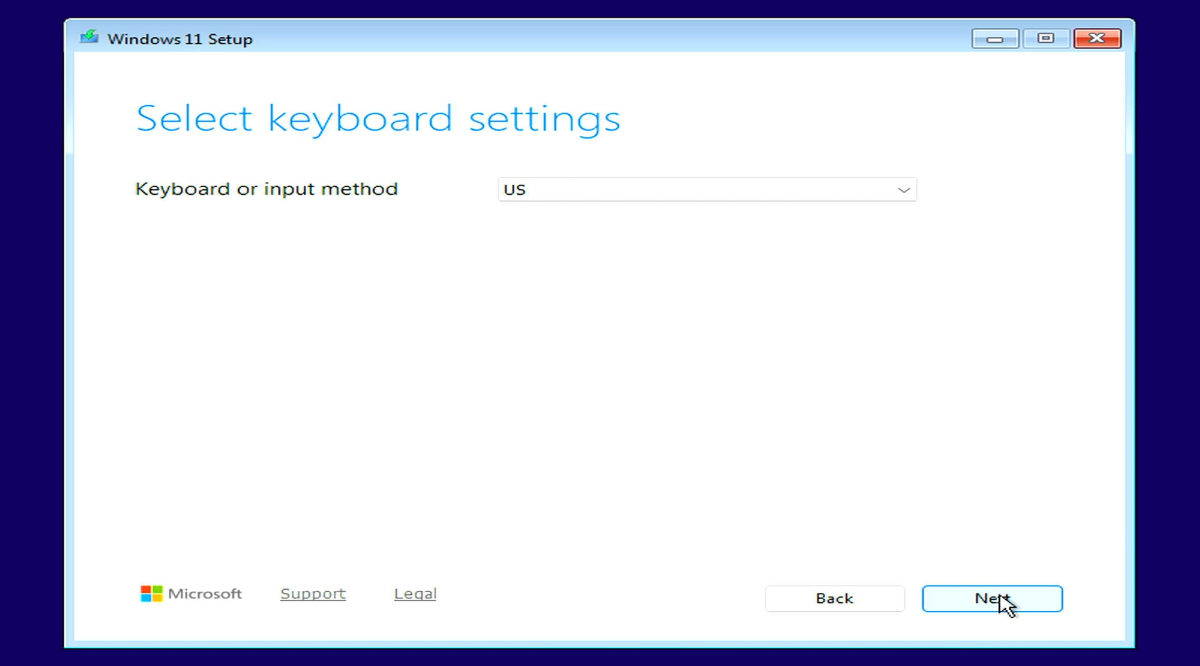
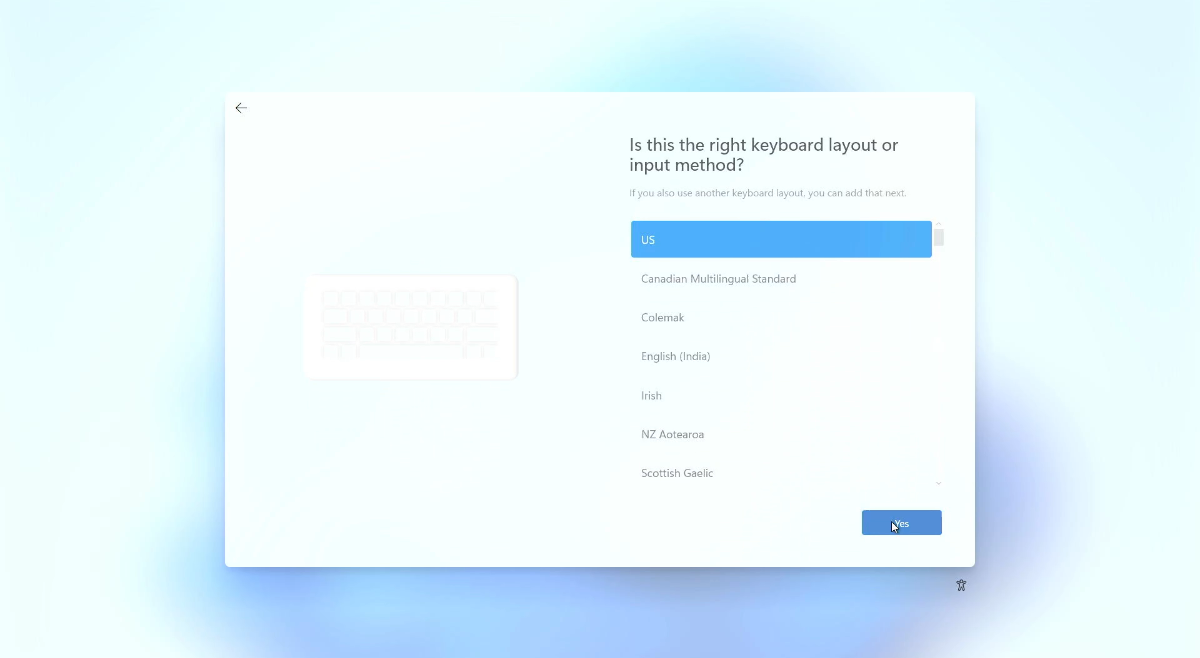
Keyboard
Select US, then click Next.
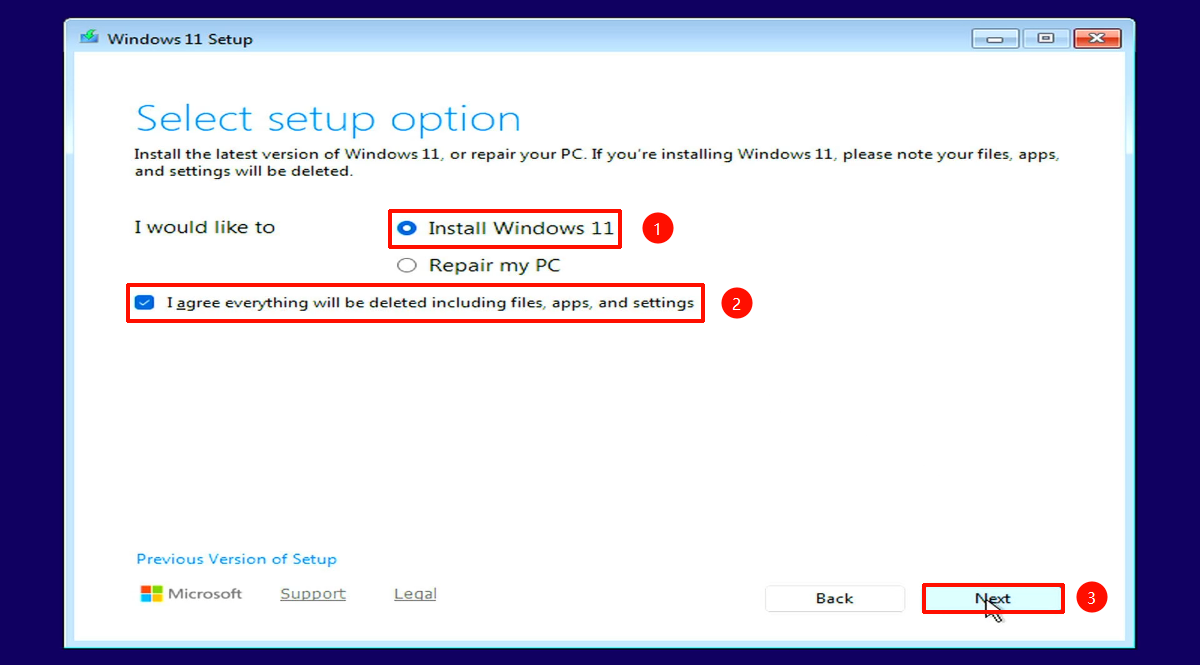
Installation options
Select Install Windows 11 and check I agree ..., then click Next.
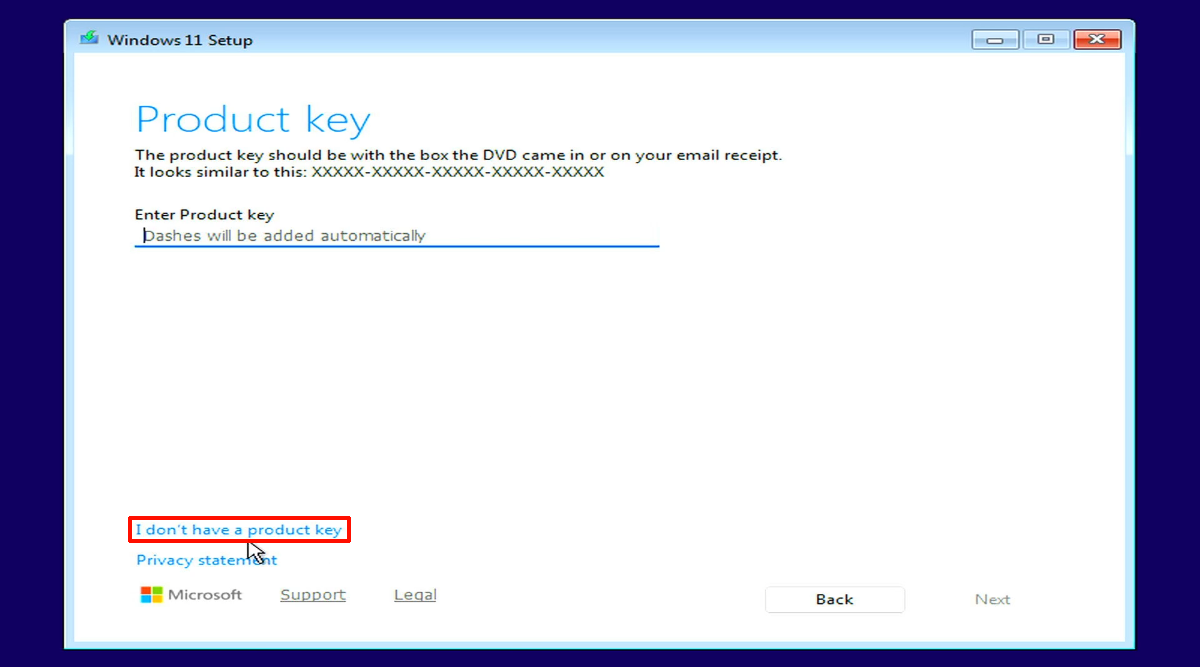
Product key
If you do not have a product key, click I don't have a product key. If you do, enter the key and click Next.
Select an OS image
Select the image/edition you want to install, then click Next.

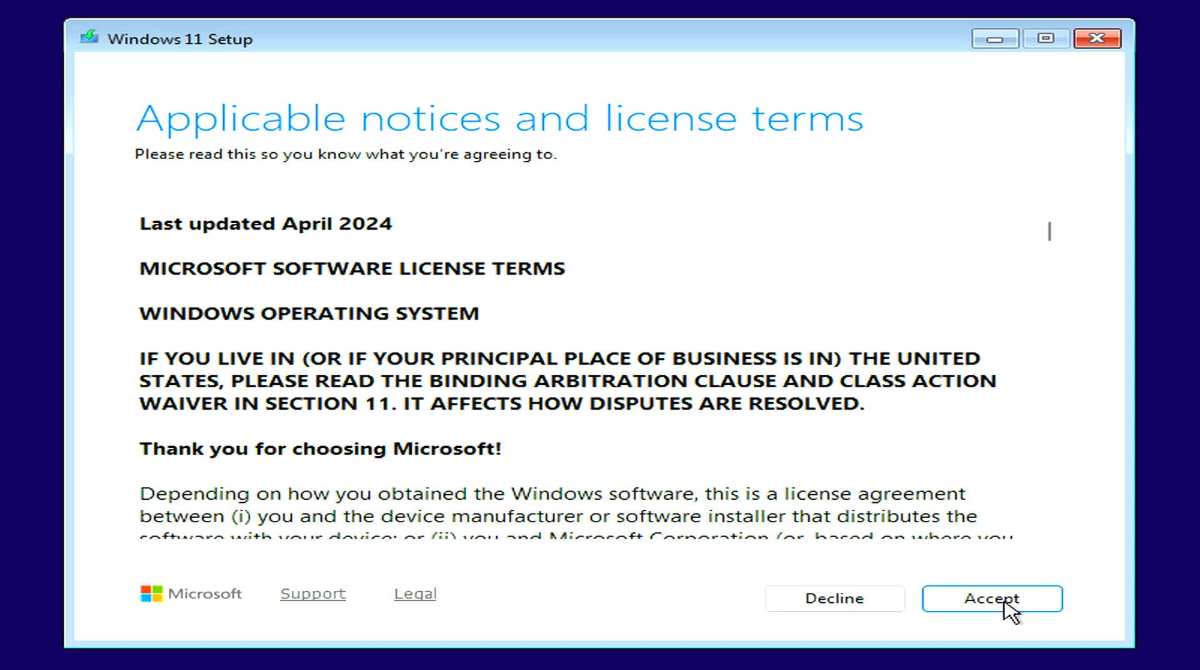
Accept the license
Choose Accept.
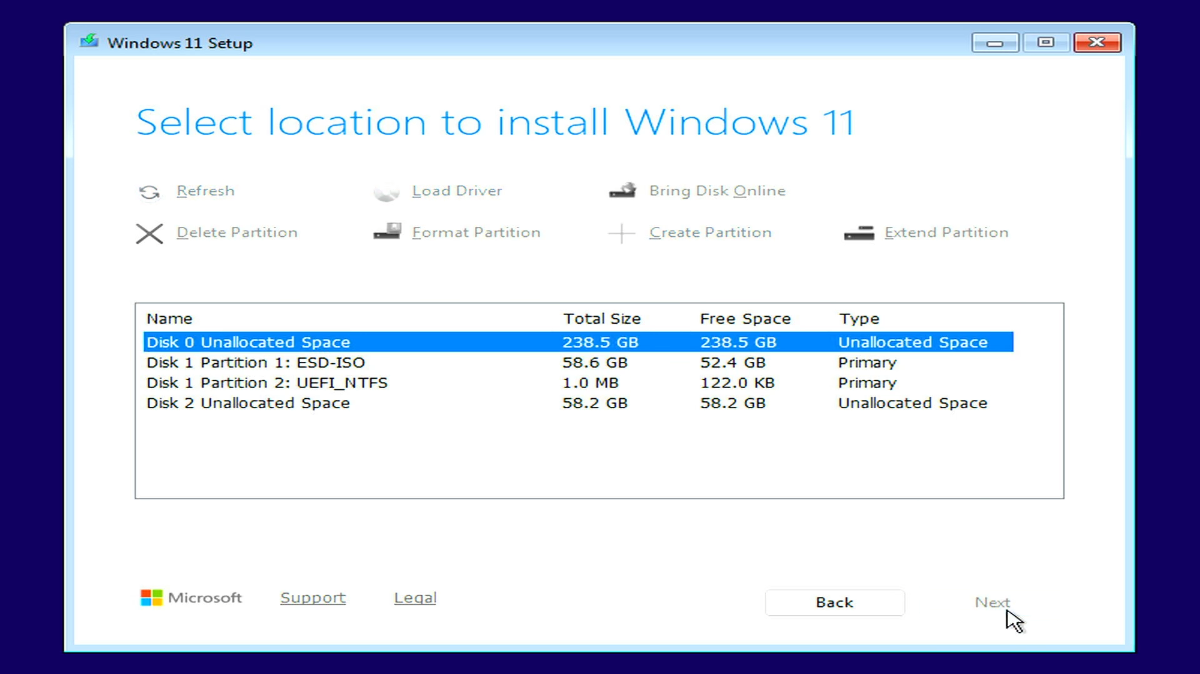
Select installation destination
Select the destination drive, then click Next.
Radxa X5 can use onboard eMMC or an external M.2 M Key 2230 drive. You can usually identify the drive by its capacity.
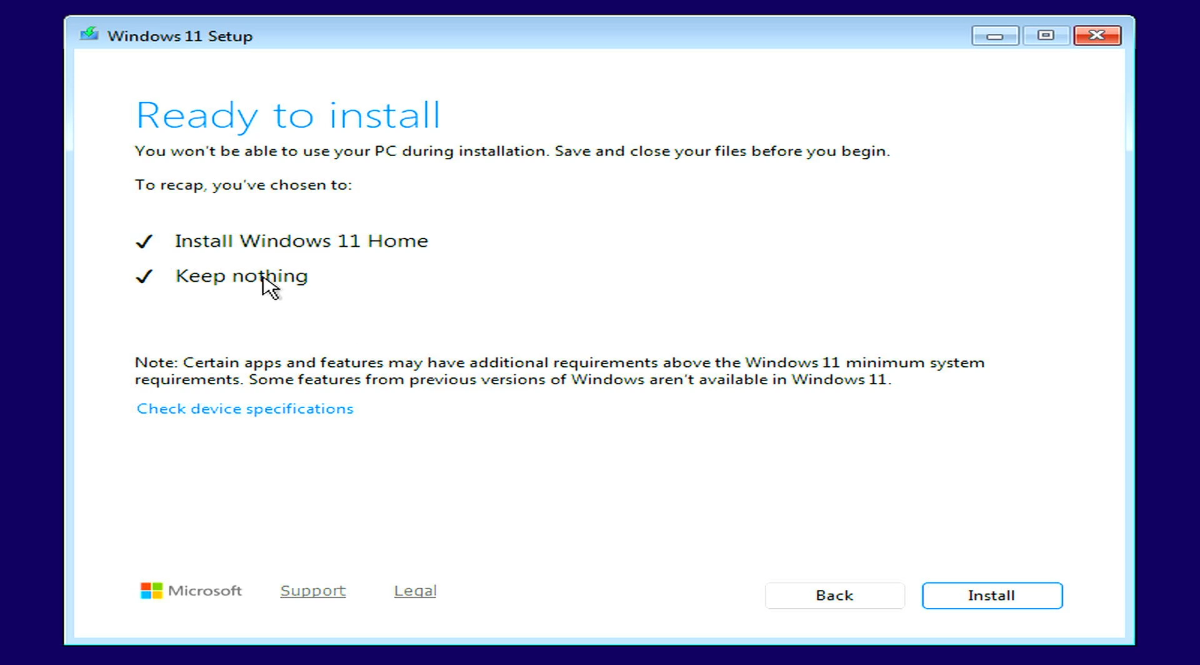
Install
Click Install and wait for the installation to complete. The system may reboot during the process; this is normal.
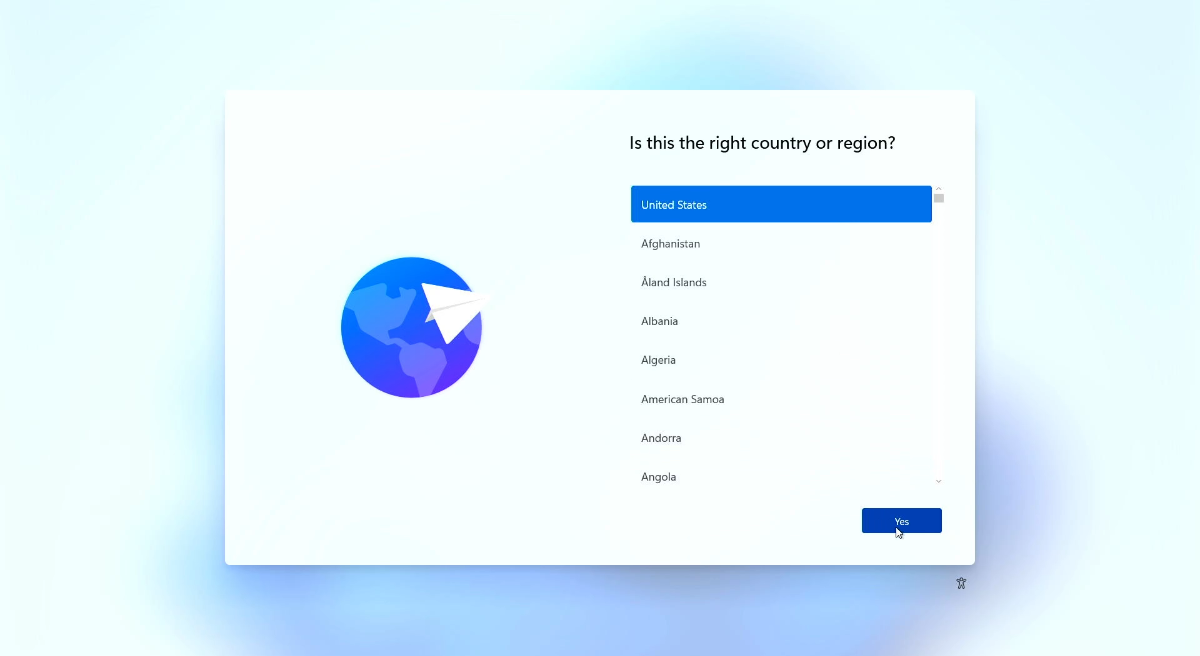
Region
Select United States, then click Next.
Keyboard layout
Select US, then click Next.
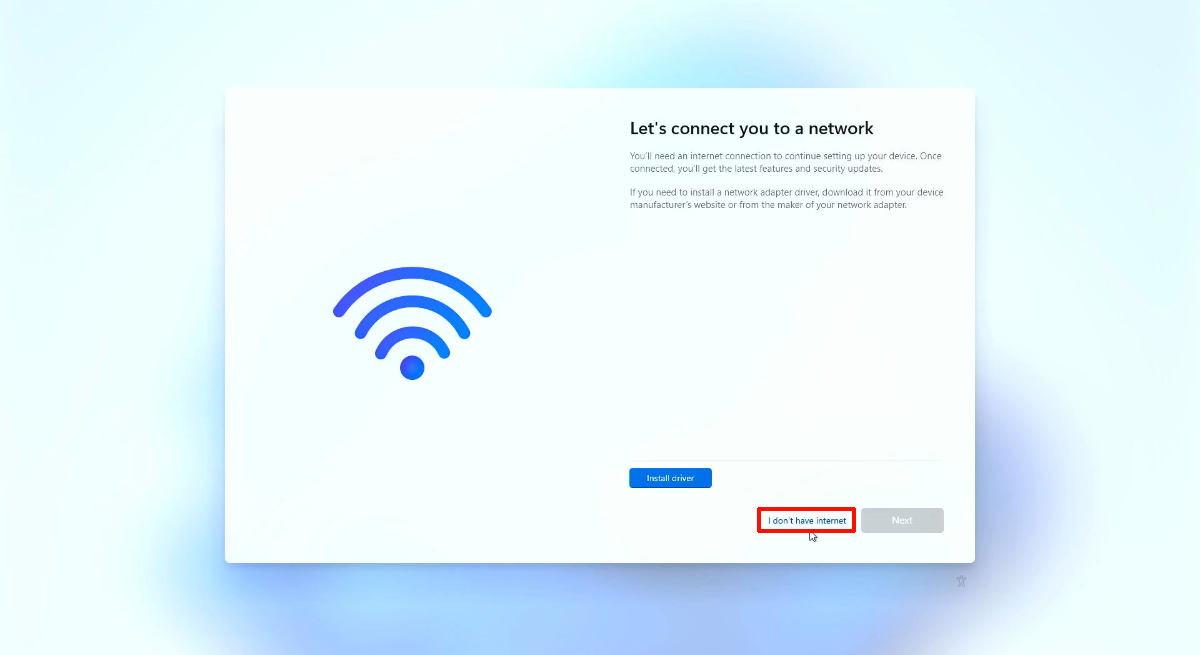
Network
You can connect via Ethernet to go online. Wi‑Fi may require drivers. This guide demonstrates an offline installation.
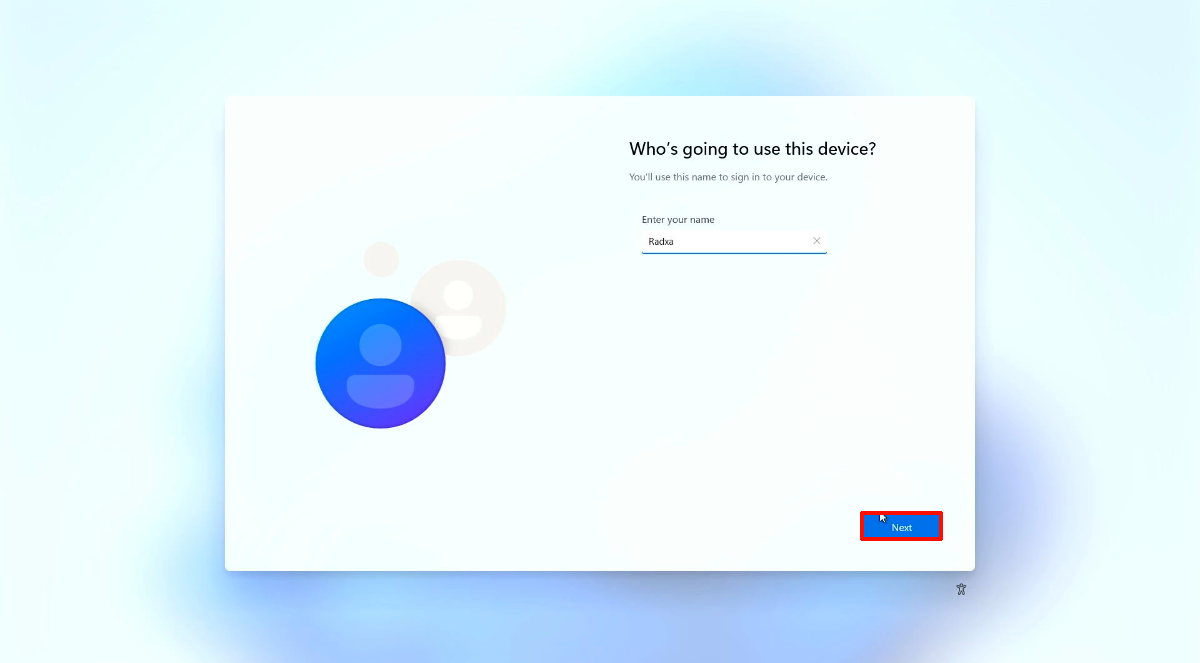
User account
Enter the username, password, and confirmation password, then click Next.
If you leave the password empty and click Next, Windows will set an empty password.

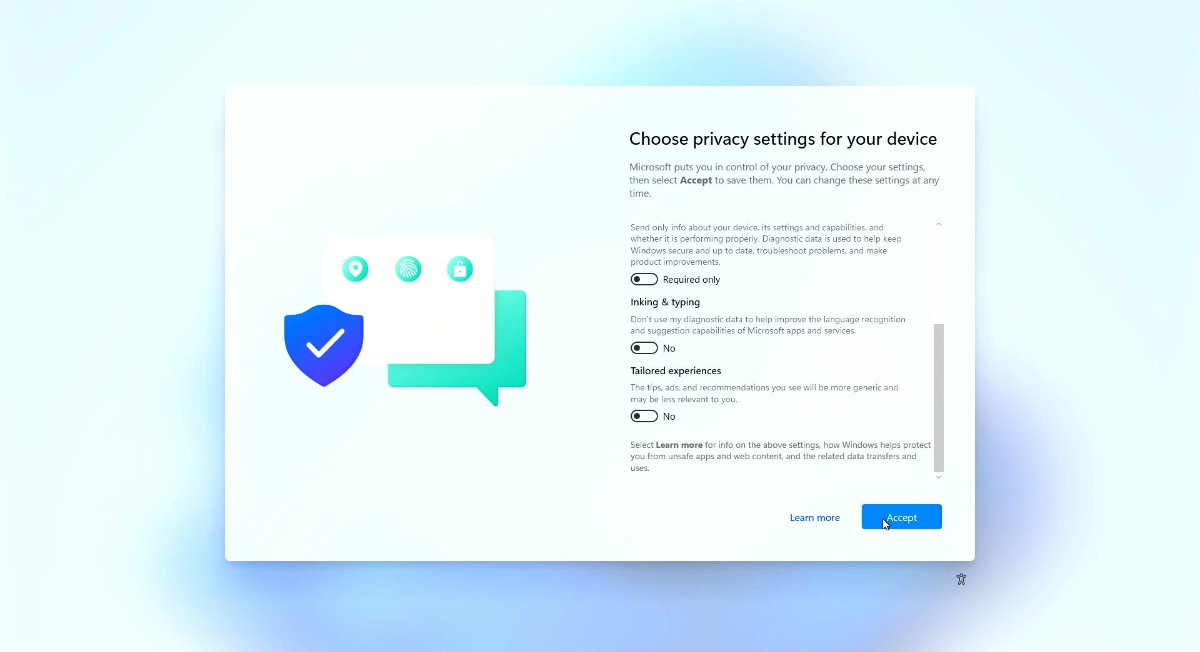
Privacy settings
Choose the privacy options you want, then click Accept.
Done
Wait a few minutes until you reach the Windows 11 desktop. The installation is complete.