Install OS
OpenWrt Mainline Installation
This document describes how to install an OpenWrt mainline image on Radxa ZERO 3W / ZERO 3E.
Image Download
Please go to Resource Download to download the corresponding image.
Recommended image filename:
openwrt-25.12.0-rockchip-armv8-radxa_zero_3w-ext4-sysupgrade.img.gz openwrt-25.12.0-rockchip-armv8-radxa_zero_3e-ext4-sysupgrade.img.gzMake sure the downloaded image matches your product model. Extract the image before continuing.
Install the System
- Install system to microSD card
- Install system to eMMC
Preparation
- 1x microSD card
- 1x microSD card reader
- 1x power adapter (recommended: 5V/2A power adapter)
Install the System
Balena Etcher is a cross-platform and user friendly image file burning tool that we recommend you use.
- Download Etcher and install it.
- Windows
- Linux
Please download balenaEtcher-2.1.4.Setup.exe After the download is complete, there is no need to perform any additional actions. After downloading, you can double click it to open it without any additional operation.
Please download balena-etcher_2.1.4_amd64.deb. Once the download is complete, please install it by executing the following command in the terminal:
sudo dpkg -i balena-etcher_2.1.4_amd64.deb
-
Open Etcher

-
Click
Flash from fileto select the image to write to.
The downloaded system image is in compressed format. You must decompress it first before using Balena Etcher for image flashing.
-
Click
Select targetto select the device, please select carefully.
-
Click
Flash!Start writing and wait for the write progress bar to complete.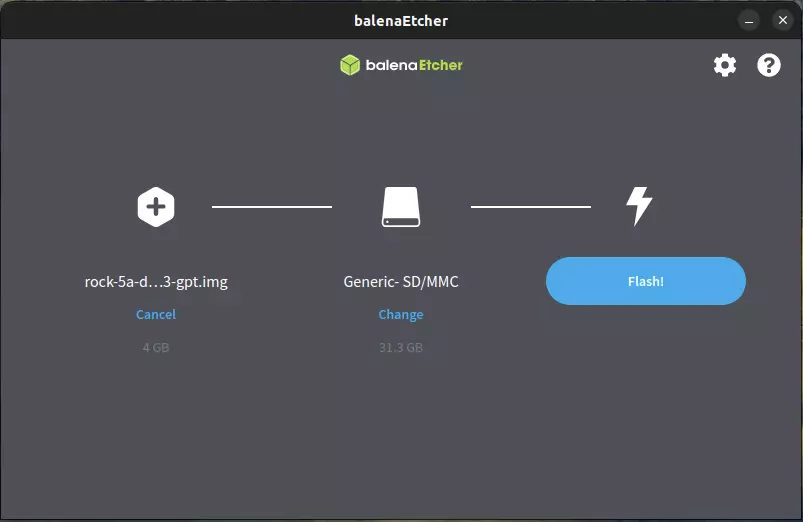
-
When writing the image successfully, Etcher will display
Flash Complete!.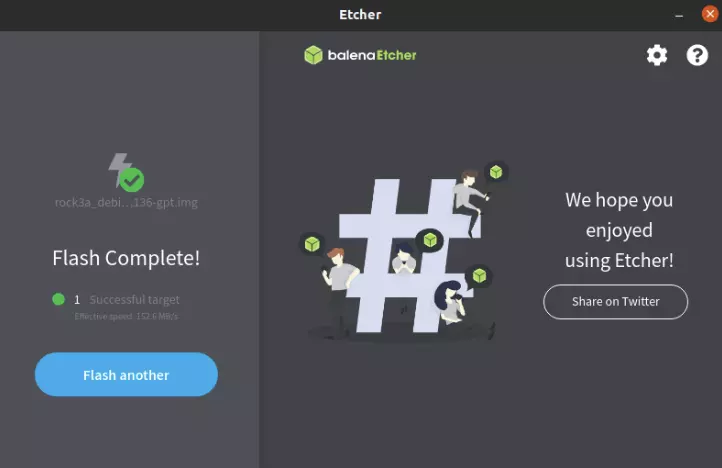
If there is an error in flashing, please try again.
Boot the System
- Insert the flashed microSD card into the microSD slot on Radxa ZERO 3W / ZERO 3E
- Power on the board with 5V/2A power adapter
Preparation
- USB data cable
- x86 PC
- Extracted image file
- Radxa ZERO 3W / ZERO 3E with eMMC
Enter Maskrom Mode
Please refer to Maskrom Guide.
Windows
Install RKDevTool
RKDevTool is Rockchip's software for USB burning on Windows platform. If RKDevTool is not installed on your Windows host, please follow the steps below to install it.
Please download and extract the following files to install RKDevTool:
- RKDevTool v2.96 (Includes Chinese documentation)
- DriverAssistant v5.14
Installation of drivers
Download and unzip DriverAssistant, then execute DriverInstall.exe and click the Install Driver button to install the driver.
If you have already installed another version of driver, please click Uninstall Driver to uninstall the driver first, and then reinstall it again.

Install RKDevTool
unzip RKDevTool_Release_v2.96_zh.zip ,click RKDevTool.exe to open.
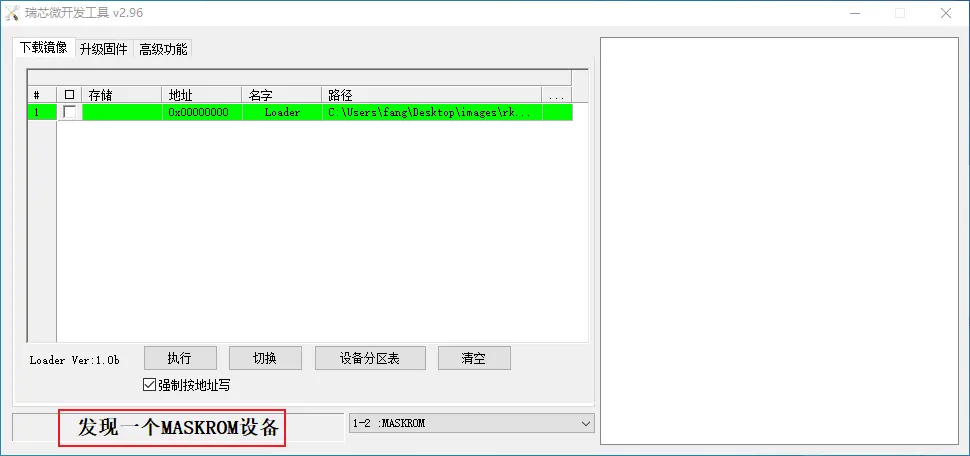
Enter Maskrom mode
If the operation is normal, RKDevTool will prompt A MASKROM device was found.
Flash images into storage media.
eMMC
- Select Loader (see File Download section above, the loader in picture below is just a example).
- Right click, select Add item, select eMMC as the storage media.
- Select the system image (see above section on file download, you need to unzip it into .img format after downloading, the image in the picture below is just a example).
- Click Execute to start burning
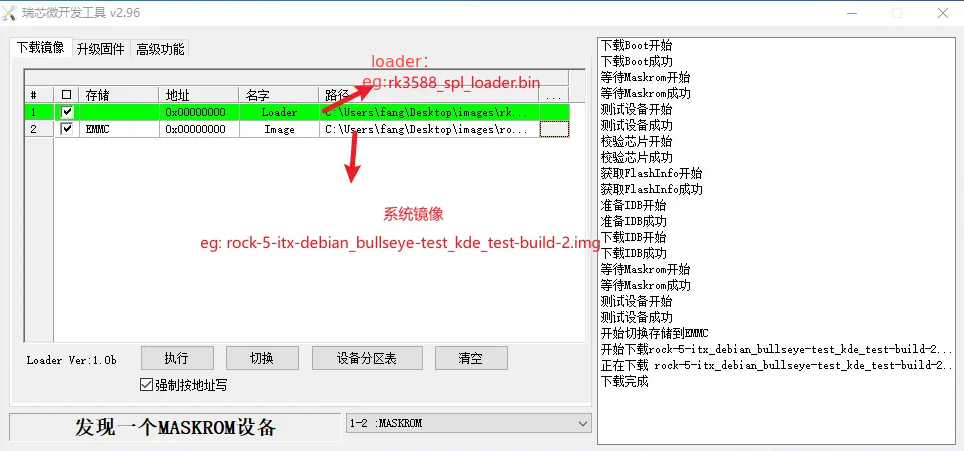
If there is a prompt Download complete, it means the burning is complete, the system will be restarted automatically after burning, and you can log in to the system via HDMI or serial port.
Linux
Please refer to Linux flashing guide.
Log In
- The default management address is usually
192.168.1.1 - The default username is usually
root - Set the password when prompted on first login
Storage Expansion
If the root partition does not occupy the whole storage on first boot, refer to the official OpenWrt guide first:
Storage device names, partition numbers, and expansion steps may vary by product. Do not directly reuse partition commands from another board.
Frequently Asked Questions
- Device not detected: check whether the board has entered Maskrom mode, and try another cable or USB port.
- Flashing failed: check the image format, file integrity, and model match.
- LuCI is not reachable: check the default IP, Ethernet port, and host network settings.