QUECTEL LTE EM05-CE
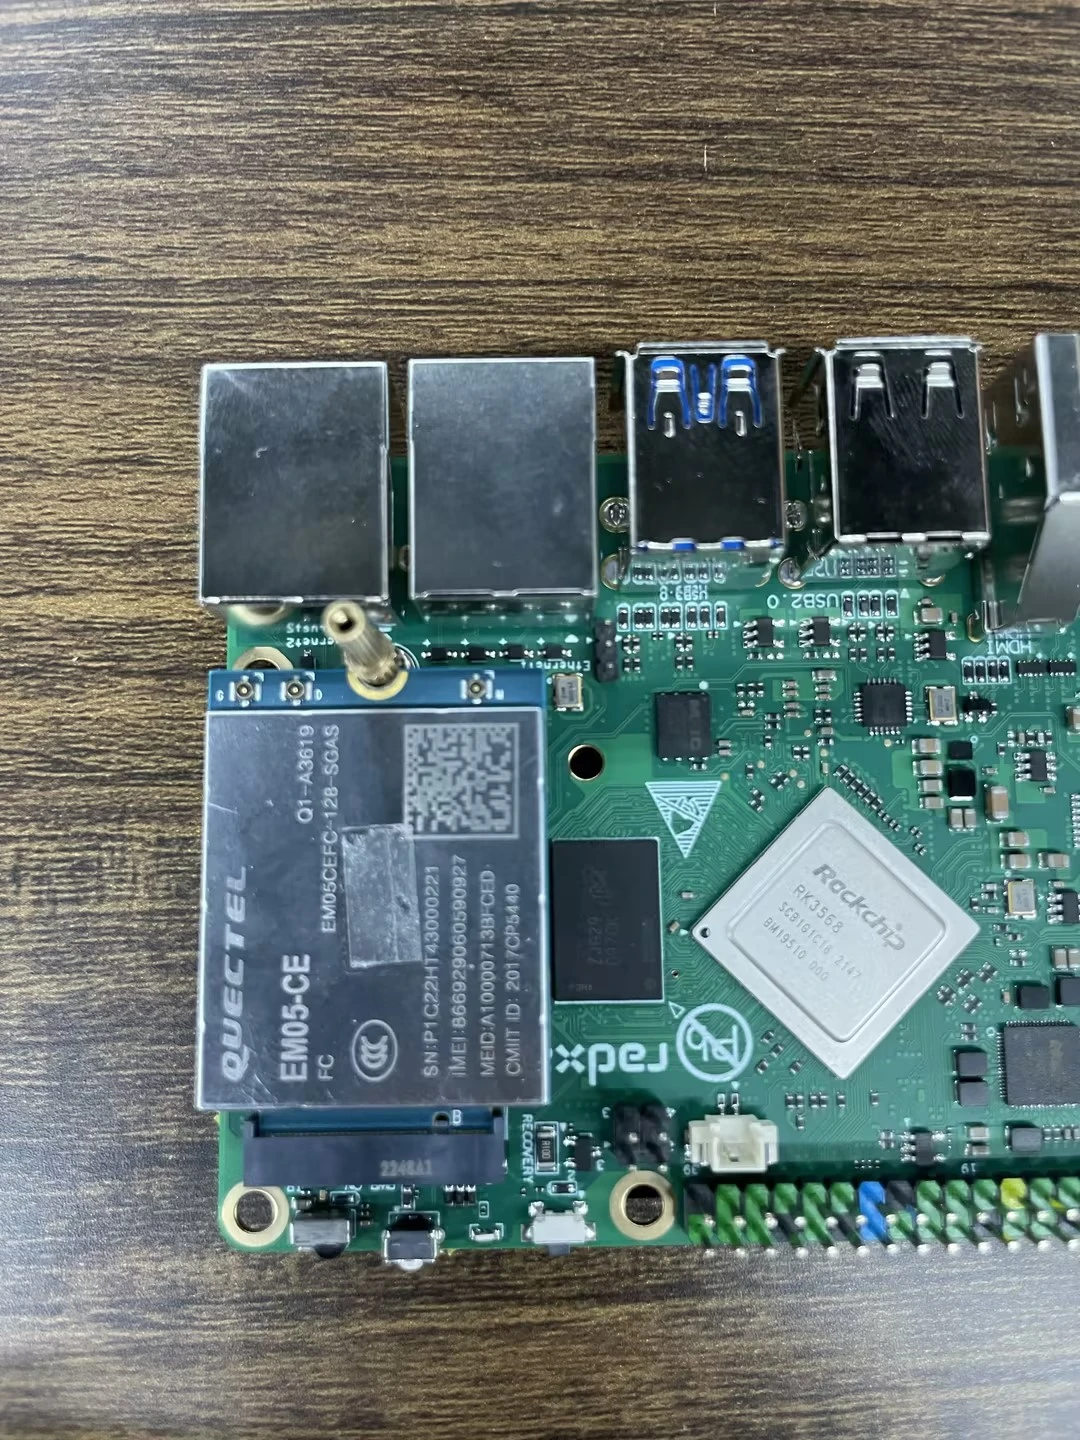
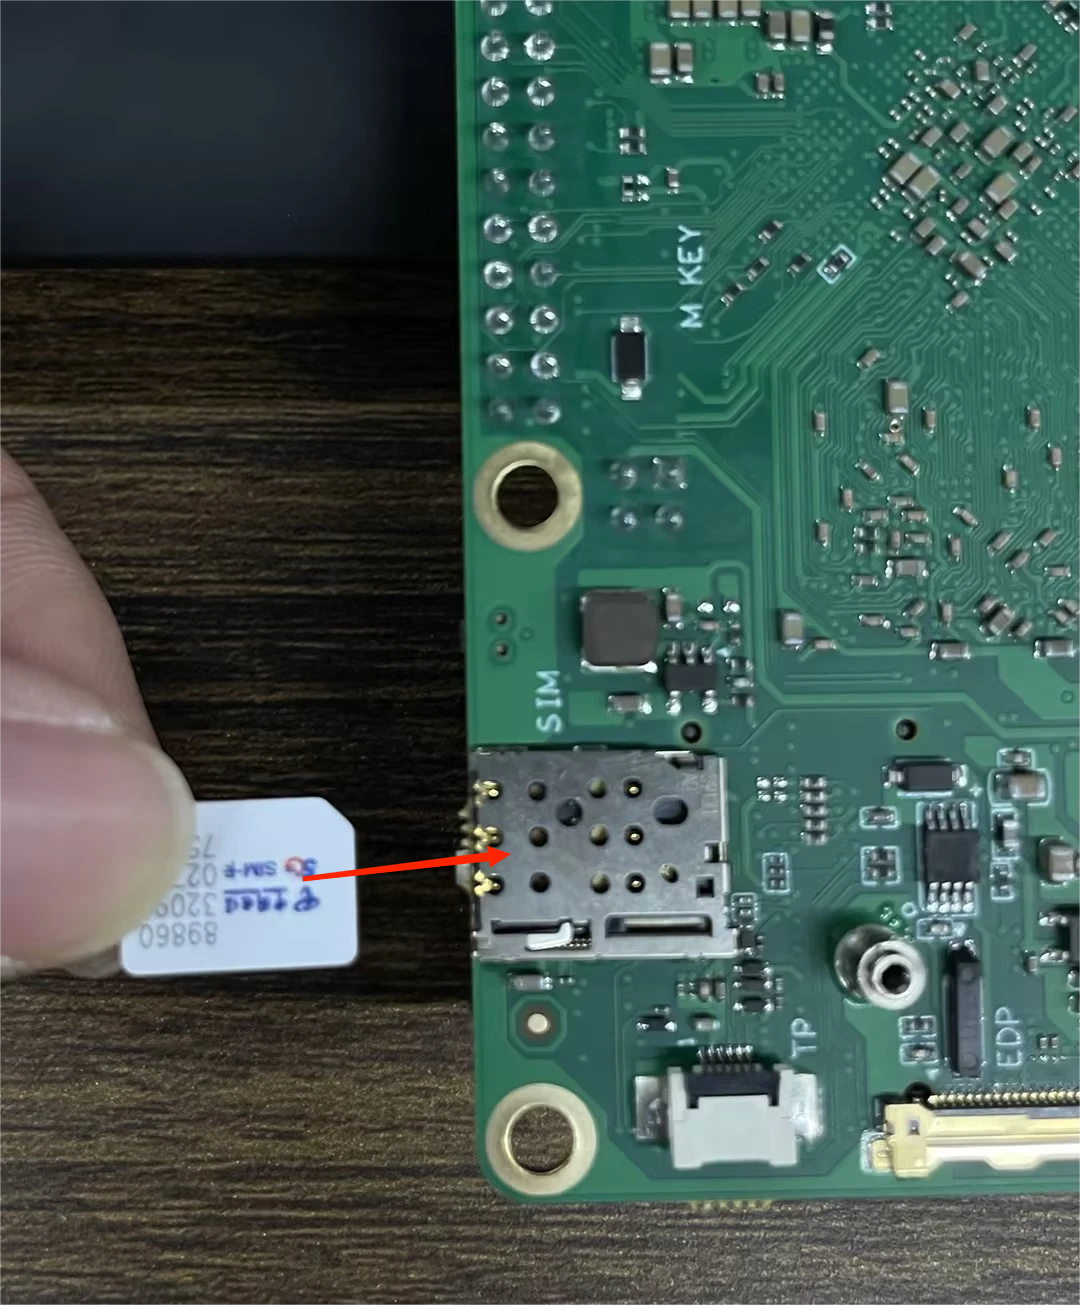
First, you need to plug the Mobile LTE EM05-CE into the B-key connector of the ROCK 3B and insert the SIM card.
-
The 4G module demonstrated here is: Quectel EM05-CE

Link peripheral
First, connect ROCK 4B+ via USB and move LTE EC25-AU away.
-
The mounting position is shown in the figure:
-
The SIM card slot location and insertion direction are shown in the figure:
You can check if the device is connected by the following command:
radxa@rock-3b:~$ lsusb | grep -i Quectel
Bus 002 Device 002: ID 2c7c:0125 Quectel Wireless Solutions Co., Ltd. EC25 LTE modem
The modem usually communicates with the host computer through a serial port. Check whether the system correctly enumerates the corresponding serial port devices:
radxa@rock-3b:~$ ls /dev/ttyUSB*
/dev/ttyUSB0  /dev/ttyUSB1  /dev/ttyUSB2  /dev/ttyUSB3
Install related software
Run the following command on the terminal to install the dial-up Internet access software:
sudo apt update
sudo apt install ppp picocom net-tools
Test the modem with the at command
First, open the serial port using picocom :
sudo picocom -b 115200 /dev/ttyUSB3
After the program starts, you can enter the following at command to check the status of the modem:
  at+cpin?
  +CPIN: READY

  OK  #Check whether the SIM card is in place

  at+csq
  +CSQ: 14,99

  OK  #Detection signal. 99 means no signal

  at+cops?
  +COPS: 1,0,"CHN-UNICOM",7

  OK  #View Carrier

  at+creg?
  +CREG: 0,1

  OK  #Get the registration status of the phone (0,1: indicates normal registration)

  at+qeng="servingcell"
  +QENG: "servingcell","NOCONN","LTE","FDD",460,01,19A358C,366,100,1,5,5,774E,-108,-5,-83,9,13

  OK  #Signal strength and quality of the currently connected service cell
If the modems return to normal, you can use the Ctrl+A Ctrl+X key combination to exit picocom .
Dial-up Internet via ppp
In a terminal, execute the following command to switch to the peers directory to add the ppp dial-up configuration script.
sudo su
cd /etc/ppp/peers
Use the vi editor to add the first script file, rasppp, which reads as follows:
# The password is hidden during connection debugging
hide-password

# The phone does not require authentication
noauth

# Used for call control scripts
connect '/usr/sbin/chat -s -v -f /etc/ppp/peers/rasppp-chat-connect'

# Disconnect script
disconnect '/usr/sbin/chat -s -v -f /etc/ppp/peers/rasppp-chat-disconnect'

# Debugging information
debug

# 4G module
/dev/ttyUSB3

# Serial baud rate
115200

# Use the default route
defaultroute

# The default IP address is not used
noipdefault

# PPP compression is not used
novj
novjccomp
noccp
ipcp-accept-local
ipcp-accept-remote
local

# It is best to lock the serial bus, create a lock file, and other programs will be able to learn that the appropriate serial port has been used once they discover the existence of this file.
lock
dump

nodetach

# Username password (The configuration varies with carriers)
user [email protected]
password vnet.mobi

# Hardware control flow
crtscts
remotename 3gppp
ipparam 3gppp

# Use the DNS negotiated on the server side to set the usepeerdns parameter
usepeerdns
Add a second script file rasppp-chat-connect with the following script:
TIMEOUT 15
ABORT   "BUSY"
ABORT   "ERROR"
ABORT   "NO ANSWER"
ABORT   "NO CARRTER"
ABORT   "NO DIALTONE"

""AT
OK \rATZ

OK \rAT+CGDCONT=1,"IP",""

OK-AT-OK ATDT#777
CONNECT \d\c
Add a third script file, rasppp-chat-disconnect, with the following script:
ABORT "ERROR"
ABORT "NO DIALTONE"
SAY "\NSending break to the modem\n"

""\k"

""+++ATH"
SAY "\nGood bye !\n"
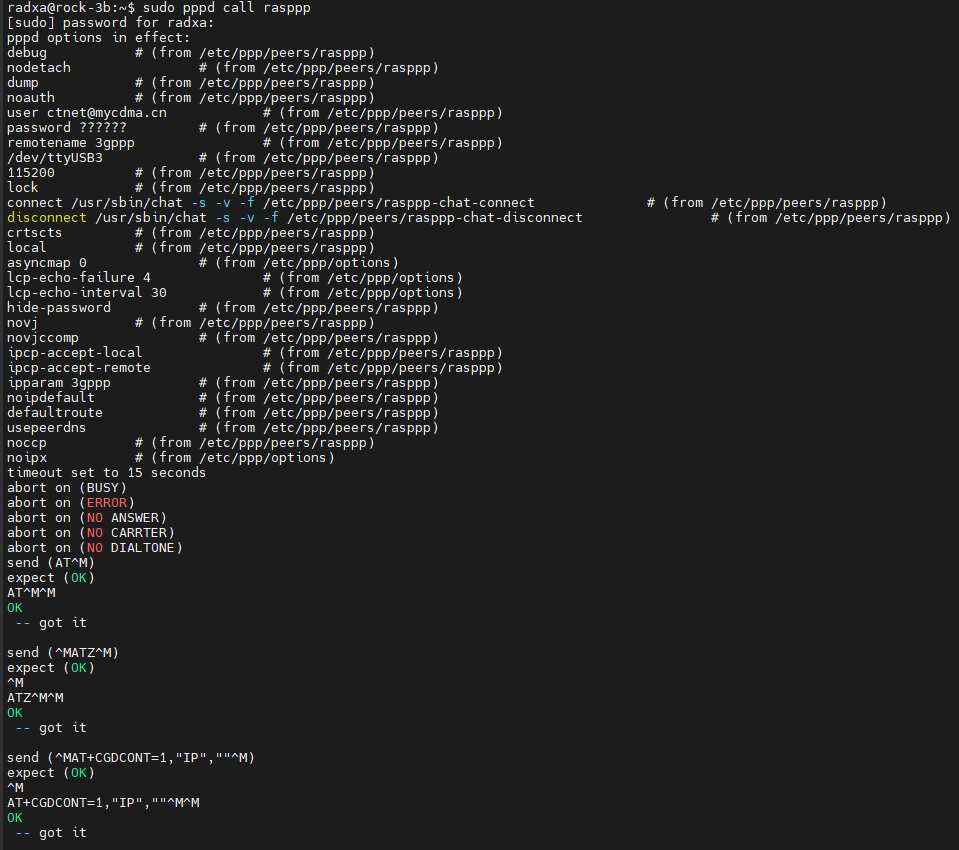
After adding the above three script files, you can now try dialling using ppp:
sudo pppd call rasppp & #Background dialing
- The complete dial-up process is shown as follows:
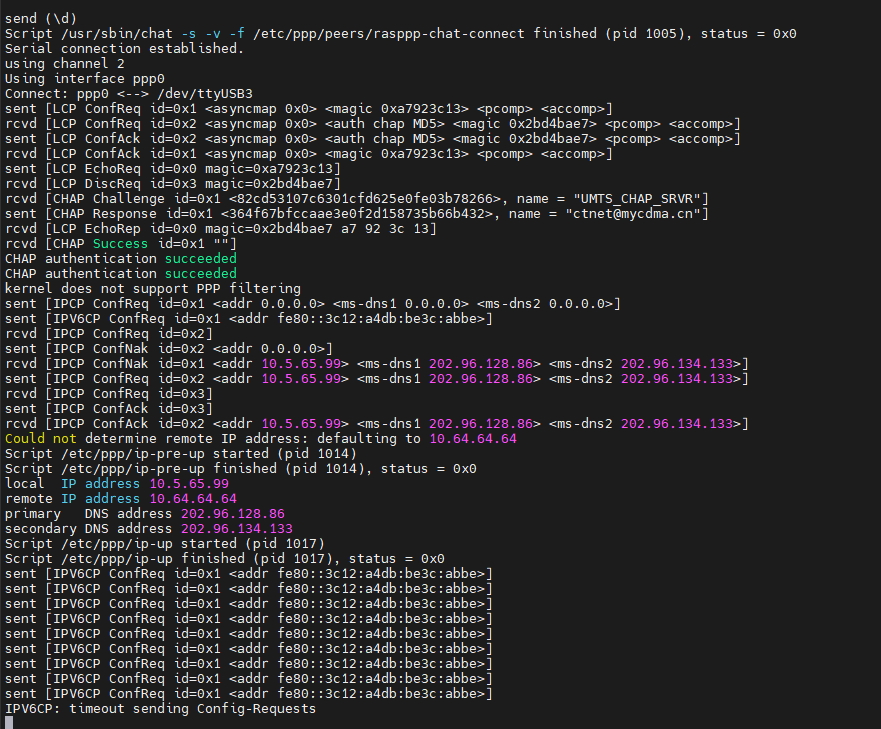
From the output of the program we can get the following information:
- local IP address:
10.5.65.99 - primary DNS server:
202.96.128.86 - secondary DNS servers:
202.96.134.133
We can now configure the network based on the above information:
sudo ip route add default via 10.224.236.90 # configure the gateway
echo "nameserver 120.80.80.80" | sudo tee -a /etc/resolv.conf # configure primary DNS
echo "nameserver 221.5.88.88" | sudo tee -a /etc/resolv.conf # Configure secondary DNS
You can now use the ping command to check if you are connected to the Internet:

Common issues
- USB serial port devices are not listed on my system.
Please check whether the corresponding driver is included in the system you are currently running. You can check by executing the following command:
radxa@rock-3b:~$ lsmod | grep usb
usb_wwan               20480  1 option
usbserial              36864  2 usb_wwan,option